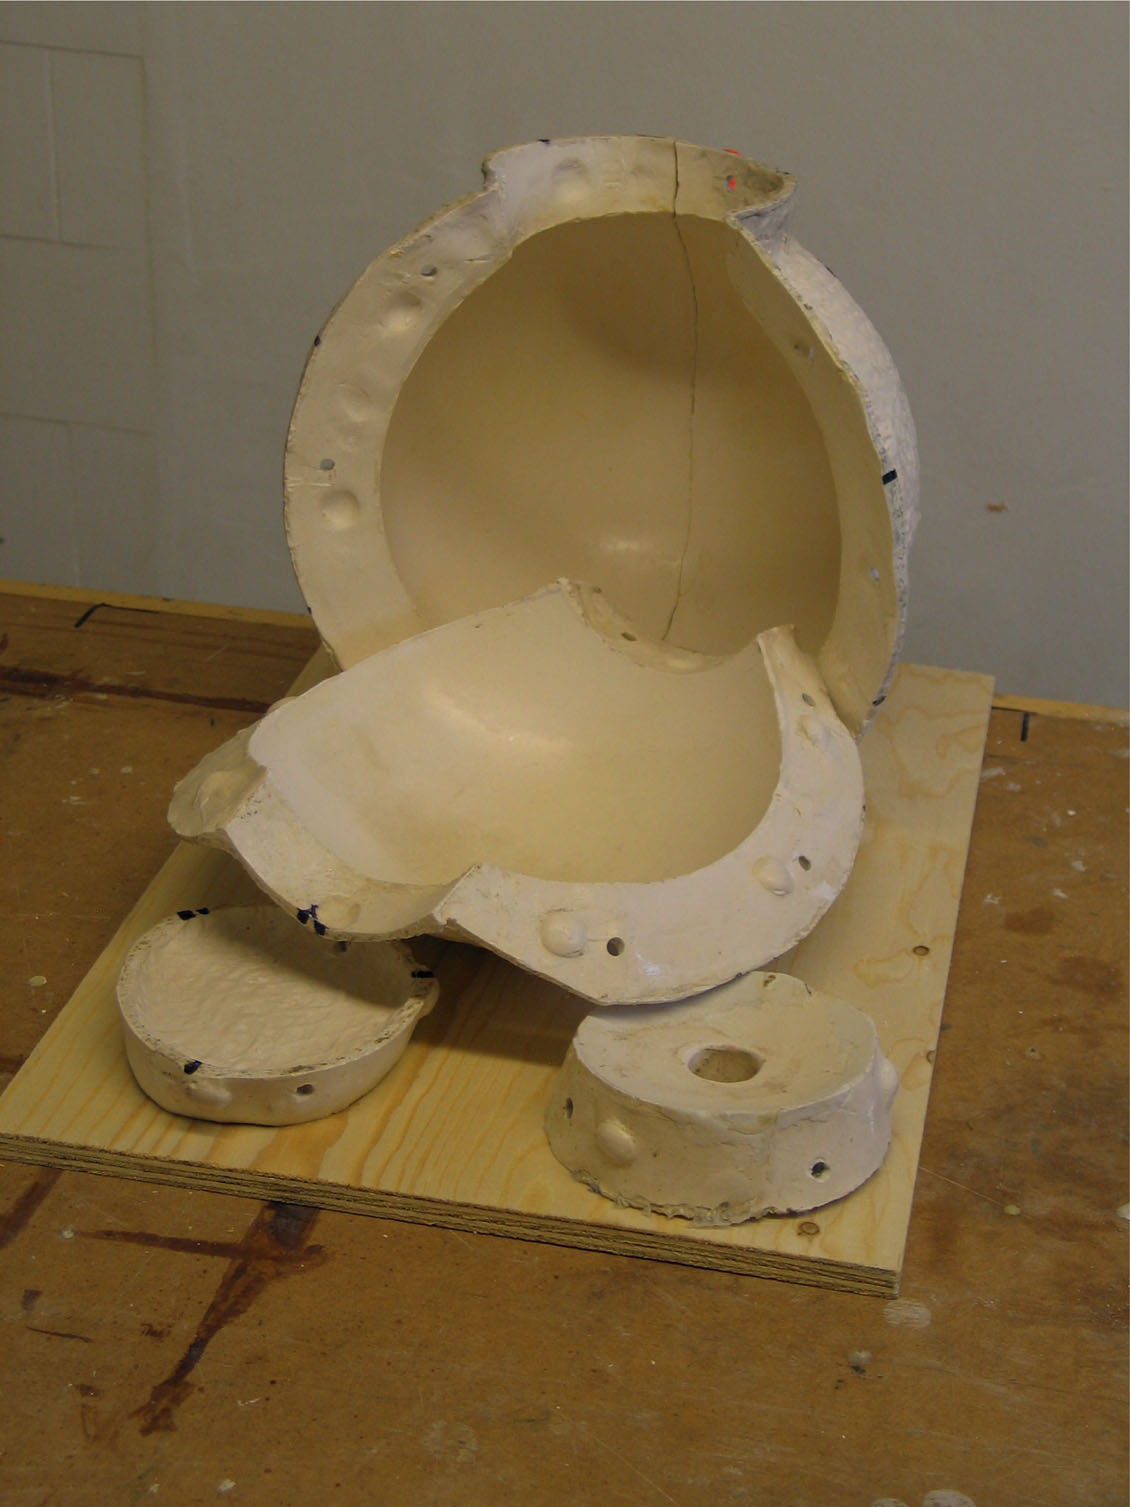
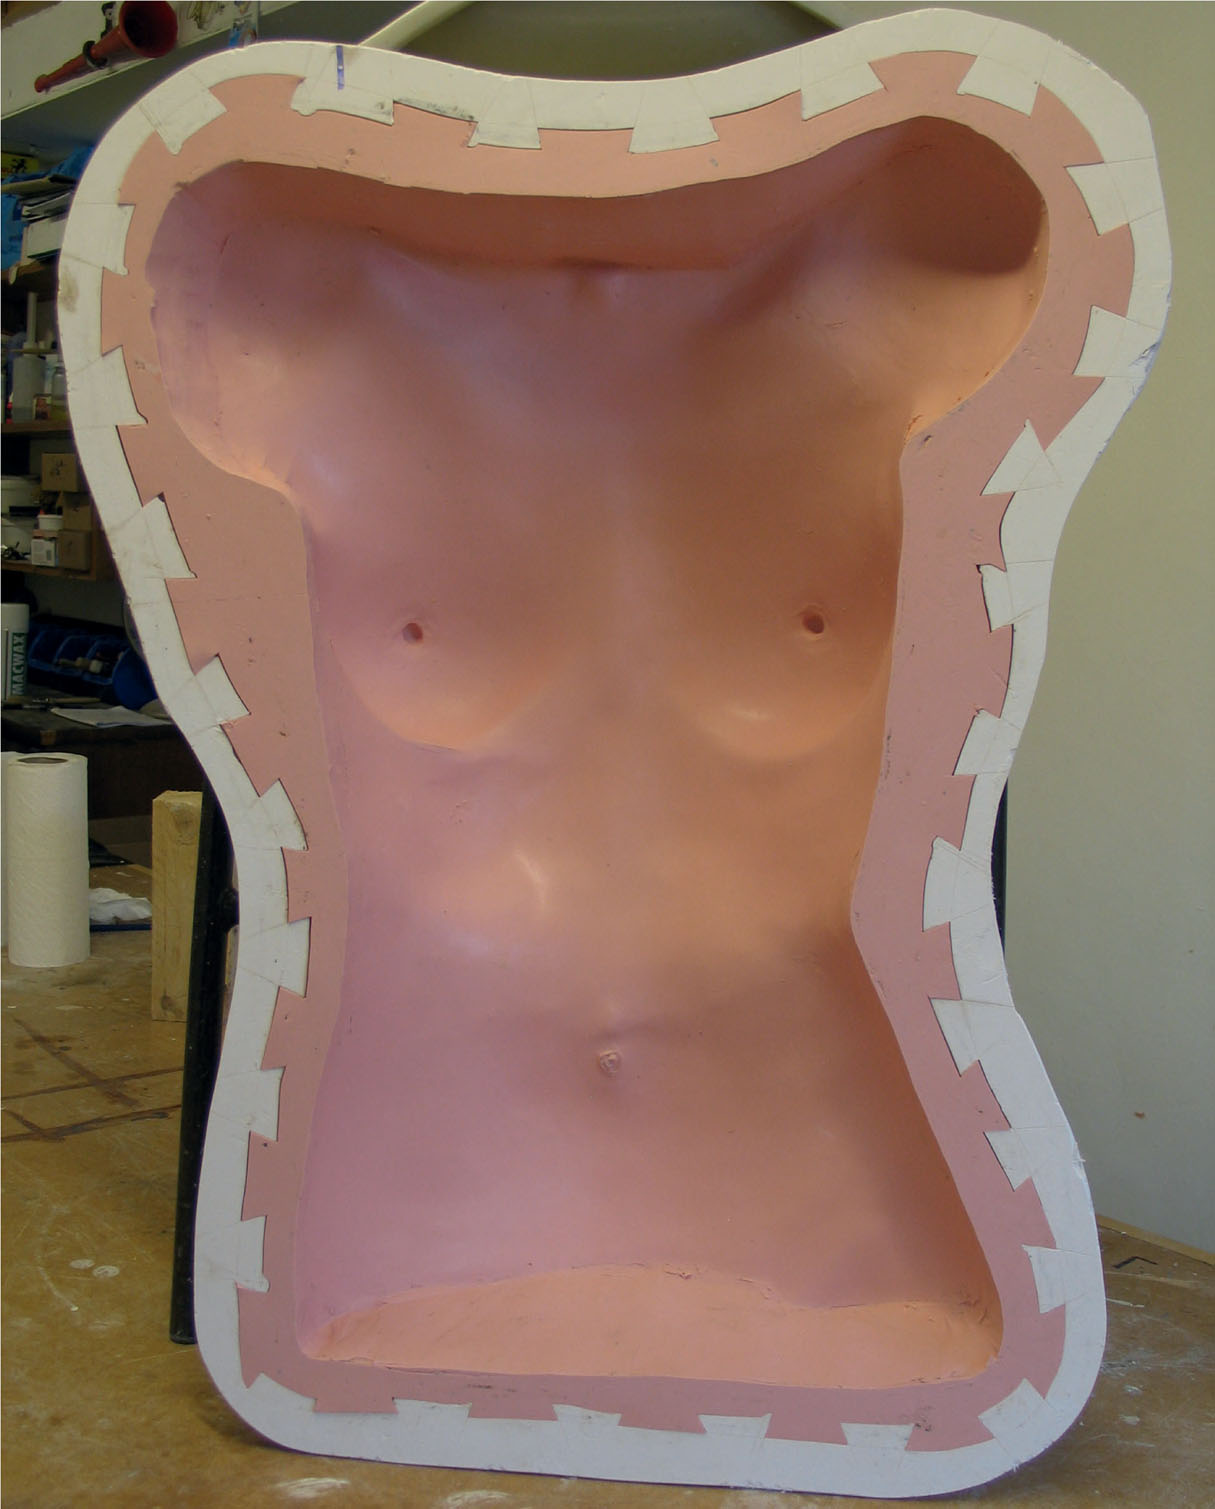
Multiple piece Jesmonite mould.
Multiple piece Jesmonite mould.
CHAPTER FIVE
JESMONITE™ MULTIPLE PIECE
Jesmonite™ composite resin systems can be utilized as very effective mouldmaking materials. Being lightweight and very durable, Jesmonite can be an attractive alternative to plaster mouldmaking. It is non-toxic and easy to clean up, so it also has many advantages over polyester resin. These factors combined with high detail capture provide an excellent mouldmaking alternative to traditional rigid systems.
Jesmonite can be used with traditional clay wall/bed techniques for mouldmaking and can be employed as an excellent case-making material for flexible mouldmaking. Wax-based release agents can be used effectively. (For full specifications on Jesmonite see Chapter 7.)
PROJECT
Specification
A five-piece laminated Jesmonite mould using clay wall mouldmaking divisions, from a plastic ball 700mm in circumference.
Time Required
Allowing for setting times this project was carried out over approximately one and a half days.
Materials
■ Clay;
■ Jesmonite AC100 Powder (supplied by Notcutt Ltd);
■ Jesmonite AC100 Liquid;
■ Jesmonite Thixotropix additive;
■ spray wax release agent;
■ paste wax release agent; and
■ M6 × 30mm roofing bolts with wing nuts.
Tools
■ Mixing beakers;
■ a cordless drill fitted with a high shear mixing blade;
■ brushes;
■ clay tools;
■ a clay harp;
■ scissors;
■ an electric jigsaw;
■ medium-grade sandpaper; and
■ a water bucket for washing tools and equipment.
Method
SET-UP AND PREPARATION
As with any project, careful preparation before the start of the job is crucial. Knowing the material quantities and tools needed, undertaking repairs to the original and setting-up the working area will all help to complete the job accurately and efficiently. (Tip: make sure you have enough materials to complete the job before you start. Running out of material halfway through the job is at least a waste of time and, at worst, a loss of previously executed work.)
1. Prepare the original. In this case a fine manufacturer’s seam line on the surface of the ball was removed with very fine abrasive paper. The original was then cleaned and dried.
2. Consider the division lines of the mould. Mouldmaking and casting principles for rigid mouldmaking should be considered at this point (see Mouldmaking and Casting). Once determined, division lines can be drawn on the original or committed to memory.
3. Secure the original in position for production of the first mould piece. In this case a plaster mixing bowl is employed to keep the ball still and secured while placing the clay walls used to produce the mould pieces.
THE FIRST CLAY WALL
1. Using a clay harp or rolling pin, prepare clay walls of a size appropriate for the job.
2. Apply the clay wall to the first division line in one operation. Avoid repeatedly resetting clay walls to ensure a clean line.
3. Pinch the clay wall onto the surface of the original from the outside of the wall. It is important to leave the inside edge of the clay wall sharp and perpendicular to the original surface to avoid feathered edges to the mould pieces (see Chapter 2 in Mouldmaking and Casting).
4. Press hemispherical registration indents at 80mm intervals along the clay wall. These will create ‘nipple and cup’ registration points between the mould pieces.
5. Set a tapered clay cone to provide the pouring hole into the mould.
6. Apply two coats of spray wax release agent. Allow to dry between and after coats. (The type of release agent used will depend on the material of the original.)
THE FIRST MOULD PIECE
The thixotropic coat
This layer will pick up the detail of the original.
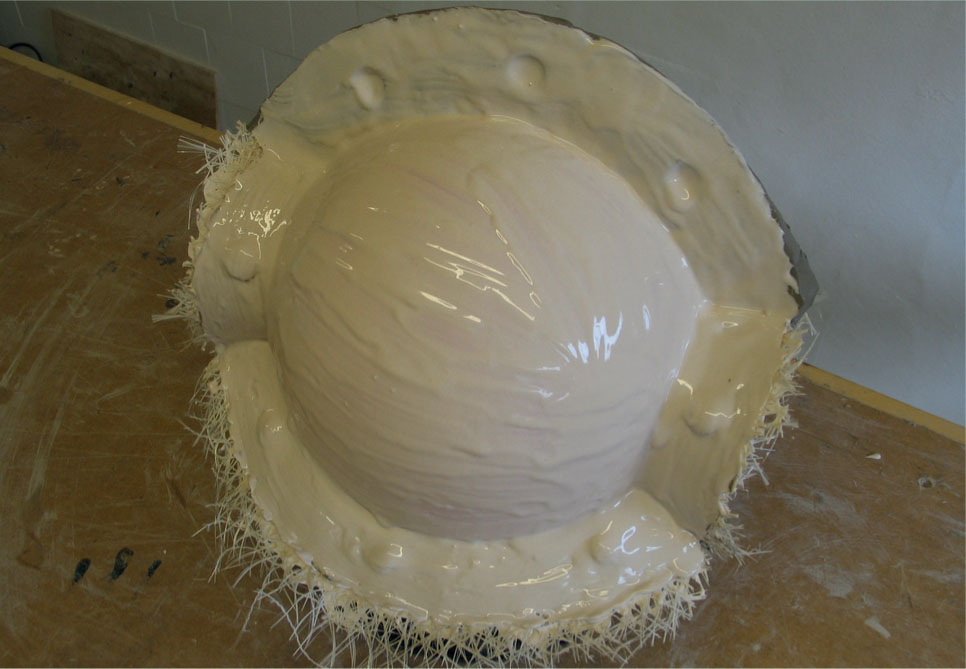
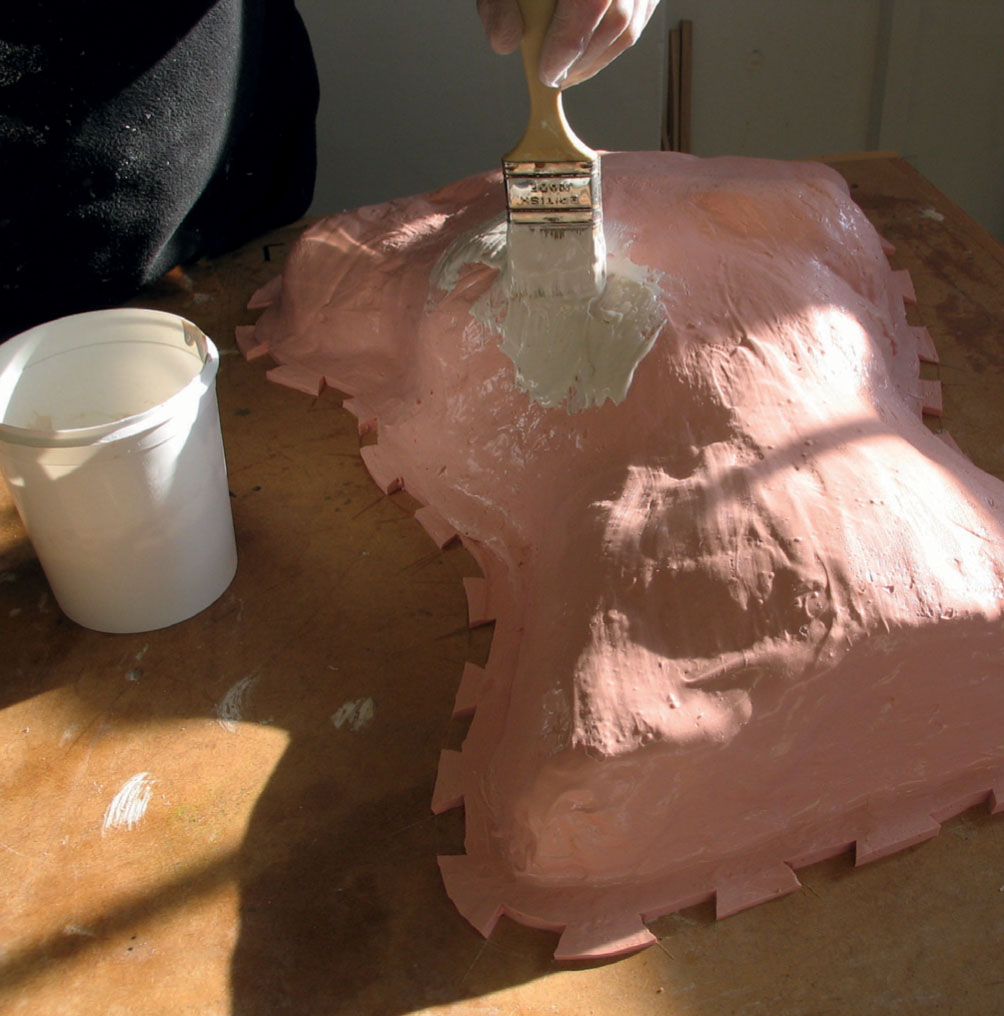
1. Make up a thixotropic addition mix of Jesmonite composite. Thixotropic additive should be added according to the specified ratios. Adjustments can be made by adding small amounts of thixotrope at a time until the required consistency is achieved. The mix should adhere to a depth of 1–2mm when applied to the surface of the original but not be so thick that it does not pick up detail.
2. Apply the thixotropic mix with a soft brush to the whole exposed surface area of the original within the clay division walls.
3. Extend the thixotropic coat up the inside of the clay walls to create a raised flange wall around the mould piece.
4. Allow it to set for 15–20 minutes, until firm to the touch and not picking up on the finger when touched lightly.
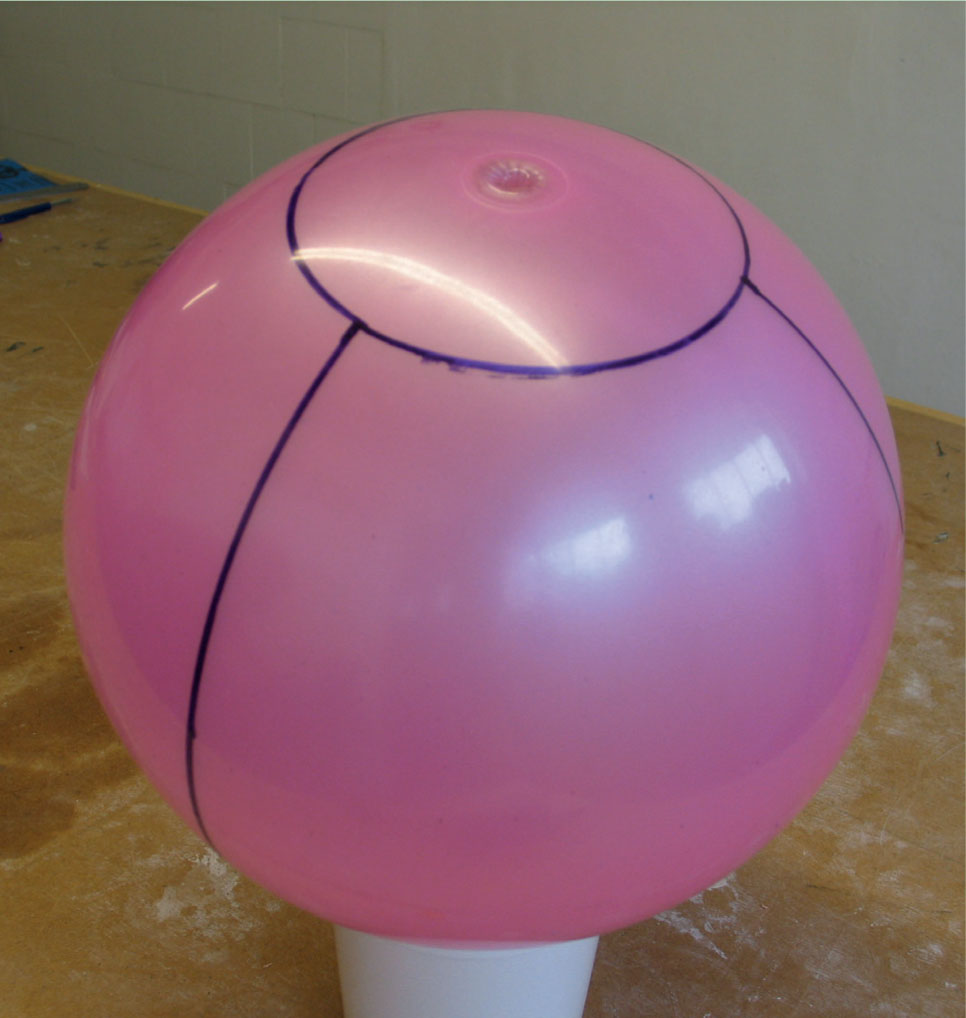
Original model.
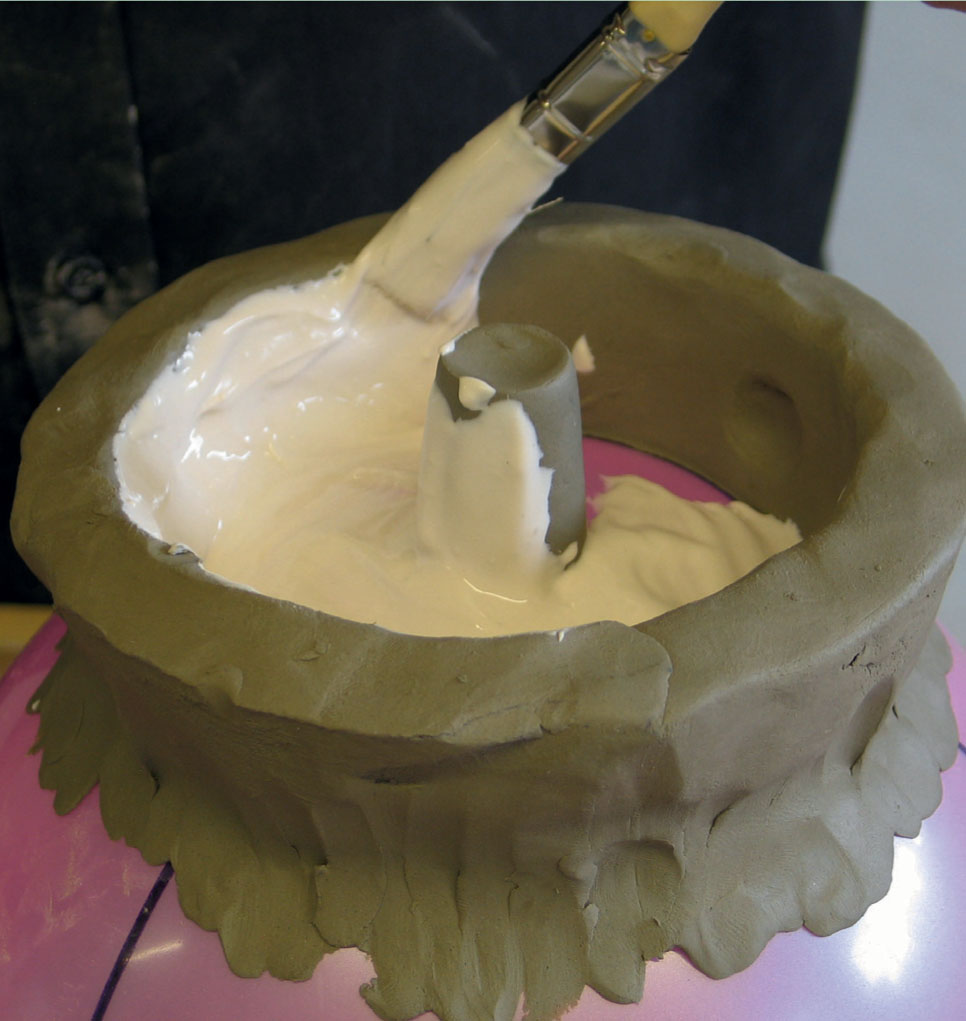
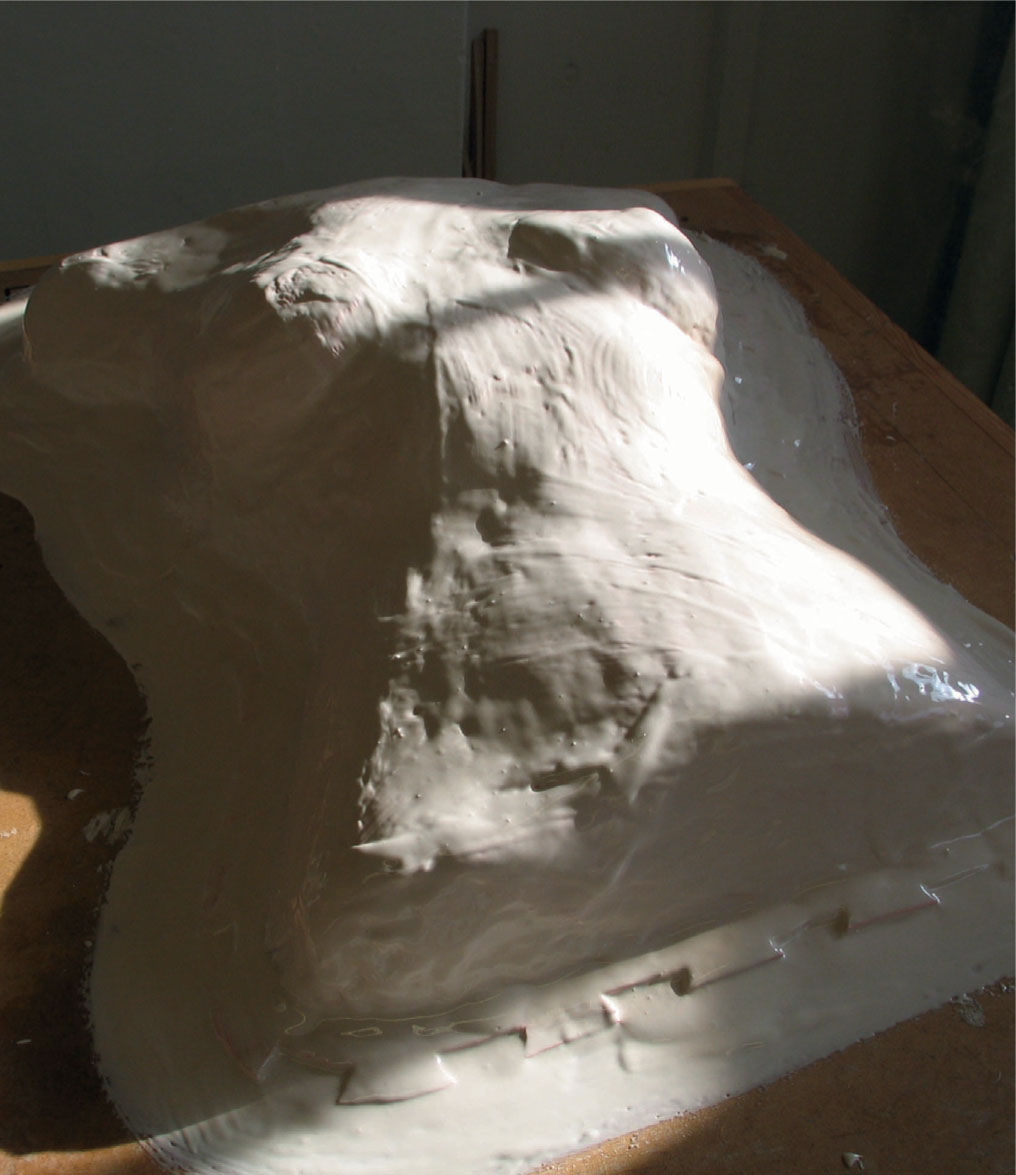
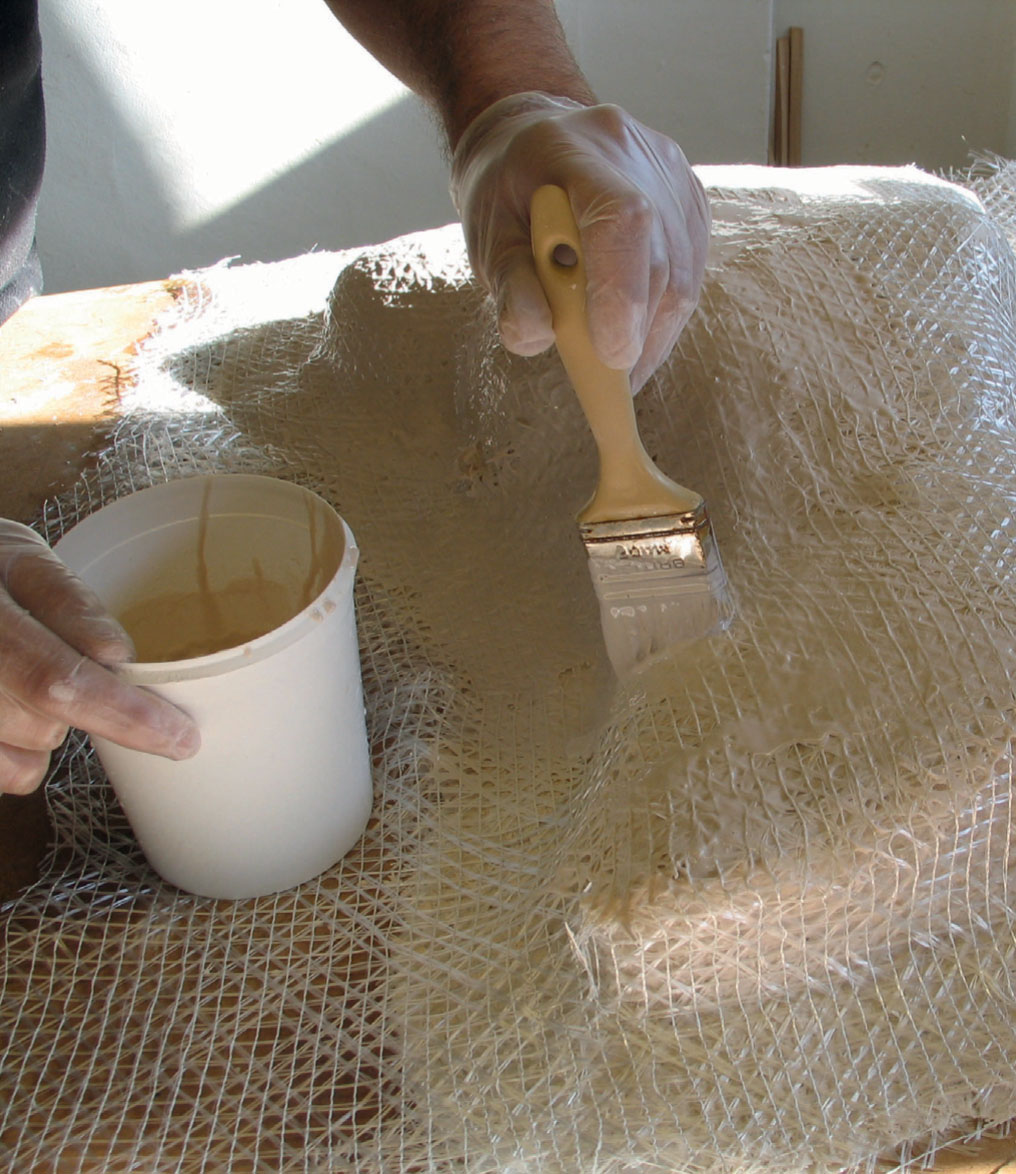
The thixotropic Jesmonite gel coat is applied.
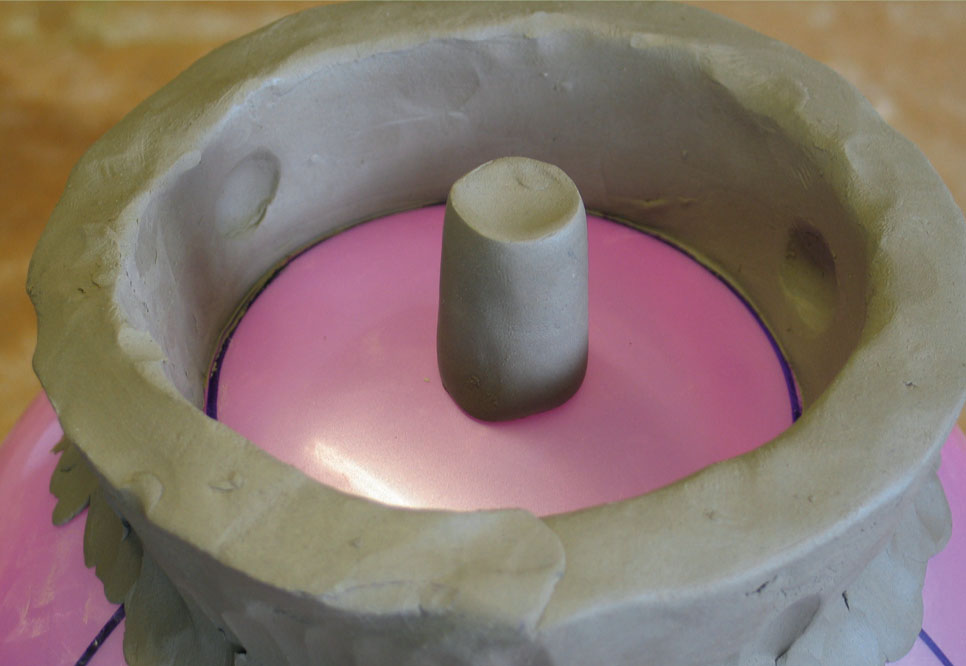
The first clay wall and pouring hole cone are created to define the first mould piece.
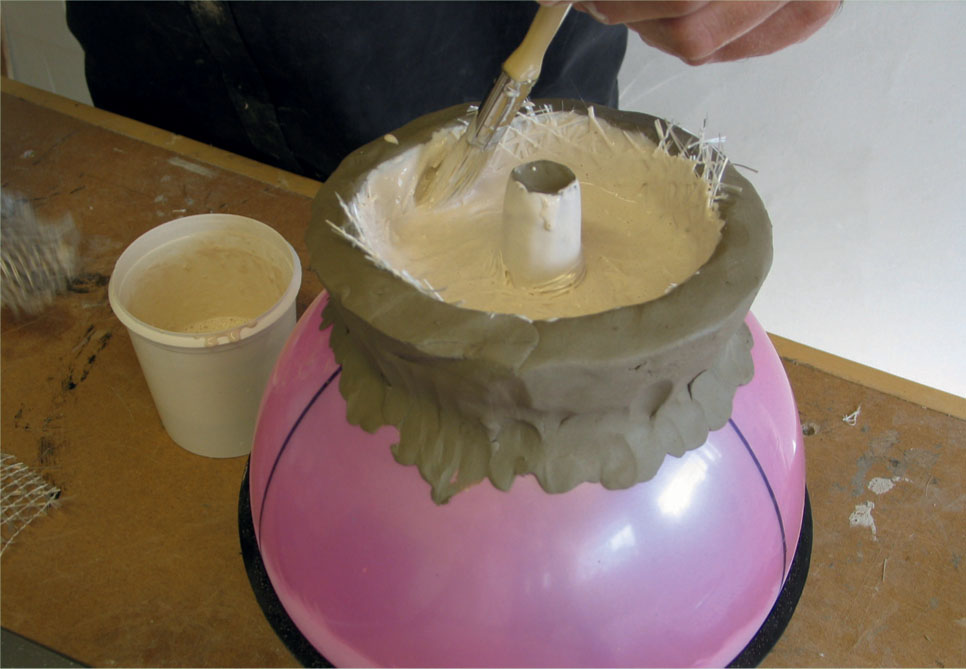
The quadaxial mat is applied to the set gel coat.
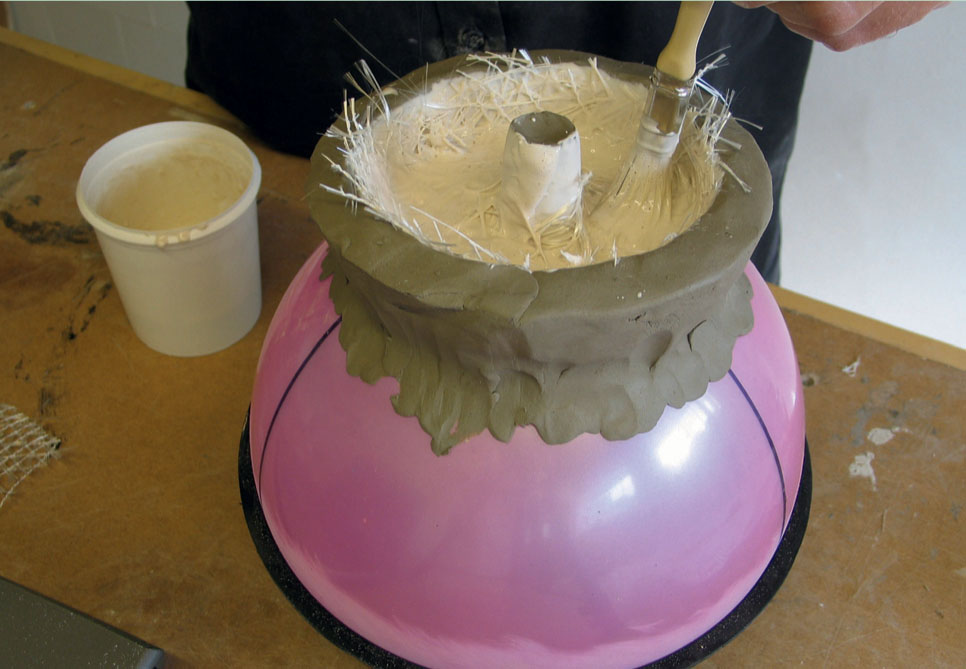
The chopped strand mix and second quadaxial layers are applied.

The third mould piece is created.
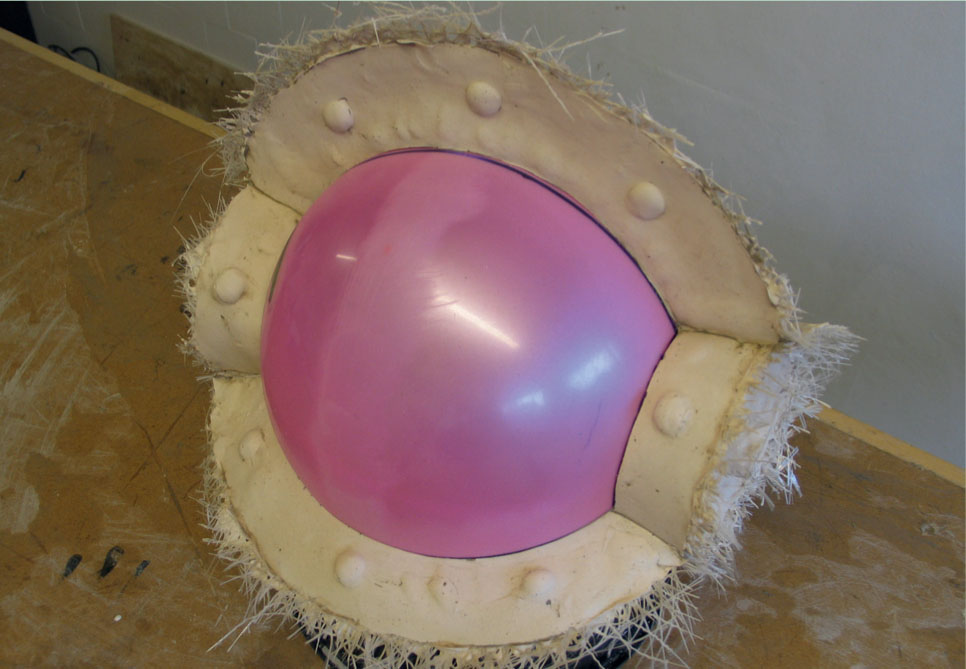
With the two end pieces created, clay walls are spanned between them to create the third mould piece.
The clay wall defining the fourth mould piece.
Thixotropic coat is applied for the fourth mould piece.

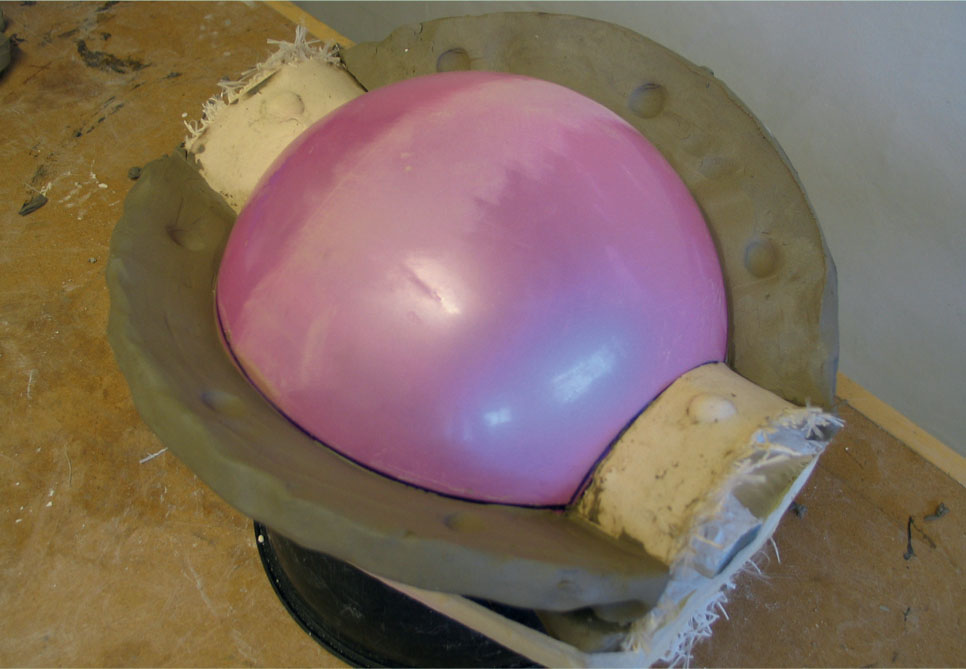
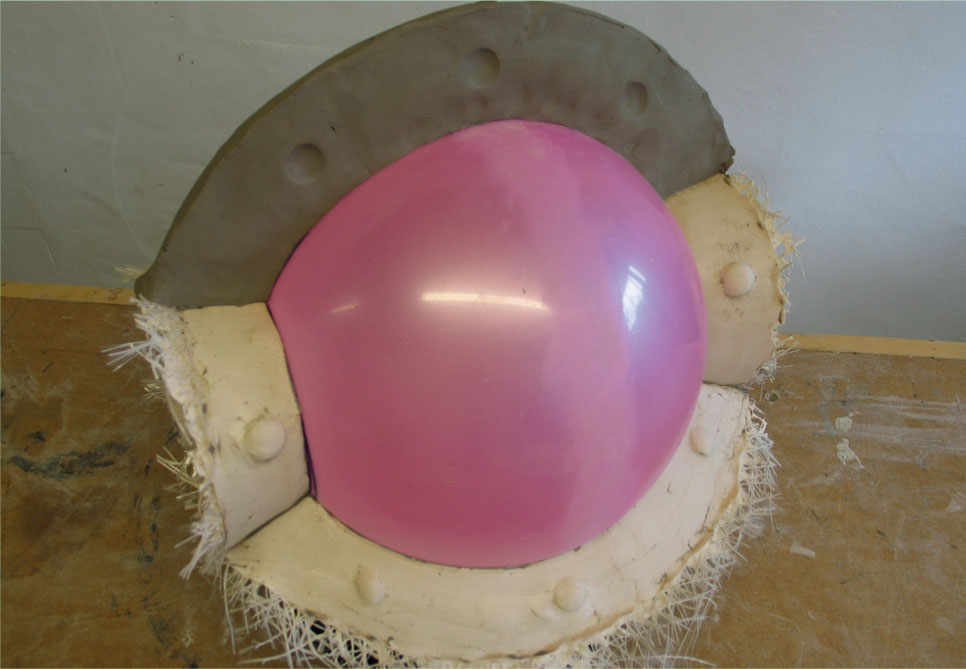
The completed mould with seams trimmed.
The exposed last remaining section of the original model.

The mould pieces are carefully separated.

The five-piece Jesmonite mould.
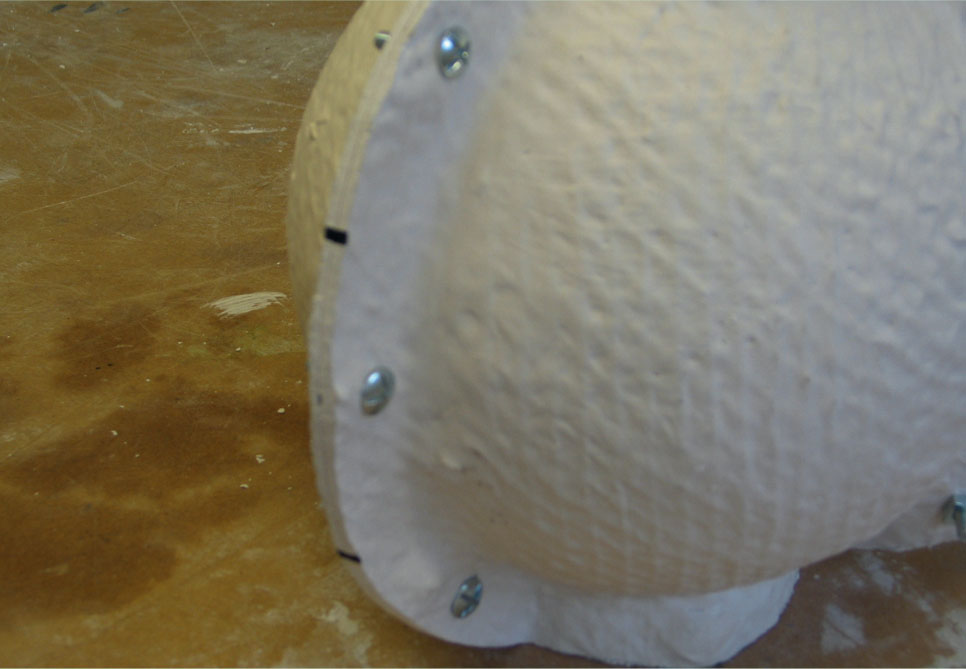
Nuts and bolts secure the mould pieces together.
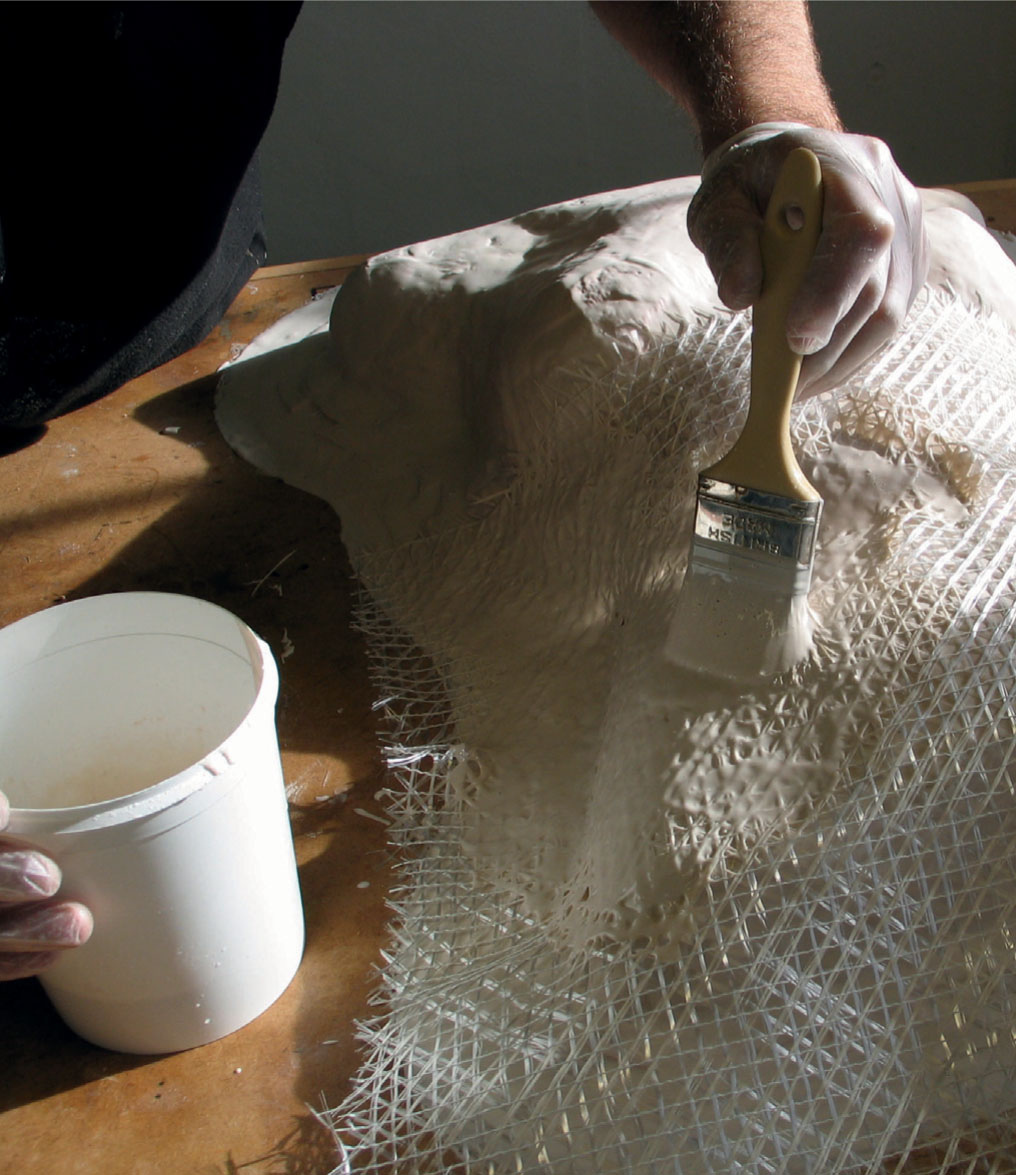
The first quadaxial layer
The gel coat layer on its own will not be strong enough and needs to be laminated to achieve the full strength of the Jesmonite system. The first stage of the laminating process is a layer of quadaxial mat.
1. Cut and prepare enough pieces of quadaxial mat to cover the surface of the applied gel coat twice. The size and shape of the pieces should be tailored to the contours of the gel-coated surface. Large open areas can be laminated with large pieces of mat; small difficult-to-access areas may need to be covered in smaller sections of mat.
2. Set out the cut mat in sequence on the work surface.
3. Prepare a mix of composite.
4. Apply the mix with a brush to the area of the gel coat to be covered with mat first.
5. Lay the mat onto the wet mix and push down gently with the brush.
6. Saturate the surface of mat with more mix. You will find that the mat softens when saturated with mix, enabling it to be laminated closely to the gel coat. Do this by gently stippling the surface of saturated mat, pushing any air entrapment out as you go. The idea is to get a tight lamination of the mat to the gel coat without any air bubbles.
7. Methodically work over the entire surface of the gel coat, overlapping mat pieces by approximately 5–10mm.
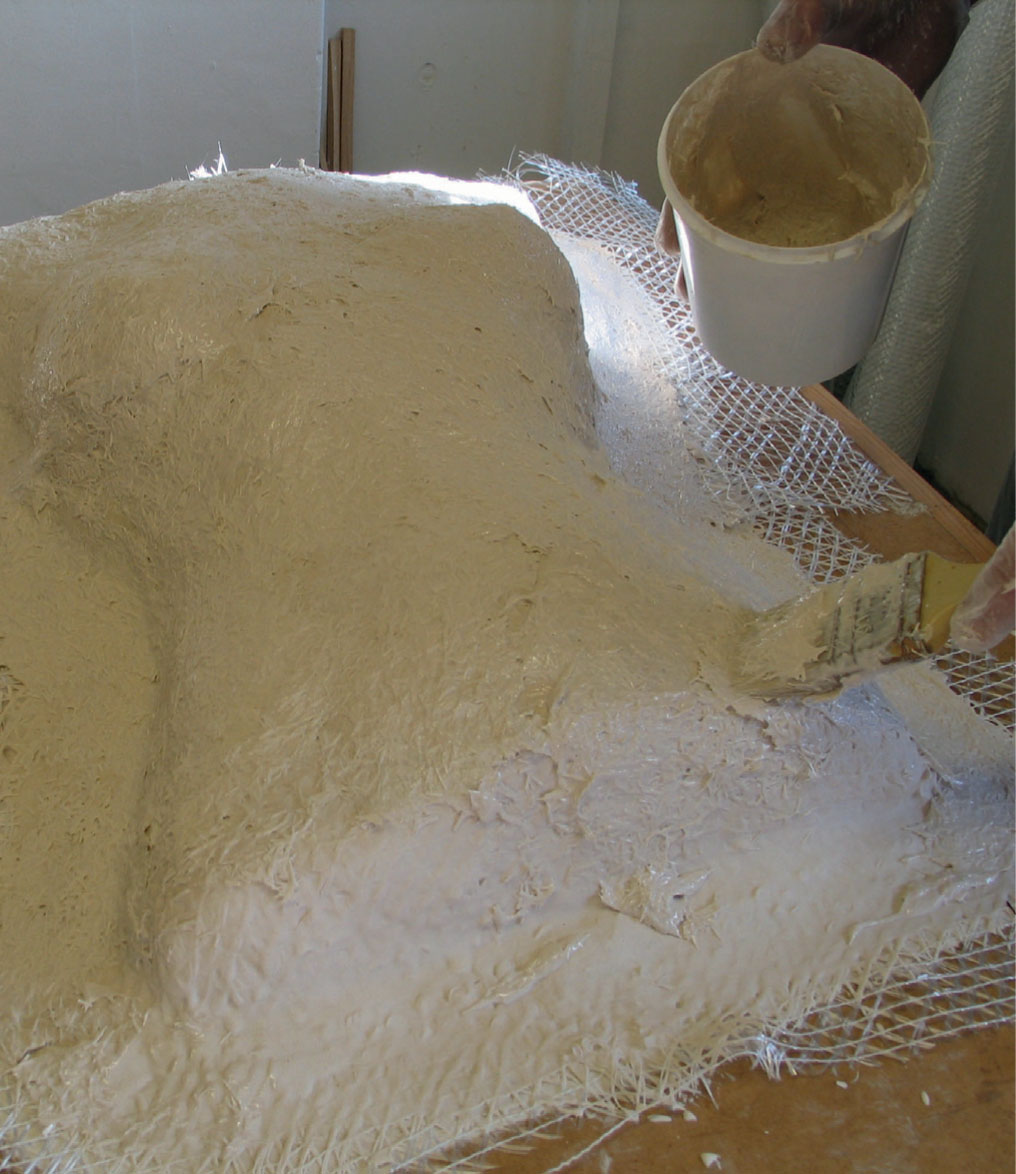
The chopped strand layer
This is a mix of composite mix and fibreglass chopped strands that is applied between the layers of quadaxial mat to give the laminate more strength. Chopped strand is added to a pre-mixed batch of composite at a rate of 1–2 per cent by weight of the mix. The consistency should be that of a thick spreadable paste.
1. Use a wooden mixing stick to mix chopped strand into the composite mix.
2. Apply it with a brush and spread out to a depth of 2–4mm.
3. Use a stick to push the mix into difficult-to-access areas.
4. Methodically work over the entire surface of the first layer of quadaxial mat.
The second layer of quadaxial mat
1. Apply a second layer of quadaxial mat, as for the first layer, over the layer of chopped strand.
2. Allow it to set for at least an hour before continuing to the next mould section.
The total laminating process will produce a mould 5–6mm thick. At this thickness the mould will have a weight of 9–11 kg/m2. Increasing the thickness of the chopped strand layer will produce stronger moulds for larger subject matter.
CURING AND DRYING
As the composite starts to set an exothermic reaction takes place, producing heat between the initial and final set of approximately 30°C. After approximately one hour the chemical reaction is complete and the casting will have achieved 60 per cent of its total strength.
Full strength will be achieved dependent on drying conditions and the thickness of the mould. Thin sections will dry faster than thicker ones. Dry atmospheric conditions will increase the speed of the drying process.
THE SECOND MOULD PIECE
Subsequent mould pieces in a multiple-piece mould are usually constructed directly against the flange wall of the first mould piece. The mould is built up sequentially in pieces from the first. However, in the case of this project the first mould piece is one of a pair of capping pieces at the top and bottom of the mould. The second capping piece can therefore be created independently of the first. This is acceptable as long as the pieces are secure to the original until a third piece can be spanned between them.
Construction in this sequence makes it easier to create evenly shaped pieces in this case, but it is not necessary and may not be possible with more complex shaped moulds.
1. Remove the clay wall from the first set piece.
2. Clean off any clay from the mould piece flange wall and the surface of the original with a small sponge.
3. Construct and apply clay walls for the second mould piece as for the first.
4. Apply registration indents along clay wall as above.
5. Construct the second mould piece as for the first mould piece.
6. Allow this to set for an hour.
THE THIRD AND FOURTH MOULD PIECES
1. Remove the clay walls from the second mould piece and sponge clean, as above.
2. Construct and apply two clay walls that span between the two capping pieces. The walls should be the same height as the flange walls on the first two pieces.
3. Apply registration indents along clay walls, as above.
4. The two exposed sections of flange wall on the two capping pieces need to be applied with a wax paste release agent so the third piece does not stick to them.
5. Construct the third mould piece between the first two pieces and allow it to set.
6. Remove the clay walls from third mould piece and clean, as above.
7. Construct the clay wall for the fourth mould piece (it only needs one as its other walls are provided by the walls from the other three pieces).
8. Apply registration indents along the clay wall, as above.
9. Apply wax paste release agent to the exposed flange walls of previously made mould pieces.
10. Construct the fourth mould piece directly against the flange walls of the previous three mould pieces.
11. Allow to set for an hour.
THE FIFTH MOULD PIECE
1. Remove the clay wall and clean the flange wall of the fourth mould piece.
2. The fifth and last mould piece will require no new clay walls as they are all provided by the flange walls of the other mould pieces. This last piece completes the mould over the original.
3. Apply release agent to all exposed flange walls.
4. Construct the final mould piece as above.
5. Allow it to fully cure and air dry until hard (this can take up to twenty-four hours at room temperature).
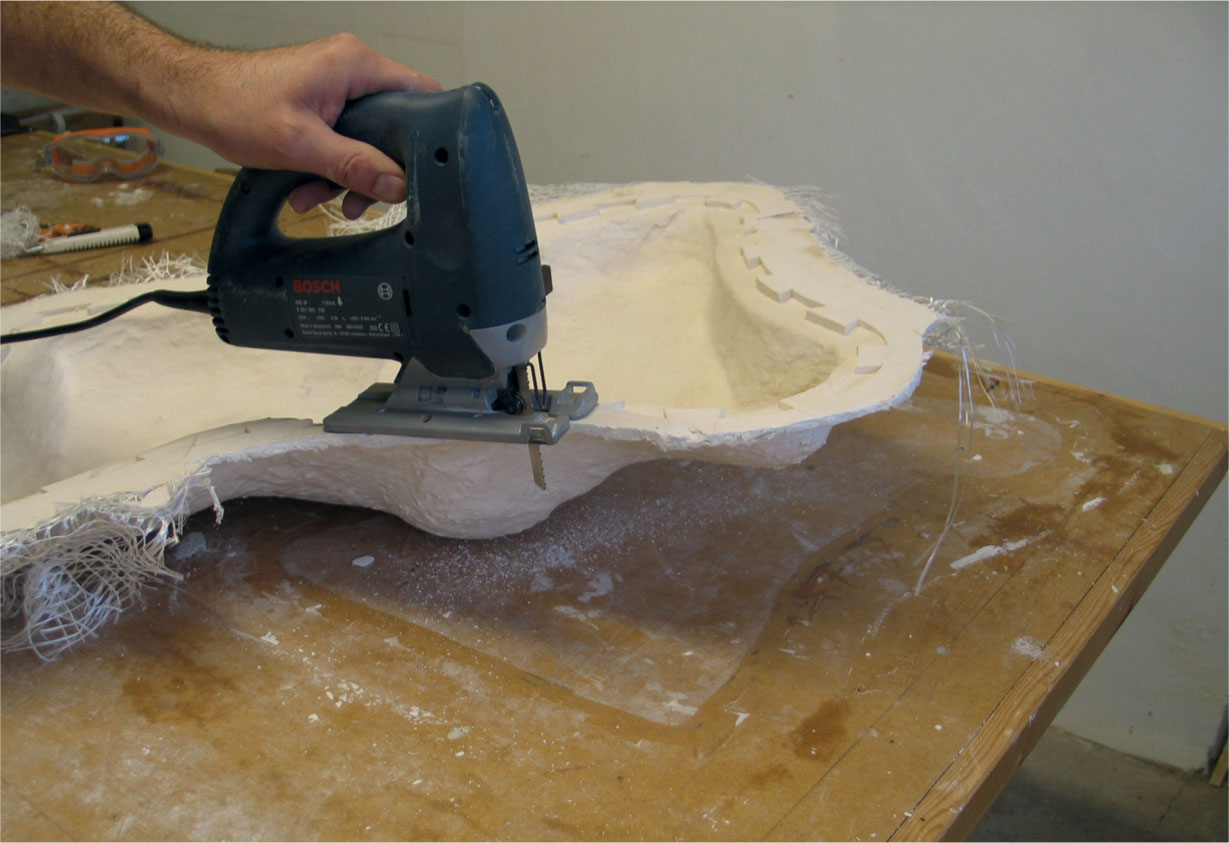
OPENING, TRIMMING AND CLEANING
1. Trim all the doubled flange mould walls with a hacksaw blade or electric jigsaw.
2. Before opening the mould 6.5mm holes should be drilled at 80mm intervals along the doubled flange walls of the mould to accommodate M6 bolts to secure the mould pieces together when casting.
3. Open the mould piece by piece using a wide strong-bladed knife. Small wooden wedges can be useful to push into seams, to keep them apart as they are opened.
4. Once apart, mould pieces should be sanded of any rough edges, washed, dried and reassembled ready for use. Nuts and bolts should be secured finger-firm for storage and tightened in opposite pairs a little at a time until tight for casting.
Jesmonite as a Case-Making Material for Flexible Moulds
As well as being a versatile casting material Jesmonite can be used as an effective case-making material for flexible moulds. Being lightweight and extremely durable it can be used to produce a very viable alternative to traditional case-making materials. As an alternative to fibreglass cases it also has the obvious advantages of being non-toxic and easy to clean up.
AC100 is probably the best system to use, being very durable and designed for laminating. The process is effectively the same as for a laminated cast but it can be used on the cured surface of a thixotropic-applied silicone mould. The first layer of Jesmonite needs either an addition of thixotropic additive or inert filler to make it thixotropic and it is capable of being brushed onto the surface of the silicone as a gel coat. This is then laminated in the same way as for casting or mouldmaking to create a case.
Note that Jesmonite cases can also be used with vinyl mouldmaking methods. The case would be produced after the clay slab stage in vinyl case mouldmaking.
Method
1. Apply silicone to the original subject matter using the brushable thixotropic method. Allow it to set and cut registration dovetails.
2. Mix a batch of Jesmonite AC100 with thixotropic addition.
3. Paint a layer of this 2–3mm thick onto the silicone and allow to set.
4. Cut enough quadaxial mat to cover the gel-coated layer twice.
5. Mix a batch of Jesmonite and apply it to the set gel coat.
6. Lay the first layer of mat and thoroughly saturate with more mix. This can be done in one piece of mat if the size and shape of the mould allows or it can be laid in overlapping strips.
7. Stipple out any air bubbles from between the gel coat and mat.
8. Mix a batch of Jesmonite with an addition of fibrewglass chopped strand to make a thick paste.
9. Apply the chopped strand paste to the previously applied quadaxial layer and spread it out to 2–4mm thick.
10. Apply a second layer of quadaxial mat, as for the first.
11. Allow this to set and cure fully before trimming with an electric jigsaw or hacksaw blade.
12. Demould.
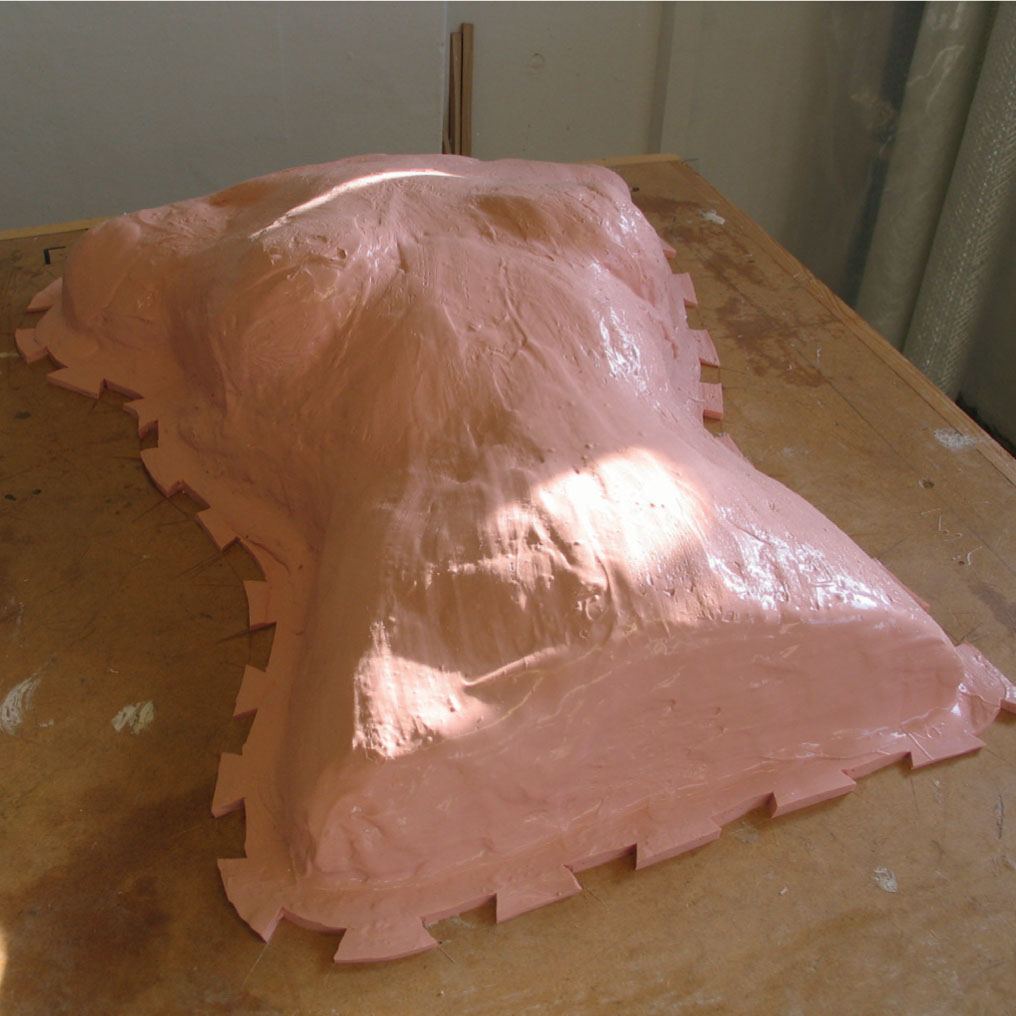
The silicone rubber mould.
The application of the thixotropic Jesmonite layer.
The thixotropic layer is allowed to set.
The first quadaxial mat layer.
The chopped strand layer.
The second quadaxial mat layer.

Removing the set and hardened case from the silicone mould.
Trimming the case.
The silicone rubber mould and Jesmonite case.