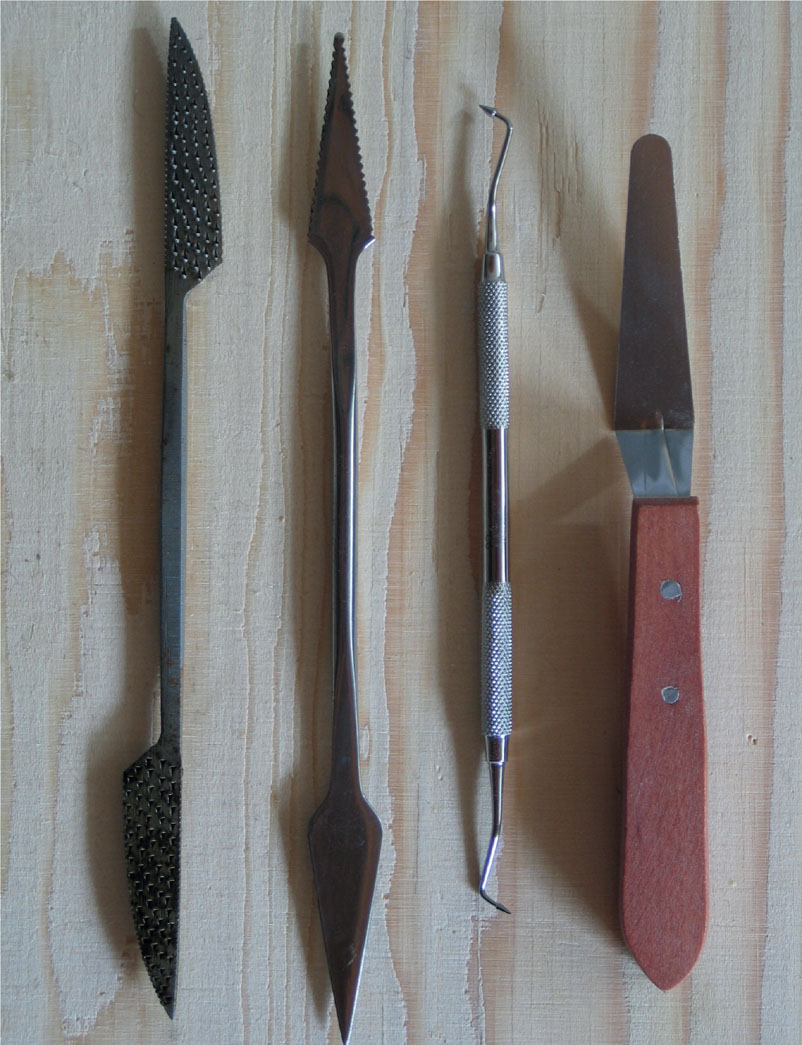
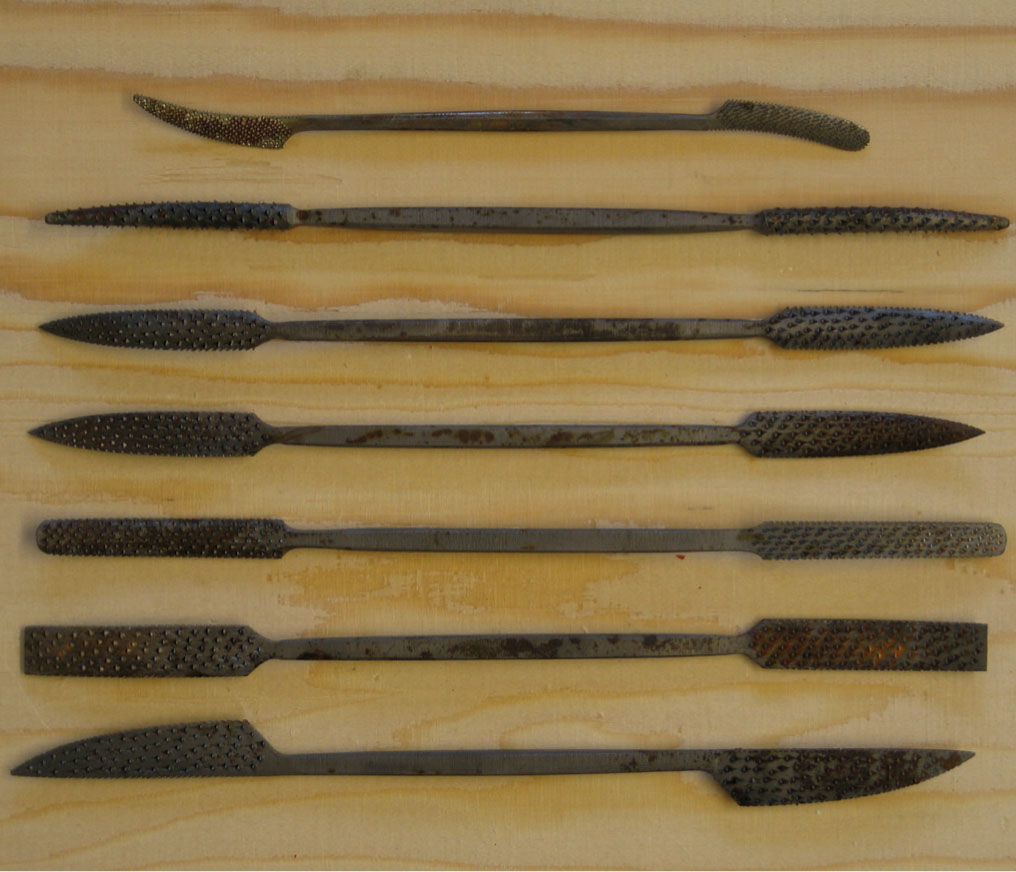
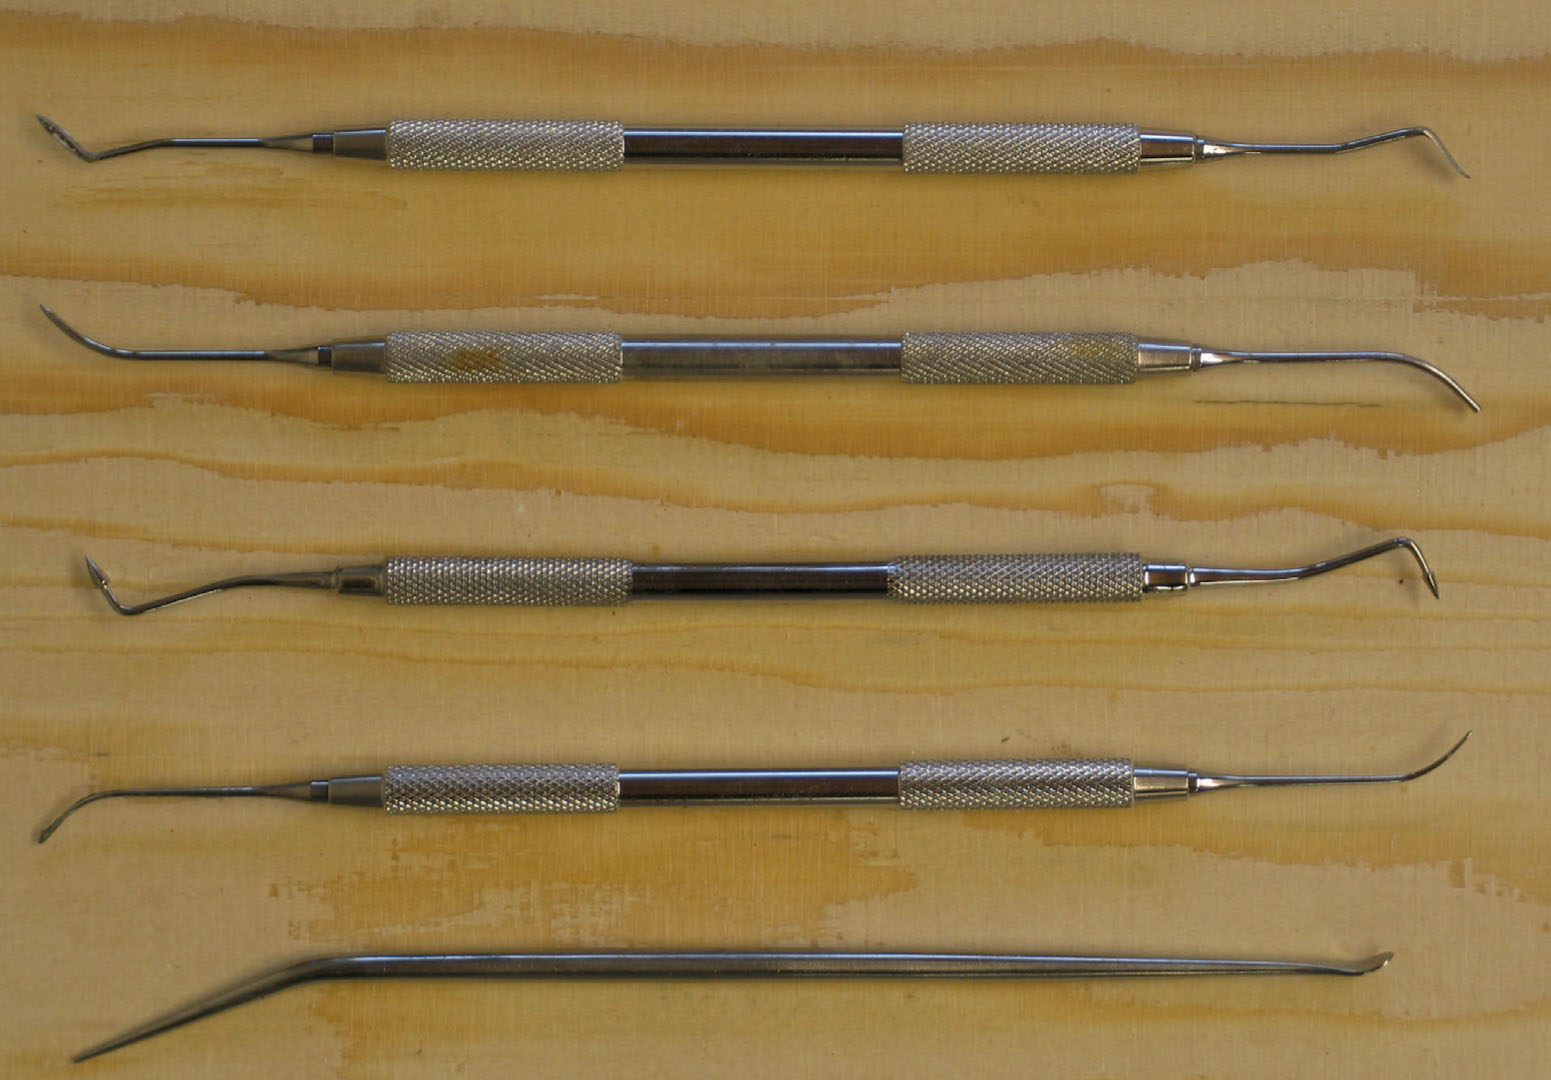
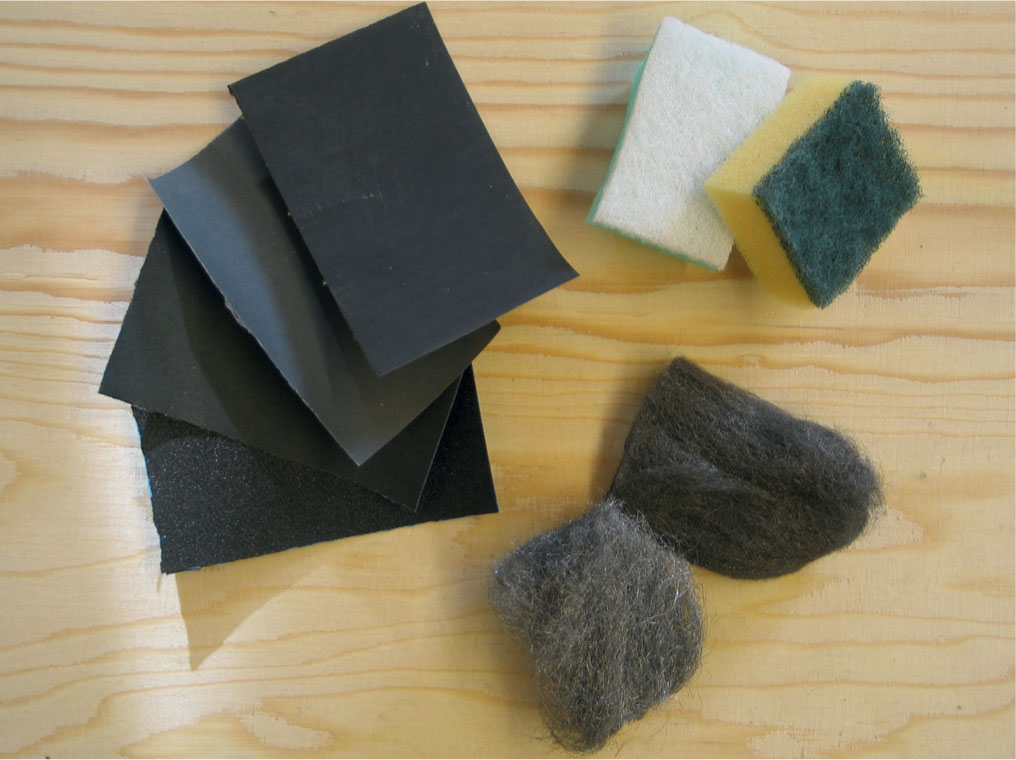
A selection of finishing tools.
A selection of finishing tools.
CHAPTER FOURTEEN
FINISHING
The end result in any mouldmaking and casting project is only ever fully achieved in the finishing process. The quality of the final finished casting can vary greatly depending on the amount and quality of the finishing process and it should therefore be considered as taking at least a third of the whole length of the job, sometimes even half.
Mouldmaking and the production of the subsequent casting are not finite processes and there will always be a certain amount of finishing to do on any project. The degree and amount of finishing required will obviously depend on a number of factors. Accuracy in preparation and mouldmaking is of primary importance and this can reduce the amount of finishing a casting will require. Similarly, good preparation and accuracy in the casting process will help to reduce your labour at the finishing stage. Some mouldmaking techniques inherently require more work at the finishing stage because of the nature of the process, as with life moulding for example. Also, some casting materials can be difficult to finish because of the nature of the material. Clear resin castings, for example, with seam lines can be particularly tricky due to the transparency of the casting showing up any imperfections. The quality of your castings will no doubt be improved and refined with experience, but never expect to have no finishing to do!
Before undertaking any finishing processes it is advisable to first assess the casting and then select the appropriate finishing system or systems. In your assessment determine how much finishing is actually required; it would be a mistake to wade into a programme of finishing processes that is too comprehensive for the job in hand. If one or two systems will achieve the required finished result do not go through ten systems.

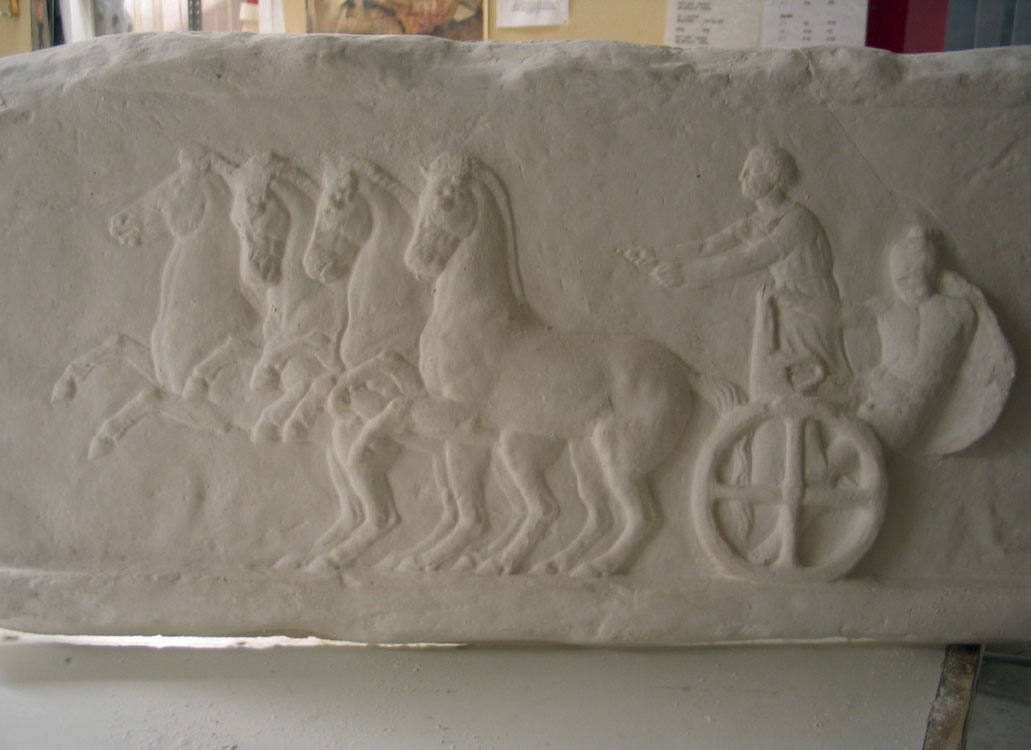
Cold-cast bronze and clear resin tablets (H: 120mm).
An Alpha plaster cast (W: 850mm).
Knowing where to start is obviously the crucial factor here, and defining what degree of finishing is required should be easy to judge from visual inspection. Finishing can be broken down into two categories: seam line and surface, or just surface. The finishing needed will be determined by the type of mould employed. A multiple-piece mould will produce seams on a casting and a one-piece mould will not, but both will require surface finishing of some sort.
Finishing systems incorporate a process of abrading from course to fine, with degrees of this within each system. The categories I have laid out therefore start with large chisels and end with polishing and buffing systems, with many decreasing levels in between. Within the scale of ten it will be necessary to assess the stage at which to start. Castings with very rough seam lines may need to be taken through all ten, but castings with smaller seam lines may only require work beginning at the finer levels. Similarly, choices of required finish will determine which finishing systems are employed. Some castings may look better polished and others not, for instance, and this may be an aesthetic choice for the mould-maker.
The tools used within each system described here can of course be expanded upon depending on the nature of the project. There are no rules, only possibilities and choices.
Whatever the requirements and choices, for the best results take finishing processes slowly and methodically and stand back frequently to look at the results progressively until satisfied.
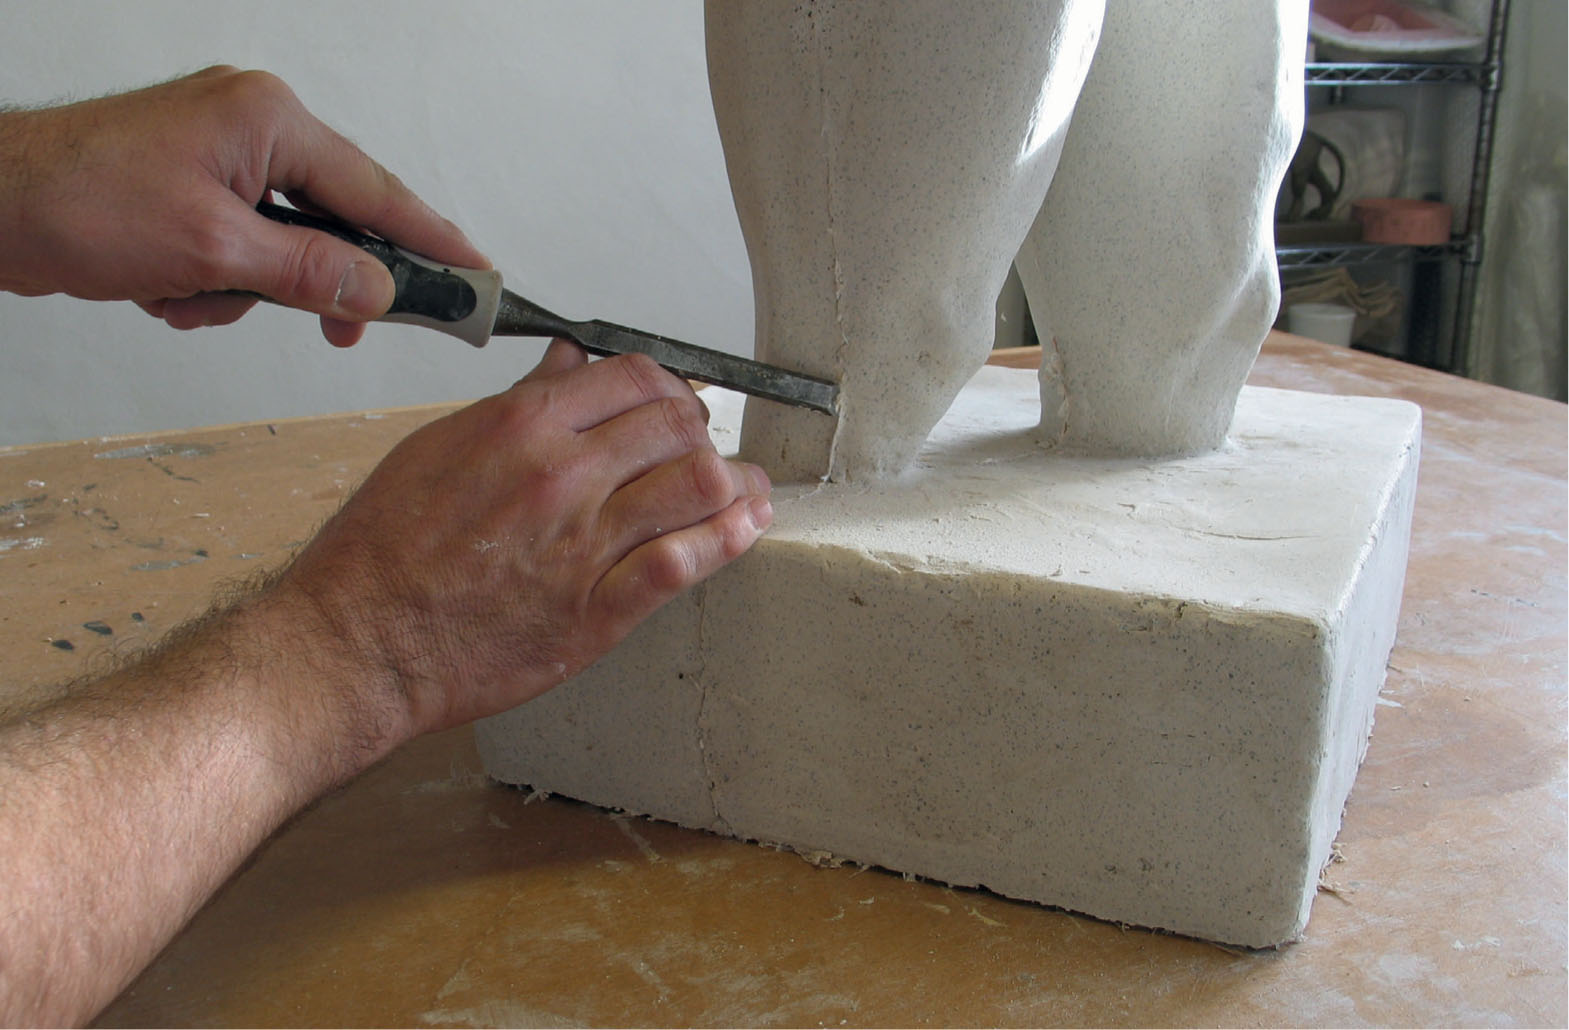
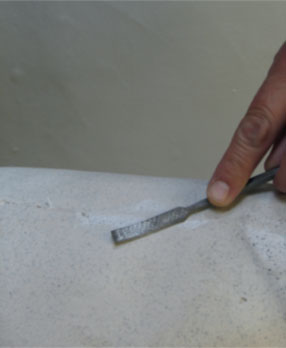
1. Large chisels Old wood or stone-carving chisels of 5–25mm are ideal. They should be used only for the removal of large amounts of seam flashing or imperfections. Stop using these tools when you are within 2 or 3mm of the surface of castings. They can be used on most materials but will blunt more readily on stone composite or concrete-based castings.

2. Surforms Surforms of various sizes and shapes can be used to remove seam flashing up to 2 or 3mm close to the casting surface. Standard surform plane bodies can be fitted with differently shaped blades to accommodate undulating casting surfaces and contours. They should be kept clean and unclogged with a coarse wire brush.
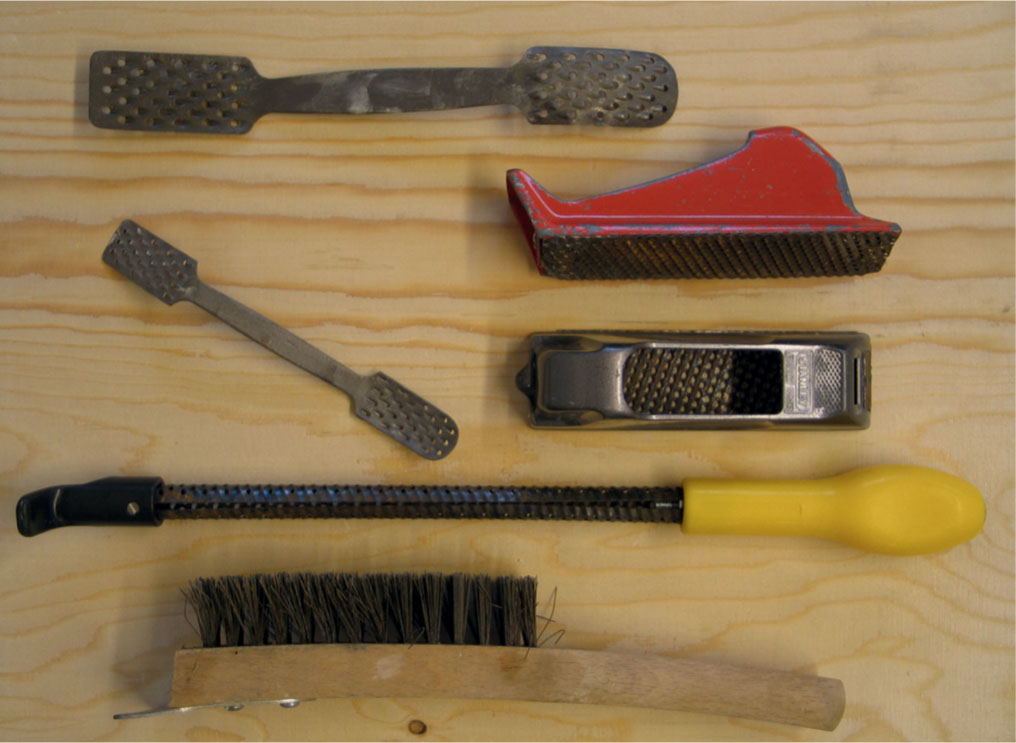
3. Rasps A further finer level of abrasive action following surforming can be achieved with rasps, working up to about 1mm to the casting surface. Multiple shapes and contours are available. These should be kept clean and unclogged with a fine wire brush.
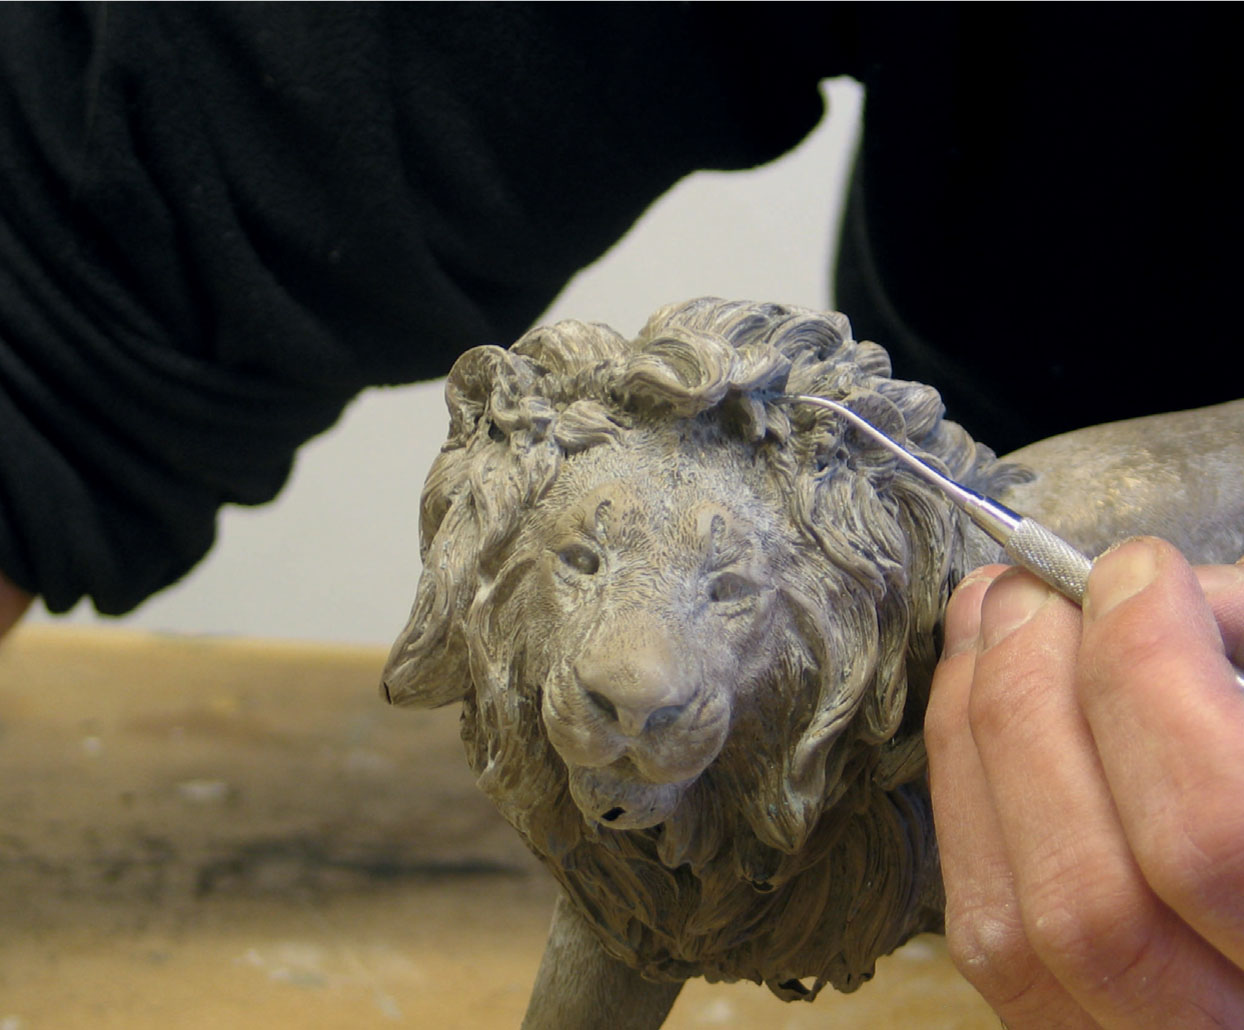
4. Leaf and spears (and other metal modelling tools) Leaf and spears are picking and scraping tools available in multiple sizes. Leafs can be used to scrape back fine seam lines to very near the cast surface and around the inside of concave surfaces. Spears can be used to pick imperfections out of difficult-to-access areas. These tools can be useful for opening up cracks or seams that need to be filled. Other metal modeling tools, usually sold for working with plaster, can be used as finishing tools and these come in a multitude of sizes and shapes. Use tools of an appropriate size and shape for the job in hand.

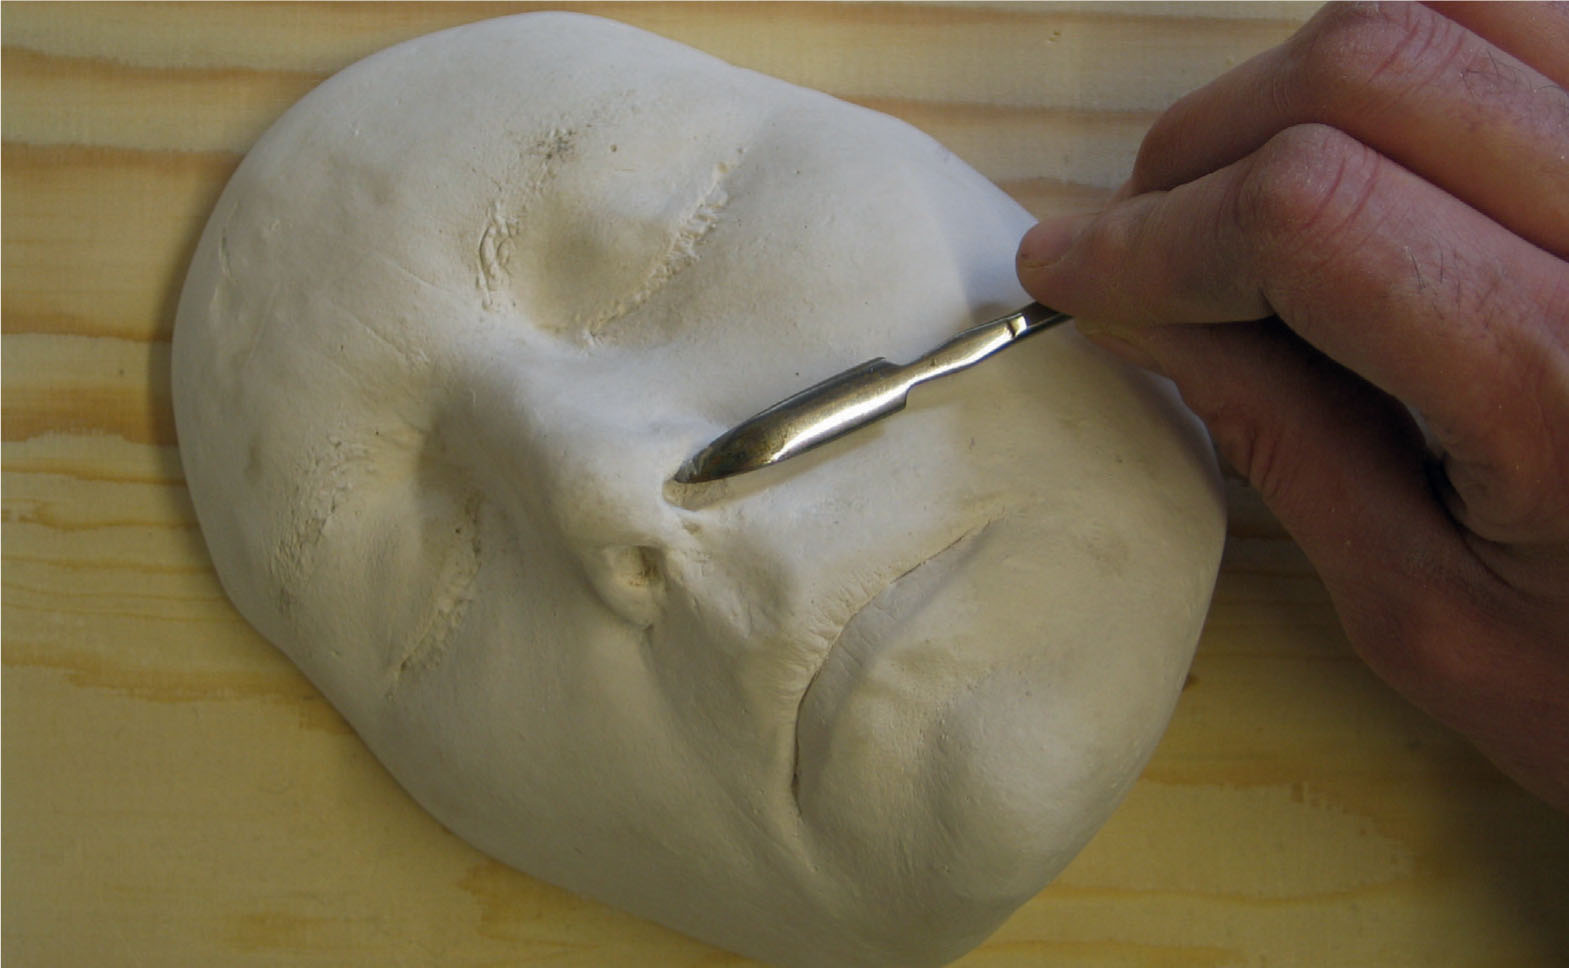
5. Small chisels and dental tools Chisels of 5mm and smaller can be used to take back seam lines and very small imperfections very close to the cast surface. Small chisels can also be used to open up cracks and seams prior to filling. Sets of small wood-carving chisels come in multiple profile ranges. Dental tools in various shapes and sizes can be very useful to remove imperfections in very highly detailed areas that are difficult to access.

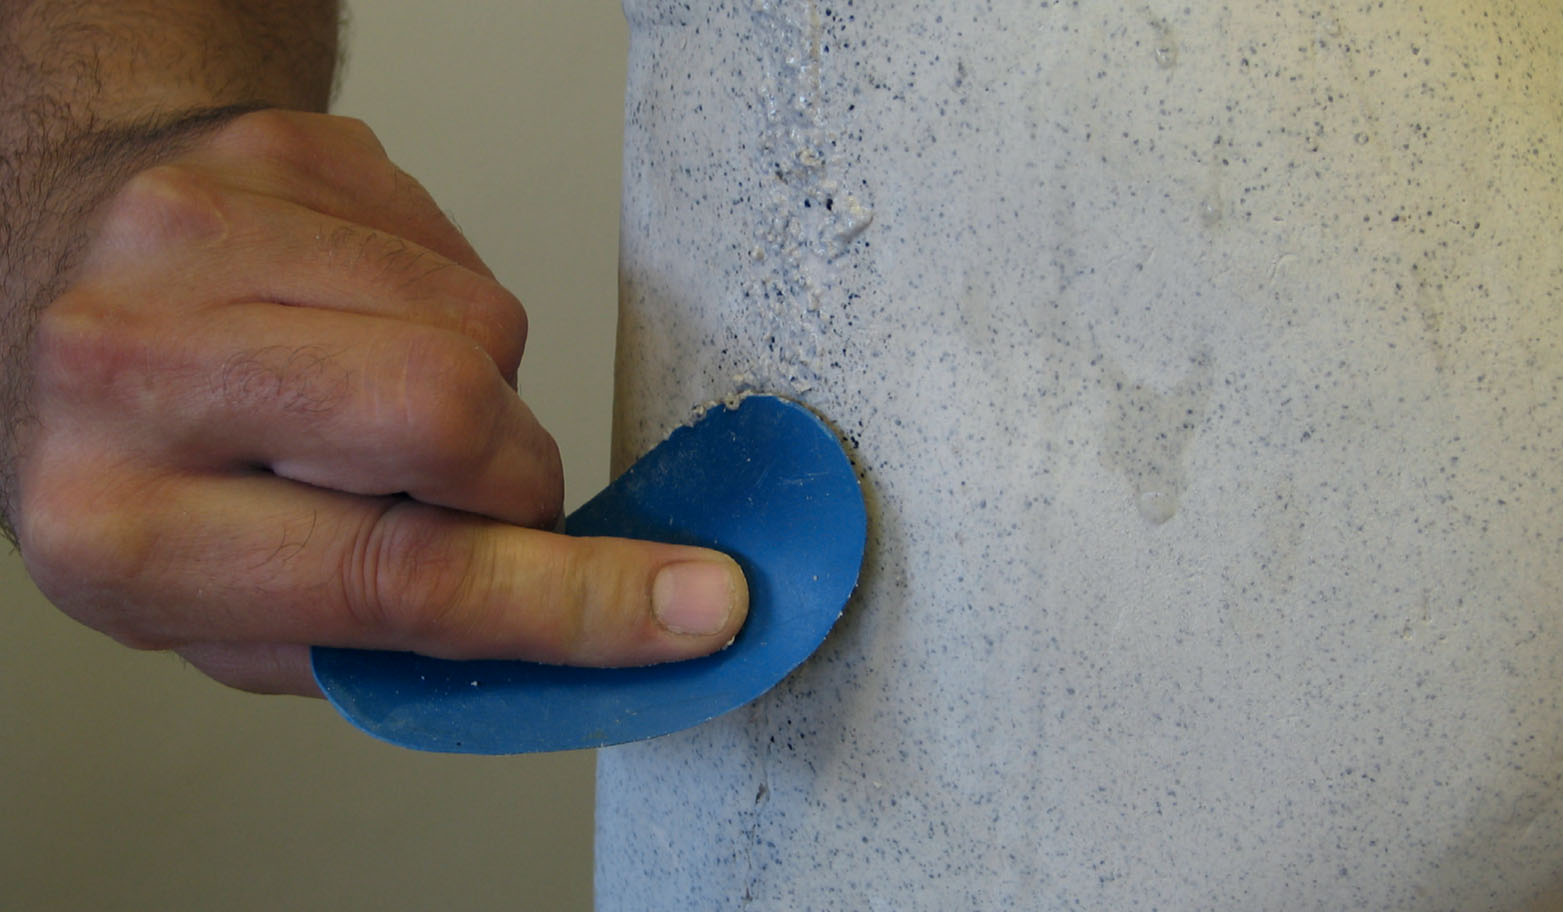
6. Filling Filling with the appropriate casting material may be necessary on areas with air bubbles, cracks or seam lines that have not joined properly. Various flexible tools can be used to apply the filling material (fingers are good as well!). Areas to be filled should be opened up a little to clear any loose material and to allow filler to get a good hold. When applying water-based filling materials the area should be primed beforehand with a water spray to allow good adhesion. For this reason areas to be filled should also be free of debris and clean. Always overfill a little to allow for potential shrinkage and accurate sanding back to the cast surface when set. It is advisable to colour-match and test any filling materials before application.

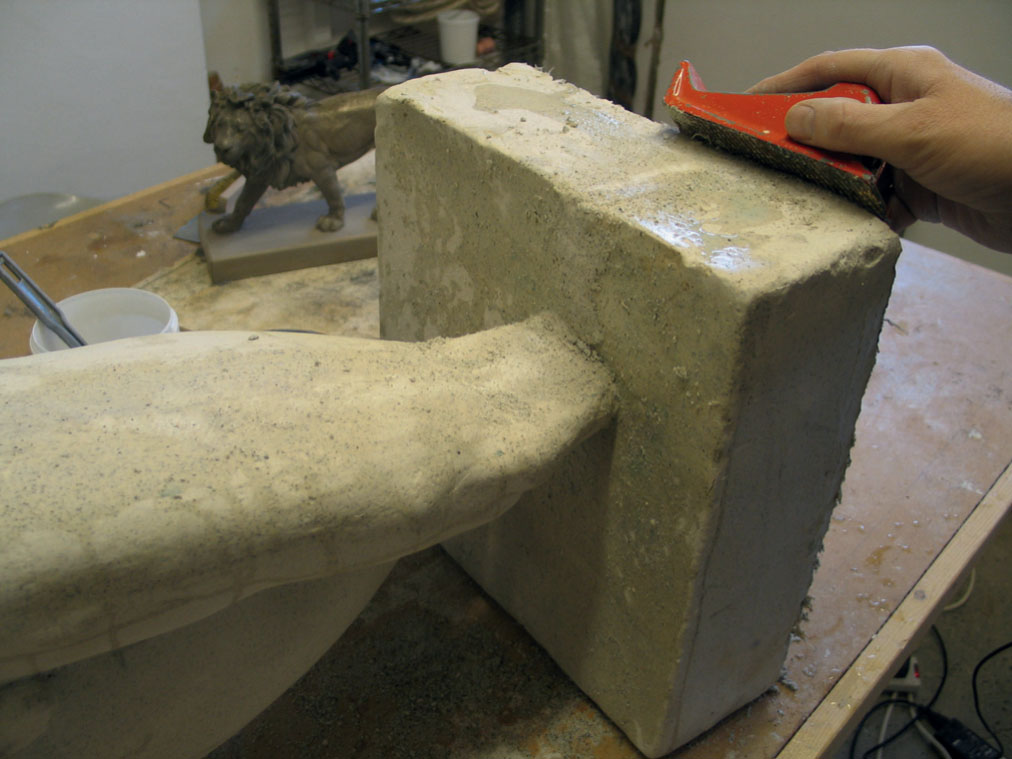
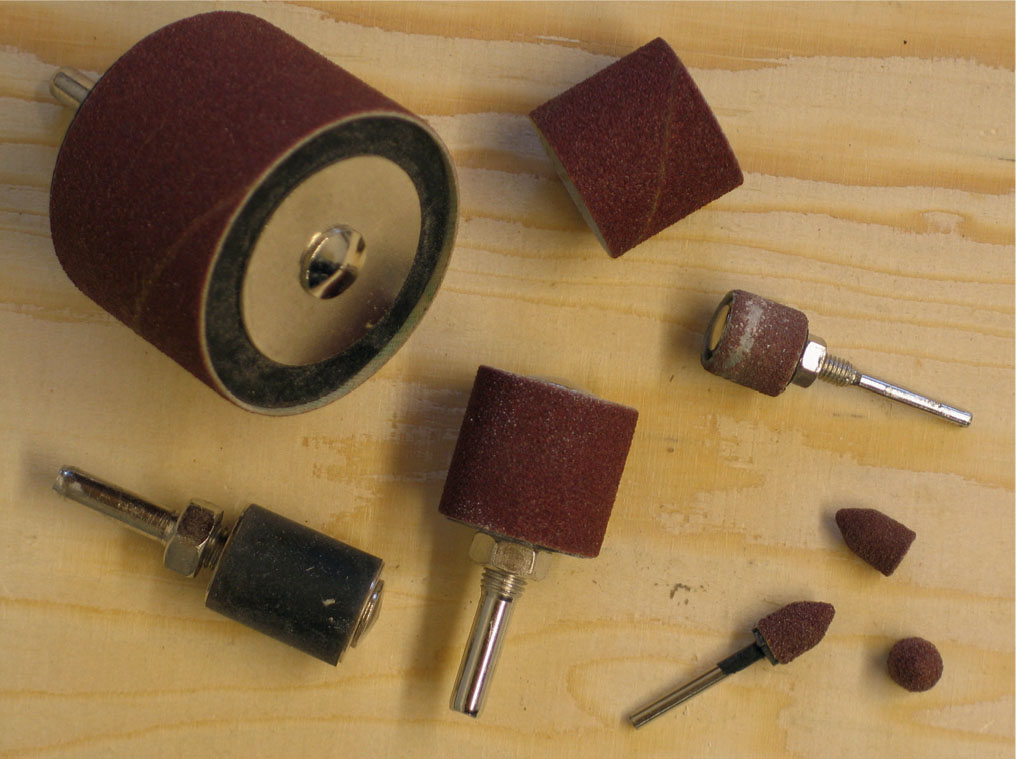
7. Mechanical sanding Small-scale mechanical sanding apparatus can be used on medium-level seam flashing and imperfections (of 2–3mm). Small sanding drums and attachments for cordless drills are useful, as are electric ‘delta’ sanders with interchangeable profiles and different paper grit sizes. Do not wet sand with mains electric tools. Be wary of sanding too far too quickly when sanding mechanically, particularly when exposing metal or stone composites. Work progressively through the coarse levels of abrasive to finer levels. Be aware of dust control measures.

8. Hand sanding Hand sanding systems should be employed to take seam lines, raised imperfections or set filled areas of castings down to the cast surface. They are also used for exposing metal or stone composites. Wet sand with waterproof papers and sanding blocks, rinsing frequently during use and changing water between abrasive grades. A little washing-up liquid can assist wet sanding, particularly when cutting back clear resin castings. Wire wool can be used effectively to expose metal composites. Heavy duty nylon kitchen scourers are useful for exposing Jesmonite stone composites; dry and view the work frequently to determine levels of exposure. Work progressively through the coarse levels of abrasive to the finer levels. Be aware of dust control measures.

9. Polishing Some castings may benefit from or require polishing. Different polishing systems are available, including wax-based blocks or cream systems applied to mechanically driven mops and hand-applied wax or cream polishes. Polishing with cutting compounds should be considered as another level of abrasion; grades should be worked through progressively and then it should be finished off with polishing systems. Levels of polishing can only really be determined after buffing.
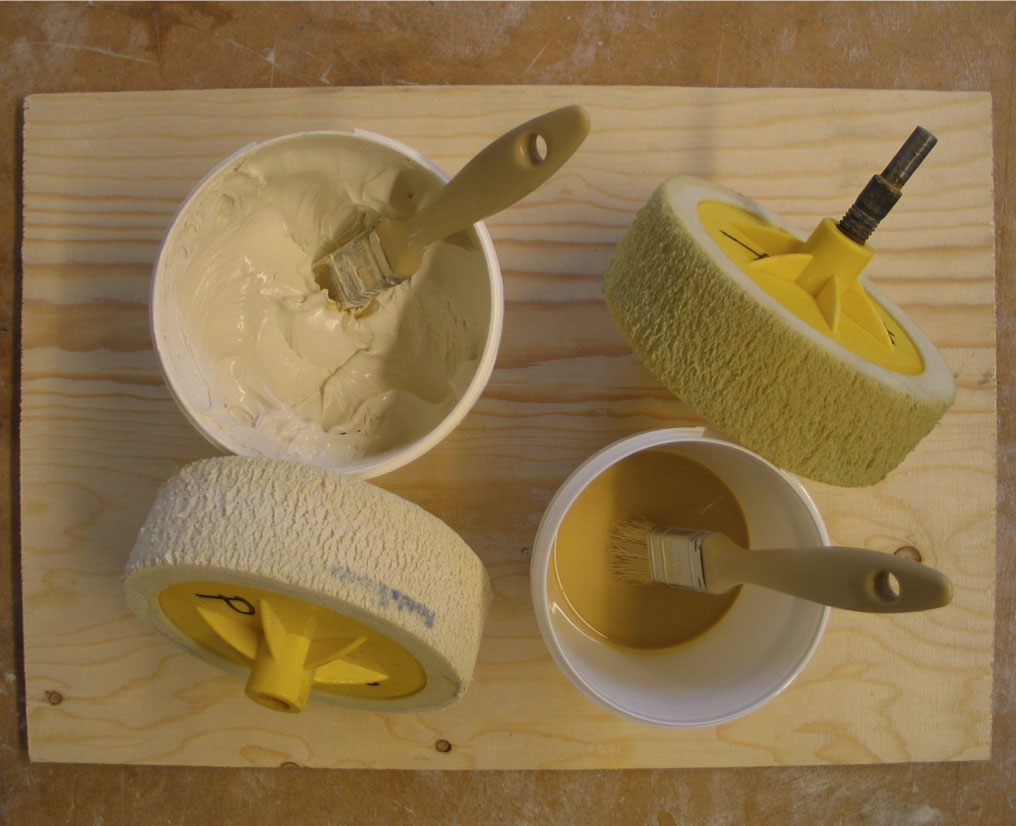
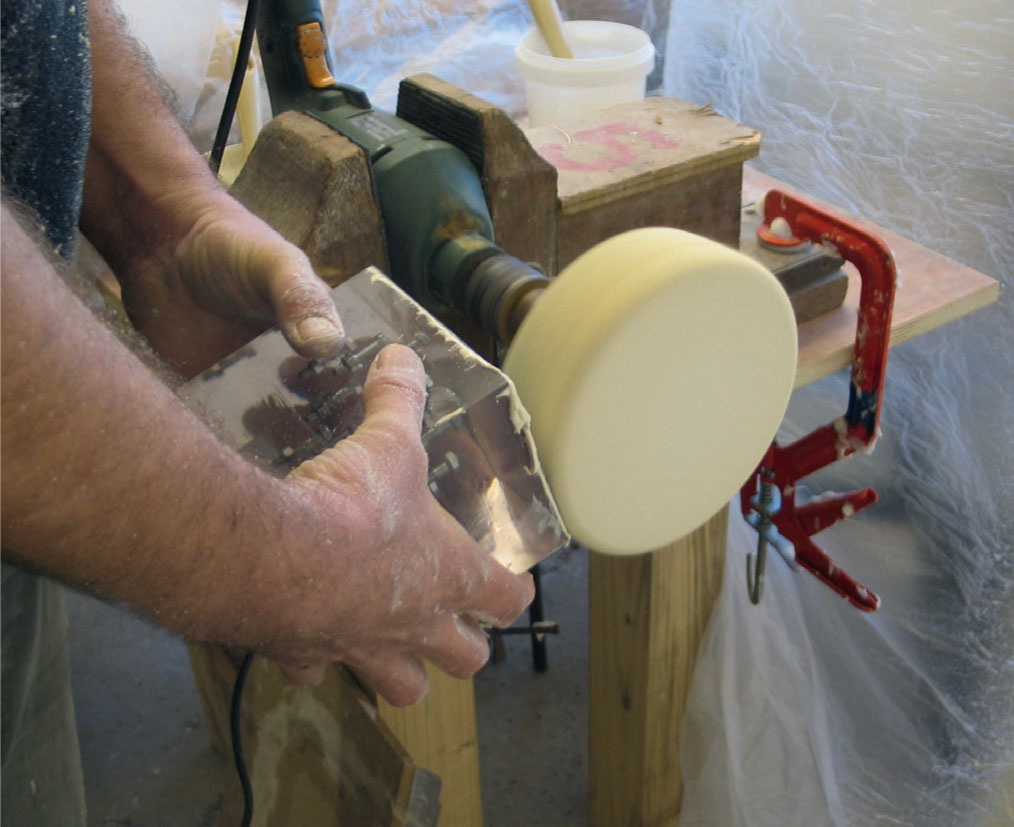
10. Buffing The final sheen or shine can be achieved by buffing pre-polished castings. Soft lint-free cloths or mechanical fleece buffing mops can be used. If the required levels are not achieved then revert to polishing, or if necessary to sanding levels and then polishing, and repeat.

