Although specific preparation directions are given in each recipe, the basics, such as scaling, removing the gills, filleting, skinning, removing pin bones, and skin-drying salmon, are detailed here. If you ask, a fishmonger will usually do some of these tasks for you. As a courtesy, I prefer to call in advance and place an order. That way, rather than me walking into the shop at a busy time, the fishmonger has time to prepare my fish without rushing.
All the recipes in this book specify in the ingredients list whether the salmon needs to be scaled or not. Scaling salmon is necessary if you are planning to cook a whole fish, fillets, or steaks with the skin on. This is a messy job, and, honestly, not a favorite of mine, so if you are buying fish that needs to be scaled, ask the fishmonger to do it for you. If you find that you must do it yourself, here’s how.
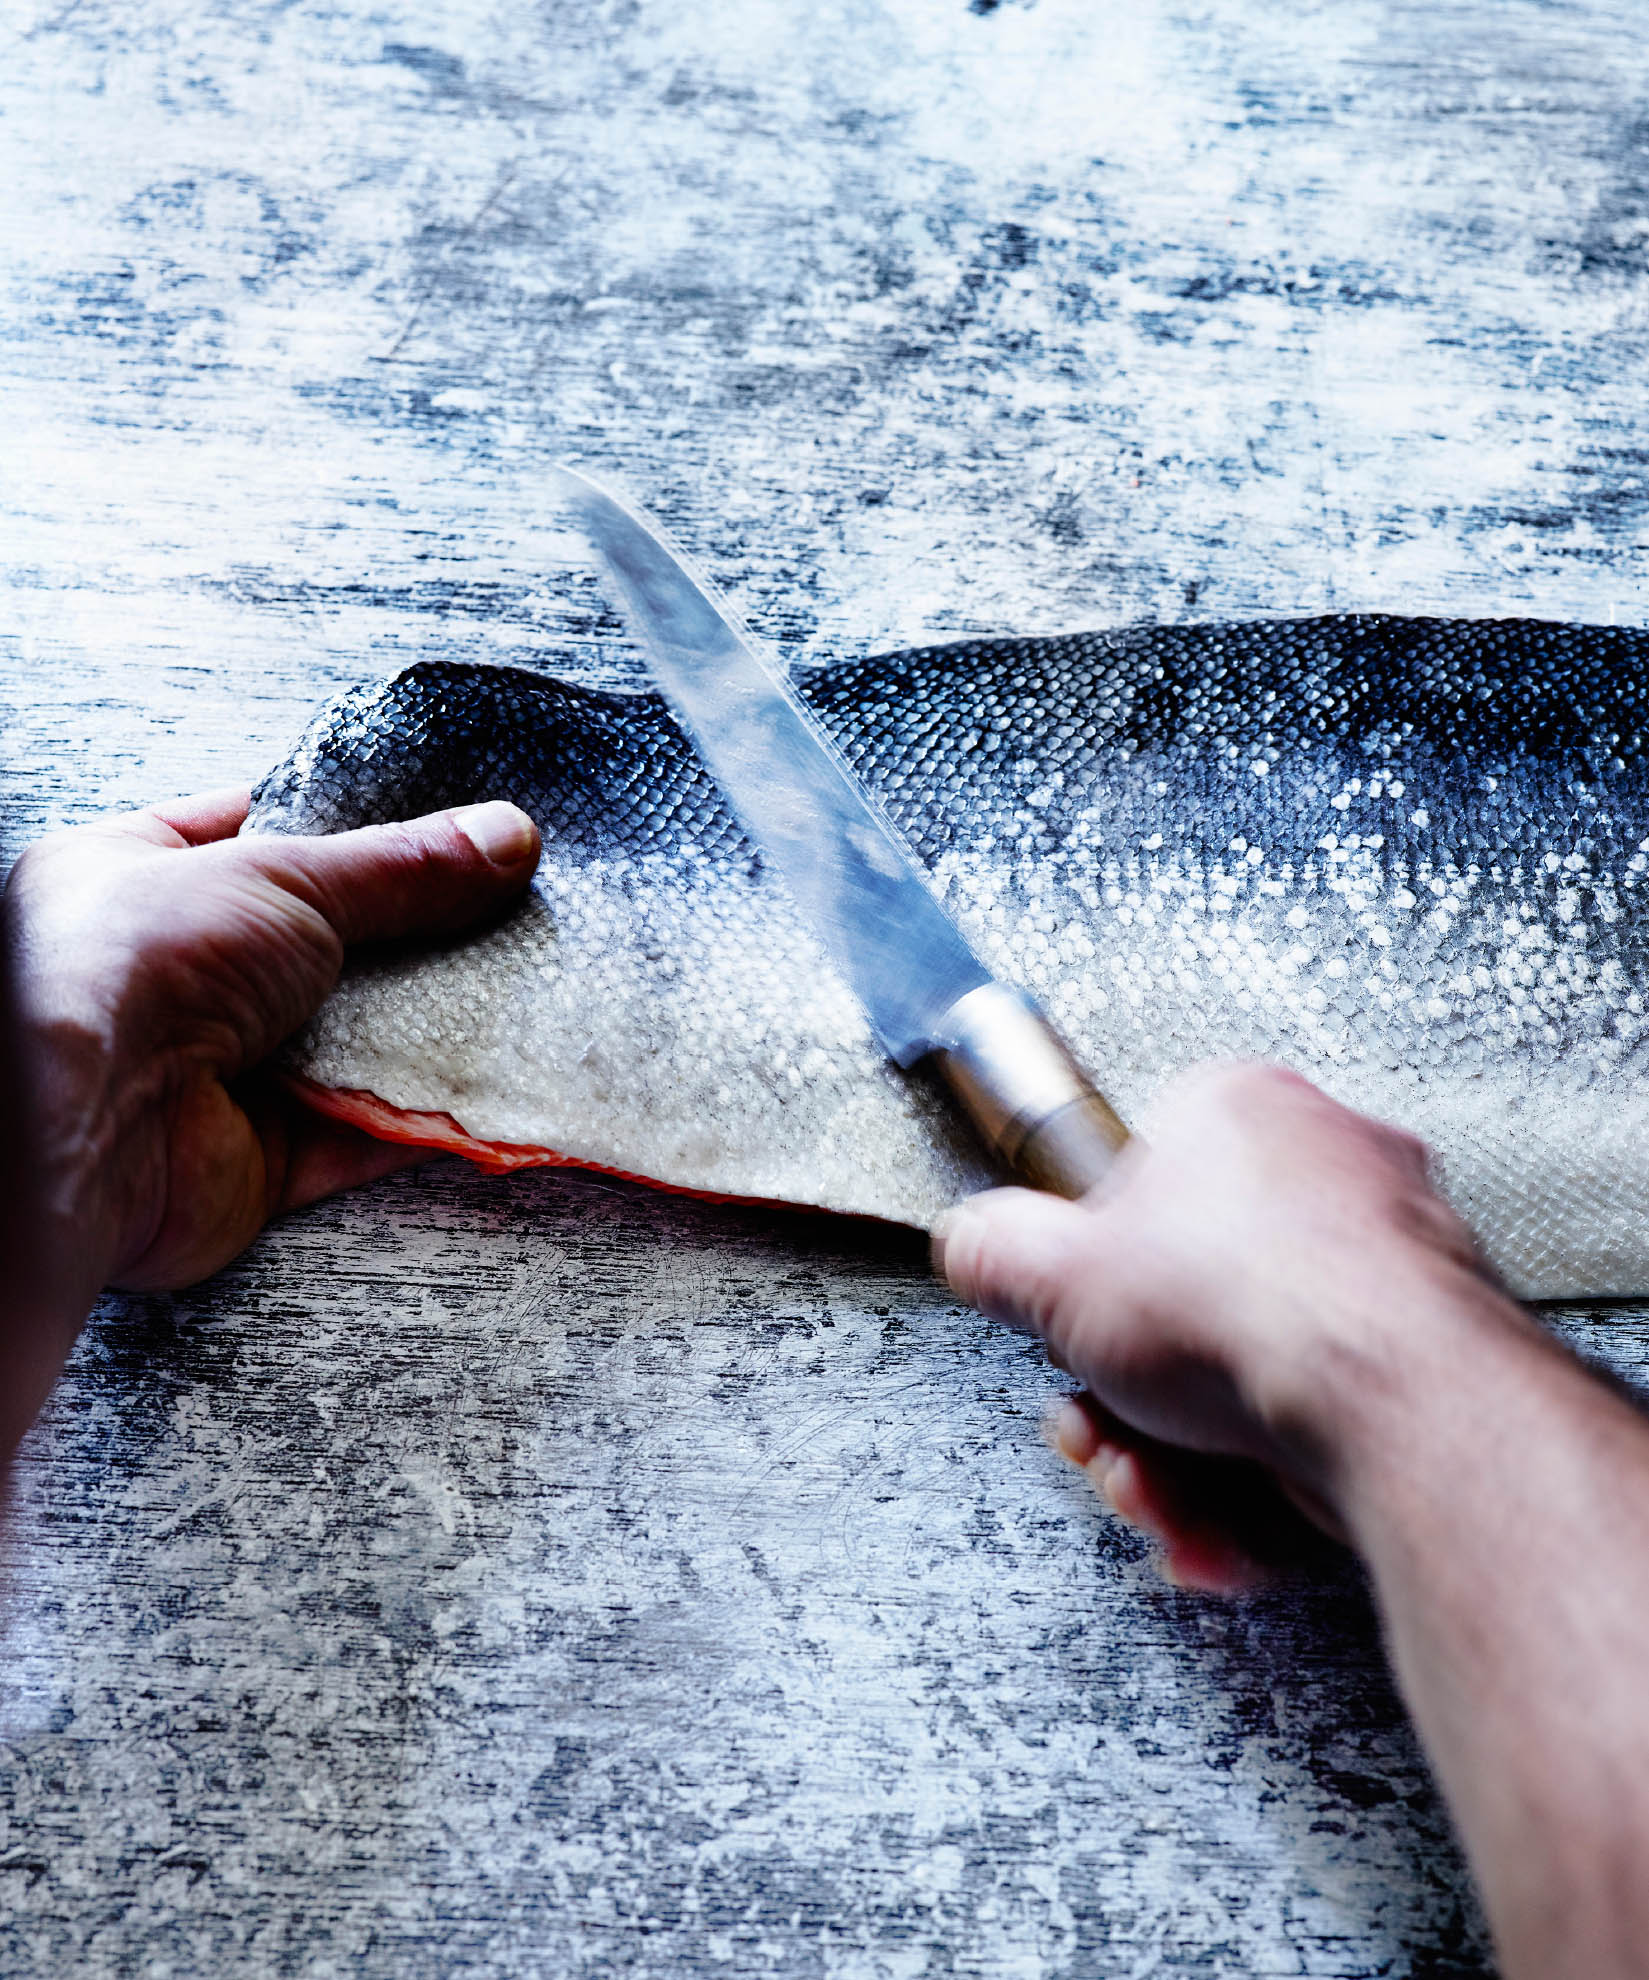
If working with a whole fish, spread several layers of newspaper in the sink, covering it well, and place the fish on top. You can also place the fish in a very large plastic bag to contain the scales as they come flying off. Using kitchen shears, cut off the three fins on the underbelly, then turn the fish over and remove the dorsal fins if they are still attached. Using a fish scaler (available at cookware stores) or the back of a rigid knife blade (I use a small chef’s knife), scrape the skin from the tail toward the head. Run your hands over the fish to feel for any scales you’ve missed. Rinse off the fish and pat dry with paper towels.
If you are working with portioned fillets, place the salmon flesh-side down on a clean cutting board. Using a fish scaler or the back of a rigid knife blade, gently scrape the scales “against the grain,” so they lift and release from the skin. I do this very slowly to avoid pulling and damaging the cut flesh. I also wipe off the knife blade frequently with a folded dry paper towel to remove the scales as I work. Rinse off the fillets and pat dry with clean paper towels.
Salmon breathe through their gills, feathery tissues that allow the fish to extract oxygen from the water in exchange for carbon dioxide. The gills need to be removed if you are cooking a whole salmon, or if you are using the head to make salmon stock, because they contain impurities and will make a sauce or stock taste bitter. Lift up the gill plate—the flap just behind the eyes—on one side of the head and you’ll see the gills, which are pink or red, crescent shaped, and attached at the head and at the collarbone. Using sharp kitchen shears or a knife, cut out the gills on one side of the head at the two attached points. Turn the fish over and repeat to remove the gills from the other side. Discard the gills, rinse the fish, and pat it dry with paper towels.
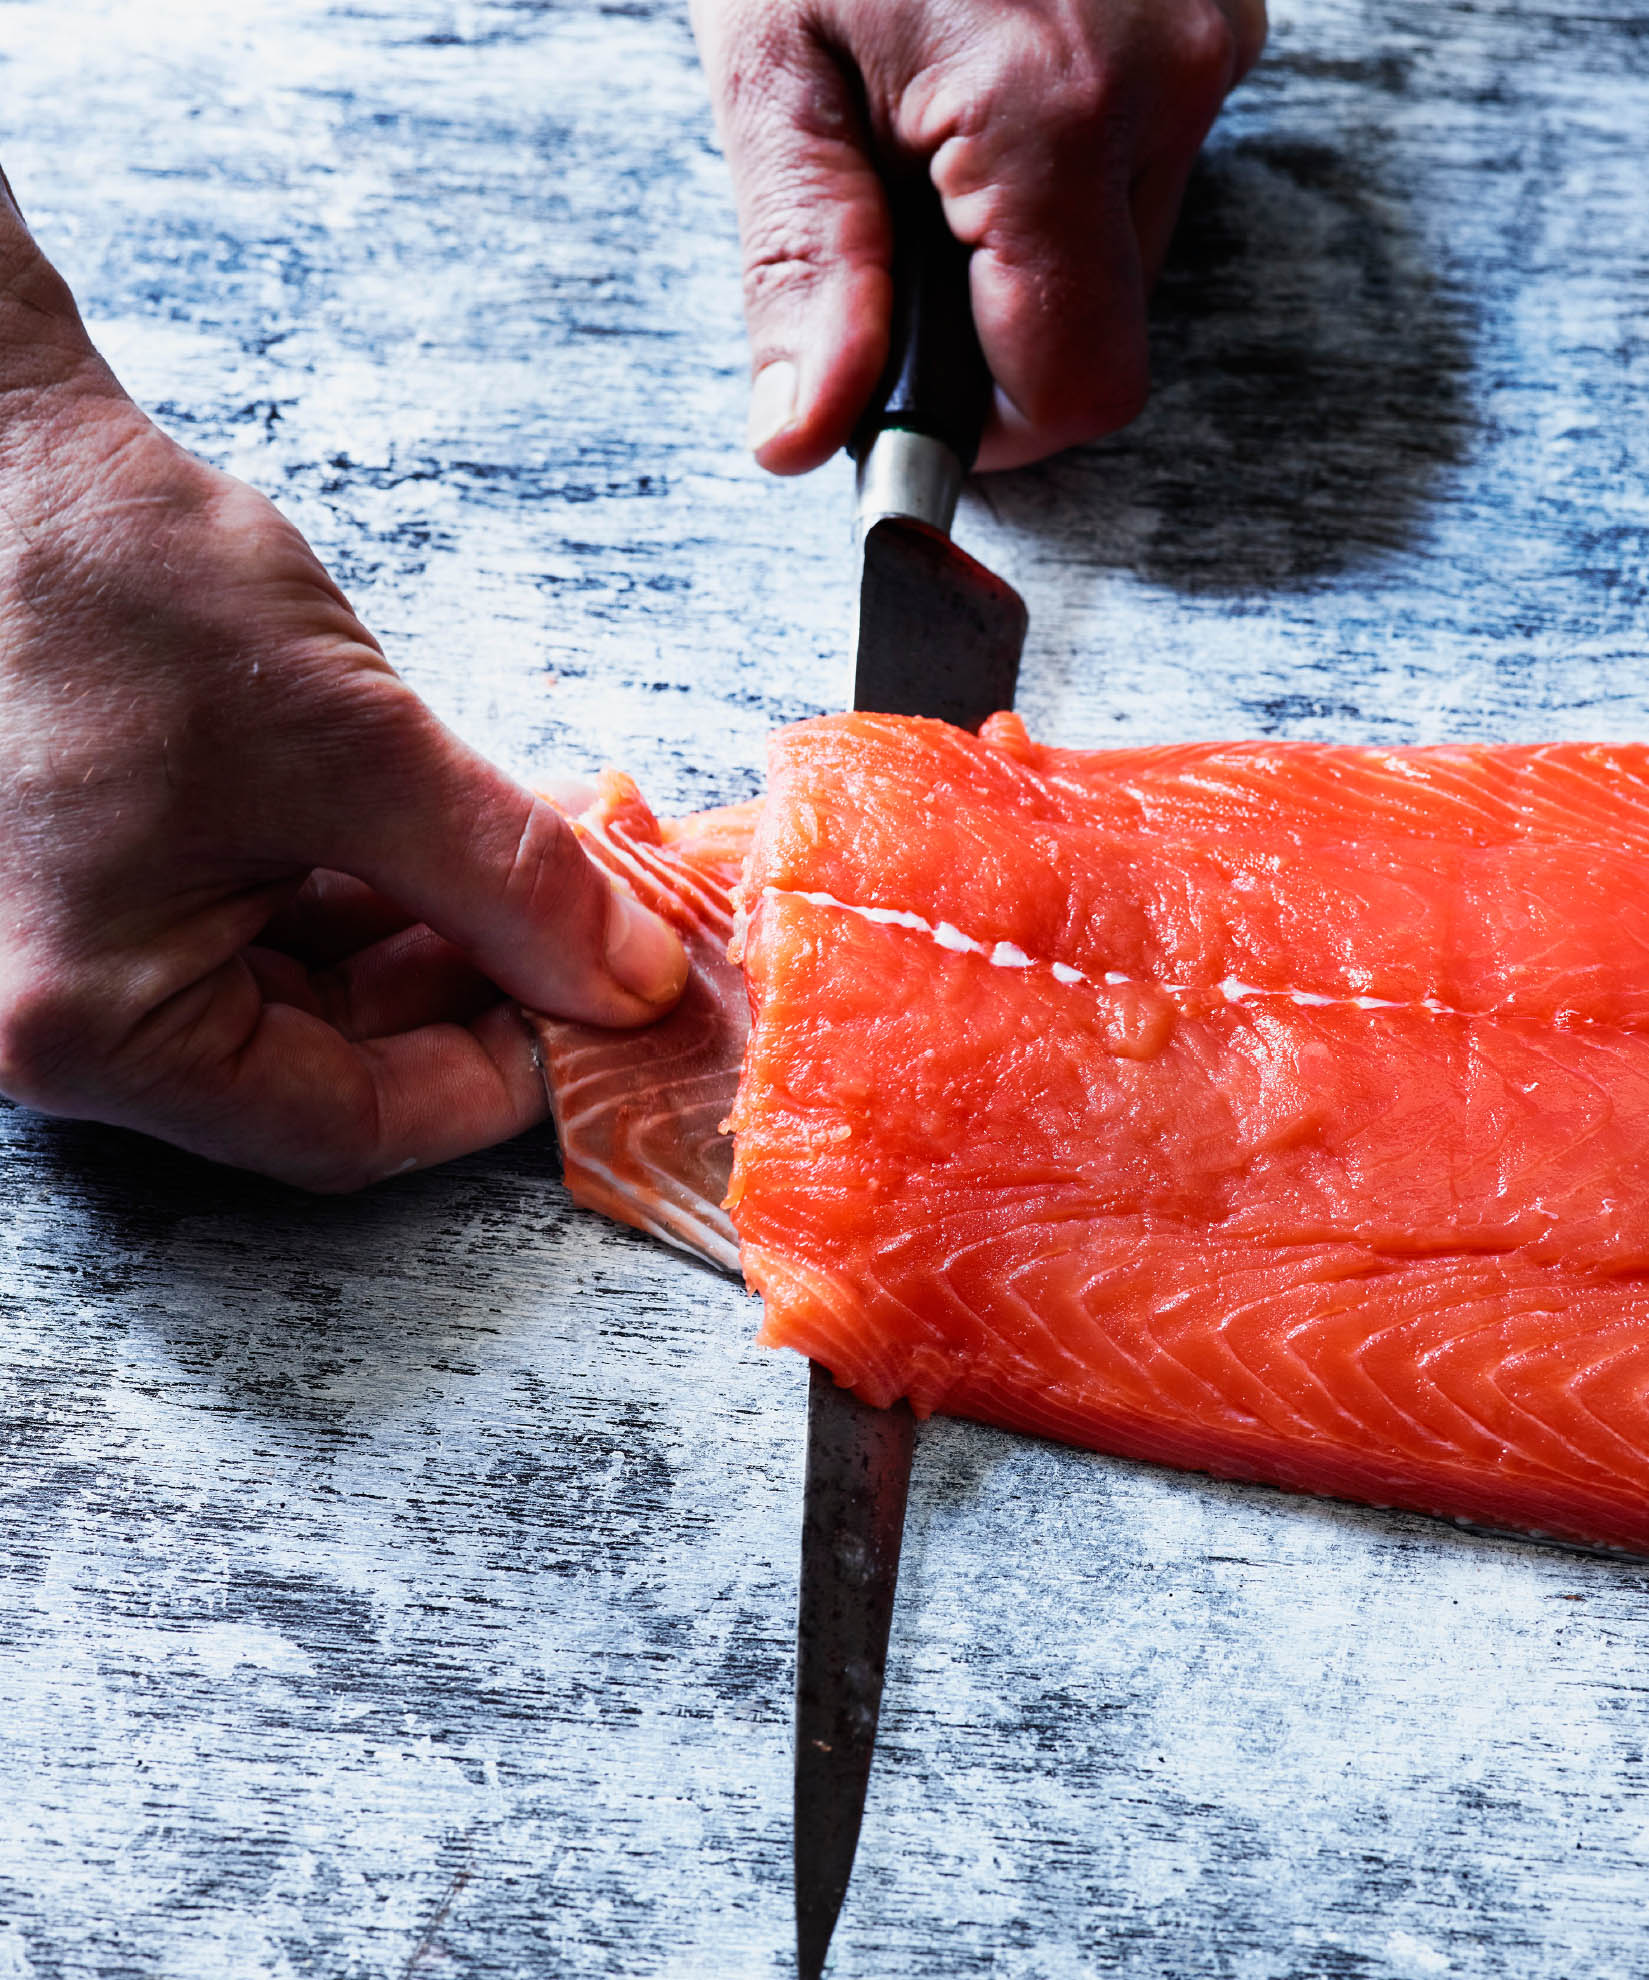
If you are purchasing a whole salmon and are planning to fillet it, ask the fishmonger to fillet it for you. It takes a little practice to get clean, smooth fillets off the bones without jagged cuts. But if you want to fillet the fish yourself, here is the method I use. Assuming the salmon has already been cleaned through the belly (see Cleaning and Gutting a Whole Salmon, page 31), place the salmon on its side and make a diagonal cut just behind the gill cover. Do this on both sides and then cut through to detach the head. Using a sharp, flexible boning knife, slice down the length of the fish, starting at the head end and cutting all the way through the spine bone. Again, starting at the head end and working your way down to the tail while keeping your knife almost flat against the bones, skim the knife along the bones in a smooth sliding motion, trying not to stop. As you slice, lift the fillet with your other hand, which will allow you to see the flesh being sliced away from the bone. Slice in this manner all the way down to the tail. Turn the salmon over and repeat the process on the other side to remove the second fillet. Trim off the rib bones from the upper side of each fillet. If desired, save the head, bones, and trimmings for making salmon stock.
Lay the salmon fillet skin-side down and with the tail facing you. With your non-dominant hand, grip the tail with a piece of paper towel, or put a little coarse salt on your fingertips to create traction. Using a sharp, flexible boning knife in your dominant hand, angle the blade toward the skin and, while continuing to grip the tail skin securely, cut along the skin as smoothly as you can. Cut all the way from the tail to the head end, keeping the skin taut. Discard the skin.
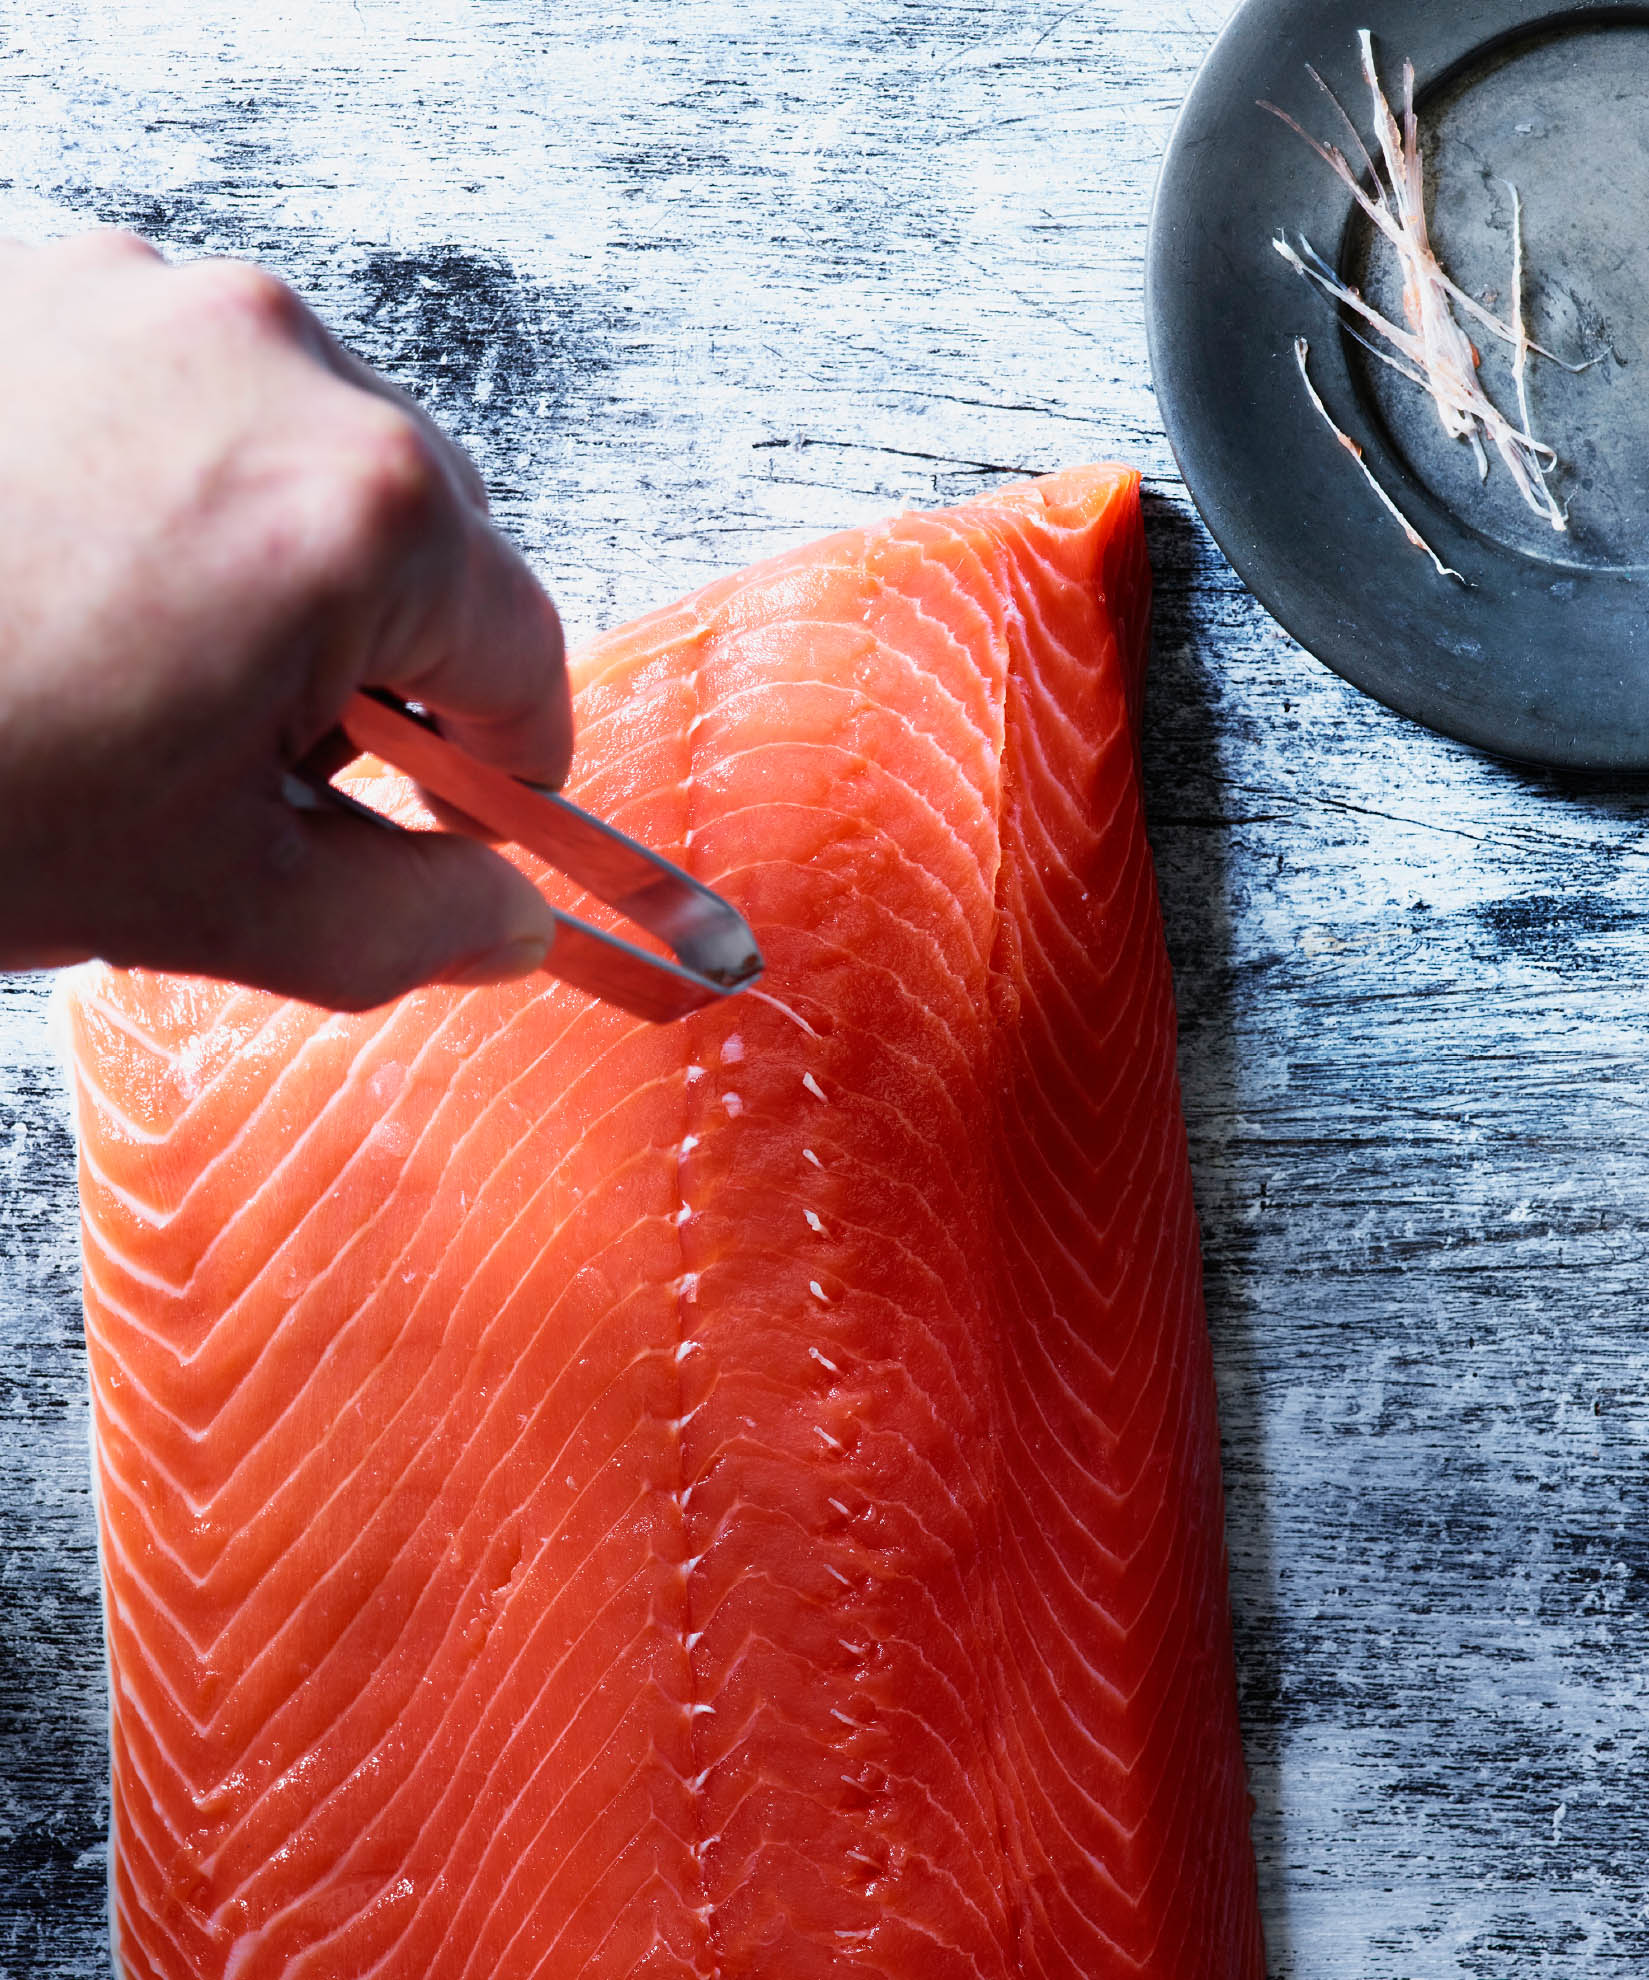
Run your fingertips along the flesh side of the fillet until you feel the pin bones. To remove a pin bone, using either clean needle-nose pliers (I keep a pair in the kitchen precisely for this use) or fish tweezers, grasp the end of each bone and pull it straight out and away from you. If you try to pull the bones upward or backward, the flesh will tear.
Most of the main-course recipes in this book call for a 6-oz [170-g] salmon fillet as a portion size. Although restaurants sometimes serve as much as 8 oz [230 g] for a main course, I think it is an unnecessarily large serving. In addition, most of the recipes call for fillet portions rather than steaks. Salmon steaks, unless they are cut from the tail end, are tricky to cook because the belly flaps (the thin pieces at the ends of the steaks) hang down and cook more quickly than the center of the steak. You can bone salmon steaks and tie them into medallions, but this is a fussy and time-consuming job.
There are several ways to cut salmon fillets from a boned side of salmon. To create straight-sided fillets, place a whole fillet skin-side up and cut the fillet crosswise into straight-sided portions. Or, cut the fillet in half lengthwise and then cut the halves crosswise into portions. If you want to serve only the thicker portions, reserve the belly portion for chowder or tartare. To create diagonally sliced fillets, start at the head end and follow the natural diagonal line of the fillet. Cut fillet portions on a sharp angle through the flesh. If you look at the cross section of the portion, it should be a parallelogram with angled sides rather than a rectangle. As you cut portions, you will need to make the pieces at the head end narrower than those at the tail end to achieve the same weight per serving. Finally, to achieve a butterfly cut from a skinless square-cut portion of salmon, cut straight down the middle of the flesh but not all the way through. Fold back the halves as if the piece of salmon were a butterfly opening its wings. It should look like a salmon steak without the bone in the center. Make a slightly deeper cut if the butterflied portion will not lie flat.
Over the years, I have learned many tips and techniques from chefs who focus on fish, such as Eric Ripert of Le Bernardin and Rick Moonen of RM Seafood. The technique of skin-drying salmon discussed here was explained in exacting detail by Thomas Keller, owner of the famed French Laundry restaurant in Yountville, California, and Per Se in New York City, in an article that appeared a number of years ago in the Los Angeles Times. Keller wrote, “The skin of many fish is exquisite, never more so than when it’s crisped to a delicate wafer-thin crunch accompanying the sweet, soft flesh. Crisp fish skin should taste clean and fresh, with the concentrated flavor of the fish itself. Its colors and design are vivid on the plate. The fork clicks on its surface. It cracks brittlely beneath a knife.”
The secret is to remove as much water as possible from the skin of the fish before you cook it. Keller continued, “Remove some of that water mechanically, by drawing a knife blade firmly back and forth over the fish, the way a wiper blade moves across a windshield. The pressure compresses the skin and squeezes the water to the surface, and the knife blade carries it away. Repeat this until no more water rises to the surface.” Periodically wipe the knife blade clean with a paper towel to remove what looks like grayish scum.
I have brined turkeys and chickens, and I have brined pork, all with great success to improve the tenderness, flavor, and moistness of the meat. And now, in the course of developing and researching recipe ideas for this book, I have brined fish with the same terrific results. Brining salmon before cooking helps inhibit the secretion of albumen, the white protein between muscle fibers that leaches out during cooking. Here are the simple directions.