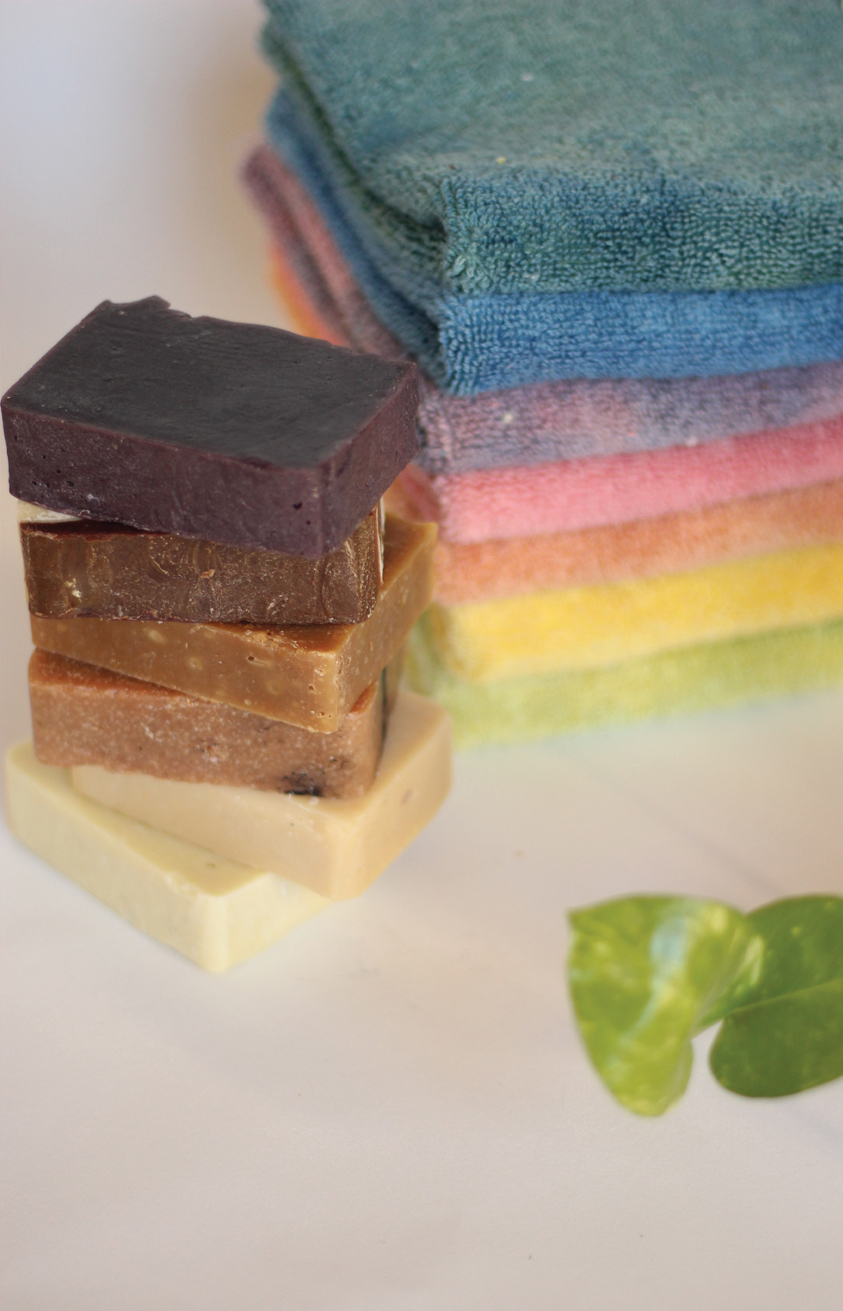
Soap Cutter
In the making of this soap cutter, I went through many different ideas. I settled on this one because I love a great DIY, but I have very little experience with carpentry. So I knew it would need to be as easy as possible, but still versatile for any size soap. I also wanted it to be frustration-free. I did use a drill, a table saw, and a jigsaw. My edges were clean and frustration was low. I feel it was successful enough to share.
Supplies:
3 wood screws #6 x 1¼
7 wood screws #10 x ¾
1¾ brass hinge
1¼ bolt with a hole drilled through the head
1 (20-gauge) steel guitar string
1 piece of ¾-inch-thick birch plywood, 9.75 x 12 inches (you can use varying plywood, whatever is best for you, or that you have on hand).
1 piece of ¾-inch-thick birch plywood, 9.25 x 7.5 inches
1 plastic cutting board, 9.25 x 6.75 inches (I took a regular store-bought one and cut it to size.)
1 piece of 1-inch wide x ½-inch thick pine, 10.5 inches long
Tools:
screwdriver
wrench
pen
ruler
sandpaper
drill
skill saw
jigsaw
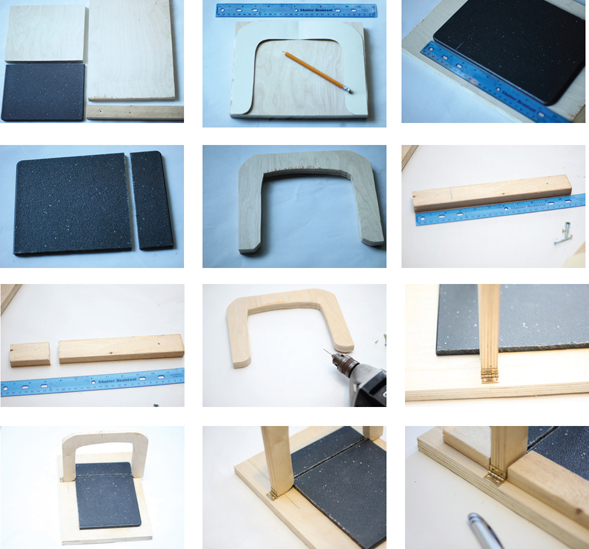
Start with your piece of ¾-inch birch plywood, 9.25 x 7.5. This will be the soap cutter handle. To make the handle, I recommend drawing up a design on a piece of 9.25 x 7.5 inches rectangular paper to trace onto the wood, but you can certainly draw directly onto the wood. Measure 1.5 inches in on each side of the bottom and 1.5 inches down from the top. Now, create a line connecting these together to form a horseshoe. I like to curve the top edges, but if you prefer right angles that’s fine, too. Use a jigsaw to cut out the handle design. Sand the edges to soften.
Next, take your plastic cutting board and measure longways and mark a line on opposing sides so you can get a straight cut 2 inches along 9.25-inch side, so you will end up with one 2-inch-long piece and one 7.25-inch-long piece. Cut along this line and sand off rough edges.
Then, take your piece of 1 x ½-inch-thick pine, 10.5 inches in length, and measure 2.5 inches along the length of the pine. Cut this so you now have two pieces, one measuring 2.5 inches and one 8 inches.
Now, use a drill to create a tiny, slanted hole from the bottom of the handle where it just starts to curve and out the side of the base, about ¼ inch from the base of the board. Do this on each side, trying to make your bottom holes in the same spot on both sides as close to the bottom edge of the handle as possible. This will be where the guitar wire will go across the bottom to cut the soap.
Lay your cutting board onto the birch plywood, right where you will want it to sit, creating a tiny space for your handle and cutter to come down. Set the handle over this. Next, set out your brass hinge right up against the edge of the plywood; you may need to move your cutting board and handle over to achieve this. Drill holes for your brass hinge and fix it to the handle side only. Trace light lines where your cutting board will end up. Remove handle and drill holes, one for your bolt with the hole through it and one for a #10 1¼ screw. Screw these in place.
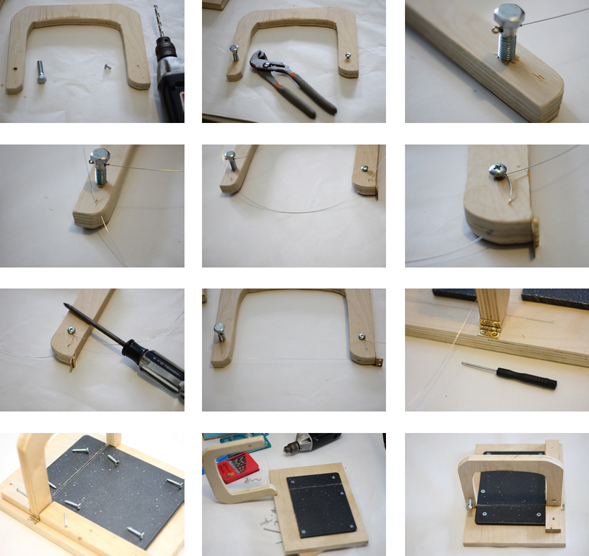
Thread your guitar string through the hole in the bolt, pulling it all the way through so the metal knob comes to a stop. Now thread your guitar string through the hole directly below this bolt and out the bottom of handle. Pull the guitar string across to the other side of handle and thread it from the bottom of the handle up to just below the screw on this side. Pull your guitar string relatively tight and wrap it around this screw. Tighten the screw until the guitar string is snug and wrapped around the screw a few more times. Then tighten the bolt on the other side with a wrench until the guitar string becomes taught, but don’t break your string.
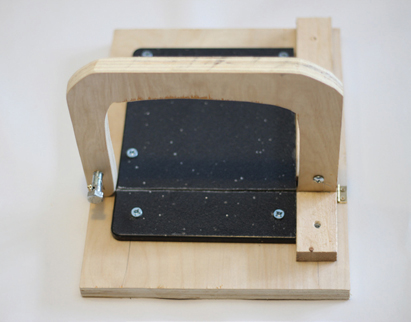
Finally, screw your handle onto the plywood where your hinge holes were drilled. Set the cutting board on a piece of 1 x ½ pine so that the smaller piece is on the smaller side of cutting board and the longer piece is on the other side; this will act as a bumper for your soap, helping to hold it in place while it is being cut. Place screws along the corners of the cutting board, using only two screws on the 2-inch width of the cutting board, using 6 #10 ¾ for the cutting board and 3 #10 1¼ for the pine boards as pictured, about every 3 inches or so. Screw everything in place. You just made a soap cutter!