Nothing is more enticing than a disembodied eye—except perhaps a disembodied eye marinating in a thick, glistening pool of sticky goo. Be sure to make a good-size batch of these tantalizing cakes, because everyone will surely want one of their own.
• serrated and craft knives
• 6 x 6 in. (15 cm) square cake boards, about 1/2 in. (1 cm) thick, covered with white self-adhesive shelf paper
• large piping bag and quick-ice tip
• small curved spatula
• small rolling pin
• modeling tool
• 21/2 in. (6 cm) round cutter
• no.1M and no.10 icing tips
• small palette
• paintbrushes
• airbrush
• microwave cooker
• 1 recipe cake batter of choice, baked in 12-hole miniball pan
• 41/2 cups (1 liter) decorator’s buttercream icing
• 11/2 lb. (675 g) white fondant
• gel colors: eye color of choice, black, and red
• vodka or lemon extract
• red airbrush color
• 1 cup (235 ml) clear piping gel
• 4 oz. (110 g) red fondant
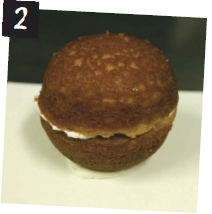
Using a serrated knife, level the flat surfaces of the miniball cake halves. Fix a cake half to each cake board, leveled side up, using a dab of buttercream icing.

Spread a layer of buttercream over the leveled surface of each half-cake on the cake boards, then place another half-cake on top.
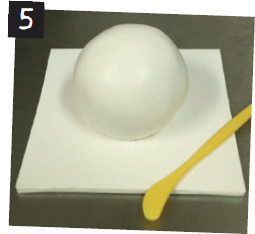
Using the large piping bag and quick-ice tip, pipe buttercream icing in an even layer over entire surface of each cake. Smooth the surface of the icing with the curved spatula.

Divide white fondant into six pieces. Roll out each piece into a rough circle—diameter should be width plus height of cake ball times two, plus extra for leeway. Drape fondant over each cake, smoothing on with your hands. Trim off and keep excess.
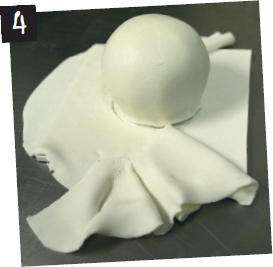
Using modeling tool, tuck in fondant around the base of the cakes to ensure a rounded shape. Smooth surface again with your hands.
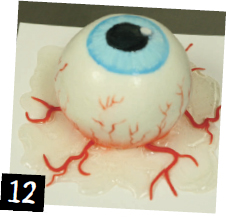
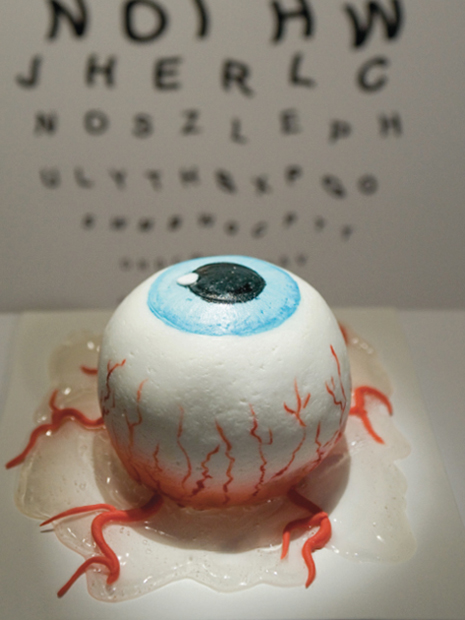
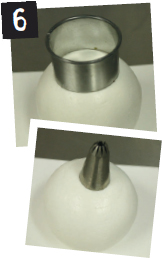
Using 21/2 in. (6 cm) round cutter, lightly mark the area that will be the iris on each cake, then using the large end of 1M icing tip, mark out pupil.
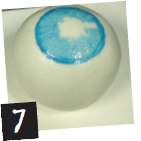
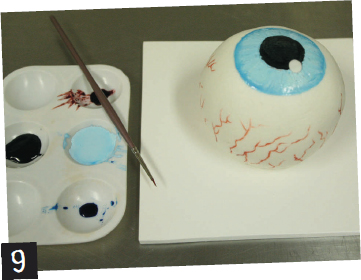
Mix gel colors in small palette with a few drops of vodka or lemon extract. Using a small paintbrush, paint iris area of each cake, concentrating darker color around the rim and gradually lighter color toward the pupil. Paint pupil area black.
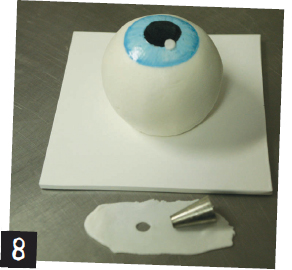
Roll out a small piece of white fondant, and cut out a round highlight for each cake using small end of no.10 icing tip. Carefully fix fondant highlight to the edge of the pupil area on each cake.
Using a very thin paintbrush and red gel color, paint veins around lower half of each cake in branch-like patterns.
To add depth to the base of the eye, airbrush with a very light coat of red color, concentrating only on the bottom of the eyeball.

Heat clear piping gel in a microwave cooker for a few seconds until slightly runny. Apply gel around the base of each cake using small spatula.
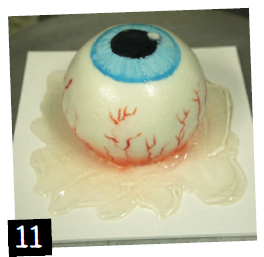
Roll out thin snakes of red fondant. Fix around base of each cake, arranging so that they branch out from the cake.