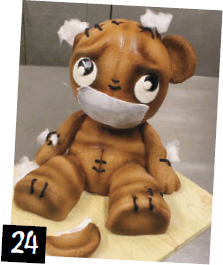
When I was a young, I made sure I meted out equal amounts of attention on all my toys. As time wore on, though, I found myself playing with some toys less and less. What happened to those toys I once so loved? I convinced myself that they had found their way into new homes with new little girls to care for them. But could they have fallen into less loving hands? Observe this cake as a cautionary tale.
• 3/8 in. (8 mm) and 1/8 in. (3 mm) doweling
• drill
• 12 in. (30 cm) square wooden cake board, 1/2 in. (1 cm) thick
• no.6 wood screw
• teddy bear templates
• baking parchment
• serrated and craft knives
• 4 in. (10 cm) and 5 in. (13 cm) round cutters
• large piping bag and quick-ice tip
• thin cake board
• curved spatula
• rolling pin
• scrub brush and piece of metal mesh, for texturing
• ruler
• modeling tools, including ball tool
• stitching wheel
• 2 toothpicks
• airbrush
• paintbrushes
• 2 x recipe cake batter of choice, baked in 1/4 sheet pan and 2 halves of 6 in. (15 cm) sports ball pan
• 2 cups (470 ml) decorator’s buttercream icing
• 8 oz. (225 g) modeling chocolate
• 2 lb. (900 g) brown fondant
• chocolate discs, melted
• 2 oz. (55 g) each black and white fondant
• dark brown airbrush color
• confectioner’s glaze
• silver luster dust
• vodka or lemon extract
• white cotton candy
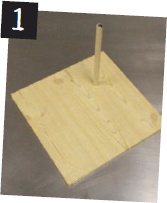
Cut 6 in. (15 cm) length of 3/8 in. (8 mm) doweling. Drill pilot hole into corner of cake board. Drill pilot hole into end of doweling and screw into cake board using no.6 screw.
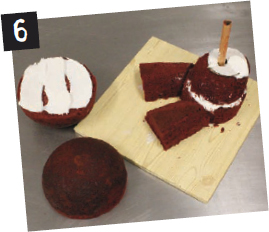
Use bear-leg template to cut out two pieces of baking parchment. Attach parchment pieces to chilled cake with dabs of buttercream and follow outline to cut out legs with serrated knife. Use round cutters to cut out a 4 in. (10 cm) and a 5 in. (13 cm) circle of cake.

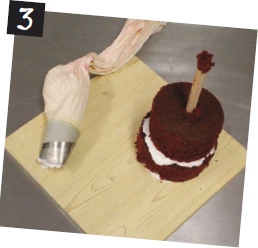
Apply a dab of buttercream to cake board around dowel. Carefully push 5 in. (13 cm) round cake over doweling onto board. Use large piping bag with quick-ice tip to pipe buttercream over top of cake layer, then stack 4 in. (10 cm) round cake on top.
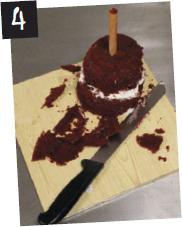
With serrated knife and using angled movements, carve the stacked cake layers until they form a slightly conical shape. To get idea of finished cake, set leg pieces in place.
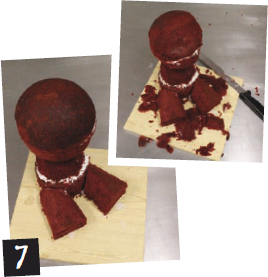
Cut three 4 in. (10 cm) lengths of 1/8 in. (3 mm) doweling. Insert into top of cake. Pipe buttercream onto top of cake. Cut out 4 in. (10 cm) circle from thin cake board and cut 3/8 in. (8 mm) hole in center. Slip cake board circle over large dowel and onto iced top of cake.

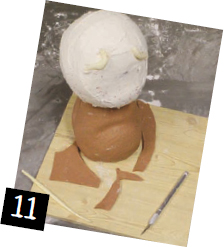
With the piping bag and quick-ice tip, pipe a layer of buttercream over the flat surface of one half-ball of cake. Place the other half-ball of cake on top to form the teddy’s head.
Attach head on top of cake with a dab of buttercream. Carve into shape, narrowing sides to form jaw and chin. Make a horizontal cut from forehead down to mouth area and round slightly to form muzzle area.
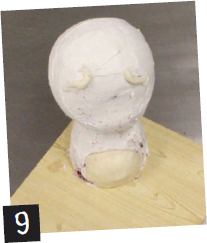
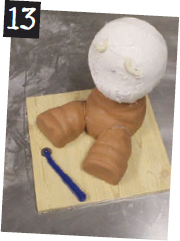
Cover the entire cake with buttercream icing using large icing bag and quick-ice tip. Smooth icing with curved spatula. Place leg pieces on a sheet of baking parchment and pipe icing over them. Smooth icing.

Form flattened ball shape from modeling chocolate. Place on body to create fat belly. Roll two 2 in. (5 cm) snakes of chocolate. Curve upward and place on each side of brow area. Curving pieces up slightly gives the teddy a frightened expression.
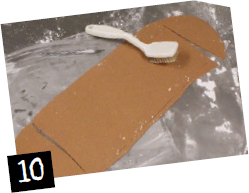
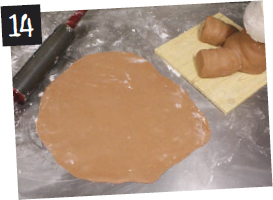
Roll out half of brown fondant onto dusted surface. Press scrub brush randomly into fondant to imprint fur texture. Using ruler and craft knife, cut out a rectangle, measuring approximately the height and circumference of bear’s body.
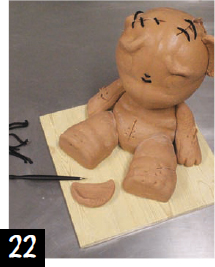
Wrap fondant piece around body. Smooth onto cake, rounding over chocolate on belly. Trim as necessary. With modeling tool, add definition to body, pressing in folds and creases to give the teddy a slouchy appearance.
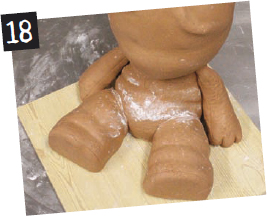
Roll out more brown fondant and press on scrub brush to give fur texture. Cut in half and drape piece over each leg. Trim to fit. Attach legs to body with dabs of icing. Add creases with modeling tool. Pinch feet to create paw detail.

While fondant on body and legs is still soft, add stitching detail. Roll stitching wheel tool along center of body to create two rows of stitching. Repeat at sides of legs and around feet.
Roll out a large circle of brown fondant. Press with head of scrub brush to imprint with a fur-like texture.
Drape fondant circle over iced head and quickly smooth and stretch simultaneously. Tuck under in chin area. Trim as necessary. Use modeling tool to emphasize facial details. Add stitching detail with stitching wheel around sides and top of head.

Using the template as a guide and with the serrated knife, carve out the basic arm shapes from pieces of modeling chocolate. Use modeling tool to create the paw area details.
Roll out remaining brown fondant on dusted surface. Press with end of scrub brush to imprint with fur texture. Cut out and drape a piece over each chocolate arm. Tuck under and around arms. Trim excess.
Make small piping bag from baking parchment. Fill with melted chocolate, twist to close and snip end. Apply melted chocolate to underside of one arm. Attach to body. Hold in place until set. Repeat for second arm. Add detail to side of arms with stitching wheel.
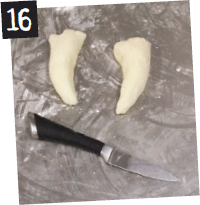
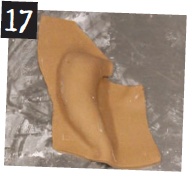
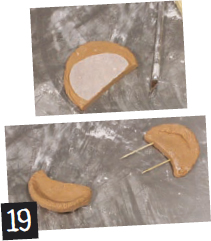
Use ear template to cut out piece of baking parchment. Follow outline of parchment to cut ear shapes from rolled-out brown fondant trimmings. Add texture with scrub brush. Curve edges to make ear folds. Insert toothpicks into one ear.
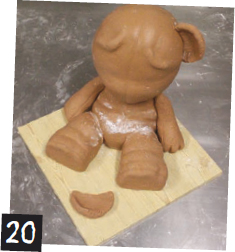
Pipe a small bead of melted chocolate onto inner edge of ear with toothpicks. Carefully insert ear into side of head. Hold in place until set. Leave second ear on board. With stitching tool, add detail along outer edge of ears.
With a craft knife, make random slits wherever you desire in the fondant covering on the body and head. Pull back the edges of the openings with modeling tool.
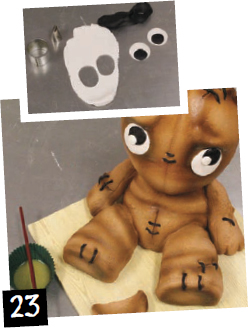
Roll out black fondant onto dusted surface. Cut out small strips, about 1/8 in. (3 mm) wide. Poke small holes onto either side of “rips,” using small ball tool. Insert black fondant thread ends into holes. Trim as necessary.
Airbrush on dark brown shadows. Roll out white fondant and black fondant trimmings. Cut white circles for eyes. Attach to bear with water. Cut smaller black circles for irises. Fix with water. Cut out white highlights. Attach with water. Brush confectioner’s glaze over eyes.
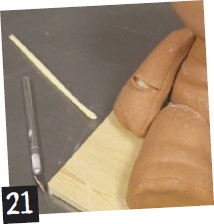
Cut out 2 x 5 in. (5 x 13 cm) white fondant strip. Press with metal mesh to texture. Shred ends. Fix on mouth area with water. Curl edges away slightly. Paint with mixture of silver luster dust and vodka or lemon extract. Apply white cotton candy pieces to ripped areas.