Chapter 4: Organizing Photos
Manage Events

iPhoto can group photos into events based on the time the photos were taken. When you import photos, iPhoto automatically organizes photos into events based on the day the photos were taken. You can customize the name of the event to describe the photos in it.
Manage Events
View Event Photos
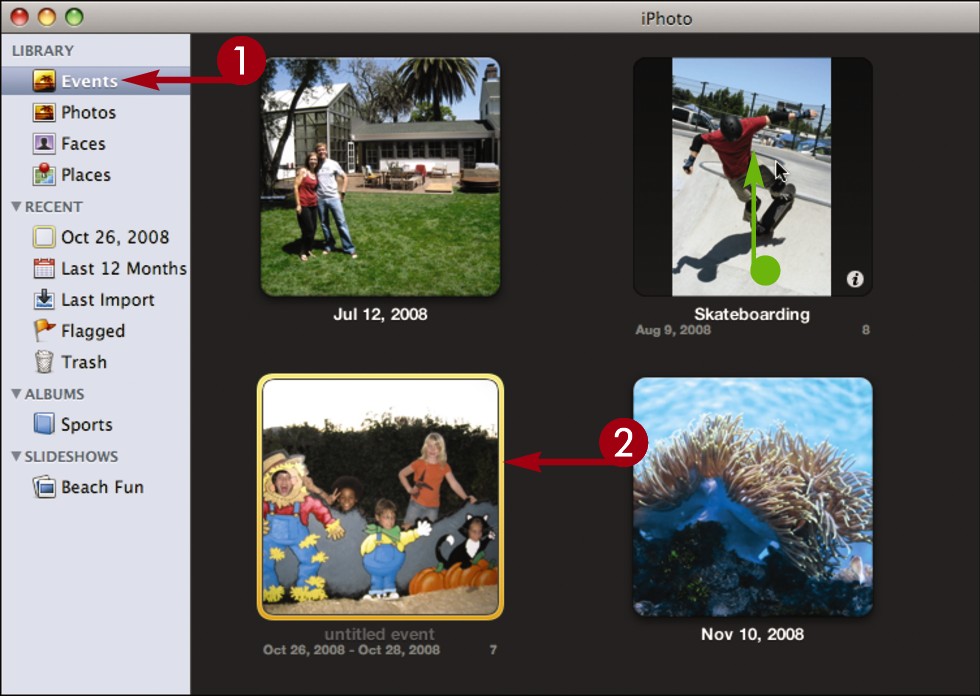
 Click Events.
iPhoto displays each event as a square thumbnail.
• You can move your cursor horizontally across a thumbnail to preview the event photos, a feature known as skimming.
 Double-click an event.
iPhoto displays the photos in the event.
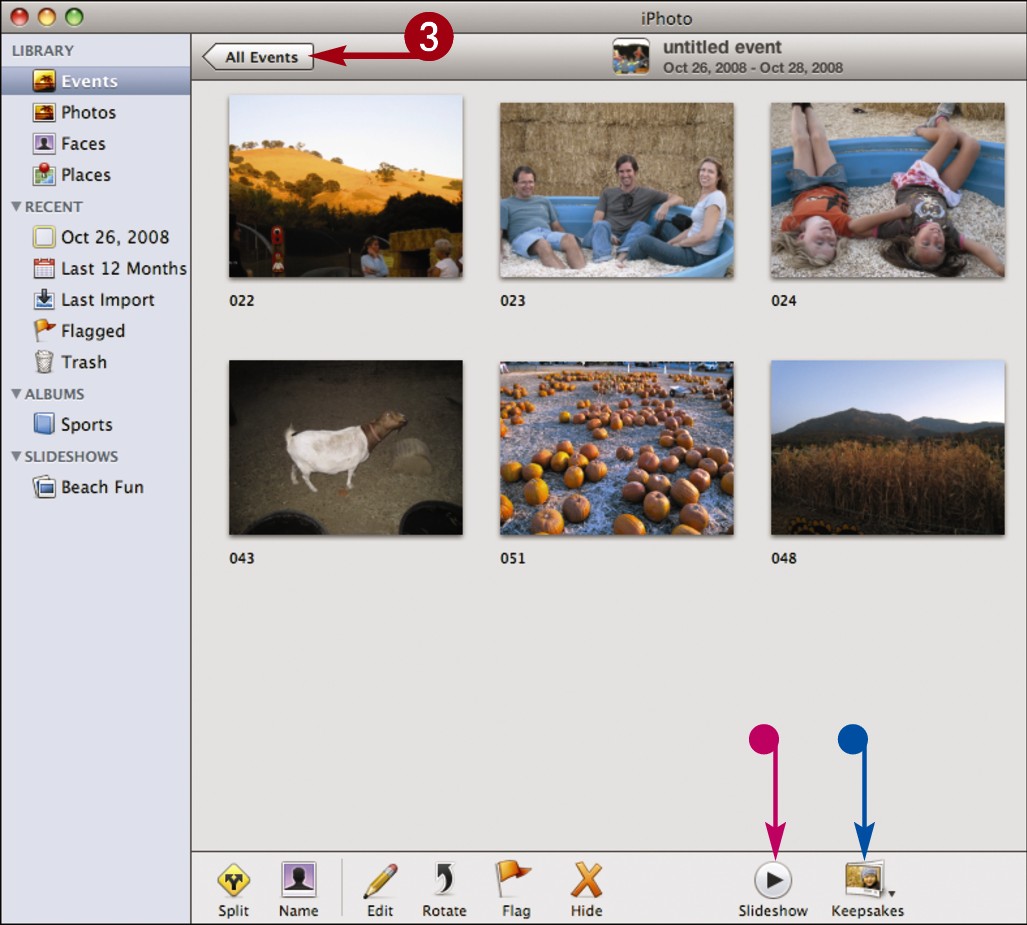
• You can click Slideshow to display the photos as a slideshow.
• You can click Keepsakes to create a project out of the event photos.
Note: Depending on your monitor resolution, you may see separate buttons for creating books, calendars, and cards. See Chapter 6 for details about creating these projects.
 Click All Events to return to the event thumbnails.
Name an Event
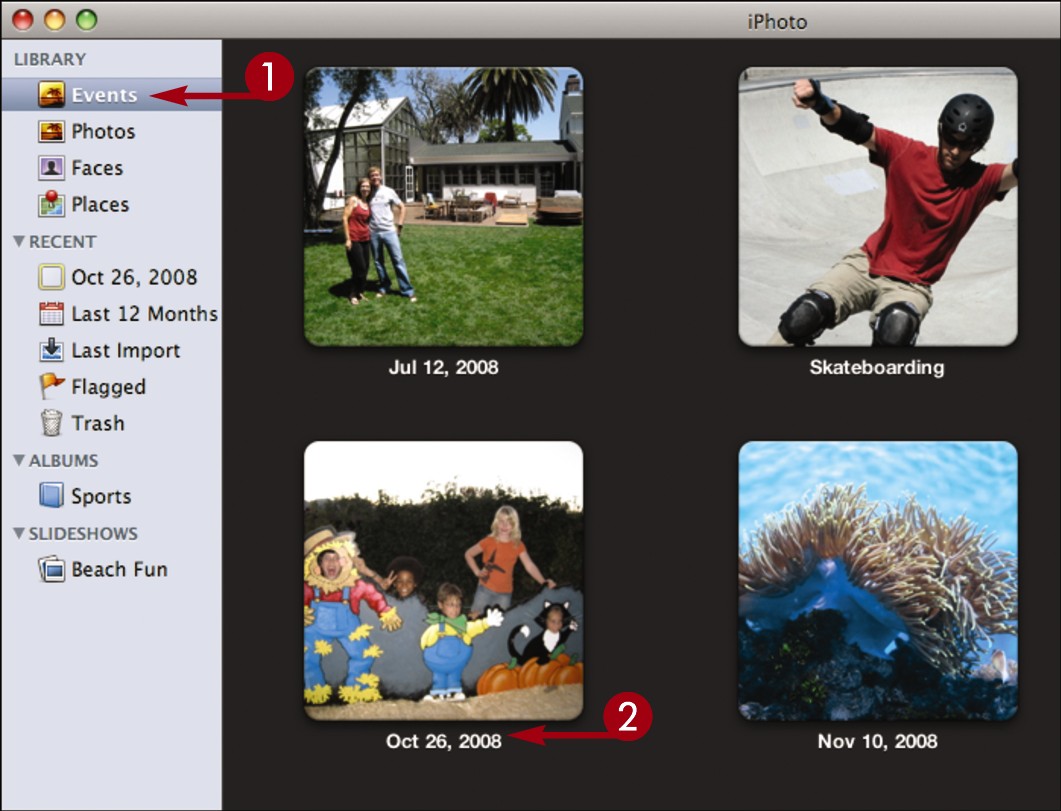
Click Events.
In the Events view, untitled events are titled with their date.
Click a title.
The title becomes editable.
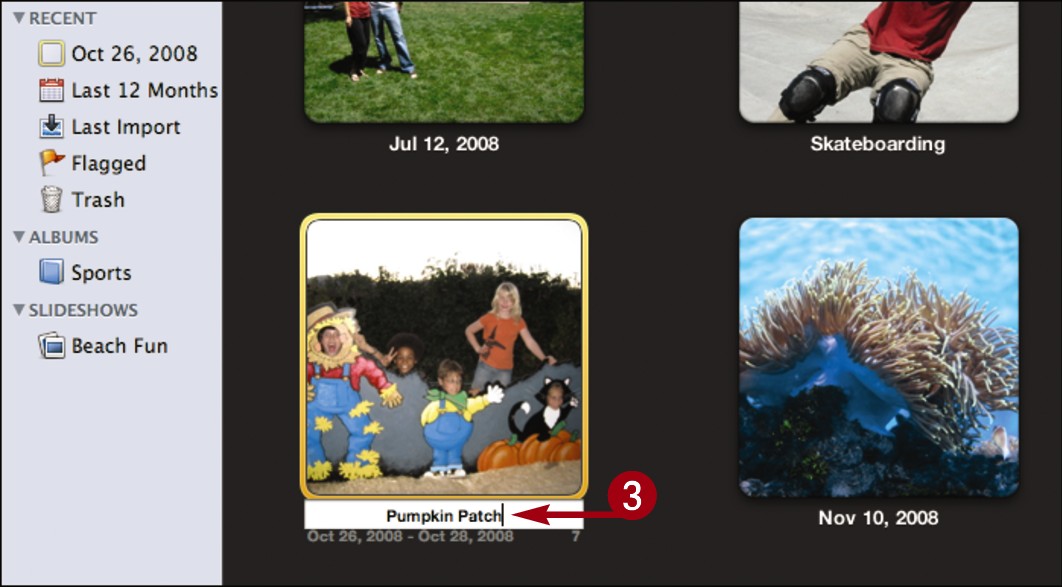
Type a new title.
 Press
Press  .
.
iPhoto saves the new title.
![]()
How do I determine what photo iPhoto uses for the event thumbnail?
By default, iPhoto uses the first photo as the thumbnail. You can change it using the following steps:
View the photos for the event.
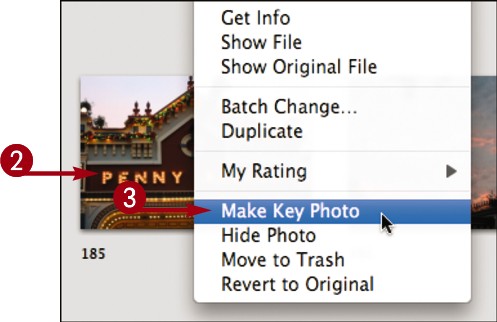
 -click a photo.
Click Make Key Photo.
iPhoto uses that photo for the event thumbnail.
Create a New Event

You can create a new event to group together photos that occur at the same time. You might group photos from a birthday party into one event and photos taken during a holiday vacation into another event.
You can group photos that were taken at different times as an album. See “Create an Album” for details.
Create a New Event
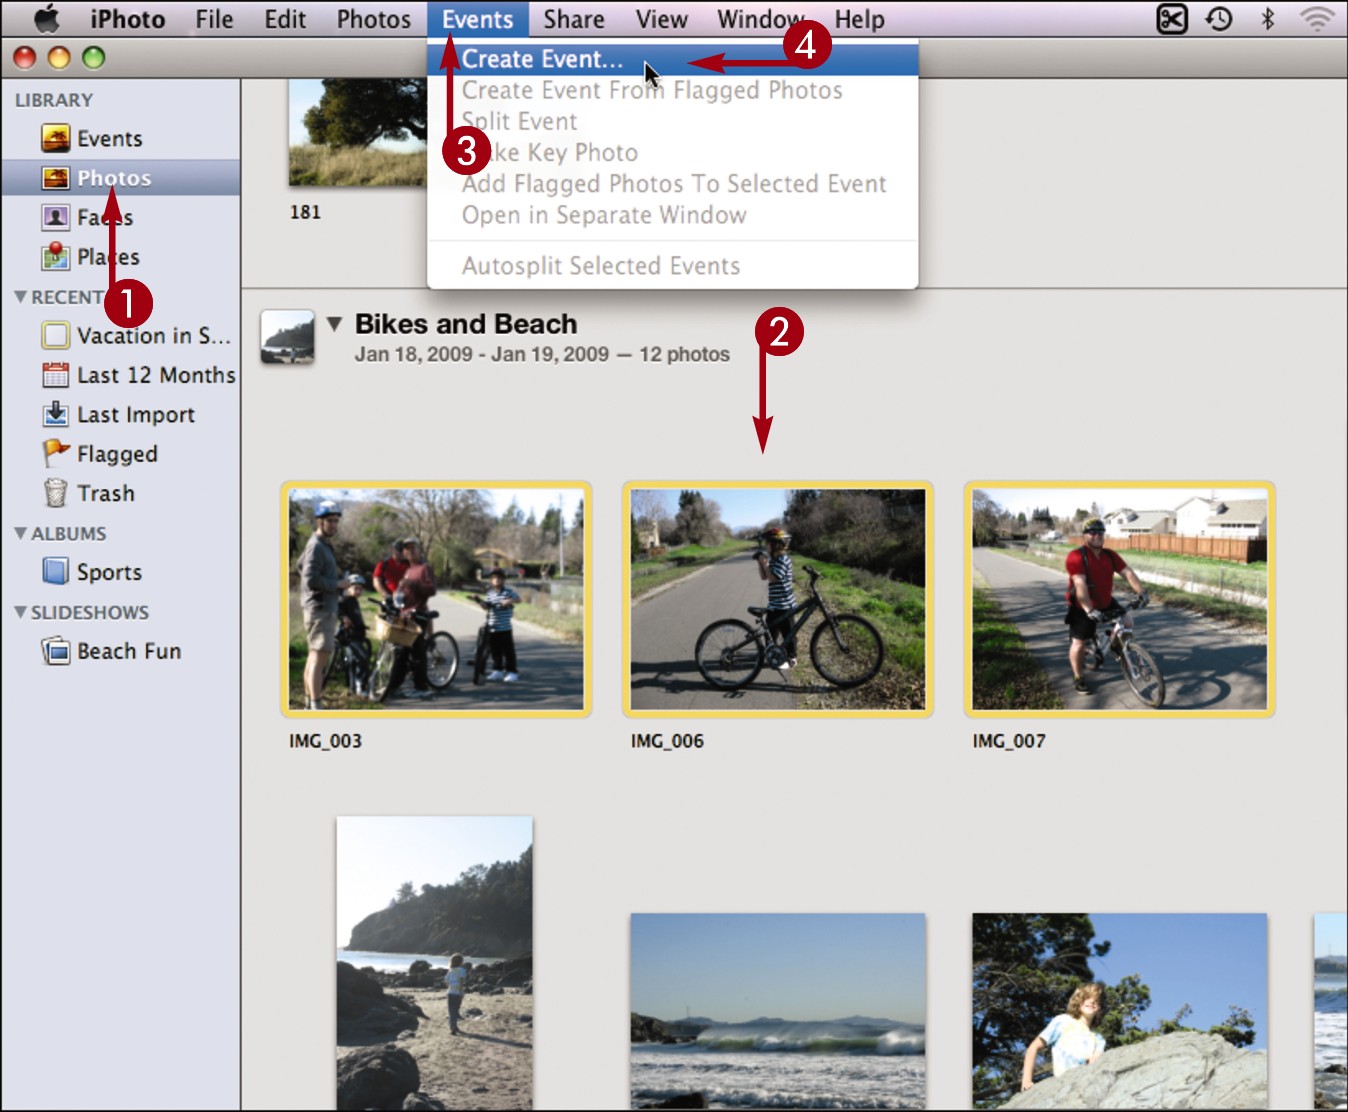
Click Photos.
iPhoto displays the photos in your library with event labels as headings.
-click to select photos to add to your new event.
Click Events.
Click Create Event.
iPhoto displays a warning about photos being able to belong to one event.
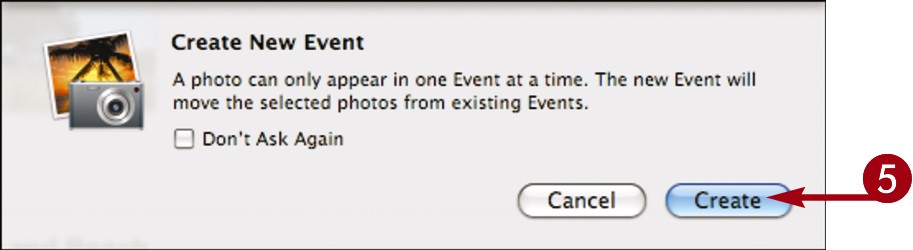
 Click Create.
iPhoto creates a new event for the photos.

• You can click the event title to edit it.
 Click Events.

• iPhoto displays your new event as a thumbnail.
Note: For more about viewing events, see “Manage Events.”
![]()
How do I merge the photos in several events into one event?
Follow these steps:
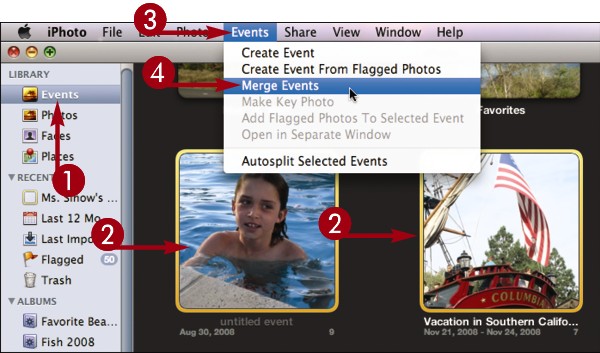
Click Events.
-click the events you want to merge.
Click Events.
Click Merge Events.
iPhoto merges the events.
Name a Face

iPhoto can automatically recognize faces in your photos based on shape and coloring. After it recognizes the faces, you can add names to them. Over time, iPhoto can start to match names to faces itself by recognizing specific faces.
Name a Face
View a photo that includes faces.
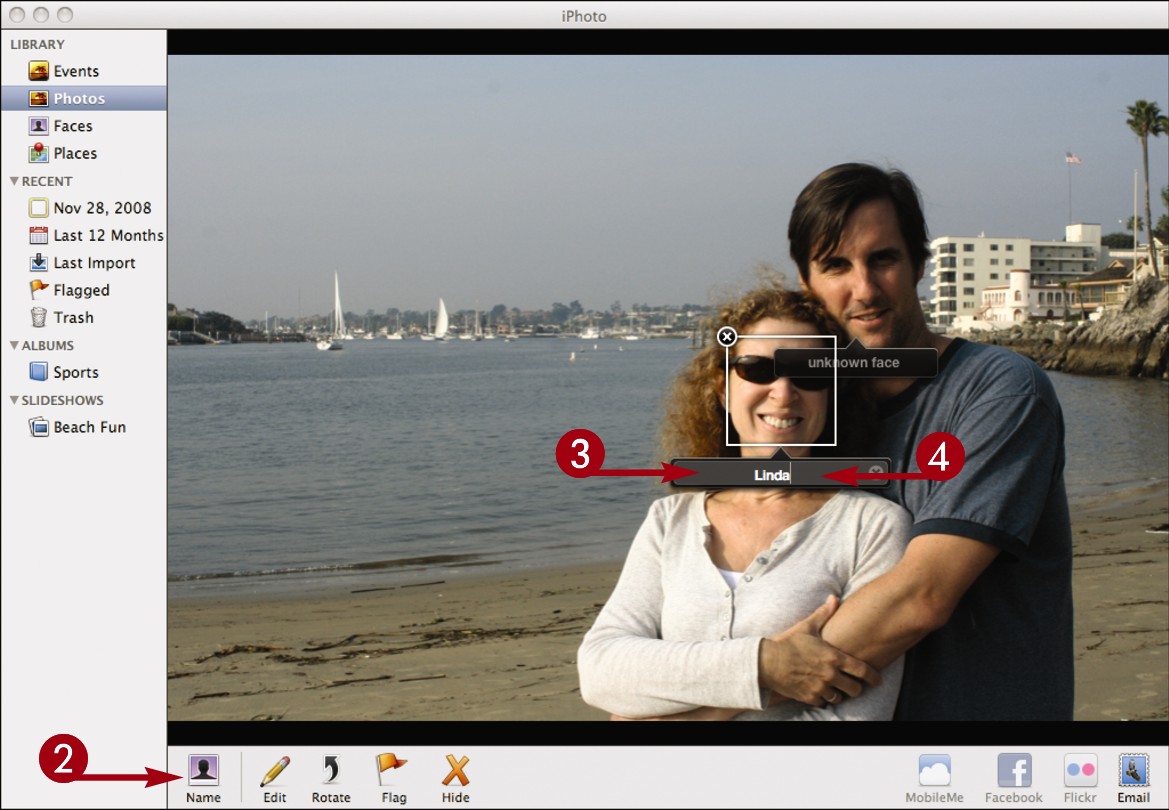
Click Name.
iPhoto attempts to recognize the faces in the photo.
Click a face label.
The label becomes editable.
Type a name for the face.
Press .
iPhoto assigns the name to the face.
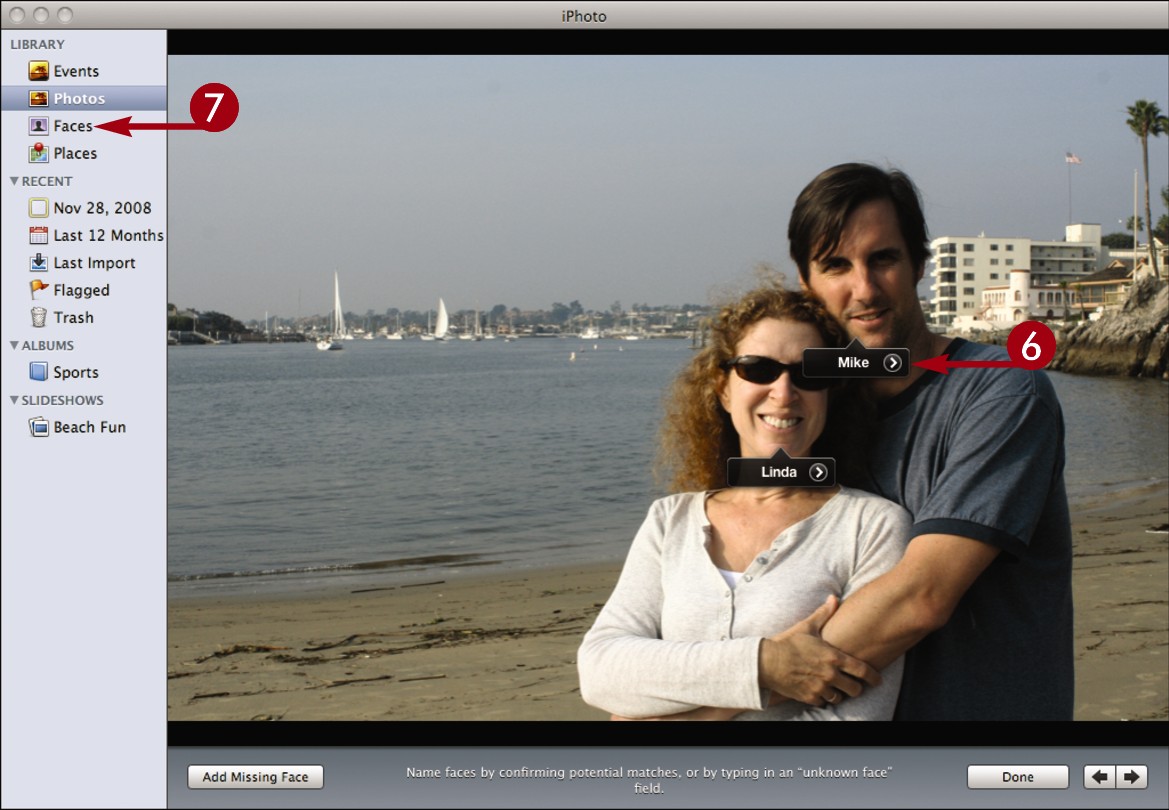
Repeat steps 3 to 5 to name other faces in the photo.
 Click Faces.
iPhoto groups your photos based on named faces.
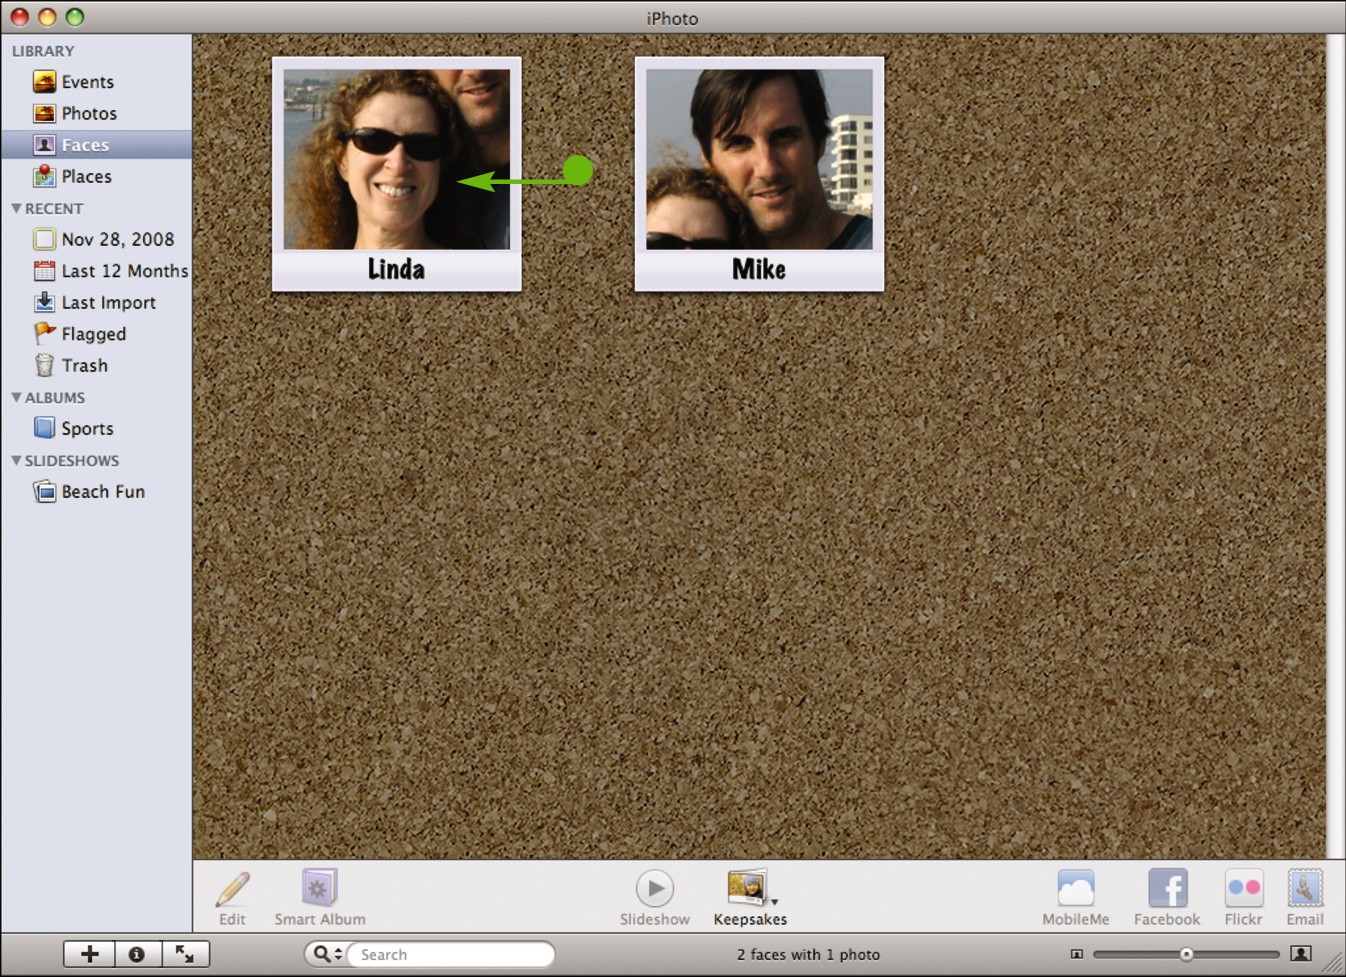
• You can double-click a face photo to view the named photos.
![]()
How do I name a face that iPhoto does not recognize?
Sometimes iPhoto cannot recognize a face because the face is at an angle or is obscured. Follow these steps to name it:
Open the photo and click Name to open the labeling view.
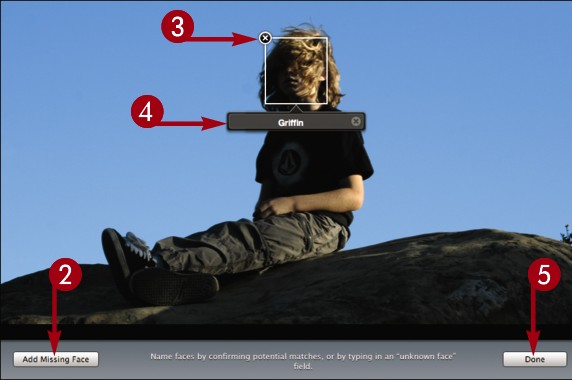
Click Add Missing Face.
iPhoto displays an editable box and label.
Click and drag the box corners to surround the face.
Click here to name the face.
Click Done.
iPhoto labels the face with the name.
Manage Faces

As you name faces in your photos, iPhoto examines other photos in your library and attempts to name them for you. You can view iPhoto’s face suggestions to confirm them. To label faces with names yourself, see “Name a Face.”
Manage Faces
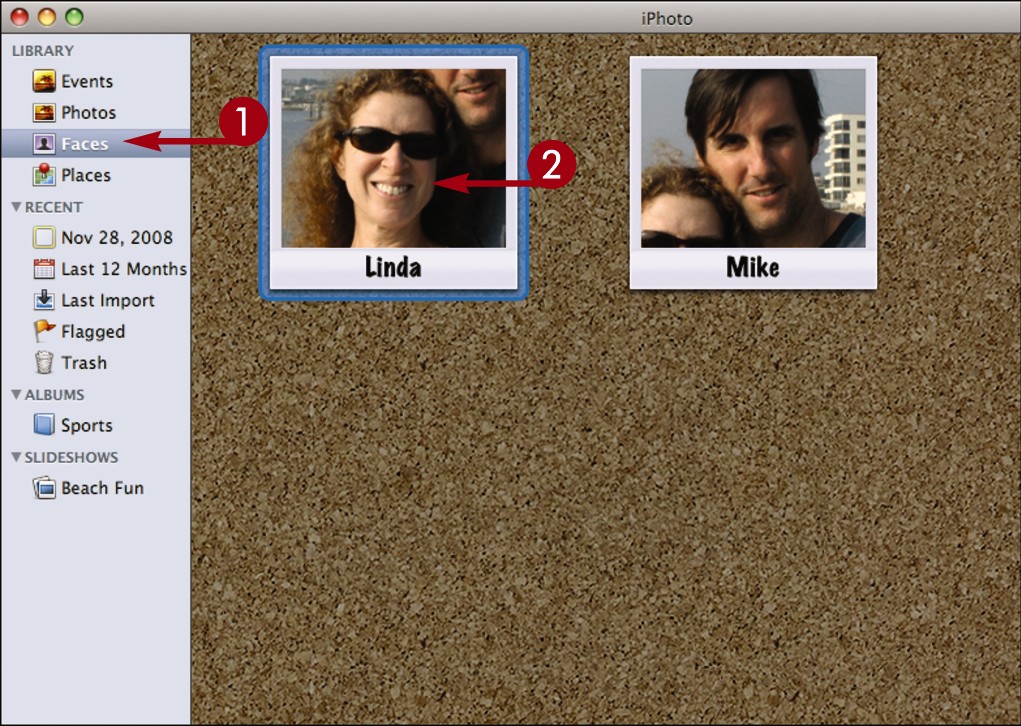
Click Faces.
iPhoto displays the faces you have labeled.
Double-click a face.
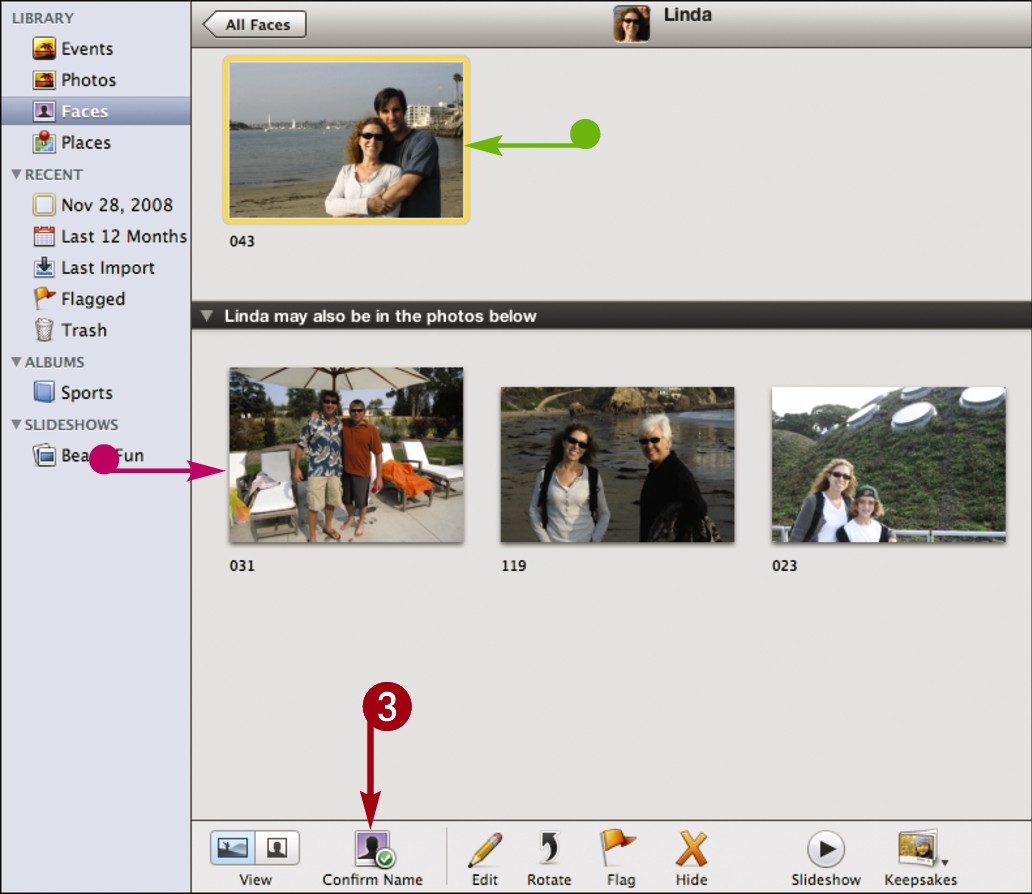
• iPhoto displays the photos you have named here.
• Photos with name suggestions appear here.
Click Confirm Name.
• iPhoto displays the unconfirmed faces here.
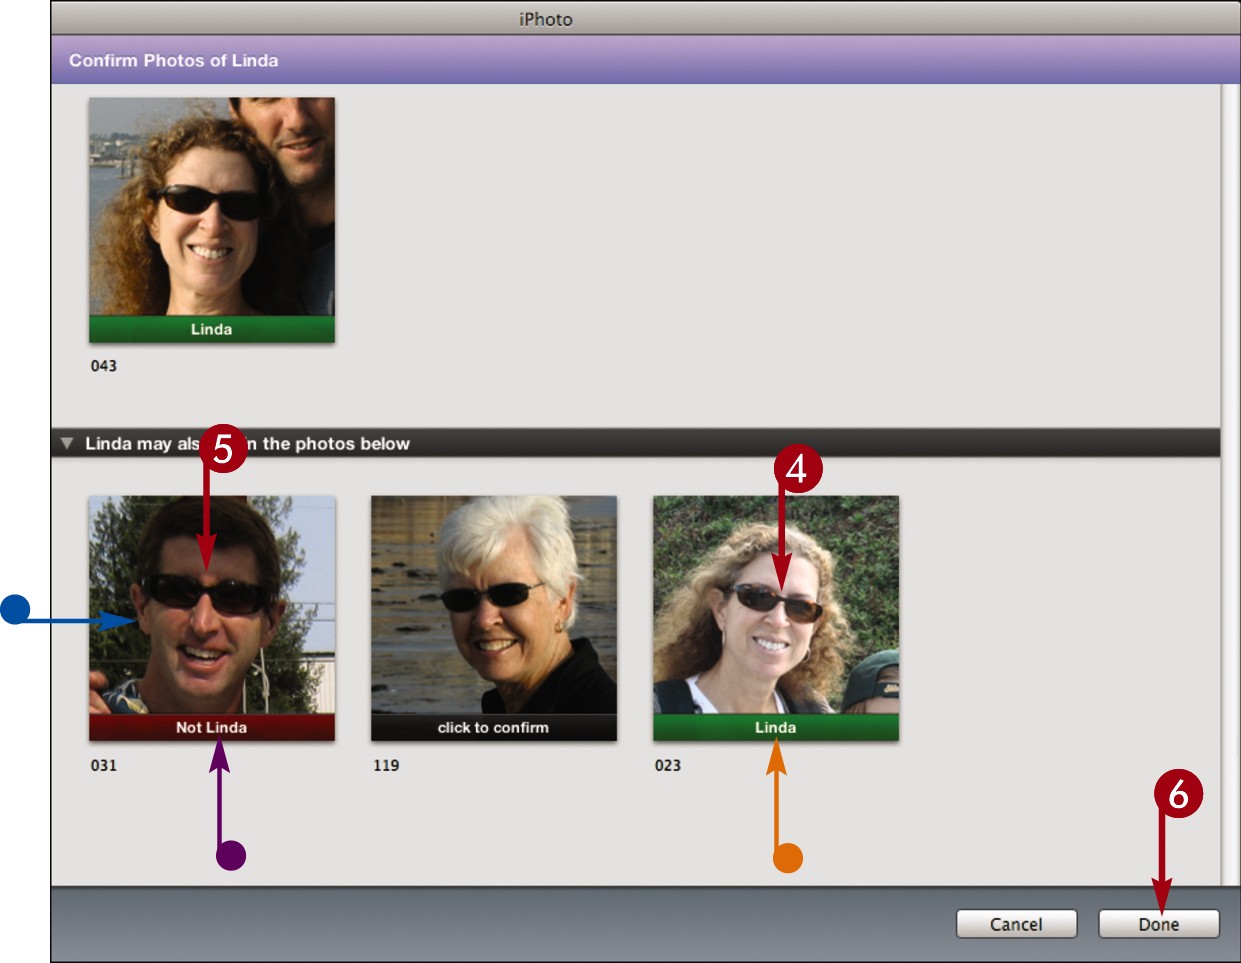
Click a face once to confirm it.
• iPhoto marks a confirmed face with a green label.
Click a face twice to reject it.
• iPhoto marks a rejected face with a red label.
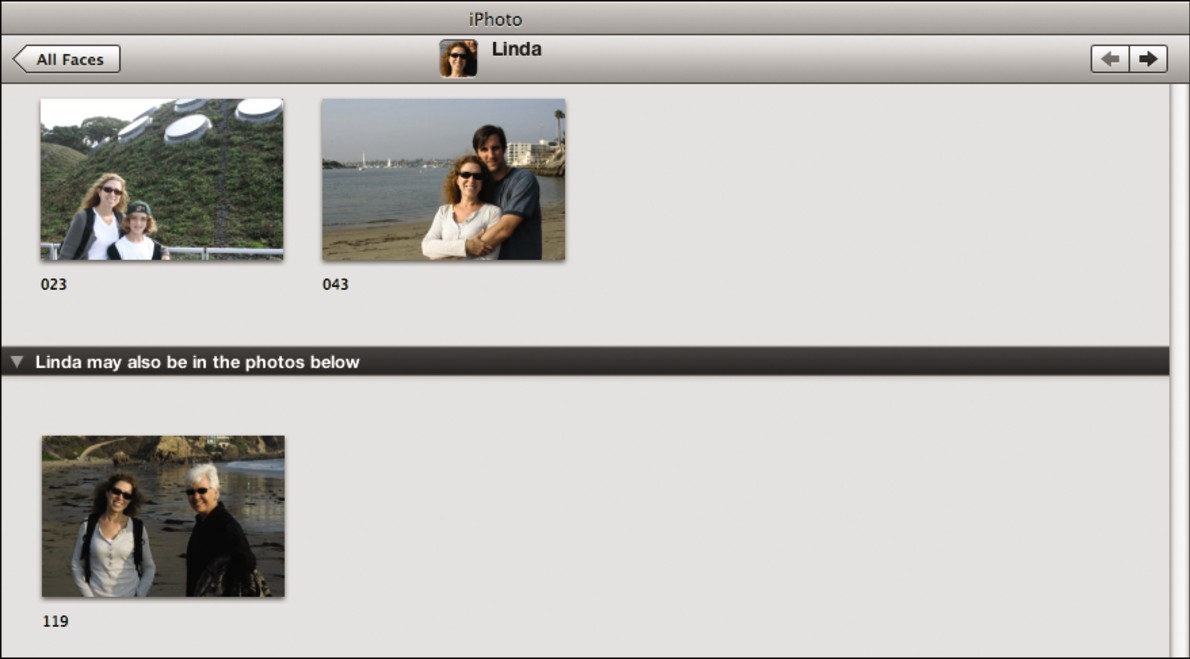
Click Done.
iPhoto updates the photos for that face.
![]()
What happens if two faces have the same name?
If two faces in your photo library are labeled with the same name, iPhoto sees them as the same person and merges their photos in the Faces view. You can add a last name or initial to distinguish such faces and keep them separate in iPhoto.

How can I add additional information to faces?
In the Faces view, position your cursor over a face, then click the info icon ( ) that appears in the lower-right corner. A box appears that enables you to add a full name and an e-mail address.

Map Photos to a Place

You can associate images in iPhoto with the places where they were taken. By zooming in on the map in iPhoto, you can pinpoint the exact street corner or landmark where you shot the photos.
To make mapping photos easier, you can turn on place lookups in the iPhoto preferences.
Map Photos to a Place
Turn on Place Lookups
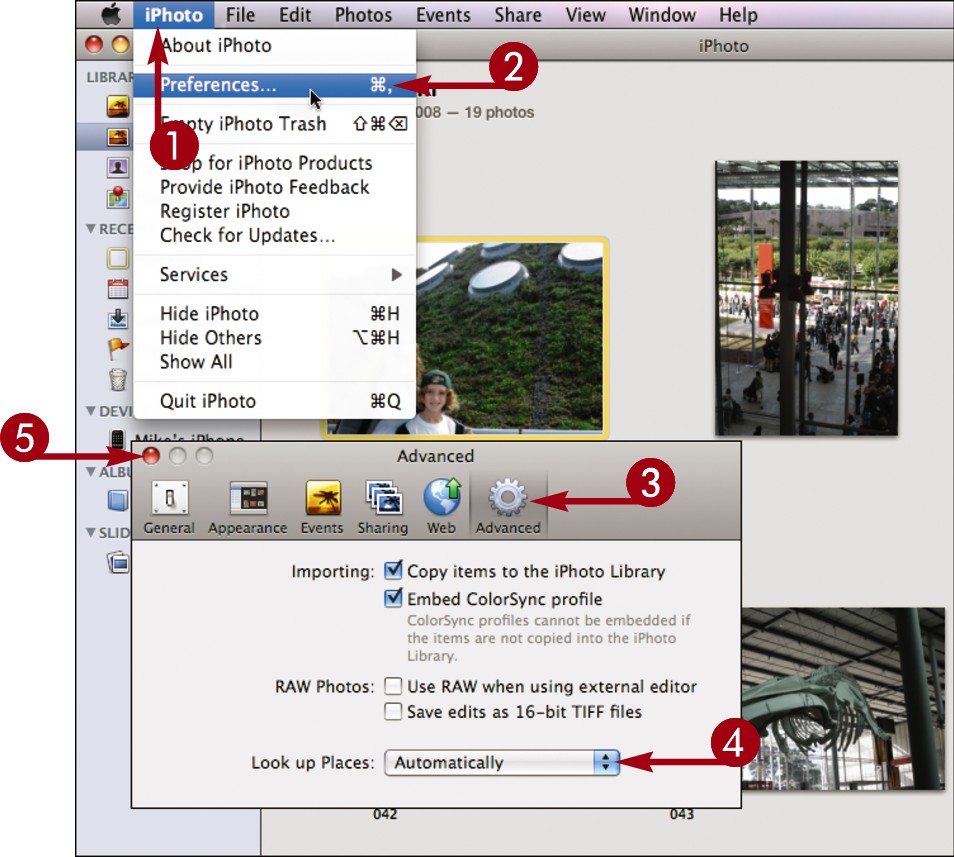
Click iPhoto.
Click Preferences.
In the dialog that appears, click Advanced.
Click here and select Automatically.
Click  to close the dialog.
Map a Photo
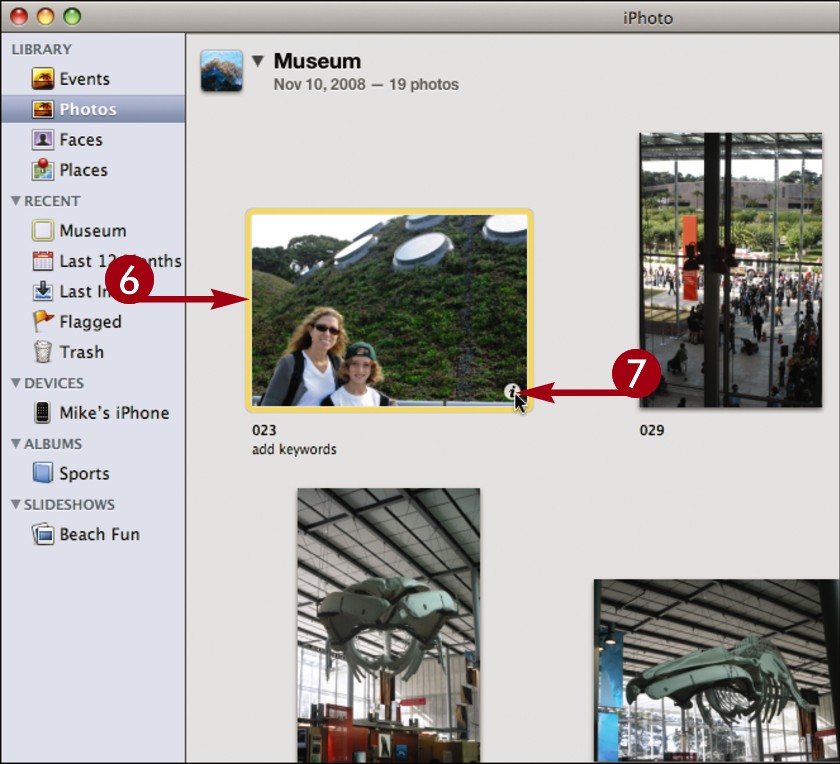
Position the cursor over a photo thumbnail.
A icon appears.
Click .
The location information for the photo appears.
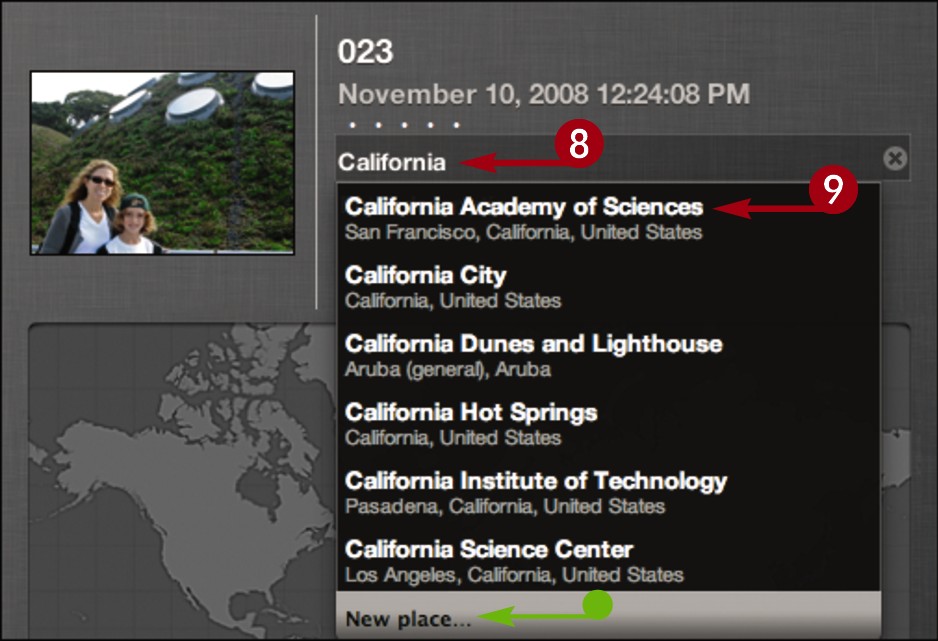
 Type the location of the photo.
iPhoto looks up the location and offers suggestions.
 Click the location of the photo from the list.
• If the location is not listed, you can click New place to perform a search.
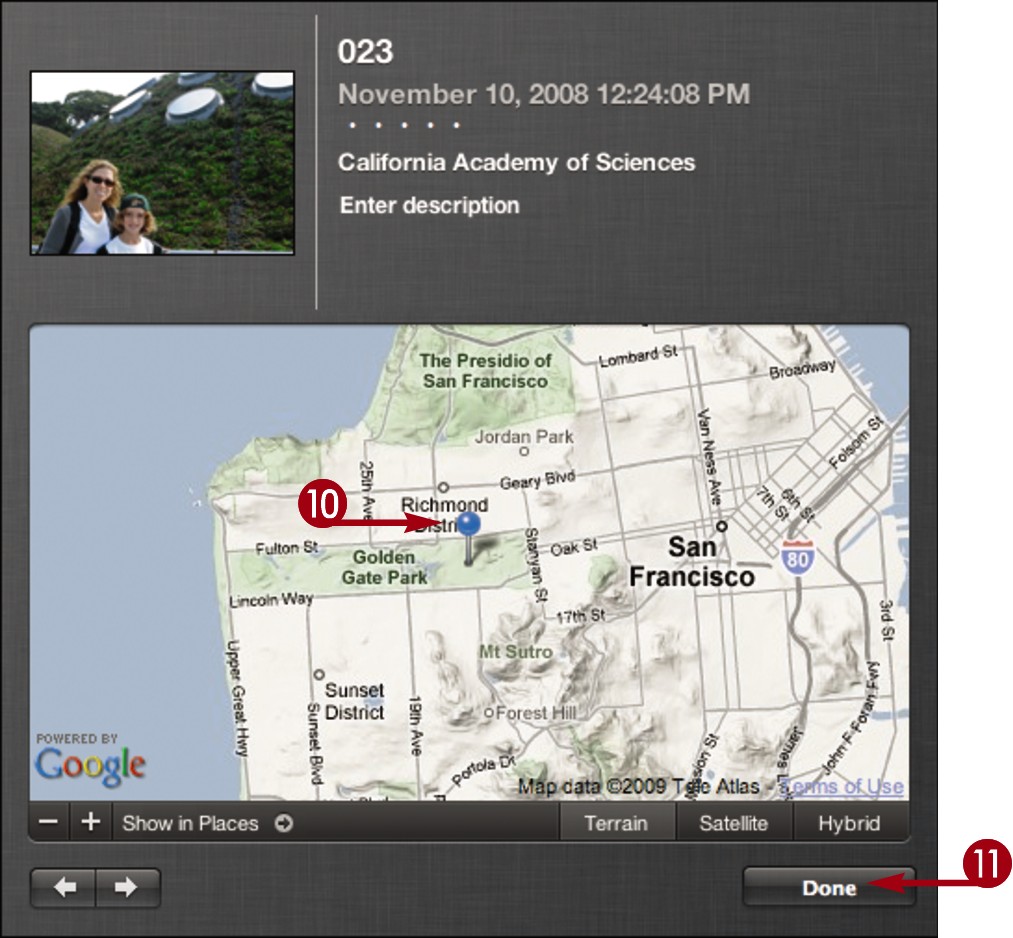
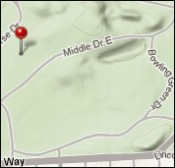
 iPhoto adds a pin to the map at the location.
 Click Done to return to the photo library.
![]()
Can iPhoto automatically assign photos to a location?
If your camera has global positioning system (GPS) capability and you have place lookups turned on in iPhoto, your imported photos can be automatically added to the map. Newer versions of the iPhone include GPS capability. To view GPS data for a photo, do the following:
Click a photo.
Click Photos and then click Show Extended Photo Info.
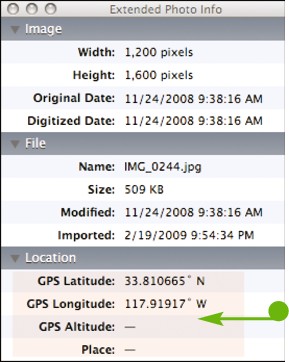
• The Extended Photo Info pane appears, showing the GPS data.
View Photo Places

You can view a map that shows the places where you have located photos. You can click a place on the map to see the photos that were taken there. You can also browse locations by geographic name.
View Photo Places
Use a Map
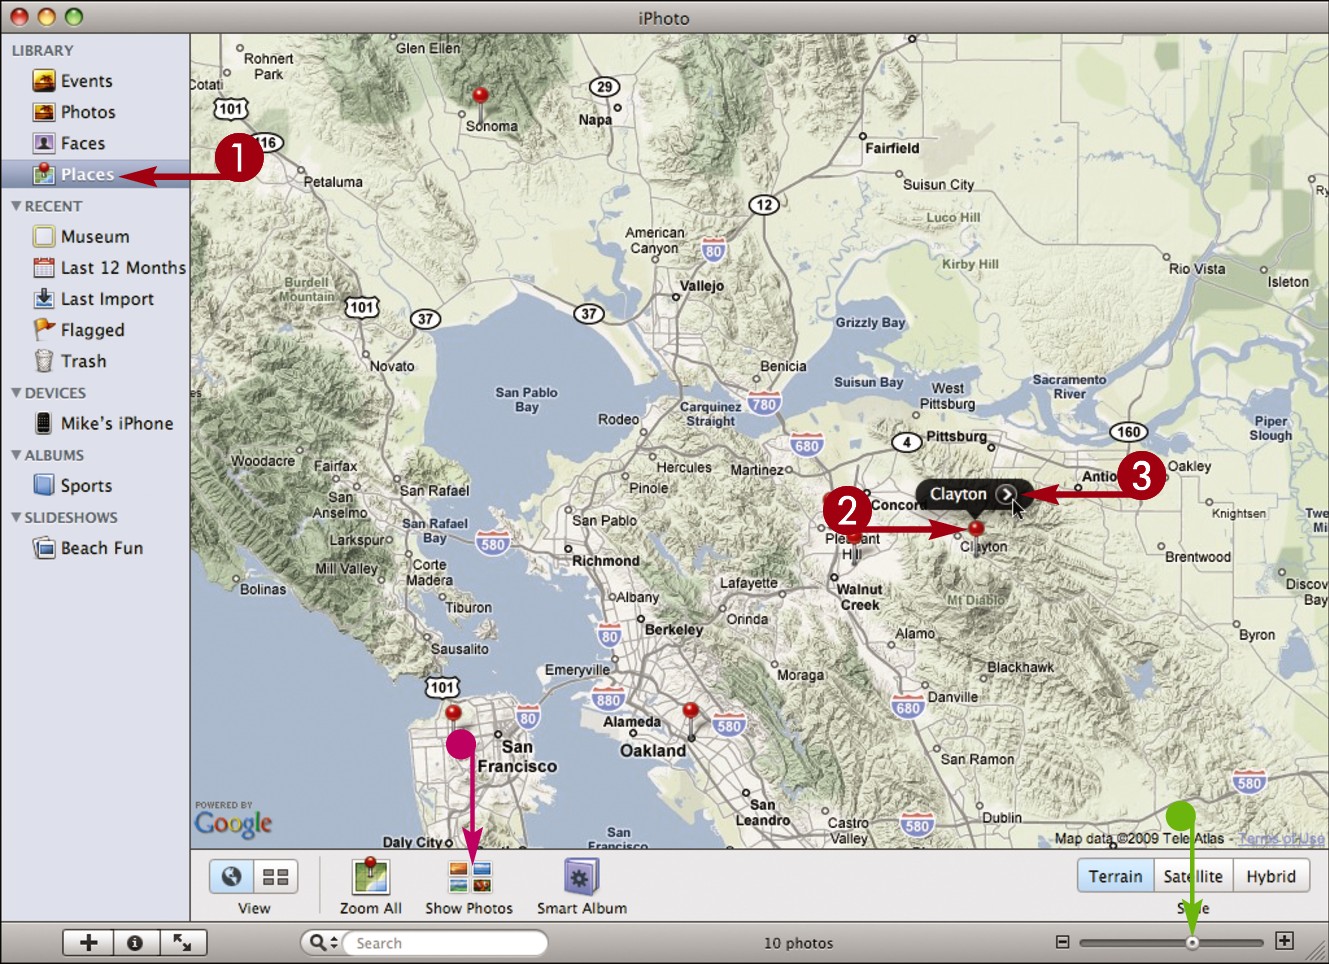
Click Places.
iPhoto displays a map showing pins where you have located photos.
• You can click and drag the slider to zoom the map.
• You can click Show Photos to show all the photos from the locations shown on the map.
Position the cursor over a pin.
A location label appears.
Click the arrow ( ).
).
iPhoto displays photos from the location.
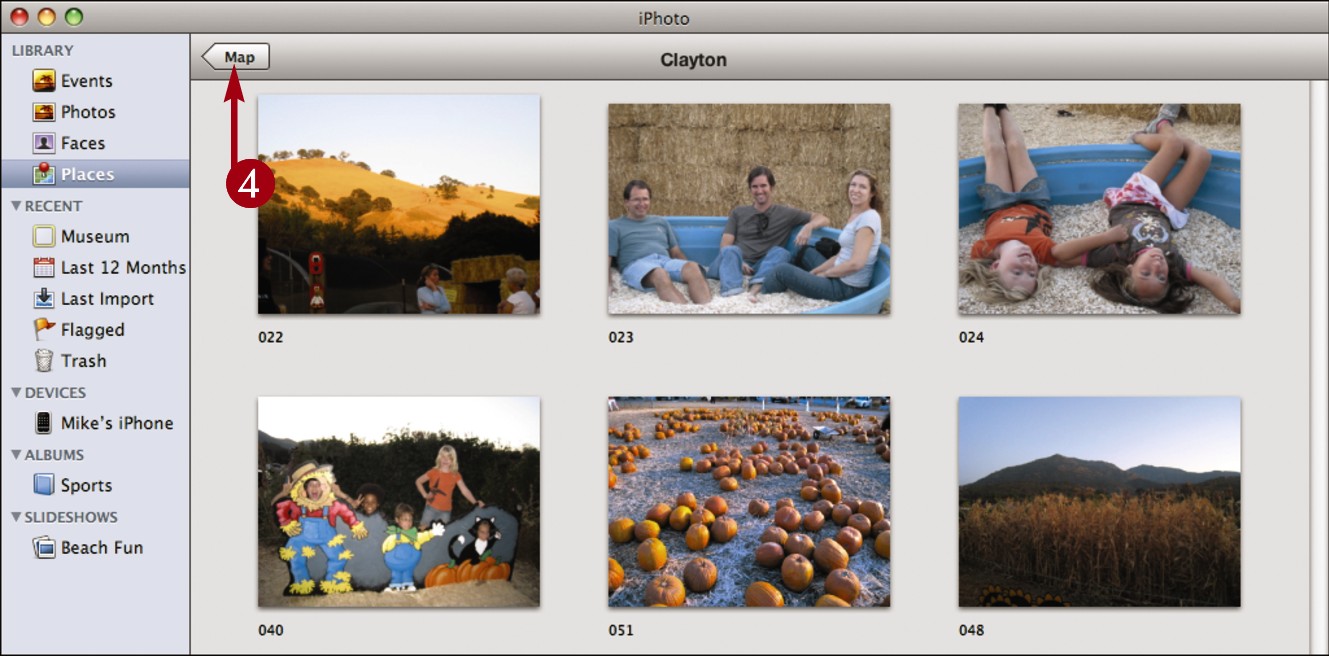
Click Map to return to the map view.
Browse Locations
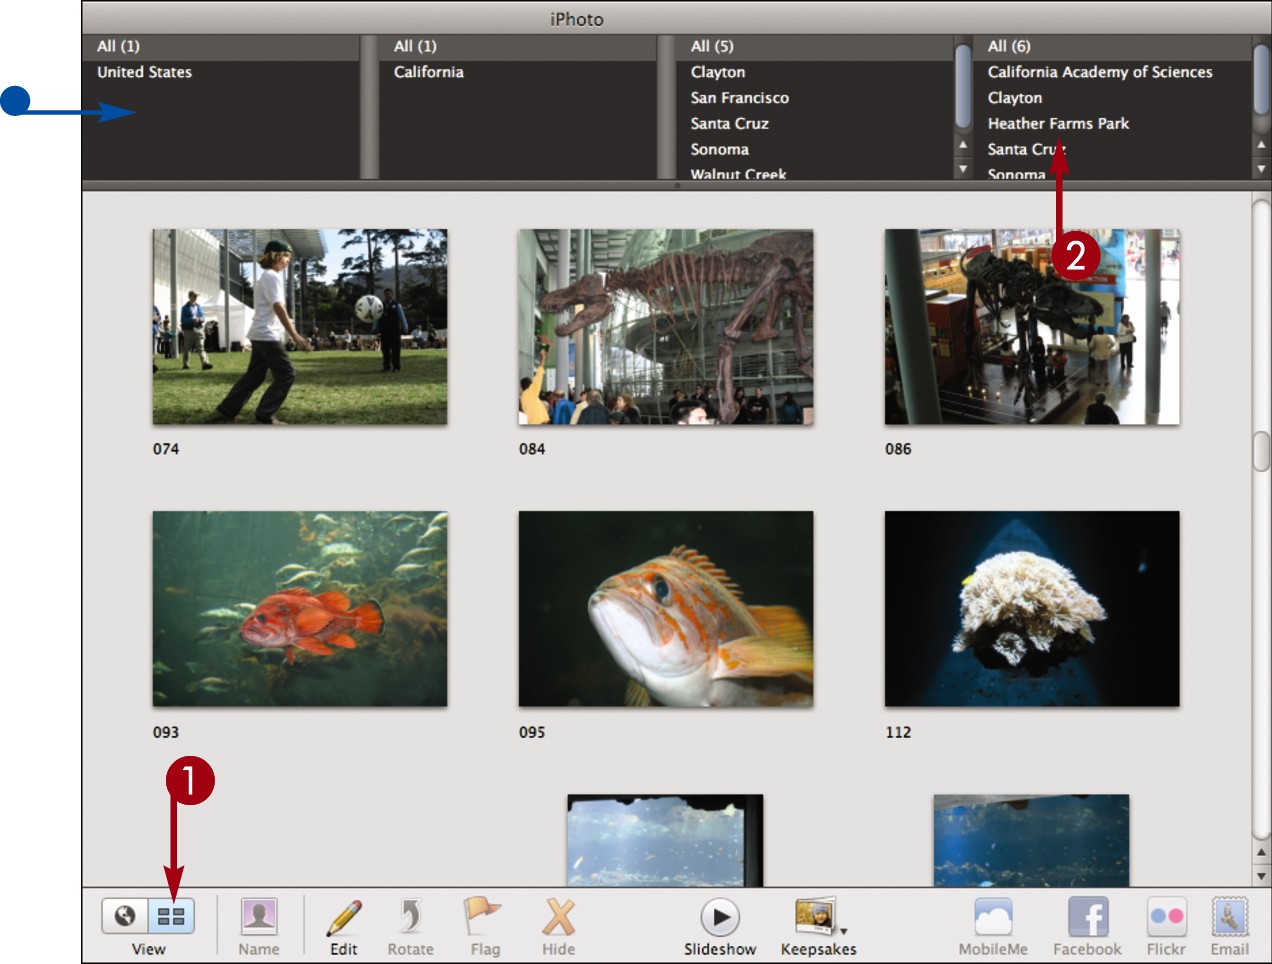
Click to display your locations in list view.
• iPhoto displays your locations hierarchically with all photos shown.
Click a location in a list.

• iPhoto filters the photos, showing only those from the location.
![]()
What are the style options in the lower-right corner of the map view?
Terrain displays a graphical map.

Satellite displays satellite photos.

Hybrid is a combination of satellite photos and graphics.
Create an Album

You can organize photos into subject-specific albums. Creating an album makes it easy to turn those photos into slideshows, photo books, Web galleries, and other projects.
For more about creating projects in iPhoto, see Chapter 6.
Create an Album
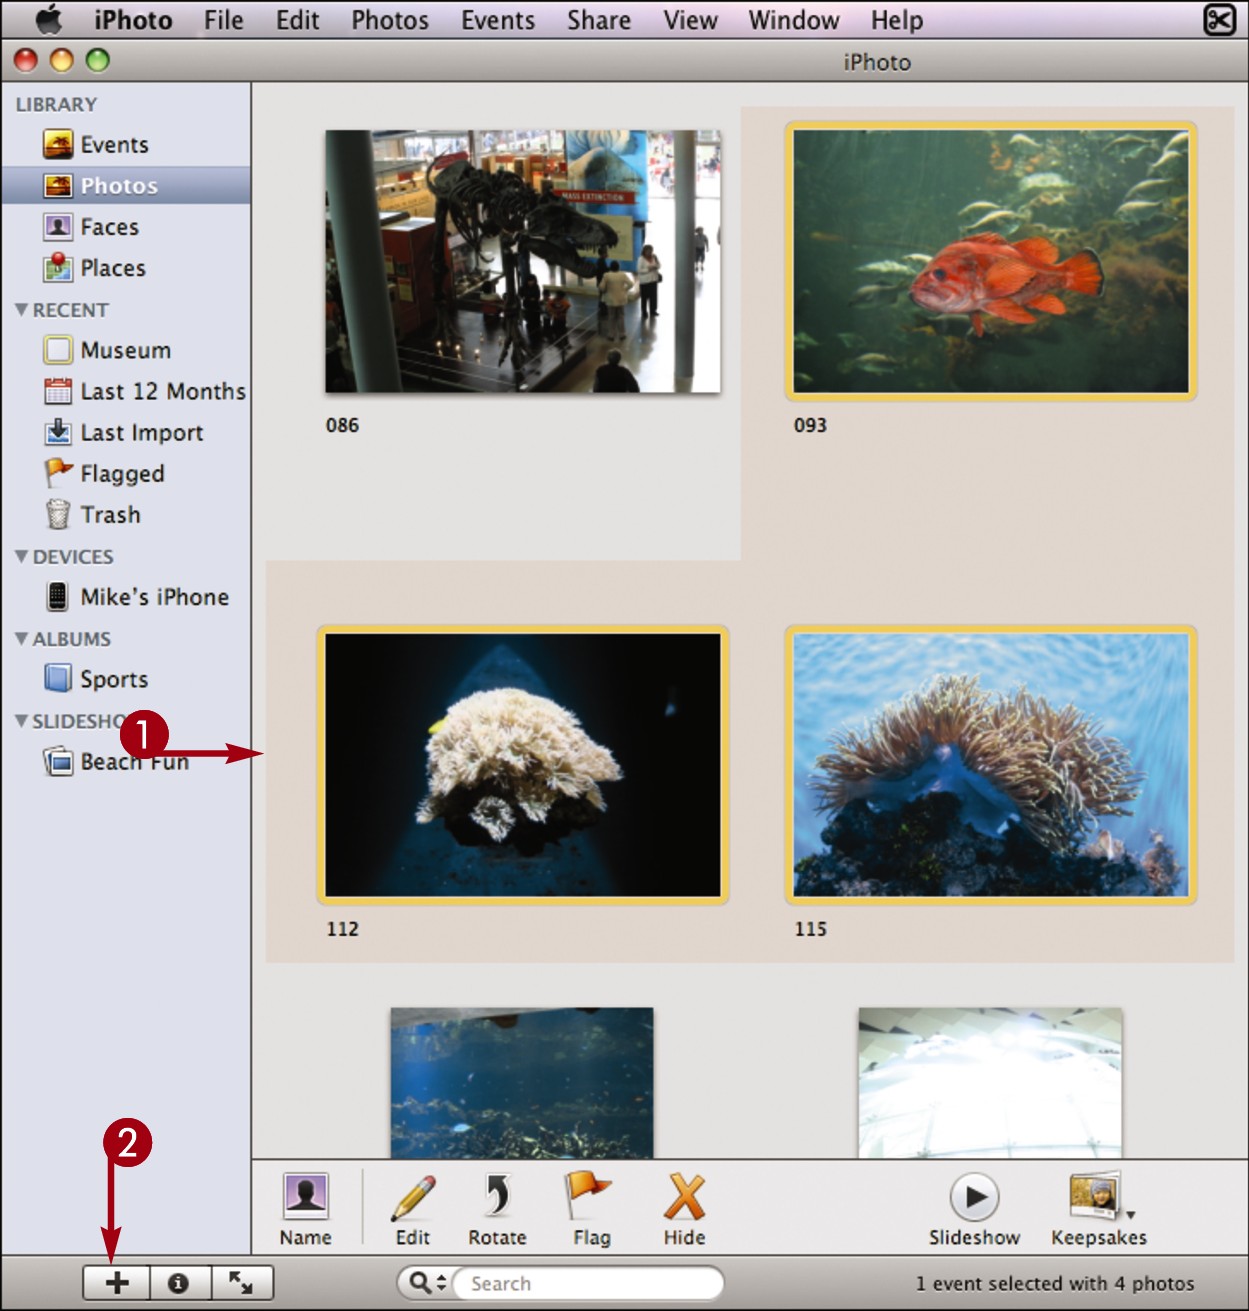
-click to select photos to add to the album.
Click the Create button ( ).
).
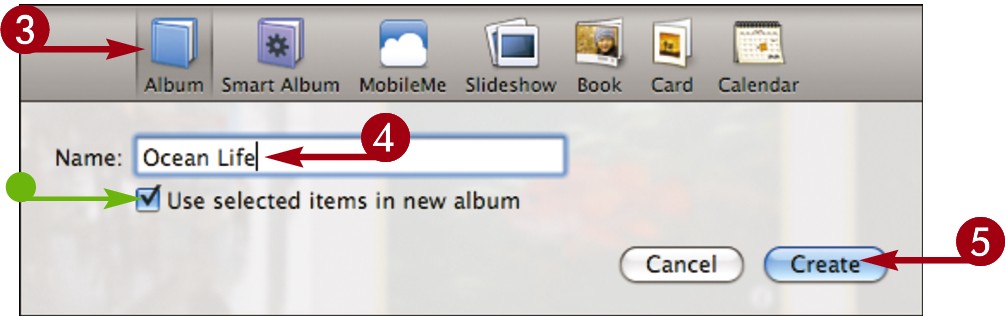
Make sure Album is selected.
• You can click to create an empty album ( changes to
  ).
).
Type a name for the album.
Click Create.
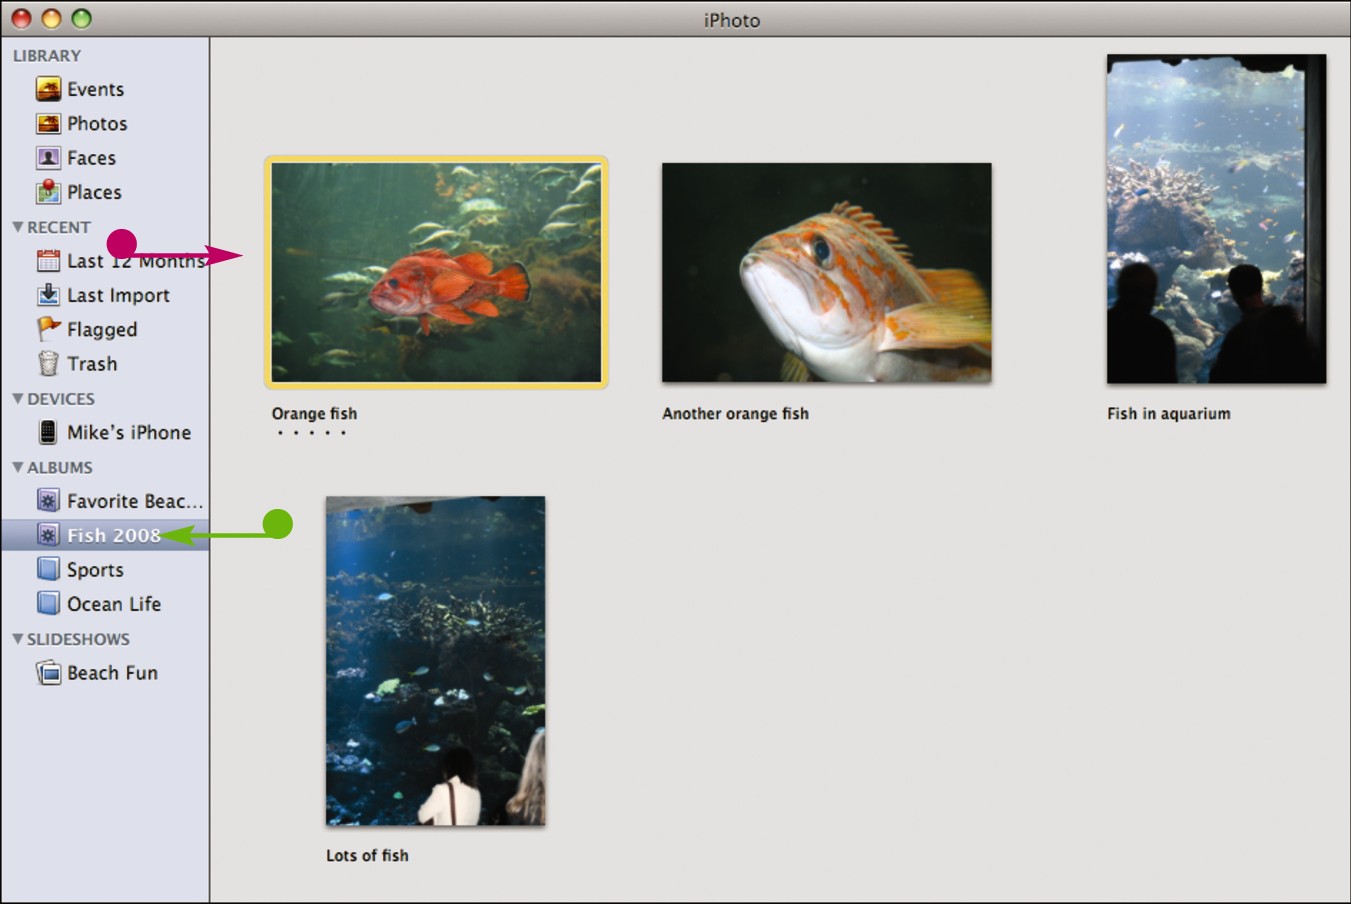
iPhoto creates the album and displays its contents.
• The album name is displayed in the source list.
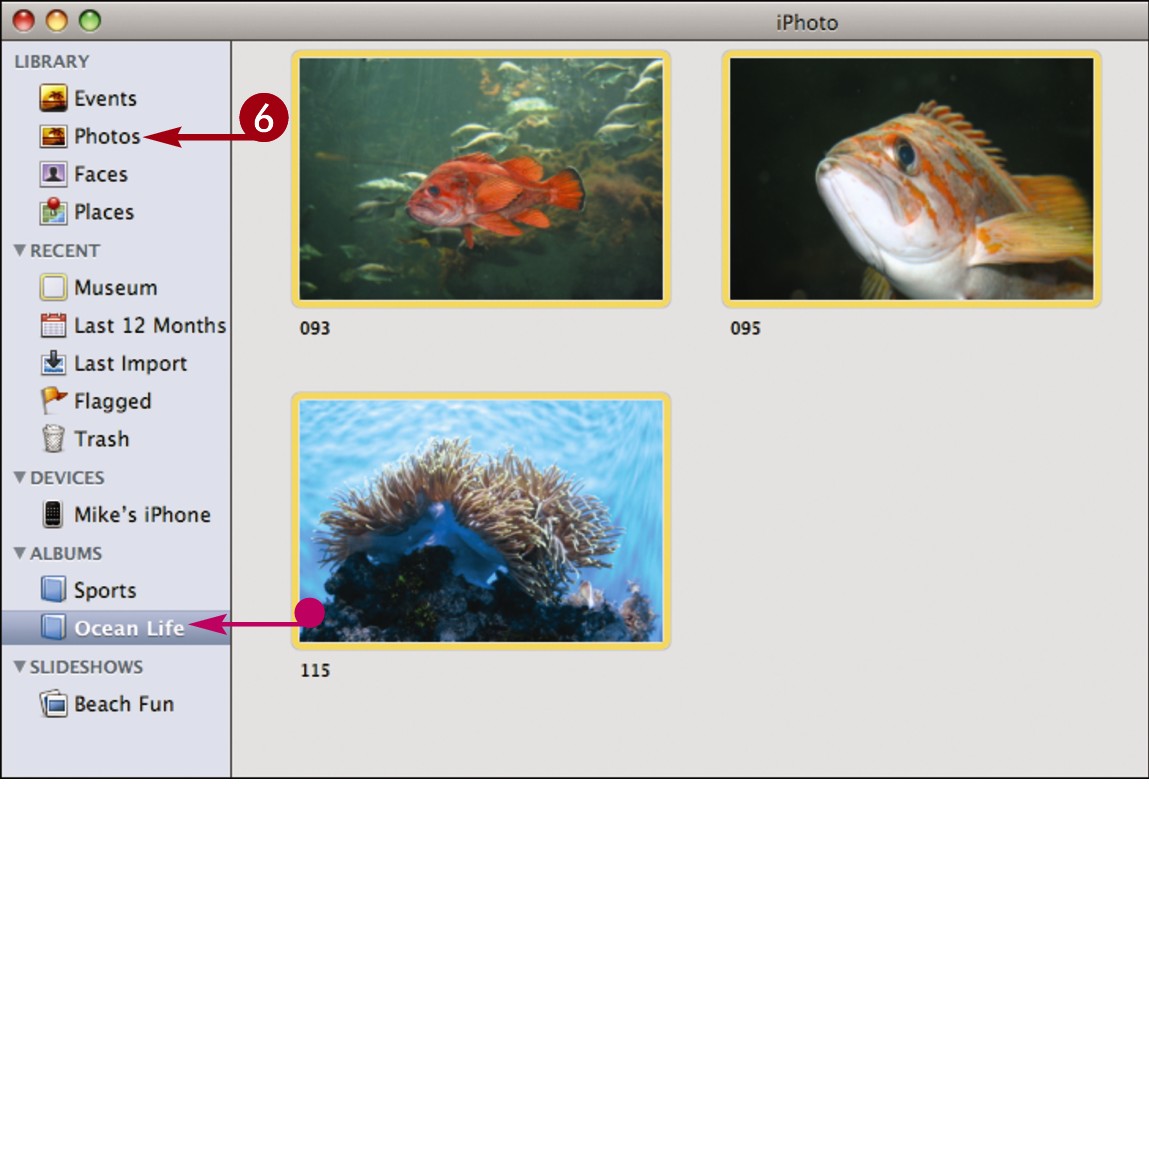
Click Photos.
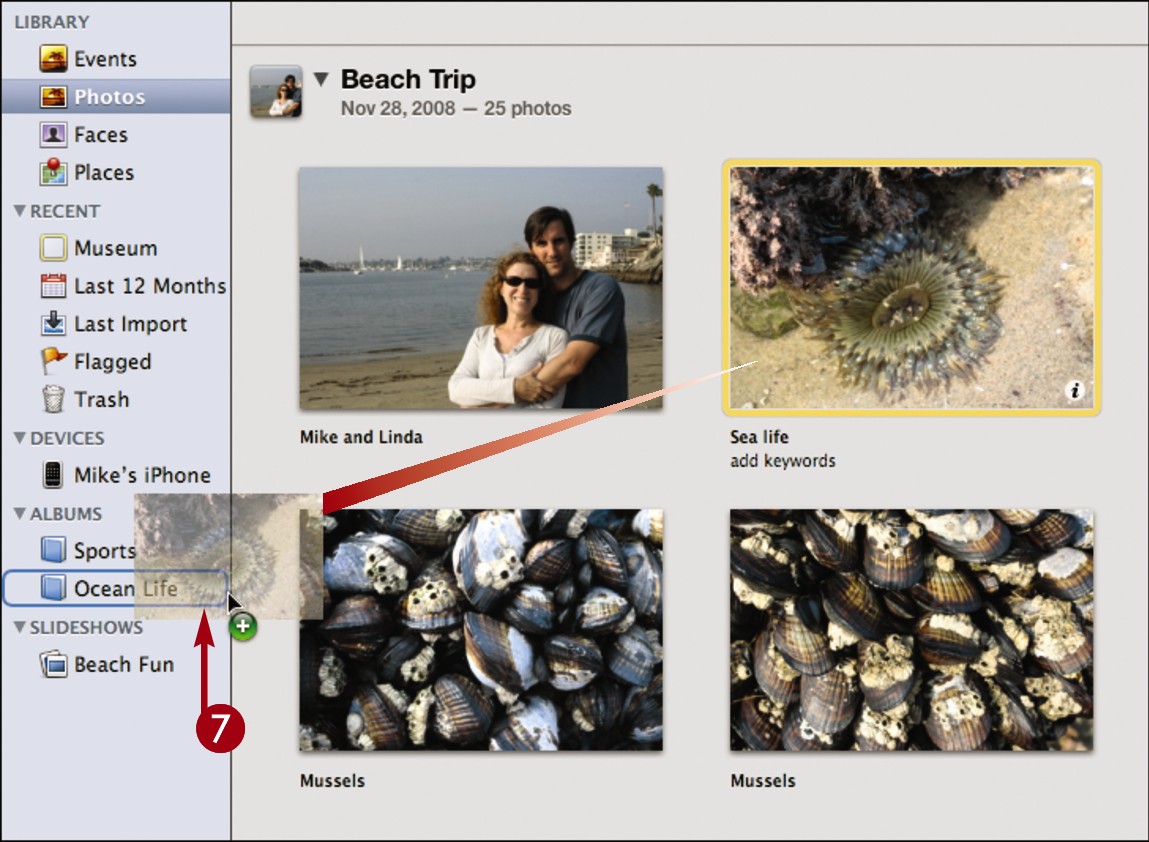
Click and drag a photo to the album.
iPhoto adds the photo to the album.
![]()
How are albums different from events?
A photo in your library can be associated with multiple albums but only one event. For example, a photo might be associated with a “December 25, 2008” event but also “Christmas,” “Winter Vacation,” and “Family” albums.

How can I quickly create an album?
You can -click to select a group of photos in your library and then click and drag the photos to the source list. You can also select a group of photos and click File and then New Album from Selection. iPhoto creates an untitled album for the photos.

Create a Smart Album

You can create a smart album by setting one or more criteria based on date, keywords, rating, and other photo characteristics. Photos that meet the criteria are automatically added to the album and iPhoto updates the album as the library changes.
Create a Smart Album
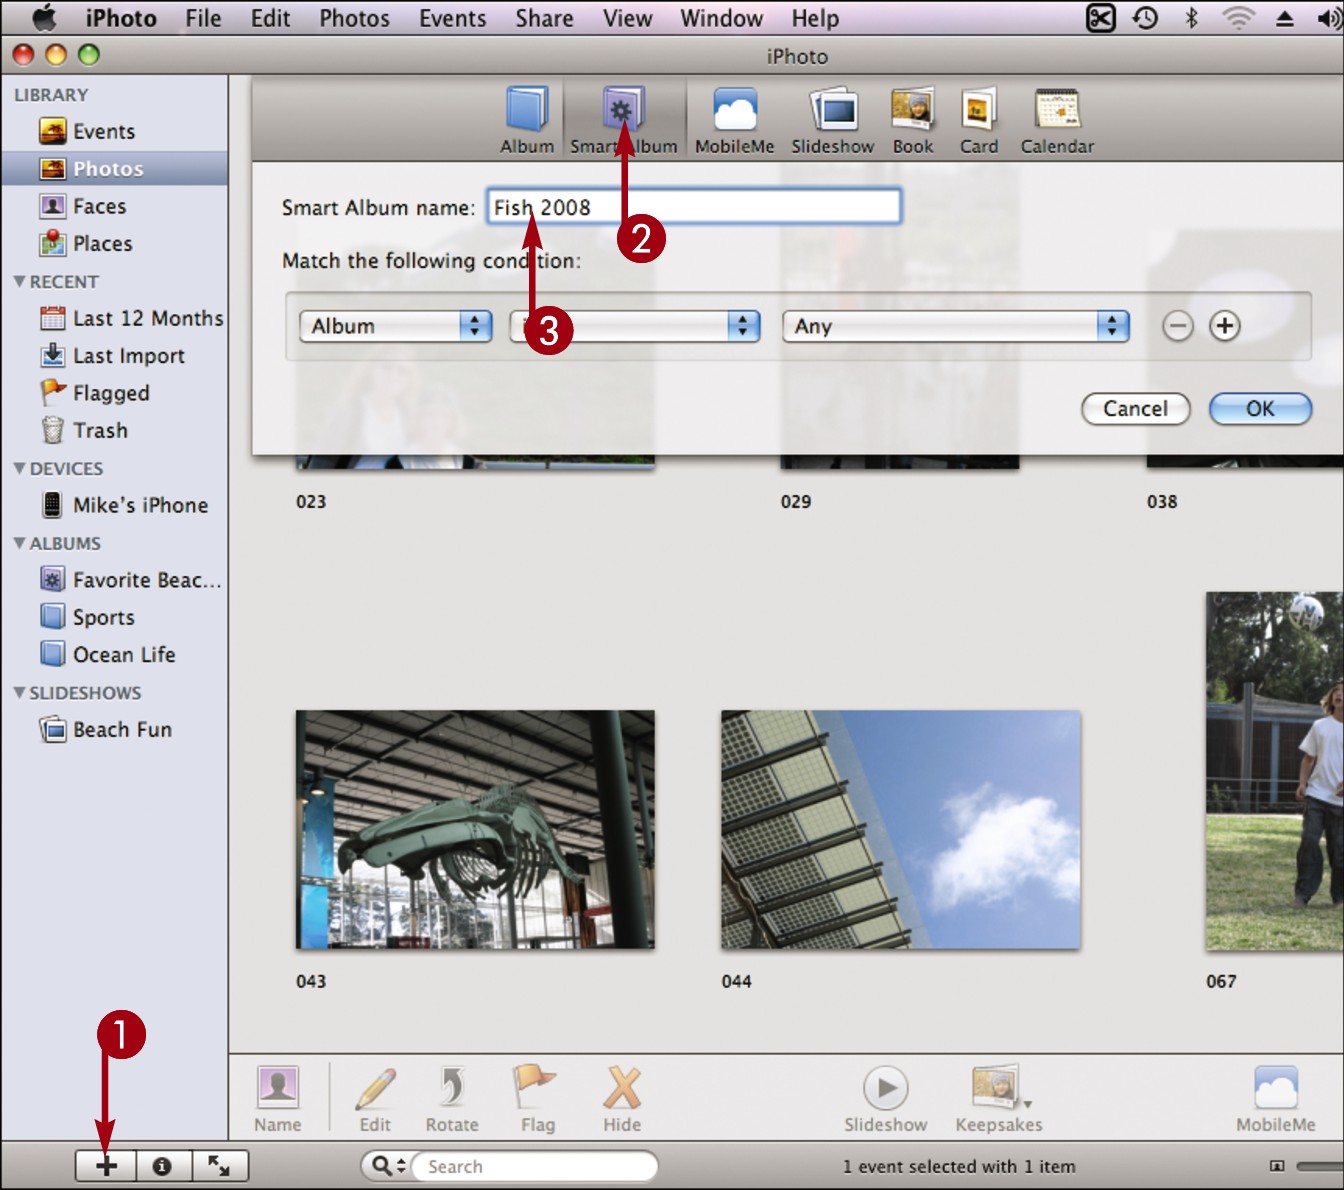
Click .
In the dialog that appears, click Smart Album.
Type a name for the smart album.
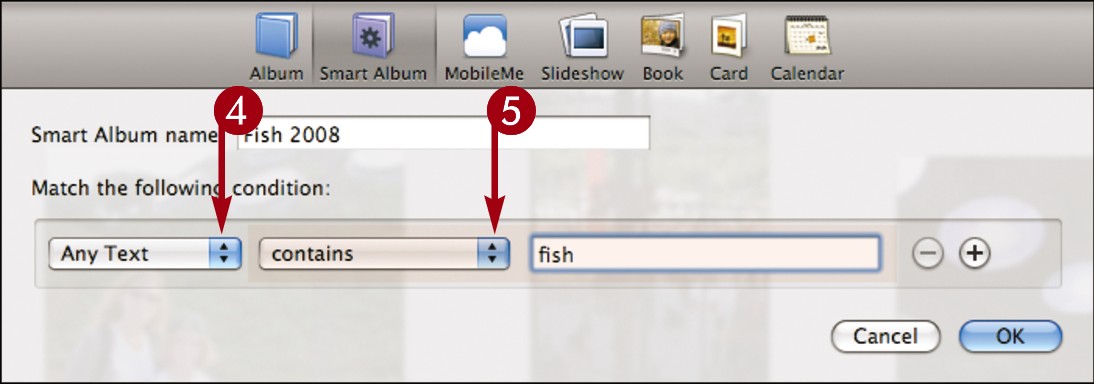
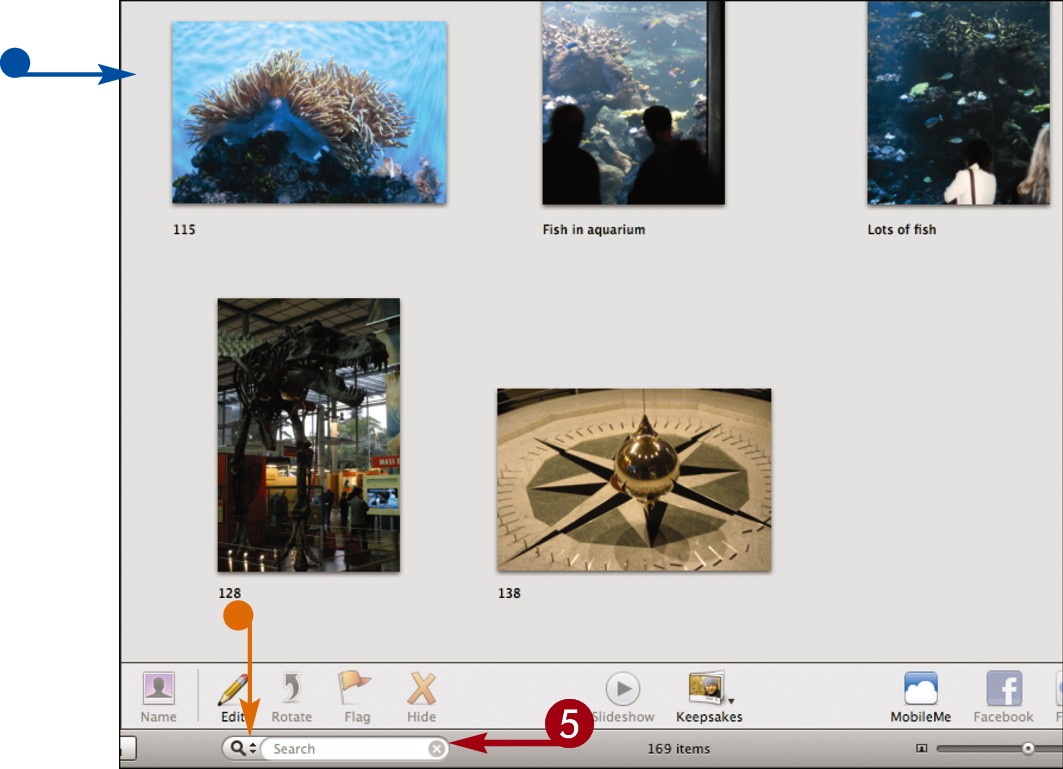
Click here to specify the first type of criteria.
Set the conditions.
In this example, the term “fish” must be present in any of the text fields associated with the photo.
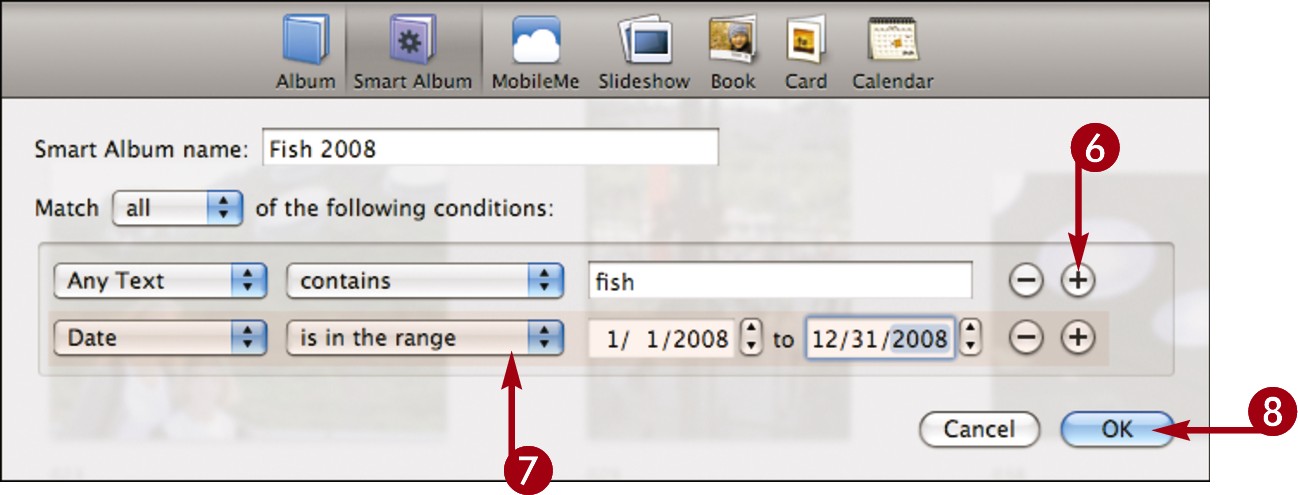
Click  .
.
A second criterion is added.
Set the conditions.
In this example, the date must be in the year 2008.
You can click to set additional criteria.
Click OK.
iPhoto creates the smart album.
• The album name is displayed in the source list.
• Photos that meet the album criteria are displayed.
![]()
How can I create a smart album based on places?
You can use the map to define geographic criteria for your smart album.
Click Places.
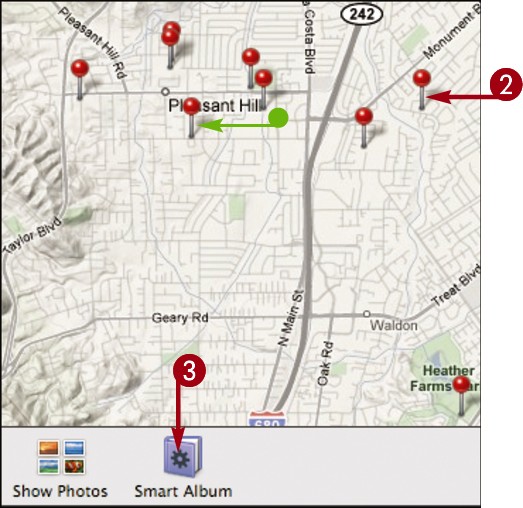
Zoom the map to display the locations that you want to include in your smart album.
• Alternatively, to include a single location, you can select a pin by clicking it. The pin turns blue.
Click Smart Album.
iPhoto creates a new location-based smart album.
Add a Keyword to a Photo

You can add a keyword to a photo to associate the photo with a subject. You might add keywords that describe objects in the photo or the event at which the photo was taken.
See “Find Photos” to learn how to use keywords to find specific photos.
Add a Keyword to a Photo
Use the Keyword DIALOG
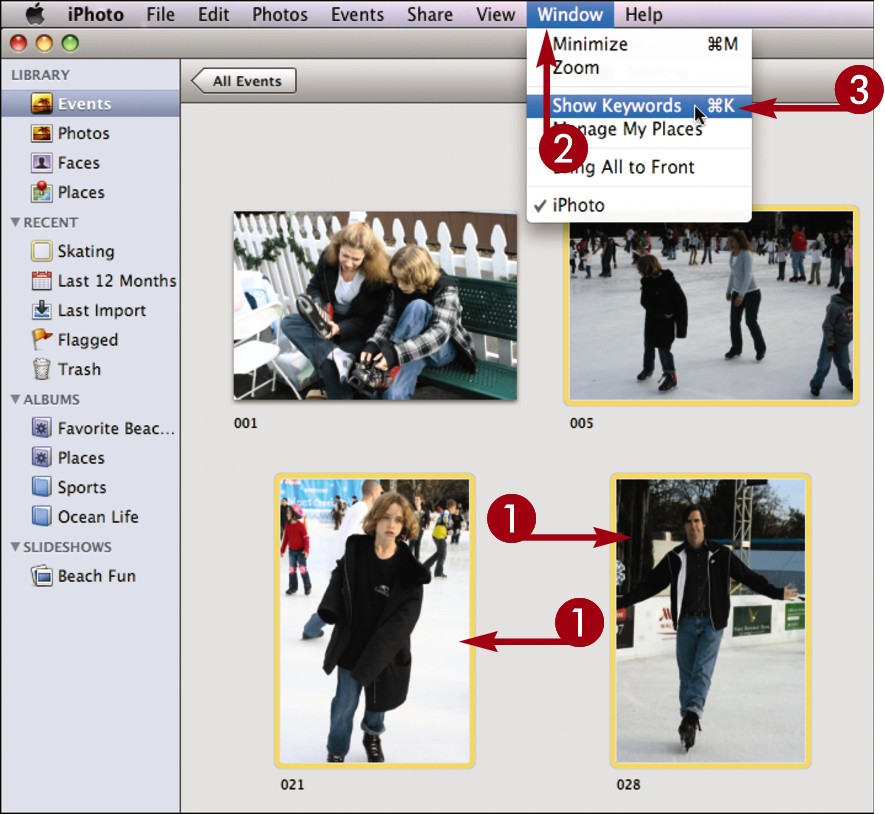
-click to select the photos to label.
Click Window.
Click Show Keywords.
The Keywords dialog opens.
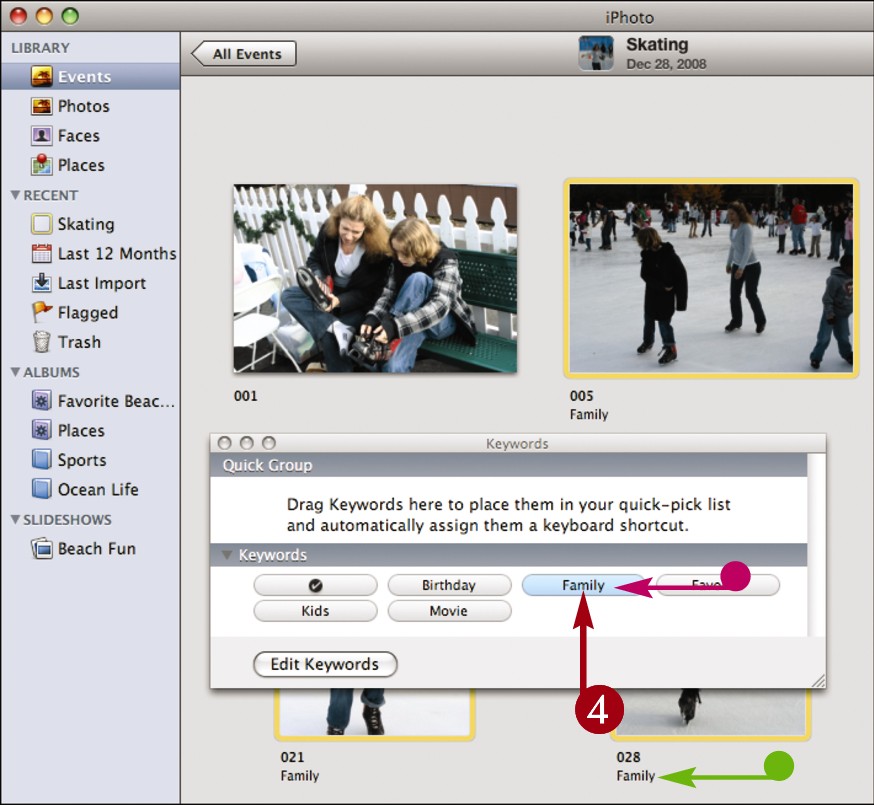
Click a keyword.
• iPhoto adds the keywords to the photo.
• You can click the keyword again to remove it from the photos.
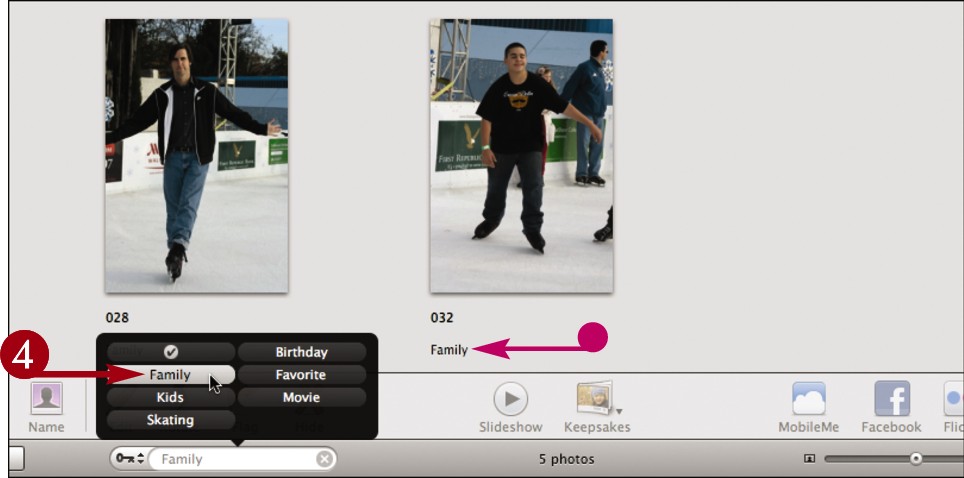
Type Keywords
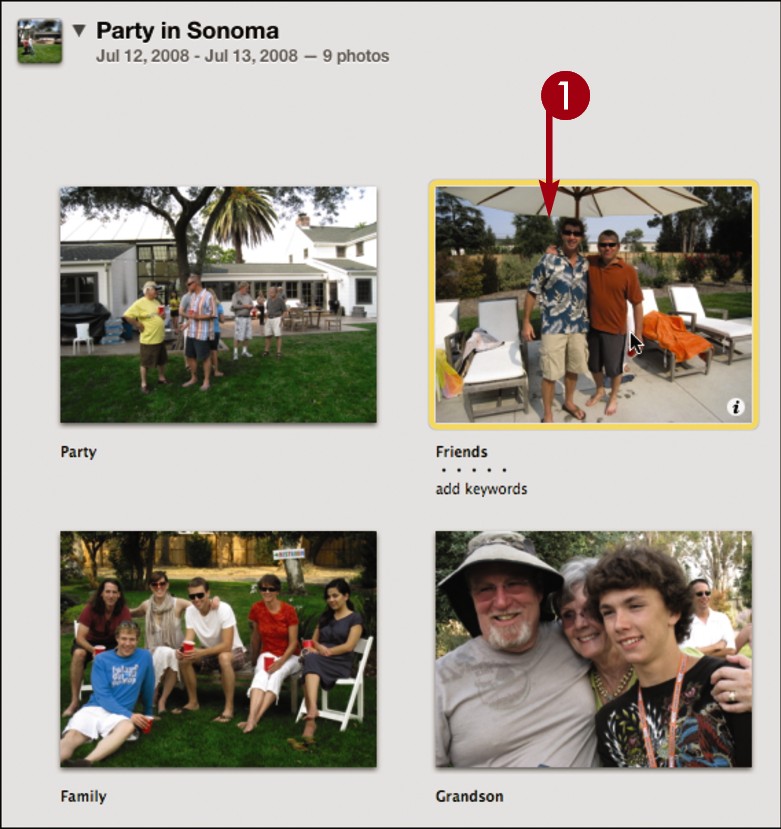
Position the cursor over the photo to label.
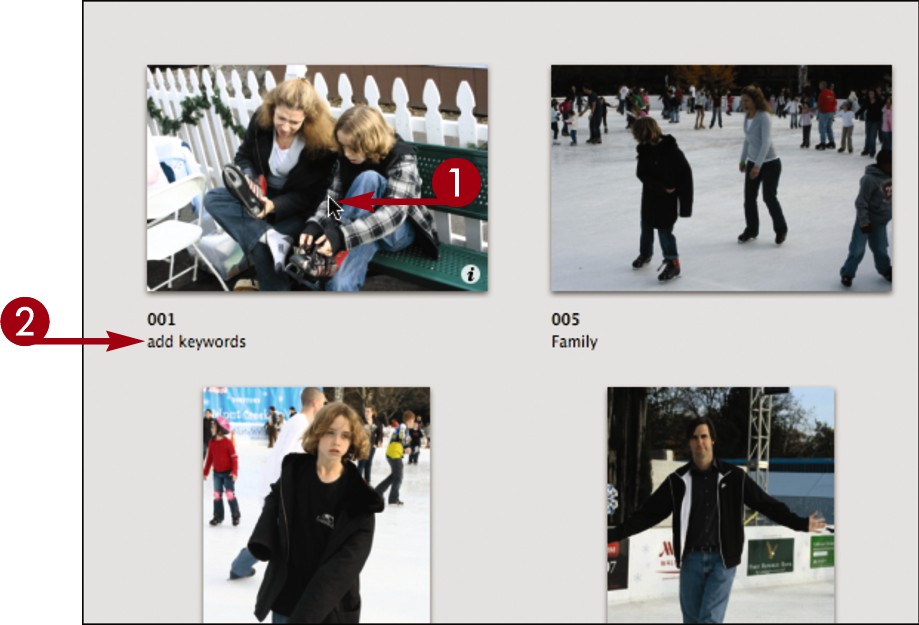
Click add keywords below the photo.
If a photo already has keywords listed below it, click the keywords.
An edit box appears.
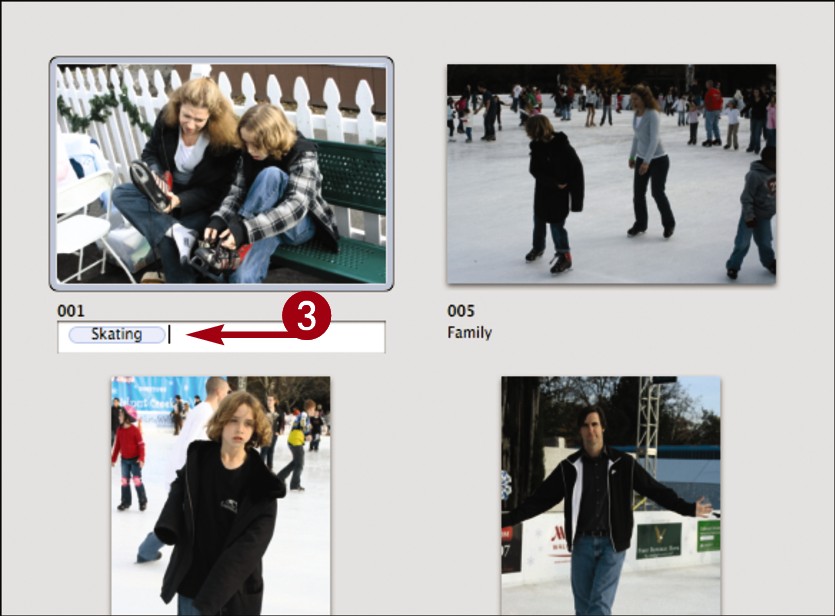
Type a keyword.
Press .
iPhoto adds the keyword to the photo.
iPhoto also adds the keyword to the list in the Keywords dialog.
Press again to close the edit box.
Note: To use keywords to filter photos, see “Find Photos.”
![]()
How do I add and remove keywords listed in the Keywords dialog?
Follow these steps:
In the Keywords dialog, click Edit Keywords.
A list of keywords appears.

Click  to add a new keyword.
To remove a keyword, click to select it and then click  .
.
Click OK when you are finished editing.
Rate a Photo

You can rate a photo to label the photo with one to five stars. This can help you pinpoint which photos in your library are worth adding to slideshows, Web galleries, and other projects.
See “Find Photos” to learn how to use ratings to find specific photos.
Rate a Photo
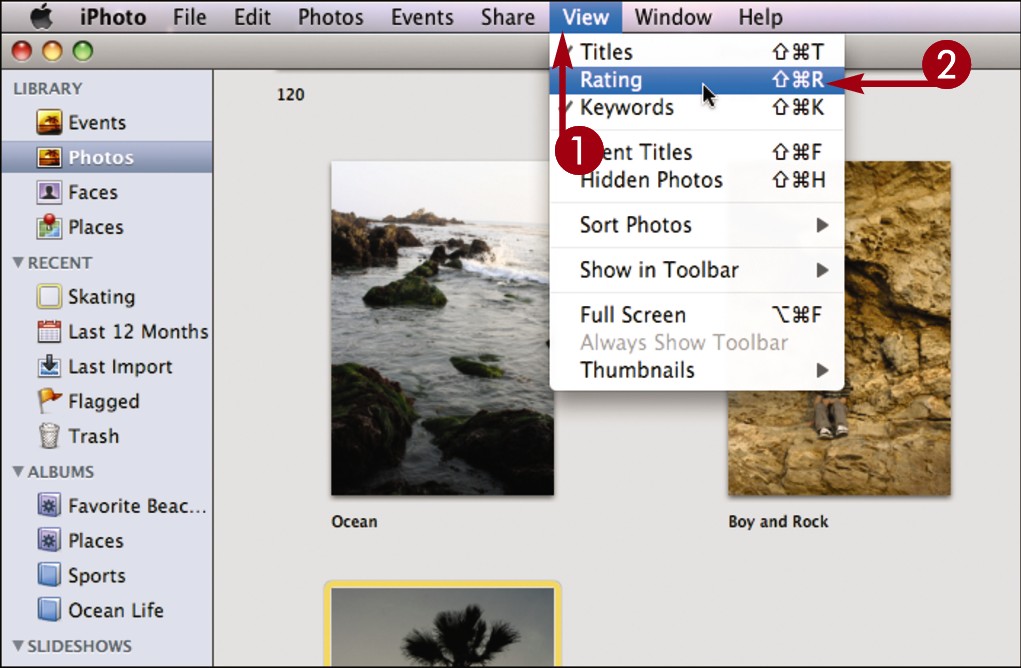
Click View.
Click Rating.
iPhoto displays ratings for photos that have them.
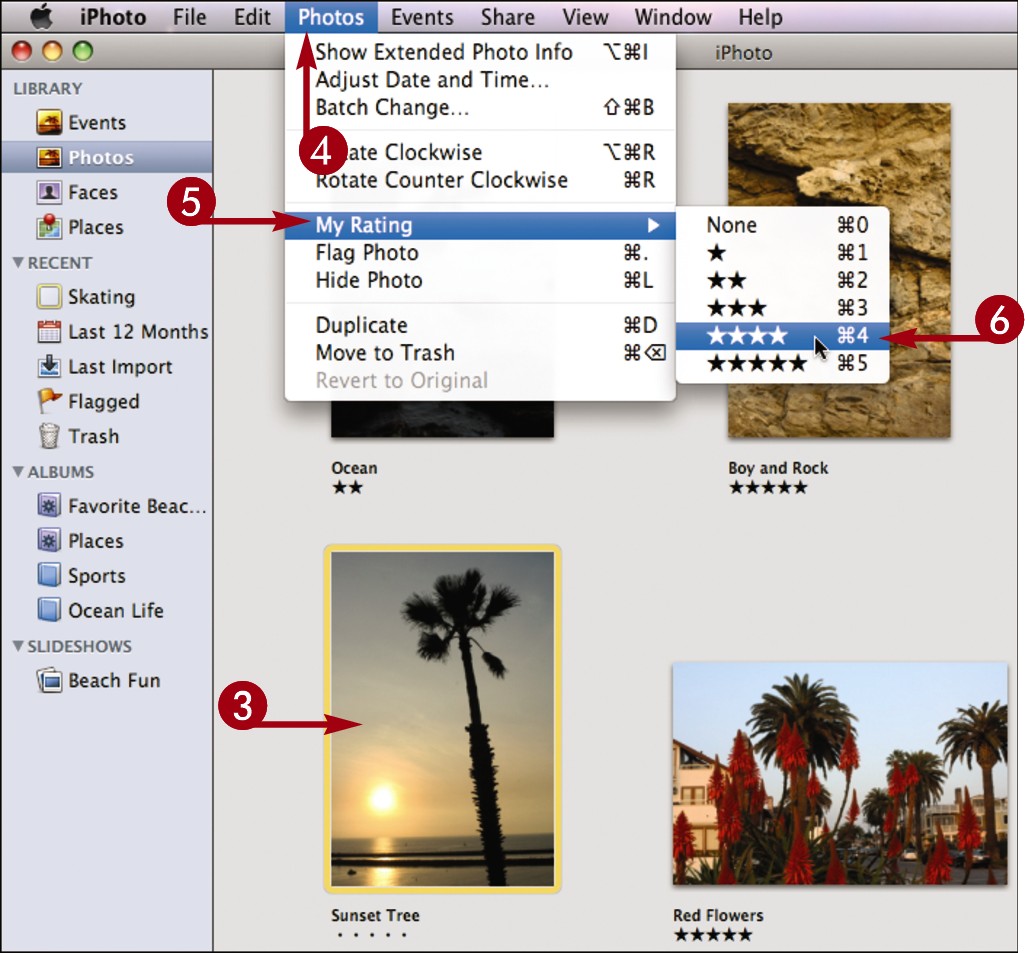
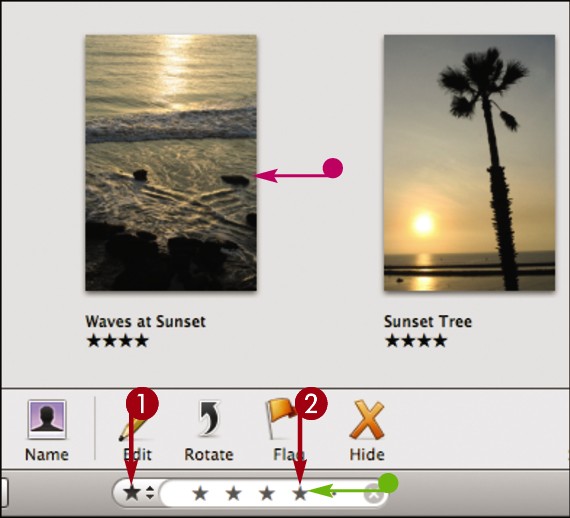
Click to select the photo to rate.
Click Photos.
Click My Rating.
Click a rating.
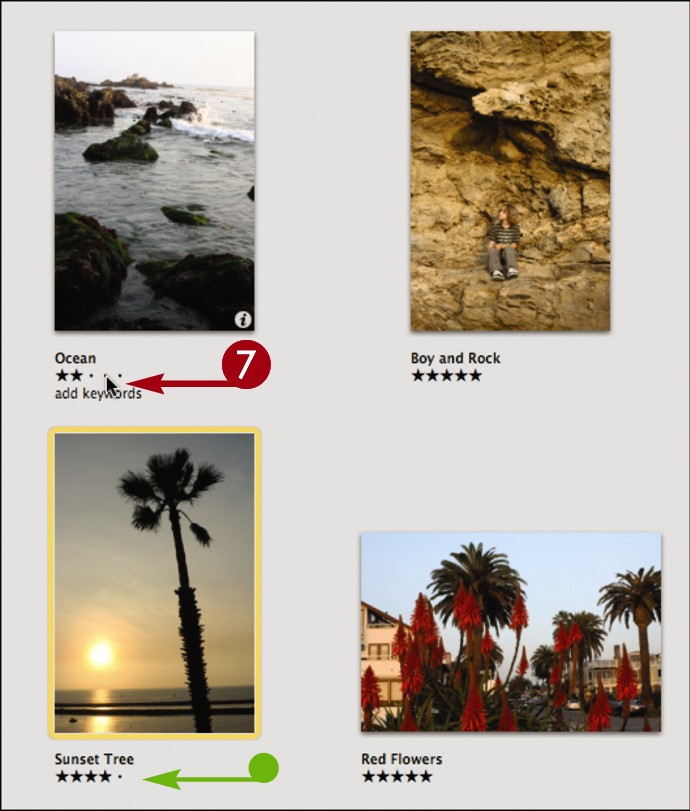
• iPhoto assigns the rating to the photo.
You can also assign or edit a rating by clicking a star or dot.
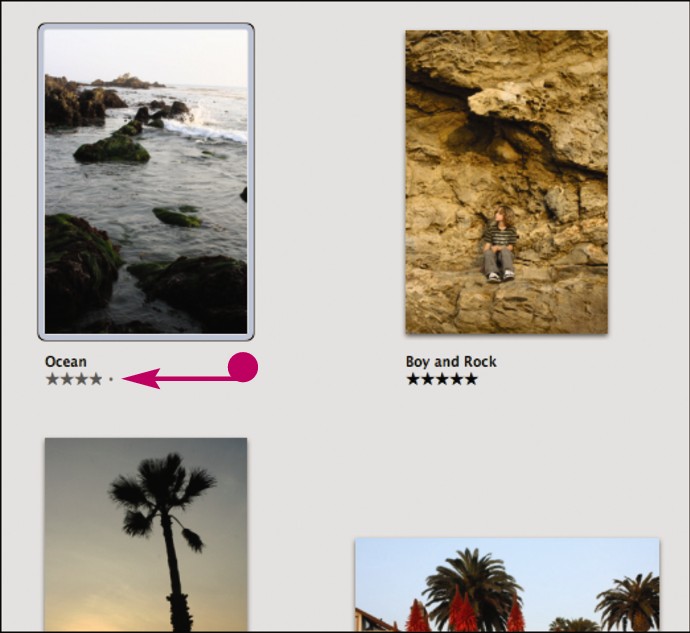
• iPhoto assigns the rating to the photo.
![]()
How do I easily create an album made up of my five-star photos?
You can create a smart album with a five-star rating as the album’s criterion.
Create a new smart album.
Note: For details, see “Create a Smart Album.”
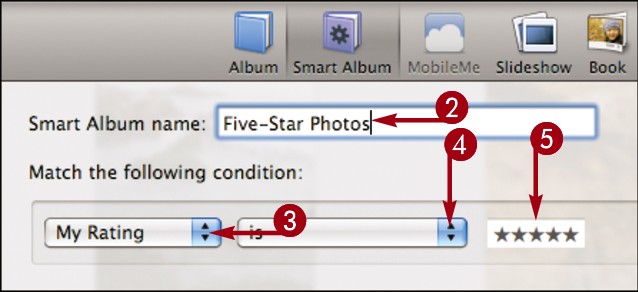
Type a name for the album.
Select My Rating.
Select is.
Select five stars.
Click OK (not shown).
iPhoto creates the album and automatically adds photos that have five-star ratings.
Flag a Photo

You can flag a photo to mark it for editing or adding to an event or album. iPhoto adds a flag icon to flagged photos.
Flag a Photo
Click to select the photo to flag.
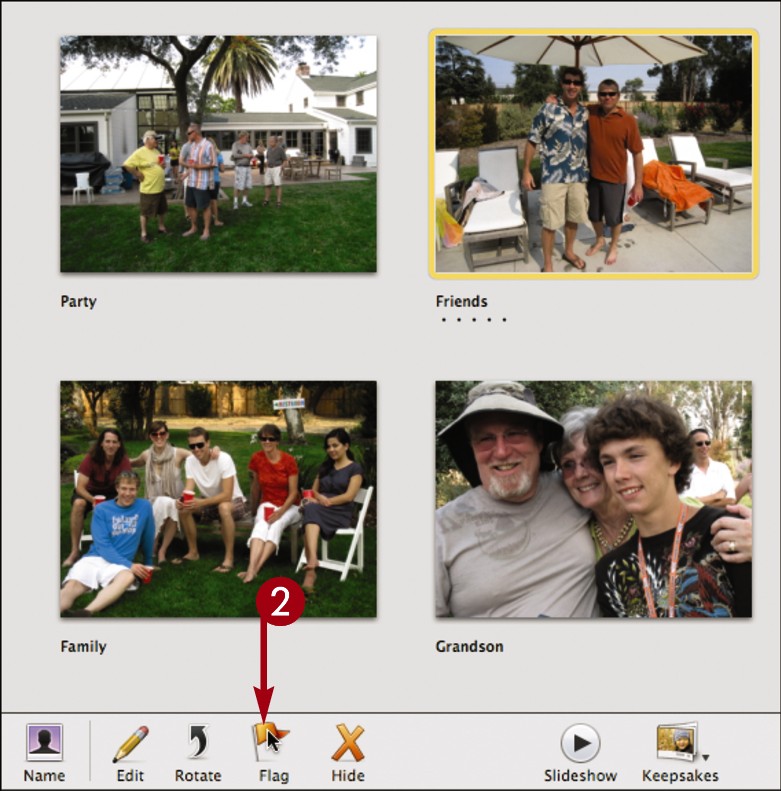
Click Flag.
iPhoto flags the photo.

• An icon is added to the photo thumbnail.
• You can click Unflag to remove the flag.
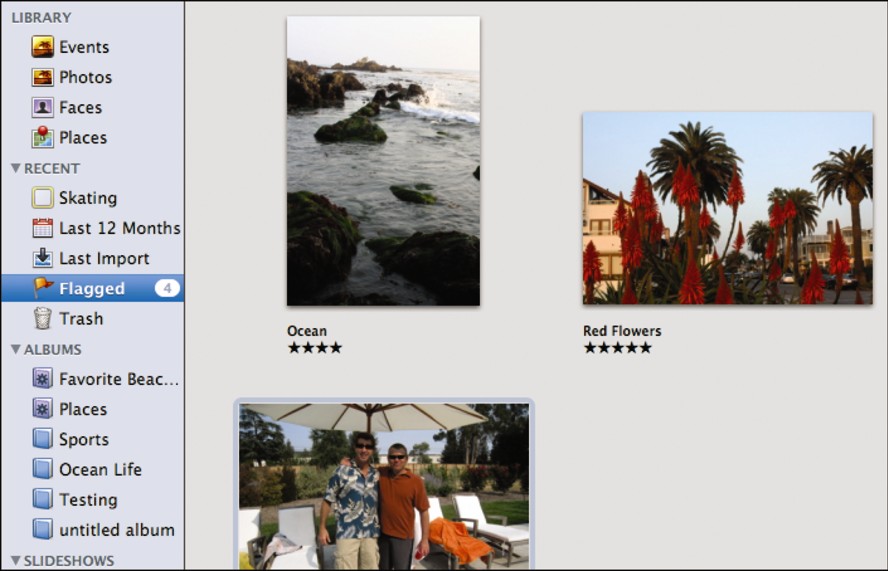
Click Flagged.
iPhoto displays your flagged photos.
![]()
How do I create an event out of flagged photos?
Follow these steps:
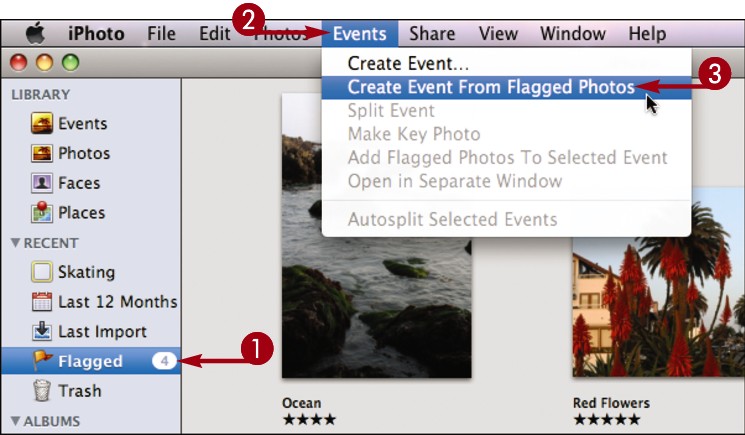
Flag the photos you want to add to the event.
Click Events.
Click Create Event From Flagged Photos.
iPhoto creates a new event and adds the photos to it.
Find Photos

As the number of photos in your library grows, being able to find photos quickly can become challenging. The search tool in iPhoto allows you to search for photos by text, date, rating, and more.
Find Photos
Search by Text

Type one or more terms into the search box.
iPhoto searches for photos as you type.
• iPhoto displays the photos whose title or description contains the search terms.
Click here to open the search menu.
Search by keyword
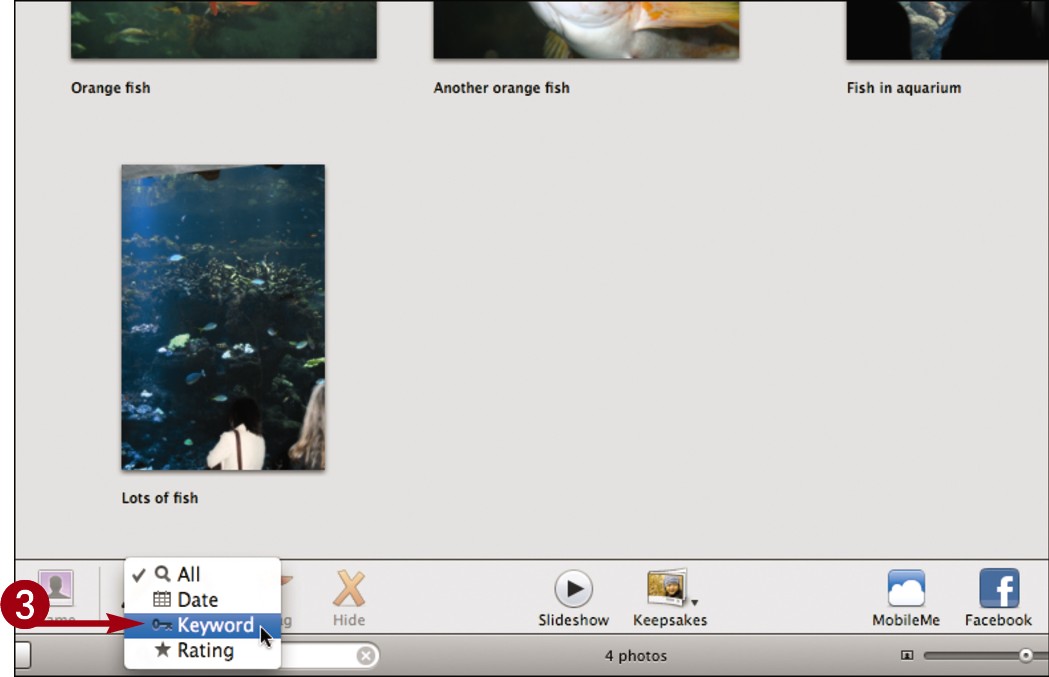
Click Keyword.
iPhoto displays a keyword panel.
Click one or more keywords.
• iPhoto displays photos with the keywords.
Note: To add keywords to a photo, see “Add a Keyword to a Photo.”
Click  to clear your search.
• iPhoto displays all the photos in the library.
• You can also click here and select Date to search by a time range.
![]()
How do I search by rating?
Follow these steps:
Click here and select Rating.
iPhoto displays five dots.
Click a dot.
• The corresponding dots change to stars.
iPhoto searches for photos with that star rating.
• The matching photos are displayed.
Hide and Unhide Photos

You can hide a photo so that it does not appear in your photo library. This is helpful if you do not want to use the photo but are unsure about deleting it.
Hide and Unhide Photos
Hide a Photo
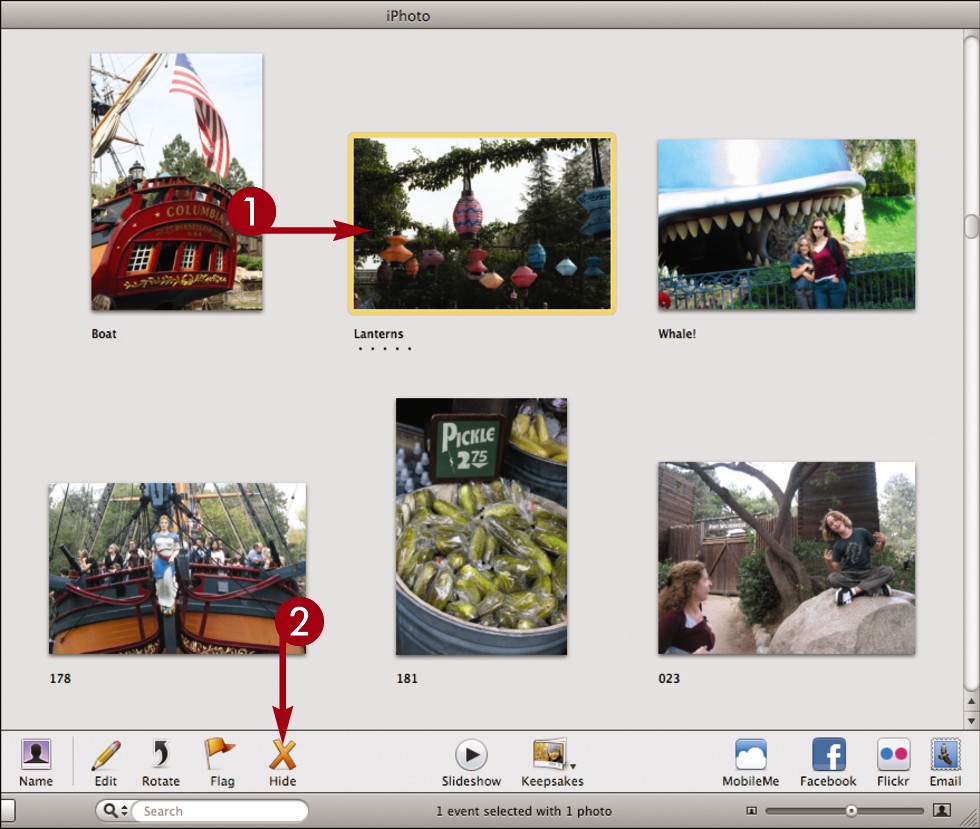
Click to select a photo to hide.
Click Hide.
iPhoto hides the photo.
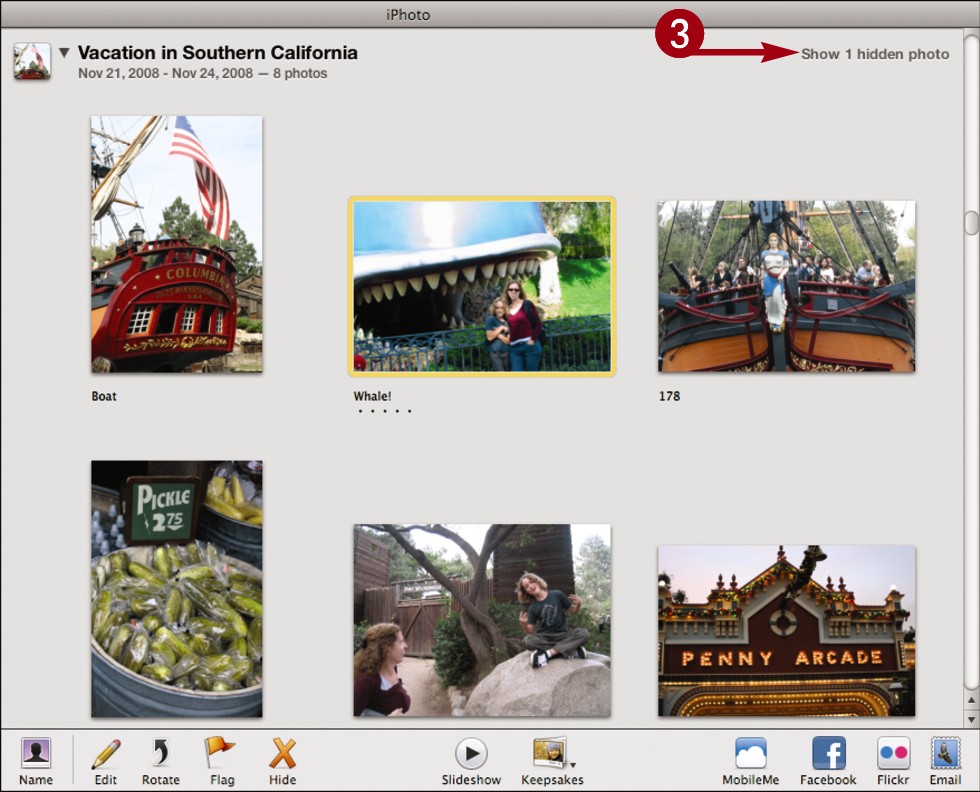
Click the Show text.
iPhoto displays the hidden photos.
• Hidden photos are marked with an icon.
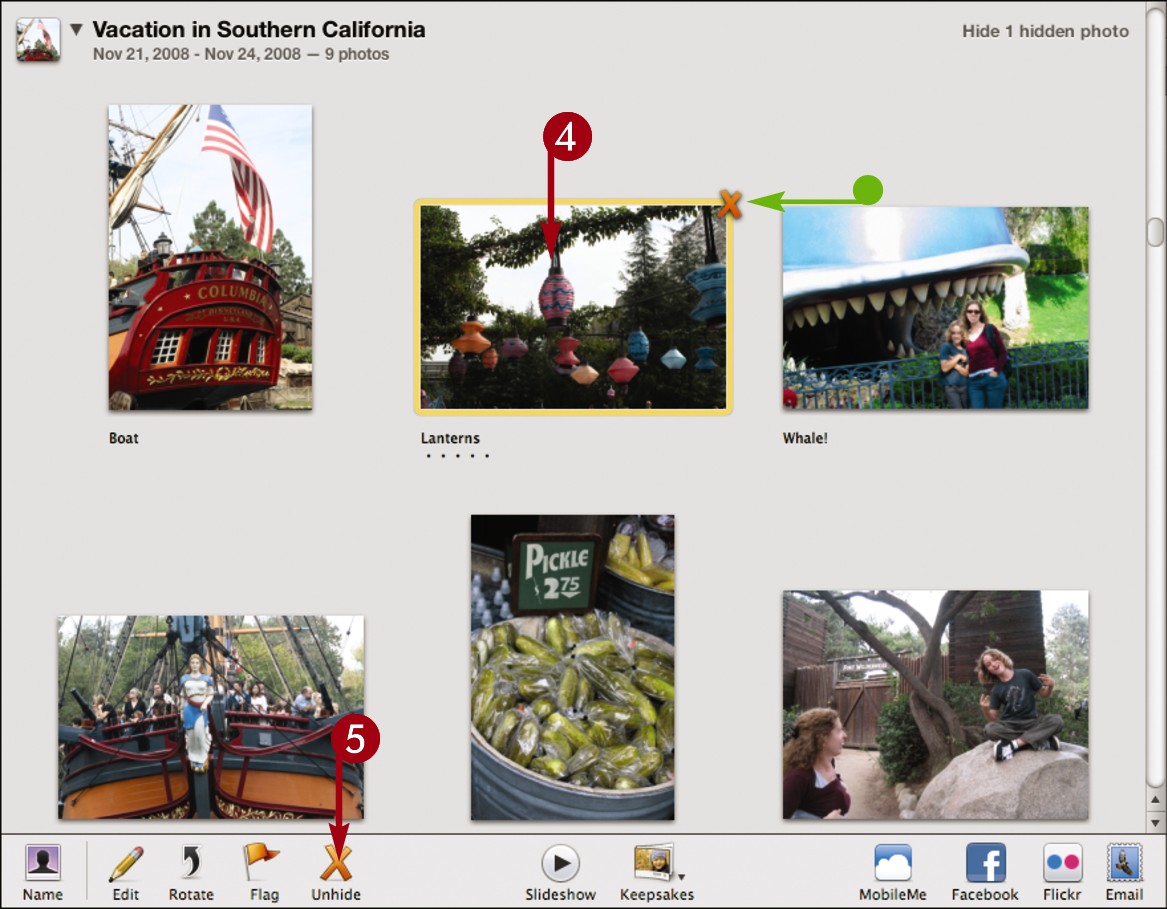
Unhide a Photo
Click to select the hidden photo.
Click Unhide.
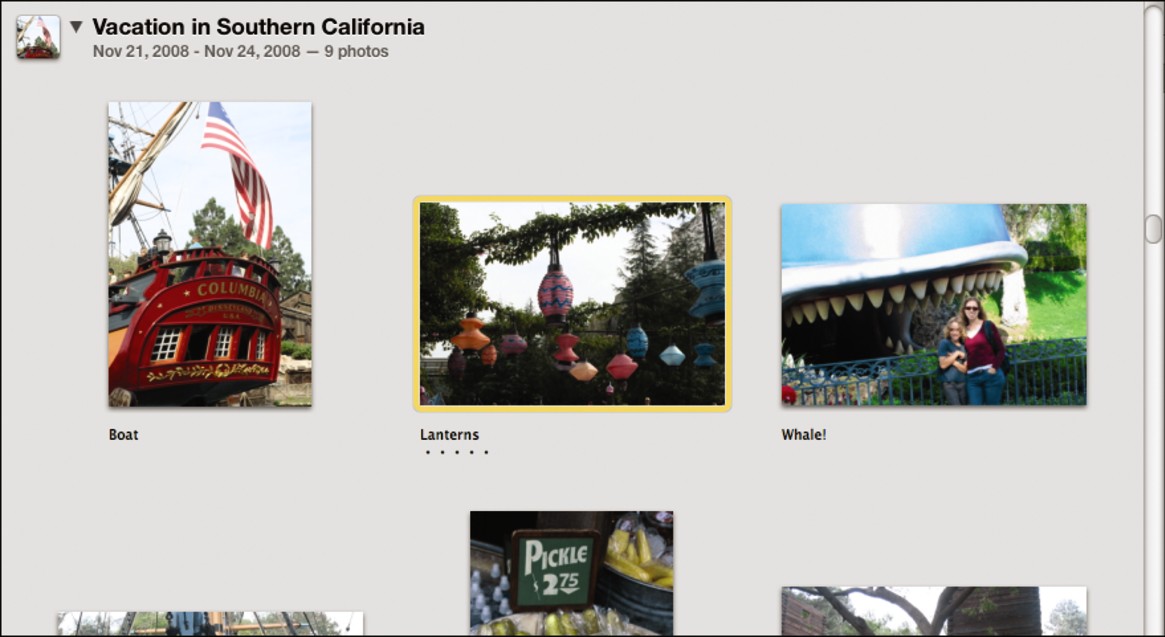
iPhoto unhides the photo.
![]()
How do I display photo counts in the source list?
You can make iPhoto display counts next to the items in the source list in the preferences. This helps you keep track of where the most photos are organized in your library, even if the photos are hidden.
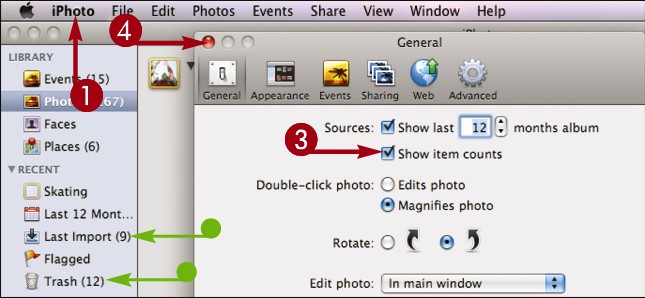
Click iPhoto.
Click Preferences.
The Preferences dialog opens.
Click Show item counts ( changes to ).
• Item counts are displayed.
Click to close the dialog.
Delete a Photo

You can delete a photo when you are sure you do not need it. Deleting is done in two steps. First the photo is moved to the iPhoto trash, where it can be recovered. Then the trash is emptied, which removes the photo from the library.
If you originally imported a photo from another location on your computer, deleting the photo from iPhoto does not delete the photo from its other location.
Delete a Photo
Move a Photo to the Trash
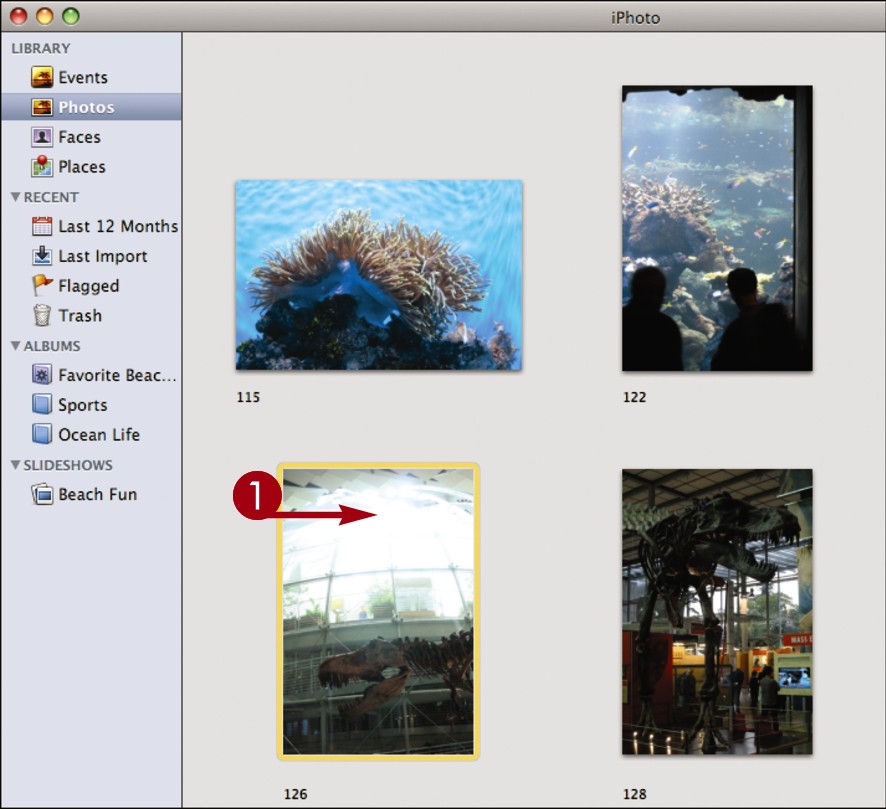
Click to select the photo to delete.
Press  .
.
iPhoto moves the photo to the trash.
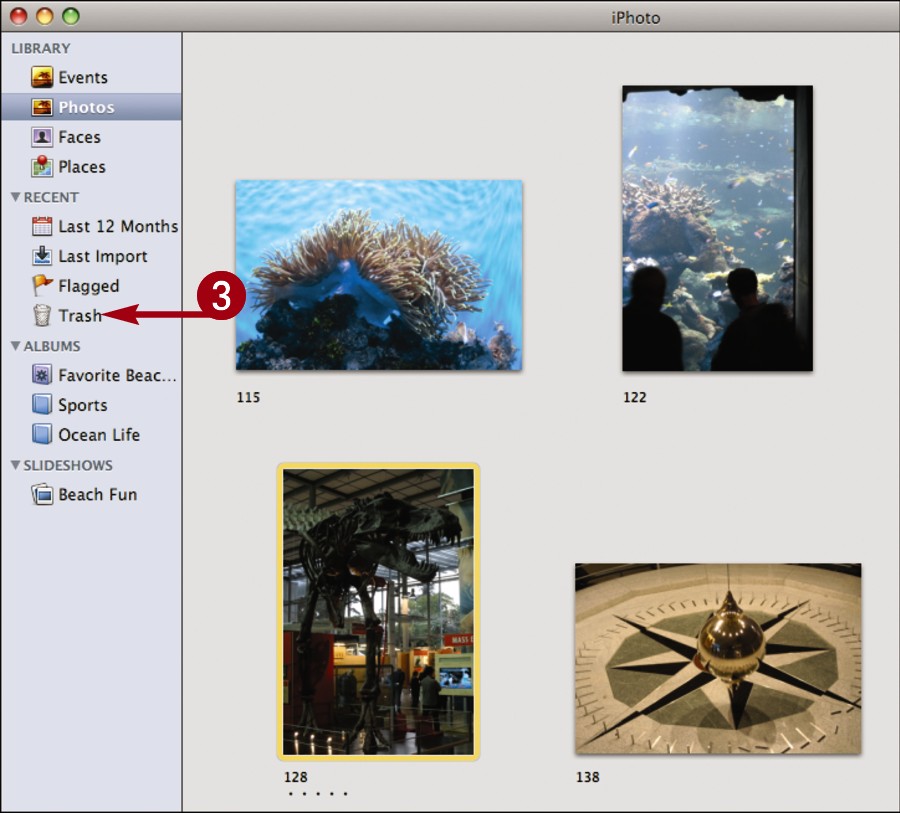
Click Trash to view photos in the trash.
• To recover a photo, select it, click Photos, and then click Restore to Photo Library.
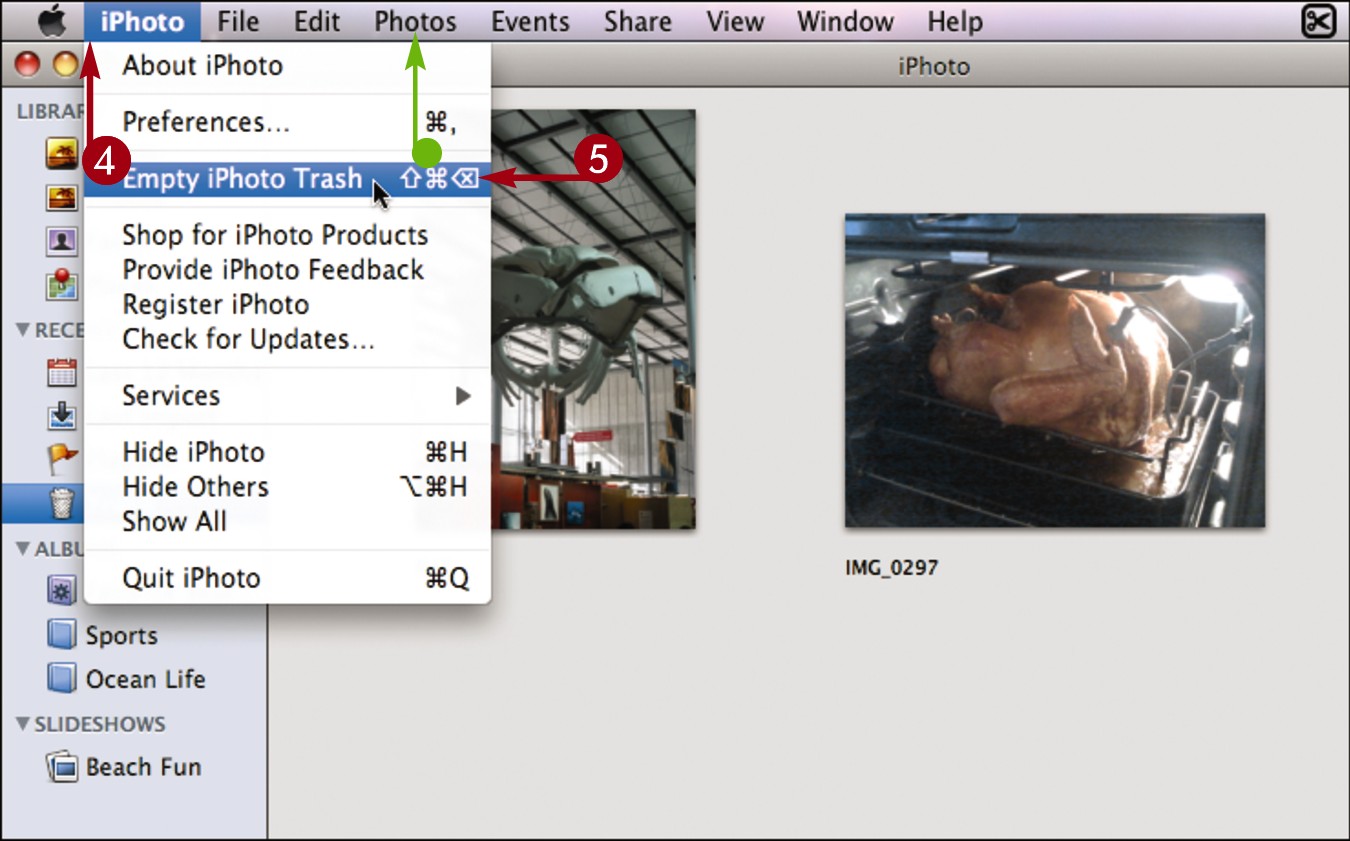
Empty the Trash
Click iPhoto.
Click Empty iPhoto Trash.
iPhoto prompts you to confirm the deletion.
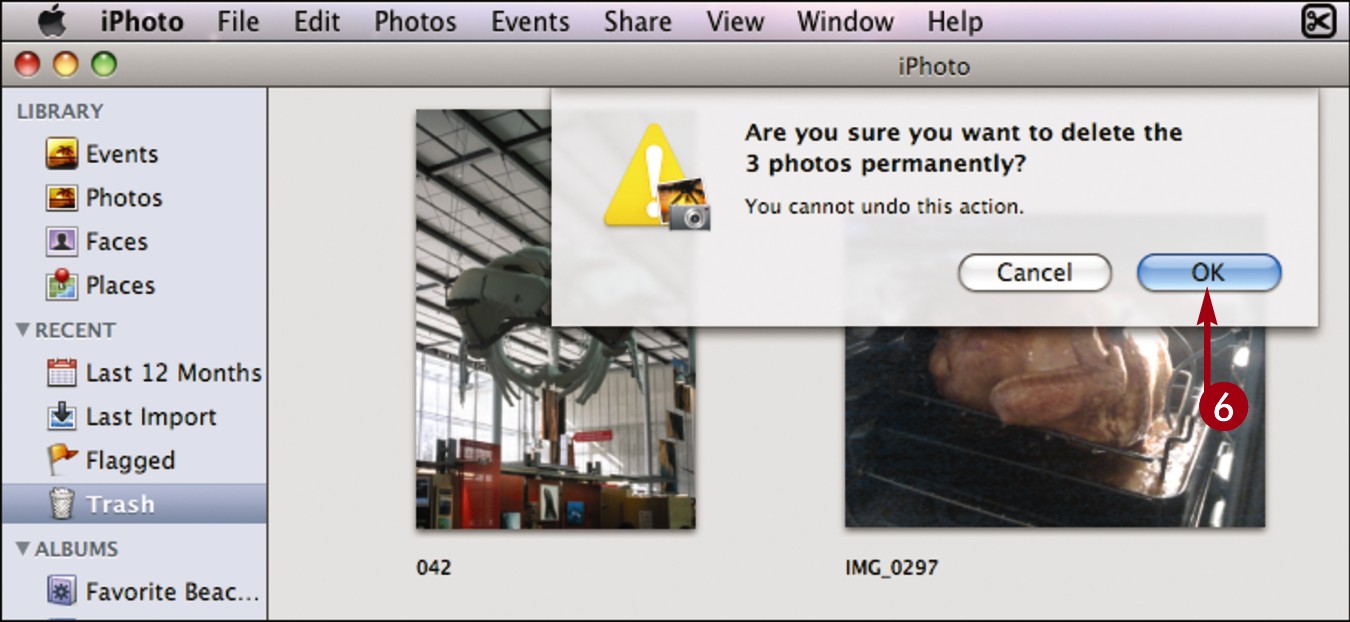
Click OK to delete the photos in the trash.
![]()
How do I delete an album, book, calendar, card, or slideshow?
You can delete albums and keepsake projects listed in the source list by selecting them and then pressing . iPhoto displays a dialog letting you confirm the deletion. Once these items are deleted they cannot be retrieved.

How do I delete an event?
Click Events to display the event thumbnails and then select an event. Select Photos and then Move to Trash. iPhoto deletes the event and moves the photos to the trash.
