Chapter 14: Sharing Music
Save a Song to iTunes
You can save a song you create in GarageBand to iTunes. iTunes lets you manage music and other media on your Mac. From iTunes, you can play the song, transfer it to an iPod or iPhone, or burn it to a CD-ROM disc.
Save a Song to iTunes
 Open the GarageBand project you want to save.
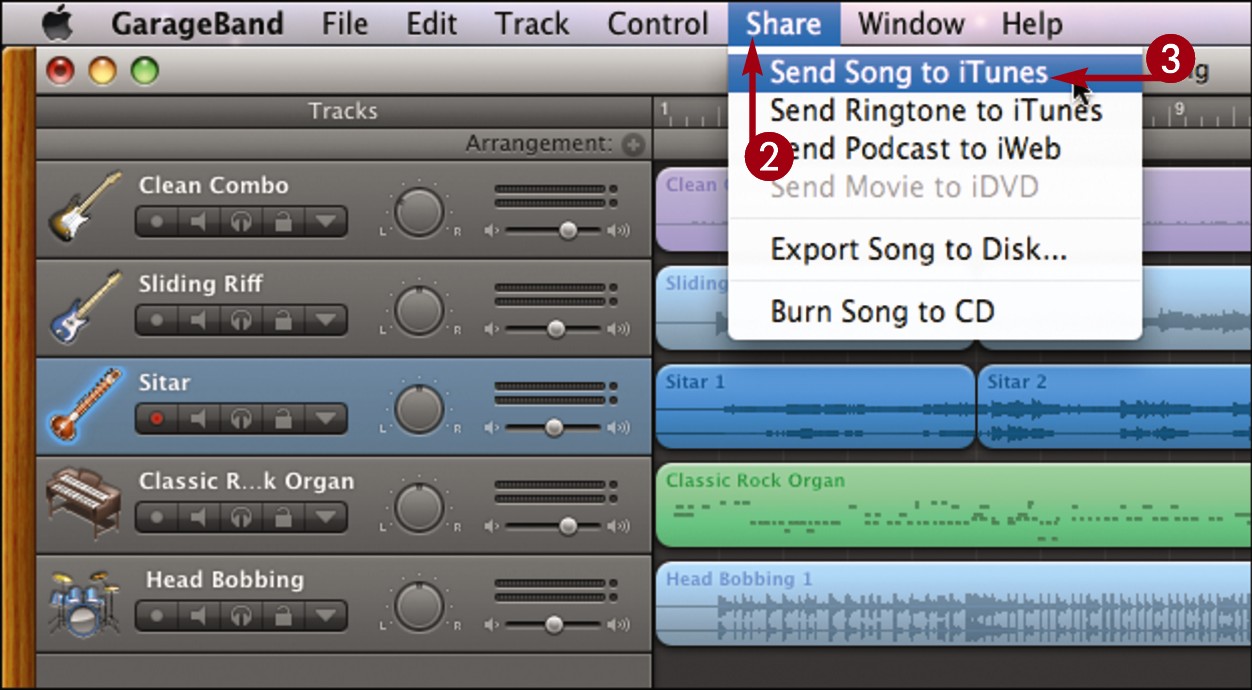
 Click Share.
 Click Send Song to iTunes.
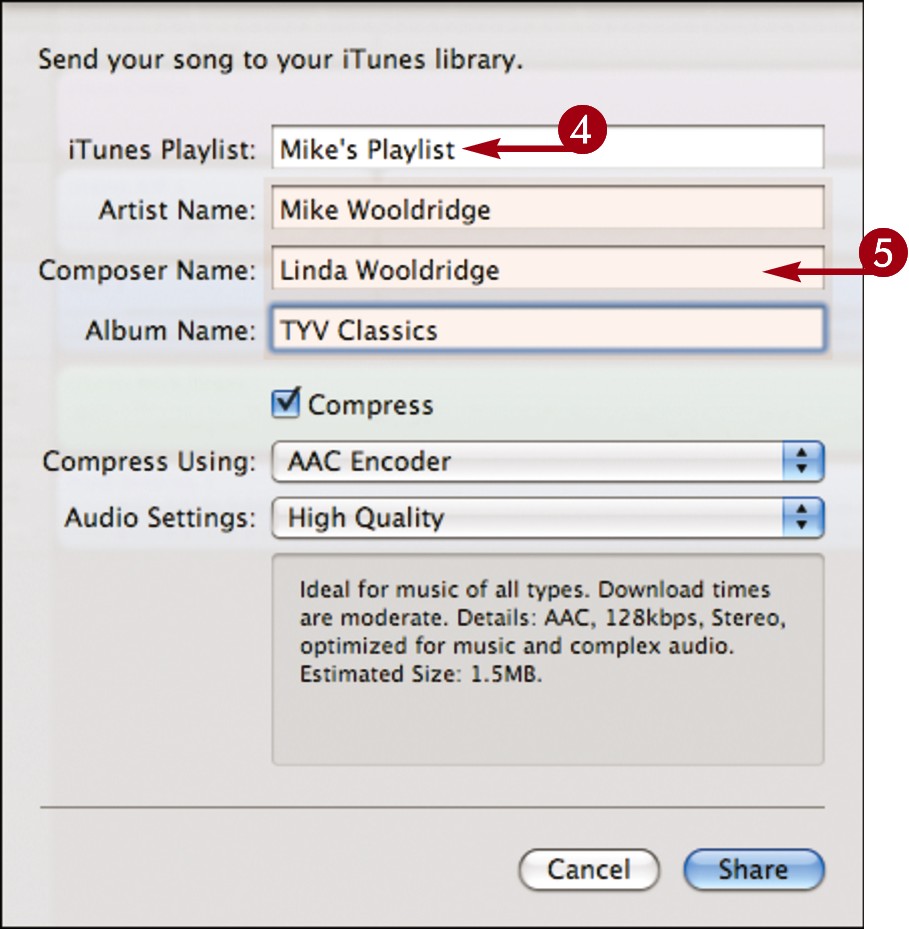
 Type a playlist for the song.
 Type the artist, composer, and album information.
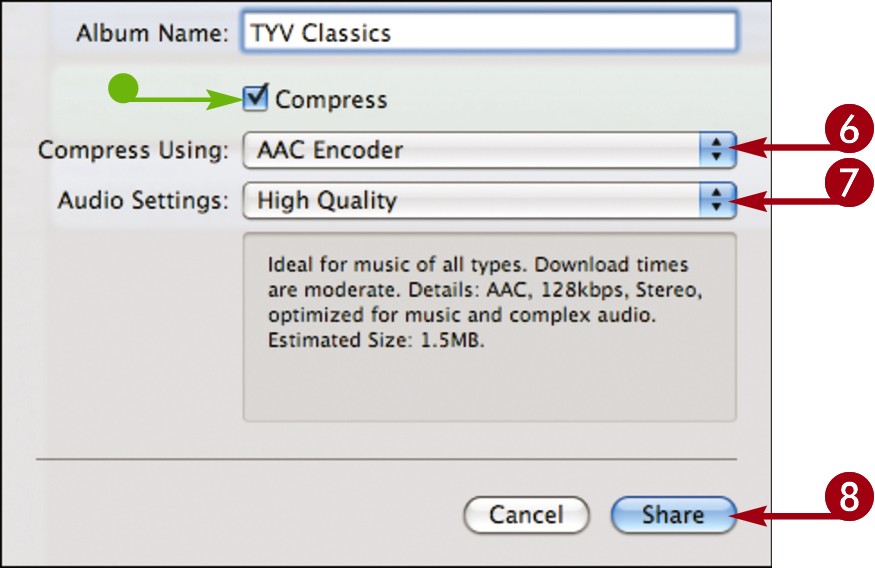
 Select a compression scheme.
The AAC encoder saves files in the M4A format and offers better sound quality and smaller file size.
The MP3 encoder saves files in the MP3 format, which is a more widely supported audio standard.
 Select the audio quality.
Higher quality settings result in larger file sizes.
• You can click here to turn off compression ( changes to
  ). GarageBand saves the file in AIFF format.
 Click Share.
GarageBand processes the song and exports it to iTunes.
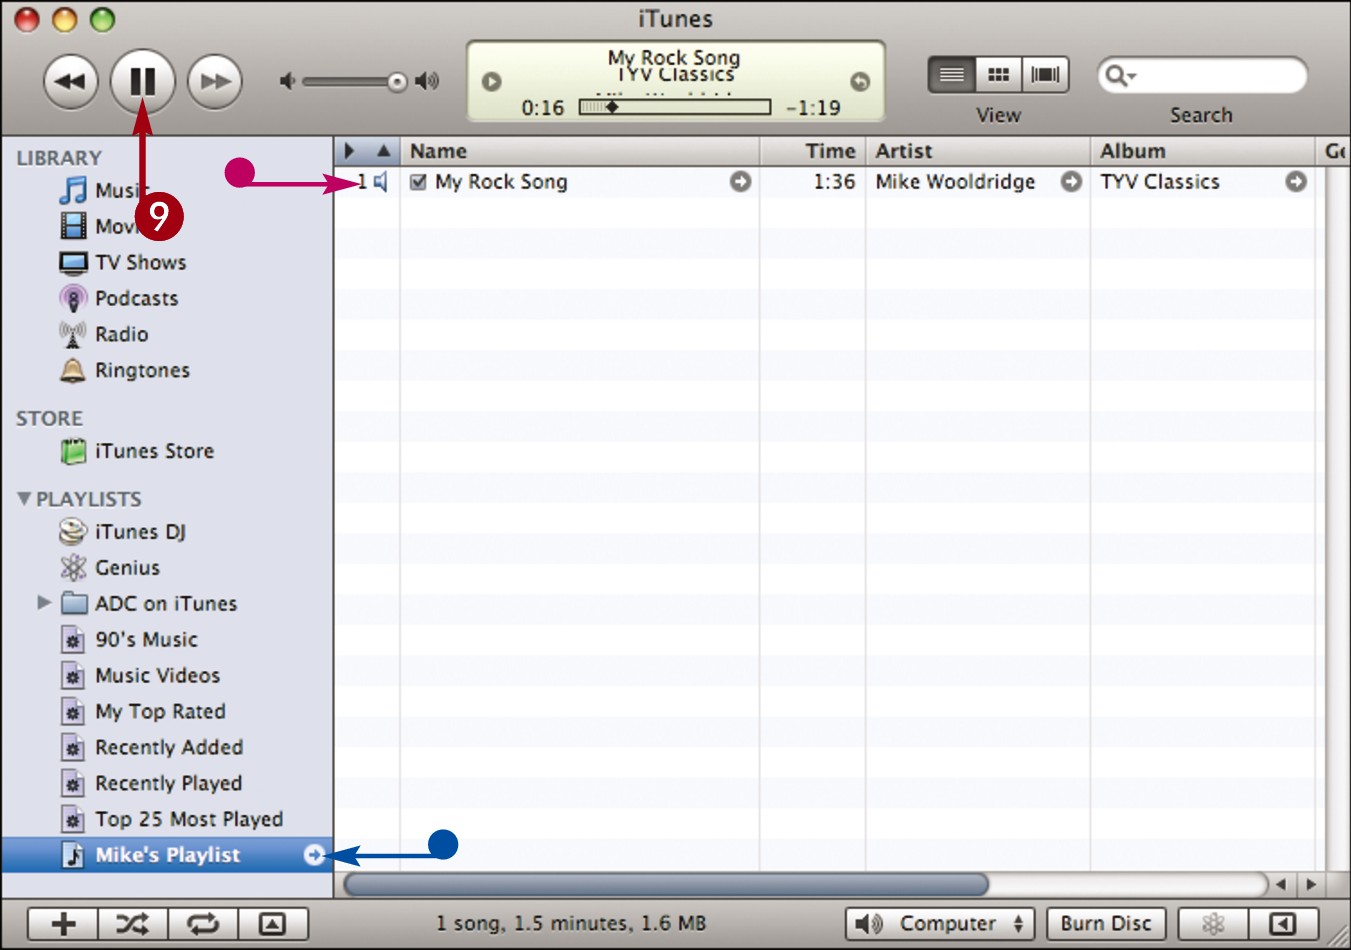
• iTunes opens and plays the song.
• Your playlist is selected.
 Click here to stop playing the song.
![]()
How do I set my information defaults for exports to iTunes?
You can set defaults for artist, composer, and other information in the GarageBand preferences.
Click GarageBand and then Preferences.
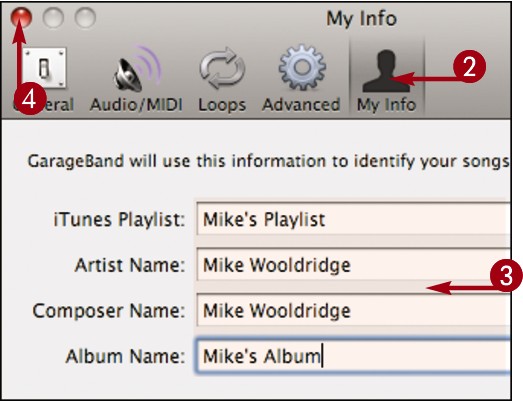
In the Preferences window, click My Info.
Type your default information.
Click  to close the window.
GarageBand uses this information when exporting songs and podcasts to iTunes.
Export a Song to a File

You can export your song to a file on your computer. From there, you can use the file in another application, upload it to the Web with an FTP client, or burn the file to CD or DVD disc for backup.
Export a Song to a File
Open the GarageBand project you want to export.

Click Share.
Click Export Song to Disk.
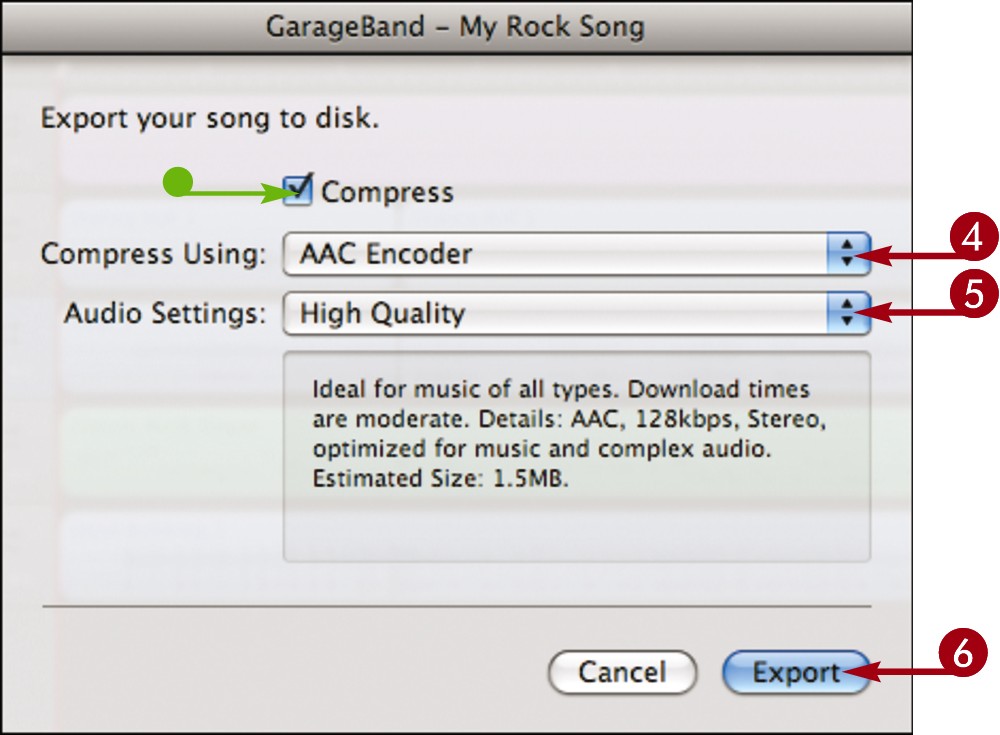
Select a compression scheme.
The AAC encoder saves files in the M4A format and offers better sound quality and smaller file size.
The MP3 encoder saves files in the MP3 format, which is a more widely supported audio standard.
Select the audio quality.
Higher quality settings result in larger file sizes.
• You can click here to turn off compression ( changes to ). GarageBand saves the file in AIFF format.
Click Export.

Type a song name.
Select where to save the song on your computer.
Click Save.
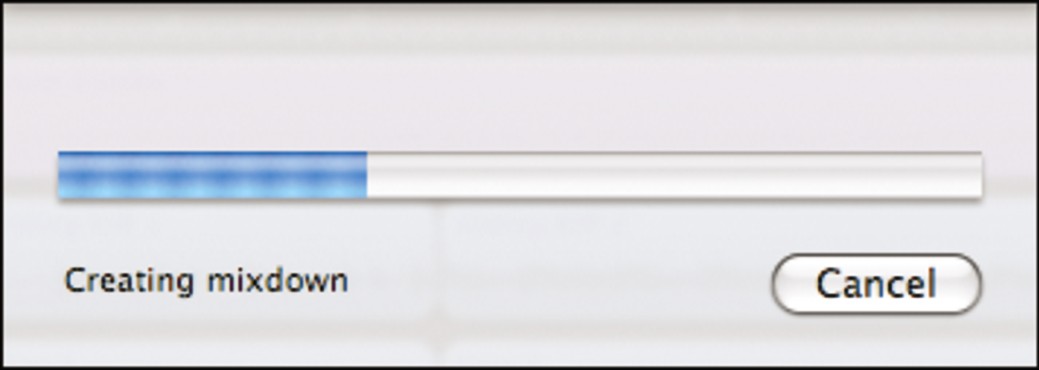
GarageBand saves the song.
![]()
How do I save or share just a segment of a song?
You can use the cycle region to define a part of the song that you want to save or share.
Click  to display the cycle region.

Click and drag to define the segment you want to save or share.
You can click and drag in the middle to move the region.
You can click and drag at an edge to change the size of the region.
Click Share and then Export Song to Disk.
Note: To save the segment to iTunes, click Share and then Send Song to iTunes.
Create a Ringtone for an iPhone
You can select a part of your GarageBand song to use as a ringtone and then export it to iTunes. From iTunes, you can transfer the ringtone to your iPhone. Ringtones need to be 40 seconds or less. You can use the cycle region to define the part of your song to use.
Create a Ringtone for an iPhone
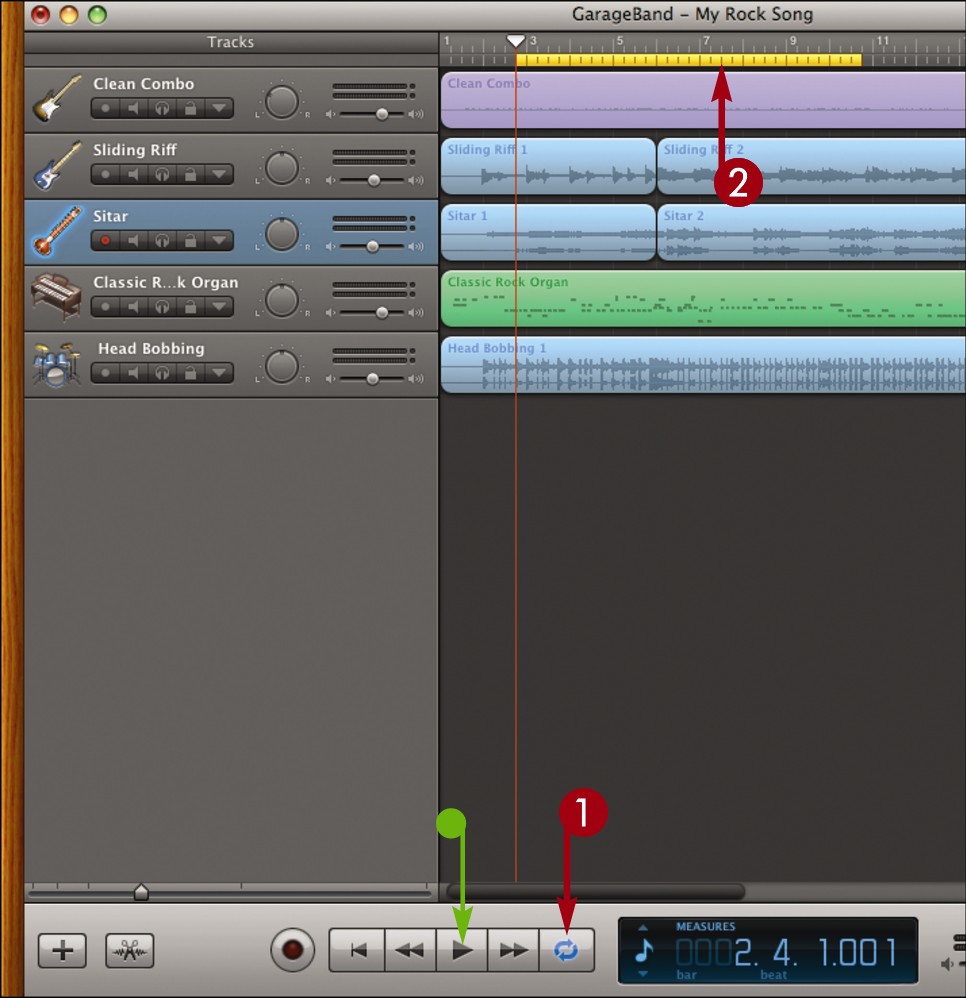
Click to display the cycle region.
Click and drag to define the segment you want to use as the ringtone.
You can click and drag in the middle to move the region.
You can click and drag at an edge to change the size of the region.
• You can click the Play button ( ) to preview the segment.
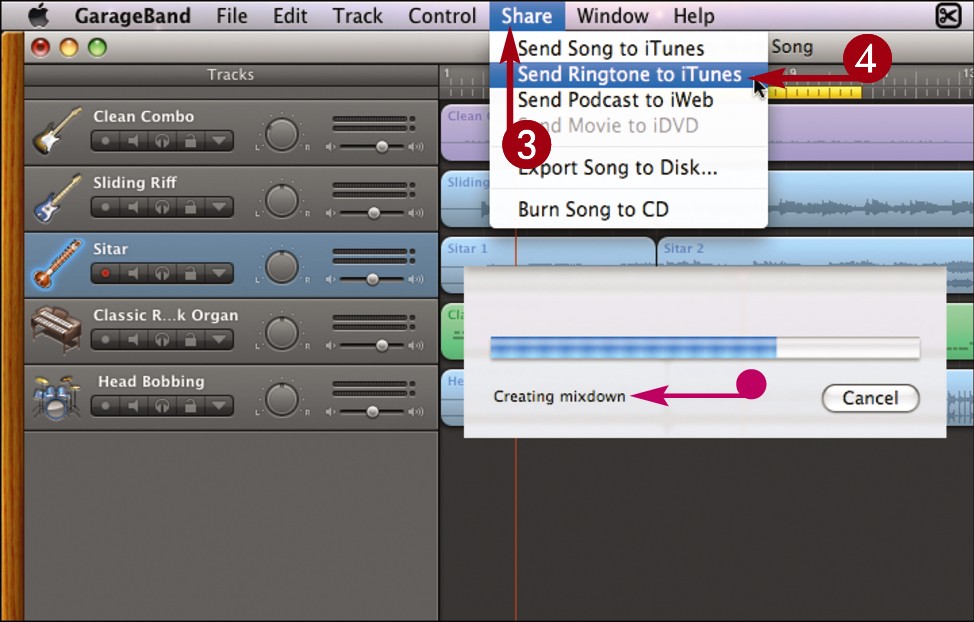
Click Share.
Click Send Ringtone to iTunes.
• GarageBand optimizes the segment as a ringtone and exports it to iTunes.
iTunes opens and plays the new ringtone.
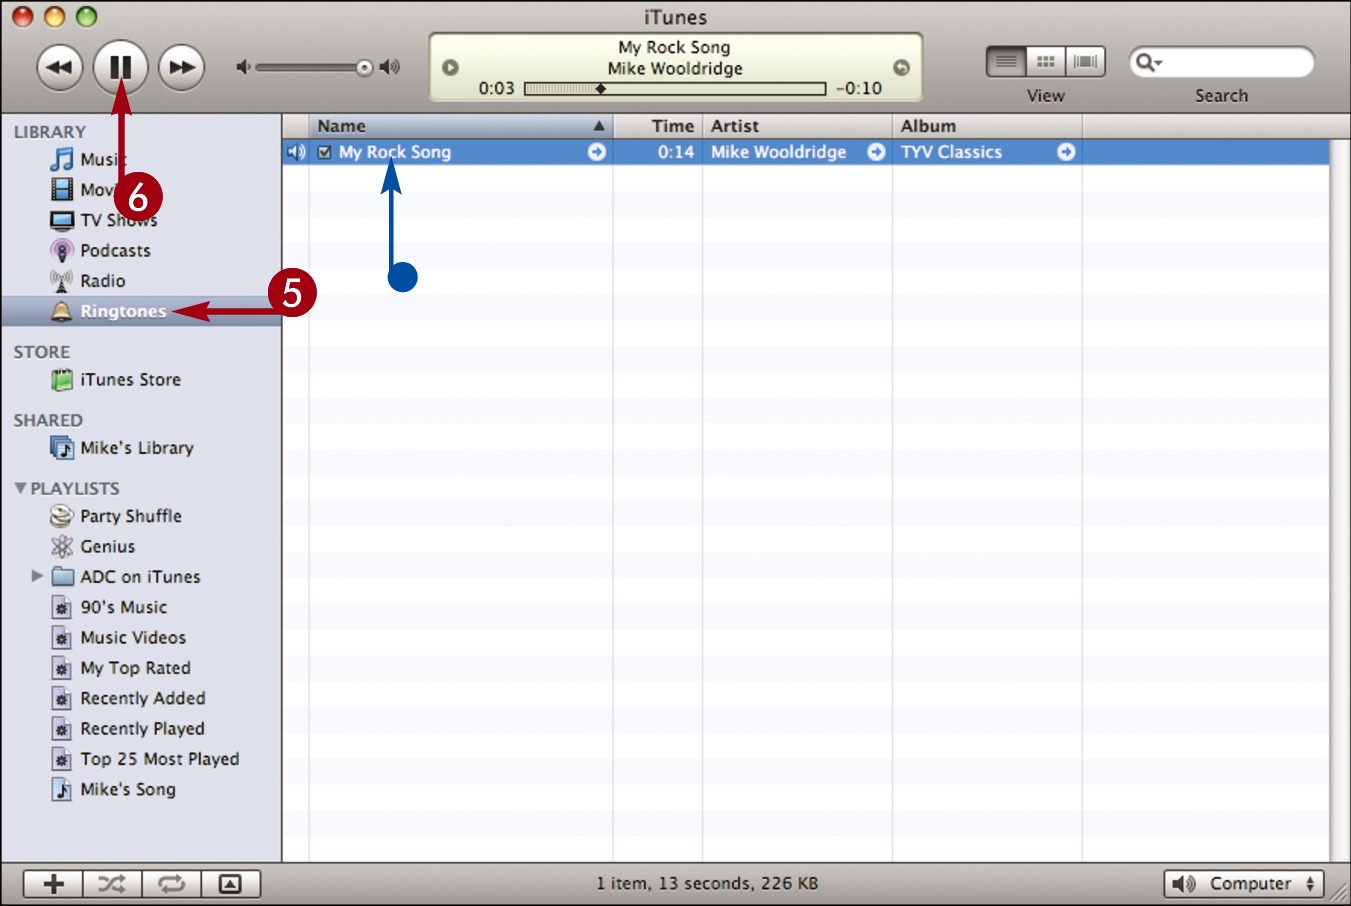
Click Ringtones.
• iTunes displays your ringtone.
Click here to stop playing the ringtone.
![]()
How do I add ringtones to my iPhone in iTunes?
Follow these steps:
Connect your iPhone to your computer and open iTunes.
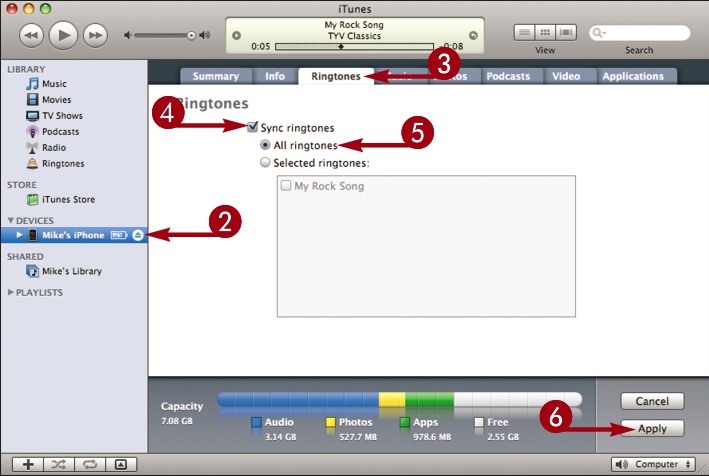
In iTunes, click your iPhone in the Devices section.
Click Ringtones.
Click Sync ringtones ( changes to ).
Click All ringtones ( changes to
  ).
).
Click Apply.
When you next sync your iPhone, iTunes adds ringtones in the iTunes library to your phone. For more about ringtones and syncing, see the iTunes documentation.
Burn a Project to CD
You can burn a music CD of your GarageBand project to create a disc that you can play in a CD player. Most newer Mac computers come with optical drives that can burn CD discs.
Burn a Project to CD
Open the GarageBand project you want to burn to CD.
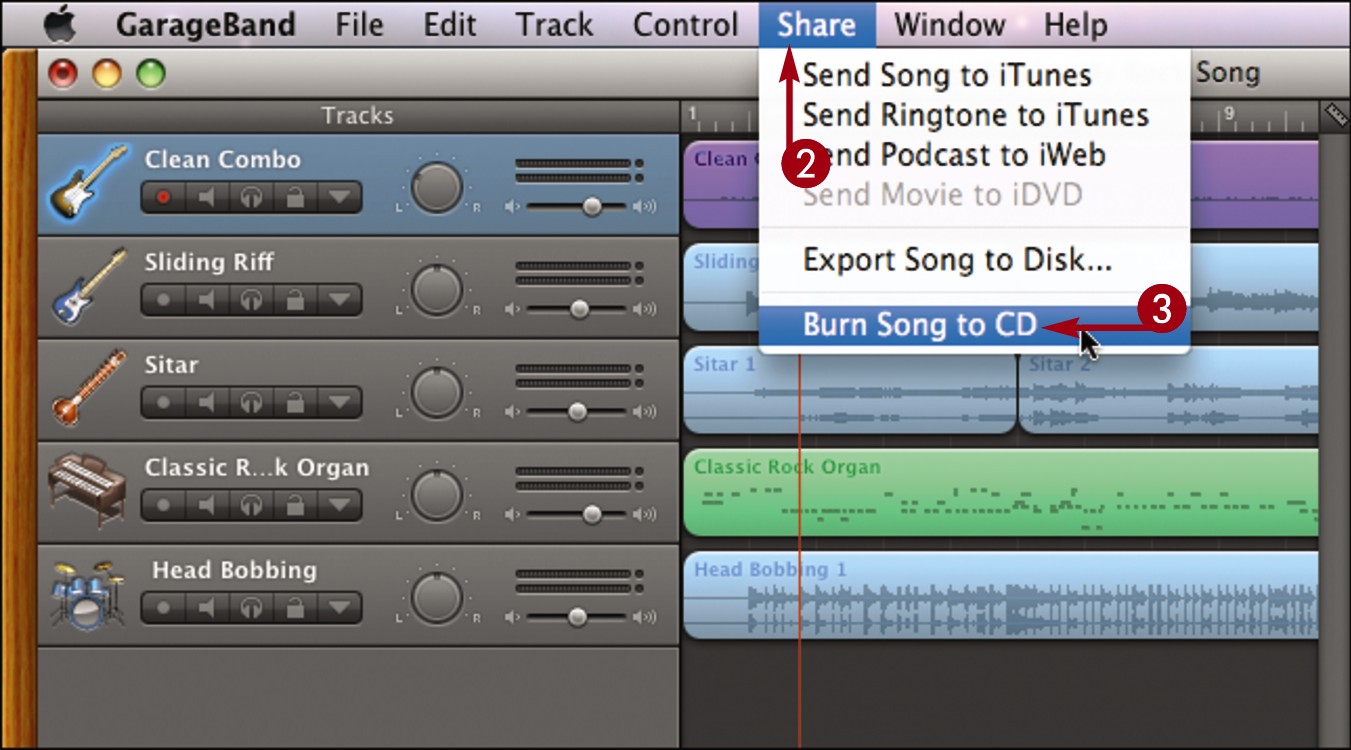
Click Share.
Click Burn Song to CD.
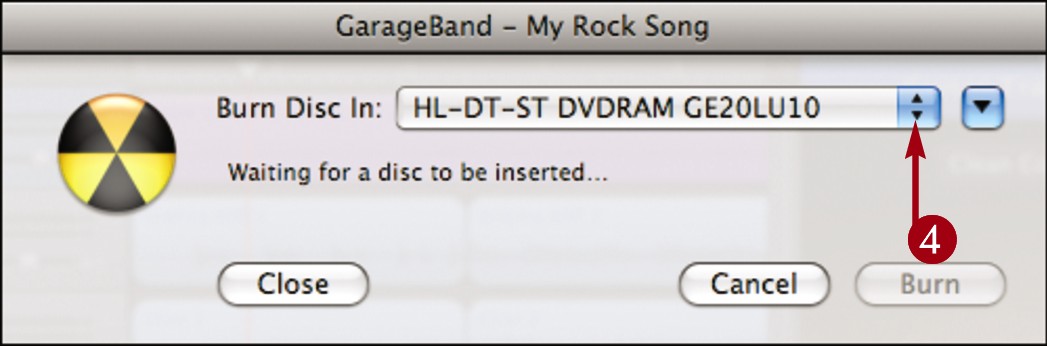
Select the optical drive to burn with.
Insert a writable CD into the drive.

Click Burn.
GarageBand burns the project to CD.
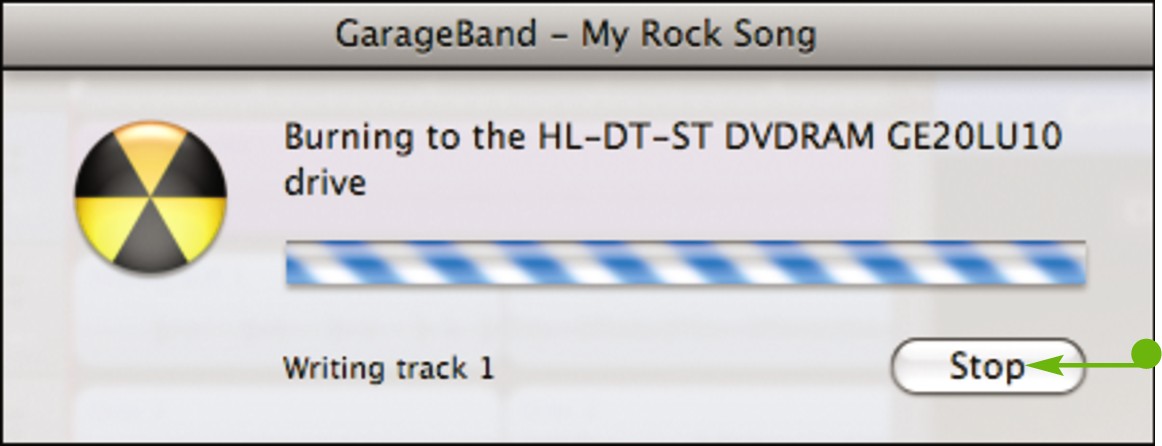
• You can click Stop to abort the burn.
![]()
How do I save, export, or burn specific tracks from my song?
You can click the Mute or Solo buttons to select the tracks to be saved.
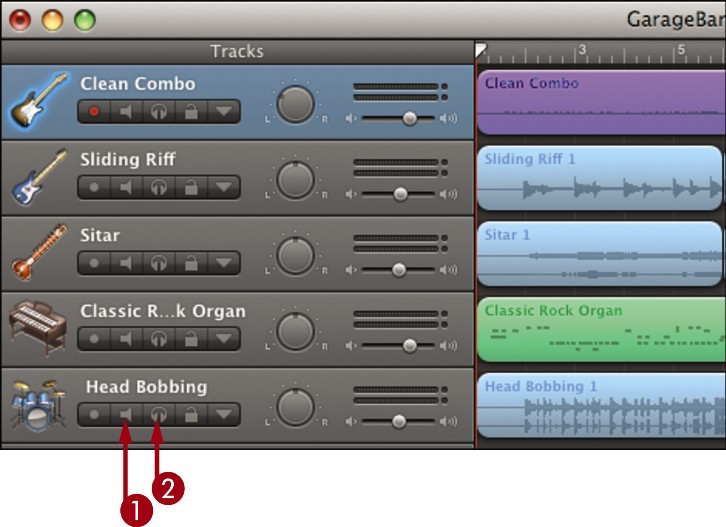
Click the Mute button to turn off a track and not have it used ( changes to
  ).
).
Click the Solo button to turn off every track except the selected one ( changes to
  ).
).
Note: For more about muting and soloing tracks, see Chapter 12.
Save your project. You can save it to iTunes, export it to a file, or burn it to a CD. See the other tasks in this chapter for details.
Create a Podcast

You can create a podcast to share your voice and music with accompanying imagery over the Internet. GarageBand makes creating podcasts easy with its podcast template. You can put a podcast online using iWeb.
Create a Podcast
Create a podcast project
Click File and then click New.
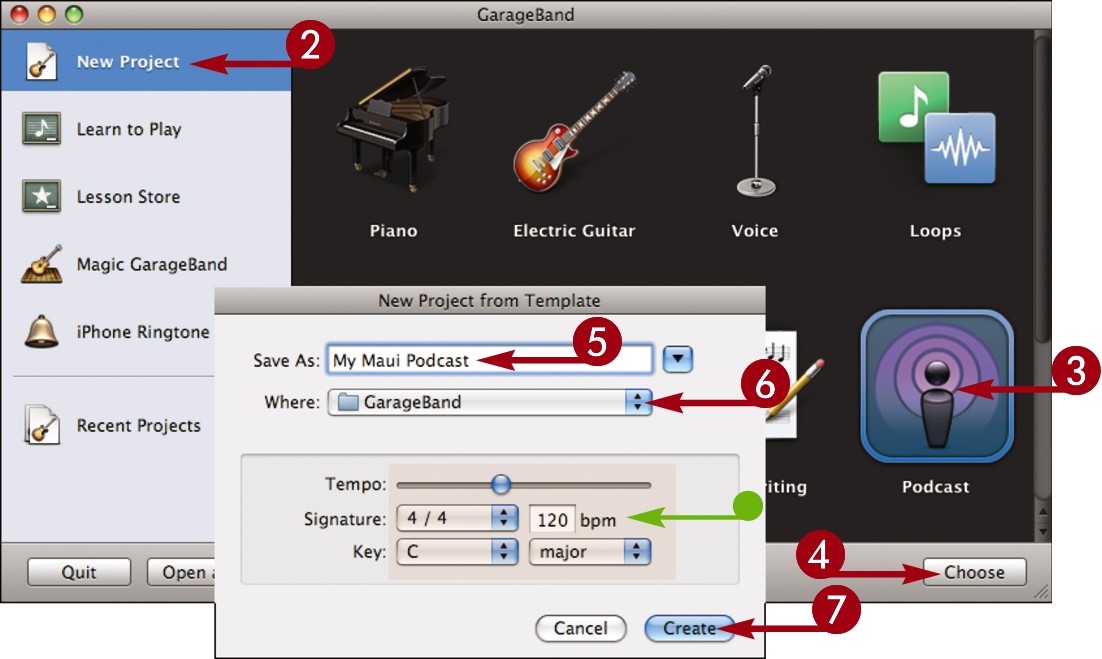
In the GarageBand window, click New Project.
Click Podcast.
Click Choose.
In the New Project from Template dialog, type a name for the project.
Select where to save the project.
• You can configure the tempo, signature, and key. See Chapter 12 for details.
Click Create.
GarageBand opens the podcast project template.
Record audio
GarageBand sets up male and female vocal tracks by default.
Connect a microphone to your computer. See Chapter 13 for details.
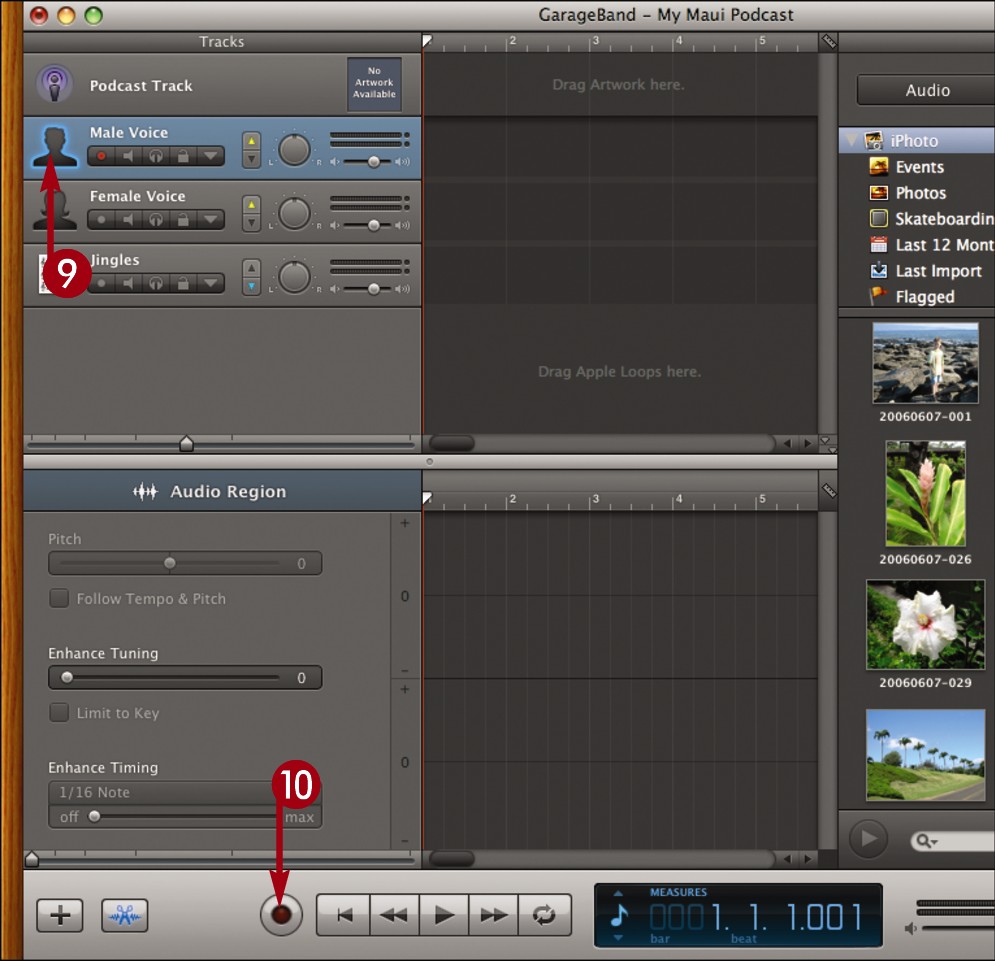
Click a vocal track to record.
 Click the Record button (
 ).
).
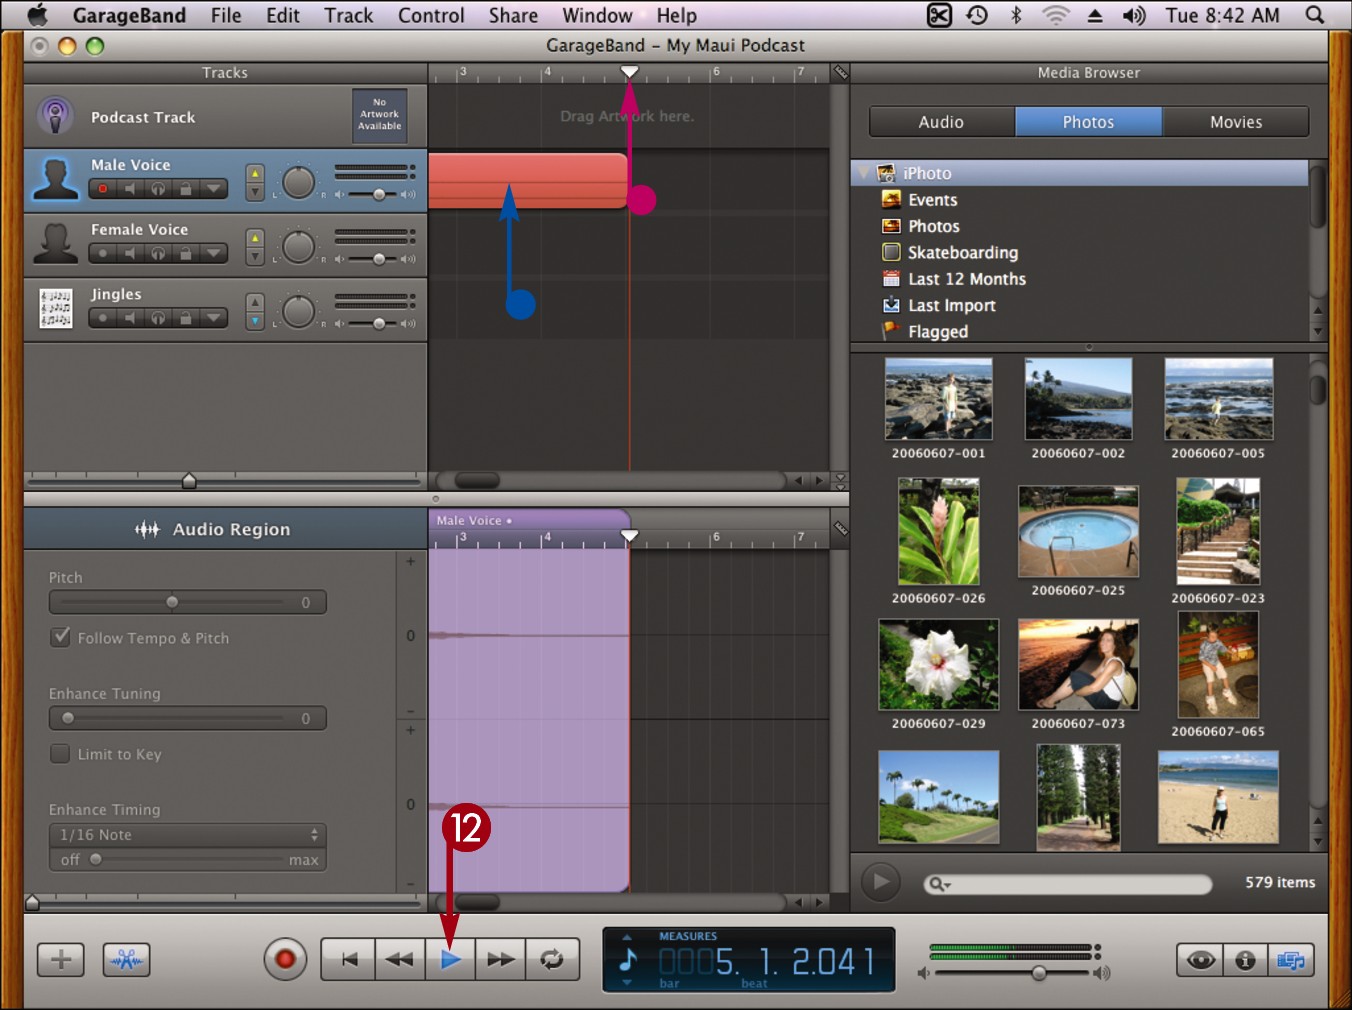
• GarageBand starts recording and the playhead moves across the timeline.
 Speak into the microphone to record audio for your podcast.
• A new region is created in the timeline.
 Click the Play button () when you are done recording.
![]()
How do I add music jingles to my podcast?
You can add jingles, or short snippets of music, to give your podcast a professional sound.
Click  to open the loop browser.

Click  to show loops for podcasts.
Click the Jingles category.
Click a keyword.
• GarageBand displays the loops.
Click and drag a loop to the Jingles track of the podcast.
GarageBand adds a jingle to play along with your other podcast recordings.
Create a Podcast (continued)

You can add artwork to complement the audio of your podcast episode using the Podcast Track. By arranging the artwork on the podcast timeline, you can make different imagery appear during different segments of the podcast.
Create a Podcast (continued)
GarageBand stops recording.
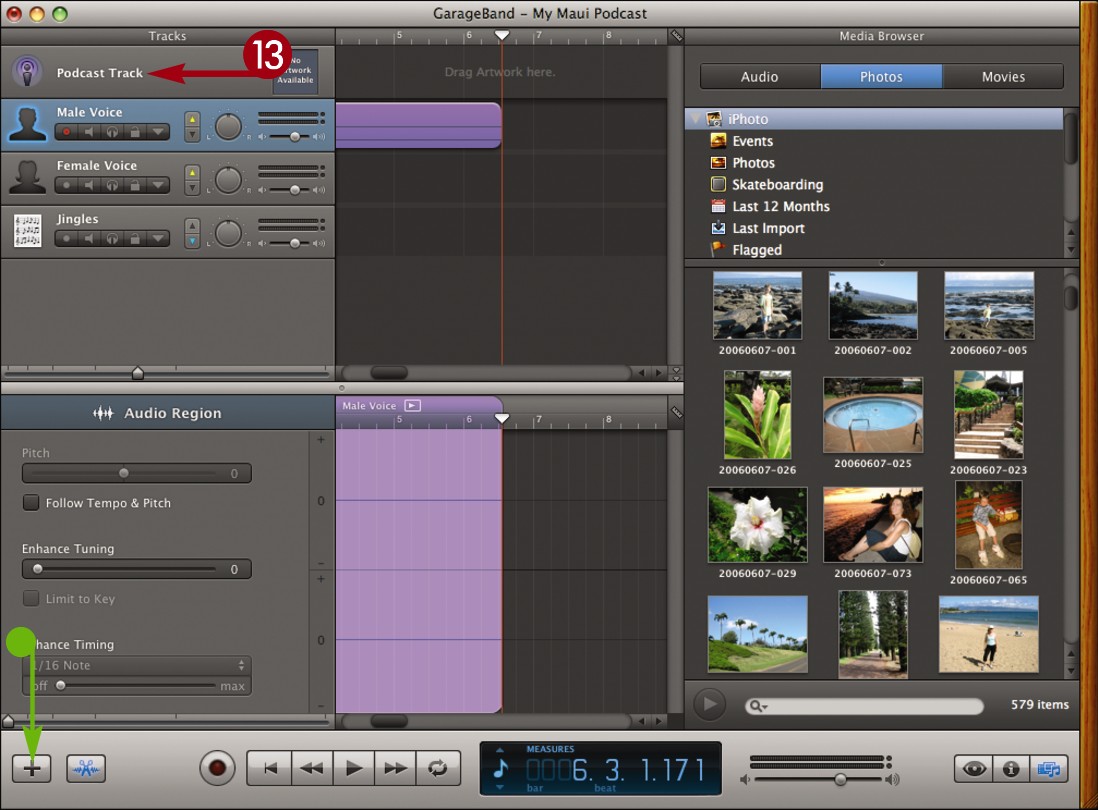
• You can click  to create additional tracks, including instrument tracks, for your podcast. See Chapter 13 for details.
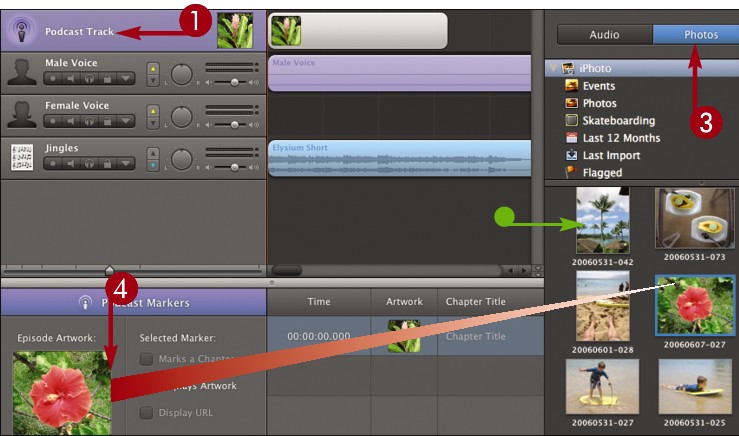
Add artwork
 Click Podcast Track.
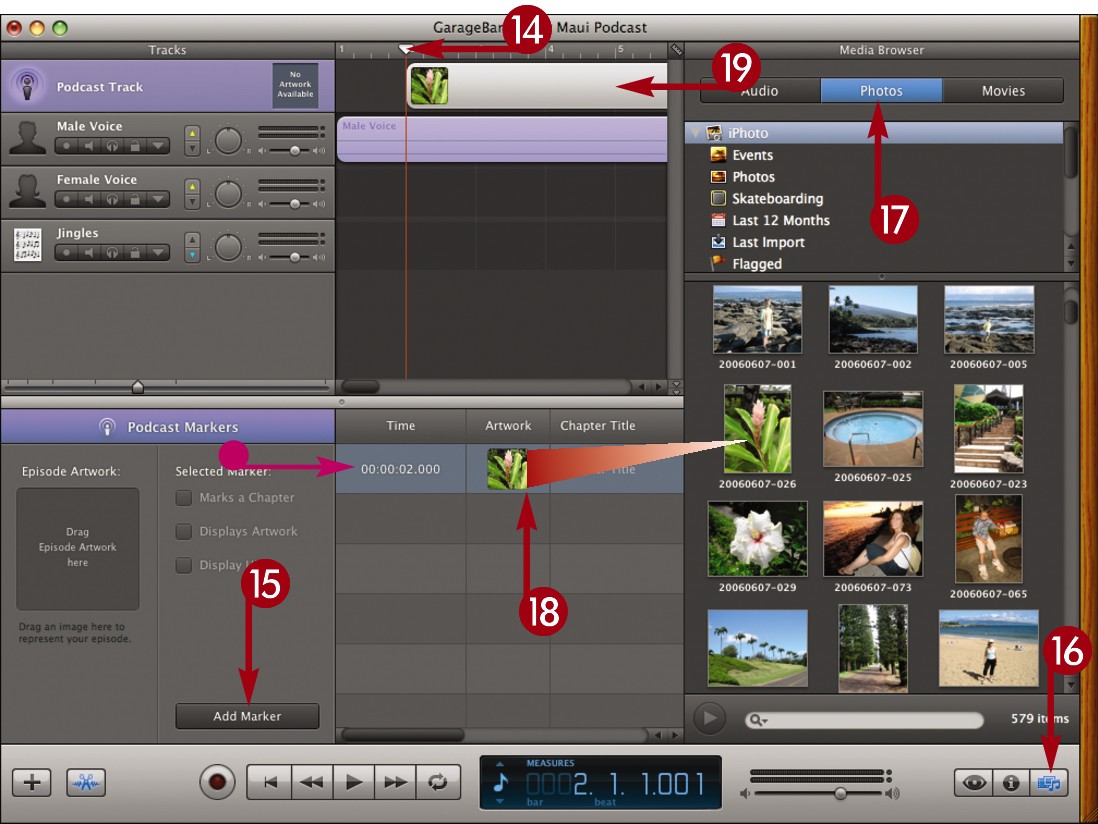
 Click and drag the playhead to the point in the song where you want to add artwork.
 Click Add Marker.
• GarageBand adds a marker region.
 If the media browser is hidden, click
  .
.
 Click Photos.
 Click and drag an image to the podcast markers list.
A thumbnail image appears in the Podcast Track.
 Click and drag the center of the thumbnail to adjust when the image appears; click and drag the right edge to adjust the display duration.
 You can repeat steps 17 and 18 to add more artwork to the podcast.
Preview the podcast
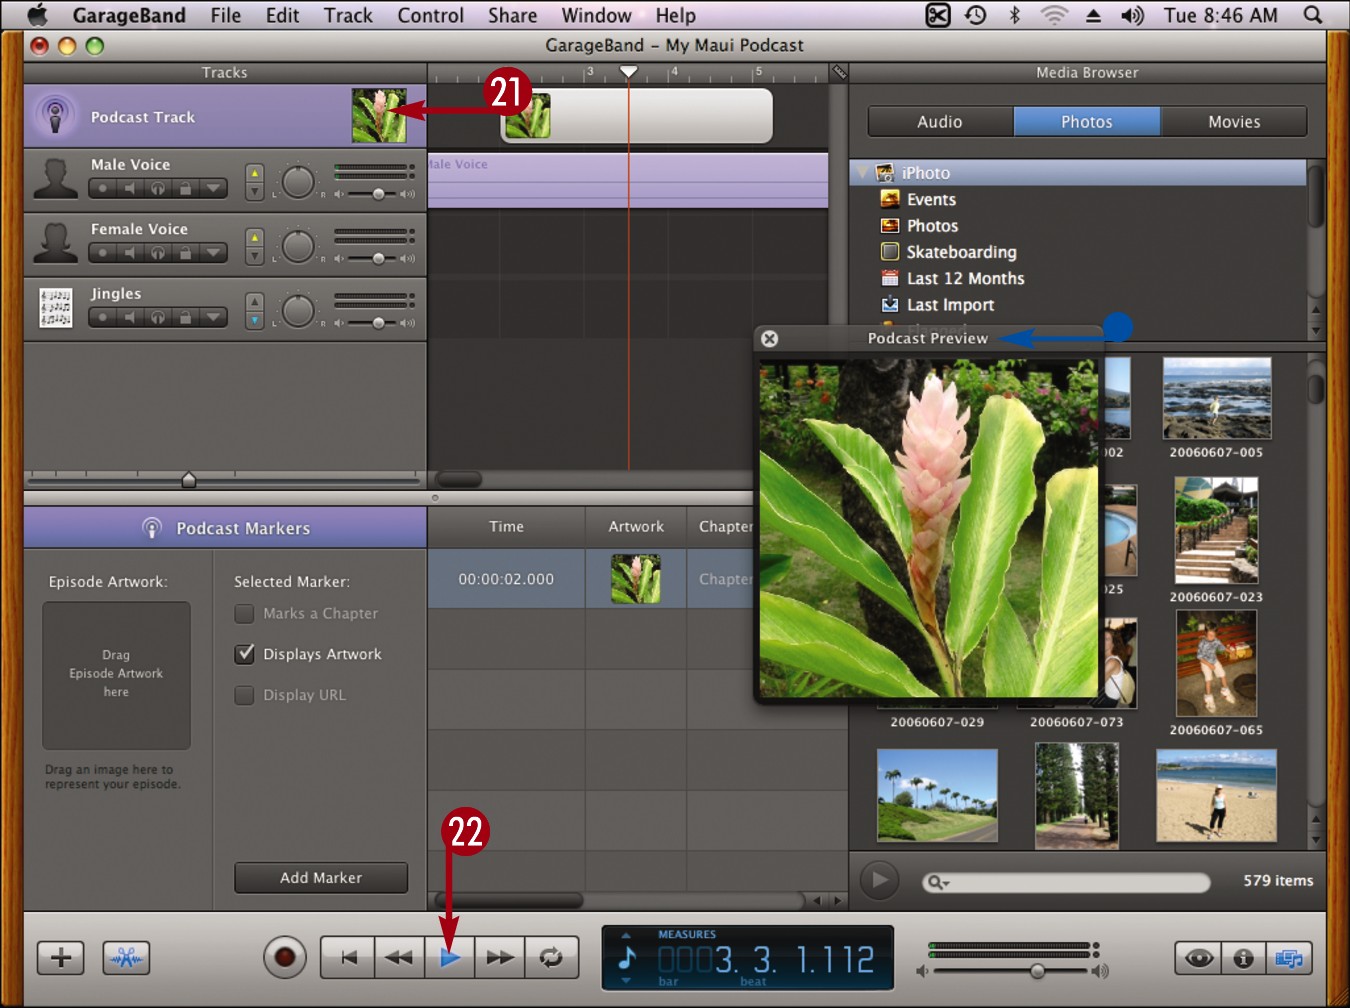
 Click the preview icon in the Podcast Track.
• The Podcast Preview window opens.
 Click the Play button ().
GarageBand previews the podcast.
![]()
How can I add artwork to represent my podcast episode when I publish it?
You can insert an image from the media browser to include representative artwork.
Click Podcast Track.
Click to show the media browser.
Click Photos.
• GarageBand displays images from the iPhoto library.
Click and drag an image to the Episode Artwork box.
GarageBand creates episode artwork for the podcast.
Add a Podcast to a Web Page

You can add a podcast created in GarageBand to a Web site in iWeb. After adding the podcast, you can publish it using the publishing features in iWeb. See Part V of this book for details.
Add a Podcast to a Web Page
Use the podcast project template to create a podcast.
Note: See “Create a Podcast” for details.
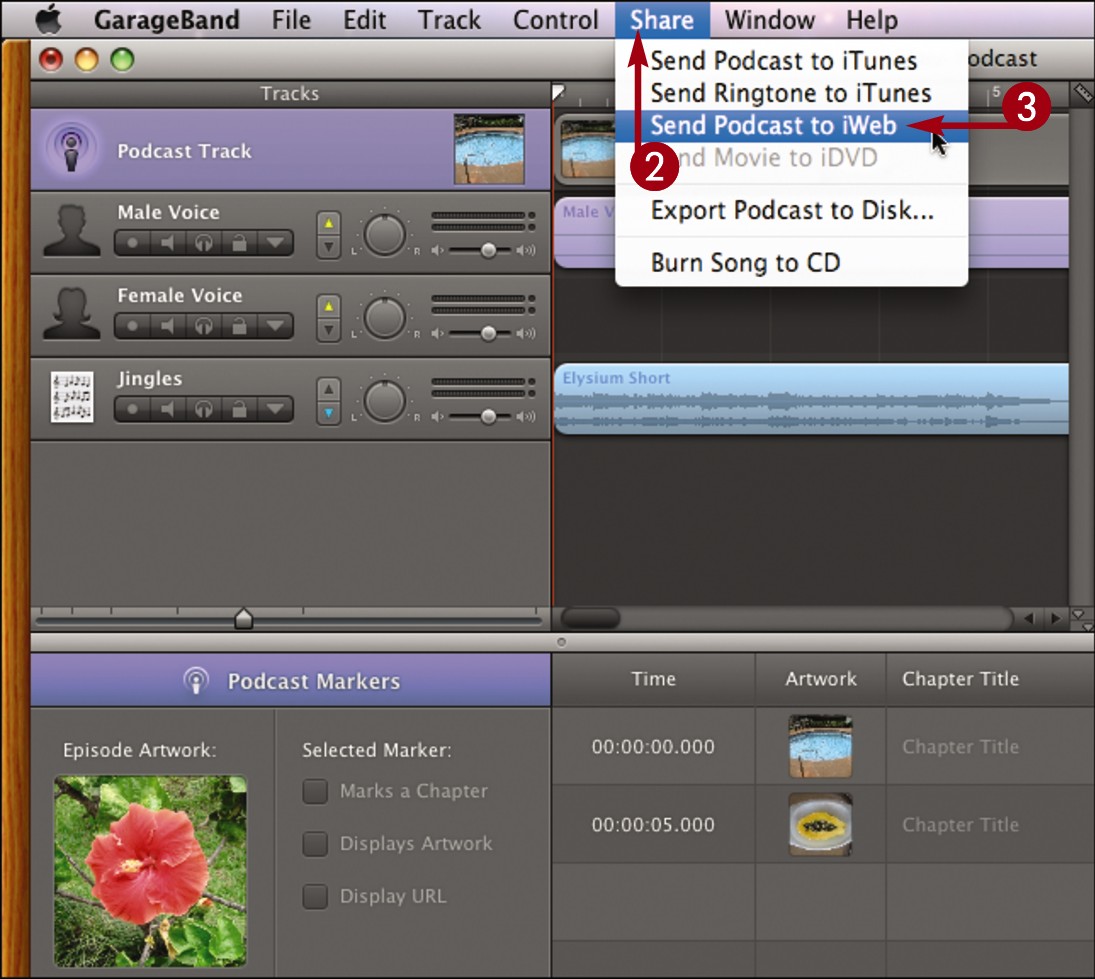
Click Share.
Click Send Podcast to iWeb.
GarageBand displays the export settings.
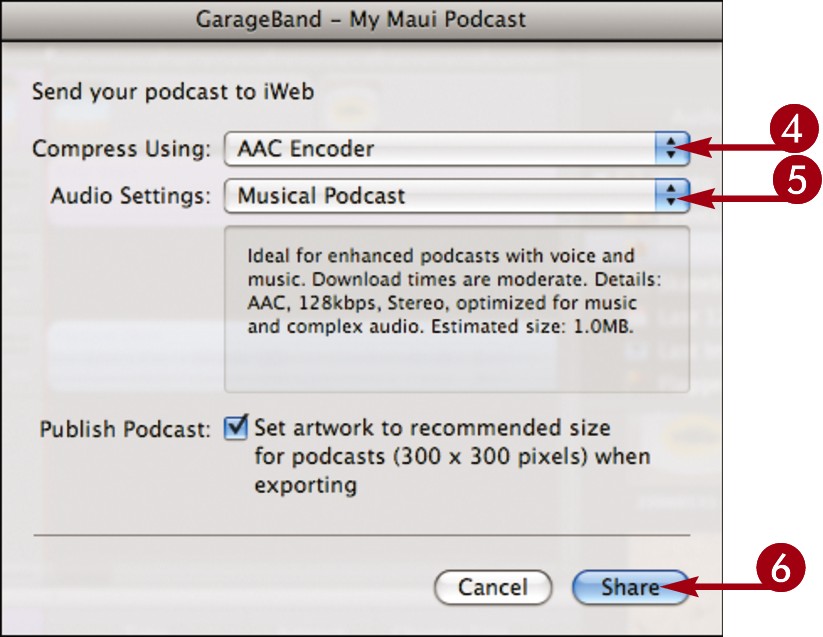
Select an encoding setting.
The AAC encoder saves files in the M4A format and offers better sound quality and smaller file size.
The MP3 encoder saves files in the MP3 format, which is a more widely supported audio standard.
Select an audio setting for your podcast.
Click Share.
GarageBand processes the podcast and iWeb opens.
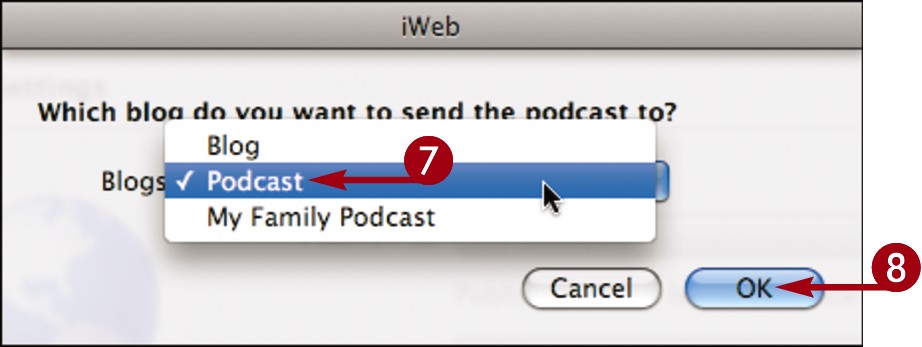
Select the page where you want the podcast to appear.
You can add a podcast to a podcast page or blog page on any of your iWeb sites.
Click OK.
iWeb adds the podcast to the Web page.
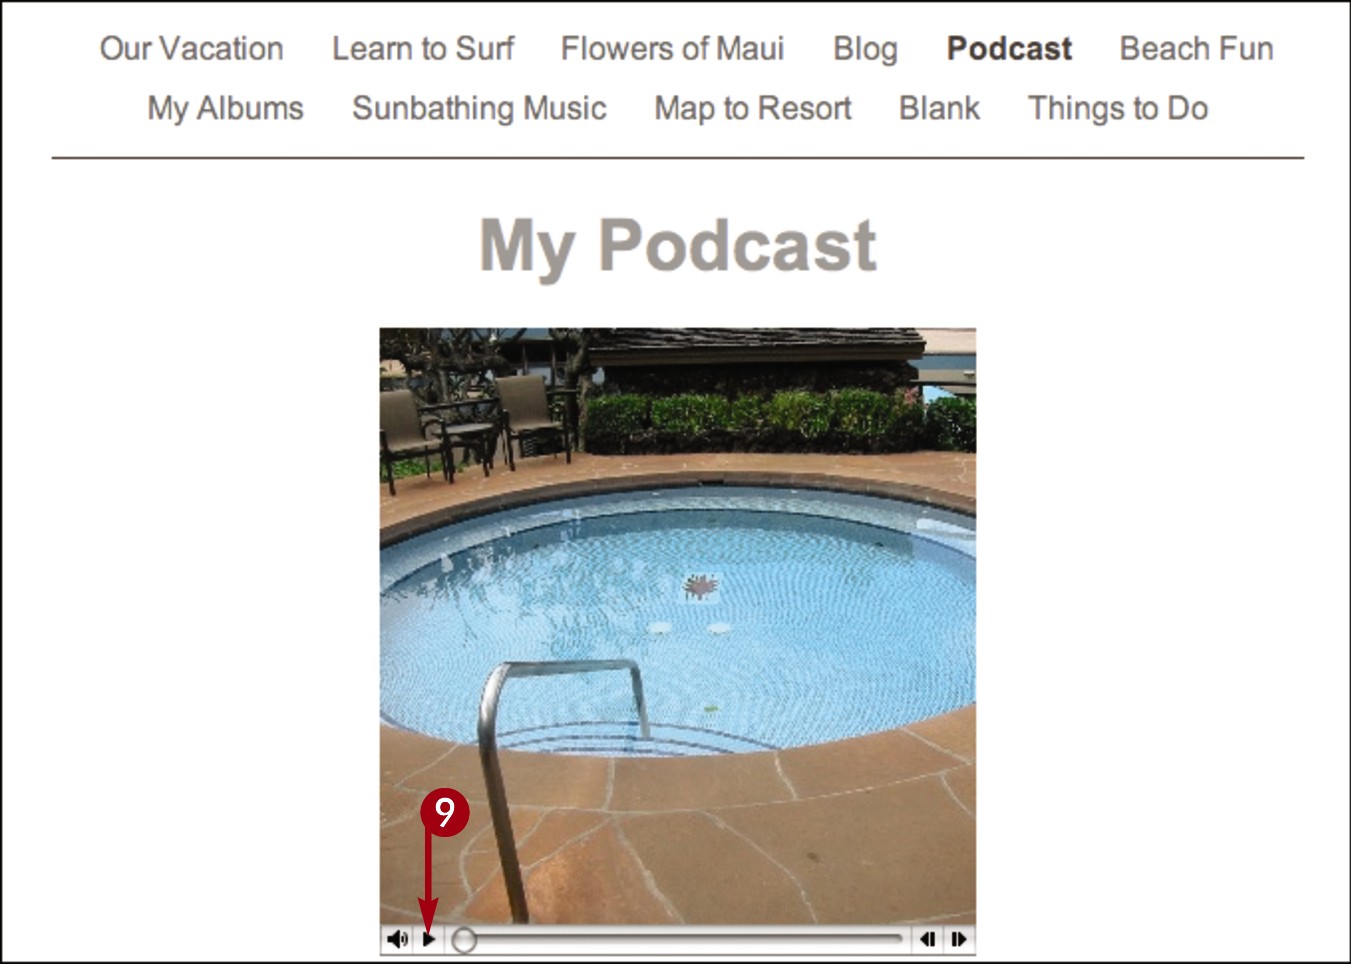
Click the play button to preview the podcast on the page.
Note: See Part V of this book for more about iWeb and podcasts.
![]()
How can I export a podcast as a file?
You can export a podcast as a file to view on your computer, share with others, or publish on the Web. Click Share and then Export Podcast to Disk. GarageBand lets you select a compression setting and audio setting, and then where to save the file on your computer.
How do I add a movie to a podcast?
You have the option of adding movie clips to your podcasts instead of still artwork. You can click Track and then Show Movie Track to display a track for adding movies. You can open the media browser and then click Movies to access content to add to the track.