Chapter 17: Editing Web Site Content
Add a Text Box

You can add a text box to your Web page to add paragraphs, headings, and lists. You can adjust the size and position of the text box to make it fit in with the rest of the content on your page.
Add a Text Box
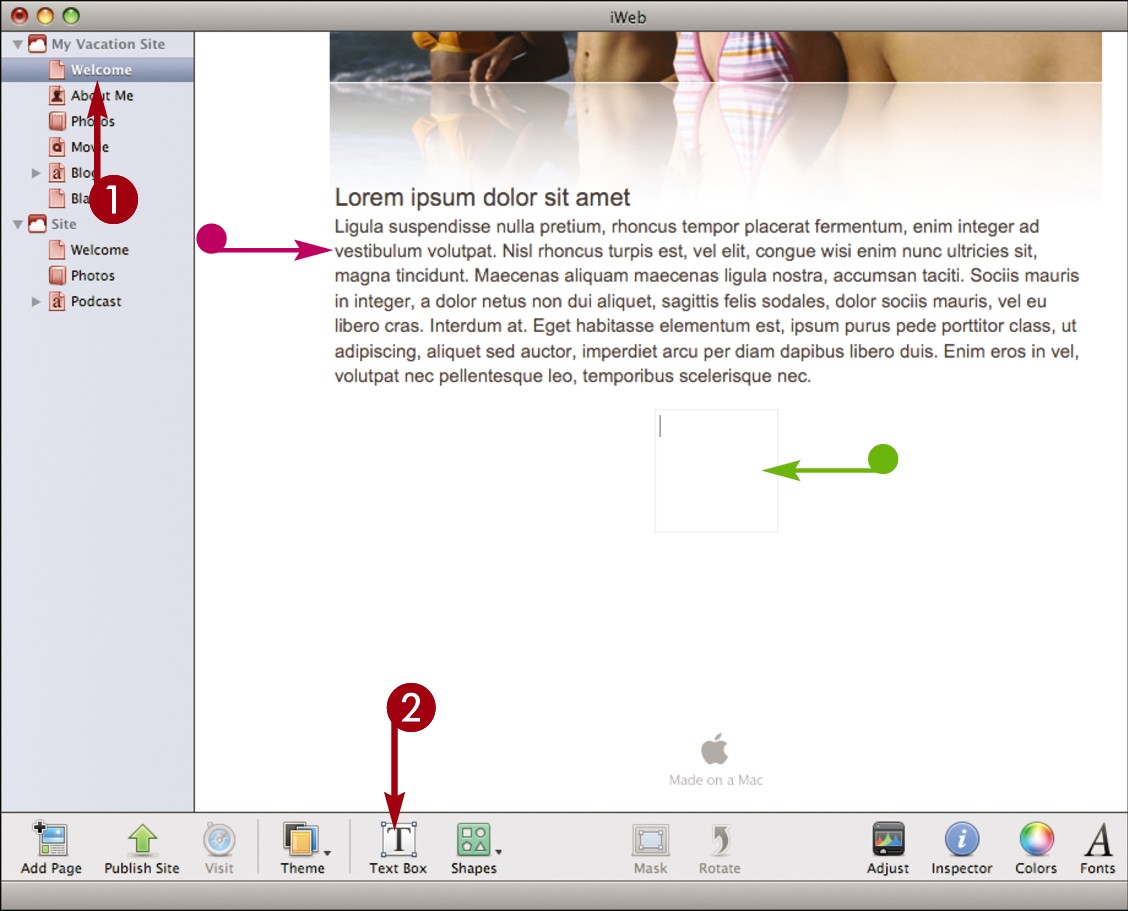
 Select the page to which you want to add text.
 Click Text Box.
• A new text box appears in the middle of the page with a blinking cursor inside it.
• To add text to a placeholder text box in a template, double-click it to select its text. Press  to remove the text and add your own.

 Type to add your text to the text box.
You can also copy and paste text from another program.
You can press  to start a new line.
 Click the border of the text box.
Handles appear on the sides and corners of the box.
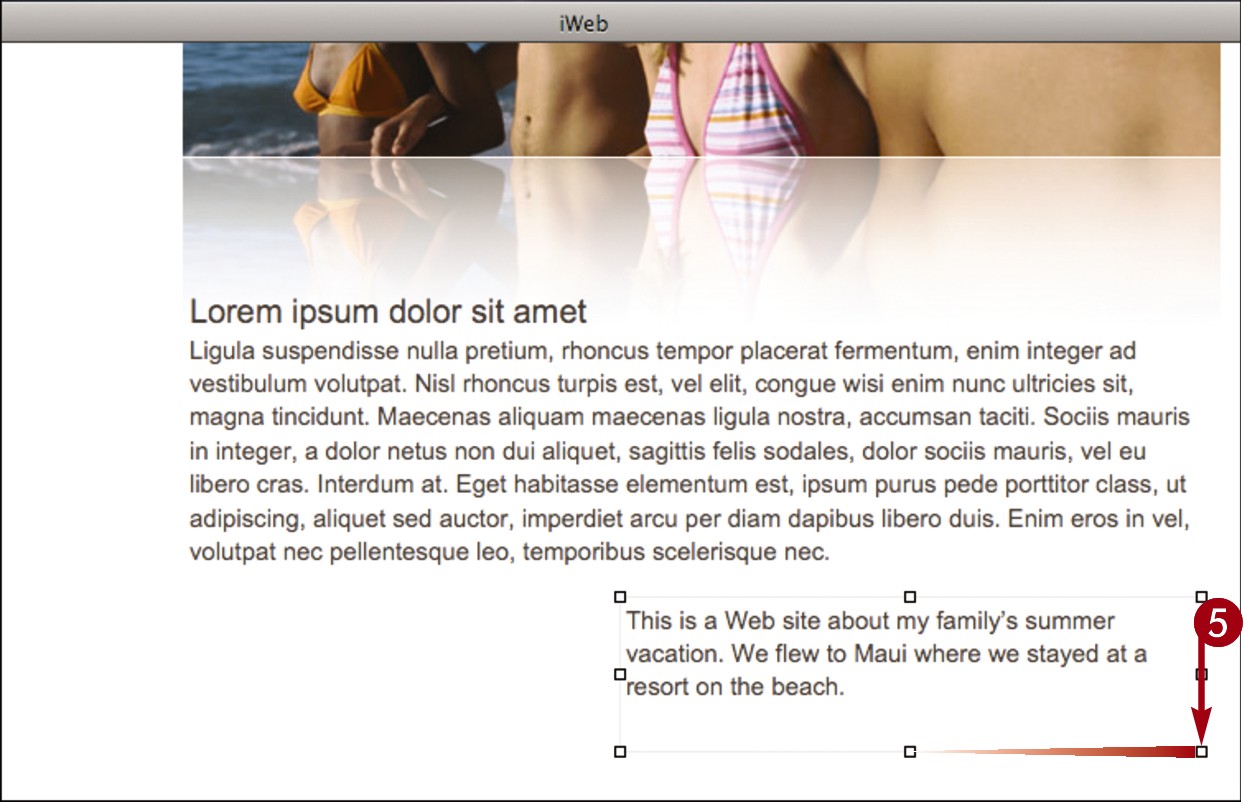
 Click and drag a handle to resize the text box.
The box resizes.
Note: To change the alignment of text inside a box, see “Align Page Text.”
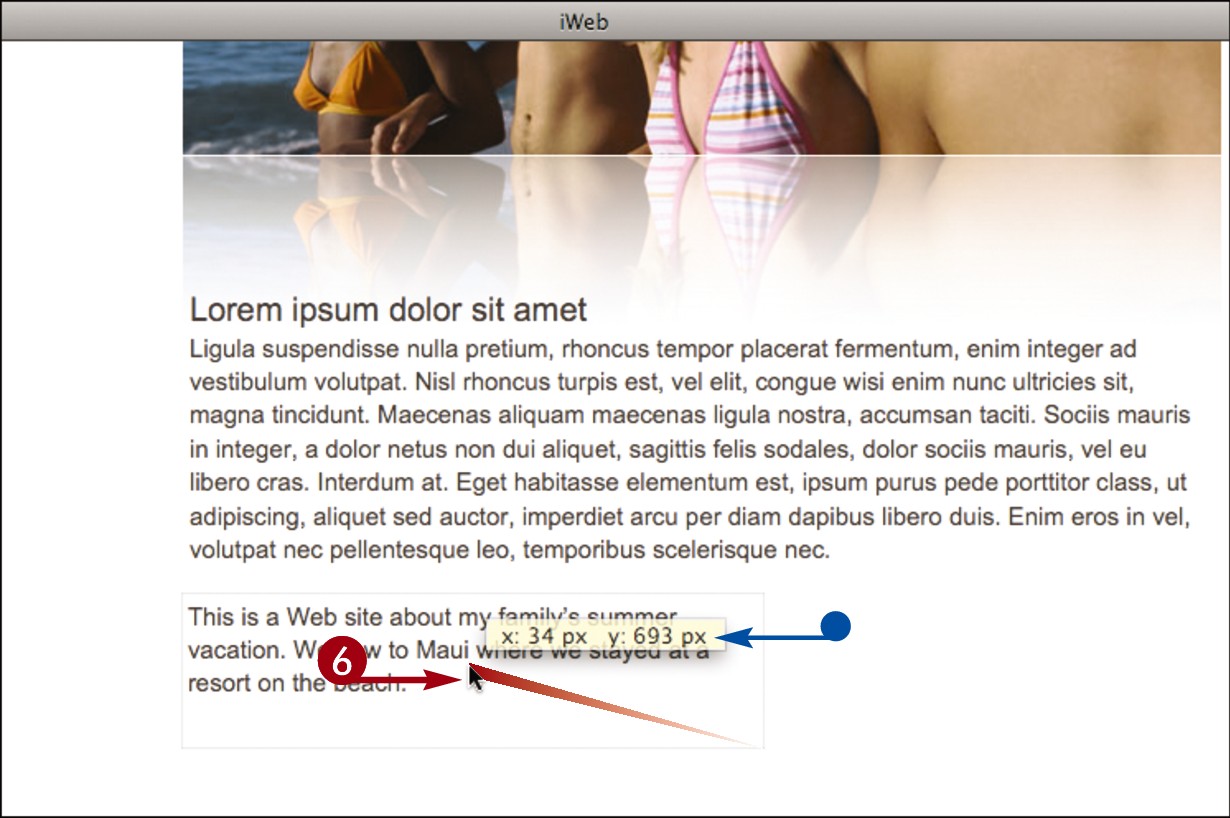
 Click and drag inside the text box to move the box to another place on the page.
• A yellow box appears displaying the coordinates of the box on the page as you drag.
You can also press the arrow keys to change the position of a selected text box.
To delete a text box, click the box to select it and then press  .
.
Format Text

You can format text on your page to match the theme of the site or to emphasize the text. You can change the font color and size as well as how the text is spaced.
Format Text
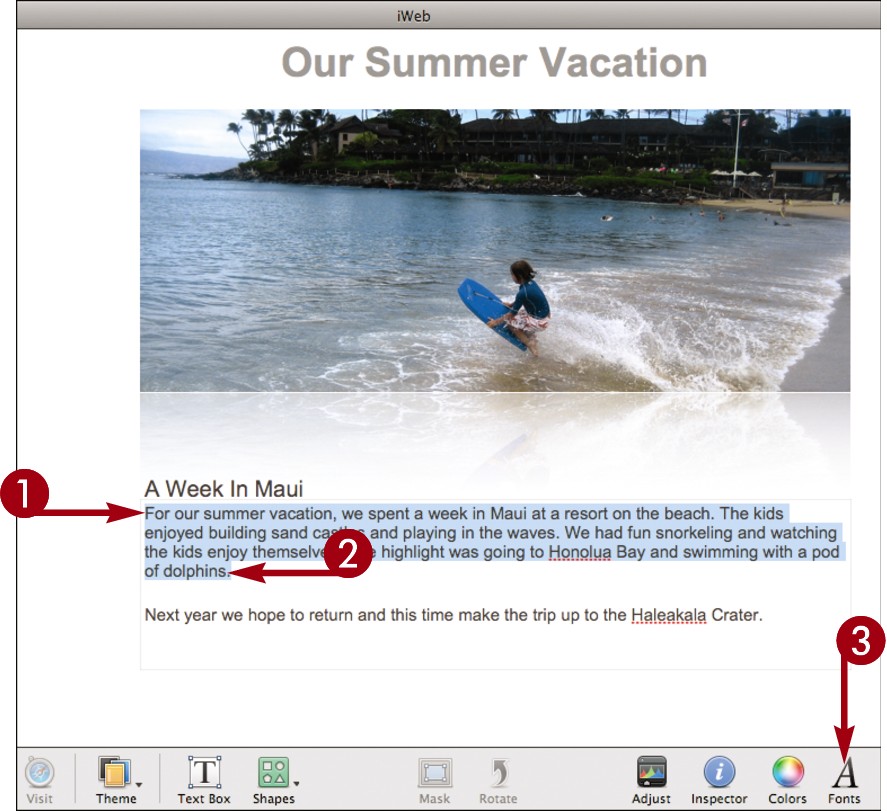
 Double-click a text box.
 Click and drag to select the text to format.
 Click Fonts.
The Fonts dialog appears.

 Click a font family.
 Click a font typeface.
 Click a size.
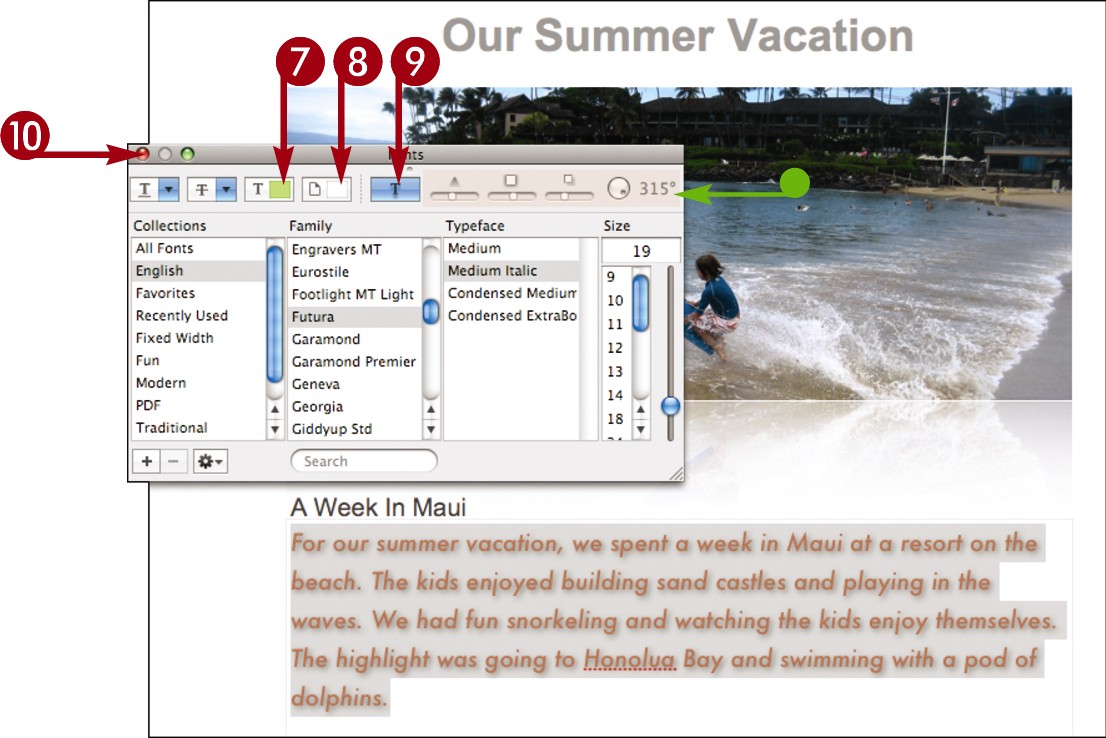
 Click a text color.
 Click a background color for the text.
 Click
Click  to turn a drop shadow on or off.
• You can adjust a drop shadow here.
 Click
Click  to close the Fonts dialog.
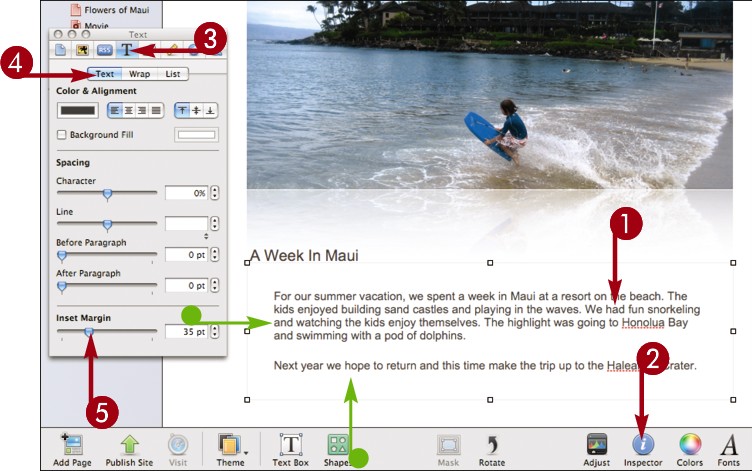
 Click Inspector.
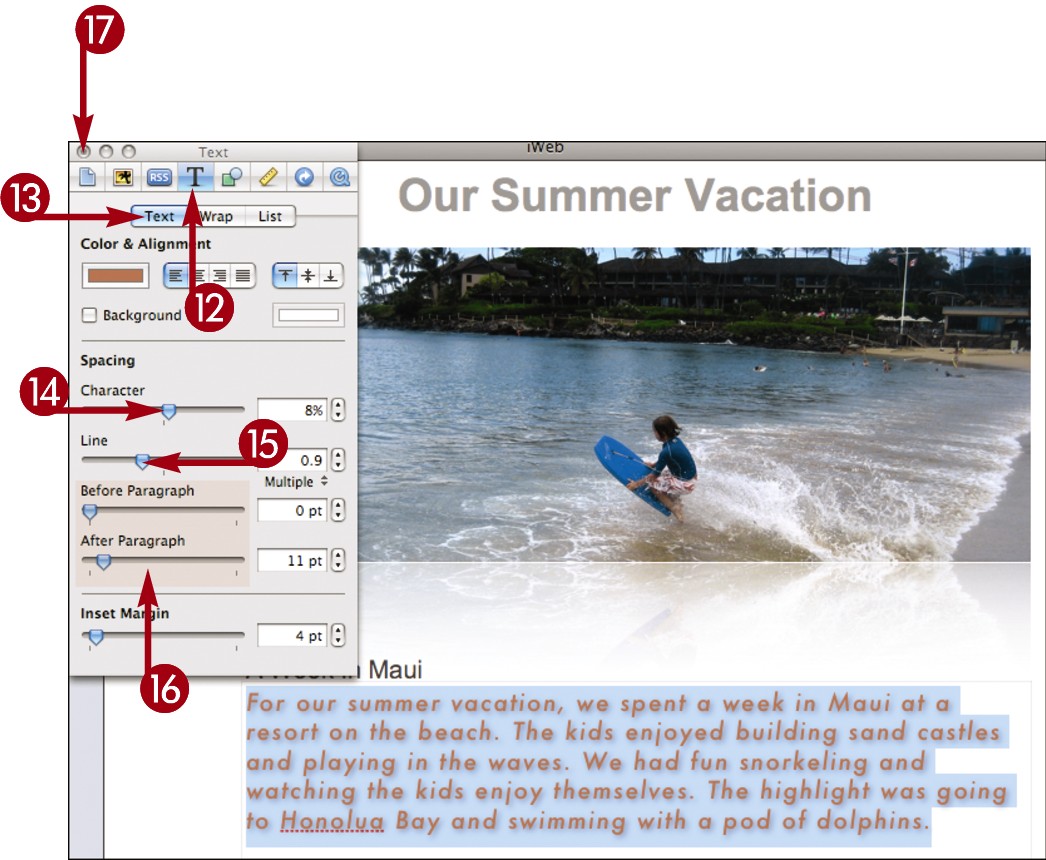
 In the Inspector, click the Text Inspector icon (
 ).
).
 Click Text.
iWeb lists the text settings.
 Click and drag the slider to control character spacing.
 Click and drag the slider to control line spacing.
 Click and drag the sliders to control paragraph spacing.
 Click
Click  to close the Inspector.
iWeb formats the text.
Align Page Text

You can control the horizontal or vertical positioning of text on your page. For example, you can align a bold heading in the center of the page or top-align several paragraphs beneath photo.
Align Page Text
Align Text Horizontally

 Click to select the text box whose text you want to align.
 Click Inspector.
The Inspector appears.
 Click the Text Inspector icon (
 ).
).
 Click Text.

 Click a horizontal alignment.
You can horizontally align text to the left, right, or center. You can also justify text, which aligns it to both the left and right.
iWeb aligns the text.
• In this example, the heading text is center-aligned.
Align Text Vertically
 Click to select the text box whose text you want to align.
 Click Inspector.
The Inspector appears.
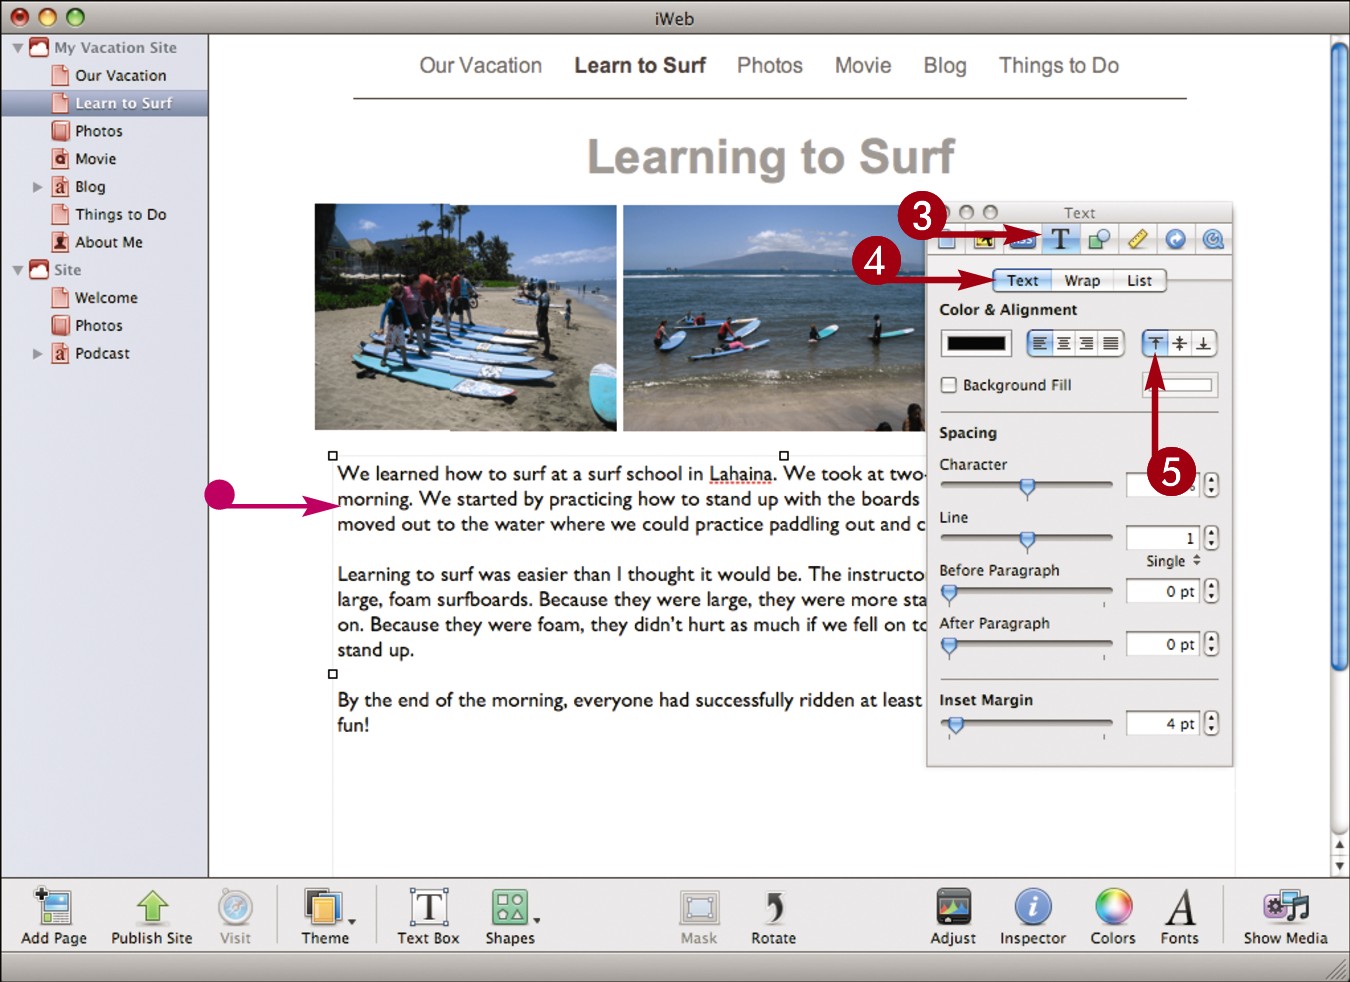
 Click the Text Inspector icon (
 ).
).
 Click Text.
 Click a vertical alignment.
You can vertically align text to the top, middle, or bottom of a text box.
iWeb aligns the text.
• In this example, the body text is top-aligned.
Add a Hyperlink

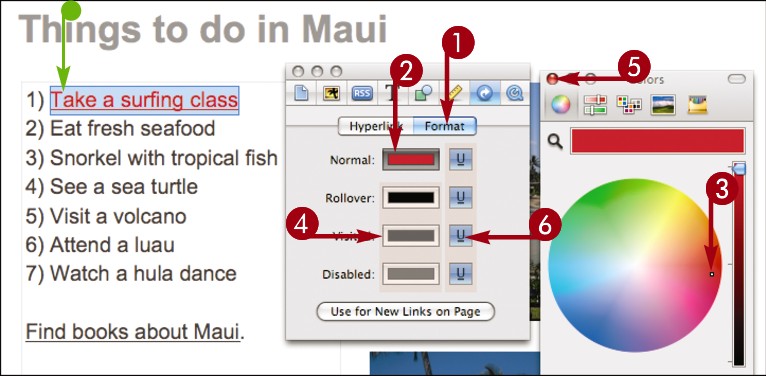
You can connect your Web page to another page by turning text or other objects on the page into hyperlinks, also known as links. Hyperlinked text on a page is usually distinguished with a different color and underlining. You can create a link to another page in your site, an external page on the Web, or an e-mail address.
Add a Hyperlink
Link to a page in your Site
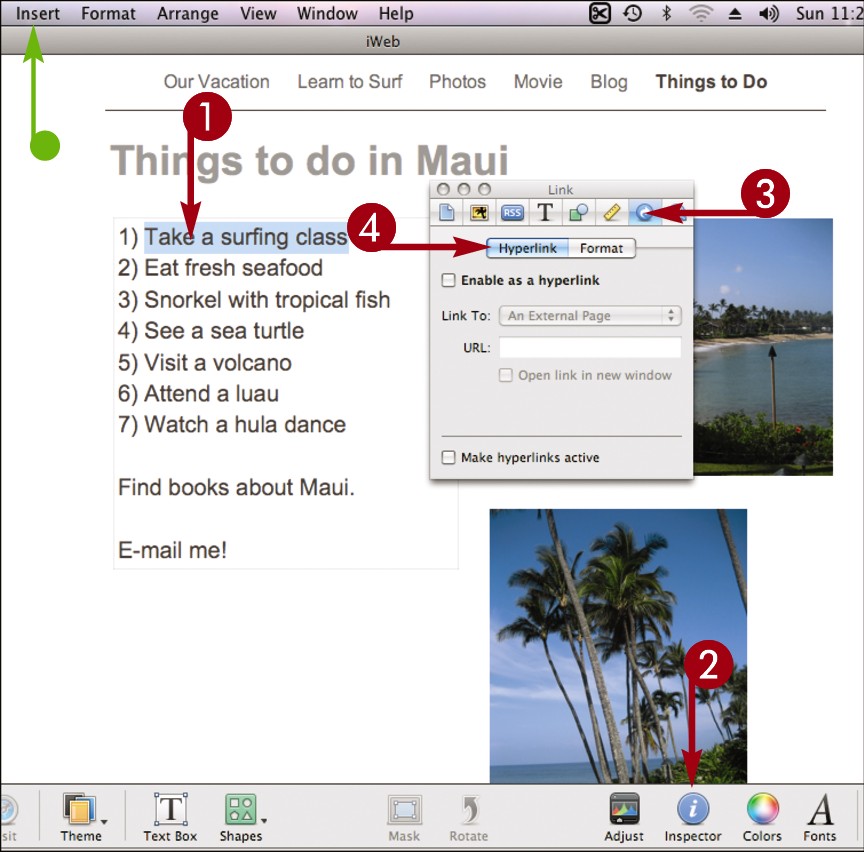
 Select the text or object you want to turn into a hyperlink.
 Click Inspector.
The Inspector appears.
 Click the Link Inspector icon (
 ).
).
 Click Hyperlink.
• You can also click Insert, Hyperlink, and then Web Page.
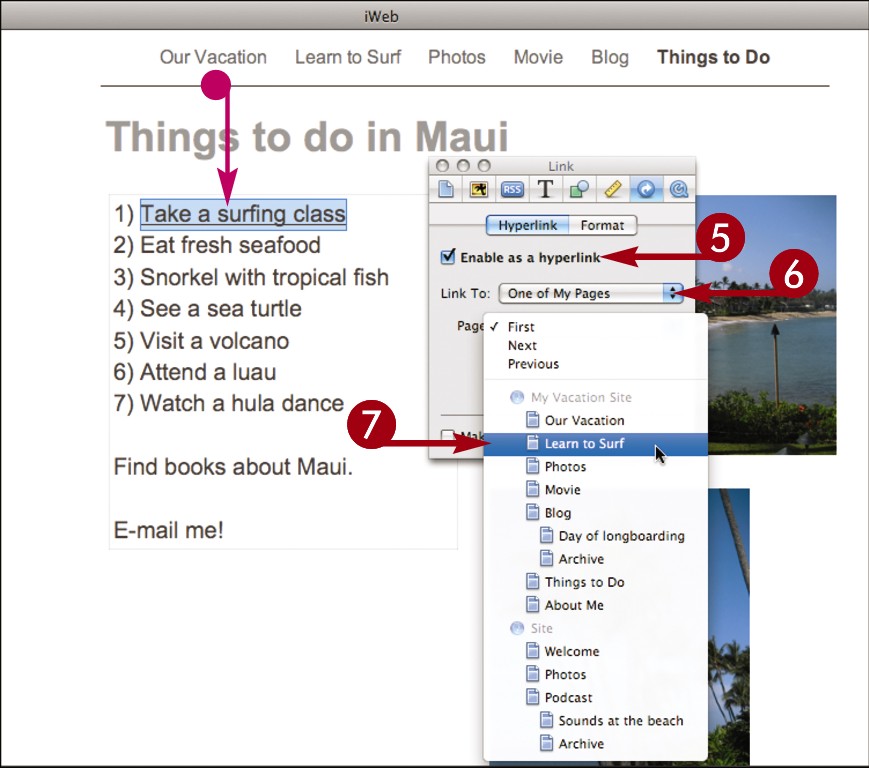
 Click Enable as a hyperlink (
 changes to
  ).
).
 Click here and select One of My pages.
 Click the Page
  and select the destination page.
• iWeb creates a hyperlink.
Note: You can also add links to other pages in your site with page navigation. See Chapter 16 for details.
Link to an external Page
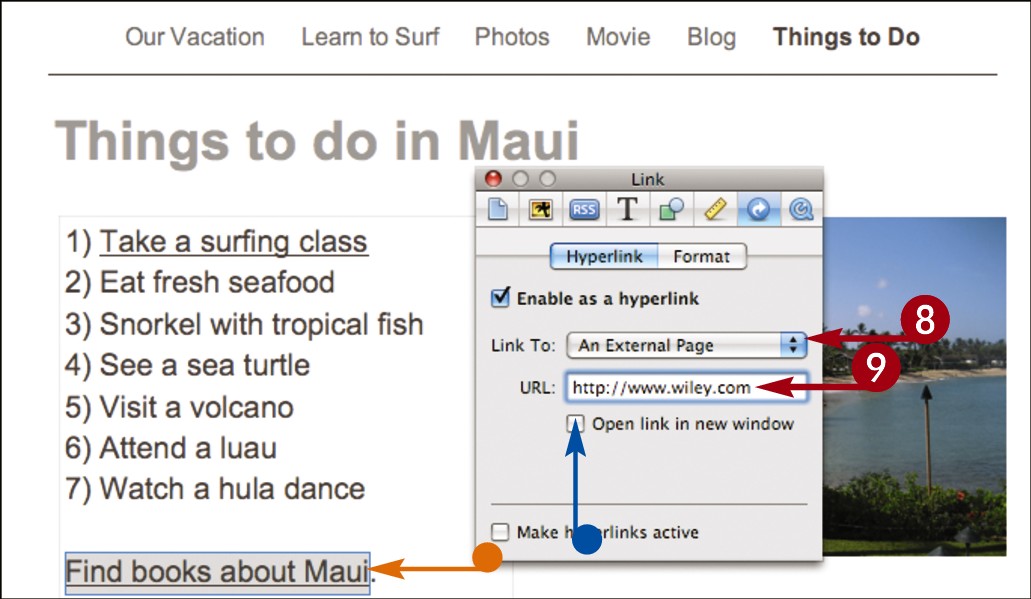
 With additional text selected, click here and select An External Page.
 Type the Web address for the external page.
To get the Web address for a page, you can view the page in a Web browser and copy the address from the browser address box.
• You can click here to cause the destination page to be opened in a new browser window ( changes to
  ).
).
• iWeb creates the hyperlink.
Create an E-mail Link
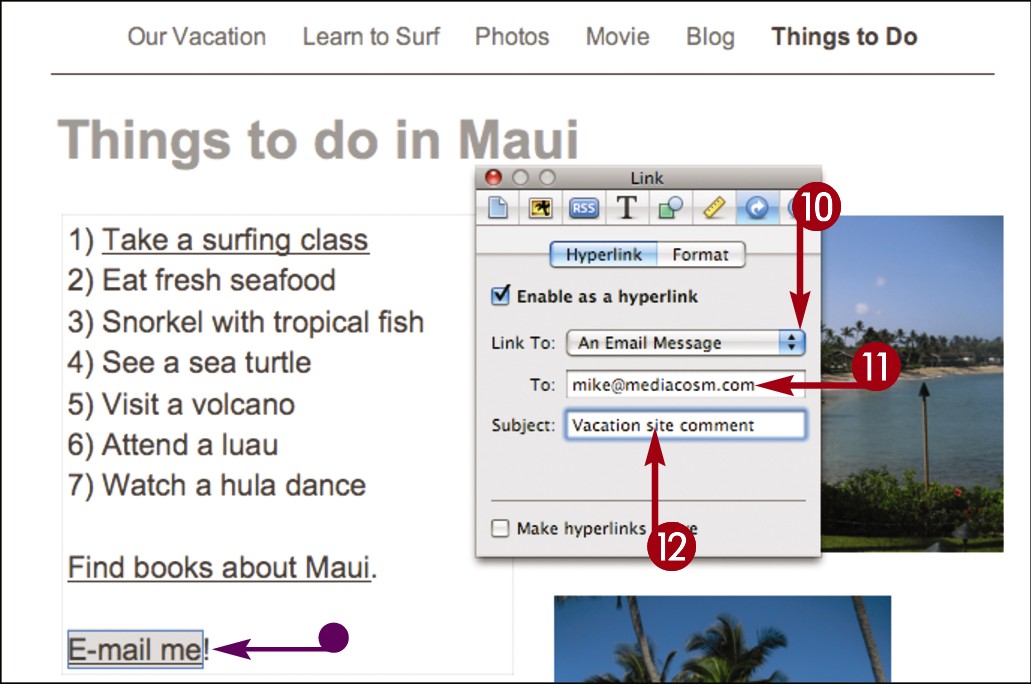
 With additional text selected, click here and select An Email Message.
You can also click Insert, Hyperlink, and then Email Message.
 Type the e-mail address.
 Type an e-mail subject.
• iWeb creates the hyperlink.
Add an Image

You can add an image to illustrate a passage of text or to add decoration to a plain-looking page. You can choose images from your iPhoto library. To easily add a collection of photos as an album to your Web site, see Chapter 18.
Add an Image

 Select the page to which you want to add an image.
 Click Photos in the media pane.
Note: If the media pane is not visible, click Show Media at the bottom of the workspace to display it.
• iWeb displays images from the iPhoto library.
To make more photos available, you can drag folders containing images from the Finder to the media pane.
 Click a list item to display images from iPhoto. For more about organizing images, see Chapter 4.
 Click and drag an image to an image placeholder.
Placeholders are the generic content items that appear when you create a page from a template.

• iWeb replaces the placeholder image.
 Click and drag an image to an empty area of the page.

• iWeb adds the image to the page.
You can click and drag the image to reposition it.
Note: To customize the image, see “Resize an Image” and “Mask an Image.”
Resize an Image

You can resize an image on your page to emphasize or de-emphasize it, or to make it fit in with the other page content. You can control the size of your image, as well its position on the page, using the Metrics Inspector. Note that resizing an image to greater than its original size can make it look blurry.
Resize an Image
Use Image Handles
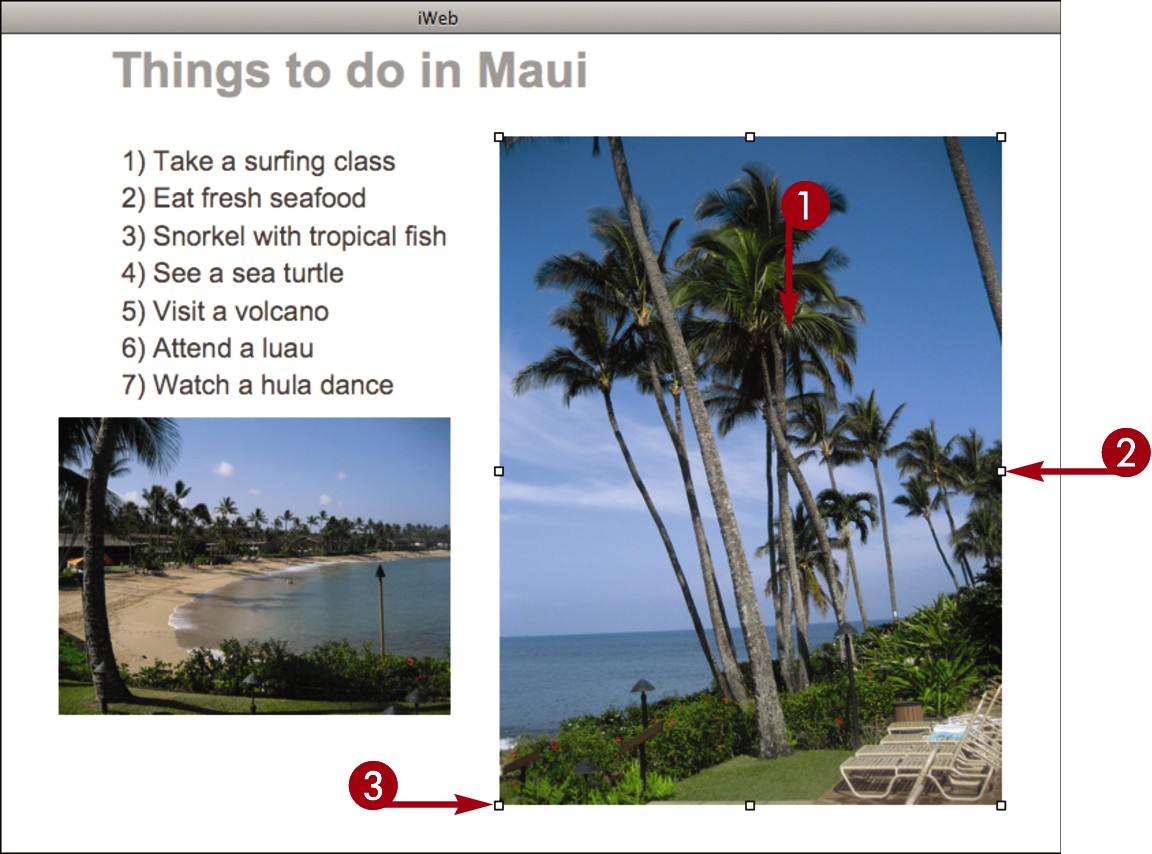
 Click to select an image.
Handles appear on the edges of an image.
 Click and drag a side handle to change one dimension of the image.
 Click and drag a corner handle to change two dimensions of the image at once.
To keep the image at the same proportions, press  as you click and drag a corner handle.
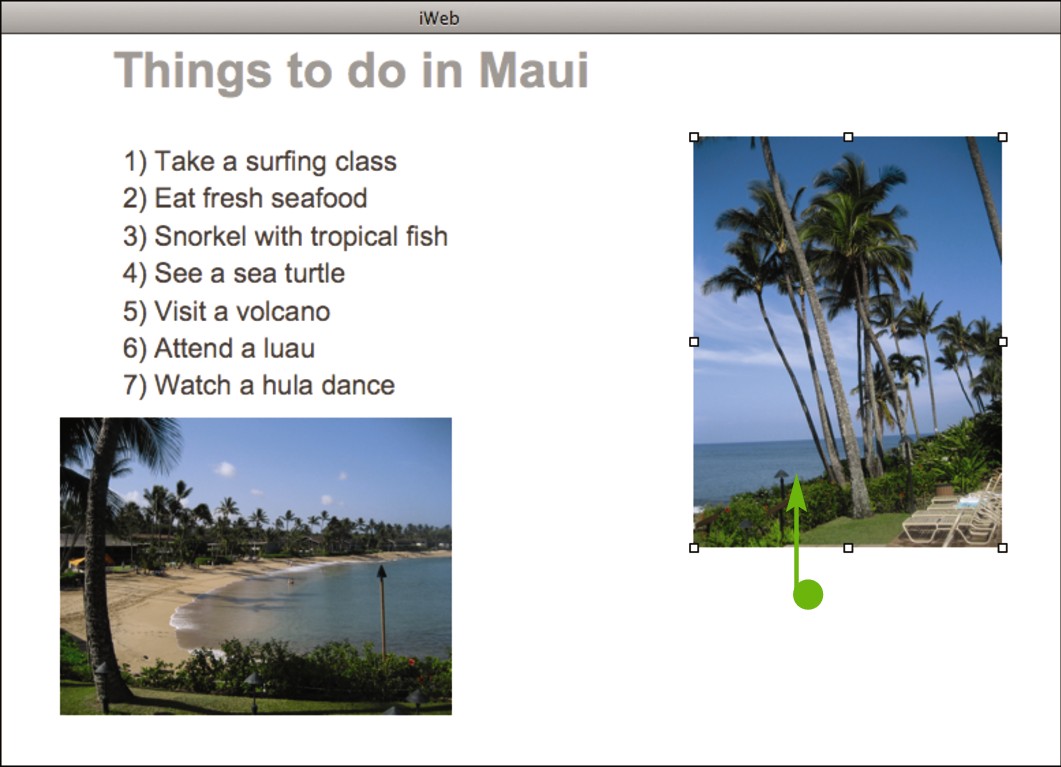
• iWeb resizes the image.
In this example, the bottom left corner handle was used to shrink the image.
Note: You can click Edit and then Undo to revert to the previous size.
Use the Metrics Inspector

 Click to select an image.
 Click Inspector.
The Inspector opens.
 Click the Metrics Inspector icon (
 ).
).
 Type new dimensions here.
Note: Image sizes are measured in pixels (px). Pixels are the tiny, solid-color squares that make up digital images.
• You can click Constrain proportions ( changes to
  ) to change one dimension at a time. This will distort the image.
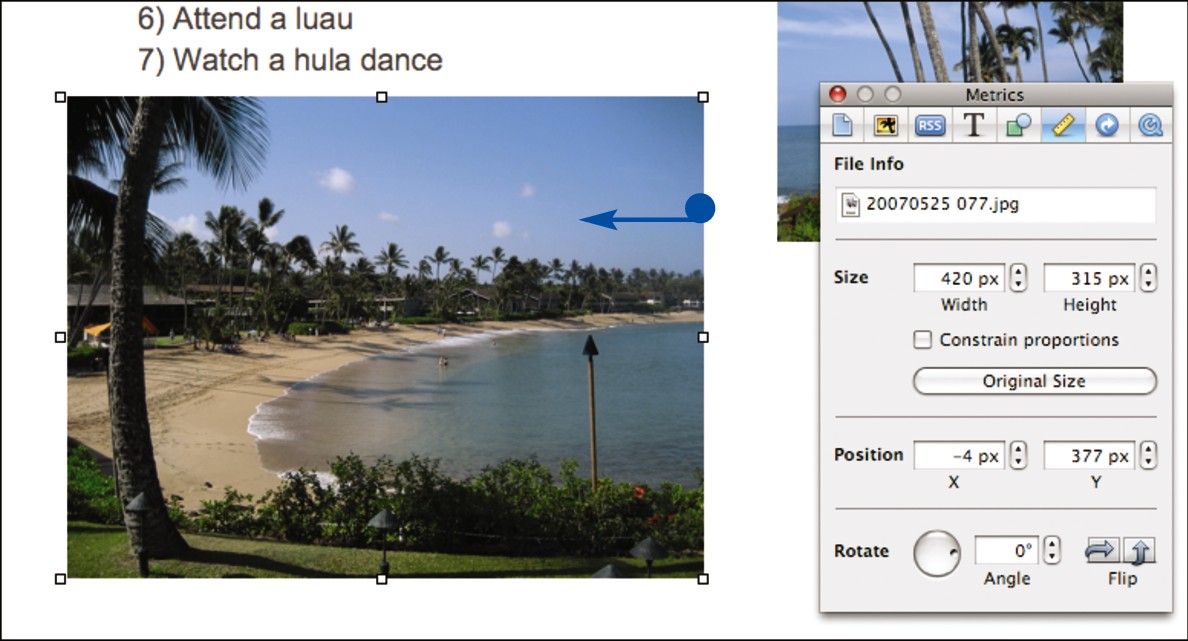
• iWeb resizes the image.
Note: You can click Edit and then Undo to revert to the previous size.
Mask an Image

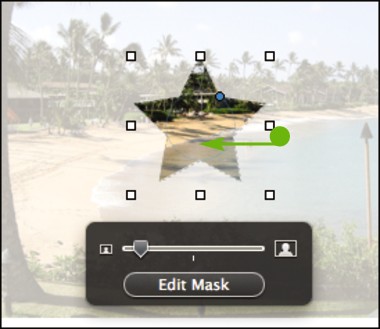
You can mask an image to crop it, which removes unwanted areas of the image from view. iWeb hides the masked areas without removing them from the original image, so you can still crop the image differently later. You can also zoom the image within the masked area.
Mask an Image
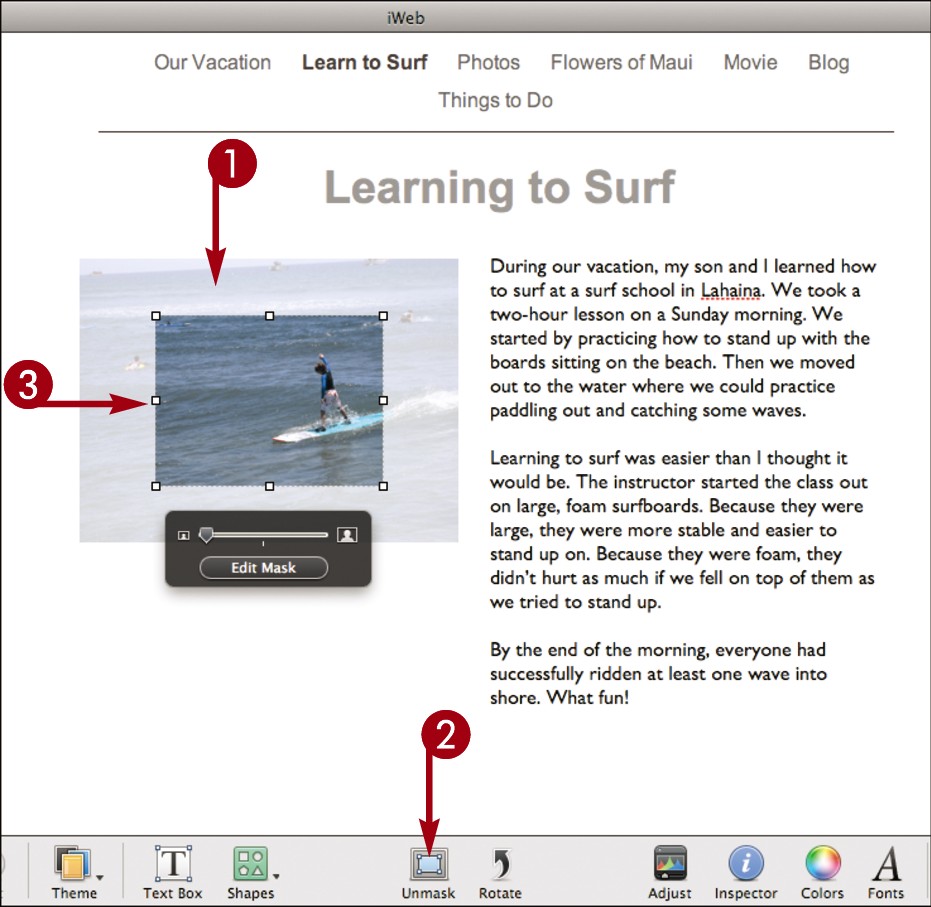
 Click to select an image.
 Click Mask (Mask changes to Unmask).
iWeb adds a mask to the image.
 Click and drag the handles to adjust how the image is cropped.
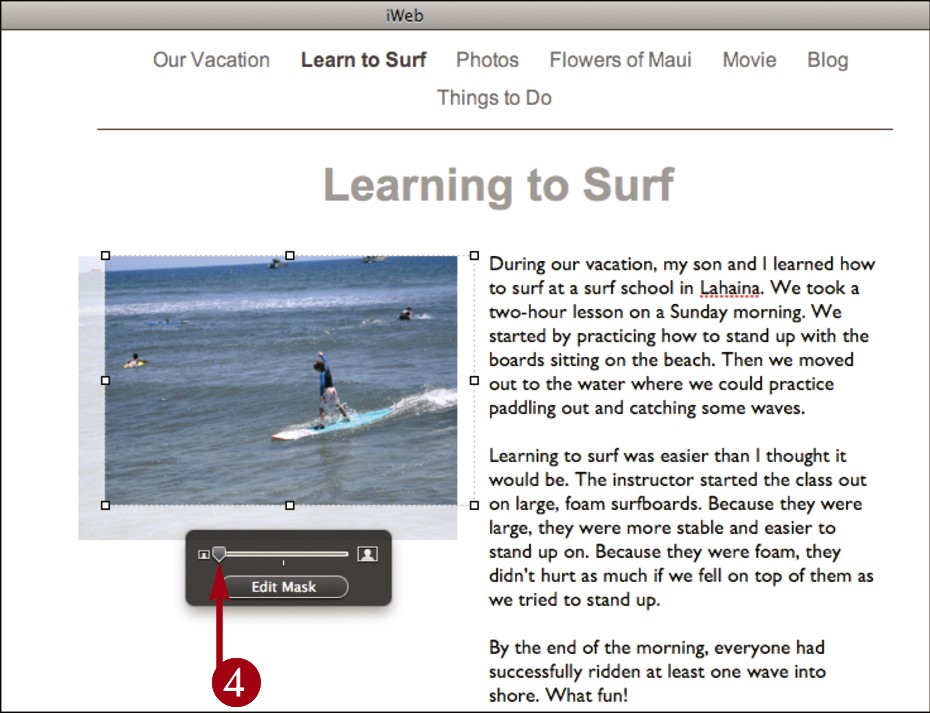
 Click and drag the slider to zoom the image. Drag left to zoom out or right to zoom in.
iWeb zooms the image under the mask.
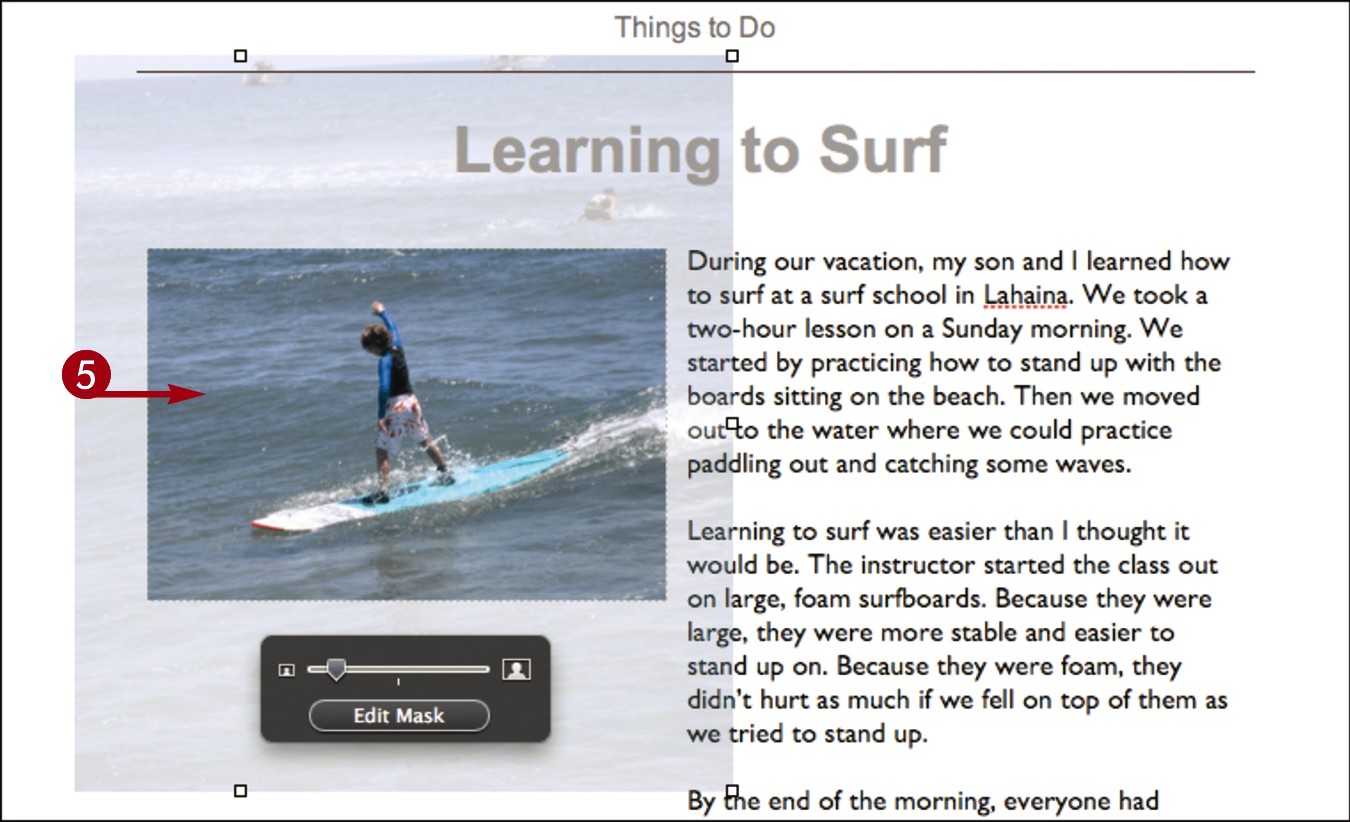
 Click and drag inside the tool to adjust the position of the image.
 Click away from the masking tool.
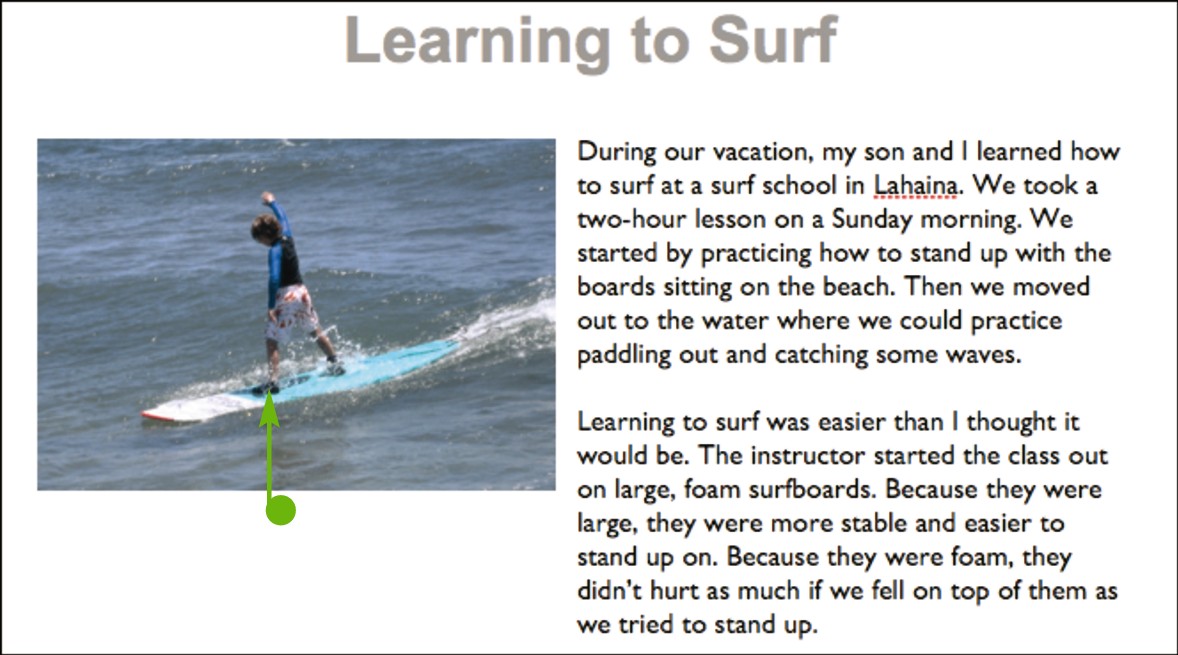
• iWeb displays the masked image.
You can click the image again to display the masking tools and adjust the image further.
Insert a Shape

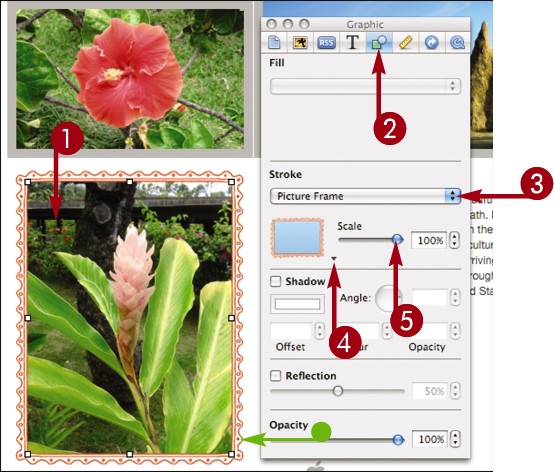
You can insert a shape to use as a text box or to decorate your page. To customize the shape, you can fill it with a color, gradient, or image. You can also stroke the outside edge with a color or add a drop shadow.
Insert a Shape

 Select the page to which you want to add an image.
 Click Shapes.
A list of shapes appears.
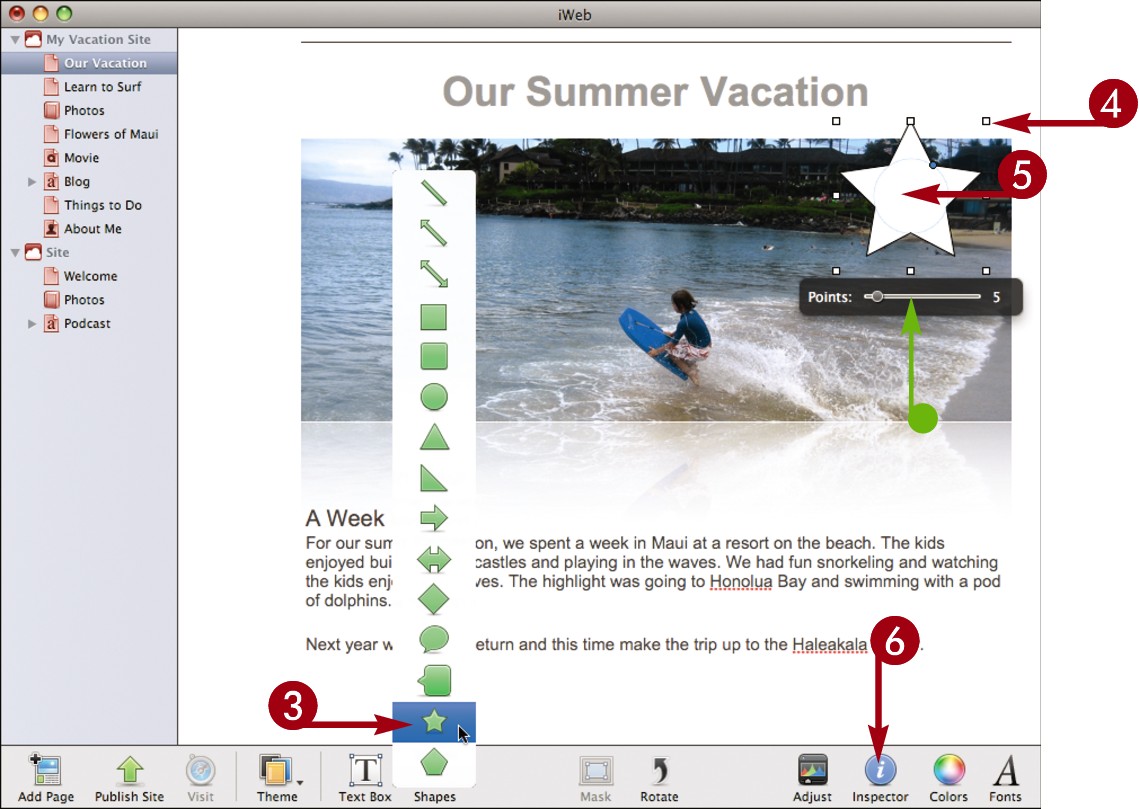
 Click a shape.
iWeb adds the shape to the page.
 Click and drag the side and corner handles to resize the shape.
 Click the shape and drag to reposition it.
• You can customize some shapes using additional settings.
 Click Inspector.
The Inspector opens.

 Click the Graphic Inspector icon (
 ).
).
 Use these settings to fill the shape with a color, gradient, or image.
 Use these settings to outline the shape.
 Use these settings to apply a drop shadow.

 Double-click the shape.
A blinking cursor appears in the shape.
 Type to add text inside the shape.
Note: To format the text, see “Format Text.”
Wrap Text Around an Image

You can wrap text around an image to fit more content on your page or to associate an image with descriptive text. To wrap text around an image, you insert the image in a text box and then select the alignment settings.
Wrap Text Around an Image
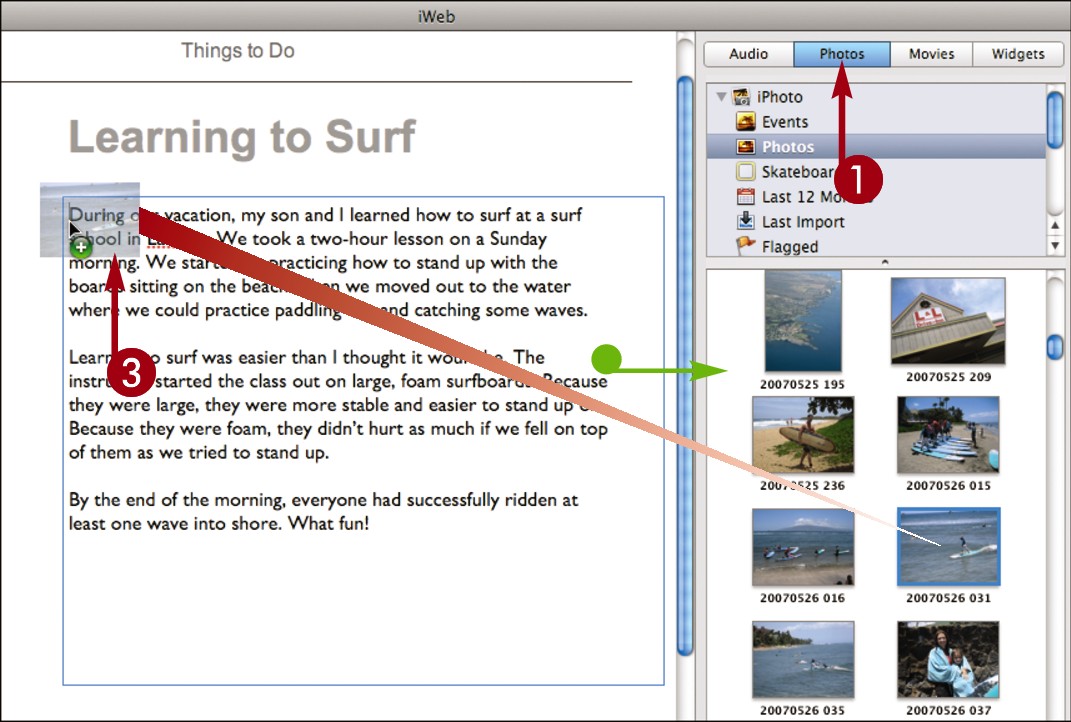
 Click Photos in the media pane.
Note: If the media pane is not visible, click Show Media at the bottom of the workspace to display it.
• iWeb displays images from the iPhoto library.
 Press and hold
  .
.
 Click and drag an image to a text box.

• iWeb inserts the image into the text box.
 Click Inspector.
The Inspector opens.
 Click the Text Inspector icon (
 ).
).
 Click Wrap.

 Double-click the image to select it.
 Click Object causes wrap (
 changes to
  ).
).
 Click an alignment; this example aligns the image to the left.
• Click here to align the image to the right.
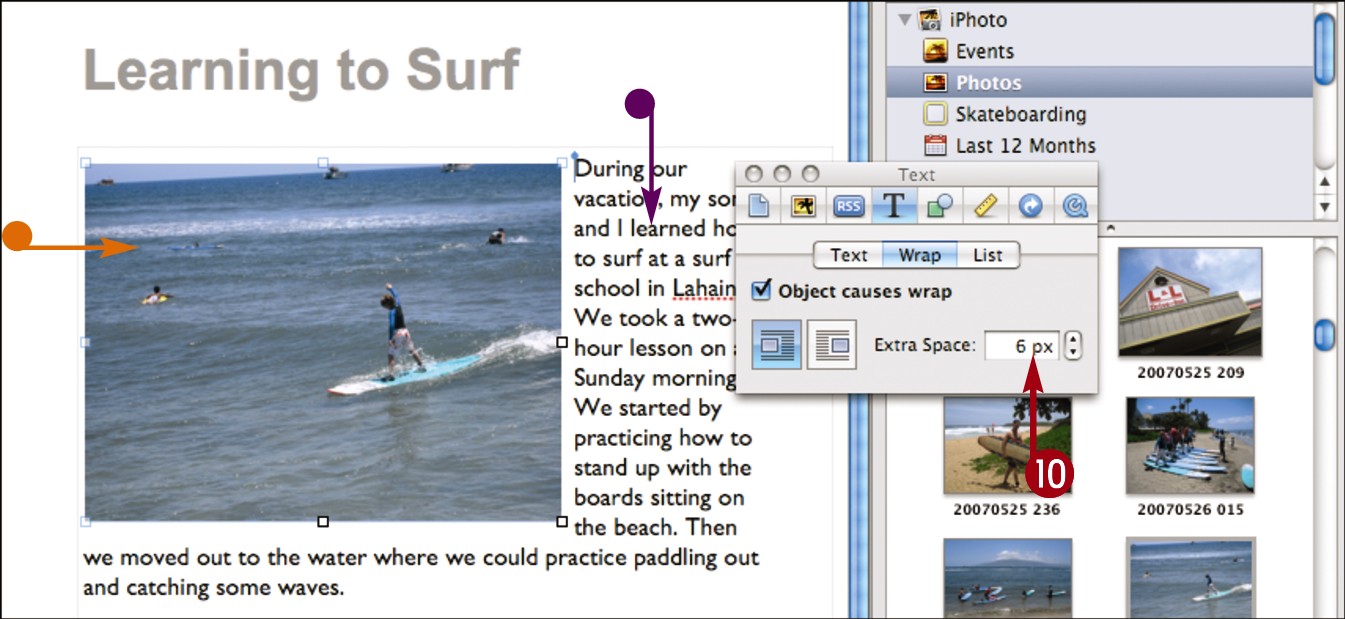
• iWeb aligns the image.
• The text is wrapped to the opposite side.
 Adjust the space between the image and the text here.


