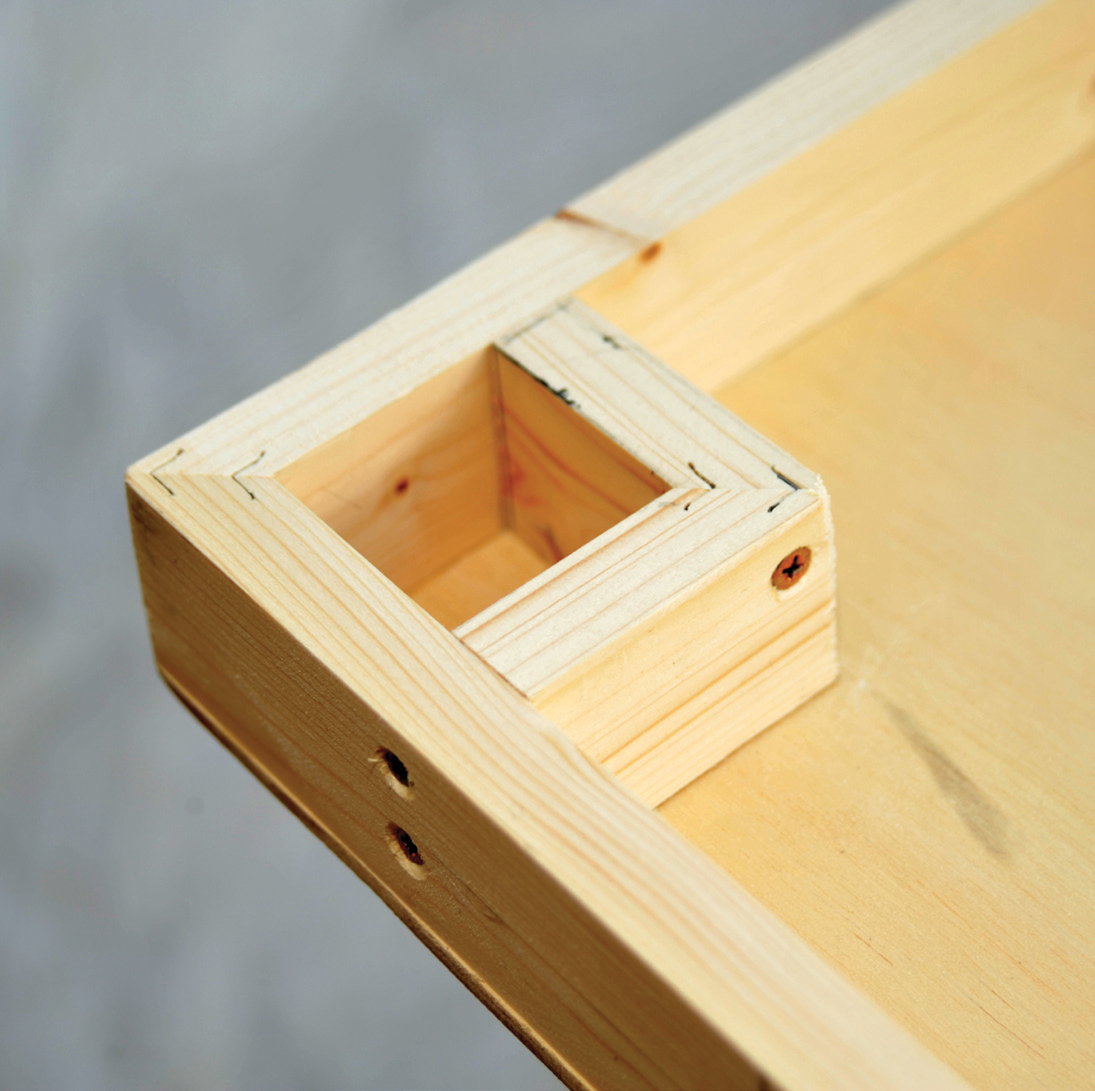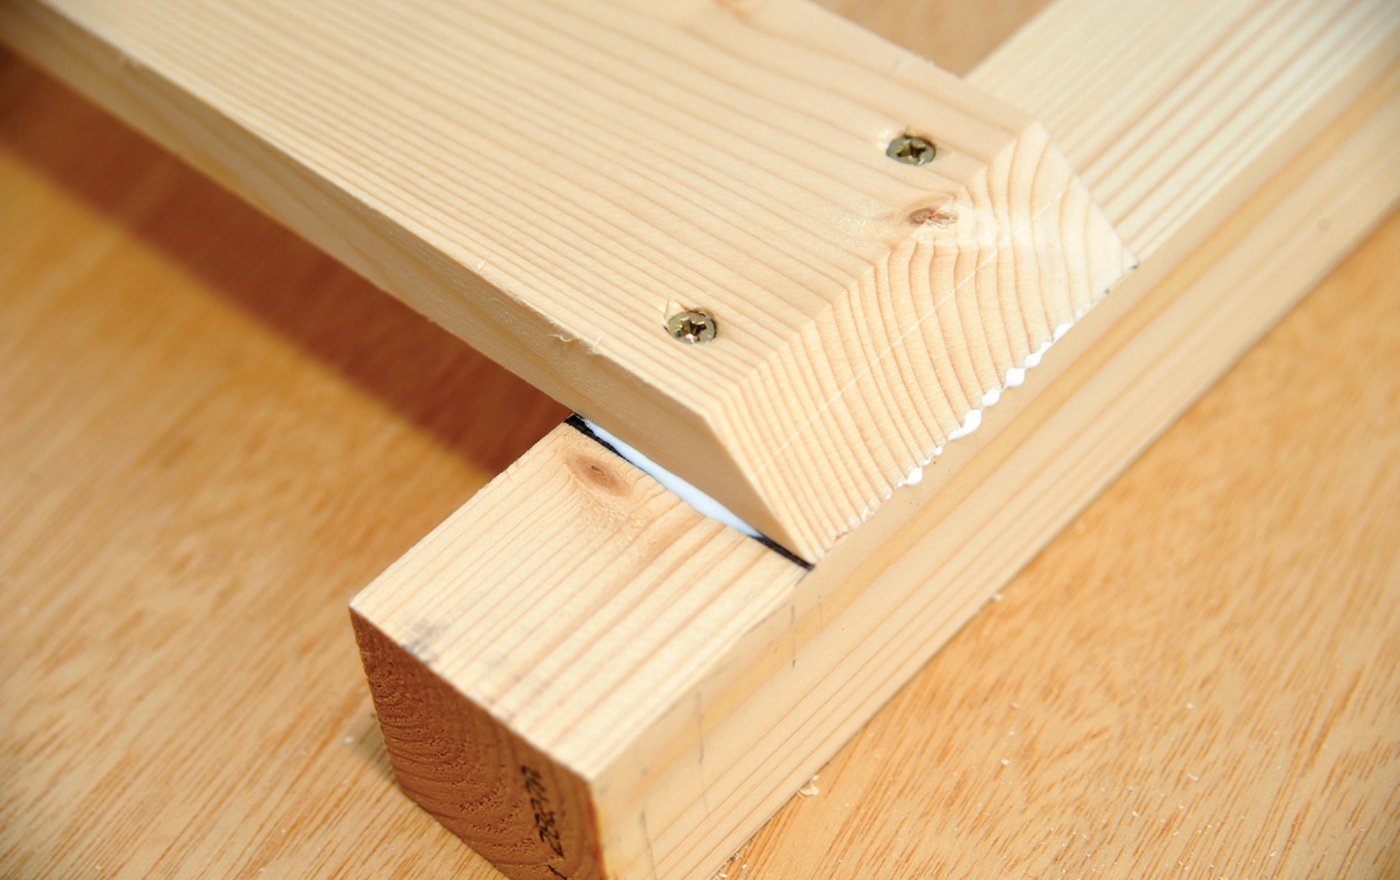
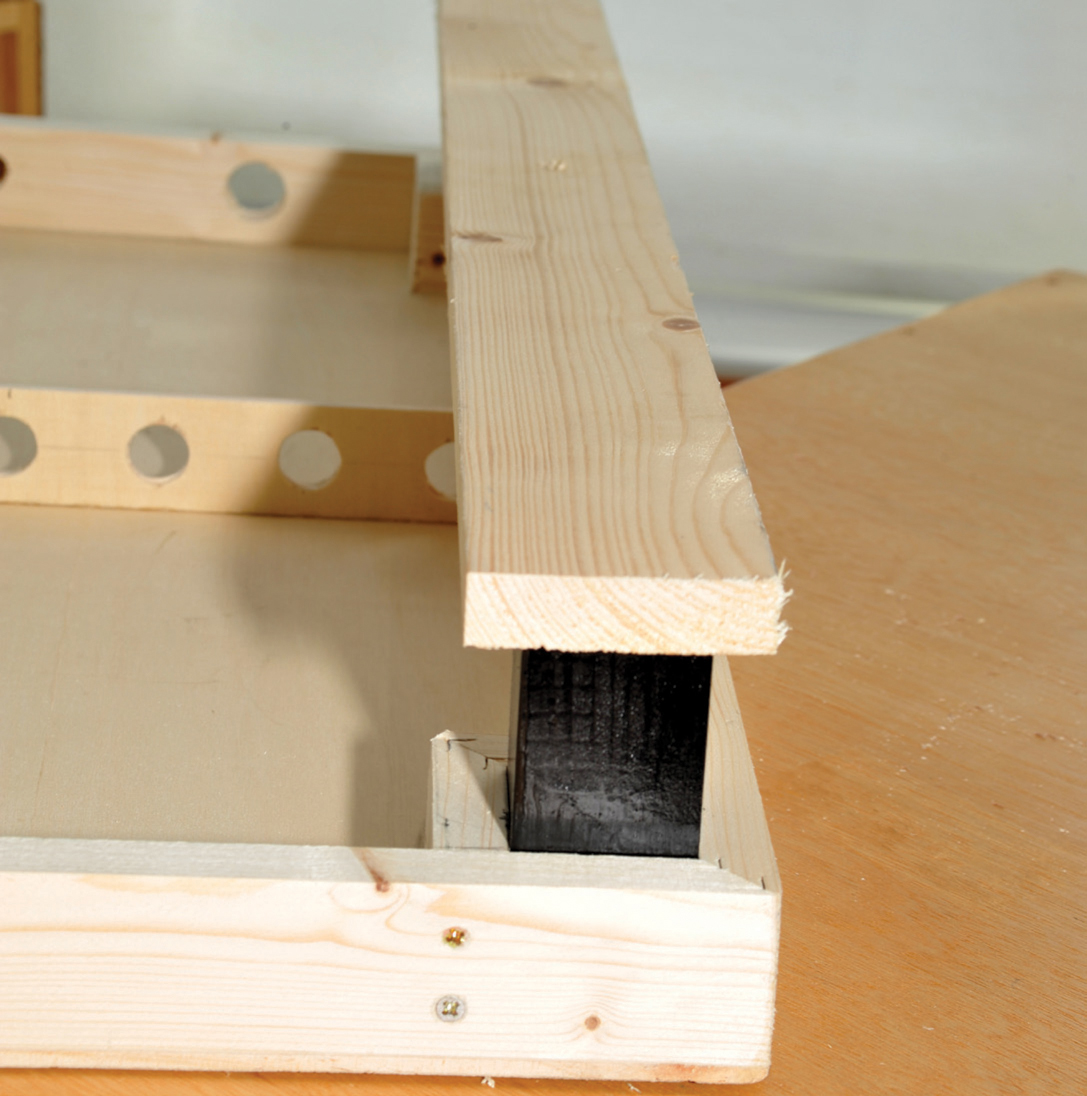
Corner cut and glued to frame leg.
There is no standard height for baseboards – it is purely a matter of personal choice. If your layout is purely for home use and mainly for young children, you will wish to have the baseboard at a suitable height for them, and as they grow you will probably wish to make the board higher. Hence it is better to have a free-standing baseboard, where the legs can be replaced or added to periodically.
There are many modellers who prefer people to view their layouts as though they are actually viewing on the ground, whilst others prefer to view layouts from slightly above, and still others who prefer to view the layout from about 45 degrees above.
For layouts used in a club there needs to be agreement across all the members, taking into account the differing heights of people and the fact that a good percentage of the time, members will be working on developing the layout. If you are working on a layout, it needs to be lower than if you are just running trains, because you need to be able to access each part with ease.
If the layout is to be displayed in an exhibition, there are a range of other considerations. It is normally accepted that layouts will be a little too high for children and many parents will bring a small stool or just lift children up. It is a good idea, as practiced at many exhibition venues, to have small stools available for the children whose parents are first-time visitors and who have no stool.
If I had to suggest a suitable height, I would say that the most popular height is just under 1,000mm (39in) high. To some younger people this will give an eye-level view, whilst others will see the layout from above, but it appears to be a reasonable compromise height. Some exhibitors go as high as 1,300mm (51in).
No matter what height you decide upon, the boards need to be stable and secure. There are a variety of ways to achieve this.
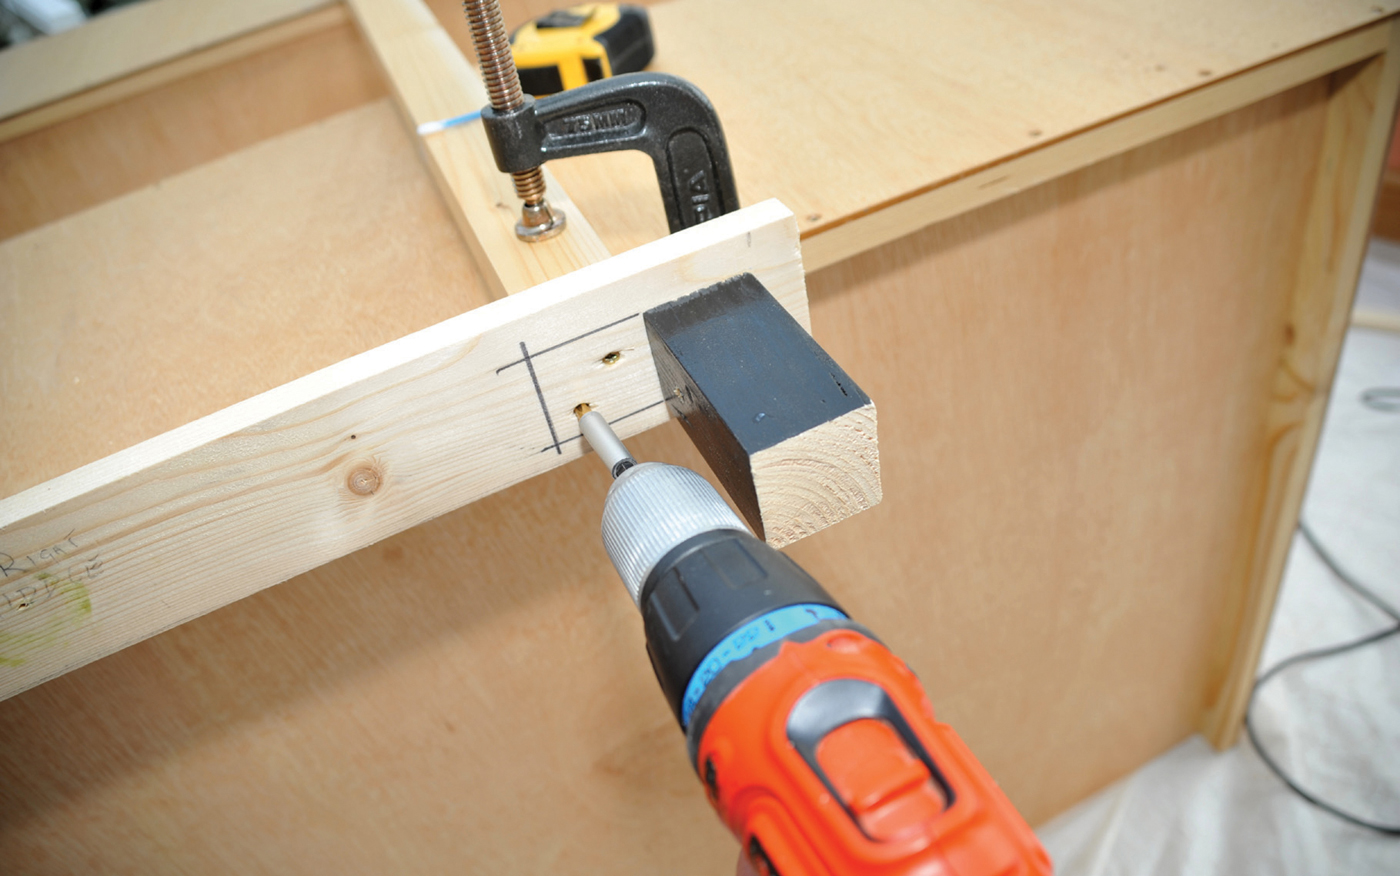
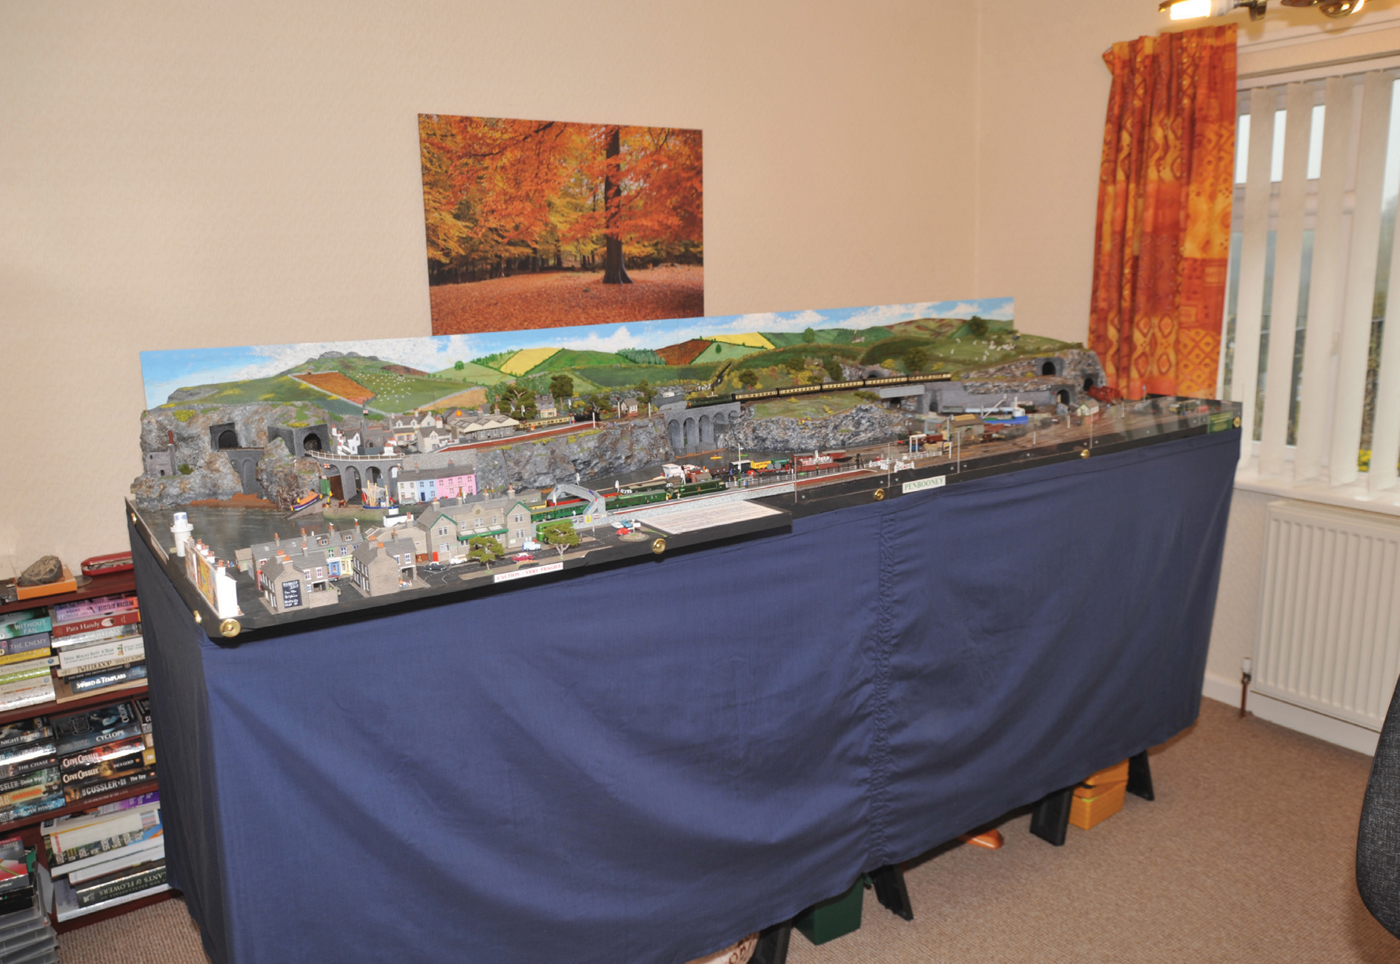
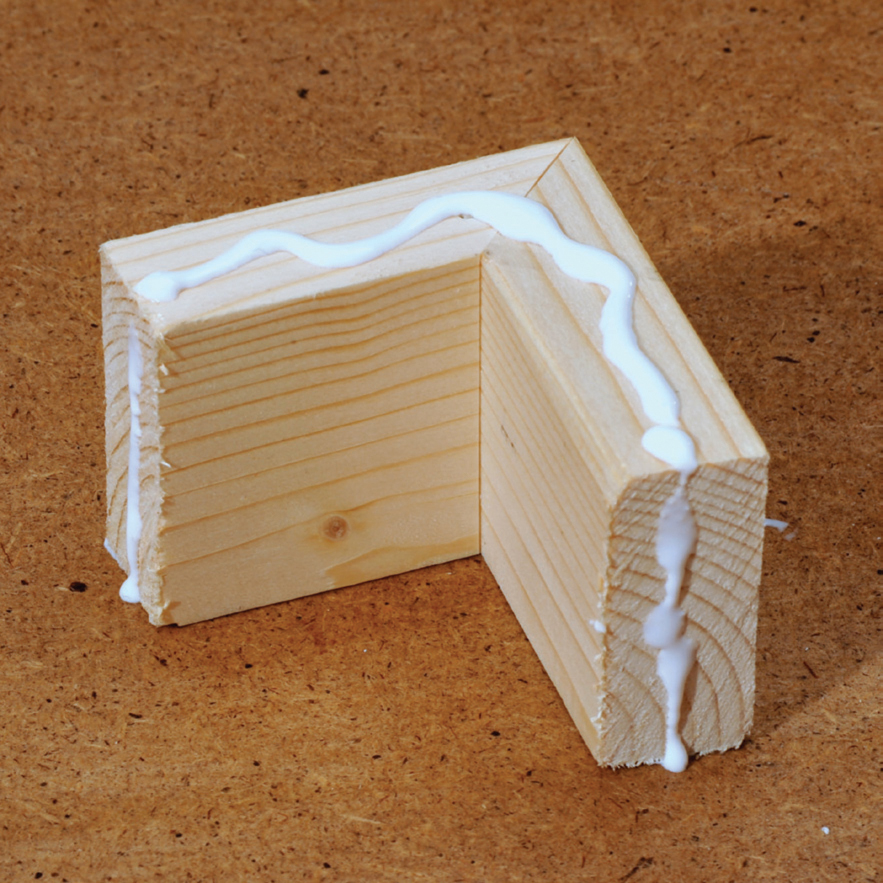
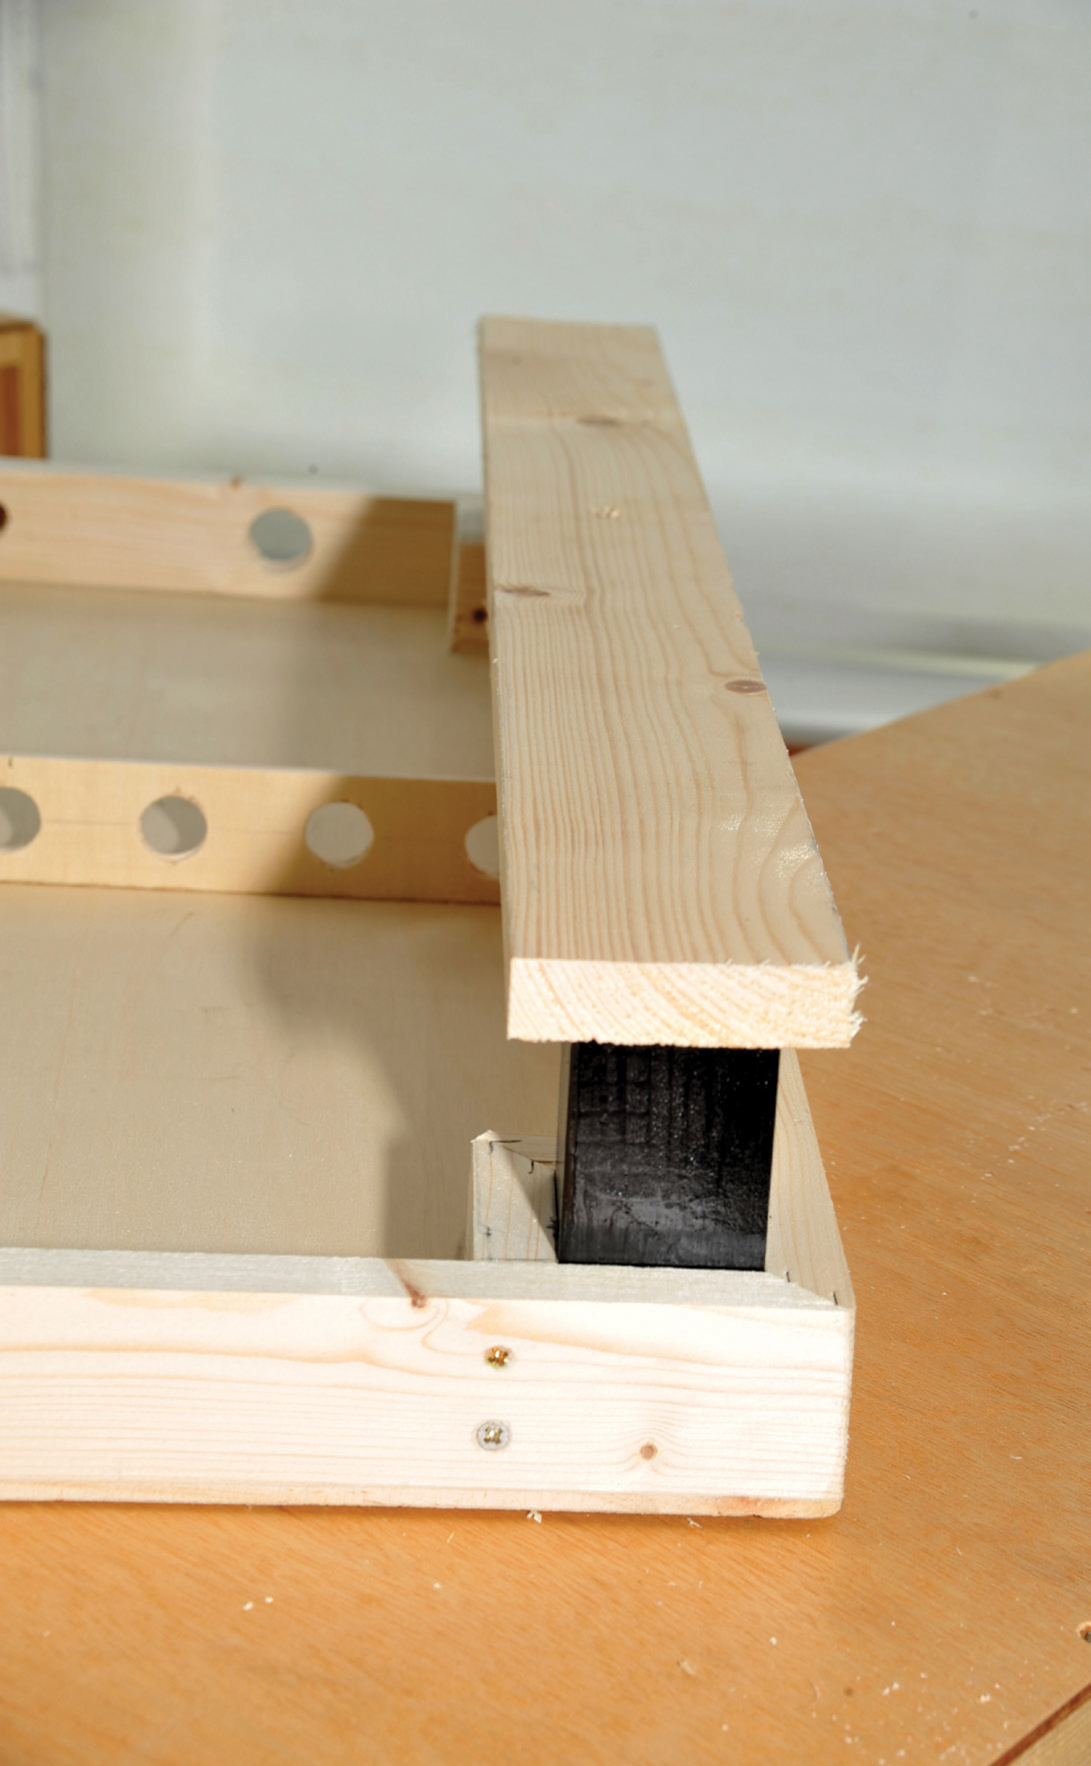
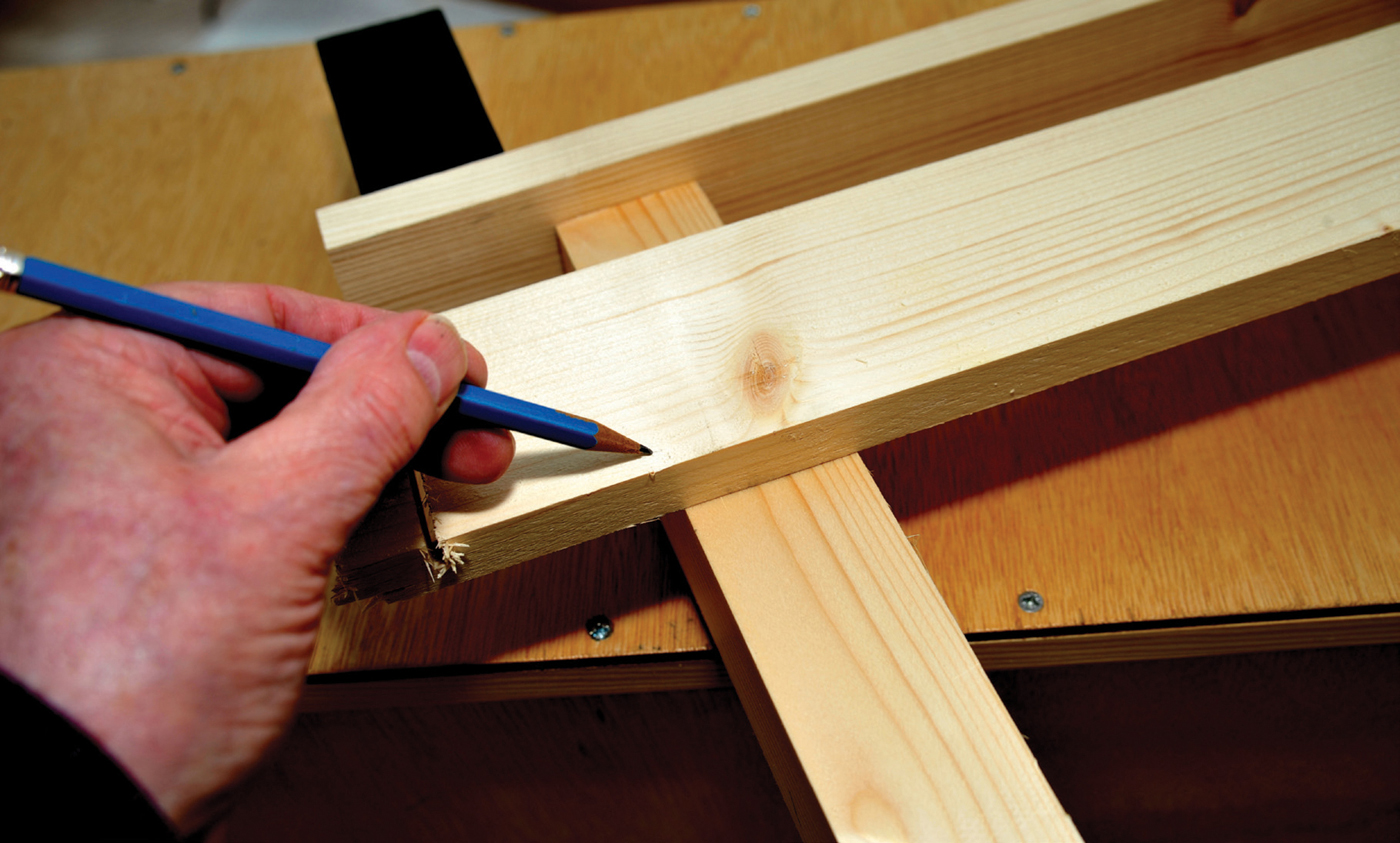
The simplest support is to put the baseboard on a table. If this is to be the case, you have to ensure that all the wires for power, switches and so on, come through the side rather than underneath the baseboard. It is probably best to have stubby legs in each of the corners, fastened to a flat board across each pair, with each baseboard covered with felt or similar material to stop the table top being scratched, whilst lifting the board a couple of inches clear. Using the same softwood as the frame, cut two corner pieces (either mitred or butt jointed) to hold the stubby leg in place. The leg is 45mm (1¾in) × 45mm (1¾in) in this case and 900mm (35½in) tall. The corner attached to the baseboard should be a close but not tight fit. Fit both of the stubby legs and then add a cross-piece to join the two legs together. I have used 18mm (¾in) × 69mm (2¾in), as this provides a reasonably wide, flat surface to rest on a table. I always make each corner only fractionally larger and then sand the top of the leg at a slight angle so that it goes into the frame with ease and tightens up as it is pushed fully home. I also put candle wax on the leg to make it easier to slide into place.
Corner cut and glued to frame leg.
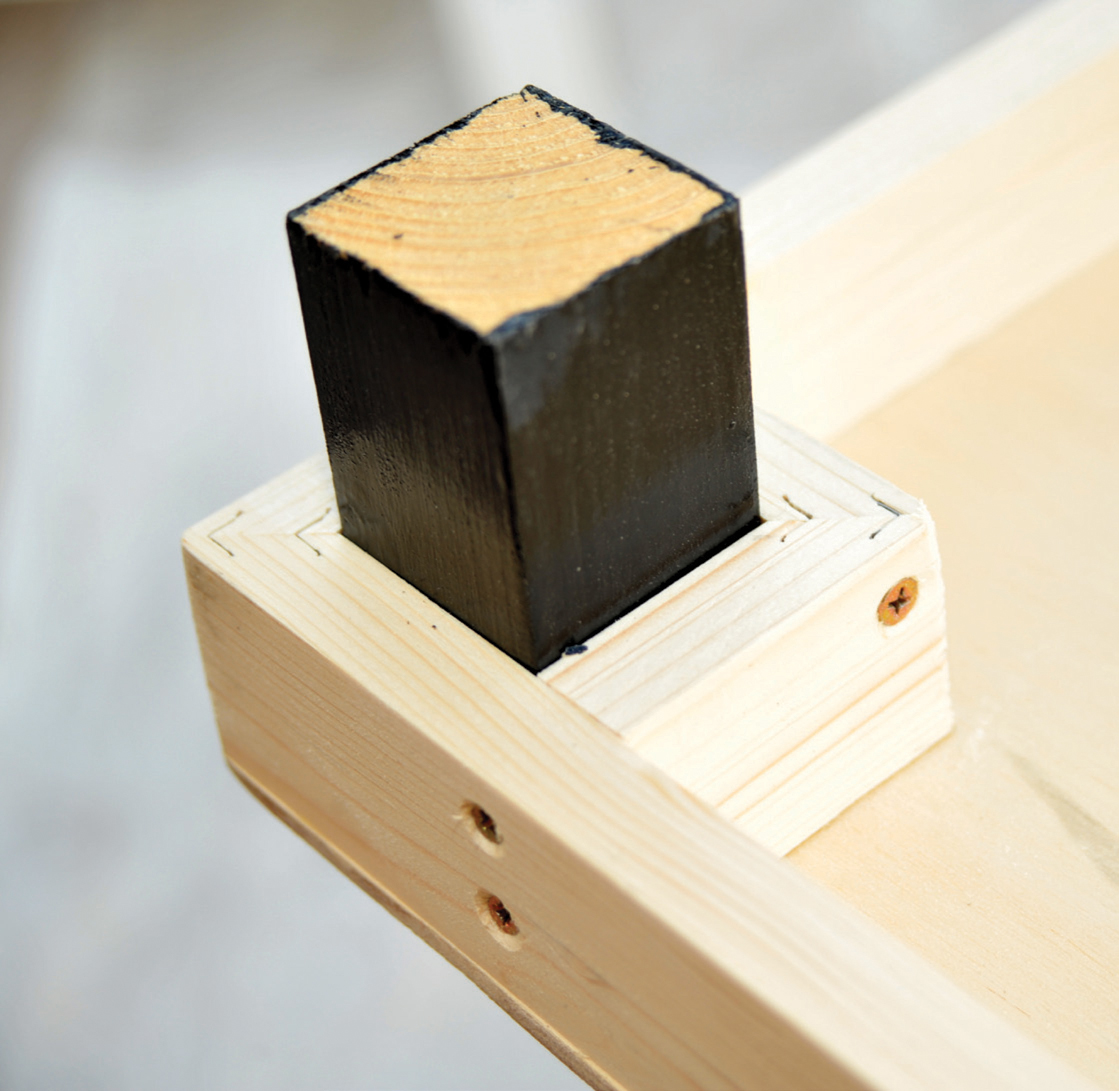
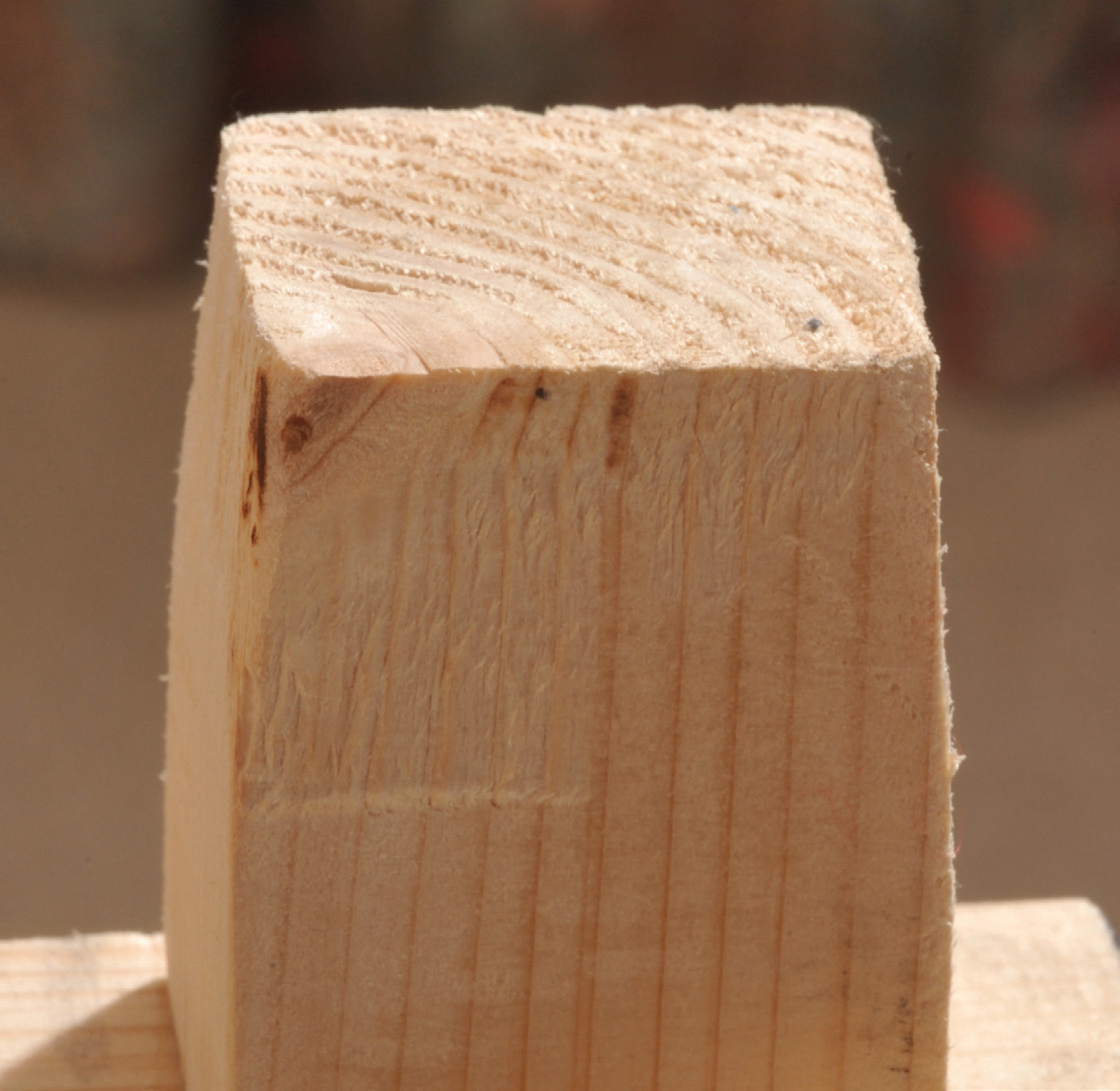
Stubby leg being tested before chamfering.
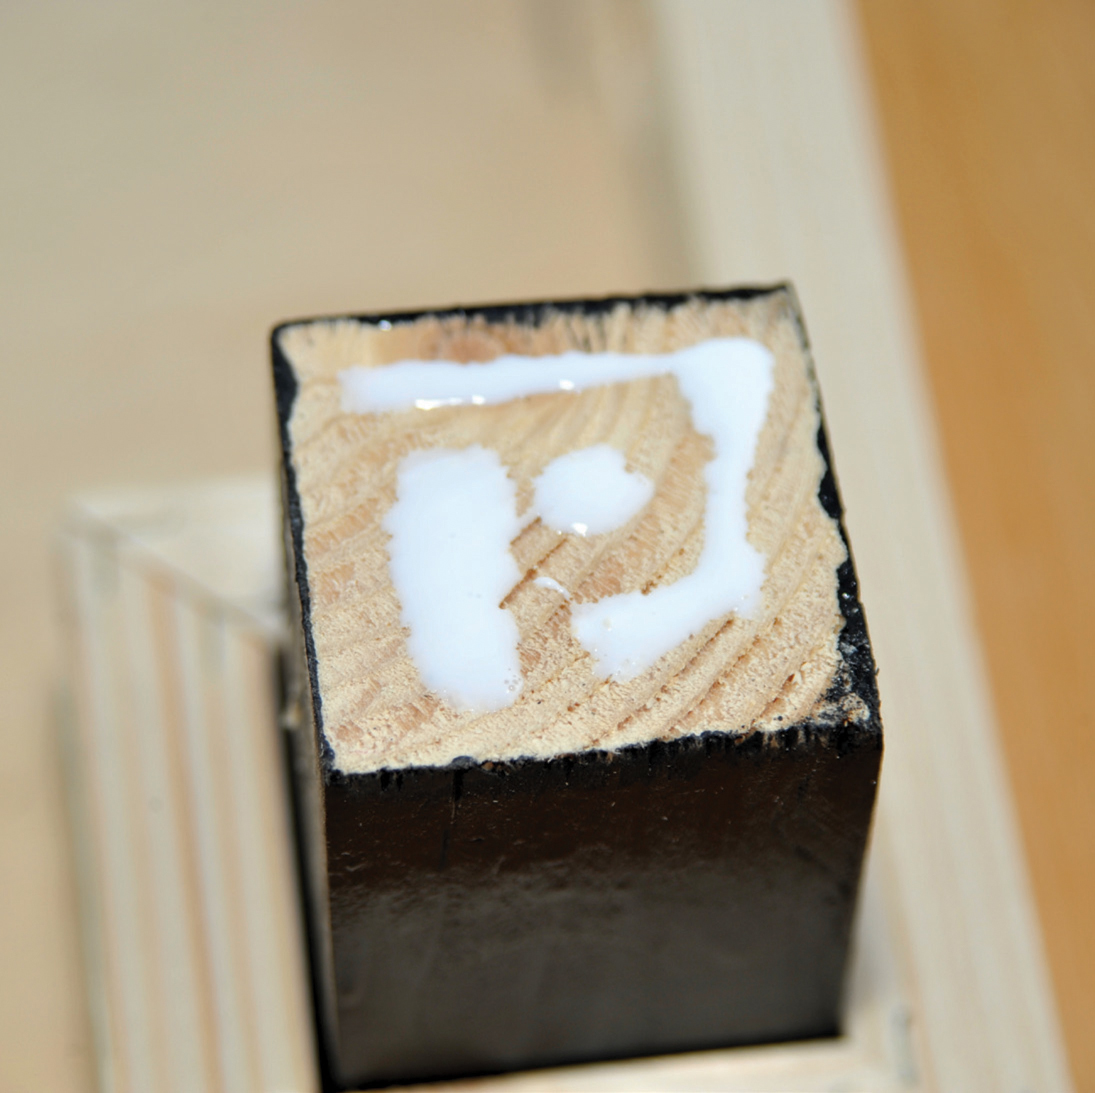
End of leg glued ready for cross-plate.

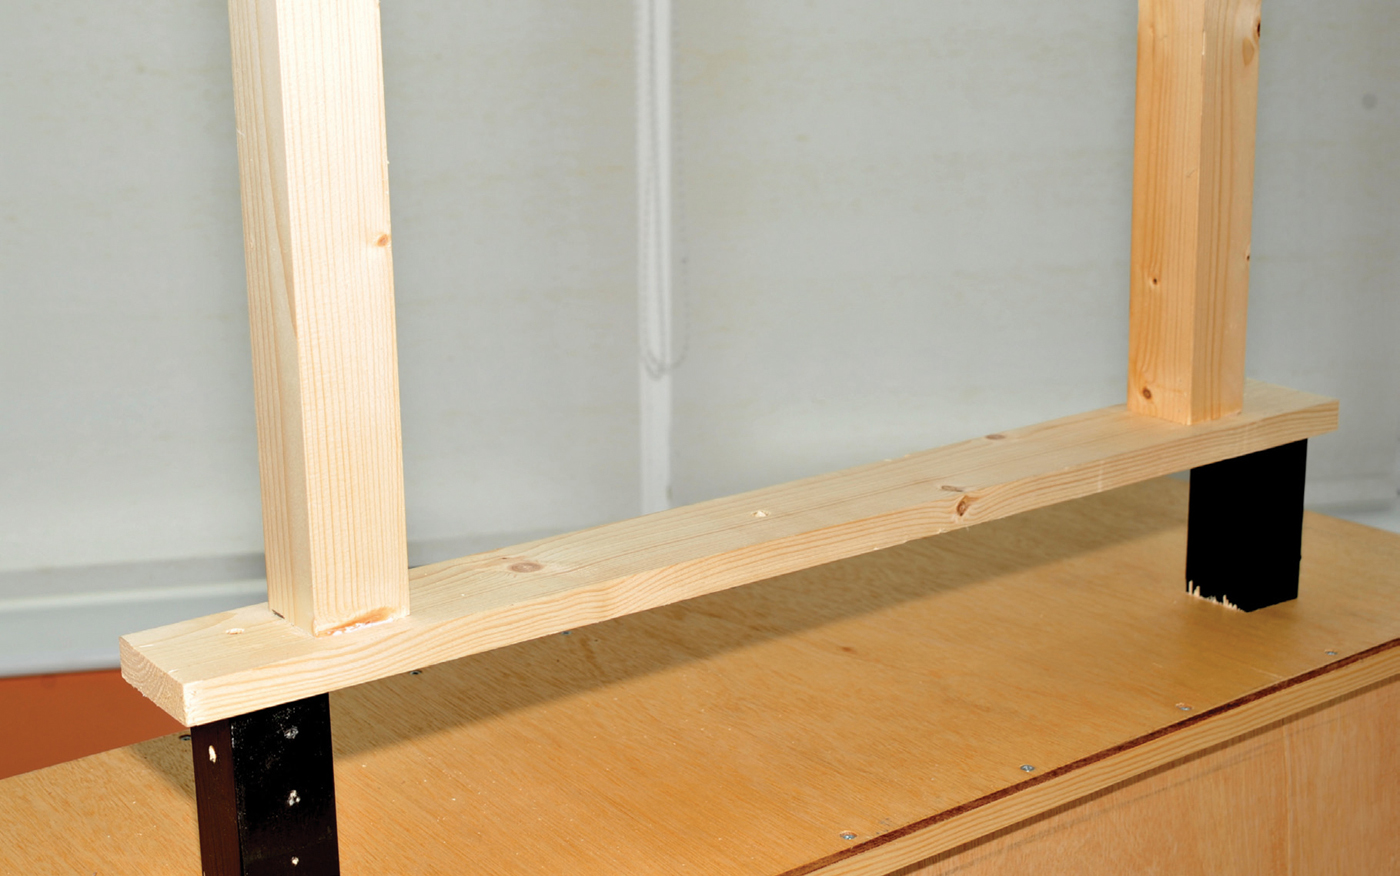
With legs in place, screw in the cross-plate to both legs.
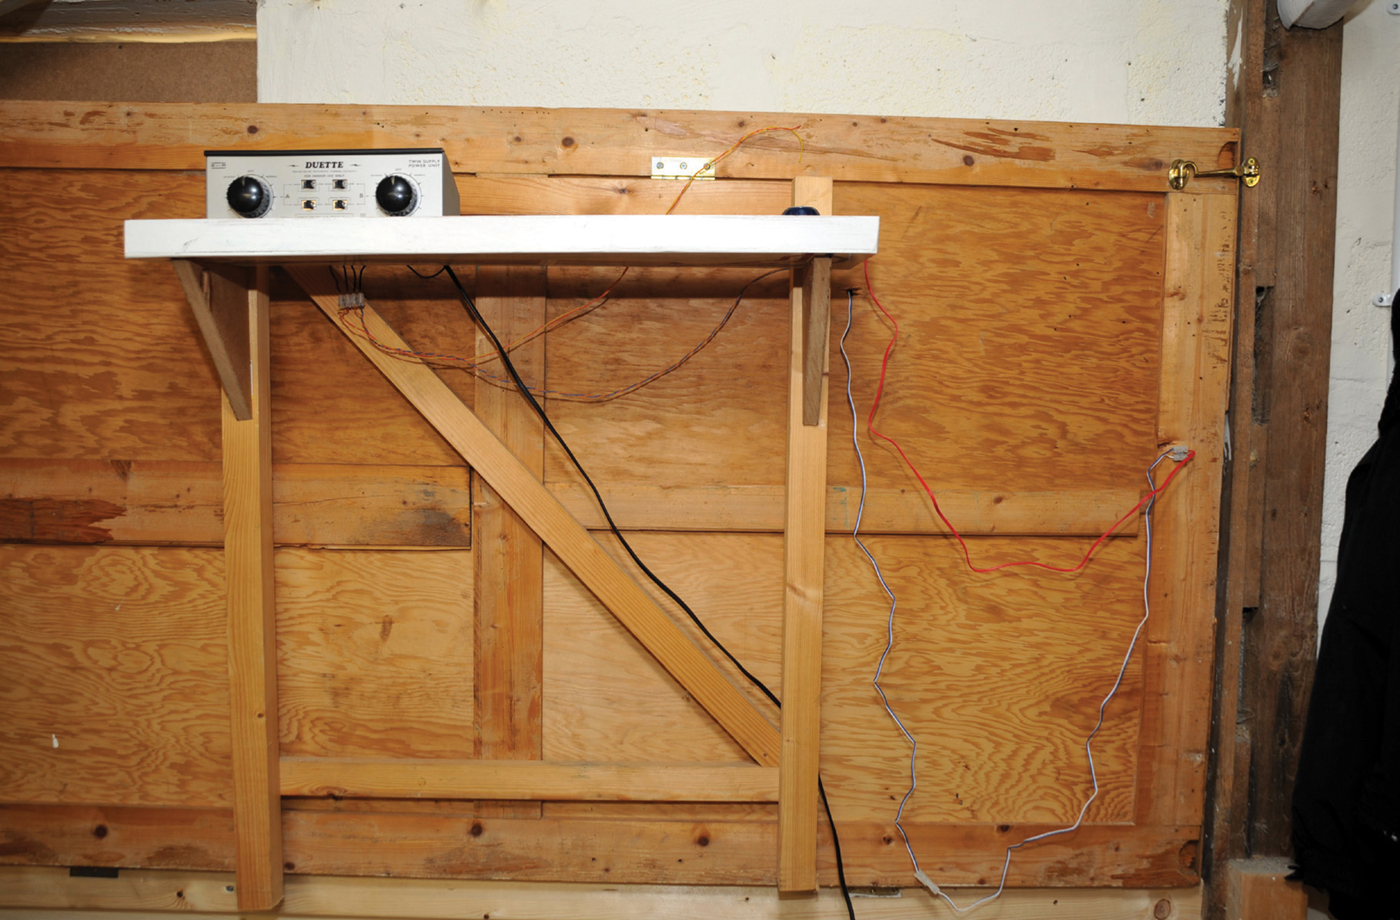
If the layout is purely a simple track layout with either no scenery or removable tunnels, stations and so on, you simply need to attach a suitable 44mm (1¾in) by 34mm (1½in) batten to the wall and then fix hinges between the batten and the baseboard. This batten must be 100 per cent level for its full length and it must also be very securely fixed to the wall. This is more of a problem when the property is constructed in stud and plasterboard, than it is with solid walls. If you attach the hinge to the back of the baseboard, the thickness of the baseboard must be less than the thickness of the batten; otherwise it will not fold up flat. If you attach the hinge to the back of the baseboard and create a slight gap between the baseboard and the batten before attaching the hinge to the side of the batten, the baseboard will slope in towards the wall and will be more stable. If you have scenery that is permanently attached, you need to make the batten wide enough to allow scenery to remain in place without being crushed against the wall. As well as making the batten wider, by creating a frame rather than a single batten, you need to provide stops on the wall to prevent the scenery being crushed against the wall. You need to use sufficient 67mm (2¾in) × 102mm (4in) grade 7 washered or ball-bearing hinges to provide adequate support. To fix the board to the batten, stand it upright on the batten with a thin packing in between and then screw the hinges in position to the outside of the batten and the base of the baseboard. If you are not using a solid wood baseboard, the baseboard frame will need some form of strengthening by using 34mm (1½in) softwood rather than the normal 18mm (¾in) for that side of the frame.
Legs with cross-plate.
You need to decide on an appropriate height before fitting the battens and you also need to ensure that the top of the baseboard does not catch on the ceiling and that it does not catch other obstructions when being folded up. The final stage of construction is to have a catch to hold it in the upright position. The simplest way is to have a piece of wood screwed to a block on the wall just above where the baseboard reaches when folded. This wood is held up when the baseboard needs to be undone or when it is to be closed. The piece of wood will simply hang down and hold the frame in place. This was the method used in our clubroom for the first few weeks but it has now been replaced with a more complicated system. With very large boards it is possible to fit a rope system with counterweights. If the board folds down rather than up, the track is then exposed and can be easily snagged. The board also has to be sufficiently high off the ground, where it is attached to the wall, to allow it to fold down without hitting the floor. If it folds down, there is also a problem with stowing the legs; whereas if the board folds up, they naturally fold flat against the underside of the board. Instead of legs it would be possible to have a frame with a covering that acted as legs when lowered, but contained a notice-board or picture when folded up against the wall.
Hinged unit folded against the wall. Note how the legs automatically fold flat and the shelf with the controllers always stays horizontal.
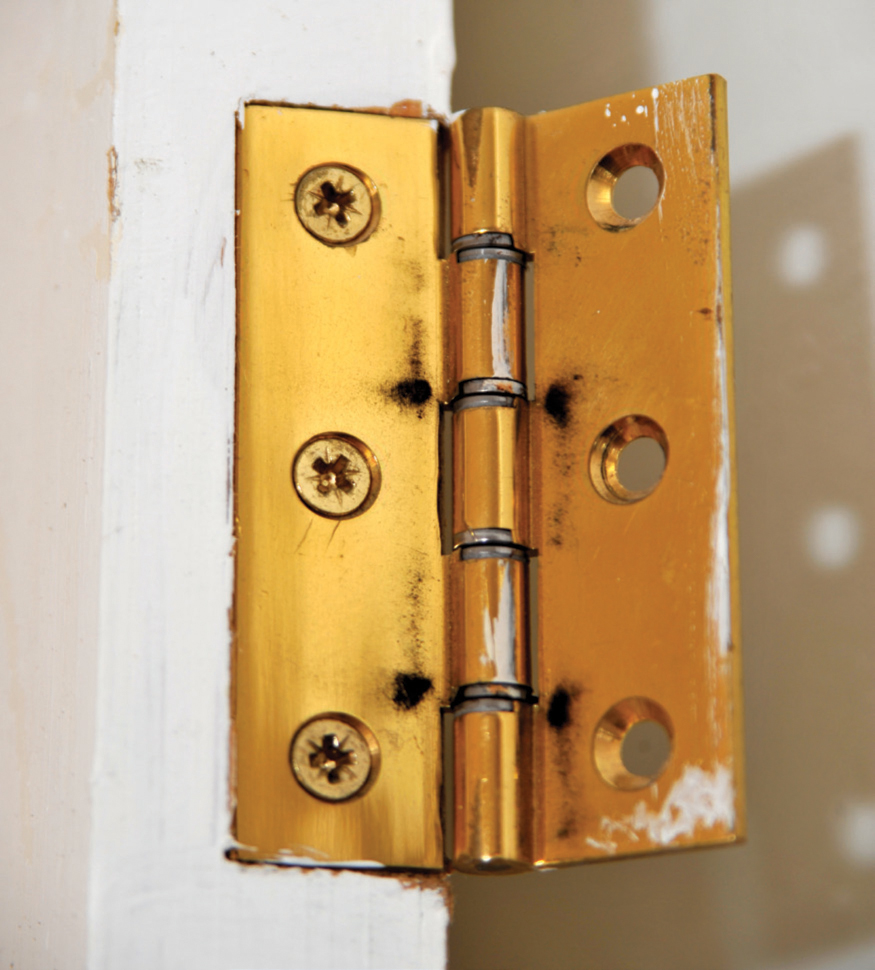
Ball-bearing hinge (stronger and easier to operate than a cheaper hinge).
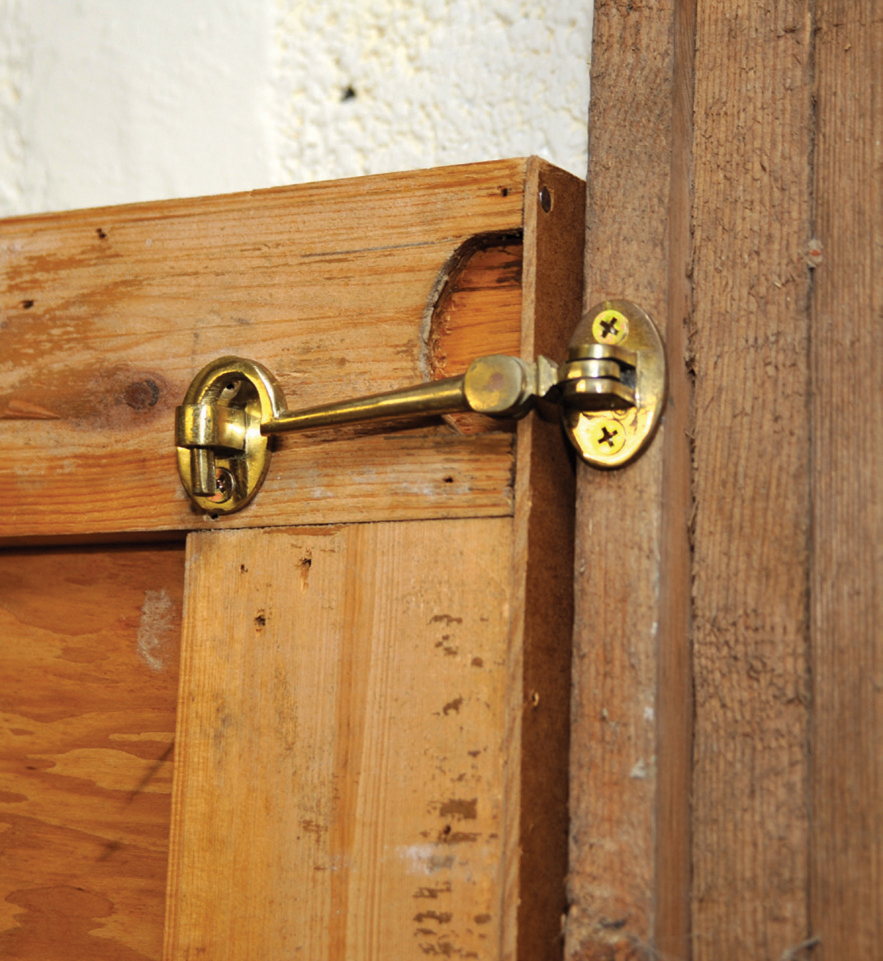
Replacement fastening device – a hook-and-eye rather than the crude length of wood when the board was first installed.
The legs need to be at exactly the same height so that the baseboard is totally level when lowered. The use of a spirit-level is essential. For repairs or alterations to electrics, replacement of point motors and so on, the board can be quickly locked up in a vertical position. Instead of legs, some people place cupboards or shelves in place of the front legs. Whilst this provides extra storage, it does limit access to the board. Even with the board folded into its upright position, you have to lean over the units to work on the underside of the board.
Basically, you need to attach a level batten to the wall, as described above. It needs to be at the height you want the top of the baseboard to be. The simple way is to screw flush mount brackets both to the rear of the baseboard and the front of the batten to create a lift-off mounting system. The legs at the front can be more permanent, as this type of fixing is most useful for fairly permanent fixtures. The two ways to work on the underside of the layout are either to remove the legs and unhook the back from the wall batten or crawl underneath and work upside down (not the easiest of tasks).
Both of the above fixings (hinged to the wall or fastened to the wall) mean that when the layout is in its operational position, there is only access to the layout from the front and possibly the sides.
If the unit is to be free-standing, there are a variety of trestles available in different guises. There are commercially available sawing horses, which are usually sold in pairs. They have the advantage that they fold flat, but they are only at table height and not adjustable. Telescopic saw horses are available, but they are heavy and extremely expensive. Folding workbenches made by Black and Decker or B&Q are also possible alternatives, as it is possible to make a ‘T’-section board and clamp this in the jaws of the bench to raise the height. Apart from the basic saw horse, the others are metal, heavy and cumbersome. They are also more expensive than the option of wooden legs. Trestles, as well as being available from DIY stores, are also available in a variety of shapes, sizes and prices at a variety of stores, including IKEA. Some of the IKEA ranges have height-adjustable central boards. It is, however, quite simple to make your own trestles. It is basically two matching rectangular frames joined together with hinges at the top.
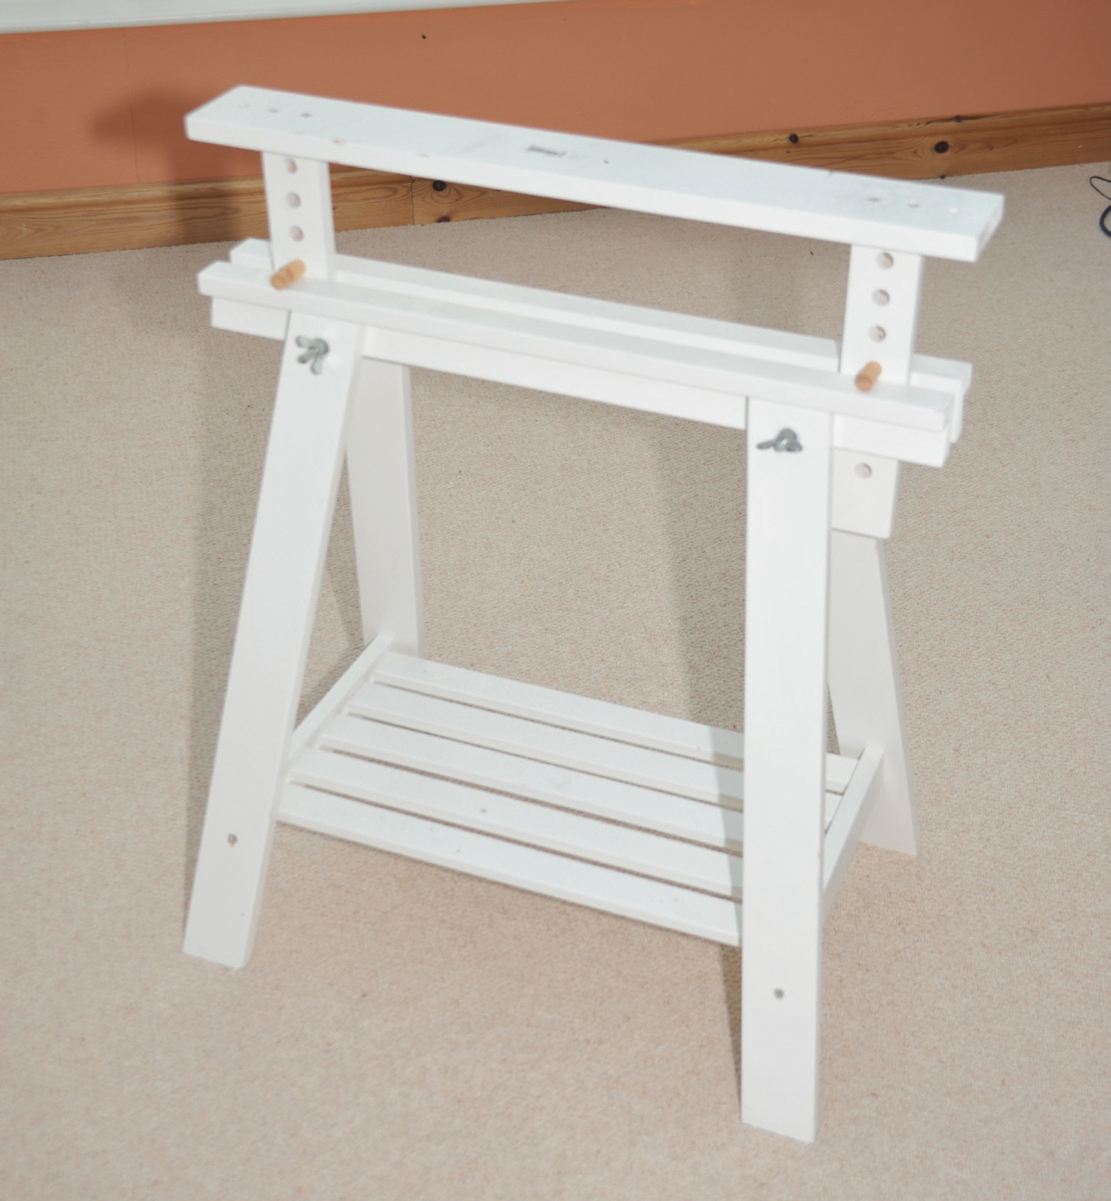
IKEA trestle.
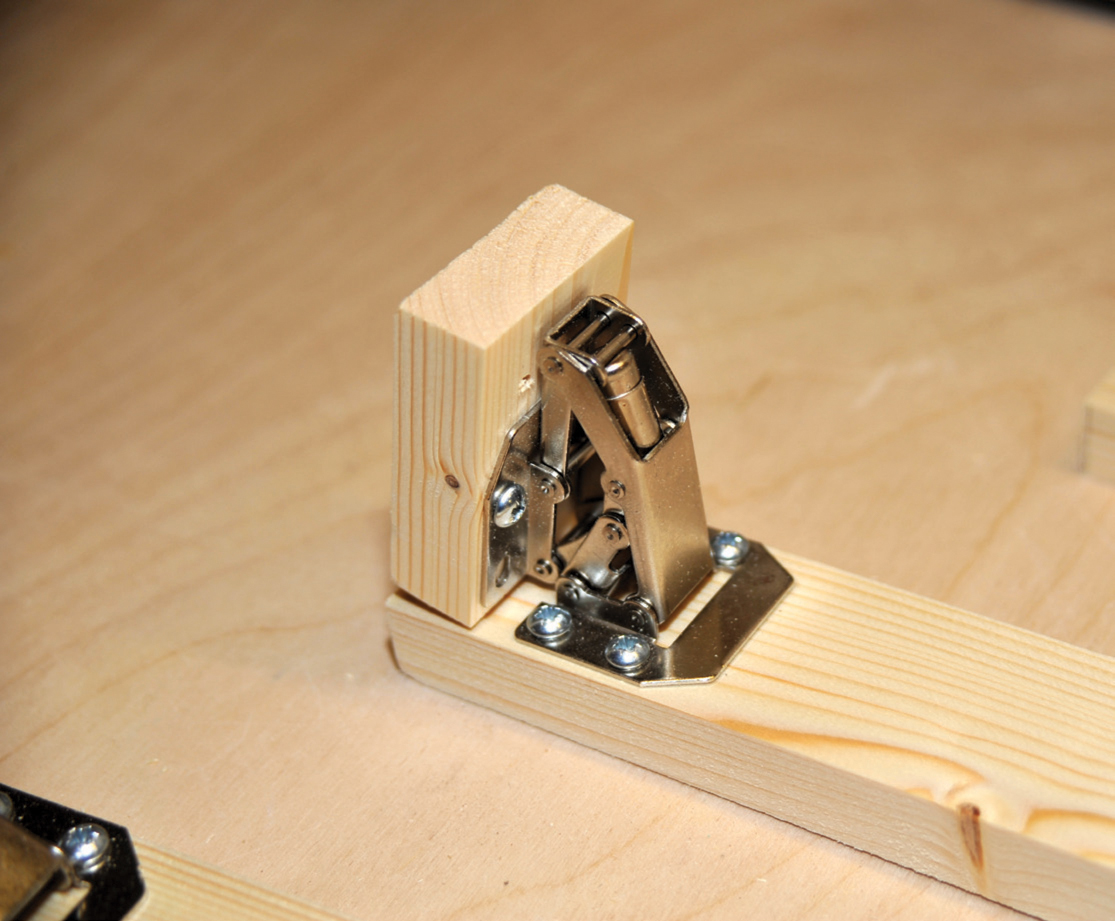
Legs made out of wood are the cheapest option. They are best made as a pair, as the cross-bars create rigidity. Wood sized 44mm (1¾in) by 44mm (1¾in) is not too heavy, but you can still achieve rigidity with 18mm (¾in) by 28mm (1¼in) legs if it is essential. Rather than using an actual hinge, it is cheaper, yet quite efficient, to just put a bolt through both the leg and the side of the frame. It is important that you either chamfer the top of the legs or ensure that it will not catch during the folding process. Hinged legs can either be permanently attached to the baseboard, which increases weight, or attached and detached each time the baseboard is relocated. Hinged legs must be held apart by either opening beyond the vertical or, more effectively, stabilizing the whole unit by having a cross-support from the lower half of the leg to the top of the baseboard. Folding legs have a tendency to drop down when transporting baseboards, unless they are clipped into the closed position, but if you use ‘Hafele’ folding leg brackets, they produce a hinge that is both strong and locks both in the open and closed positions.
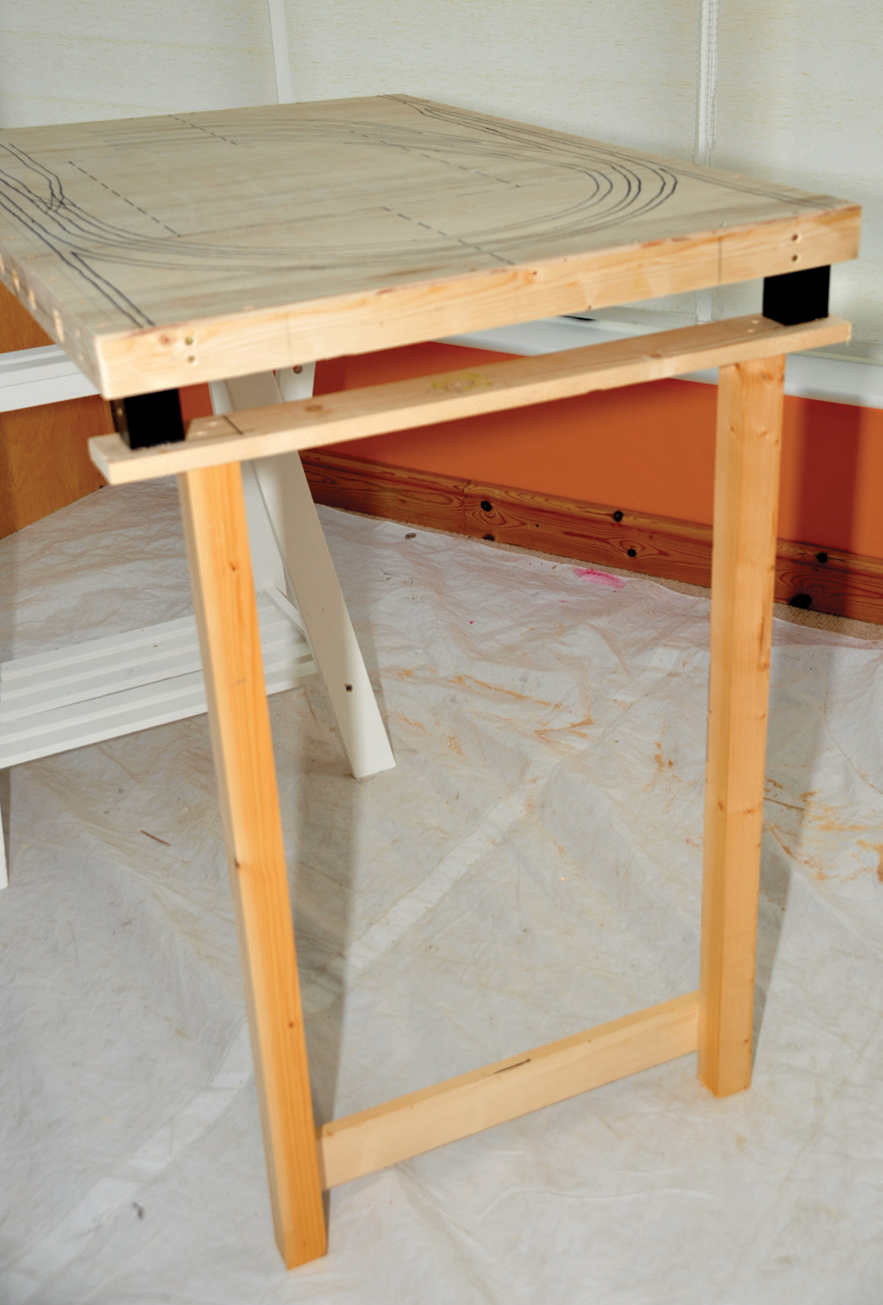
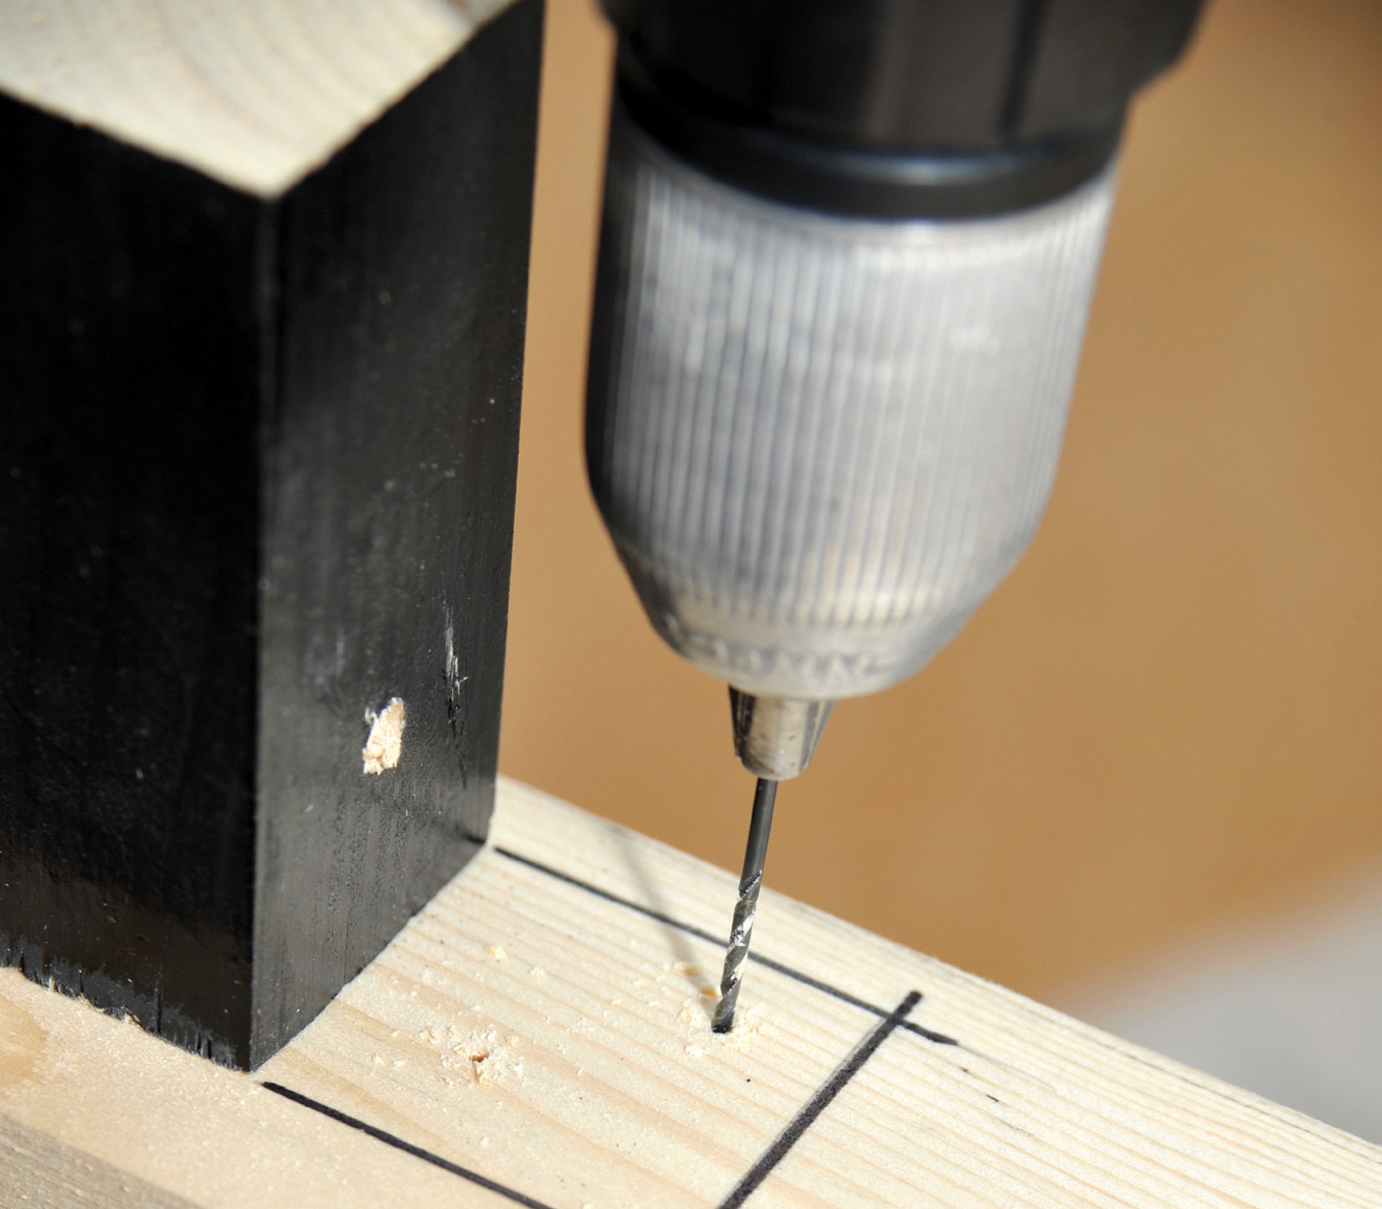
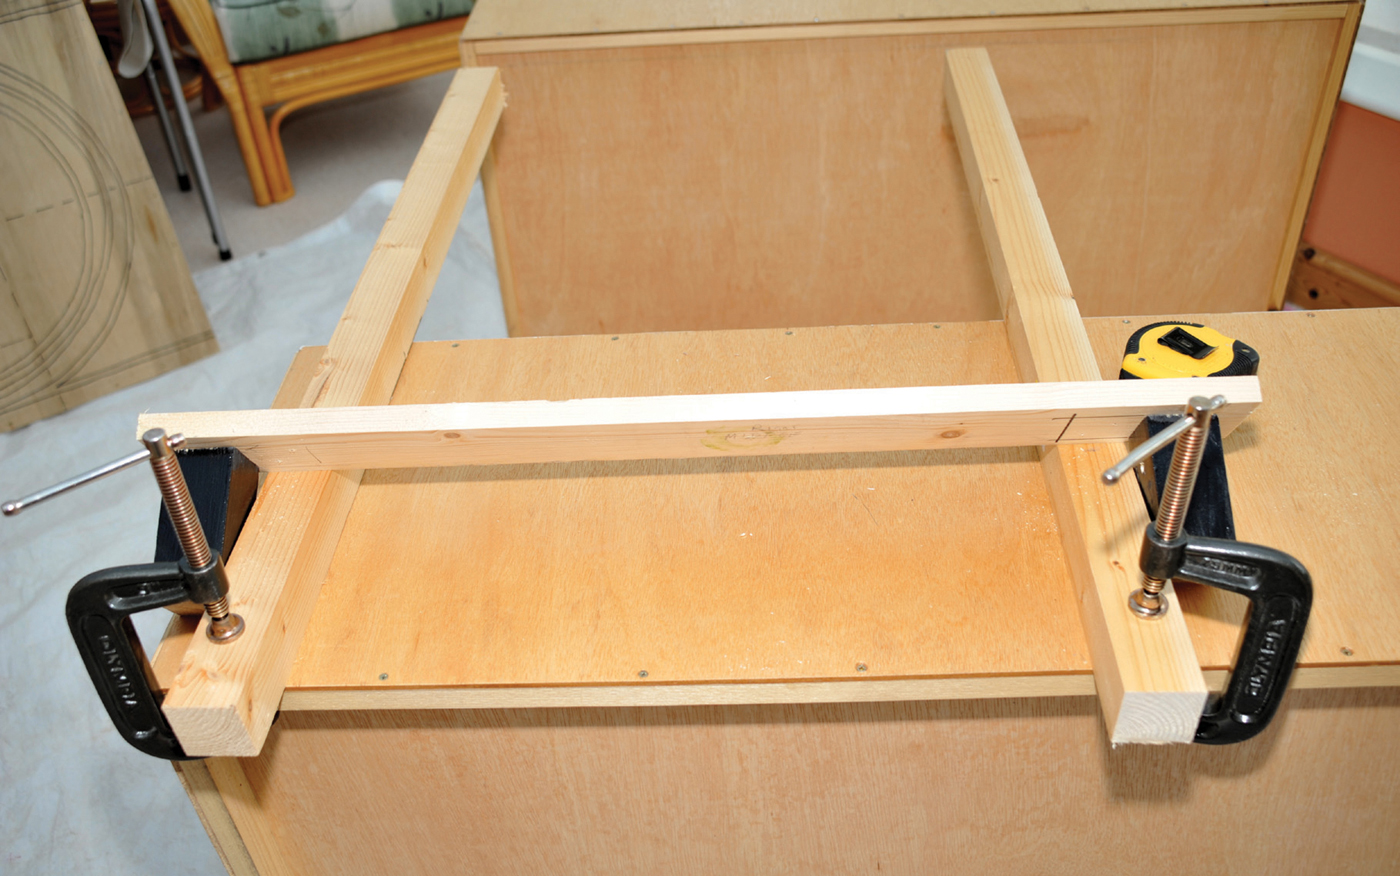
The alternative to hinged legs is to create frames on the baseboard corners into which the legs slot, in exactly the same way as described for table-top mounting. Stepped in from the short, stubby legs, I have screwed and glued a further pair of legs. These legs are 900mm (35½in) long to match my other boards and are glued and double screwed. The new legs are made more rigid at the lower end with a cross-member. Because I saved spare wood from previous cuts, I have used the same 18mm (¾in) × 69mm (2¾in). This width is sufficiently wide enough to provide a secure fixing with two screws. Again the joints are glued. It is purely a personal choice, but I always chamfer the end of the cross-beam, so that it does not catch on trousers, etc., if you are passing close to it. It is not necessary to fix the leg to the baseboard but I usually slide a bolt into a pre-drilled hole through the baseboard side and the leg, just to stop the leg falling out when the baseboard is lifted. There is no need to use a nut to hold the bolt in place. Again these need to be braced between pairs of legs to ensure a rigid structure.
The initial stubby leg described previously in this chapter.
Drill and countersink for two screws.
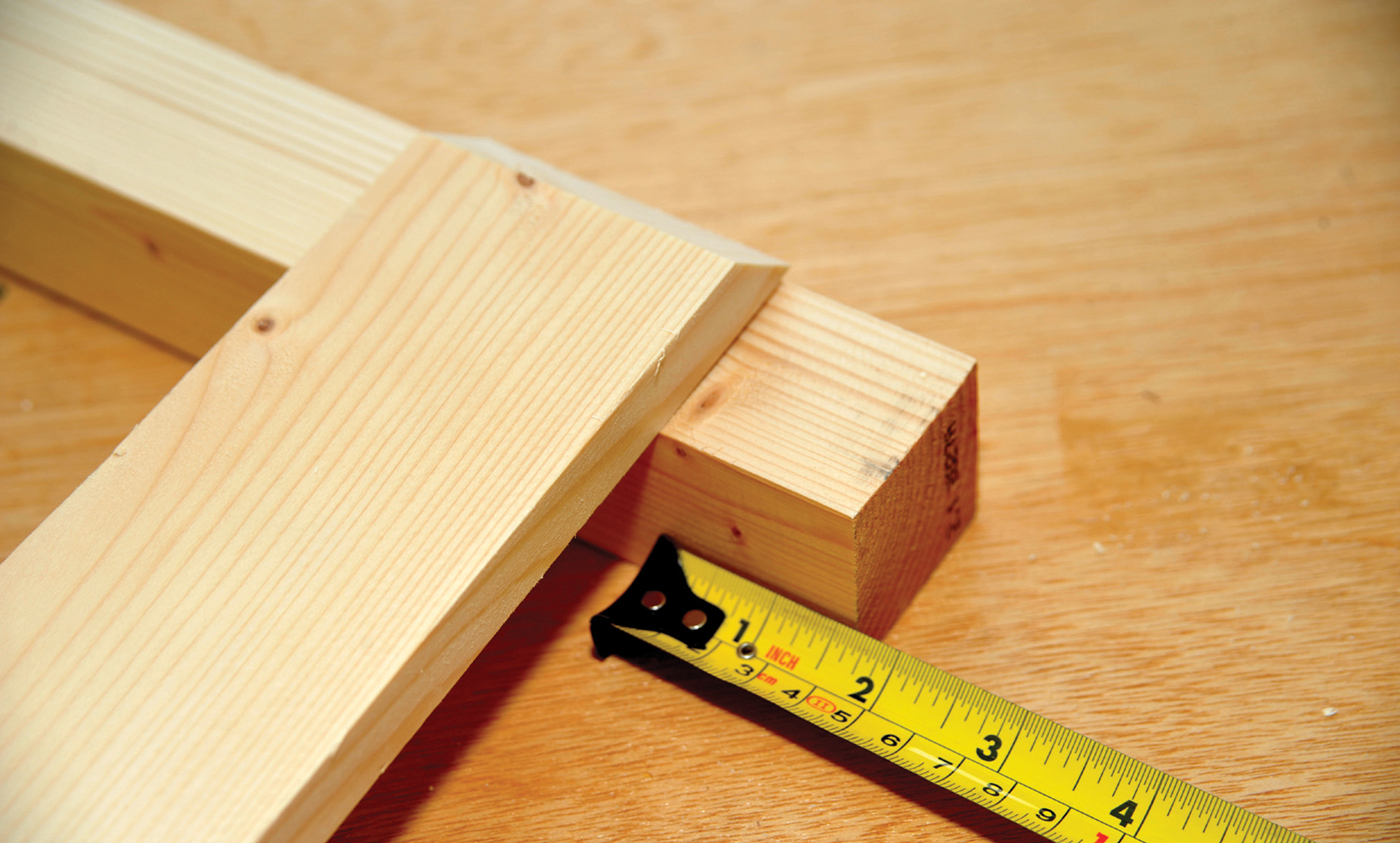
Ensure legs are square to each other and the plate and measure.
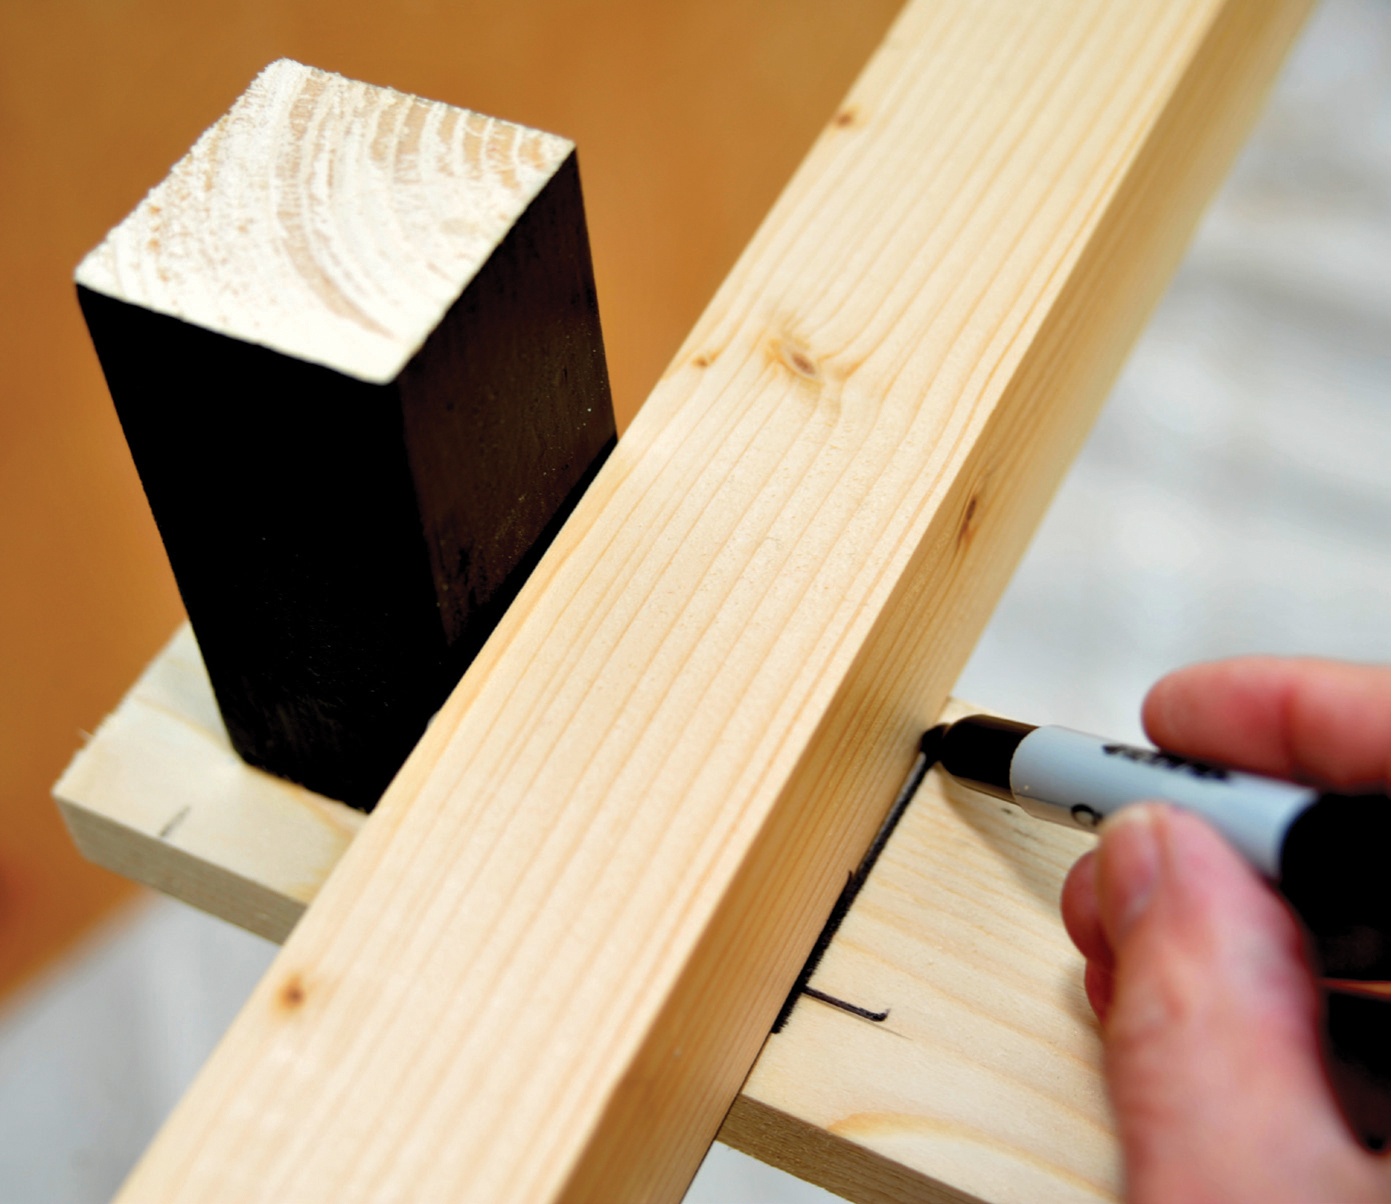
Double check your measurements by marking the lower cross piece near the top joining plate rather than at the bottom of the leg. This will ensure the legs are parallel.
Cut the cross-member to the correct size. I normally mitre the end so that clothes do not catch on a corner.
Completed leg – but still needs the stubby part of its legs to be chamfered.
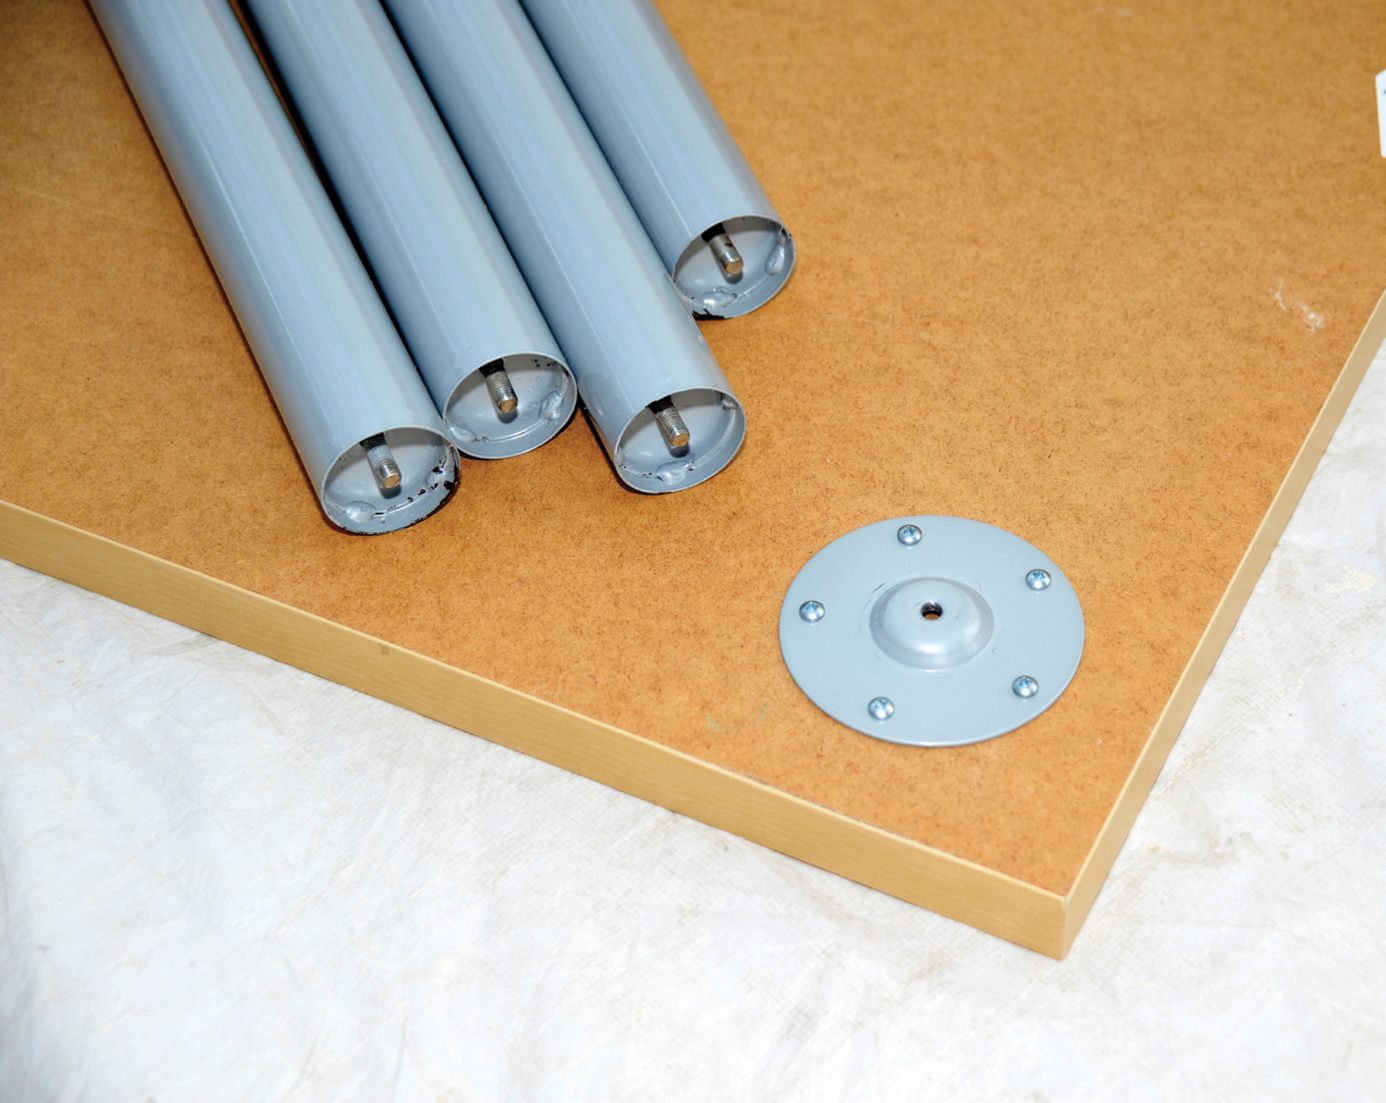
It is possible to purchase 870mm (34¼in) high breakfast bar legs or worktop support legs. These have a flat plate screwed to the baseboard. You have to install a strengthening wooden plate to screw the leg plate to it, but then legs can be attached by just unscrewing the central thread on the leg. On some versions it is possible to make small height adjustments, but most are a fixed height. These legs have the disadvantage, as well as cost, that they cannot be attached to cross-supports and rigidity relies totally on the tightness of the leg and its metal plate. They are, however, fairly rigid when tightened.
Screw in legs and plate.
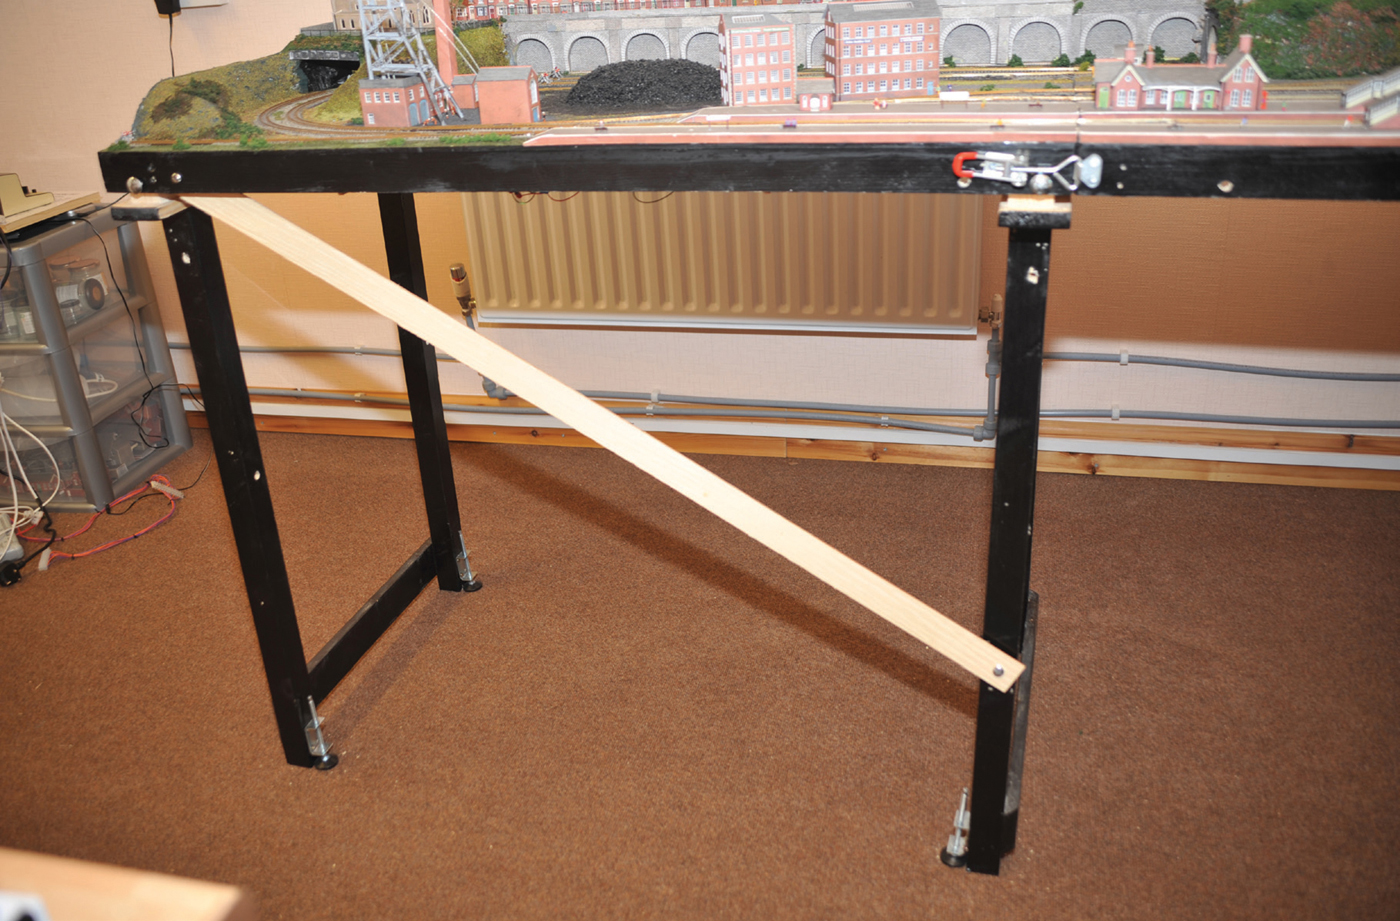
Most legs, on their own, are insufficient to stabilize a baseboard. There must be a cross-member between the lower third of a leg and the side of the baseboard. As stated earlier, whether hinged legs or slotted legs, it is best to fix the legs into pairs with two horizontal bars. You only need to add the stabilizing cross-supports to one leg at the front and the opposite leg at the back to ensure stability of a whole length of multiple baseboards.
Where the home environment is almost certain to have a level floor (although this is not always the case) putting up a layout in a clubroom or at an exhibition invariably involves slight variation in floor levels. Our club room, in an old tannery workshop, has about a 1:30 slope from one side to the other. The best solution is to buy height adjusters for each leg. These metal adjusters simply screw to each leg and can then be raised using a screwdriver to create a level baseboard. There is nothing worse than uncoupling a set of wagons for them to just run away and crash into buffers at the end of the line!

Height adjuster.
To complete the appearance of the layout, most exhibitors add a cloth around the front of the layout, stretching from the top of the baseboard frame to just above the floor. If it goes all the way to the floor, it will soon pick up all the dust and need washing. The easiest way to fix this is with Velcro tape. Attach the hooked side of the Velcro to the baseboard side and the other side to the cloth. As you roll it up, the hooks do not hook onto each other as they would if it were the other way round.