BODY
FIGURES IN ACTION
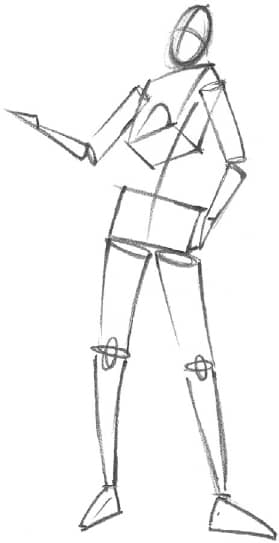
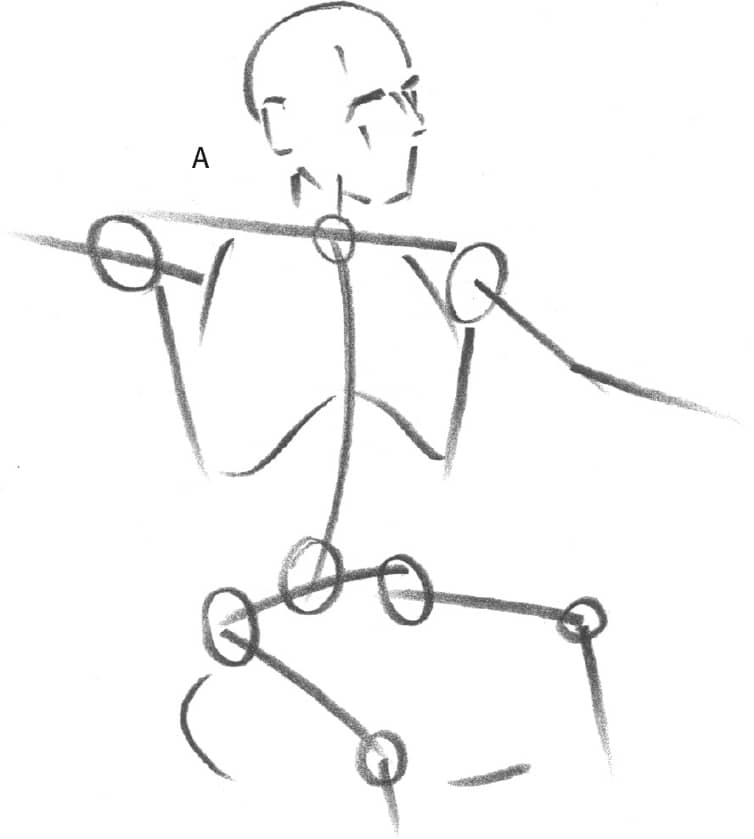
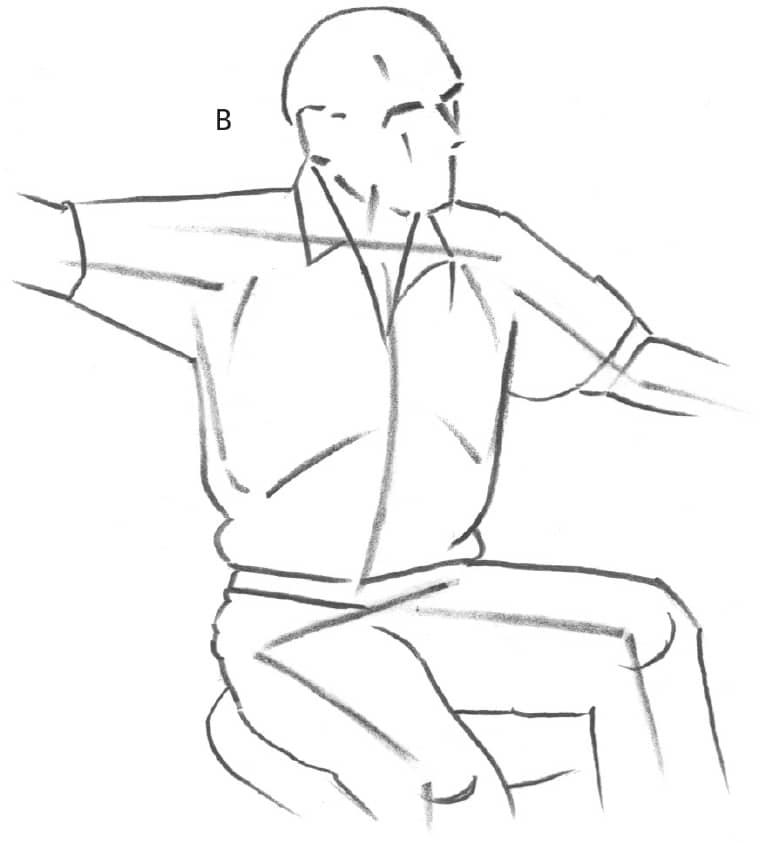
To draw the human figure from head to toe, it helps to know something about the framework on which it’s built. Many art classes have students draw people as skeletons, which is good practice for visualizing how all of the parts fit together. You don’t have to try that exercise; the simple drawings here will suffice. Start with simple stick figure sketches of the skull, shoulders, rib cage, and add the arms and legs. Then, once you have the proportions right, you can flesh out the forms.
CAPTURING ACTION
Remember that a gesture drawing is a quick, rough sketch that illustrates a moment of an action (see below). The idea is simply to capture the gesture—it isn’t about trying to get a likeness. Give yourself 10 minutes to draw the entire figure engaged in some sport or full-body activity, working either from life or from a photo. Set a timer, and stop when the alarm goes off. Working against the clock teaches you to focus on the essentials and get them down on paper quickly.
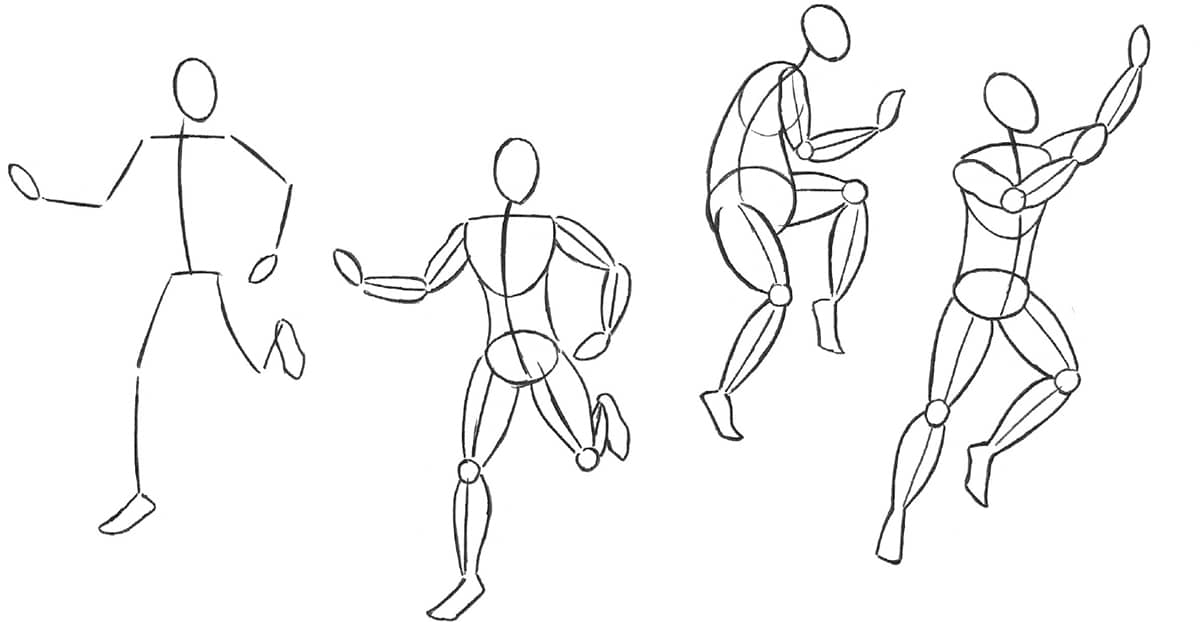
Developing Gesture Drawings Start with a simple stick figure to catch the motion; then add circles and ovals to flesh out the forms.

Suggesting Movement First sketch in the diagonal center lines for the arms and legs, and add ovals and circles for the heads and joints. Then rough in the general outlines.

Blocking in Shadows To keep the feeling of free movement, don’t draw perfectly refined lines and shadows. Instead, focus on making delicate outlines for the dancers, and quickly lay in broad, dark strokes for their clothing.
DRAWING FIGURES AT SPORT
Some of the best subjects for action drawings are sports figures. Although many artists thoroughly enjoy watching the games, they rarely draw from life. Some would much rather work from photos that have stopped the action for them. Begin by drawing the action line; then build the rest of the figure around that line, paying careful attention to the way the body maintains its balance. The athlete shouldn’t appear to be falling over!
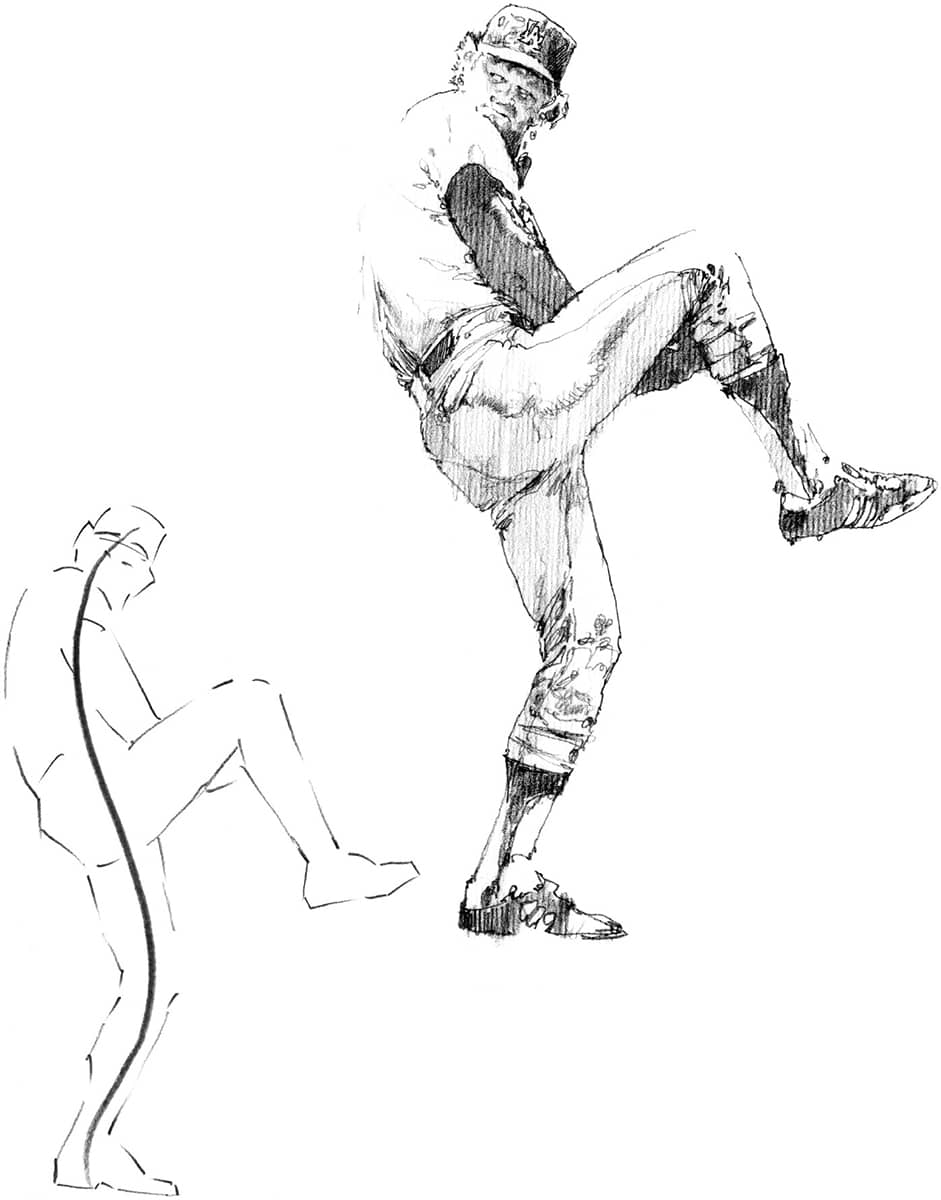
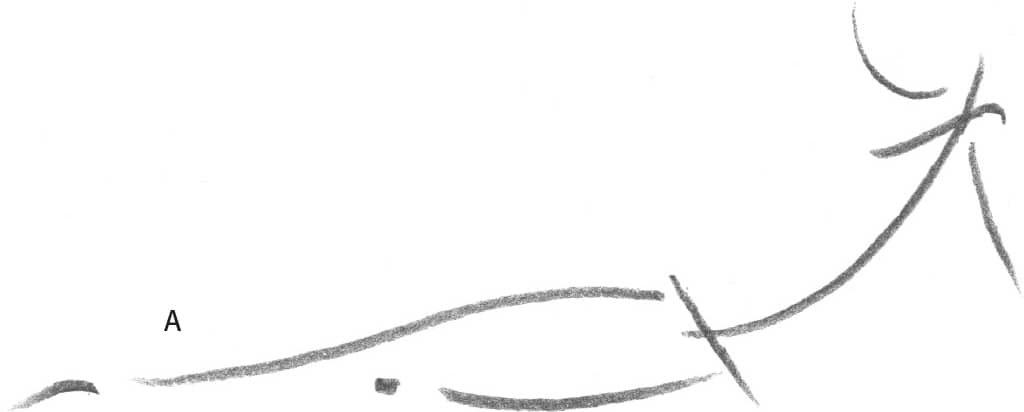
Winding Up Baseball pitchers balance for a moment on one leg, just before throwing the ball. Here, draw an S-curve for the action line to show the way the opposing top and bottom curves keep the player balanced.
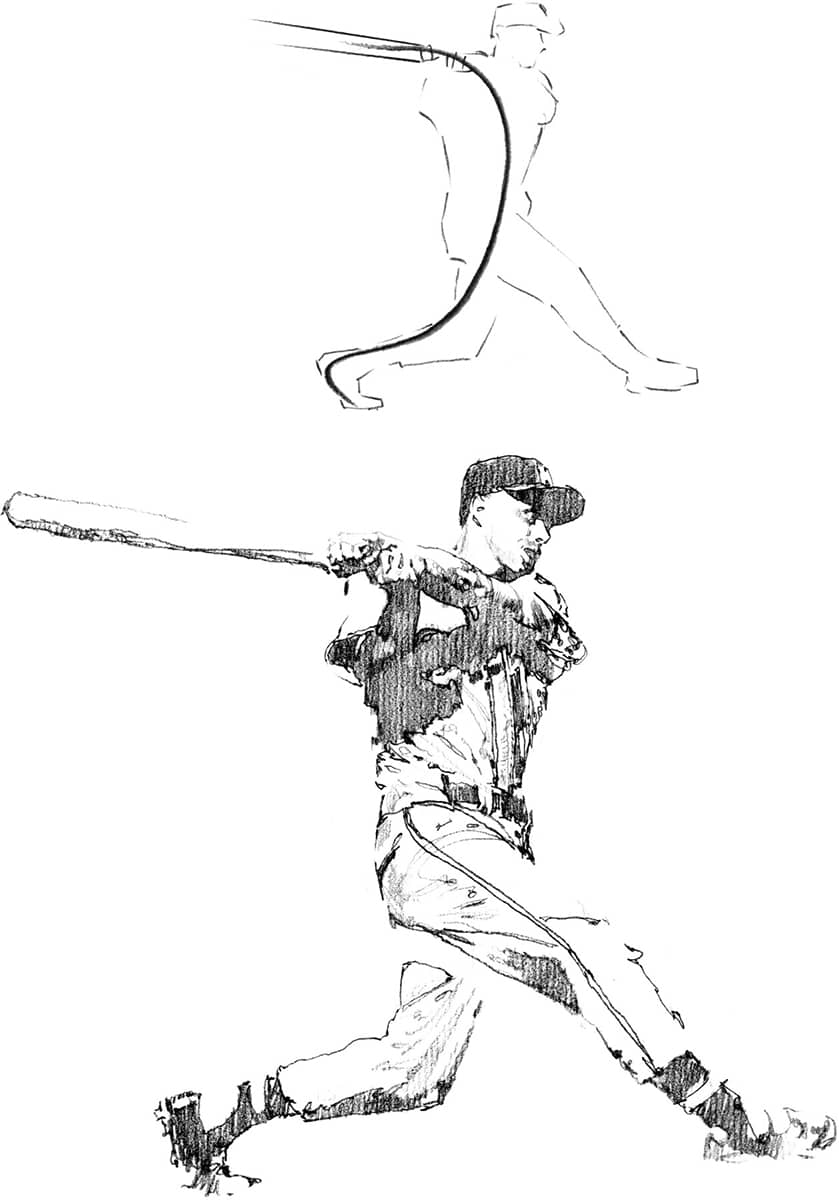
Swinging Batters balance on both legs while swinging the bat through in a complete semicircular motion. This modified C-curve (an extra turn was added for the foot) catches the full range of the player’s movement.
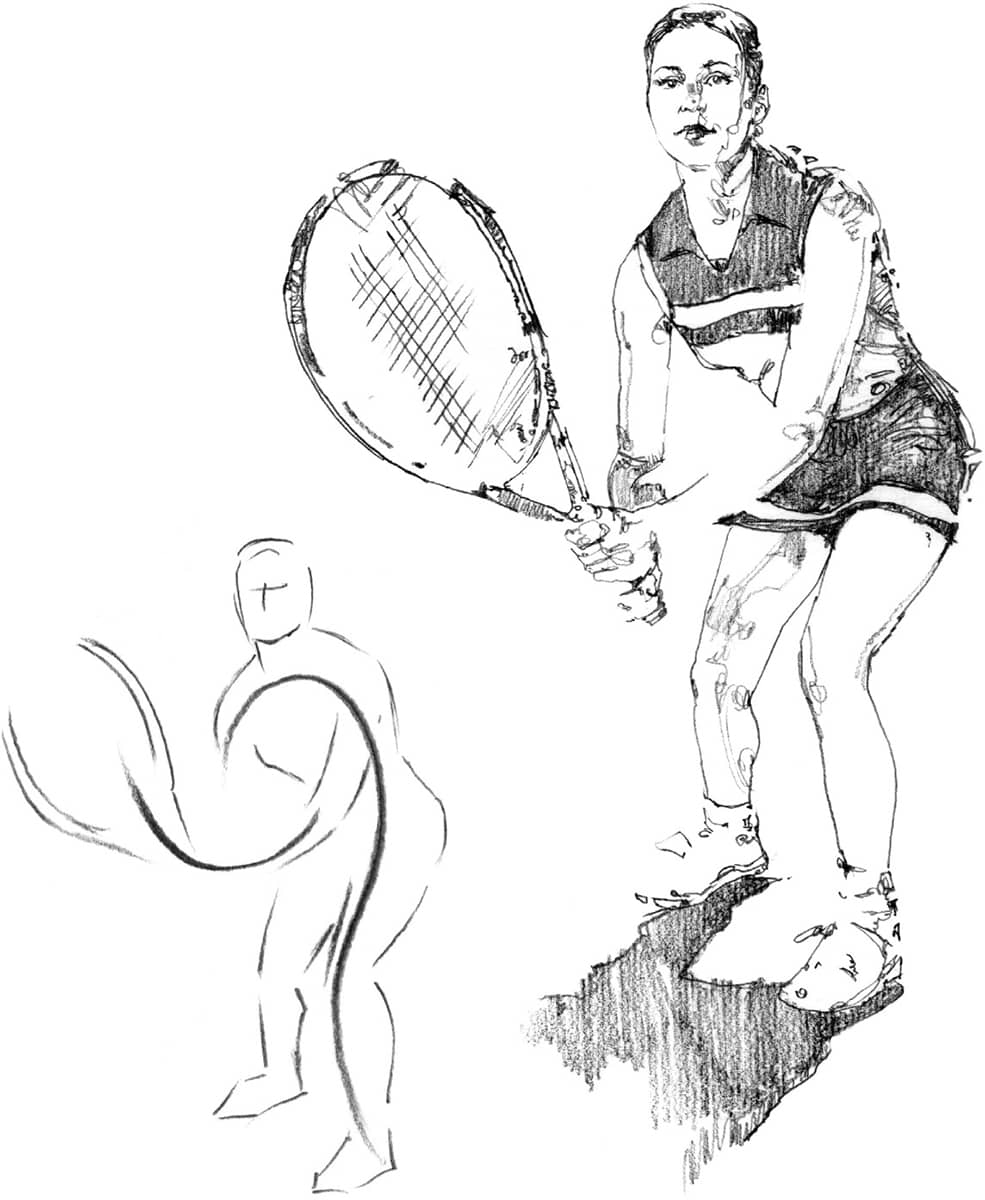
Preparing the Return Even when a player has paused, there is still a line of action, and in this case, there are two. This woman is crouching and actively holding her racket poised, so draw separate action lines for her body and her arm.
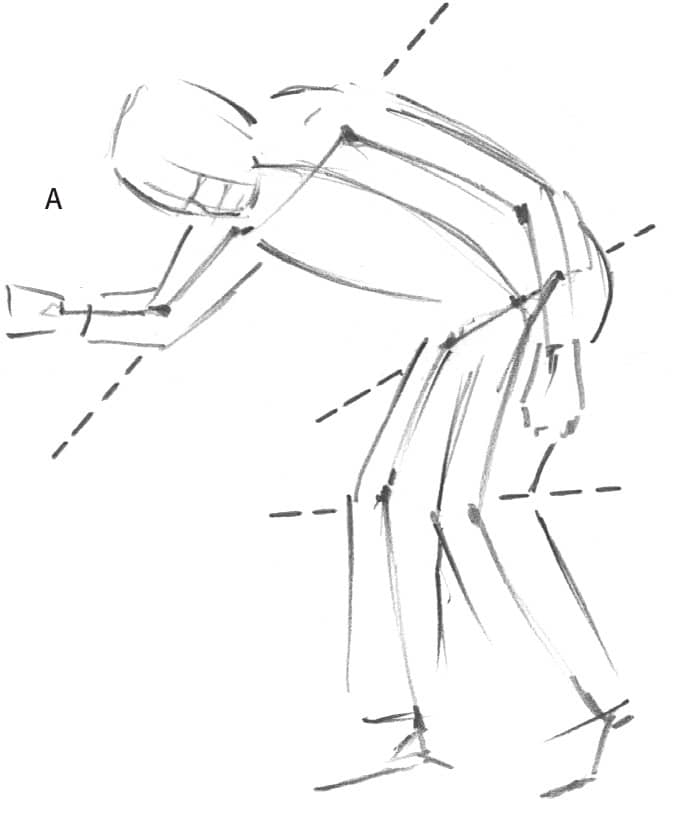
MOVEMENT & BALANCE
Another way to make drawings more realistic is to draw the figures in action. Since people hardly ever sit or stand still, your figure drawings of them shouldn’t either. You can begin by using simple sketch lines to lay out the dominant action of the figure.
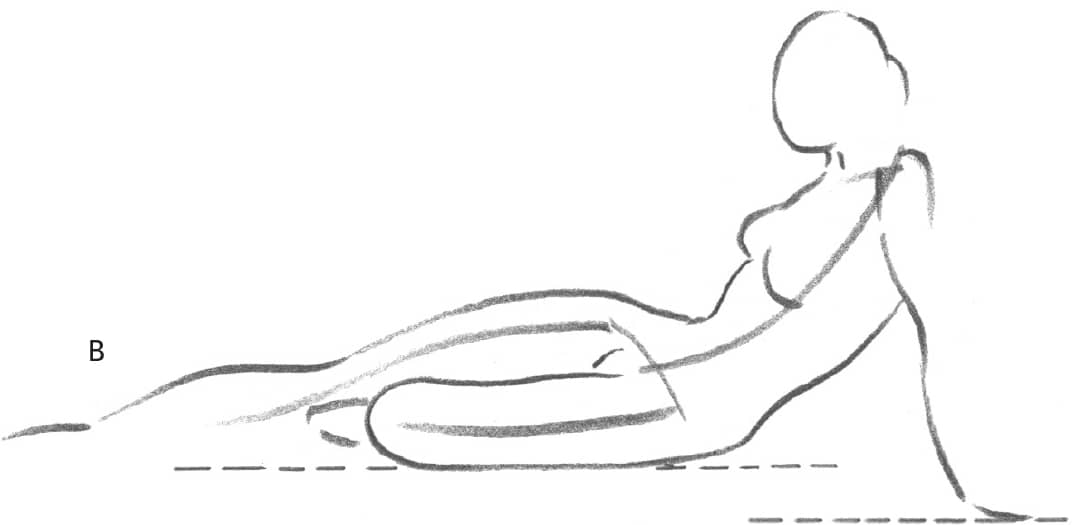
Try employing an imaginary center line of balance that seems to hold or balance the figure in its position. Otherwise, the figure may look as though it’s going to fall over. The best way to achieve balance is to place approximately the same amount of weight on either side of this center line.
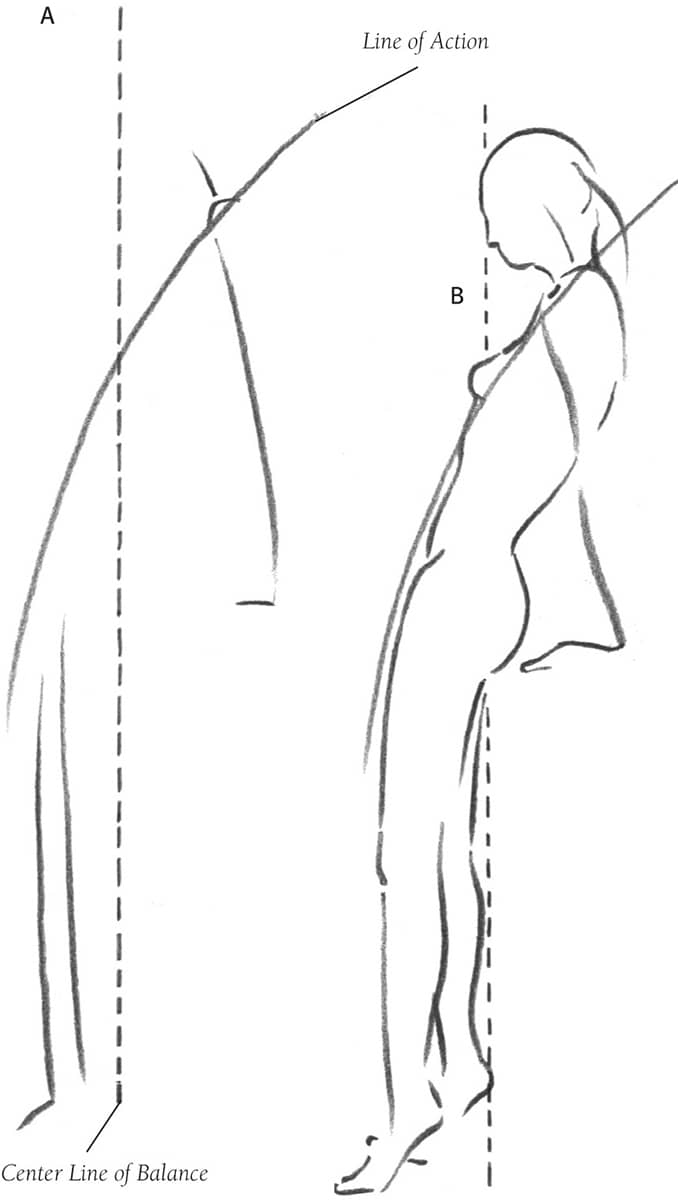
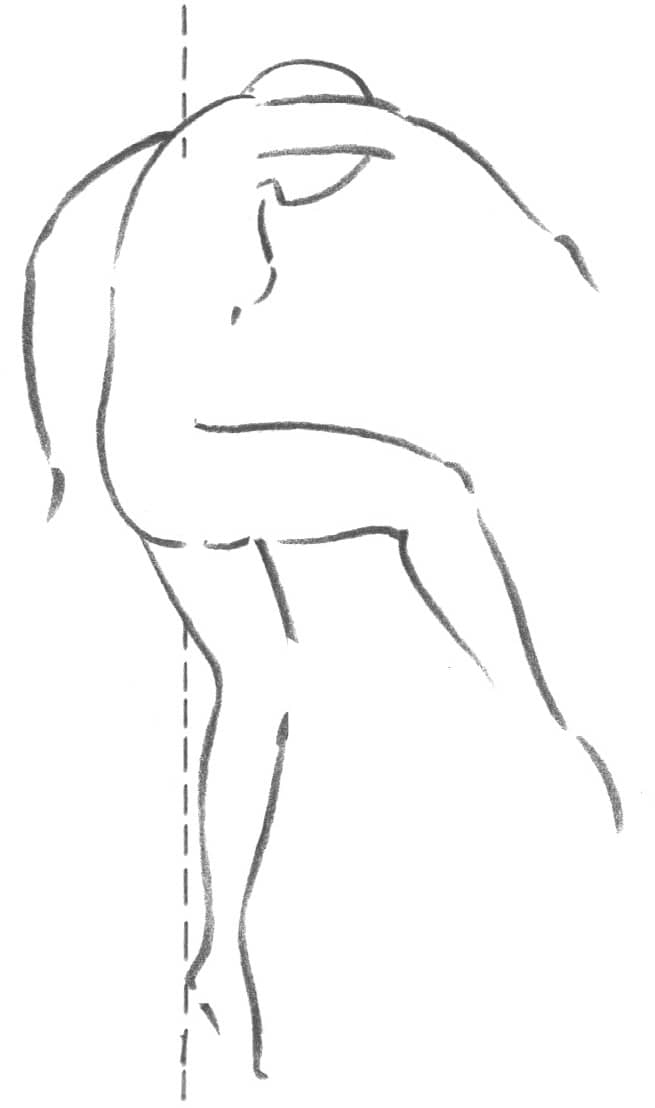
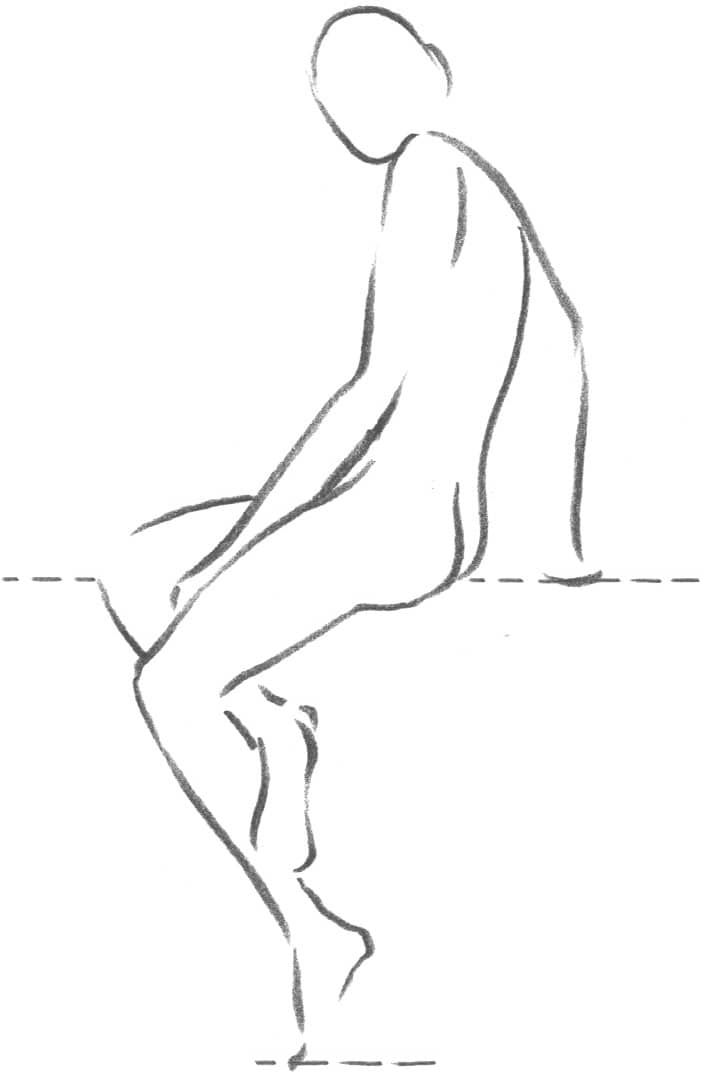
No matter what position a figure takes, you can always find a center of balance, as illustrated by the dotted lines on these examples.
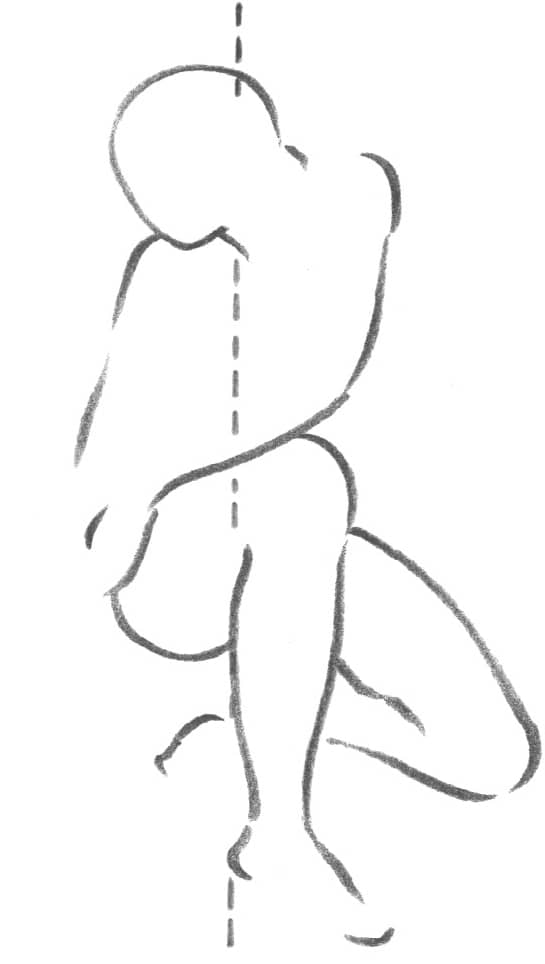
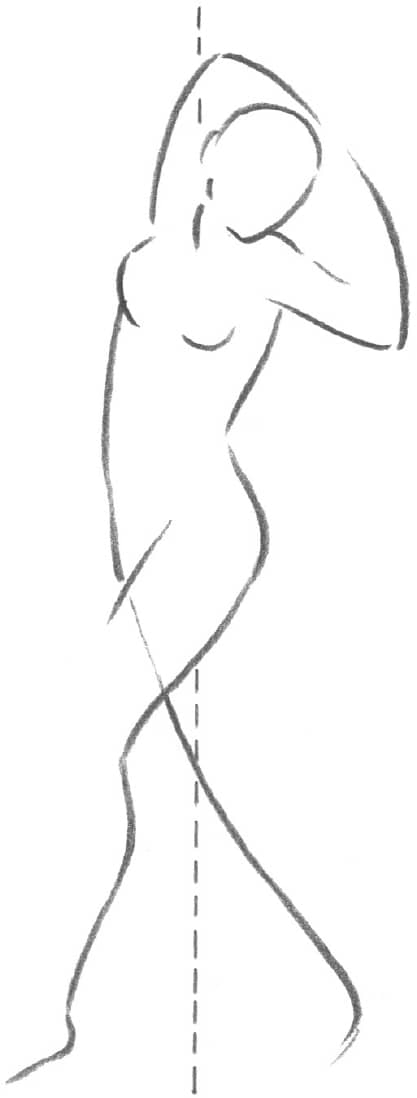
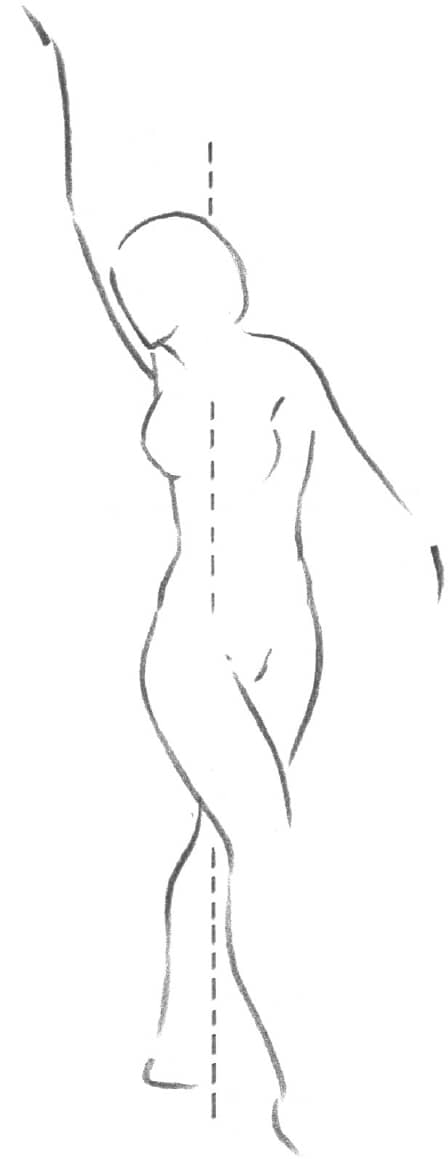
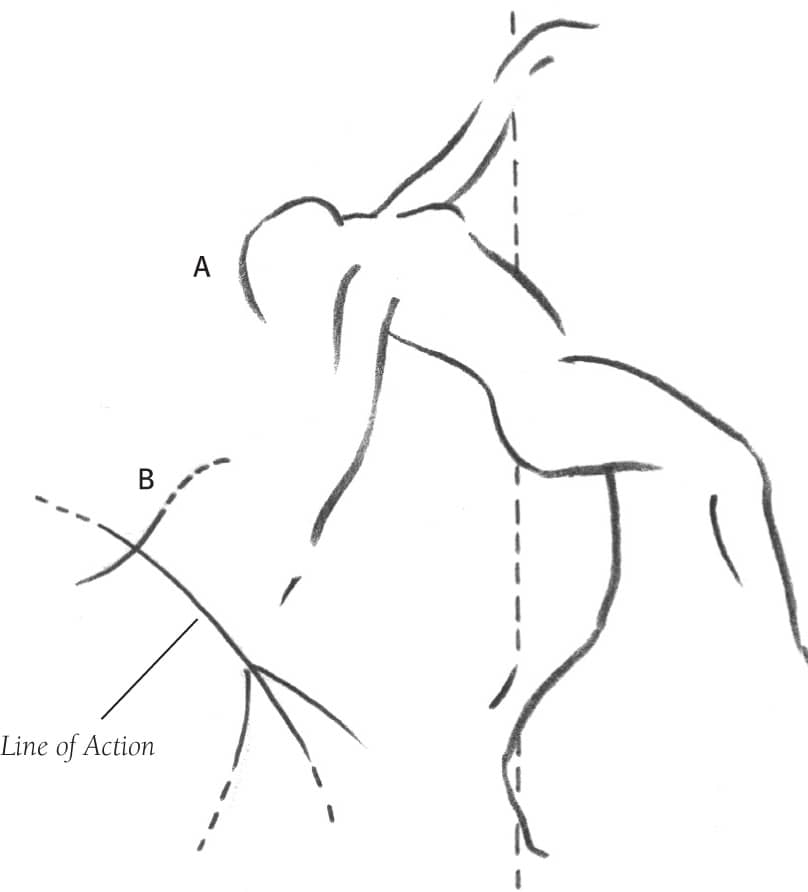
Another tip is to draw a line that represents the spine of the figure in its action pose. You can develop the pose from this line of action. Using both the center line of balance and the line of action helps to establish effective action figure drawings.
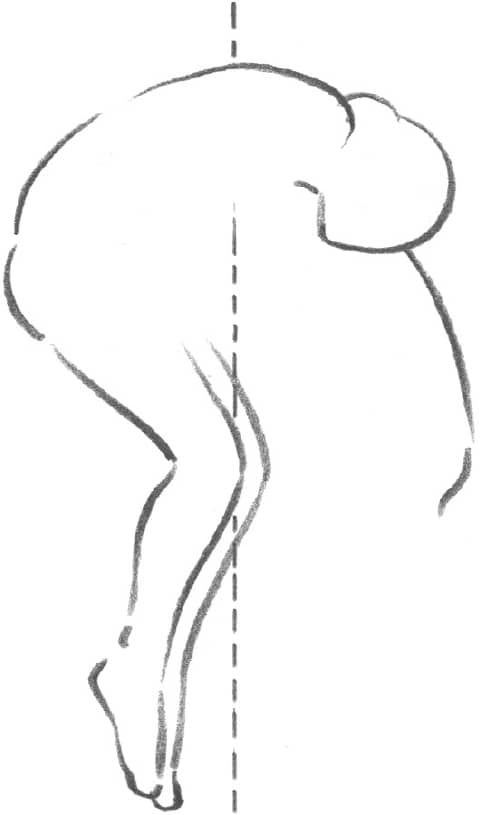
BENDING & TWISTING FIGURES
When people are involved in something active, they bend and twist their bodies. You should be able to render these movements in your drawings. Clothing helps convey the appearance of a twisting body because the folds form into a twisting design. When drawing figures in a twisting motion, use what you’ve already learned about shading folds, but keep in mind that folds on a twisting body will be tighter than folds on a person in a still pose.
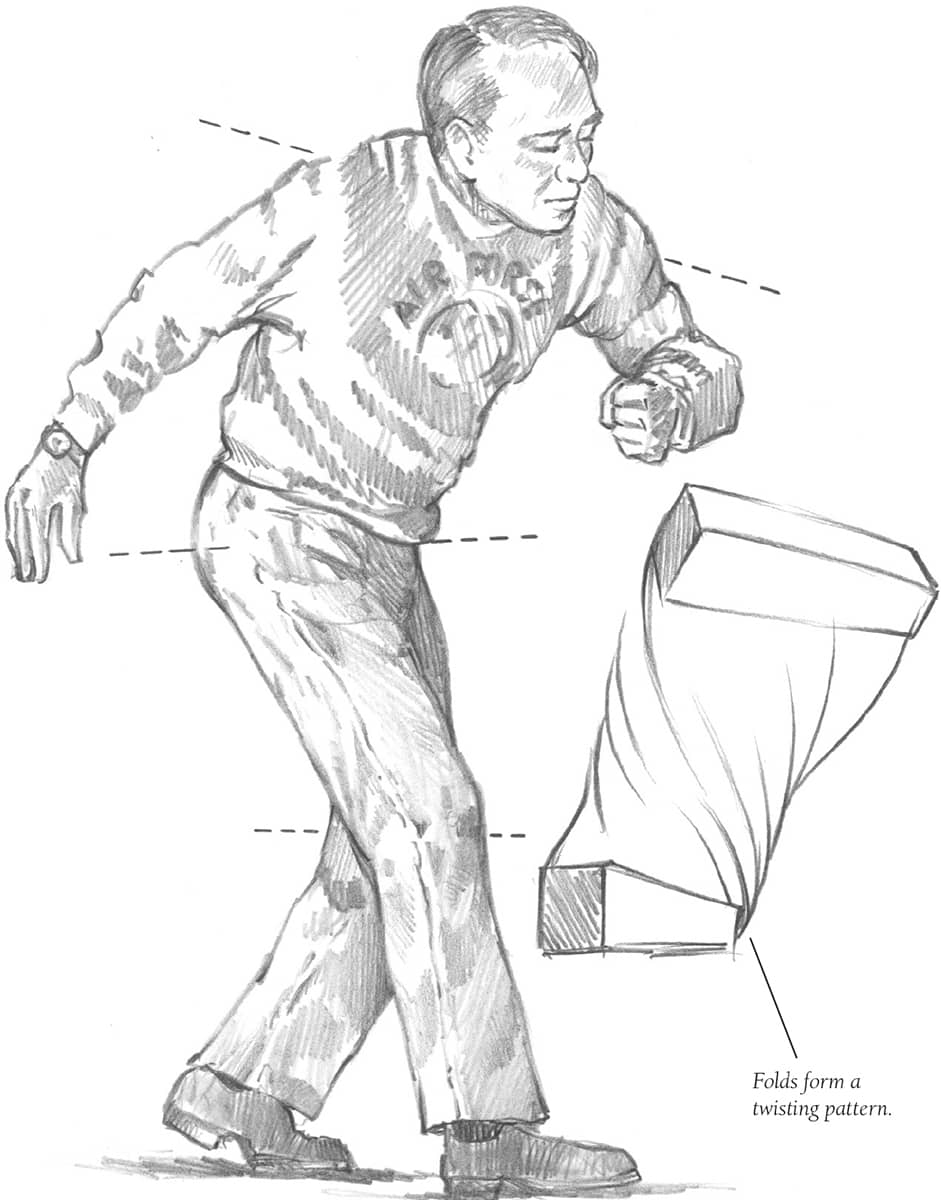
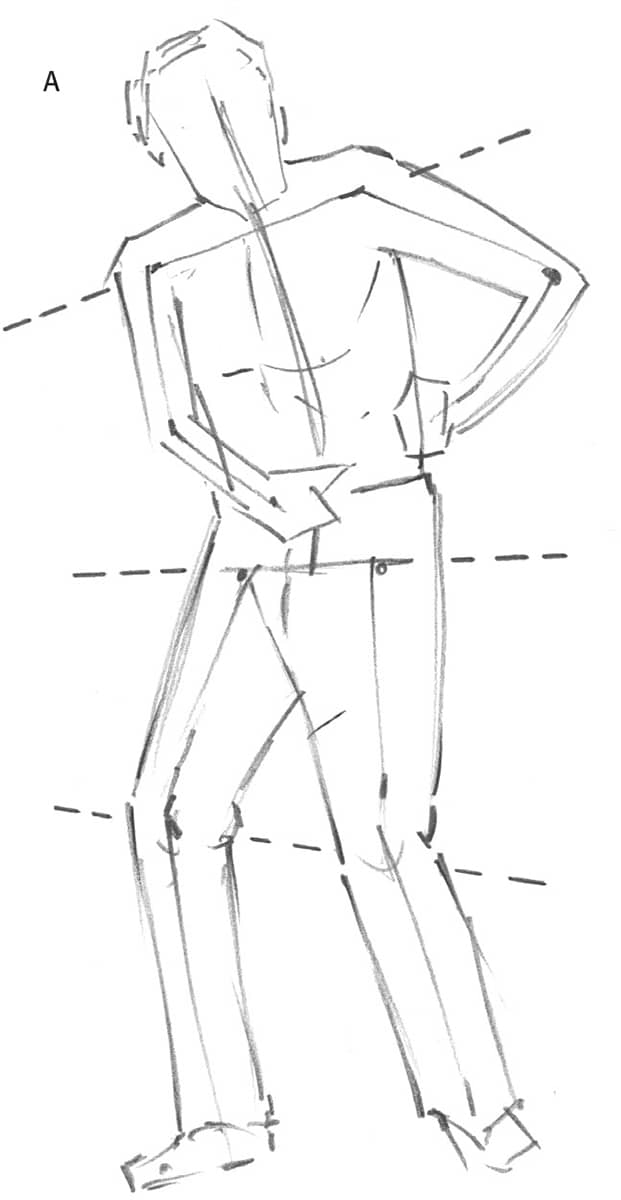
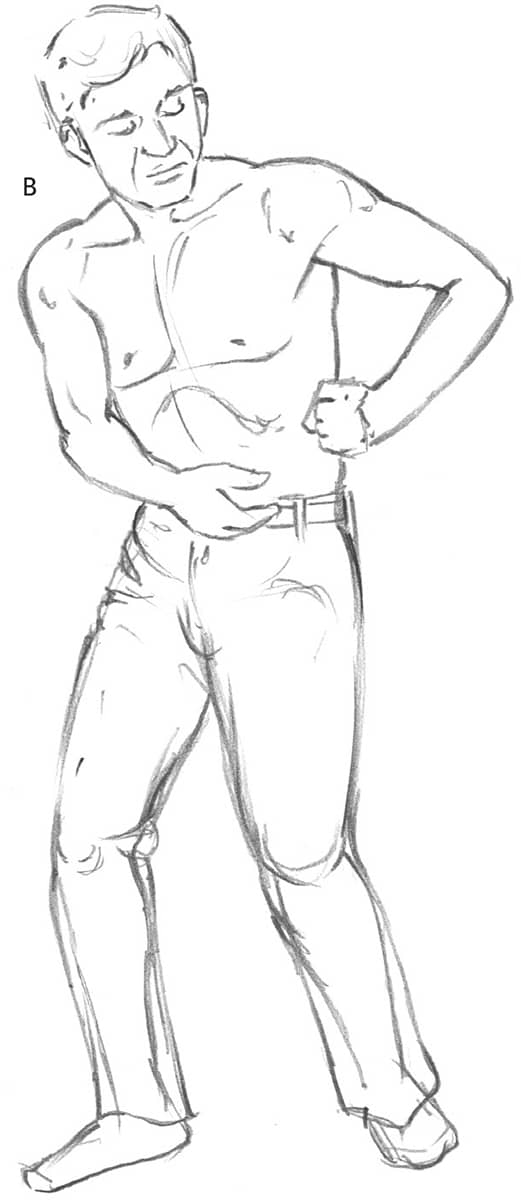
To accurately position the active body, sketch some guidelines to indicate the angles of the shoulders, hips, and knees as shown in the examples.
Don’t forget that you can make terrific drawings from photographs too.
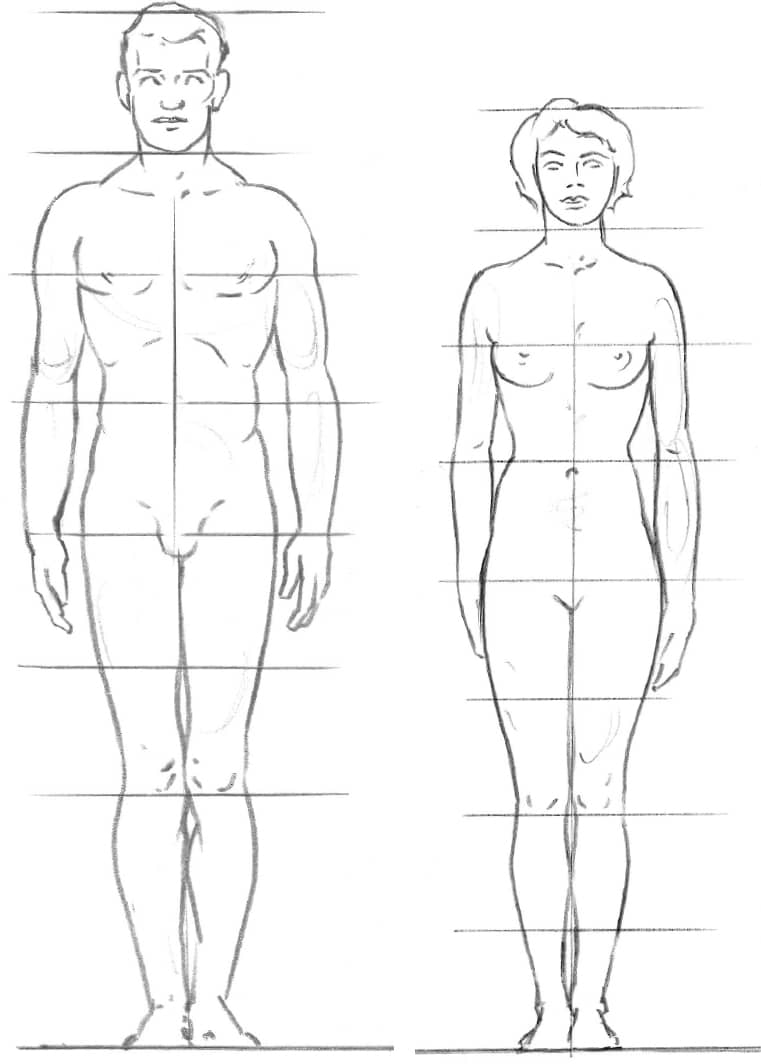
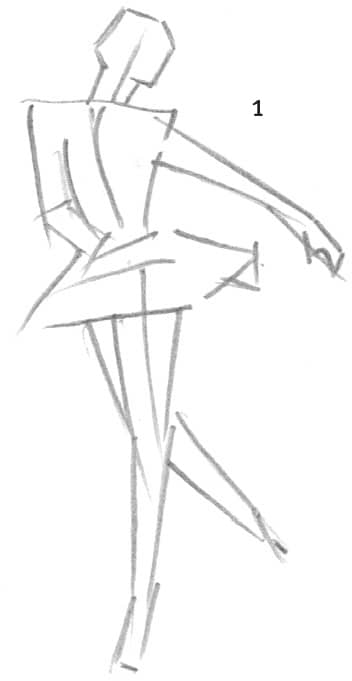
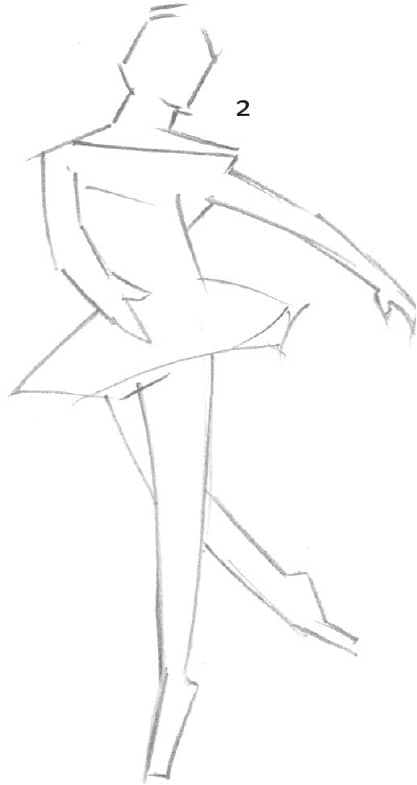
PROPORTION & DETAIL
Before drawing this ballerina, lightly sketch the center line of balance as well as the action line representing the shape of her spine. Start out with straight lines to lay out her body parts in correct proportion, eventually smoothing out the lines in accordance with her body contours.
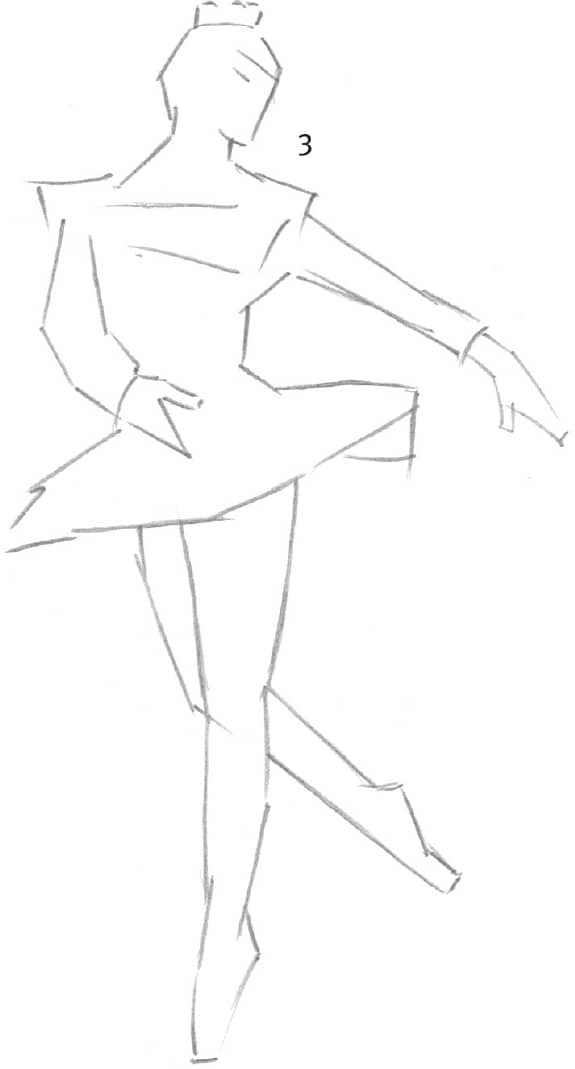
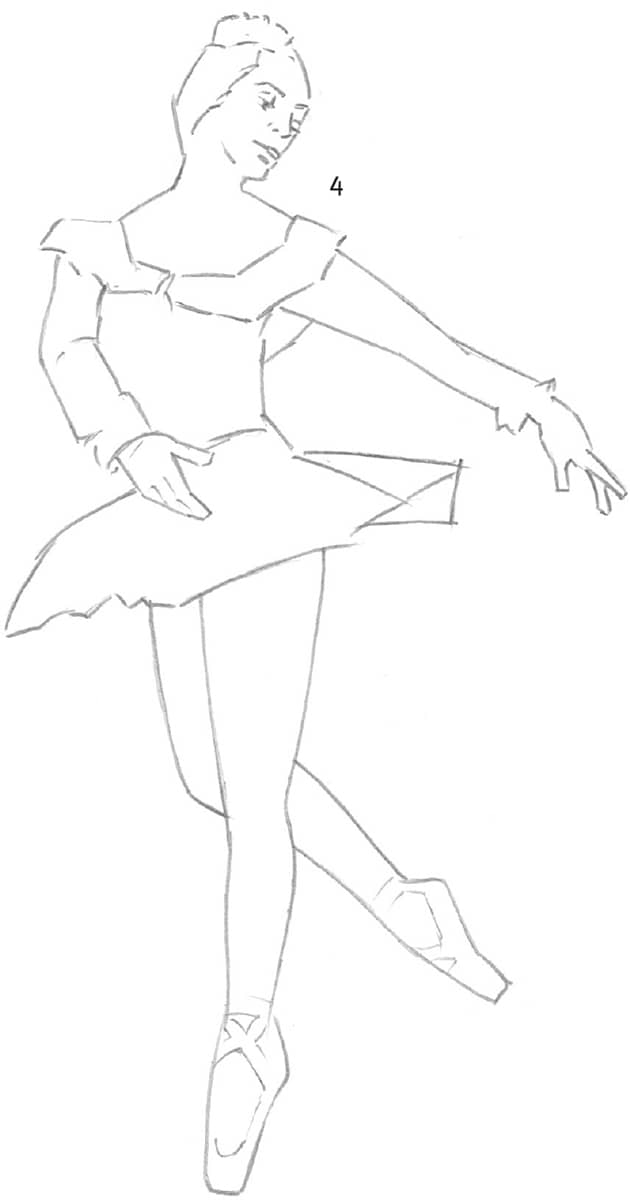
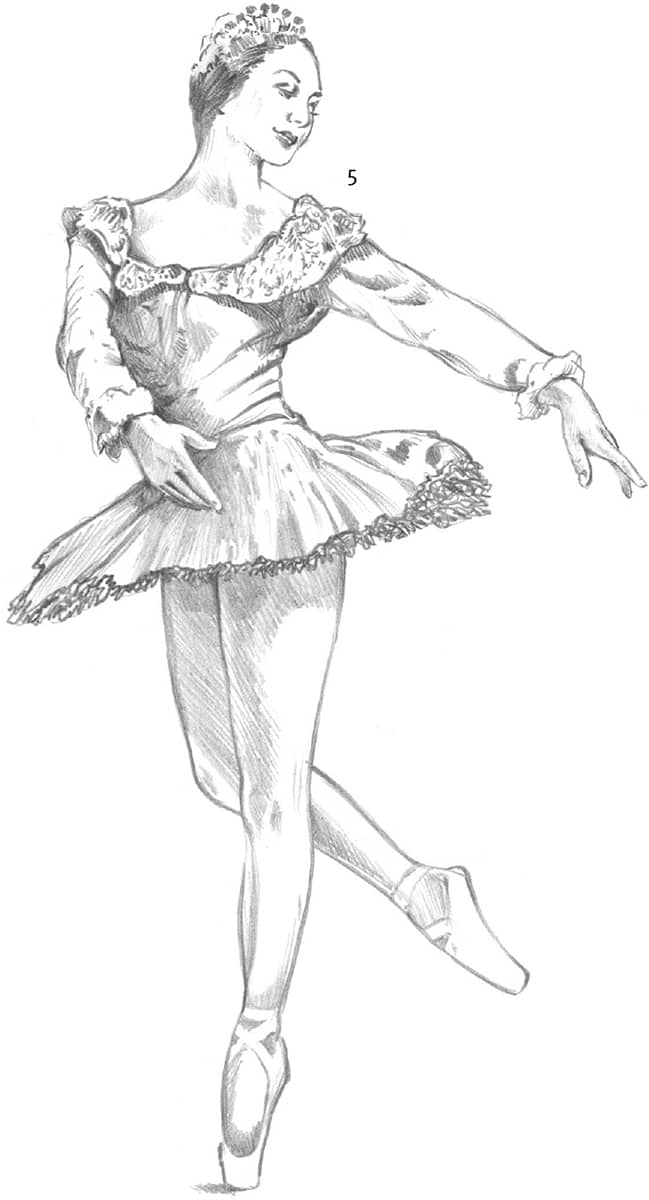
Drawing the Hands The position of this subject’s hands also enhances her serene, graceful mood. Just as the ballerina appears delicate, so should the shading you apply on both her skin and costume. In other words, keep your shading minimal.
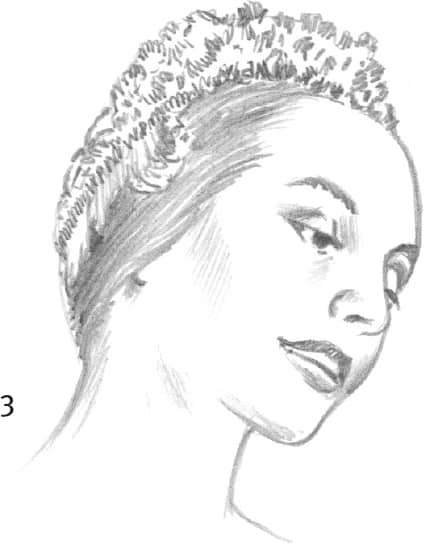
Face Detail When you reach the stage of drawing the dancer’s facial features, it’s important that her expression corresponds with the feeling of her pose.
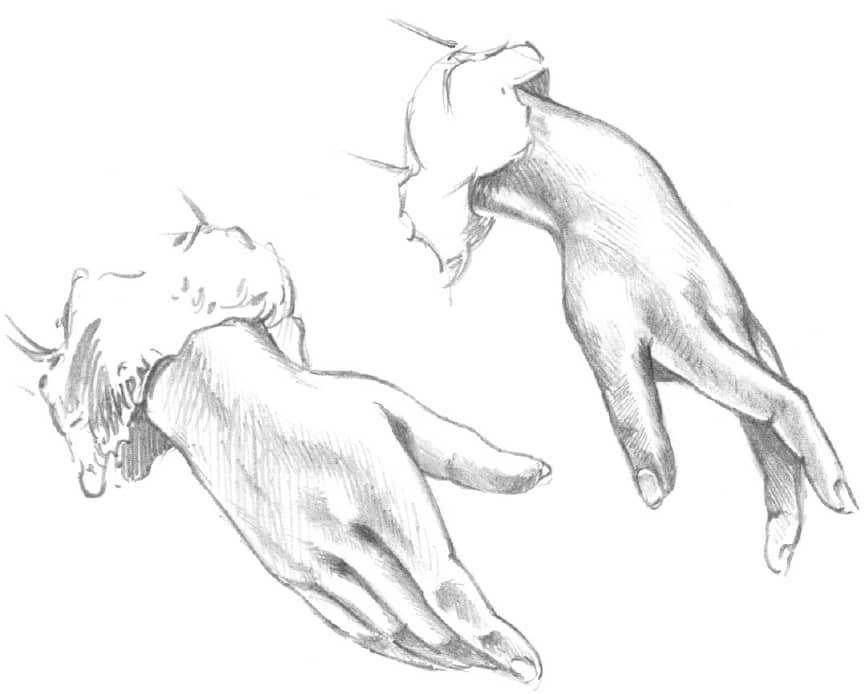
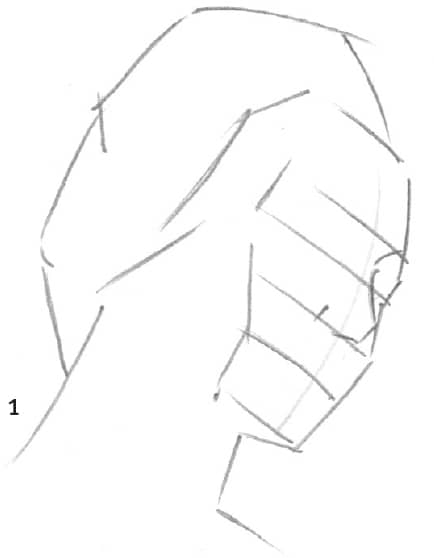
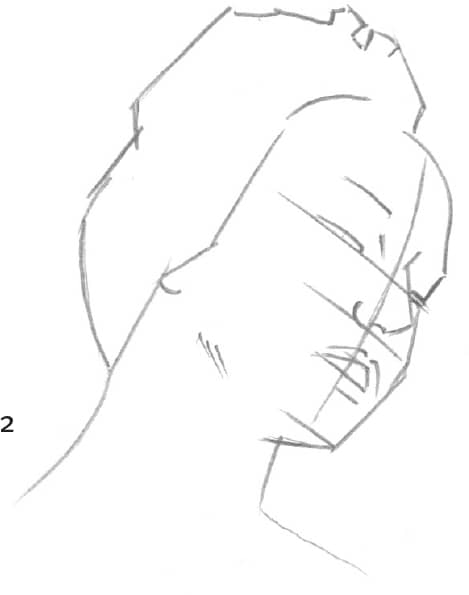
HANDS & FEET
Hands and feet are very expressive parts of the body and are also an artistic challenge. To familiarize yourself with hand proportions, begin by drawing three curved lines equidistant from each other. The tips of the fingers fall at the first line, the second knuckle at the middle line, and the first knuckle at the last line. The third knuckle falls halfway between the finger tips and the second knuckle. Coincidentally, the palm is approximately the same length as the middle finger.
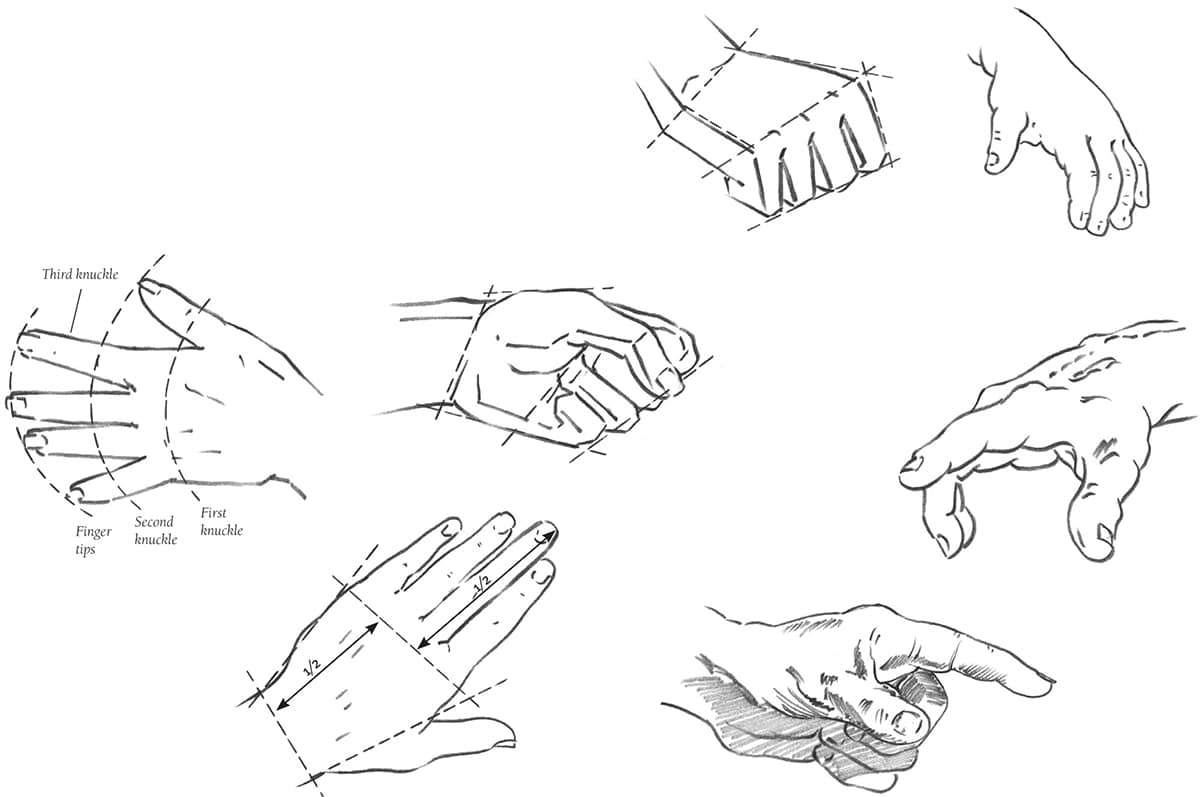
Drawing Hands Every time a finger bends at the knuckle, a new plane is created. Picture the three-dimensional shape of the hand in various positions. This will help you correctly draw the hand.
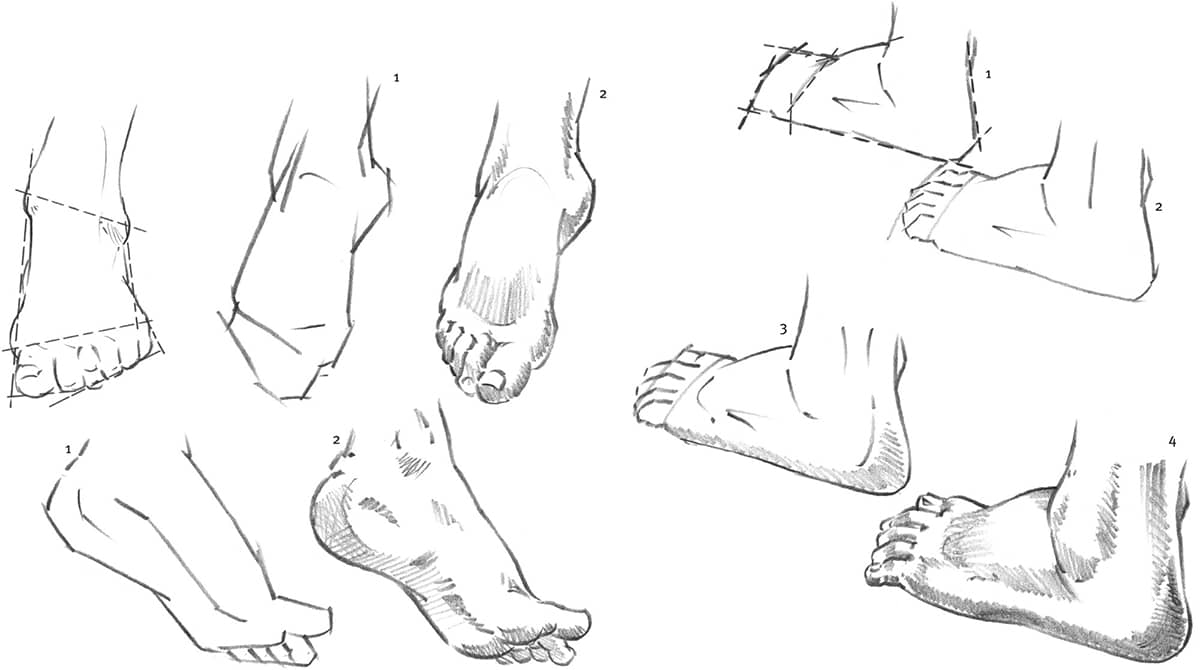
Drawing Feet Follow the steps shown to draw the feet. Block in the shape in two parts: the main part of the foot and the toes. Once you’ve drawn a good outline, add minimal shading so you don’t call too much attention to the feet.
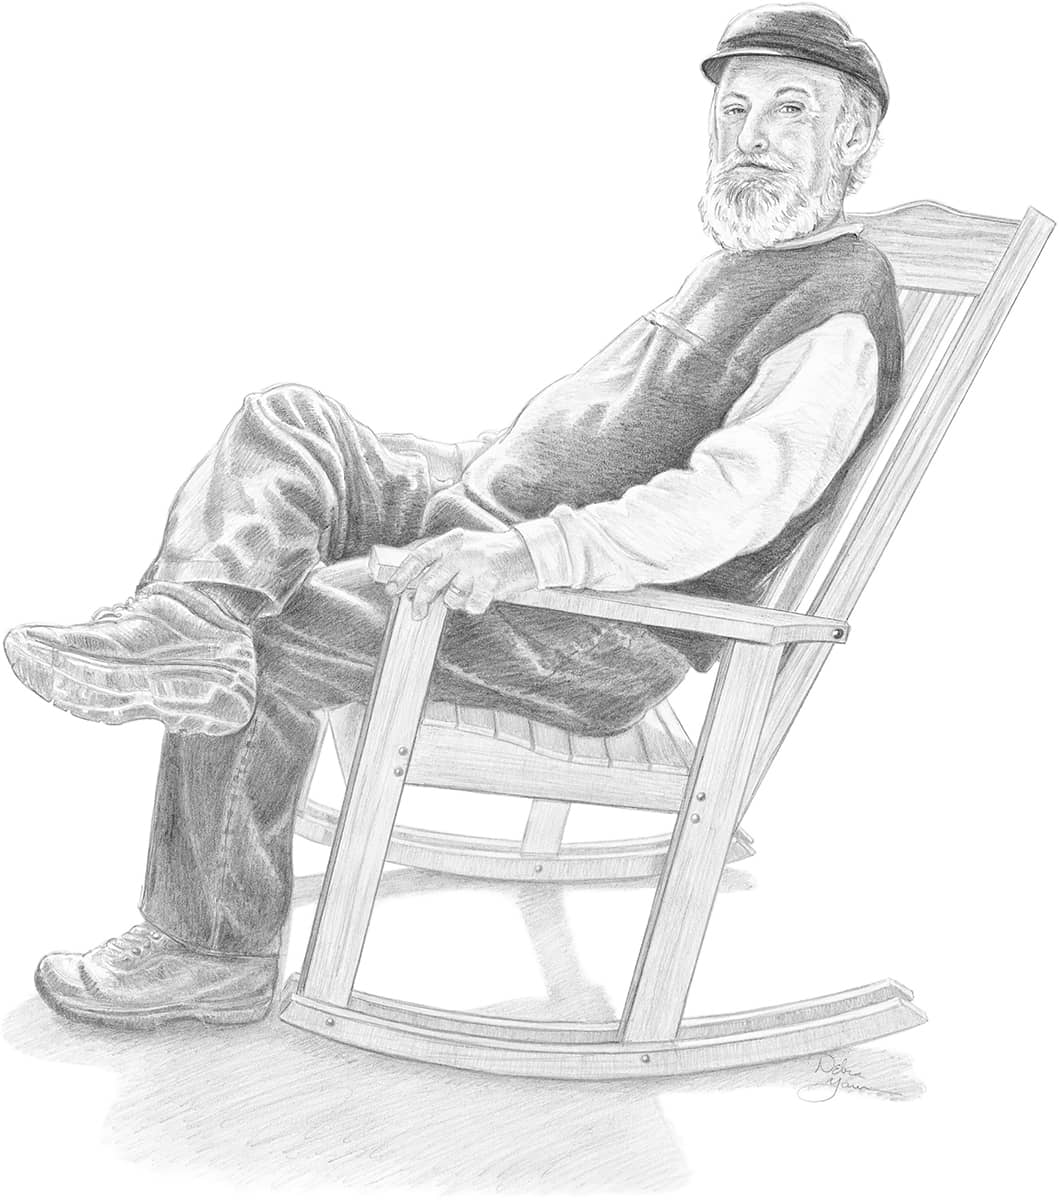
DRAWING FROM LIFE
Drawing from a live model (also called “drawing from life” or “life drawing”) is a wonderful exercise in drawing the human body in its various shapes and positions. Drawing from life helps you avoid overworking your drawing because you’re focused on quickly recording the gesture and specific details of your model before he or she moves, resulting in a spontaneous, uncomplicated finished drawing. Take advantage of available models—your children, other family members, or friends—whenever possible. When drawing from life, be sure the pose is comfortable for the model. Allow short breaks for your models (also providing you with time to rest), and don’t require them to smile, as this can tire out their facial muscles. Because you’re working at a faster pace, drawing from life will help you learn freedom and flexibility—both of which will benefit your drawings regardless of the type of reference. It will also help you appreciate the subtleties the eye perceives that the camera can’t, such as the twinkle in this man’s eye!
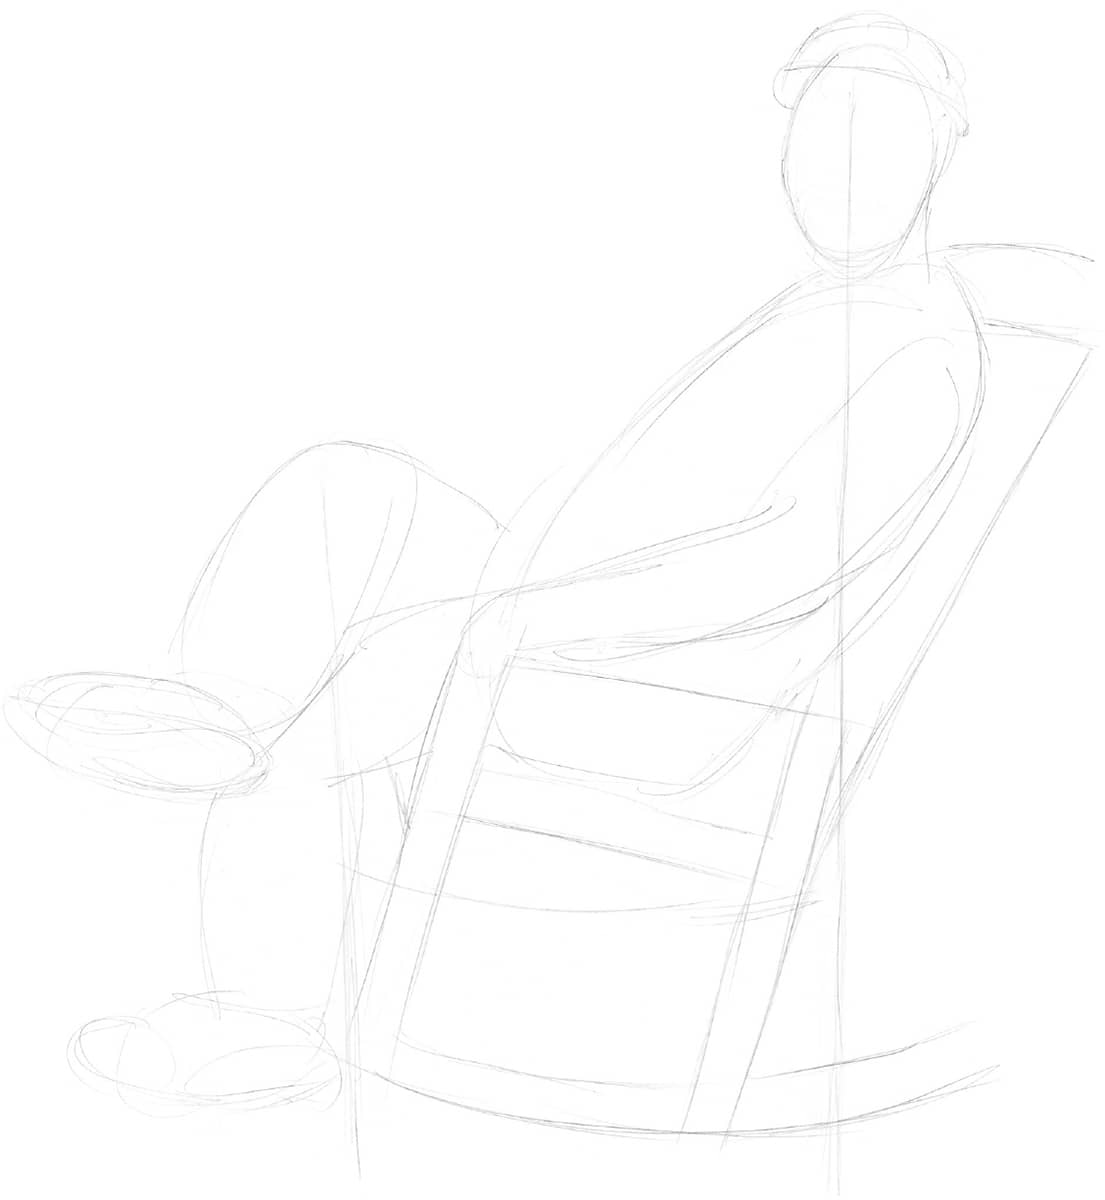
Step 1 Using an HB pencil, lightly block in the basic shapes of the figure and the rocking chair, paying particular attention to the vertical lines and balance to make sure the figure doesn’t look as if he’s going to tip over in the chair. Notice that the model’s back curves forward while the back of the chair angles backward, and his head aligns vertically with the back of the chair leg. Foreshorten the right leg and make the right foot larger than the left because the right leg is angled toward the viewer.

Step 2 Begin to refine the shapes, indicating the clothing and shoes. Then block in the mustache and beard, and place guidelines for the facial features. Study the model’s face to see how the proportions and placement of the features differ from the “average” proportions explained on page 154.

Step 3 With a B pencil, draw in the facial features and refine the shapes of the head, including the ear, hair, and hat. Then hone the rest of the body, drawing the folds and details of the fabric and adding the fingers on the left hand. Next, further develop the chair, using a ruler to create straight lines. Continue by shading the hat, the sock, the far rocker, and the model’s back.
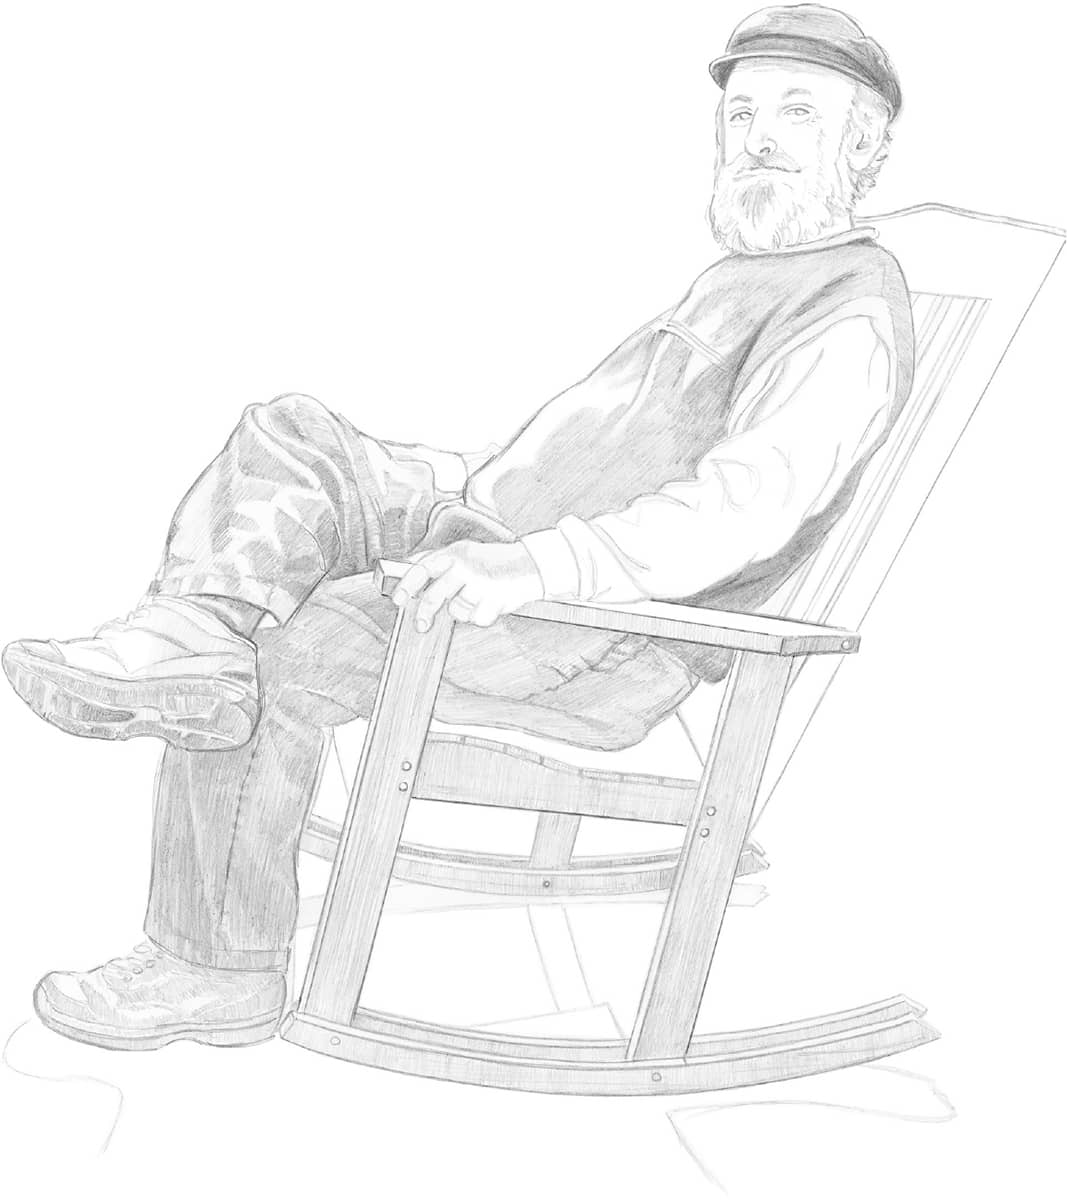
Step 4 Using a 2B pencil, begin shading the hat, leaving the top edge and a line on the brim white. Add some detailing to the hair and beard with short strokes, following the direction of growth. Shade the clothing, leaving the areas white along the side where the light hits. Watch the shapes of the wrinkles and how they affect the lights and shadows. Also shade some of the rocker, and lightly sketch in the shapes of the cast shadows.

Step 5 Lightly shade the face, varying your strokes to follow the different planes. Add further details and shading to the eyes, nose, mouth, ear, hair, and facial hair. Study your model to see what details will help create a likeness. Then shade the clothing and chair, always keeping in mind where the light is coming from and adjusting the lights and shadows as needed to enhance the illusion of depth. Use a 4B pencil for the darkest areas, and leave the lightest areas pure white. Soften any hard edges with an eraser, a blending stump, or a tissue. Finally, step back from your drawing, squint your eyes, and see if there are any areas that need to be corrected. If any areas are too light or too dark, adjust them as necessary.
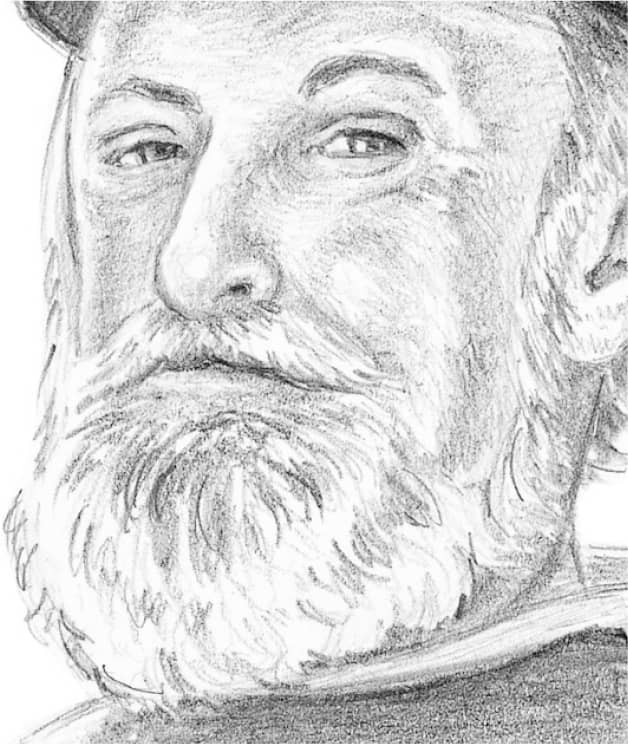
FACE DETAIL
To create the beard, apply very dark tones to areas of the beard, showing the gaps between groups of hair. Also, leave some areas of the paper completely white to reflect the areas of the beard that are in the direct path of sunlight. When detailing the face, shade very lightly to indicate wrinkles and creases. The wrinkles should appear soft, so avoid using hard lines. To create the twinkle in the eyes, pull out a highlight in each pupil with a kneaded eraser.
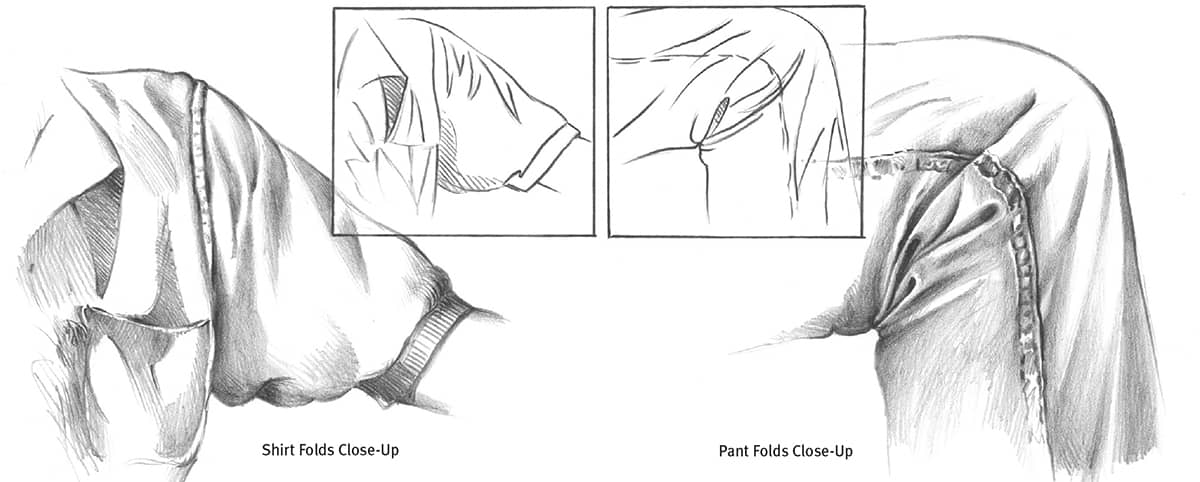
CLOTHING FOLDS
Now that you’ve mastered drawing the body, you need to know certain techniques that will improve the quality of your work. Drawing realistic clothing folds is one of those techniques.
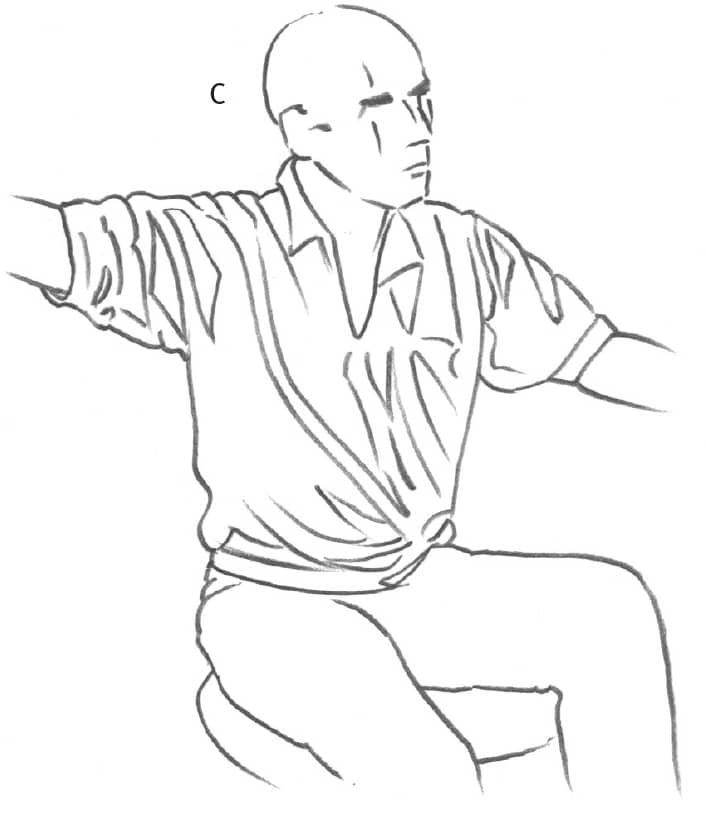
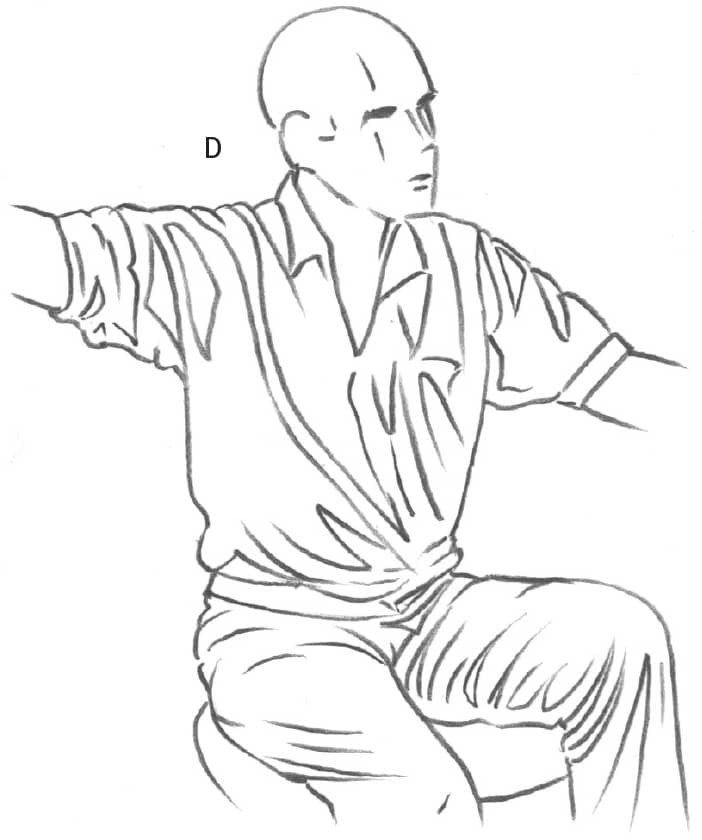
Begin by drawing a stick figure, indicating the location of each joint with some light circles. Then sketch the outline of the clothing along with preliminary guidelines for the folds; these guidelines will provide a map for your shading. Indicate only the major folds at this point while continuing to add light guidelines.
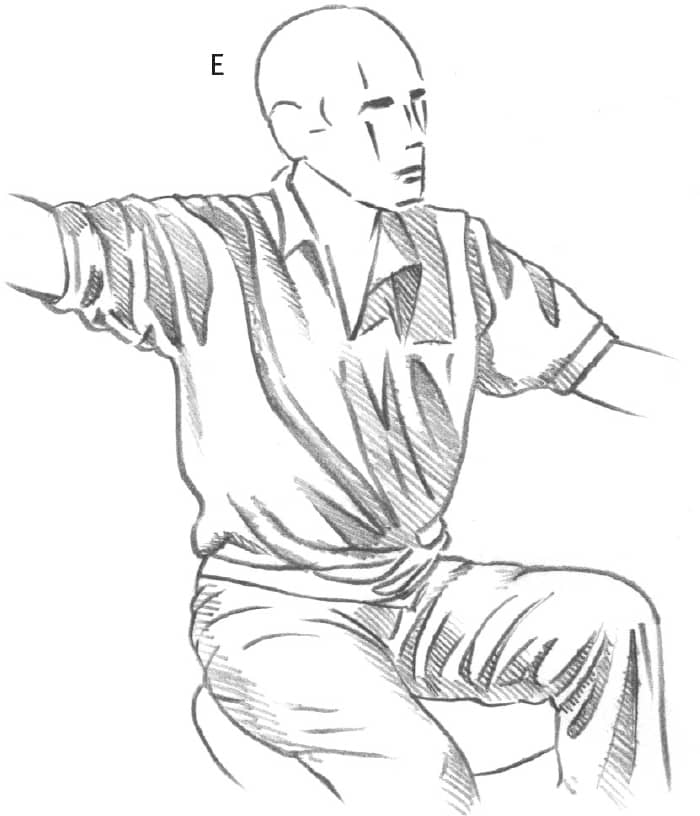
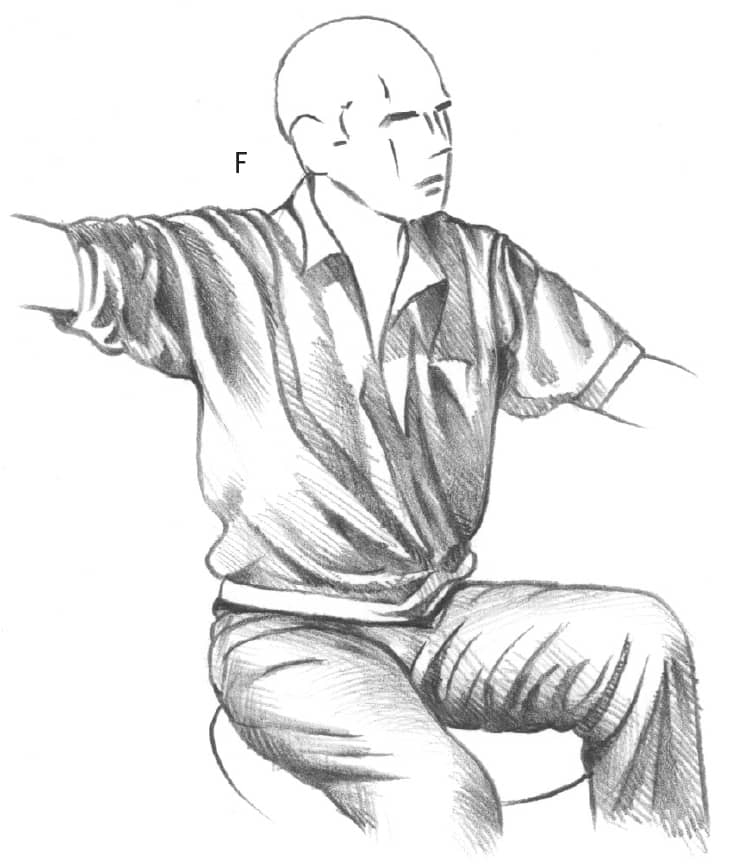
Darken the areas inside the folds with short, diagonal strokes using the point of a 2B pencil. Overlap your strokes at different angles, making them darker toward the center of the folds. Use a paper stump for the finishing touches, and blend the edges of the folded areas. You might want to leave some shading lines to give the drawing an artistic feel.