While the Table output step allows you to insert brand new data, the Insert / Update step allows you to do both, insert and update data in a single step.
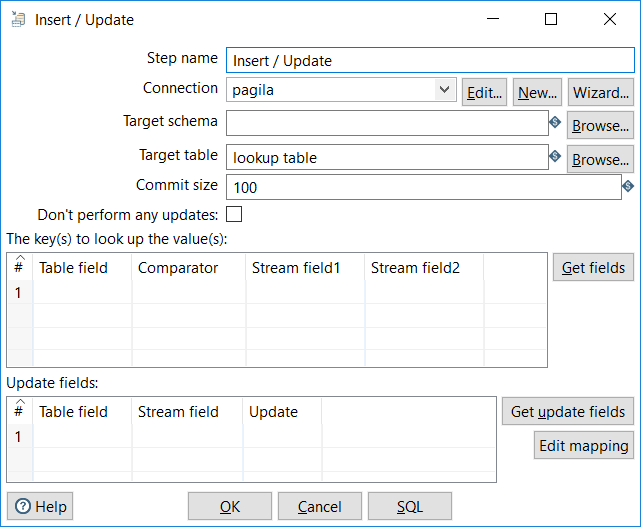
The rows directed to the Insert / Update step can be new data or data that already exists on the table. Depending on the case, the Insert / Update step behaves differently. Before explaining each case, let's introduce the step. The following image corresponds to the Insert / Update configuration window:

As you can see, the upper section is identical to the Table output window. Here, you select the database connection and provide the table name where you will insert or update rows.
Then we have two grids. While the upper grid is meant to define the conditions for the inserts or updates, the lower grid is where you define the fields to be inserted or updated.
Let's see each case in detail:
- For each incoming row, the step uses the lookup condition you put in the upper grid to check whether the row already exists in the table.
- If the lookup fails, that is, the row doesn't exist, the step inserts the row in the table using the mapping you put in the lower grid.
- If the lookup succeeds, the step updates the table, replacing the old values with the new ones. This update is made only for the fields where you put Y as the value for the Update column in the lower grid.
This insert operation is exactly the same as you could have done with a Table output step. This implies that here also you have to be careful about the following:
- All the mandatory columns that don't have a default value must be present in the Update Field grid, including the keys you used in the upper grid
- The data types for the fields that you are sending to the table must match the data type for the columns of the table
If you only want to perform updates, you can use the Update step instead. The configuration window is almost identical to the Insert / Update one.