In Chapter 3, Creating Basic Task Flows, you learned to manage files by copying, moving, and zipping files among other operations. At that time, you were introduced to the different steps and Job entries meant to do these operations. There are still two more ways to manage files:
- Copying rows to the arguments of an entry
- Using result filelists
We will explain the first of these options. In the section, Working with file lists, you will learn about the other method.
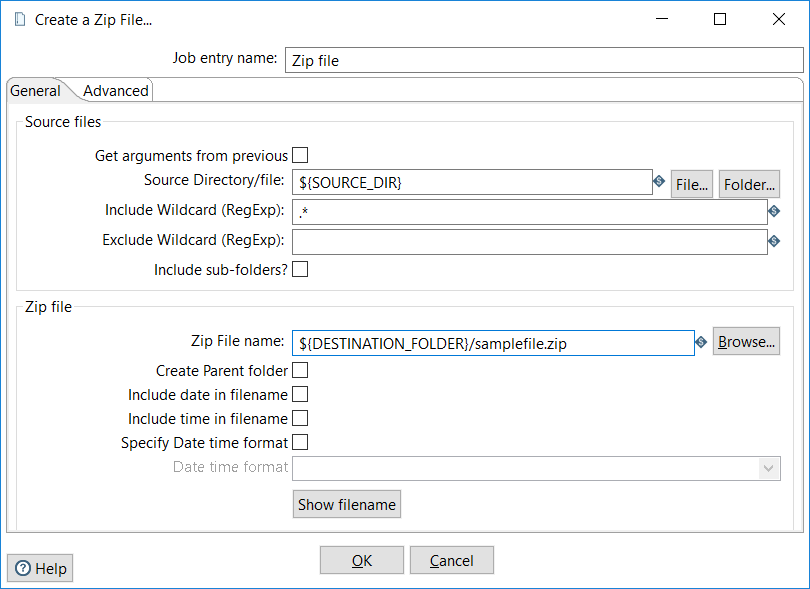
As you know, when configuring a Job entry, you have the possibility to type fixed text or use variables. Look at the following sample Job entry:

Using variables for the arguments of the entry is a flexible option. However, this may not always solve your requirements. Suppose that you want to create some ZIP files, but you don't know beforehand how many ZIP files would be. In this case, using variables doesn't help. Instead of that, you can build a dataset with the arguments to the Zip file entry, and then copy them to its arguments. The following step-by-step instructions show you how you do this:
First of all, let's investigate the configuration options of a Zip file entry:
- Create a Job.
- Drag a Zip file entry to the canvas and double-click it.
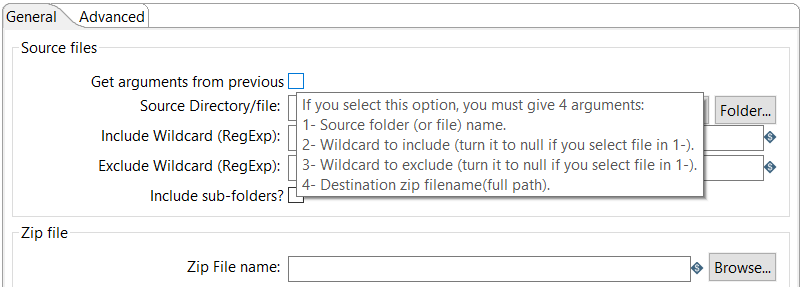
- Move the cursor over the option, Get arguments from previous. The following tooltip shows up:

What you see in the tooltip is the list of arguments that you can provide from outside the step, instead of typing fixed values. In this case, if you decide to provide arguments, you should build a dataset with the following:
- The folder where the files to ZIP are located
- A wildcard (a regular expression) describing the files to include
- A wildcard (a regular expression) describing the files to exclude
- The full path to the destination ZIP file
You build this list in a transformation. As usual, we will keep the example simple and create the dataset with a grid, but you can use all the steps you want or need. To create the dataset, take for example the following:
- Create a Transformation.
- Drag a Data Grid step to the work area.
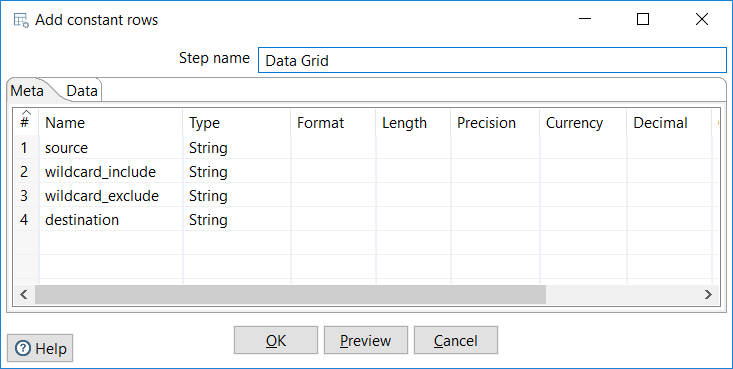
- Double-click the step and configure it with the following fields:

- Defining a dataset
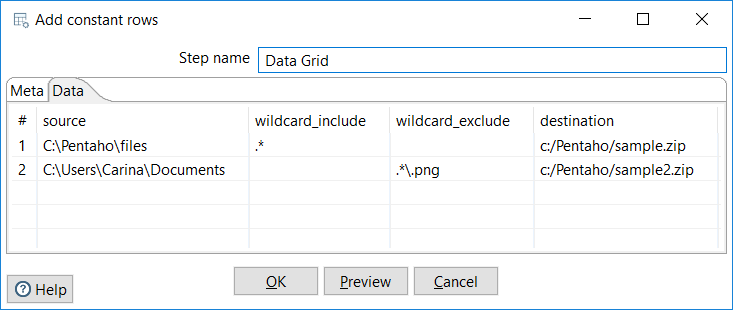
- Complete the Data tab with some sample data, as shown in the next example:

- Drag a Copy rows to result step to the work area and create a hop from the grid toward this step.
- Save the Transformation.
We are ready to build the main Job:
- Open the Job created earlier.
- Drag START and Transformation entries to the canvas. Link all the entries as shown:

- Configure the Transformation entry to execute the transformation you just created.
- Double-click the Zip file entry.
- Check the option, Get arguments from previous. You will notice that the texboxes below are disabled. This means that they will be populated with the data coming from the Transformation.
- Close the window and save the Job.
- Run it.
- Browse the filesystem. You should see the ZIP created according to the arguments you built in the Transformation.
In general, wherever you see a checkbox named Copy previous results to args?, you can use it like you did in the example. Currently, the Job entries that allow copying the results to the arguments are Zip file, Unzip file, Delete files, Move Files, Copy Files, Delete folders and Add filenames to result, all of them located under the File management category of entries. Additionally, you can also copy the results to the arguments of the Truncate tables entry from the Utility category.