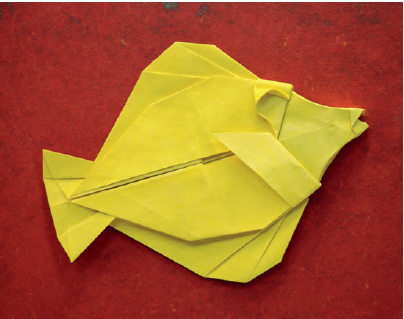
Yellow Tang for Mariko
designed by Michael G. LaFosse
LESSON: PREPARING PAPERS WITH PEARLESCENT AND LUSTER PAINTS
The west coast of the Big Island of Hawai‘i was once called the “Gold Coast,” not because of any precious metals lying about, but because of the bountiful schools of yellow tang, little fish so numerous that they made the surf zone appear yellow. The scales of the tang are tiny, and photography doesn’t do their true beauty justice. For this model, we use paper doped with pearlescent luster pigment to mimic the sheen produced by the animal’s miniature scales.
Now that you have tried wet folding, we hope you appreciate its many benefits. There is another handy method that our students enjoy that avoids some of the problems of fully wetting the papers — especially machine made papers with pronounced, often troublesome grain. We call it “Zone Folding,” and it involves applying moisture only where you need it, and only when you need it. We often use a folded napkin or paper towel, but even a moistened cotton swab works well because there is less likelihood of adding too much water. This design for the Yellow Tang for Mariko is a bit unusual because it was planned for only one side to show, as if it were displayed on a Christmas tree. It works well when mounted in a shadow box frame, or on a pin-back to be worn as a brooch. Challenge your brain by folding other-handed examples from the same set of diagrams!
First, learn this model by practicing with letter printer paper. (Trim one end to make the largest square.) It might also help to practice this model with a piece of gold or yellow foil. After you are satisfied with your knowledge of the folding sequence, wet fold another from a piece of yellow tant or similar paper.
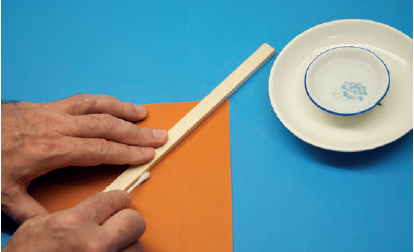
Back coating to laminate a sheet of luster paper
Once you have rehearsed this model sufficiently, prepare a special piece of back coated yellow luster paper for your display piece: Lightly moisten a sheet of thin, white washi, and then brush a coat of yellow luster pigmented paint (from the craft store) onto one side. Allow it to dry fully. Moisten it once again, but this time, brush the reverse with methylcellulose gel and fold it in half. Restrain the folded sheet while it is allowed to dry by pasting four edges to a rigid surface. Trim to the desired square size and wet fold the Yellow Tang for Mariko.


Takeaways:
Paper Can Be Like a Skin
Origami subjects depicting creatures from the river, pond, lake or the sea look wet when folded from paper made with just a hint of mica. Butterflies, birds and other natural history creatures folded from papers made with these luster pigments also seem to love the gallery lights. Acrylic-based luster paints available in craft stores are formulated for airbrush applications, but they also work just fine when applied to pre-moistened papers with a conventional paintbrush. Try several brands and colors to see which of these produce your favorite luster-enhanced papers.

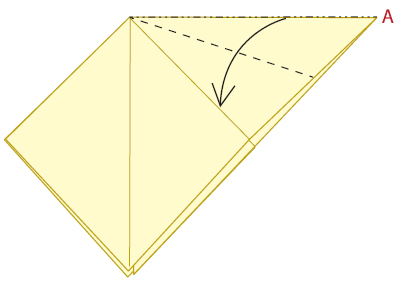
1 Valley-fold diagonally in half both ways, unfolding after each. Turn over, left to right.
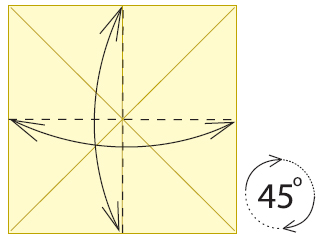
2 Valley-fold in half edge to edge both ways, unfolding after each. Rotate 45 degrees.

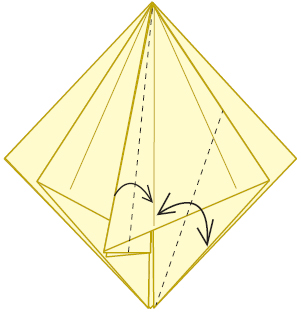
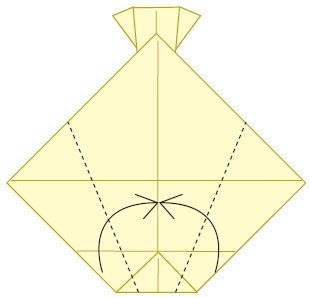
3 Use the mountain and valley creases to collapse the paper with all four corners meeting at the bottom.
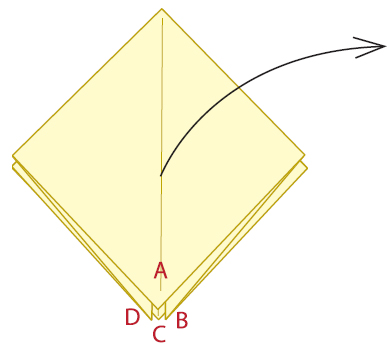
4 Pull the top layer up and move it to the right, diagonally folding layer “A” in half.
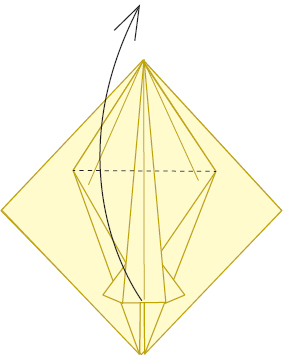
5 Valley-fold the top edge to align with the crease below.

6 Squash-fold. Look ahead for the alignment.

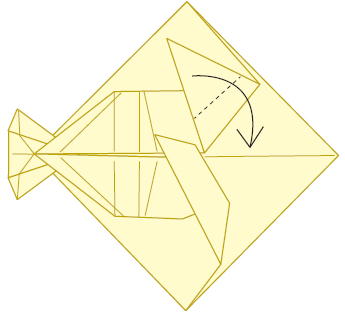
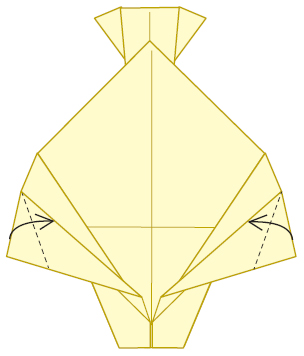
7 Squash-fold the topmost triangular flap.

8 Mountain-fold the square corner of the top layer inside.

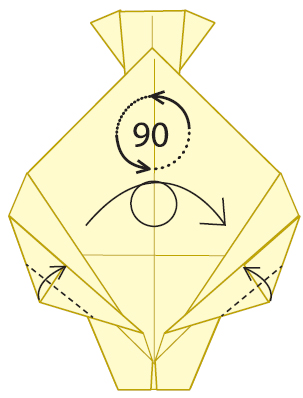
9 Valley-fold the top layer in half, right to the left.
10 Valley-fold the top left edge to align with the vertical center. Valley-fold the outer top edge to the vertical center. Unfold.

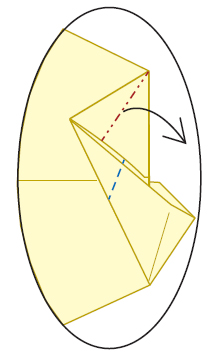
11 Valley-fold the bottom corner of the top left flap to the left, forming one lobe of the tail fin. Inside-reverse-fold the top layers on the right.

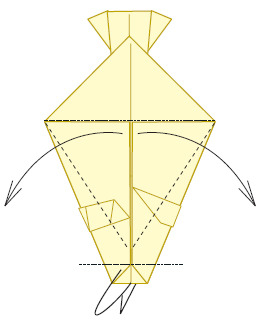
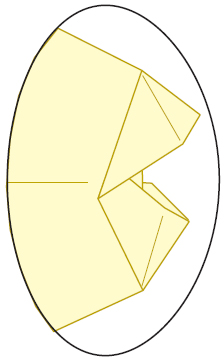
12 Valley-fold the center flap over. Repeat steps 9 through 12 on the left.
13 Valley-fold the tail flap up.

14 Mountain-fold the indicated corners behind.

15 Valley-fold the bottom left flap up, making it touch the highlighted crease. Look ahead to step 16 for the angle.

16 Mountain-fold the bottom corner of the triangular flap behind. Rotate 90 degrees counterclockwise.

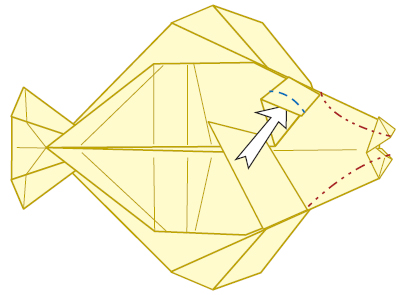
17 Valley-fold the top right flap to the left, making the bottom edge intersect the top front corner of the body, while guiding the bottom of the fold to the front edge of the pectoral fin, marked here with an “X” arrowhead.
18 Valley-fold a portion of the triangular flap down and forward of the leading, folded edge. Look ahead for the proportion and angle.

19 Mountain-fold the excess of the triangular flap behind.

20 Rotate 90 degrees clockwise, and turn over, left to right.
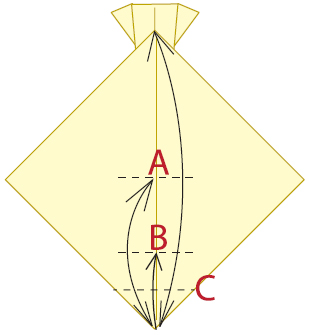
21 (A) Mark the center by valley-folding the bottom corner to the top, making a short pinch mark. Unfold. (B) Valley-fold a new pinch mark halfway between the first pinch mark and the bottom corner. Unfold. (C) Valley-fold the bottom corner to the bottom pinch mark.
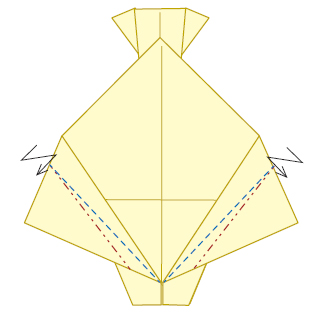
22 Valley-fold the bottom left and right edges to meet at the vertical center.
23 Mountain-fold the bottom behind, folding at the level where the vertical folded edges diverge. Valley-fold the square-cornered flaps out.
24 Valley- and mountain-fold the left and right flaps, forming detail pleats in the fins.
25 Valley-fold the outside edge of each fin to align with its nearest folded edge.
26 Valley-fold the obtuse corner of each fin straight in to touch the same folded edge. Rotate and turn over.

27 Details for folding the mouth to follow.

28 Slide the top layer of the bottom half of the mouth forward and squash-fold.
29 Slide the top layer of top half of the mouth forward and squash-fold.
30 Your paper should look like this.
31 Open and round the eye. Make gracefully curved mountain-folds, narrowing the snout.

32 Yellow Tang for Mariko