
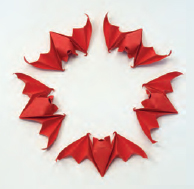
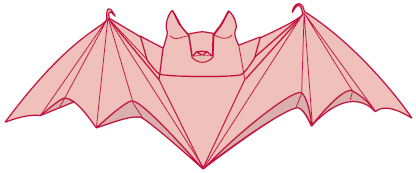
The Happy Good-Luck Bat
designed by Michael G. LaFosse
LESSON: UNDERSTAND HOW THE PAPER’S GRAIN IMPACTS FOLD PLACEMENT DURING WET FOLDING
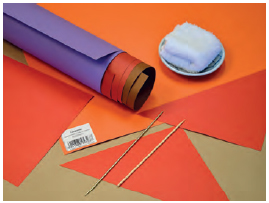
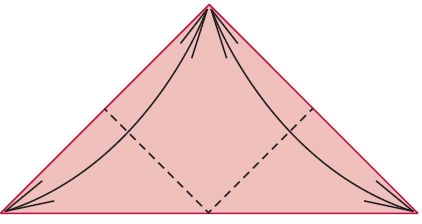
The commercial art paper that we recommend for this model is readily available in a wide variety of colors. It is inexpensive, and fun to fold, but it also has a pronounced grain. This is neither bad nor good, but do be mindful of it when you are wet folding any “grainy” type of paper. Grain is a characteristic of all machine-made papers, and of many handmade papers. If you think of fiber strands and their component cellulose fibrils as analogous to cooked spaghetti in a pot, and then imagine the paper making screen as the fork-like device that grabs at the spaghetti to pull it out of the water, it may be easier to understand how fibers will “line up” side by side on the screen as it is pulled out of the paper-making vat. This alignment or grain would not matter, but for the fact that the cellulose fiber’s width increases more dramatically than the length whenever the moisture content increases. Imagine how an emaciated cactus swells after a rainfall. Paper with grain is like a row of saguaro cactuses standing side-by-side. Add water, and none get taller, but they all get wider.
Because we wet fold our sculptural pieces, water is being evaporated throughout the folding process, causing the fiber widths to change, and so water must be added periodically. When this model is wet folded, it will make a big difference whether you place the folds by matching landmark points (as beginners often do), or by bisecting angles (which produces sharp points at the vertices). If the paper is cut when dry (as is recommended) try folding the first few steps after wetting, and you will soon see that the triangle has grown in one dimension more than in the other. This model will help you think differently about wet folding, making you less likely to use one side of the model as a placement template whenever you are using moistened, thicker, machine-made, highly grained papers. It will help you plan ahead in the future when locating points and handling flaps.
Takeaways: The Style’s the Thing
It is possible that beginning paper folders rarely think much about the way that origami, as other art forms, has a variety of distinct styles. When you have explored a subject by approaching it in several different styles, you might be surprised what you learn when you compare how the results differ. An artist’s choice of style greatly affects the spirit of each piece as perceived by the viewer.
Consider this simple bat folded in the style of the traditional, Japanese origami crane, displaying only flat planes and straight edges. Try folding one of these bats that way to compare the visual impact. Which do you prefer? For me, the geometrically planar version looks rather severe compared to the more lyrical, puffed-up, round-chested, jovial bat, which appears to delight in its flight!
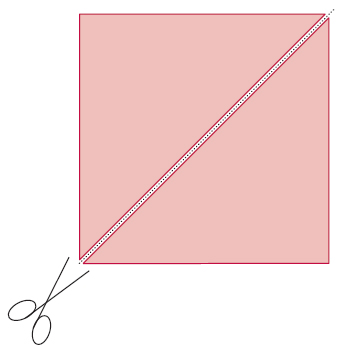
1 Cut a square of suitable paper diagonally in half. Each right-isosceles triangle makes one bat. Using a moistened cloth or paper towel, swipe the back of a triangle.
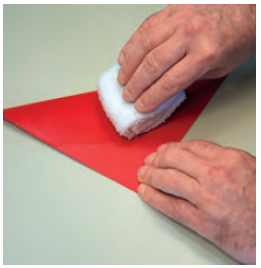
Notice how the paper curls as moisture makes only the wet side swell.
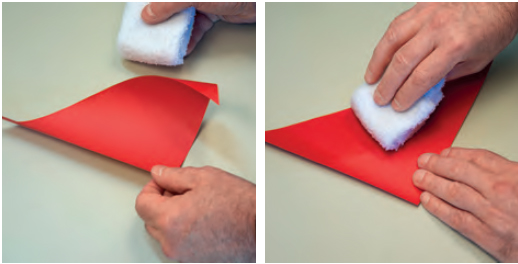
Repeat the moistening step on the reverse side.
In a few moments, the paper will soften uniformly, and feel like a piece of cool leather.
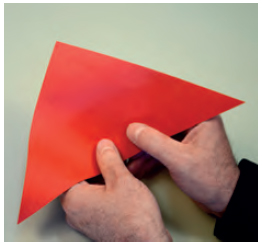
2 Valley-fold the two bottom acute corners to the top right-angle corner.
Notice how the length of one flap is longer. That means that the grain runs perpendicular to the length of the flap! Don’t worry. When the paper dries, all will be well. Unfold.

3 Valley-fold the two bottom acute corners to meet at the middle of the bottom edge.
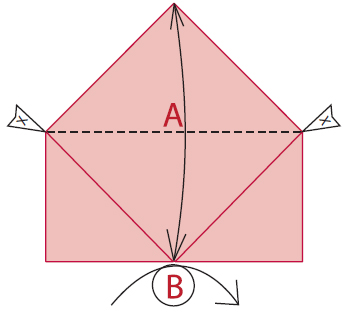
4 (A) Valley-fold the top corner down. Be sure that the fold spans between the two corners indicated by the “X” arrowheads. Unfold. (B) Turn over, left to right.
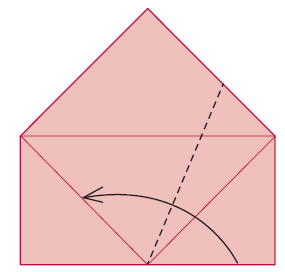
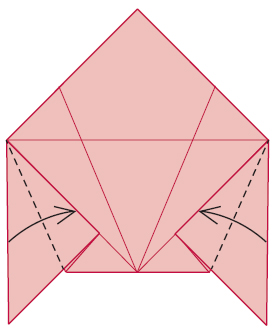
5 Valley-fold the right half of the bottom edge to align with the 45 degree-angled crease on the left.

6 Your paper should look like this. Unfold.
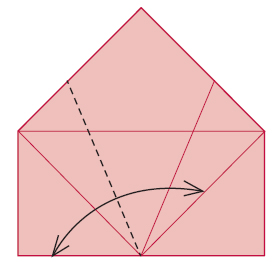
7 Valley-fold the left half of the bottom edge to align with the 45 degree-angled crease on the right. Unfold.
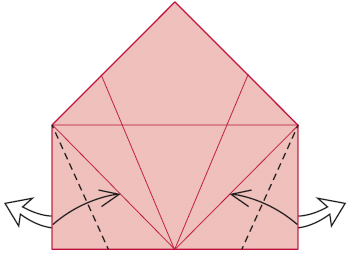
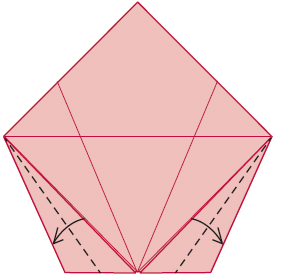
8 Valley-fold the left and right vertical edges to align with the 45 degree-angled creases. Allow the hidden triangular flaps to come to the front.
9 Valley-fold the left and right vertical edges to align with the 45 degree-angled folded edges.
10 Valley-fold the topmost triangular flaps in half, longest edge to the second longest edge.
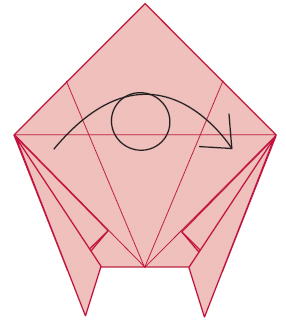
11 Turn over, left to right.
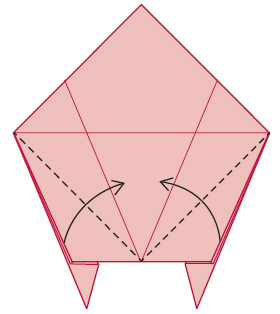
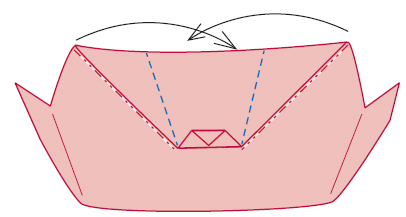
12 Use the 45 degree-angled creases to valley-fold the topmost flaps inward.
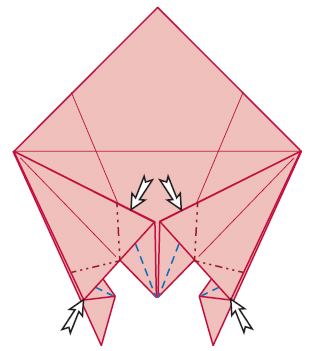
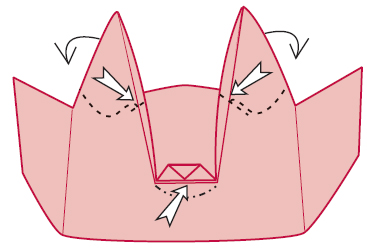
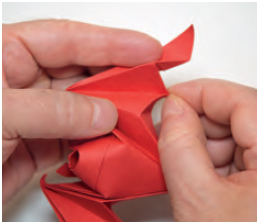
13 Your paper should look like this. Inside-reverse-fold each of the four double-layered corners.
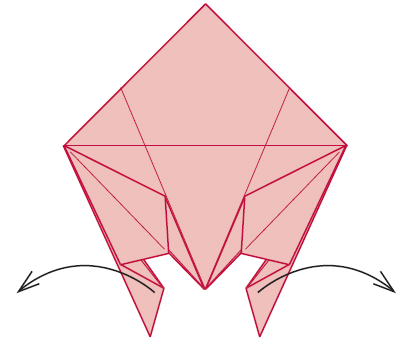
14 Your paper should look like this. Open the wings.
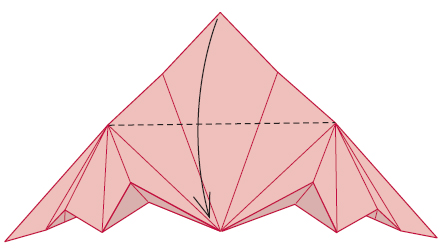
15 Use the existing crease to valley-fold the top triangular flap down.
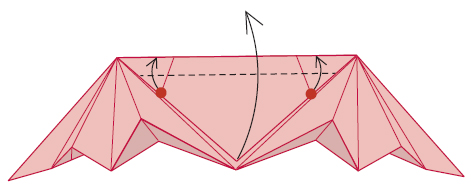
16 Valley-fold the triangular flap up. The correct amount can be determined by placing the ends of the indicated creases (red dots) upon the top folded edge.
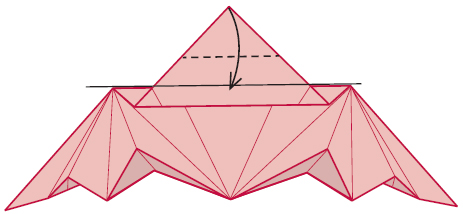
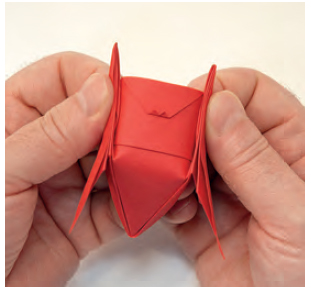
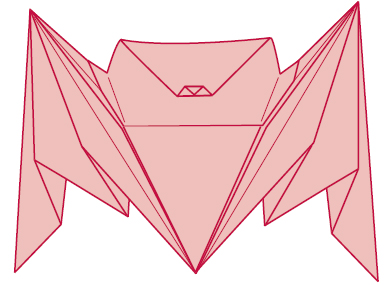
17 Valley-fold the top corner down, just a bit below the level at the black line, which represents the level of the hidden folded edge, behind.
18 Valley-fold the corner up at the level of the hidden folded edge. Fold corner down to touch the middle of the folded edge, below. Mountain-fold the indicated edges under as far as possible.

19 Your paper should look like this.
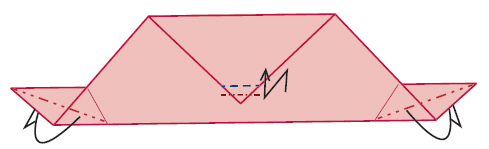
20 Use the pleats in the wings to close and flatten the model.

21 Mountain-fold along the edges of the wings, from their outward corners down to the creases on the body. Move these mountain-folded edges of the wings up to the top corners of the head, valley-folding between to make the body plump.
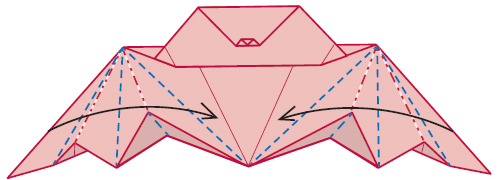
22 Open the wings, slightly.
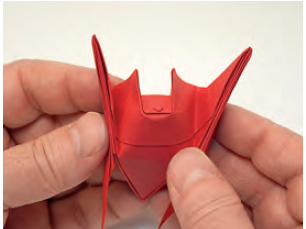
23 Mountain-fold along the cut edges of the top layer of paper on the head, stopping at the mouth corners. Fold the top corners of the head over each other and raise them straight up for the ears.
24 Twist the ears to face forward.
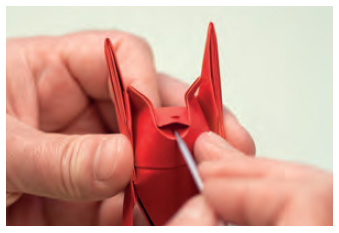
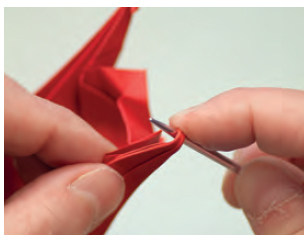
Open the mouth — you may use the point of a skewer or pen to do this. Be creative and form the bat’s expression with these folds.

25 Detail of the head.


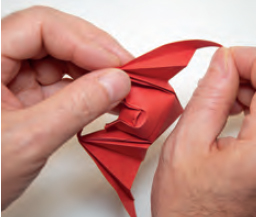
Curl the thumbs inward.

26 Open the wings wide.
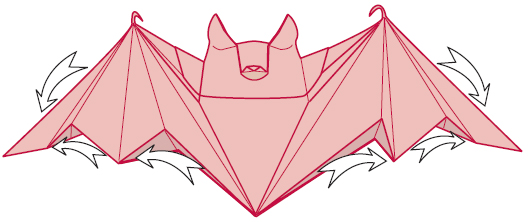
27 Make graceful curves in the outer edges and the scalloped underline of the wings.

28 The Happy Good-luck Bat