
The Alexander Aztec Swallowtail Butterfly
designed by Michael G. LaFosse
LESSON: WET-FOLDING WITH DUO PAPERS
Tiger swallowtail butterflies were always my favorite, and when Michael began to explore variations of his origami butterfly design system, I was particularly taken by the beauty of a version that he later dubbed the “Alexander Swallowtail.” At about the same time, I had been teaching my fancy variation of the three-piece, six-facet box by Molly Kahn, and I found that by fan-folding the inner flap to the outside, my students had a much easier time assembling the three pieces. I named it the “Fiesta Box” because the resulting triangular spots reminded me of so many popular decorations south of the border. It didn’t take long for Michael to adopt fan-folded, triangular spots to grace the wings of his origami butterflies. We happened to be working on updating our video butterfly lessons, and this version, sporting my favorite swallowtail wing treatment, was realized. As with my Fiesta Box, this butterfly looks great when folded from thicker Japanese duo-color foil. If you use fancy papers instead, it is best to wet fold a pasted duo-color laminate.
• Back coating is an essential technique that separates the more serious origami artists from the casual folders. Back coating does much more than make thicker paper, or make paper that has a different desired color on each side. It can do both of those things, but it also allows the artist to create a much stronger laminate that includes an important layer of internal size between the two sheets. This methylcellulose gel is an archival, water-soluble adhesive that lubricates the fibers and allows the layers to slide imperceptibly as the model is folded and shaped. It sets when dry to retain the desired pose or position. Back coating fine papers with methylcellulose provides exceptional strength during complex folding, allows more artful shaping possibilities, and produces a more durable final product.
• It is easier to back coat the two different papers if one is slightly larger than the other. Most laminates dry properly when at least a ¾” margin about the perimeter can be pasted onto the drying board. (This means that you should trim one piece to be 1½” shorter in each dimension.)
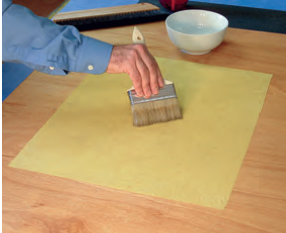
• After trimming, use a spray bottle and a brush to add moisture evenly to both sides of each sheet that you will be laminating. Add methylcellulose to the largest sheet only. Brush the adhesive along one diagonal, and then from the center to each of the remaining corners. Working the adhesive with the brush from the center to the edges allows the paper to “grow” as the cellulose fibers swell and relax with the addition of the moisture and adhesive. More methylcellulose will require more drying time. An uneven coat will dry unevenly and pucker, so work the layer long enough with the brush to ensure an even coating. If the gel is adjusted to the proper consistency, it will relax on the surface and look glossy and even. Too thin, and it will disappear into the fibers. Too thick, and the blobs won’t spread out and level into a glossy glaze.
• Add the second moistened sheet, centered on top of the applied gel. You might want to have somebody help you by holding two of the corners. Lower one end first, and gently adhere the lowered sheet onto the wet adhesive. Using a wide, dry brush, work any trapped air bubbles to the edges where they can be released.

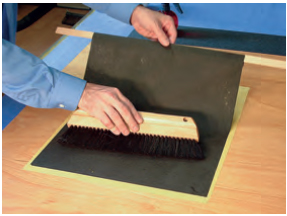
• Tear a ¾” x 1½” “tongue” (or gate) of scrap paper to lay across the gooey perimeter. This will prevent the paper from sticking to the backer (drying surface) at that one spot, where a knife can later be inserted to release the pasted perimeter from the backer. Transfer the wet laminate by flipping it onto the backing surface. Allow the paper to dry. As moisture leaves, the sheets will shrink and tighten.
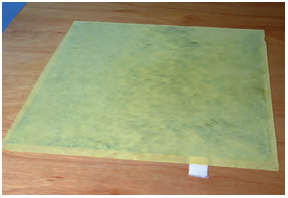
• When dry, release the paper from the backer by inserting a knife at the “tongue” (or gate). Trim squares for your project!
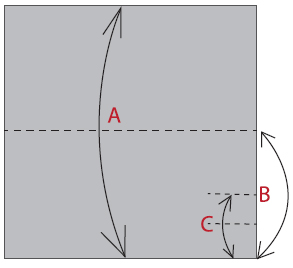
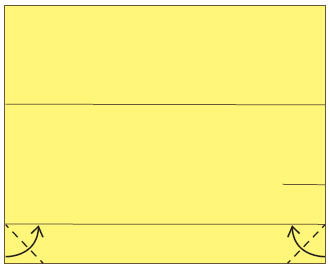
1 Begin with the “wrong” side up. (A) Valley-fold in half, bottom edge to top edge. Unfold. (B) Valley-fold the bottom edge to the center crease, making only a short pinch mark at the right edge of the paper. Unfold. (C) Valley-fold the bottom edge to the bottom pinch mark, making a new pinch mark. Unfold.

2 Lay the bottom pinch mark upon the one above to valley-fold the distance between them in half.
3 Valley-fold each of the two free corners of the bottom flap to align their short edges with the bottom edge.
4 Your paper should look like this. Turn over, top to bottom.
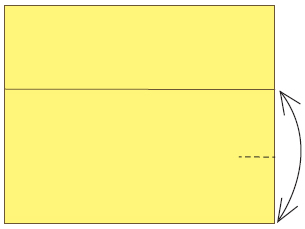
5 Valley-fold the bottom edge to the crease, making only a short pinch mark at the right edge of the paper. Unfold.
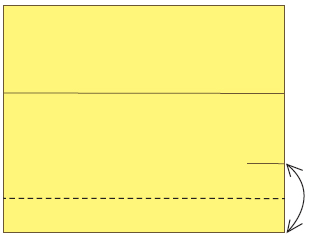
6 Valley-fold the bottom edge to the pinch mark, folding the full length of the paper. Unfold.
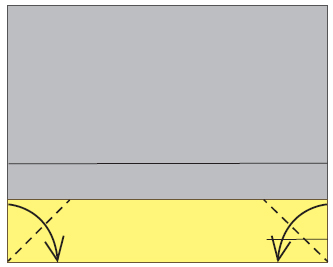
7 Valley-fold the bottom corners up, aligning their short edges to the crease.
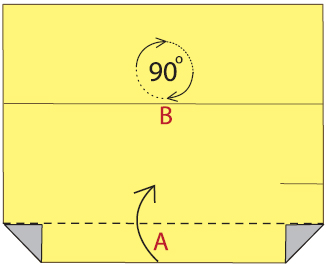
8 (A) Valley-fold the bottom flap up. Rotate the paper 90 degrees clockwise.
9 Valley-fold in half, bottom short edge to top short edge.
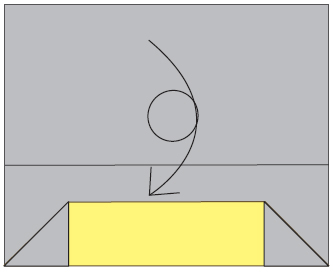
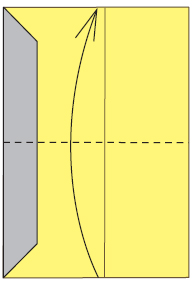
10 Squash-fold the smaller right half of the model.
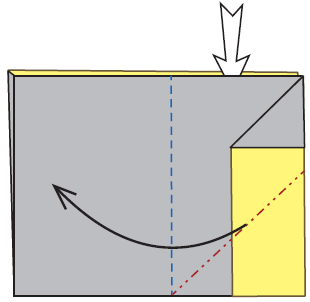
11 Your paper should look like this. Turn over from left to right.
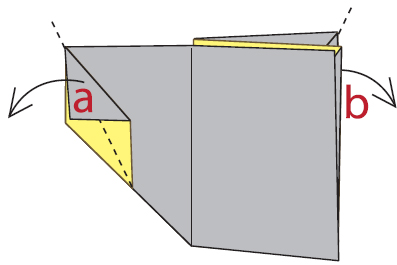
12 Pull out the flaps marked “a” and “b” and valley-fold to flatten.
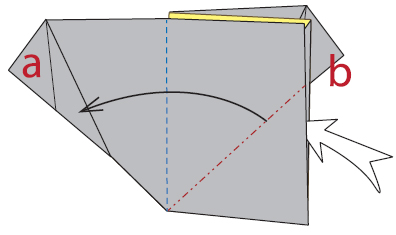
13 Squash-fold.
14 Valley-fold the bottom corner to the top of the split. Unfold.
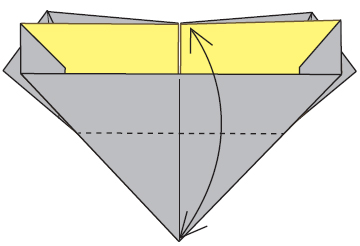
15 Squash-fold the top left and right quadrants, hinging at the horizontal center crease. Look ahead for the result.
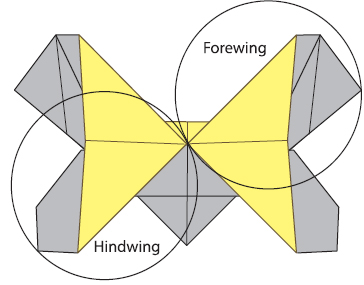
16 Your paper should look like this. This is one of my many origami butterfly system basic forms. Hundreds of new “species” of origami butterflies can be developed from these bases. Let’s go on to refine the forewings and hindwings for the Alexander Aztec Swallowtail.
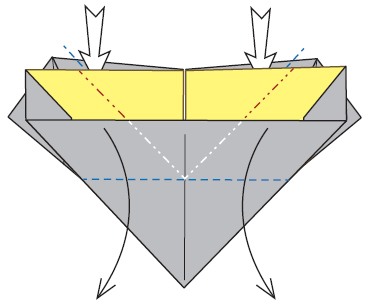
17 Valley- and mountain-fold the lower edge of the hindwings, forming fan pleats.
18 Unfold the pleats.
19 Pull up the top layer of the hindwings and mountain- and valley-fold along the creases to collapse the fan.

20 Your paper should look like this.
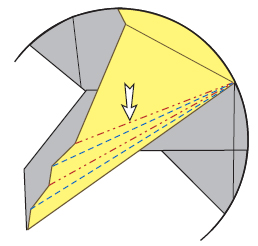
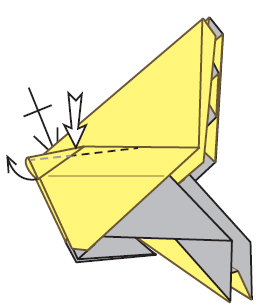
21 Sharply mountain-fold the horizontal center crease, indicated here with an “X” arrowhead, and move it downward, pulling the top edge of the forewing down with it. Valley-fold under the mountain fold and at the top of the wing to flatten the shape. Look ahead at the next drawing for the result.
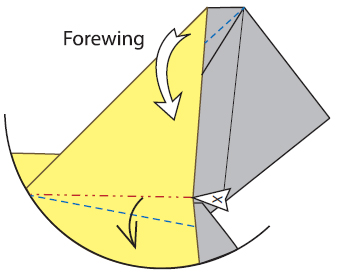
22 Valley-fold the square-cornered flaps over the forewings, aligning the top edge of the flaps with their associated crease.
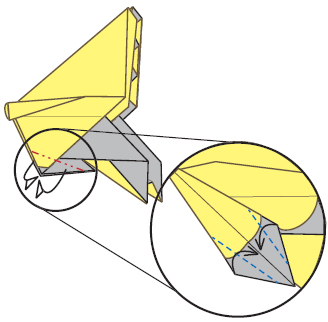
23 Valley- and mountain-fold the remnant of the flaps that overlap the topmost layers of the forewings, making a two-colored border of triangles. Inside-reverse-fold the indicated corners at the outside base of the forewings.
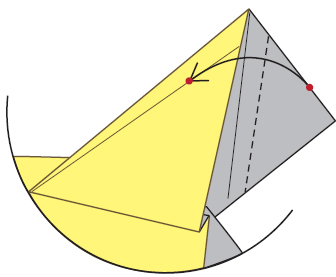
24 The forewings should look like this.
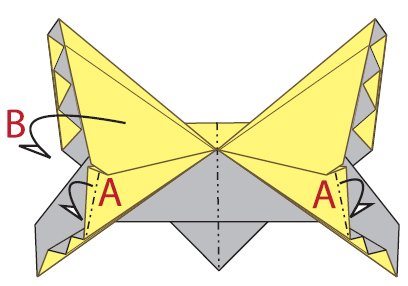
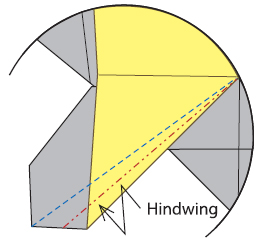
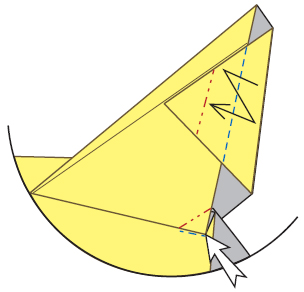
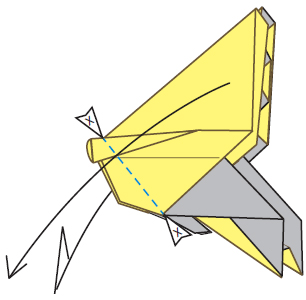
25 (A) Mountain-fold the indicated vertical edges behind the top layer of each hindwing. (B) Mountain-fold the butterfly in half, wing to wing.
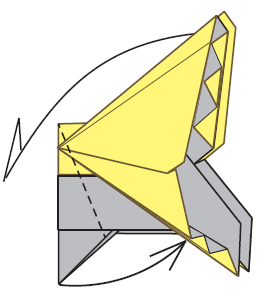
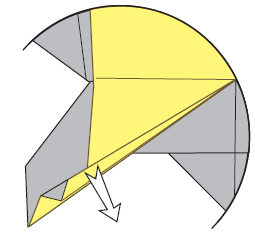
26 Valley-fold the left edge at an angle, pivoting at the top left corner and making the bottom corner touch the trailing edge of the top hindwing. Allow the full wing at the back to swing into view on the left.
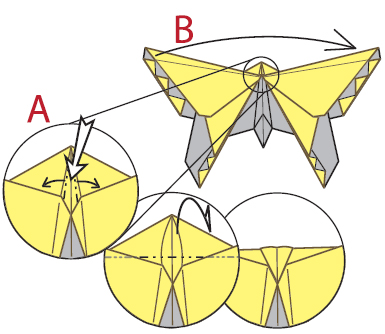
27 (A) Form the head: Squash-fold the center rib flat, then mountain-fold the flattened flap behind. (B) Gently fold the butterfly in half, wing to wing, being careful not to press too firmly at the head, lest it tear.
28 Adjust the head angle to prevent the paper from splitting: Push the indicated folded edges, front and back, down simultaneously, making the bottom edge of the head jut out slightly. Valley-fold firmly to flatten the newly formed edges.
29 Taper the underside of the abdomen by mountain-folding the short, hind edges inside the model.
30 Valley-fold each wing down, folding between the points marked with “X” arrowheads, spanning from the top of the head to the wing-locking point near the abdomen.
31 Open and set the wings, as shown. Hindwing folding detail to follow.
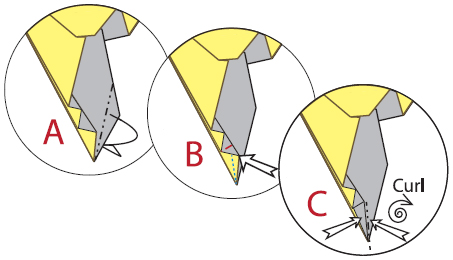
32 (A) Mountain-fold the indicated edge behind, narrowing the point. (B) Inside-reverse-fold the bottom edge of the upper layer. (C) Mountain-fold the point in half and give the point a gentle, outwardly sweeping curve.

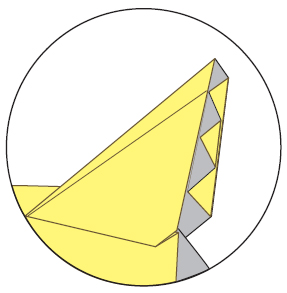
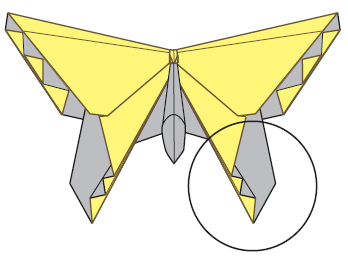
33 The Alexander Aztec Swallowtail Butterfly
Takeaways: Metamorphosis in Origami
Michael is fond of calling origami a “metamorphic art form.” A sheet of paper is transformed, only by folding, into a sculptural piece with enhanced beauty or meaning. With its papery wings and metamorphic life cycle, what better subject could there be to represent origami than the butterfly? This example, the Alexander Aztec Swallowtail, is only one of hundreds of origami butterfly designs that Michael has created, and they are all based upon a handful of folding routines that constitute Michael’s creative origami butterfly designing efforts. These folding routines may be mixed and matched in thousands of ways to produce new “species” of butterflies. Since 1992, I have helped him explain and share his origami butterfly design system in several videos, books and kits, and I consider it his most important “gift” to the world of origami because Michael’s base is fun, simple and quick, yet it allows stunningly creative variation. In that way, it reminds me of Senbazuru, the first published “system” of creating “thousands” of interesting variations of Japanese origami cranes. I (Richard Alexander), am particularly proud that Michael named this variation of his origami butterfly for me.