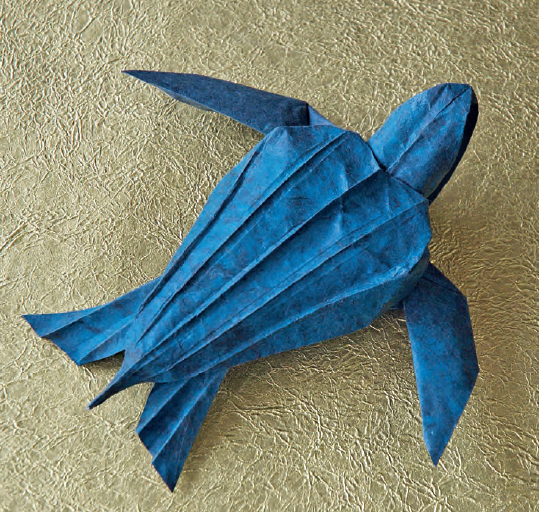
The Leatherback Sea Turtle
designed by Michael G. LaFosse
LESSON: PRE-PAINTING AND WET FOLDING 90-POUND COTTON WATERCOLOR PAPER
These massive turtles’ elongated, ridged, teardrop-shaped shell provides an exciting form to approximate in folded paper. Smooth and rounded turtles require big compromises for origami artists, but this species sports structurally reinforcing ribs that are highly satisfying because they are so doable with folding. As SCUBA divers, we love to catch a glimpse of any sea turtles, but we must admit that we would be both highly excited and at least a little bit frightened if we came across a huge, ten-foot long leather-back sea turtle. We prefer to fold this model from 90-pound (fairly lightweight) commercial, cold press 90% cotton rag watercolor paper, and this choice works well for such a structural model. Watercolor paper contains an additive similar to gelatin, which makes the paper stiff when it is dry. This helps to control the migration of watercolor paints and pigments, and so we decided to color the paper with a mottled blue pattern before folding the model. The additive is water-reversible and so the paper folds more easily when it is slightly moistened. Although these papers are relatively thick, the cotton fibers are still quite compressible.
Why not color your watercolor paper to exactly the appearance you desire? It is not difficult, and it is quite fun! If you want your work to last, remember to use the best fine artist-quality pigments, papers and materials that you can afford. For this project, use the tools in the photo: spray bottle, brush, archival ink and a dish!
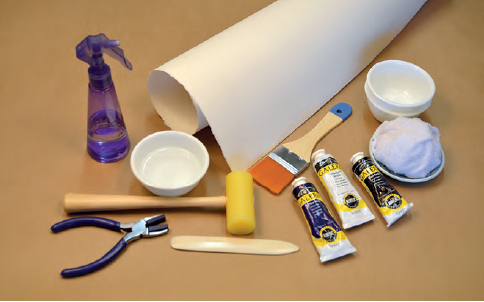
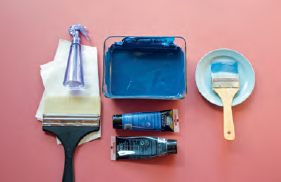
Here is a selection of tools and materials for painting the watercolor paper. Paints may be mixed in a flat-bottomed glass or plastic pan. Thin with water to make the paint easy to spread. Place protective materials under and around the watercolor paper to prevent paint from getting onto surfaces that you need to keep clean. Repeat the process to “relax” the paper.
Materials:
• Acrylic paints (Blue and Black) plus water for mixing and thinning
• Paint mixing tray
• Three-inch-wide acrylic paintbrush
• Spray bottle filled with water
• Wide, soft brush or cloth for spreading water on paper
• Paper towels
• 80- or 90-pound weight rag content watercolor paper, trimmed to the largest possible square, approximately 22 inches (56 cm), from the full-size sheet.

Spray water generously over the entire surface of one side of the watercolor paper.
Use a soft dry brush or cloth to spread the water evenly across the paper.

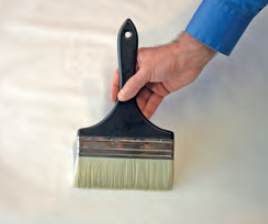
Apply paint with a wide acrylic paintbrush, brushing parallel to a side of the square and in the same direction, creating a streaky grain.
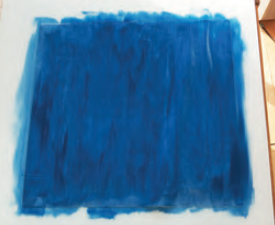
Work quickly to coat the entire sheet so that the entire sheet will be freshly wet.
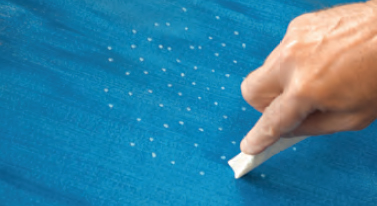
Fold a piece of paper towel into a pointed shape and touch repeatedly over the area of the freshly painted surface to make a pattern of small white spots.
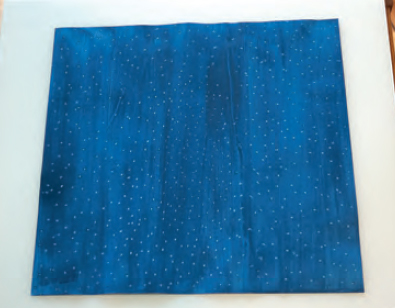
Let the paper dry completely.
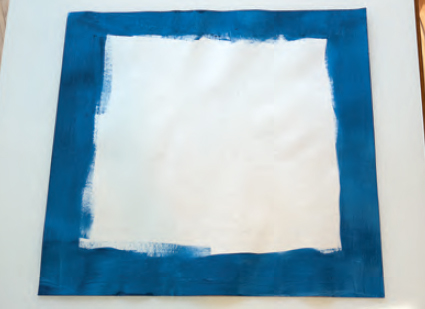
Paint a border of color on the backside of the sheet. Let dry completely.
There is a huge Leatherback Sea Turtle specimen, preserved and mounted at the entrance to the Museum of Comparative Zoology at Harvard University. The Boston Malacological (mollusk) Club meets monthly in the classroom near where this mounted creature has been proudly on display for decades. Professor George Buckley says that it was one of the last huge individuals ever seen. Even the relatively tiny, 2-foot “babies” seen occasionally in the Gulf of Maine are quite rare sightings today. A few of these join the more common green sea turtles in strandings on the inner curl of Cape Cod almost every year, especially if bitter cold weather comes early and catches them during their migration back to warmer southern waters.
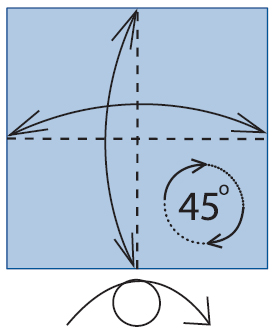
1 Begin right side up. Valley-fold in half edge to edge both ways, unfolding after each. Turn over and rotate 45 degrees.
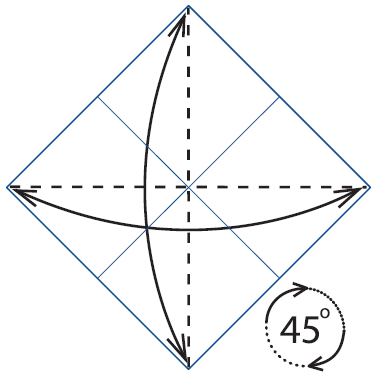
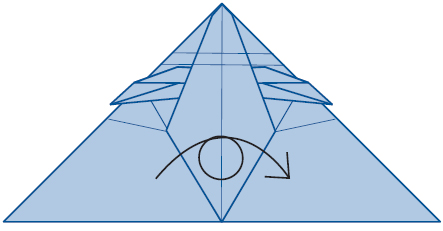
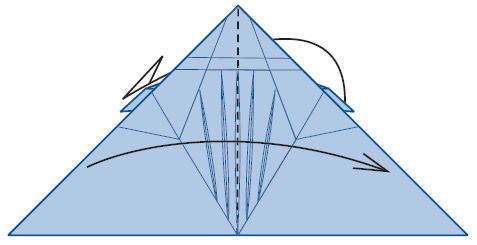
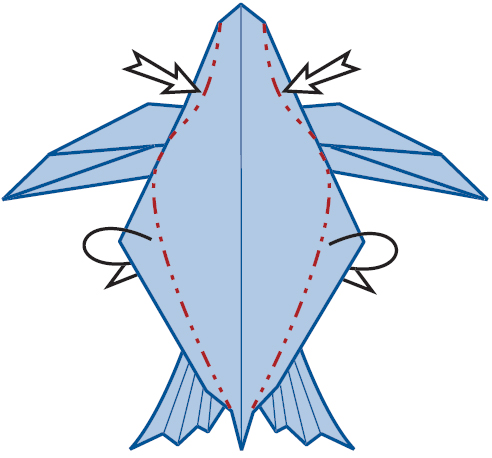
2 Valley-fold in half diagonally both ways, unfolding after each. Rotate 45 degrees.

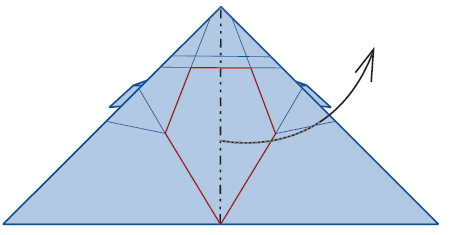
3 Collapse the square into a layered triangular shape, open at the bottom. Note carefully the position of the corners and the layering.
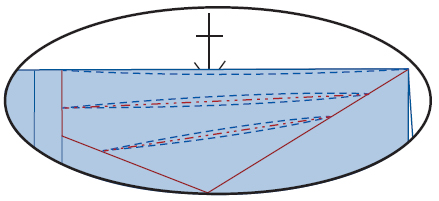
4 Your paper should look like this.

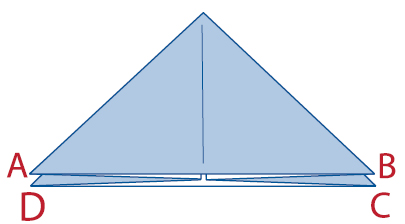
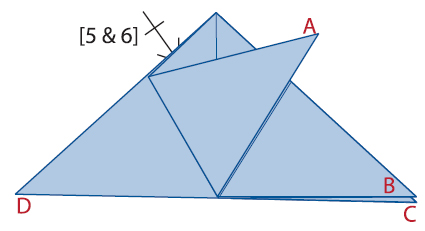
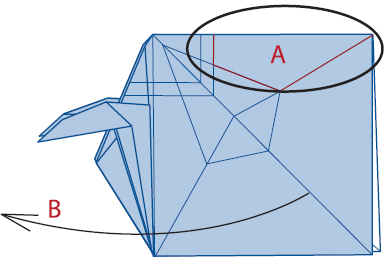
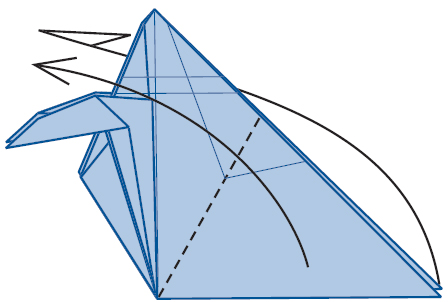
5 Valley-fold the left (A) and right (B) corner flaps to overlap in equal thirds, with flap B on top.

6 Your paper should look like this. Return flap B to the bottom right.
7 Repeat steps 5 and 6 on the other side. Be sure to organize corners C and D correctly, then return the paper to the position shown in step 8.

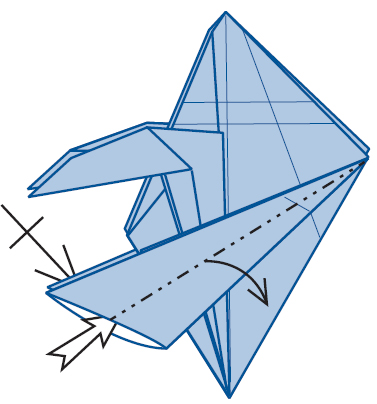
8 Valley-fold the top left obtuse corner to touch the vertical center crease, folding at an angle that will leave the top corner slightly blunted. Notice where the fold stops at the top, marked by the “X” arrowhead. Repeat behind.
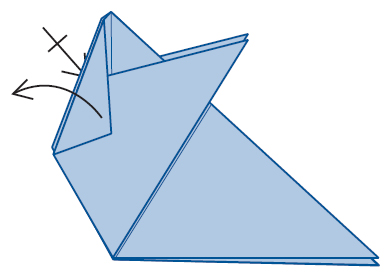
9 Your paper should look like this. Unfold the front and back flaps.
10 Inside-reverse-fold the front and back flaps.
11 Valley-fold the top triangular flap of the right side to the left. Repeat behind.
12 Use the existing valley creases to fold the large triangular flaps over, one in the front and the other in the back.

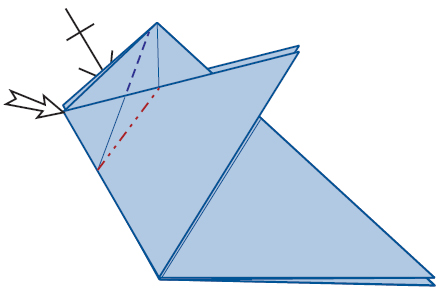
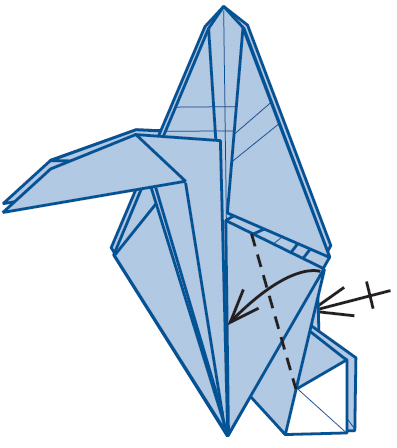
13 Valley-fold the top right obtuse corner to touch the vertical center crease, folding at an angle that will leave the top corner slightly blunted. Notice where the fold stops at the top, marked by the “X” arrowhead. Unfold. Repeat behind.

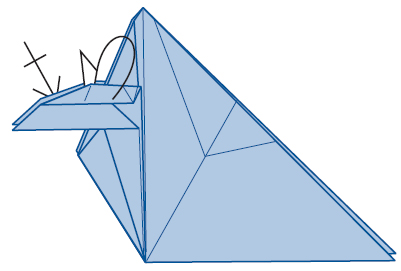
14 Unfold the front and back triangular flaps.

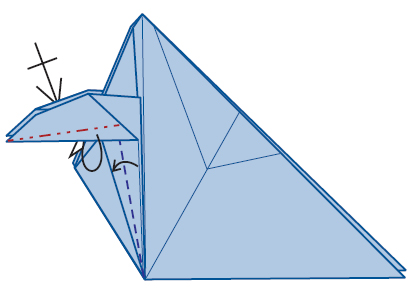
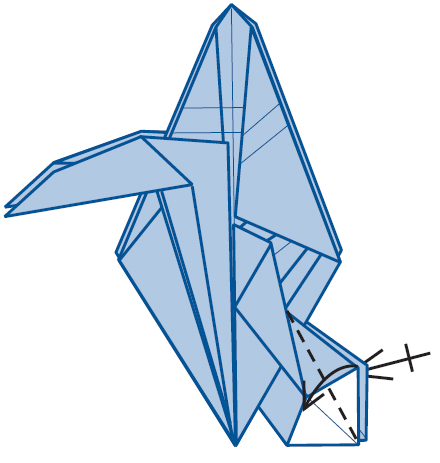
15 Valley-fold the left edge of the left-side triangular flap to align with the vertical right edge. Repeat behind.

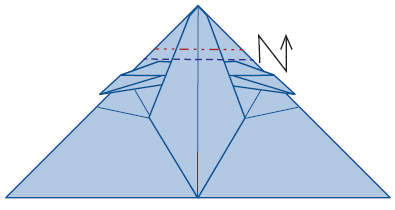
16 Move the top end of the triangular flap to the left, pivoting at the point indicated by the “X” arrowhead, and squash-fold, forming the front flippers. Repeat behind.
17 Wrap the top layer of the flipper over to the other side. Repeat behind.
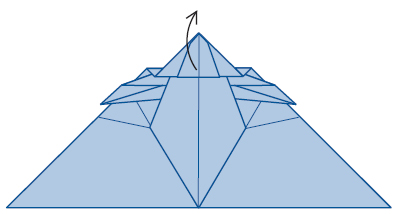
18 Mountain-fold the bottom edge of the flipper up and under while valley-folding the vertical right edge of the associated lower flap to the left edge. Repeat behind.

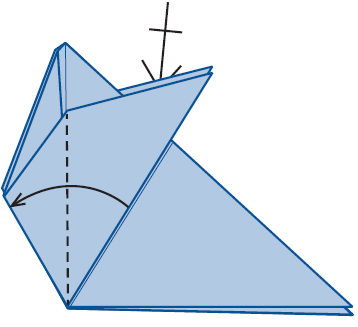
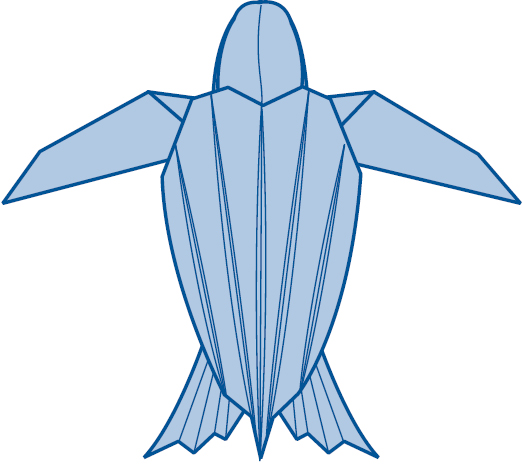
19 Move the top left half of the paper to the right and the back right half to the left.
20 Your paper should look like this. Valley- and mountain-fold the top corner, to prepare for folding the head and neck.
21 Your paper should look like this. Unfold.
22 Turn over, left to right.
23 First, notice the pentagonally-shaped crease outline, highlighted in red. This area will become the dorsal shell. Lift the top layer of paper up and to the right, mountain-folding it in half. Look ahead to the next drawing for the shape.
24 (A) Install mountain and valley creases on the dorsal surface of the shell that are detailed in step 25. (B) Move the top right layer to the left, returning the dorsal shell to the center.
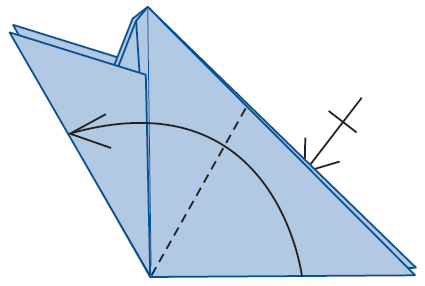
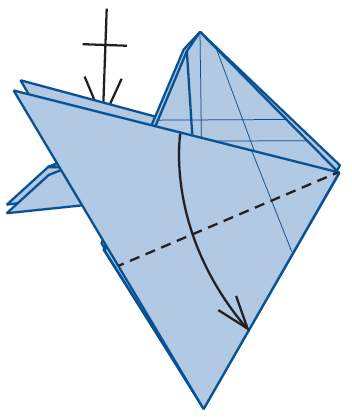
25 Detail for step 24-A: Pinch triple crease sets — valley, mountain, valley — that span from the front of the dorsal shell to the back. You should install five sets: one at the top center and two each, on the front and the back sides of the model.
26 Move the top left half of the paper to the right and the back right half to the left.
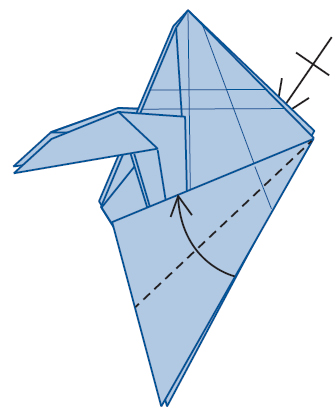
27 Use the existing valley creases to fold the large triangular flaps over, one in the front and the other in the back.
28 Valley-fold the top edge of the triangular flap to the bottom right edge. Repeat behind.
29 Valley-fold the bottom right edge of the triangular flap to the top edge. Repeat behind.
30 Squash-fold the topmost triangular flap to form the hind flipper. Repeat behind.

31 Use the existing creases to valley-fold the top right flap to touch the center crease. Repeat behind. Valley-fold the flipper along the vertical center, to the left. Repeat behind.
32 Valley-fold the indicated corner over to touch the vertical center line, making the fold stop at the overlapping layers of the hind flipper. Repeat behind.
33 Valley-fold the outer corner of the flipper over, making a single folded edge that spans from the top limit to the bottom corner. Repeat behind.

34 Move the top right half of the paper to the left and the back left half to the right.
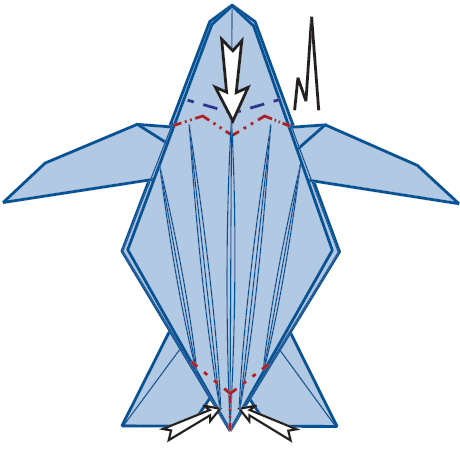
35 Crimp the head into the shell. Reform the leading edge of the shell with an M-shaped mountain fold. Pinch the tail end of the shell to rabbit-ear the point, making it slender.

36 Put your thumbs on top of the head and your index fingers into the sides; pull open the paper to make the head rounded, upright and three-dimensional. Gracefully mountain-fold the left and right margins of the dorsal shell to make them rounded. Mountain- and valley-fold the hind flippers with radiating pleats.

37 Turn over, left to right.
38 Gracefully mountain-fold the margins of the head, neck and the plastron (ventral shell) to make them rounded.

39 Turn over, left to right.
40 The Leatherback Sea Turtle