Lessons from the Heart
designed by Michael G. LaFosse
LESSON: “DANCING WITH THE PAPER”; DRY FOLDING IN THE AIR
Folding against the surface of a table is much easier for beginners, and it is essential when first learning a model. However, many advanced origami techniques are best performed off the table while supporting the paper solely with your hands. Michael recalls his first meeting with origami master Akira Yoshizawa in 1991, at a master class held in Ossining, New York. Master Yoshizawa shared several nuggets of wisdom with this group of students, and some of it was “tough love” indeed. Michael recalled how the Master railed against folding paper against the table, “You do not dance with your back against a wall!” Lifting his paper, the master deftly folded the square diagonally in half. It was perfect. His hands performed the deceptively simple task with grace and confidence. Master Yoshizawa explained that he thought folding paper against the hard surface of the table eliminated the lyrical aspect of folding, producing a lifeless product, and so, in order to create the most expressive origami art, one must fold the paper off the table and in the air.
People rarely use their hands with equal facility: a right-handed person usually places folds with that hand while securing the paper with the left, whether folding against a surface or in the air. The hand that you write with is also your dominant working, or “folding” hand; the other is your “holding” hand. And like partners in a dance, one leads as the other follows. At first, this can be challenging, and it may feel ugly and stilted. Michael likes to use his Lesson from the Heart as a practice étude to help his students work through the performance, developing the required support (for the strength and control) necessary for folding confidently in the air. He calls this exercise “a conversation between two hands.” Perfect it by rehearsing over and over again, so that you build a rhythm and cadence. Work to remove any awkward gaps interrupting the flow. With practice, folding in the air can become an enjoyable experience, and when you master this performance, it will also be quite lovely to watch.
Practice with the common papers that you have, such as 6-inch / 15-cm origami paper, or even the largest squares cut from letter-size printer stock. Begin your practice by folding the Lesson from the Heart against the surface of a table until you have learned the sequence by “Heart.” Only when you are able to fold the model without referring to the instructions will you be able to put your full concentration on controlling these folds in the air. Use the same size and type of paper for each attempt until you have mastered it, and then challenge yourself with other paper kinds and sizes. We think you will be surprised at the level of control that you will develop, and we hope that you will adopt this little exercise as part of your origami performance repertoire.
Takeaways
I love what origami master Akira Yoshizawa once said, as quoted in Leland Stowe’s article, Paper Magic of Origami, Beacon Magazine of Hawai‘i, 1970: “For when we use our hands effectively, our hearts are most at peace.” Another quote that I love is one spoken by origami artist, Paul Jackson, in the film Between the Folds, “The process of making is the point of it. The object looks good if the process felt good. This needs to be a kind of ballet.” Indeed, Yoshizawa often spoke of folding masterfully as a kind of “dancing with the paper”.
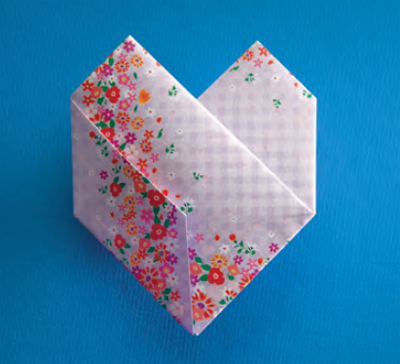
Master this model, and then “perform” it for, and give it to, a friend. You will know if you have presented a special moment by the watching the expression on their face, as they watch your graceful hands fashion this heart.
As a moment of meditation for yourself, try folding this heart to a favorite piece of music. Select a score that suits your folding style and one that will allow you plenty of time to savor every move!
This Origami Heart is dedicated to the memory of Mr. Yoshizawa.
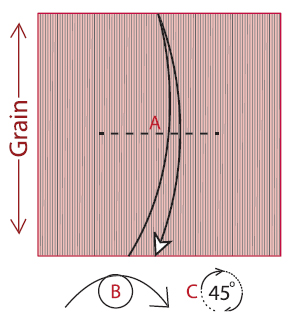
1 Begin right side up and with the grain running vertically.
(A) Valley-fold the center half of the square horizontally and unfold. Here, you are folding against the grain. This is a calculated effort to make steps 5 and 6 easier by folding with the grain. (B) Turn over, left to right. (C) Rotate 45 degrees clockwise.
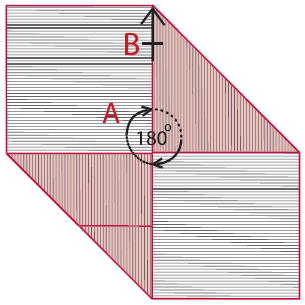
2 Notice that the grain is now running from the bottom left edge to the top right edge. Valley-fold the bottom corner to the center. Use the bottom half of the bottom right edge to align with the center crease. You will be folding against the grain.
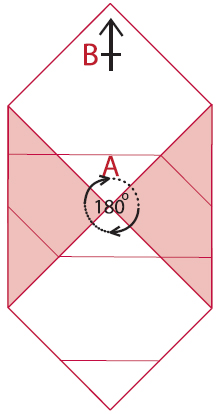
3 (A) Rotate the paper 180 degrees. (B) Repeat step 2, making the opposite corners meet at the center.
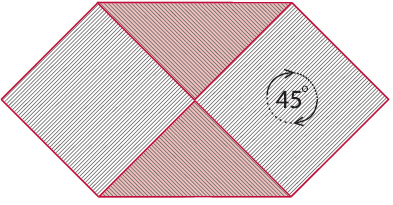
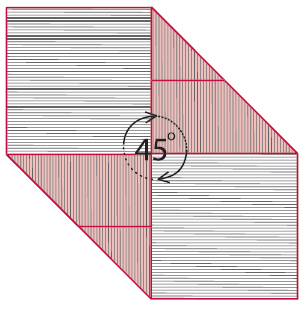
4 Rotate 45 degrees clockwise.

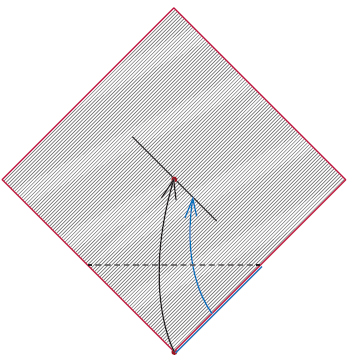
5 Valley-fold the bottom, obtuse corner to the center. Fold only from the left side limit to the center.
Unfold.
6 (A) Rotate the paper 180 degrees. (B) Repeat step 5.
7 Rotate 45 degrees clockwise.
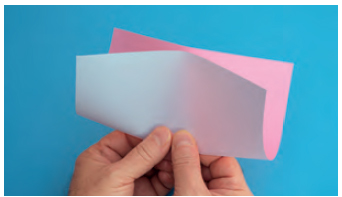
8 Valley-fold the bottom corner up, aligning the bottom right edge to the indicated crease. Fold only from the right side limit to the bottom end of the left side crease. Unfold.
9 (A) Rotate 180 degrees. (B) Repeat step 8.
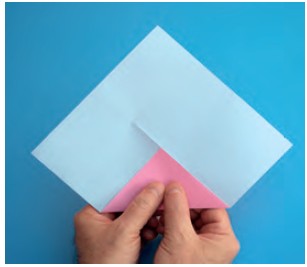
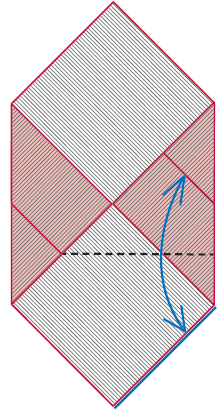
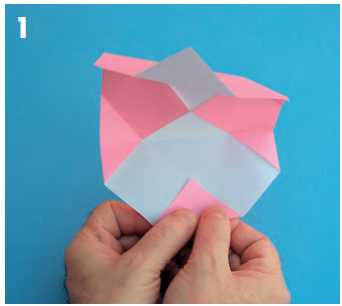
10 Your crease pattern should look like this. Use the bottom horizontal crease to move the bottom flap up.

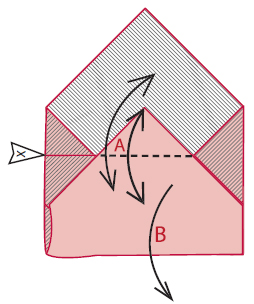
11 (A) Horizontally valley-fold the top corner of the front flap at the level of the horizontal crease of the back flap. Unfold. (B) Return the front flap to the bottom.
12 (A) Rotate the paper 180 degrees. (B) Repeat step 11.
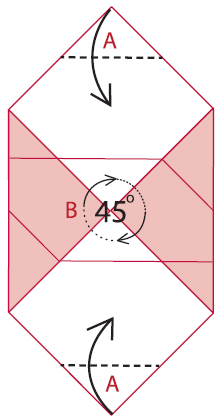
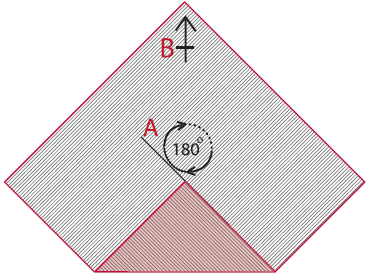
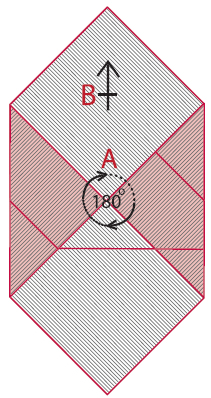
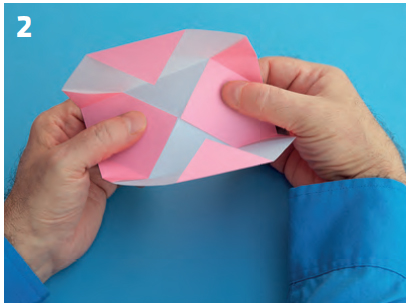
13 (A) Valley-fold the top and bottom corners inward. (B) Rotate 45 degrees clockwise.
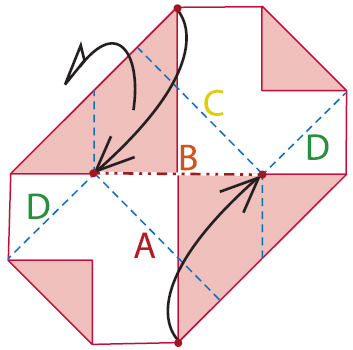
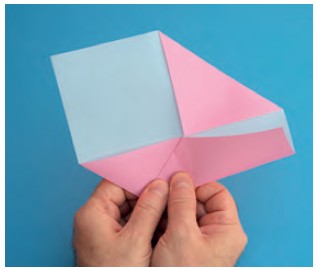
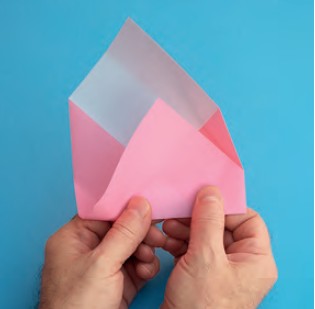
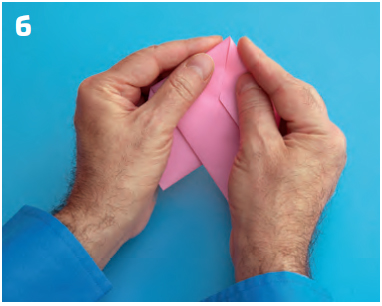
14 Your paper should look like this. Use the existing creases in sequence, closing the envelope. Creases at “D” will form upon flattening the model completely. Refer to the following photo sequence.
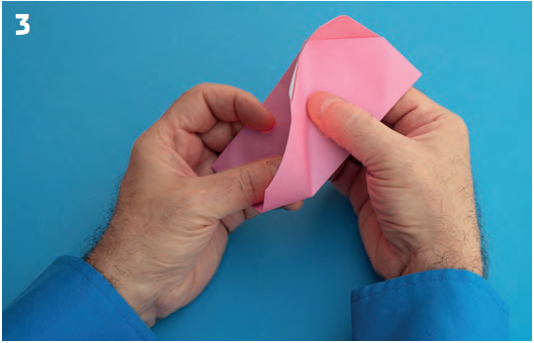

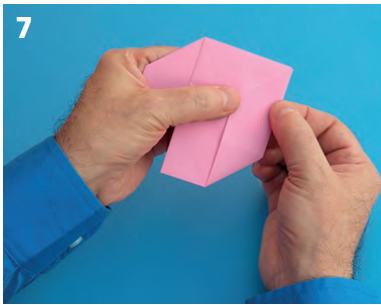
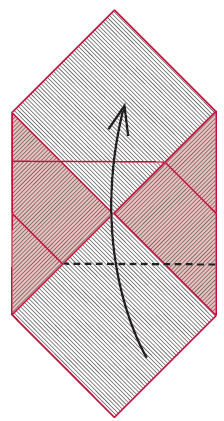
15 Your paper should look like this. Turn over, top to bottom.
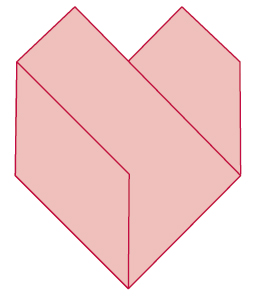
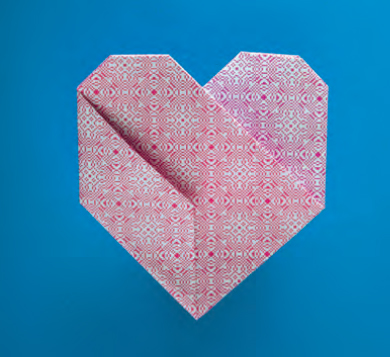
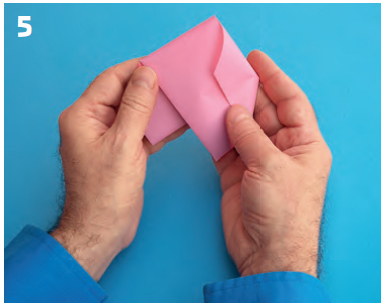
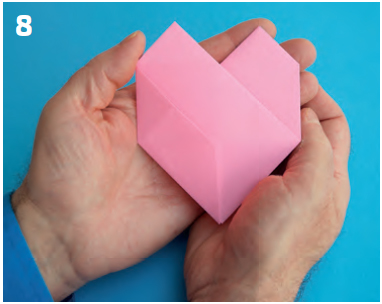
16 Lessons from the Heart. If you prefer, feel free to round off the top corners.
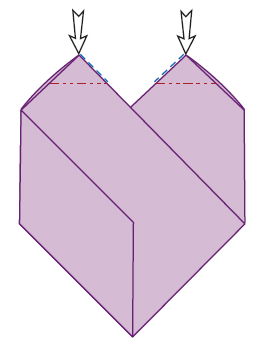
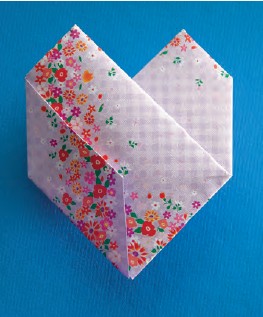
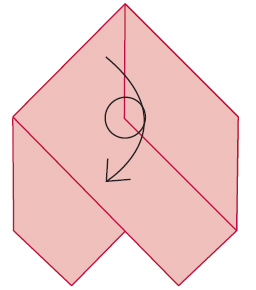
17 Try this simple variation: Inside-reverse-fold the top corners to form rounding facets.

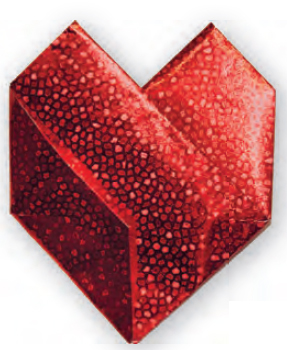
18 Complete! Now, try your hands at a mirrored example of this folding sequence!