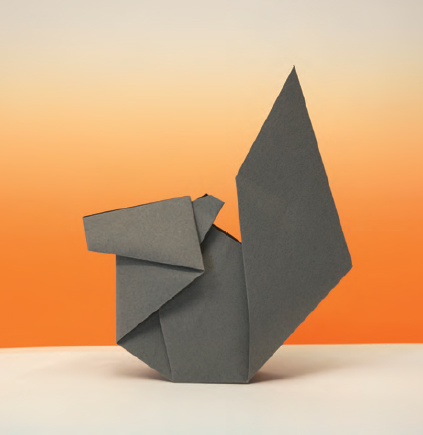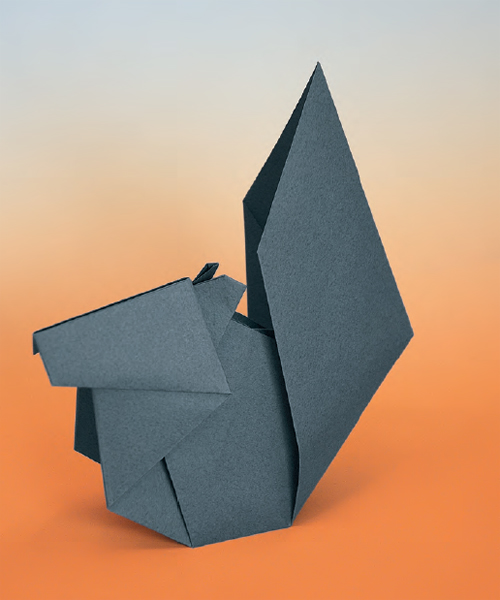
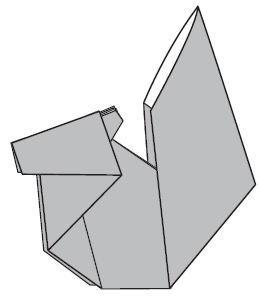
Anne LaVin’s Squirrel
designed by Anne LaVin
LESSON: DESIGNING MINIMALIST ORIGAMI
Introduction by Anne LaVin
For me, designing this origami Squirrel was a lesson in abstraction. I created it in response to a challenge posed by members of an online group focusing on simple origami. Not only did we have the basic limitation of origami folded from one square with no cuts, but the folding sequence also had to be simple and short.
I knew I wasn’t going to be able to represent everything about a squirrel, and so I decided to focus only on the visual elements that defined “squirrelness” best for me. During the long winters in northern New England, I get to know a lot of the local squirrel population — they are usually sitting at our bird feeders with their heavy winter coats fully fluffed out, flicking their wonderfully expressive tails — and so I decided to first focus on the tail. The visual volume of a squirrel’s tail is huge (although mostly just hair and air). This meant that a lot of the paper would become the tail, and for efficiency, should probably contain as few layers as possible.
If one corner of the paper was to become the tail, the diagonal of the square could become the central axis of the creature, and so I folded the square in half diagonally. The tail should be a blunt point, and so I folded the corners in towards the middle, but without bringing the fold all the way to the corner. Aha! Perhaps a sort of mutant fish base would create a narrow point at the other end to allow me to shape the head, and the extra flaps could be ears. (I find the shape of a squirrel’s ear especially cute, and so that would be another fun detail to refine.) After that, I fiddled with the proportions until it resembled a seated, fluffy squirrel.
I carefully marked the creases and intersections of the version that I liked most, unfolded it, and then I explored identifying the landmarks that would result in the correct proportions during a repeatable folding sequence. A few weeks later, with Michael’s help, I was able to nail down the landmarks for the ideal proportions so Michael could diagram it.
— Anne LaVin
Takeaways:
Do Not Overthink!
All origami is abstract, so embrace it as such! How few folds can be made to a square, yet still produce a recognizable squirrel? How few to produce one with a charming character? Which elements or specific folds contribute to that character? The flick of the tail? Cock of the ear? Tilt of the head? How did your choice of paper affect the “look,” success or the viewers’ perception of your creature? Distill.
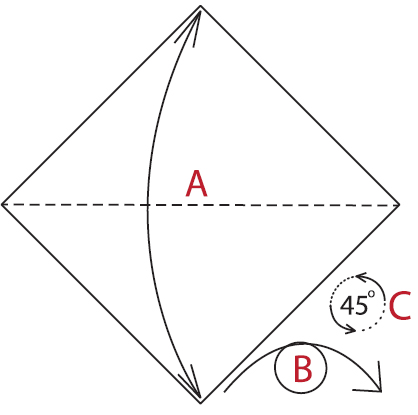
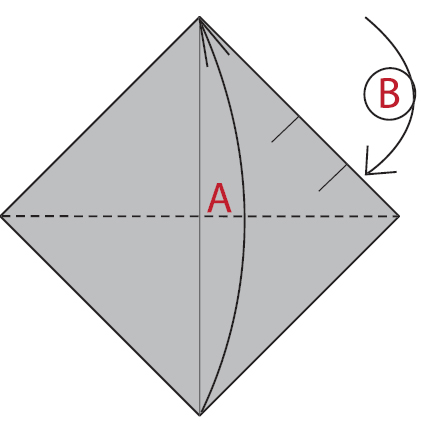
1 Begin with the white side up. (A) Valley-fold diagonally in half. Unfold. (B) Turn over, left to right. (C) Rotate 45 degrees counterclockwise.
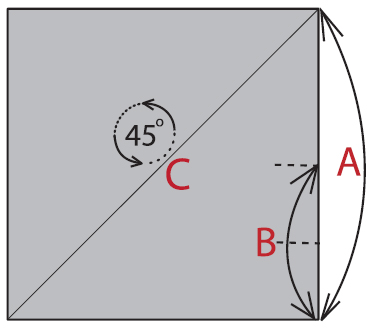
2 Notice the orientation of the diagonal crease. (A) Valley-fold a short pinch mark at the midpoint of the right edge. Unfold. (B) Valley-fold a short pinch mark halfway between the first pinch mark and the bottom right corner. Unfold. (C) Rotate 45 degrees counterclockwise.
3 (A) Valley-fold diagonally in half, bottom corner to top. (B) Turn over, top to bottom.
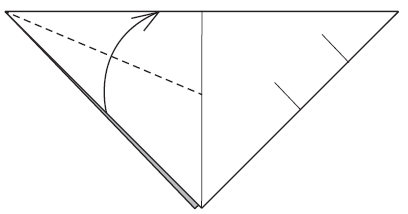
4 Check your paper to be sure that the two pinch marks are visible on the right side of the top layer. Valley-fold the left edge of the top layer to align with the top folded edge. Stop the fold at the vertical center crease.

5 Mountain-fold the square corner in half and move it to the left. Valley-fold from the vertical center crease to the end of the topmost pinch mark and flatten the paper. This is an eccentric rabbit ear.

6 Your paper should look like this. Repeat on the other side. These flaps will become the ears.
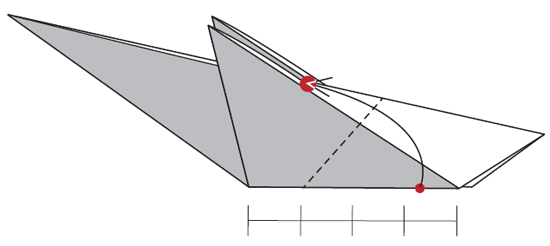
7 Valley-fold the right side of the paper over the left. Set the proper angle by pivoting at approximately one quarter the length of the bottom edge, beginning from the left end, and making one point of the bottom edge intersect with the “V” notch, above.
8 Your paper should look like this. Move the right side flap back down.
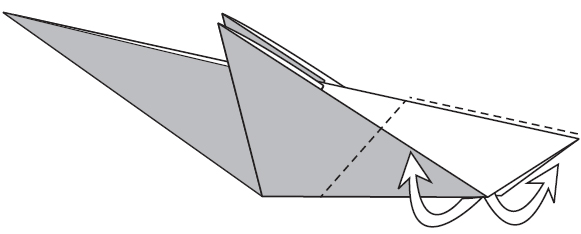
9 Turn the right side of the paper inside out, using the creases formed in the pervious step to guide the final shape. This will be the tail.
10 Use the length of bottom horizontal edge to estimate the starting point of this fold. Valley-fold the left side pointed flap to the right. The fold should be perpendicular to the horizontal bottom edge.

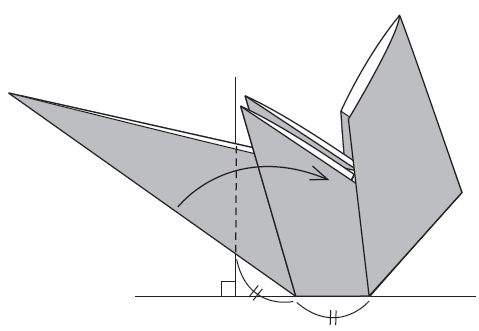
11 Use the length of top edge, from the front of the ear to the left corner, to estimate the starting point of this fold. Valley-fold the pointed flap to the left. The fold should be perpendicular to the line of the top edge.
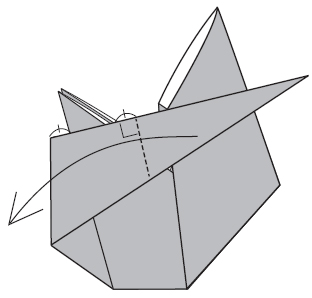
12 Valley-fold the pointed flap to the right, allowing a short forward length for the muzzle. The fold should be perpendicular to the line of the top edge. Inside-reverse-fold the tips of the ears.

13 Detail for folding in the ear tips.
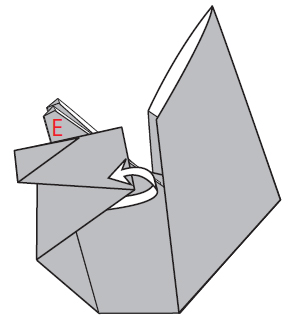
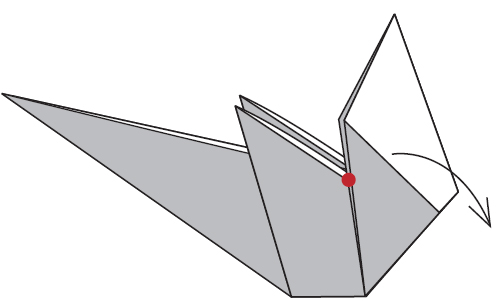
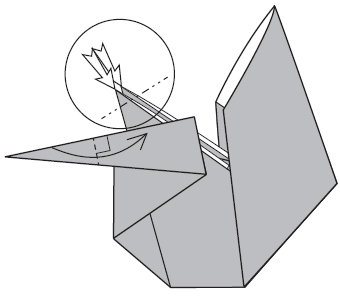
14 Move ear layer “E” to the front.

15 Valley-fold the front layer ear flap backwards. Use the intersection, marked in the diagram by a red dot, of two folded edges for the bottom end of the fold line.
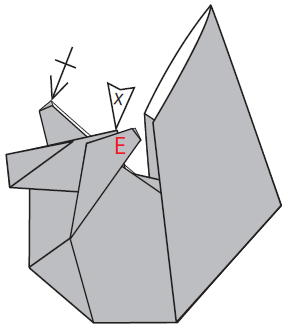
16 Notice that the top edge of the ear lies below the top edge of the head, indicated by the “X” arrow. Fold the other ear to match.
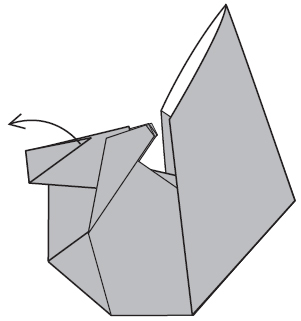
17 Unfold the head flap.
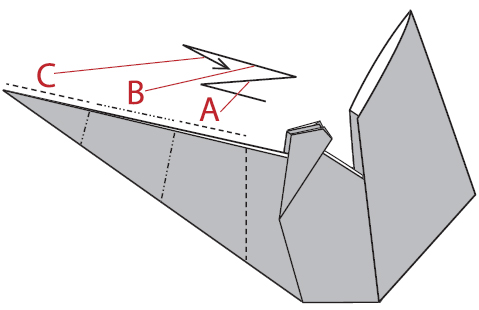
18 (A) Outside-reverse-fold back. (B) Outside-reverse-fold forward. (C) Inside-reverse-fold.
19 Anne LaVin’s Squirrel