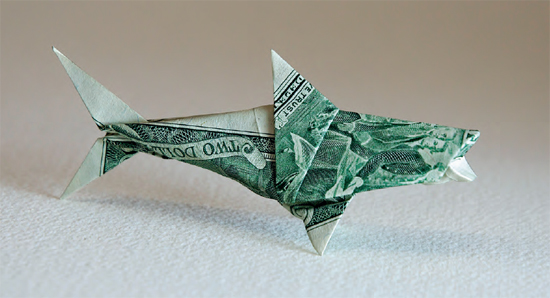
The Great White Shark
designed by Michael G. LaFosse
LESSON: WET-FOLDING PAPER MONEY
Here’s a dollar bill model that requires wet folding. Great white shark sightings have been in the news regularly, both in Massachusetts, and in Hawai‘i, and anyone with a toe in the ocean may be thinking about the probability of being mistaken for food. Humans are awed by the power, strength and violent feeding behavior of hungry great whites, but this doesn’t excuse unwarranted fear of, or brutality to them. These magnificent creatures cruise the waters for hundreds of miles, surviving by culling the sick and the weak, and in so doing, making our sea life populations even healthier.
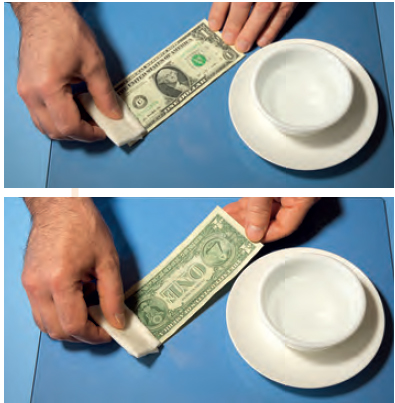
The quality of the paper used for US currency is superb because it is designed and formulated for strength and durability. It folds best when moistened slightly, as do other papers of similar quality fibers and blends. Moistening the paper before or while it is being folded is commonly called “wet folding.” This leads to misunderstanding because the paper is not soaking wet — only slightly damp. Wet-folding offers several advantages to the origami artist: Once dry, the project will retain its physical form indefinitely (until it is moistened again); wet folding makes thicker and stiffer papers easier to fold; wet folding preserves the integrity of the fibers. (Dry folding, on the other hand, breaks some of the fibers and that damage weakens the paper. Wet folding allows the fibers to gently bend instead of breaking.)
When wet folding, add just the least amount of moisture that will make the paper soft and yielding (more easily foldable). The paper should neither look wet, nor feel wet, but it will feel cool to the touch. New, crisp bills are the first choice for money origami projects, but you may partially restore a bill’s foldability with a warm clothes iron. When selecting dollar bills for origami art, it is good to be fussy. Since individual bills are trimmed from large sheets with a high-speed cutting machine, the margins are often uneven, and so bills with perfectly symmetrical margins are hard to find. If you are folding a model that requires printing symmetry, select a bill with equal margins on the short ends. Some origami designs show both back and front (reverse and obverse) sides of the bill, and some designs look best when the two designs are registered. Alignment of the engraving plate’s die strikes from front to back is easy to check by holding the bill up to the light.
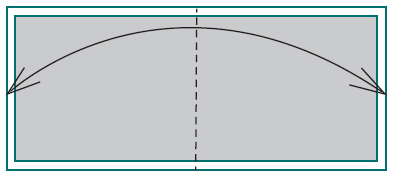
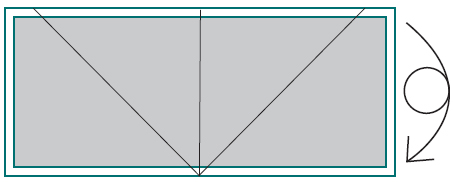
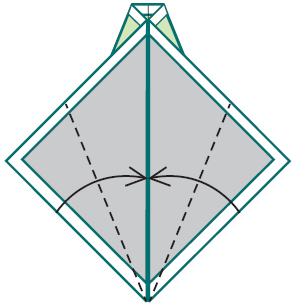
1 Valley-fold in half, short edge to short edge. Unfold.
2 Valley-fold each of the bottom edge halves up to align with the center crease.

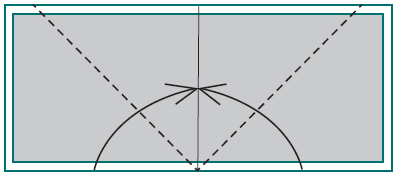
3 Your paper should look like this. Unfold.
4 Turn over, top to bottom.
5 Valley-fold the left and right short edges to align with the top edge.
6 Turn over, top to bottom.
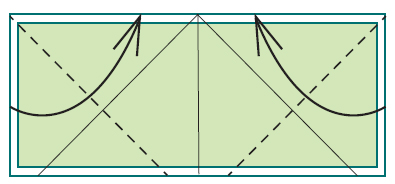
7 Valley-fold the left and right folded edges to align with the center crease. Allow the hidden triangular flaps to come from the back and lay on top.
8 Valley-fold the bottom left and right edges to align with the vertical center split.
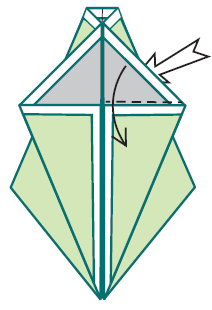
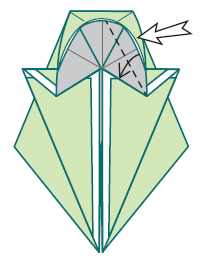
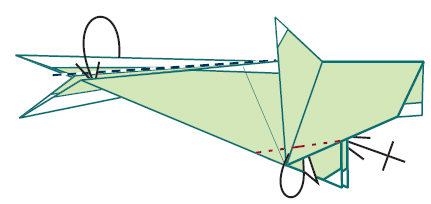
9 Open a pocket at the outside, top right — indicated by the white arrow — while valley-folding along the base of the associated triangular-shaped layer.
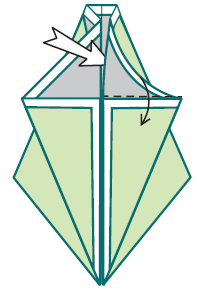
10 Open a pocket inside of the top right layer while continuing to valley-fold the associated triangular layer downward.
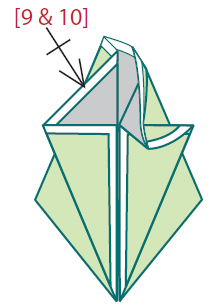
11 Repeat steps 9 and 10 to form an open hood shape at the top of the model.
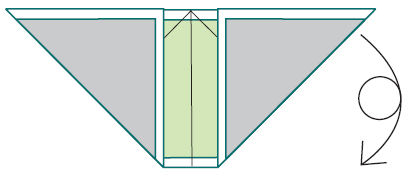
12 Valley-fold to collapse the right side of the hood shape to the center.
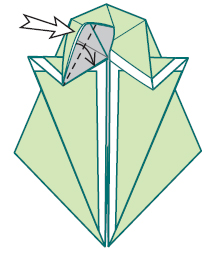
13 Repeat step 12 on the left.
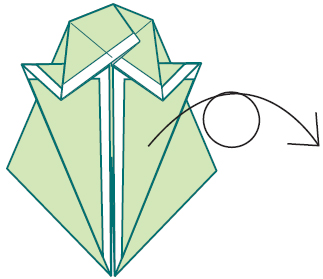
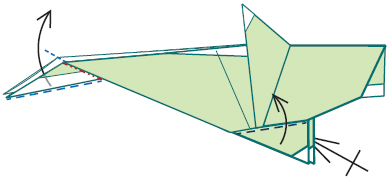
14 Turn over.
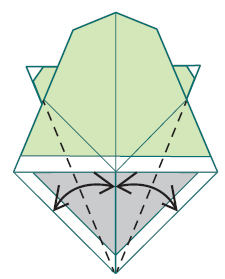
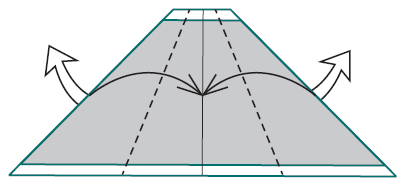
15 Valley-fold the bottom left and right edges to align with the vertical center. Unfold.
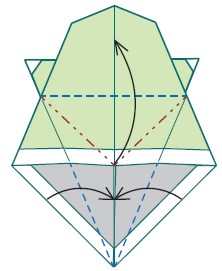
16 Use the creases to perform a petal-fold of the horizontal raw edge. Look ahead at the next diagram for the shape.
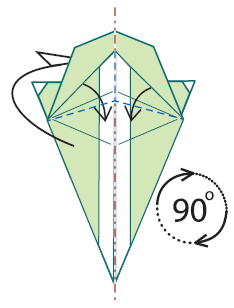
17 Rabbit-ear the triangular flap and mountain-fold the model in half lengthwise. Rotate 90 degrees clockwise.
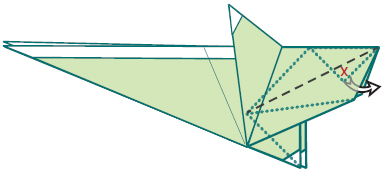
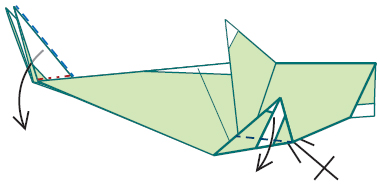
18 Pull out the hidden flap (“X”) to make ready the paper for the mouth. Valley-folds will form inside as your complete this step. Firmly flatten the model at the front to secure the hidden valley folds. Look ahead at the next diagram for the result.
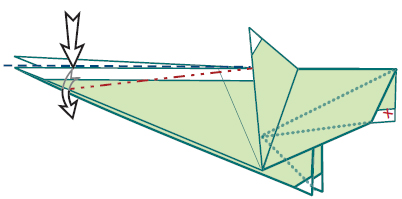
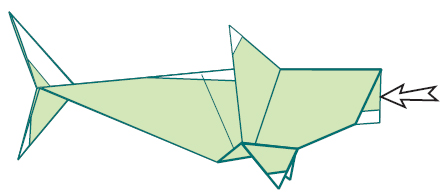
19 Inside-reverse-fold the topmost triangular flap at the back end of the model.
20 Valley-fold the top edge of the hind triangular flap into the channel. Mountain-fold the lower corners inside.
21 Reverse-fold the tail flaps together. Valley-fold the fin flaps upwards.
22 Valley-fold the leftmost flap down. Valley-fold the fin flaps down.
23 Form the mouth by opening out the sides slightly and pushing in at the center.
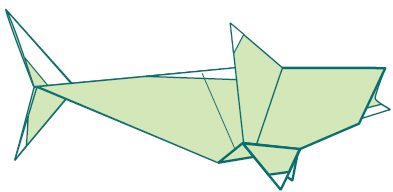
24 The Great White Shark
Takeaways: Wet Fold Your Paper Money!
Wet your paper money, it can take it! Have you ever forgotten a bill or two in your pocket, only to find that they have gone through the washing machine?
They emerge usable (and clean). Not a problem. In fact, your paper money will enjoy a little sip of water before your begin to fold, and will become supple and more relaxed. You too will be more relaxed as you fold, as you find the currency more compliant, especially when adding details with small folds. And when layers build up, the added moisture helps you compress them with only modest pressure. The dried bill will hold the new form that you so carefully crafted while it was moist.
I must say that we have encountered a good deal of resistance to the adoption of wet folding from among beginner to intermediate paper folders. Perhaps there is a perception of inconvenience; perhaps it is the difference in the folding experience that lacks appeal. We hope to change this attitude. The pros far outweigh the cons.