
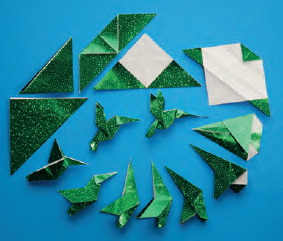
The Elegant — Simple Hummingbird
designed by Michael G. LaFosse
LESSON: DESIGN SIMPLICITY WHEN FOLDING FOILS AND PLASTICIZED PAPERS
This gem resulted from one of the many large commercial commissions that fell through. A major corporate client asked us to quote folding thousands of hummingbirds, but they wanted us to replicate or approximate another artist’s design without their permission, and so we refused. We also felt that their proposed design was needlessly time-consuming and inelegant. Michael set out to design a different approach to the subject in a way that better captured the spirit of this wonderful creature, while also reducing the folding time. When we proposed his design solution, the job had already been farmed out to a folding factory. You can’t win them all, and their loss is your gain! We know you’ll love to fold this cutie to grace your cheerful greeting cards, table place cards and scrapbook entries. We think it perfectly embodies origami elegance and simplicity — the characteristic hallmarks of the time-honored and best-loved traditional models.
Takeaways:
Take it Step by Step
One of the most useful tools that our students enjoy is making scrapbooks of their favorite models. We have a huge supply of tiny origami paper: 1½”, 1¾”, and 2” squares (often sold to be folded into individual flower petals). Each time a student progresses to the next step, they begin again with a new piece of tiny paper. At the end, they have a sequence of “step folds” that are easy to paste in a decorative arrangement into a scrapbook. When the model produces a three-dimensional object, they simply insert a snapshot in place of the 3-D object. What a great memory jog! This is as useful for seniors and older beginners as it is for our youngest folders. Try it!
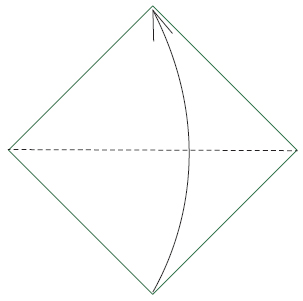
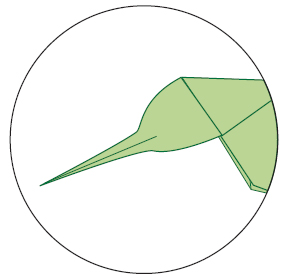
1 Begin with the “wrong” side up if using paper colored or textured differently on each side. Valley-fold in half diagonally, bottom corner to top.

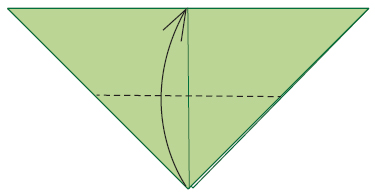
2 (A) Valley-fold in half and unfold. (B) Turn over, top to bottom.
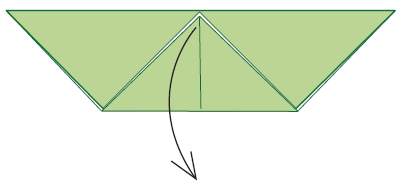
3 Valley-fold the bottom square corners to the middle of the top edge.
4 Unfold the triangular top layer flap.
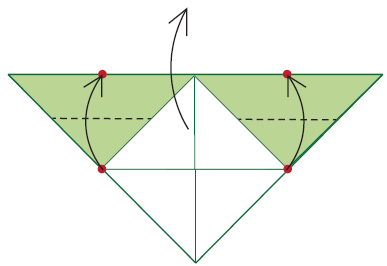
5 Move the triangular flap of the topmost layer up and beyond the top edge. Align the short horizontal crease from the base of the triangular flap with the long, horizontal folded edge. Valley-fold to flatten. Look ahead to see the shape.
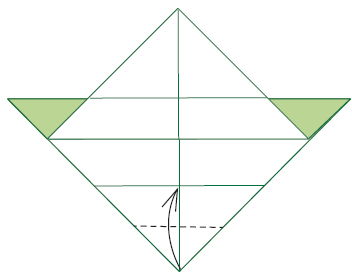
6 Valley-fold the bottom corner to the lowest intersection of creases.

7 Valley-fold the top left and right edges to align with the vertical center creases.
8 Turn over, top to bottom.

9 Valley-fold and unfold the bottom left and right edges to the center crease, installing two short creases in the bottom corner.

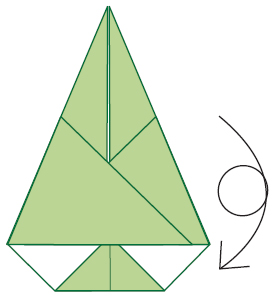
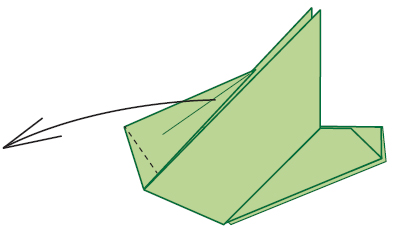
10 Use the vertical center crease to valley-fold the model in half, left to right. Allow the attached wing to move to the front as you do this. Rotate the paper 90 degrees clockwise.

11 Valley-fold the bottom right edge to align with the horizontal top edge. Repeat behind.

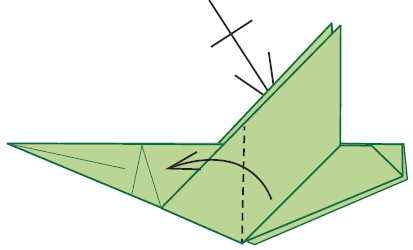
12 Unfold the front and back flaps.
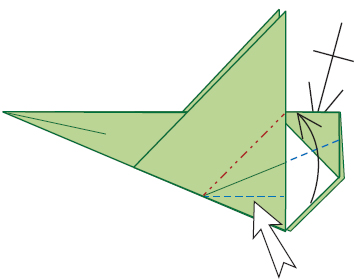
13 Inside-reverse-fold the front and back flaps.

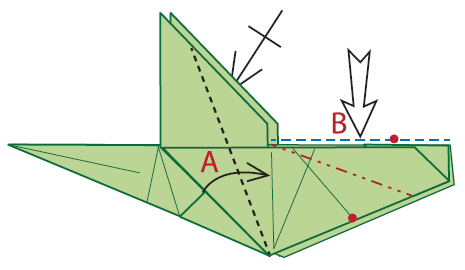
14 Valley-fold to align the bottom edges of the left side point to the folded front edge of the wing.
15 Valley-fold the pointed flap down, pivoting at the leftmost corner. Look ahead for the shape.

16 Unfold the left point.
17 Valley-fold the wings forward as indicated. Look ahead for the shape.
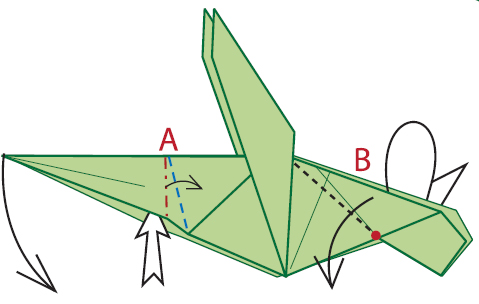
18 (A) Valley-fold the bottom left edge of the wing to align with the vertical crease. Repeat behind. (B) Inside-reverse-fold the tail. Note the red dots in the diagram: A point on the top edge of the tail (upper dot) should become aligned with the crease-end that is indicated by the lower dot. Look ahead at the next diagram for the alignment.
19 (A) Use the existing creases to crimp the head into shape. (B) Valley-fold each half of the tail down on the outside.

20 Details for folding the neck and beak will be in close-up.

21 Mountain-fold the neck paper in.

22 Flatten the beak.
23 Beak complete.

24 The Elegant — Simple Hummingbird