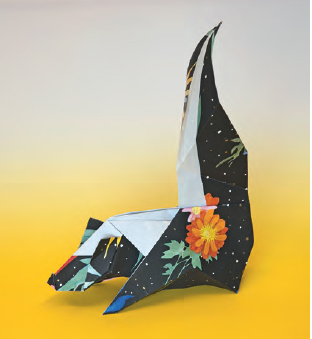
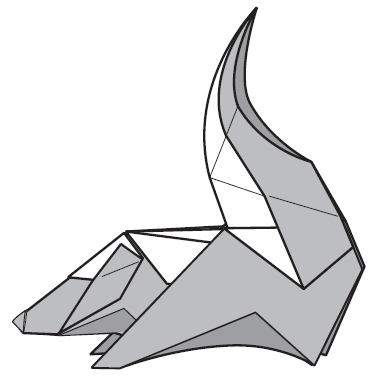
Ambrose the Skunk
designed by Michael G. LaFosse
LESSON: ORIGAMI INSIDE-OUT; MAKING “DUO PAPER” USING BACK COATING
As you fold a piece of paper, you can create a series of enveloping layers, which gives you the potential to reveal some of the inside (reverse side of the paper) on the outside of the sculpture. Imagine this skunk folded from a single, solid color paper (without a contrasting white side on the reverse). It would be impossible to evoke the same reaction in the viewer, which affirms the power of designing so called “duo” models. Michael likes to think of two types of “Inside-Out” origami models. One is “Obligatory” or consequential color-change origami designs, that result in both sides of the paper showing, regardless of the intent — there is simply no way to produce that particular form without showing both sides of the paper.
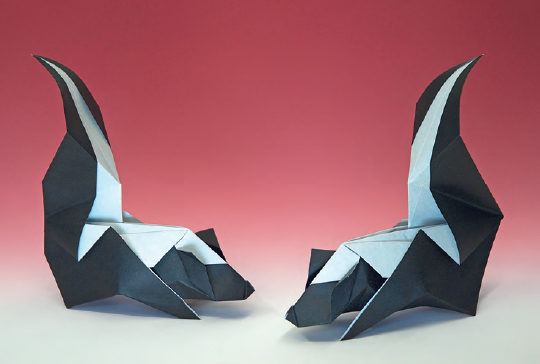
He calls the other type, “Opportunistic” or creative choice color-change models, because they allow the designer to take advantage of showing some of the reverse side (or not), at his or her discretion.
This skunk is a good example of the latter. It allowed Michael to “play” with the amount and shape of the white paper that finally shows, by changing the landmarks to balance the effect. This provided the opportunity for him to reveal just enough white to make the creature immediately identifiable and endearing.
When looking for an opportunity to display the reverse side of the paper, look for raw edges. In those places, at least a portion of the reverse side can be folded over to the outside.
While this skunk can be successfully folded from commercial origami paper, this design presents a wealth of possibilities for expressive, artistic exploration, and you may want to create your own origami “duo” papers by using methylcellulose paste to back coat a fine piece of light-toned paper onto a fine piece of darker paper. Let these skunks, folded of fancy-patterned papers, liven up your next party table.
Takeaways:
Two Sides of the Same Coin
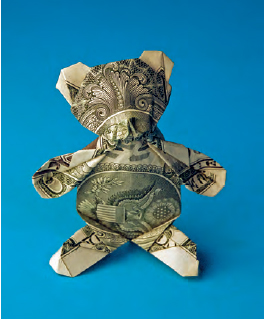
If you consider color-change designs as fun puzzles to solve, make a list of bi-colored subjects, and then give designing them a try. Don’t restrict your list to white-bellied critters; even popular symbols, shapes, and alphabet letters appearing on a white background are fair game. Chances are good that other origami designers have taken a whack at designing something to fill the bill, but don’t let that stop you. There is more than one way to skin a skunk. When you begin to design for color change opportunities, try folding familiar designs from larger sheets of duo (two-color) paper that has first been blintzed (corners folded in to the center, either all on one side or a mixture of front or back). Another handy trick is to form a square from a 2:1 rectangle by folding the end quarters over (perhaps one quarter to the front and the opposite to the back). US paper currency is also great “duo” paper, with black printing on one side, and green on the other. When you find that you have developed a knack for bringing certain colors exactly where you want them, then do the same with images on the paper money. It is fun to design origami animals that take advantage of the little swirls as eyes, or the whorls as horns.
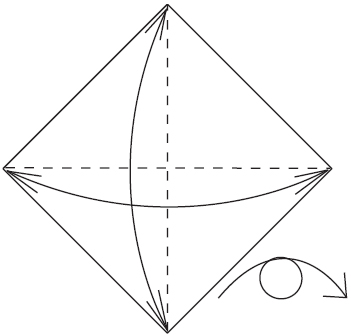
1 Valley-fold diagonally in half, both ways, unfolding after each. Turn over, left to right.
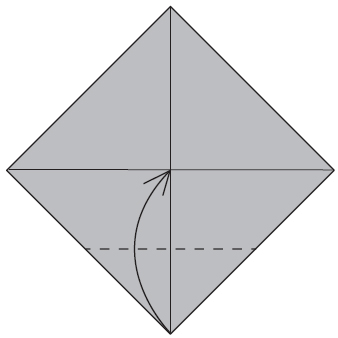
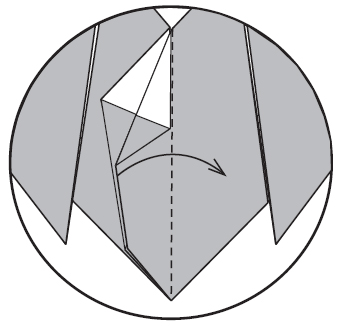
2 Valley-fold the bottom corner to the center where the creases intersect.
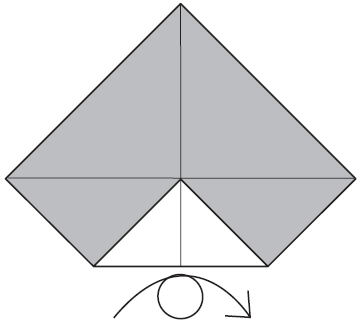
3 Turn over, left to right.
4 Valley-fold the left and right halves of the bottom edge to align with the vertical center crease. Stop each fold at the horizontal center crease.
5 Unfold completely.
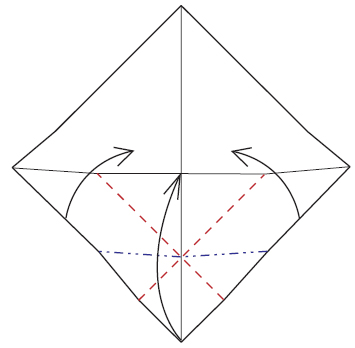
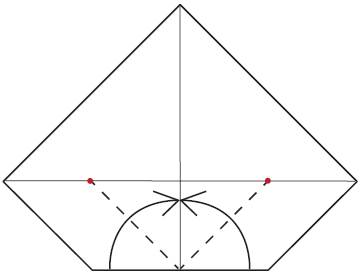
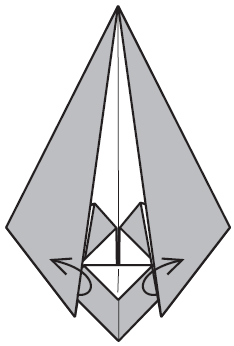
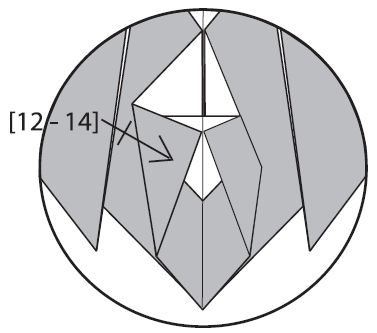
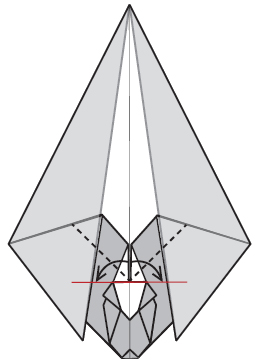
6 Use the indicated creases to collapse the bottom area, using both mountain-and valley-folds. Look ahead at the next drawing for the shape.

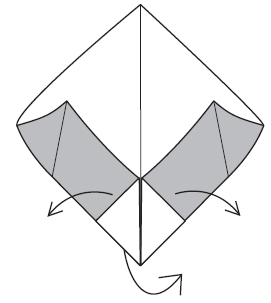
7 Mountain-fold the left and right corners in half and pivot downward. Valley-fold from each pivot point to the top corner.

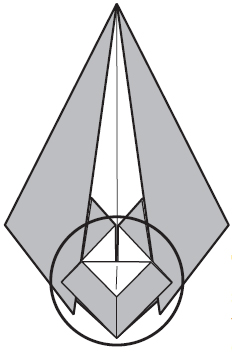
8 Your paper should look like this. Valley-fold the top center corner down, folding at the level where the corner’s edges intersect with the inner edges of the left and right flaps.
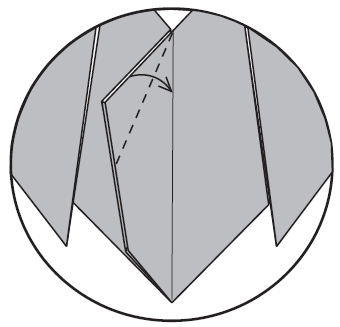
9 Swap layers so that the left and right flaps lay underneath the paper for the head.
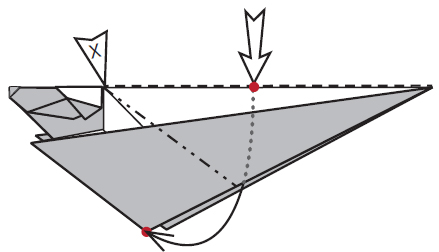
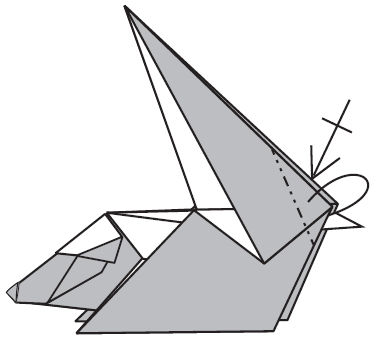
10 Your paper should look like this. Head folding details to follow.

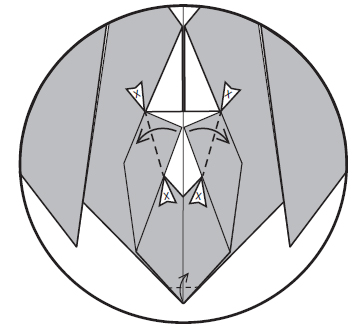
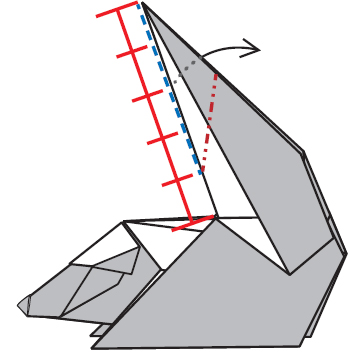
11 Valley-fold the left and right corners to meet high on the vertical center crease.

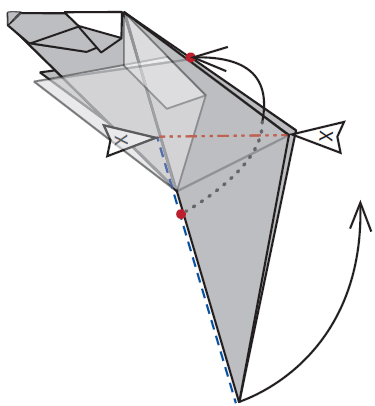
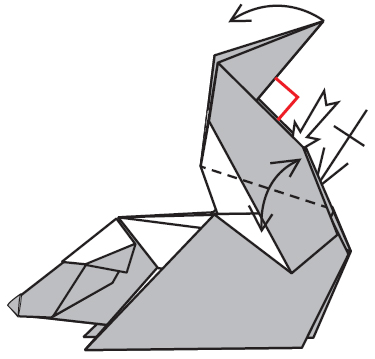
12 Valley-fold the right half of the head to the left.
13 Valley-fold the top edge of the top layer to align with the vertical center crease.
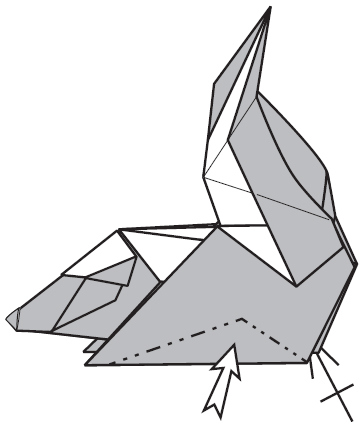
14 Valley-fold the top layer to the right.
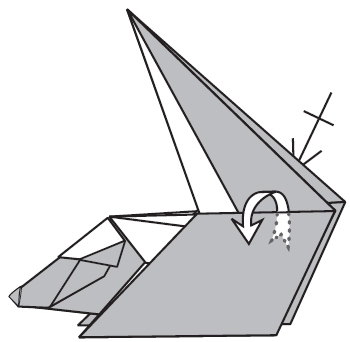
15 Repeat steps 12 through 14 on the left.
16 Valley-fold the indicated corners out, using the limits marked in the drawing to form the ears. Valley-fold the bottom corner up for the nose.
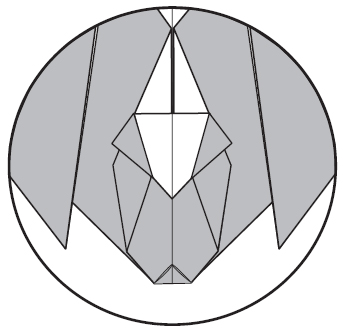
17 The completed head.
18 Valley-fold the partially hidden layers down so that the vertical edge of each layer lies horizontally at the level of the top of the head.

19 Mountain-fold in half lengthwise, and rotate 90 degrees clockwise.
20 Inside-reverse-fold the tail, pivoting at the top of the head, marked by the “X” arrowhead, and stopping when the inside-reverse-folded edge intersects the corner of the hind foot.
21 Inside-reverse-fold the tail up, hinging between the points marked by “X” arrowheads and stopping when the inside-reverse-folded edge intersects with the point at the top of the back where the front legs originate.
22 Pull out the trapped layers on both sides of the tail.
23 Mountain-fold the back corners inside the tail.
24 Inside-reverse-fold the top four-fifths of the tail. Look ahead to see the 90-degree reference mark in red, in the next step.
25 Valley-fold a hinging crease on both sides of the tail, spanning from the base of the inside-reverse down to the base of the tail, at the level of the back. Open the top of the tail.
26 Make angled sets of mountain folds and on the left and right sides of the body, defining the front and hind legs. Make these folds through all layers on each side.
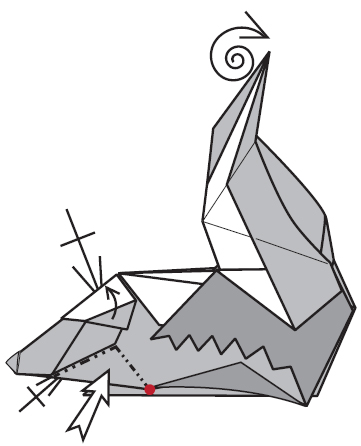
27 Lift up the ears. Make angled sets of mountain folds on the left and right sides of the neck, up along the jaw line and down to connect with the crease end, indicated by the red dot. (A cutaway view of the outermost layer of leg paper reveals the hidden layer.) Curl the tip of the tail.
28 Ambrose the Skunk