Humuhumunukunukuapua‘a
designed by Michael G. LaFosse
LESSON: OBSERVING AND TRANSLATING KEY PROPORTIONS
Often diagrams will illustrate a maneuver on one side only for efficiency, and then indicate (with just an arrow) to repeat the same on the other side. This often requires folding the mirror image of the maneuver. Some students struggle with this, and so this model will exercise spatial recognition and translation, in order to produce the mirror image. Why would you want to learn this? In this case, the fish is swimming to the right, but there may be reasons that you will want to frame another fish facing the other way. How about making origami jewelry — a pair of earrings for instance?
Tropical fish are the showy “butterflies” of the reef. Both are intricately beautiful, and when folded of brilliant pearlescent papers, will evoke the complexity and flamboyance of what these creatures choose to “wear.” Upon closer inspection, there are usually only two or three colors, but with a high contrast, accentuating the simple layout to their “graphic” designs.
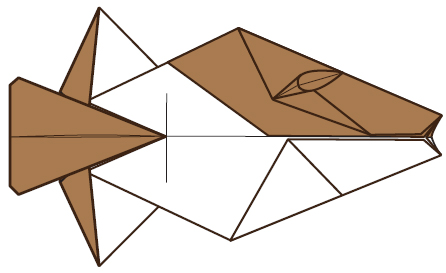
From an origami design point of view, the distinctive angles of this fish’s body, forehead and stripes provide a challenge to our ability to mimic what we observe. The eyes also seem to be set in a peculiar position. To us, the fish seems to “lean back” and defer to the more aggressive-looking creatures. Sometimes the “body language” of a body plan accurately describes the creature’s character, as with the gentle, rounded, slowly-swimming manatee.
What makes this peculiar fish so compelling? For one thing, if you swim too close, it grunts like a pig! Also known as the “reef triggerfish,” the Humuhumu (for short) has a piggy snout and bright red on its undersized pectoral fins. The Humuhumu is a highly territorial and solitary feeder, often seen darting here and there, sucking up and squirting out sand from its distinctive, blue lips. When threatened, it can change colors or wedge itself tightly into crevices. Those distinctive lines form a bright yellow-outlined directional arrow on Humuhumu’s back. If you happen to be fancy, its best to have other survival tricks up your sleeve!
Takeaways: Observing Patterns in Nature
What child hasn’t pondered the distinctive stripes of a zebra? From the youngest age, we humans are fascinated by patterns. Friedrich Froebel, the German inventor of Kindergarten, spent much of his childhood in the vast woods near his home, and was captivated by the patterns he saw in nature: seed pods, floral whorls, tree branching and even the angles of rock crystals. He worked hard all of his life to understand the underlying causes of patterns. As a crystallographer, Froebel understood that the structure of atoms and their numbers of electrons dictates how they can pack together, combine with other atoms, or as with water, form a lighter expanse of solid crystals when frozen.
Biology uses patterns too, the most common generated by cell growth around parent cells. Fibonacci described the pattern that creates spirals when the last two cells create another by doubling their sum. Charles Darwin was responsible for developing thoughts about how individuals with slight differences were sometimes favored when conditions changed, and how this natural selection nudged along the success of species displaying the variety of patterns and forms that we see on Earth today. Biology exploits shape, whether it is the sticky, spikey surface of a virus particle, or the light-hungry reach of a giant oak tree’s leafy branches. We also recognize pattern similarities between biological and non-biological entities, such as the whorl of microscopic mollusks and of spiral galaxies. It seems fitting that we are entertained by forming pleasing patterns simply by folding paper: we approximate the patterns that matter makes of itself — both invisibly small and incomprehensibly grand.
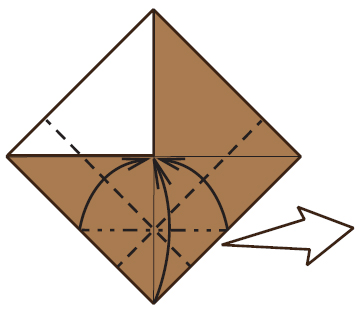
1 Begin with the “wrong” side up. Valley-fold in half edge to edge both ways, unfolding after each.
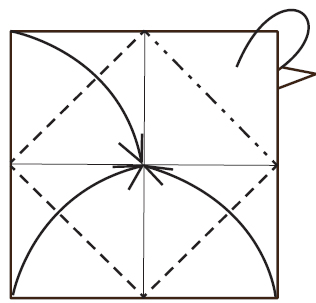
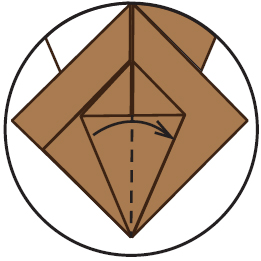
2 Valley-fold three corners to meet at the center on the front side. Mountain-fold the remaining corner to the center on the back side.

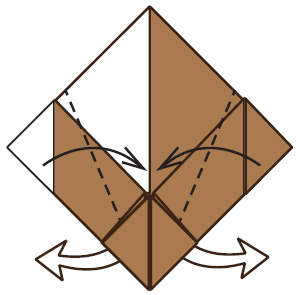
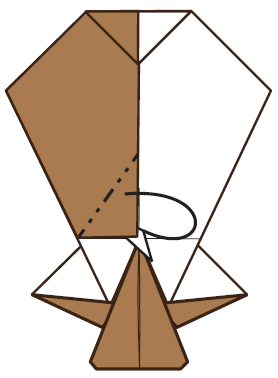
3 Be sure that your paper is oriented as shown in this drawing. Valley-fold the bottom corner to the center. Unfold. Turn over, left to right.
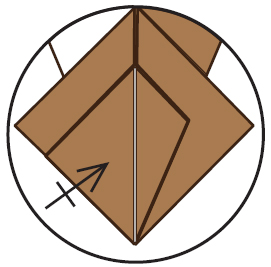
4 Again, be sure that your paper is oriented as shown. Valley-fold the bottom left and right edges to the center, unfolding after each.
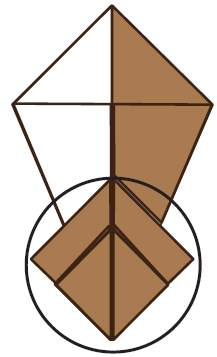
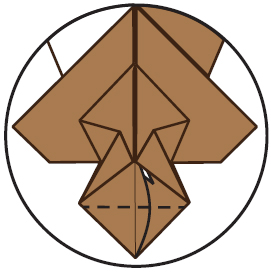
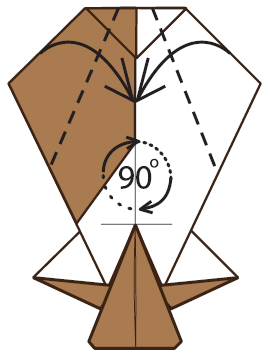
5 Use the mountain and valley creases to collapse the paper. Look ahead at the next drawing for the shape.
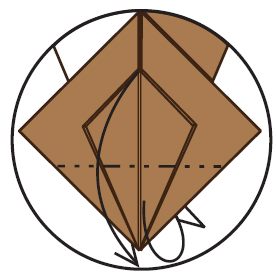
6 Valley-fold the left and right edges to meet at the vertical center. Allow the triangular flaps to come from the back and display behind the topmost square.
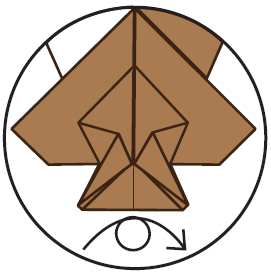
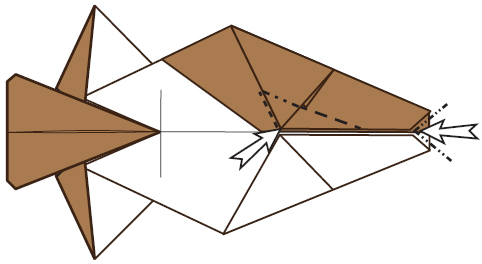
7 Folding details to follow. This area will form the tail fin, and the dorsal and ventral fins located at the back.
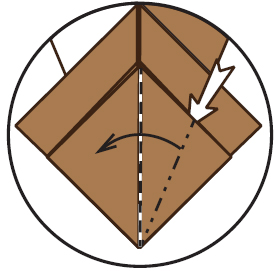
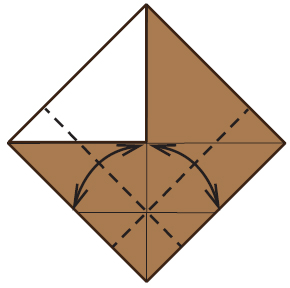
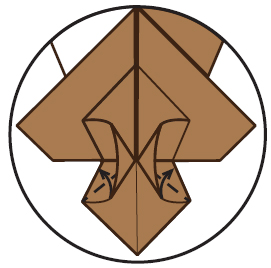
8 Squash-fold the right side of the topmost square area.
9 Valley-fold the left flap to the right.
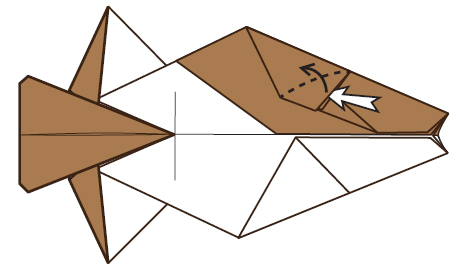
10 Repeat steps 8 and 9 on the left.
11 Your paper should look like this. Mountain-fold the bottom corner to the back. You will notice that as you proceed with the fold, a natural, centering limit will form as the inside layers emerge and form pockets. Look ahead to the next drawing for the shape.
12 Valley-fold the bottom edges of the left and right pockets upward and squash-fold the pockets.
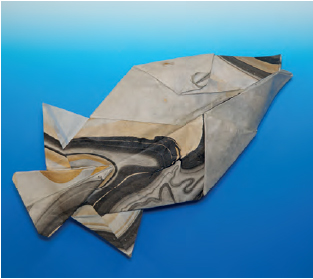
13 Valley-fold the bottom corner to touch the intersection of the folded edges above.
14 Notice that the folded edge at the bottom of the tail fin does not meet with the left and right corners. This effect makes the lobes of the tail fin look slightly rounded. Turn the model over, left to right.
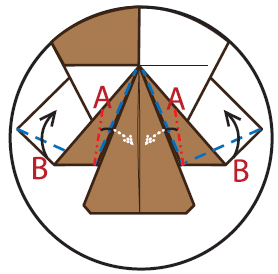
15 Valley and mountain-fold to trim the fins, tucking center-aligning flaps under the top layers of the tail paper. Move the edges labeled “A,” first, then those labeled “B.” Look ahead at the next drawing for the shape.
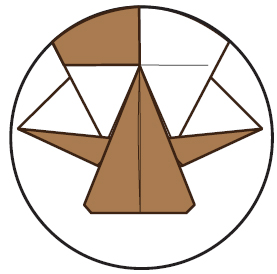
16 Your paper should look like this.

17 Valley-fold the top corner down. There is no landmark for this. Copy the proportions approximately. Valley-fold the short edge of the square corner of the top left layer to align with the outer left edge. Unfold.
18 Mountain-fold the square-cornered flap under the top layer.
19 Valley-fold the top left and right edges to meet at the vertical center. Rotate the paper 90 degrees clockwise.
20 Inside-reverse-fold the obtuse corner of the top flap to prepare paper for the eye. Mountain- and valley-fold the triangular plane at the front, forming the mouth.
21 Open the top layer of the eye paper and squash-fold slightly to round it out.
22 Humuhumunukunukuapua‘a