Before going into the details of how to configure the bricks, we first need to deploy the nodes in Azure. For this example, we are using the storage optimized VM series, or L-series. One thing that is worth mentioning is that Azure has a 30-day free trial that can be used for testing before committing to any deployment.
In Azure, performance is defined on several levels. The first level is the VM limit, which is the maximum performance that the VM allows. The L-series family provides the correct balance of price versus performance as these VMs are optimized to deliver higher input/output operations per second (IOPS) and throughput rather than delivering high compute or memory resources. The second level on which performance is defined is through the disks that are attached to the VM. For this example, we will be using standard hard disk drives (HDD) for a cost-effective solution. If more performance is needed, the disks can always be migrated to premium solid-state drives (SSD) storage.
The exact VM size for this example will be L4s, which provides four vCPUs and 32 GB of RAM, and is enough for a small storage cluster for general purposes. With a maximum of 125 MB/s and 5k IOPS, it still retains respectable performance when correctly configured.
The following screenshot shows the Availability set, Current fault domain, and Current update domain settings:

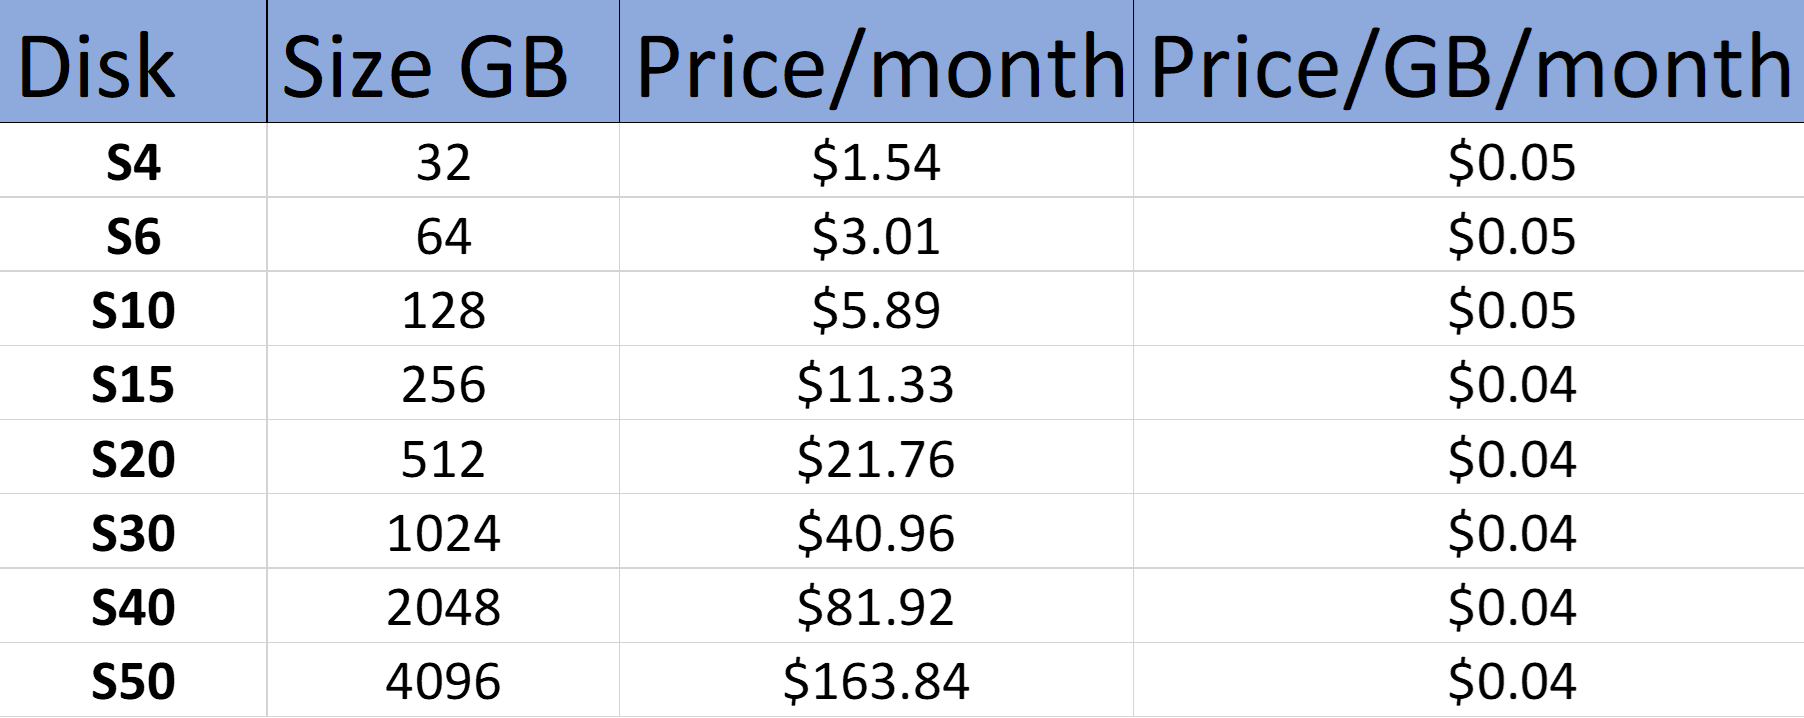
Finally, for the Azure setup, we need 512 GB per node for a total of 1.5 TB raw, or 1 TB usable space. The most cost-effective way to achieve this is by using a single S20 512 GB disk, since the price per gigabyte per month is approximately $0.04. Going down the route of a single disk will impact on performance, as a single standard disk only provides a maximum of 500 IOPS and 60 MB/s. Considering performance and accepting the fact that we will lose a bit of efficiency in the cost department, we will be using four S10 128 GB disks in a single RAID0 group. The price per month per gigabyte of an S10 disk is $0.05, compared to $0.04 per month for an S20 disk. You can refer to the following table, where the calculation is done based on the cost of the managed disk divided by its respective size: