Chapter 2: Inspiration
“I just don’t know where to start”
I HEAR IT all the time: “I’m just not creative . . . I don’t know where to start.” Starting a new project without a good idea or clear direction can be frustrating. I get it—a blank canvas is overwhelming, but you shouldn’t feel like you have to start from scratch. Merely “shooting in the dark” is unreliable and usually produces mediocre results. Taking a step back to get inspired will help eliminate second-guessing so you can tread confidently with a clear design direction.
With the industry becoming evermore competitive, the excuse of not being creative is simply no longer acceptable. Luckily, I think that anybody can produce creative results by employing a handful of creative tools and activities.
For years, it’s been believed that creativity and invention are reserved for “creative” people, and that coming up with new and interesting ideas happens only when a bunch of designers get together. Although these types of meetings usually do yield a fair amount of good ideas, it’s not because of the people in the room as much it is about the strategies and tactics that are used.
I believe there are two types of creativity:
• Natural talent that people are born with (and not everyone is born with it)
• Applied creativity
Usually, the two go hand in hand, and the best creative folks tend to be those who are naturally gifted but who augment their talent with a healthy applied creativity regimen. That doesn’t mean, however, that the ungifted are SOL. Applied creativity can be learned just like anything else and can bridge the gap between those with and those without a natural talent. At its core, applied creativity is a set of techniques you can use to develop your ability to produce repeatable and consistent, creative results. In this chapter, I share some of these strategies and tactics.
Steal Like an Artist
One of the most important things I learned in art school was how to steal. Except it wasn’t called stealing, it was called “being inspired.” There is, however, a fine line between stealing and being inspired by someone else’s work. The difference, of course, is how you reassemble an idea into something new and unique.
As a technologist, you probably have your own reliable and predictable process for creating software. And a big part of that process is experimenting with patterns and code snippets as an ongoing practice. You even may have been guilty of using a little “right-click, inspect element” to get a glimpse of something noteworthy on a website. Over time, this collection of snippets and patterns becomes your own personal “toolkit” for developing software. Combining all these bits of information results in unique applications, websites, and mashups.
Moreover, when you’re in meetings with clients and they’re briefing you on a new project, your mind starts bubbling up all these past sites, apps, and snippets. Almost instantaneously, you start envisioning these bits and pieces as technology solutions, and to clients, it appears like you have an almost super-hero ability to conjure up complex solutions on the fly. You’re Amazing!
In other words, your ability to combine many forms of “digi-spiration” to yield something unique makes you a “creative technologist.” Not surprisingly, the visual creative process works much the same. Except designers aren’t usually collecting algorithms and code snippets . They’re combining color pallets, layouts, and typography.
Code snippets and color pallets aside, sniffing out those daily delights whether they come from a mobile app, website, or cupcake require careful attention to detail. All really creative people I’ve known have one thing in common—an uncanny ability to observe their environments and make clever connections among unlikely elements.
The parallel I’m trying to draw here is that as a competent technologist, there’s a good chance that you’re already making these creative connections, but that you haven’t extended your lens beyond developer-centric sources. (See, you’re already more creative than you thought!) Let’s see what else you can do to extend your creative super powers and enhance your ability to be creative.
INSPIRATION TECHNIQUE #1: MATERIAL COLLECTION
Collecting materials may seem like an incredibly obvious technique. It is. However, all too often it’s ignored or limited to the topics that are related to our immediate field of expertise. The process of material collection is much more than simply collecting shiny trinkets and items of interest. It’s a mindset, a commitment to being a browser of all sorts of information in many different fields.
Specific and general materials
In his book, A Technique for Producing Ideas, James Webb Young suggests the following:
“The materials which must be gathered are of two kinds: they are specific and they are general.”
So with that in mind, what exactly are specific and general materials?
• Specific: Elements that represent distinct characteristics of a particular brand or style. Eventually, these elements become the building blocks that create the look of the product. For example, if I were creating a mobile application for a clothing brand, I might look for things like a texture in the clothing fabric or perhaps the font and colors on the price tag
• General: Insights drawn from behaviors and trends that usually exist outside a particular brand. Using the clothing app example again, I would keep an eye out for consumer shopping trends, say, the use of mobile devices for retail loyalty. Also, I would try to integrate related current events, such as “fashion week,” in hopes of extending the product beyond the screen.
After you collect the appropriate materials, the next step is to combine and create unique relationships among them. Mr. Young loosely describes a simple formula for combining specific and general materials to produce good creative ideas (see Figure 2-1).
Let’s explore how you might use this formula in real life. Let’s assume we have expertise in writing mobile applications. And say we also have some background in music and know the technical aspects of tuning a guitar. Both of these activities require a very specific type of knowledge. Pair that knowledge, with general observations like the fact many people learning how to play guitar can’t tune it by ear, and many of those people own mobile devices. The sum of these two very different types of knowledge could be a useful mobile application to assist with tuning a guitar.
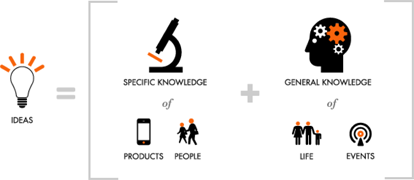
Figure 2-1: Great ideas are right in front of us, adding some structure to our thought process can help facilitate ideation.
Where do I find these materials?
Materials can literally be found anywhere. But anywhere may be a little too broad to get started. So, here are a handful of my favorite sources of inspiration:
• Menus: Typography, illustrations, and layout of menus potentially can be worked into a digital design. Menus, especially at high-end restaurants, are usually very refined and can be a great way to find interesting typography combinations (see Figure 2-2).
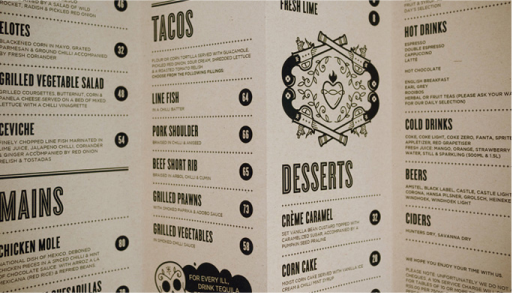
Figure 2-2: Restaurant and Bar menus often have inspirational layouts and typography choices.
• Packaging: Pay attention to color coating, whitespace, and textures, used. Things like borders and shapes are meticulously placed on packing for products like coffee (see Figure 2-3), tea, and sports drinks. Elegant packaging is also good at placing a lot of information in a small amount of space, similar to placing information on small device screens.
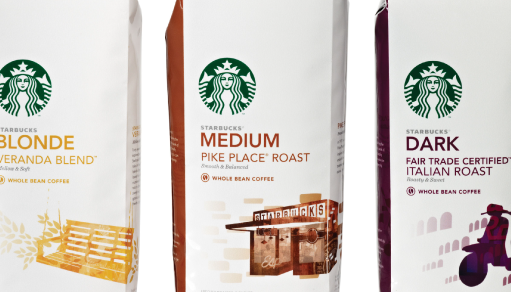
Figure 2-3: Packaging design and Mobile app design share similar challenges. Inspiration can be found in imagery and color pallets.
• Nature: Natural beauty found in nature can be used to inspire almost any type of design (see Figure 2-4). Some things I find most intriguing about nature are the color combinations, patterns, and proportions. Plants, sea life, and raw materials inherently contain properties that people find attractive.

Figure 2-4: Nature contains beautifully complex shapes and patterns that work for everything from logo designs to subtle textures.
• Video games: Sounds, layouts, and textures are all scrupulously designed and provide endless sources of inspiration (see Figure 2-5). Specifically, menu systems are always one of my favorite parts of video games. The layout, motion, and visual feedback of game menus are something worth examining. Games are also notoriously good at HUD (heads up display) graphics. Most warfare or racing games usually have excellent HUD design. HUDs are particularly useful for applications that contain maps or visualizations that require real-time feedback.
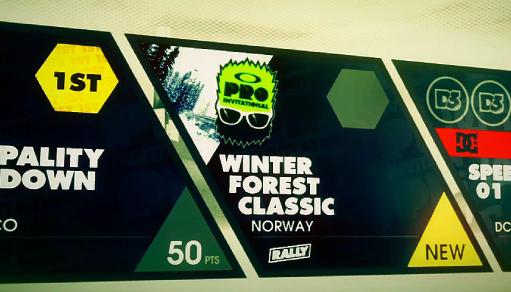
Figure 2-5: Games are meticulously designed. Desktop, web, and mobile applications can all take cues from the finesse that goes into the UIs in games.
• Movies and TV shows: Title sequences in movies and TV shows are my favorite sources of inspiration (see Figure 2-6). Unforgettable movies like the 007 series, Catch Me If You Can, and Mad Men combine illustrations, typography, and motion to create visually striking footage that captures the audience. Specifically, I look to title sequences for inspiration on clever transitions and motion techniques. The timing of the animations and transitions can help create the right feel in your application.
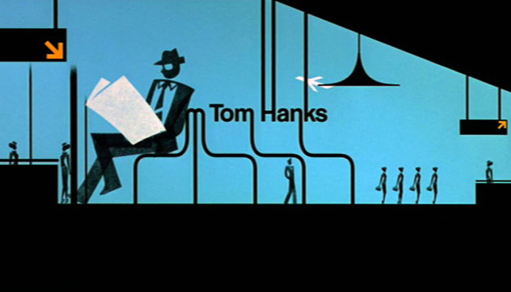
Figure 2-6: Animation and motion graphics found in film and TV can inspire unique UI transitions and animations.
• Magazines: Some of the best typography, layouts, and colors can be found in magazines (see Figure 2-7). A few of my favorite magazines are Wired, Martha Stewart’s Everyday Food, and GOOD. These magazines do a phenomenal job of combing rich photography, typography, and color.
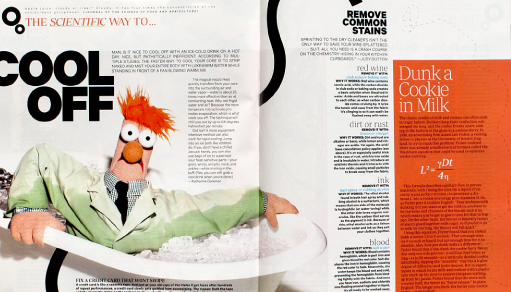
Figure 2-7: Magazines use great typography and clever whitespace to give the page character. Similar layouts help make traditional web layouts more aspirational.
These are only a few places to find inspiration; there are many, many more sources out there to draw from. As you build your own collection of inspirational artifacts, try to remember one simple rule of thumb.
KEY POINT
Think about how it makes your feel, not how it looks or how it’s built.
The things that feel good are likely to incorporate some clever thinking in terms of design; try to pinpoint exactly what the secret sauce is. Things that frustrate will probably frustrate others, so be sure to avoid these kinds of things in your own projects.
INSPIRATION TECHNIQUE #2: CREATE AN INSPIRATION BLOG
Now that you know exactly where to look for these design nuggets, you need a way to keep track of them. Relying on your brain to recall your daily finding simply won’t work. Keeping some record of these bits and bytes will help you quickly reference them as new projects and tasks come up.
Some people go as far as creating extensive libraries of textures, video, materials, knobs, switches, and gadgets in the hope of using them for future inspiration. If you have the patience to manage, catalogue, and organize your findings in that manner, by all means go for it. For the rest of us, I recommend creating an inspiration blog.
I visualize an inspiration blog as being something like a digital shoebox filled with all the things I find interesting. Tumblr (see Figure 2-8) is one of the web tools I use to help me keep a record of everything I find. Tumblr lets you easily submit many types of content such as images, video, and code. Tumblr also has a free mobile app for submitting content on the fly. I typically keep it open in a spare tab throughout the day to post interesting links and imagery as they come up. Being able to access a repository of inspirational elements on the fly is handy for meetings, brainstorming sessions, or just getting past mental blocks.
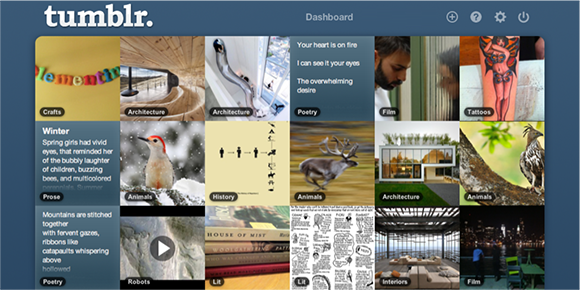
Figure 2-8: Tumblr is one of many online tools for collecting inspiration.
(Copyright Tumblr, Inc.)
Case Study—An Airport Way Finder
I’ve rambled on quite a bit now about the importance of collecting materials. Before exploring what else you can do with these materials, take a short intermission and look at an example of a project where collecting materials played a critical role.
The brief: A client came to us with an interesting idea for an airport way finder. The way finder’s purpose was to replace the old crusty sun-faded terminal maps with new shiny digital ones. The digital version of the map still needed to provide instruction on how to get to various gates in the airport but with a couple of key differences: It needed to be interactive, and it needed to support various forms of advertising. Being a frequent airport-goer, I was simultaneously excited and somewhat turned off by the challenge. The idea of interactive terminal maps was great, and I wished I had thought of it. But the notion of adding yet another advertising surface in an airport was pretty discouraging. Frankly, most airports resemble a present wrapped in newspaper—a hodgepodge of advertising imagery, video, and tag lines.
The design: In terms of its look and feel, we wanted the way finder application to cut through the visual “noise” of the usual ads that line the walls of an airport. And as a result, we decided to make it look like it belonged. In airports all over the world, signage for finding the restrooms, concessions, and baggage claim are all pretty consistent. High contrast, iconography, and whitespace are strong characteristics of pretty much every airport sign and would eventually be true of our application as well.
Specific materials: With a loose idea of what we wanted the way finder to look like, we set out looking for our materials. We started by collecting photographs of major airports until we accumulated a decent amount of colors, arrows, icons, and layouts. Figure 2-9 shows a collection of the specific materials that strongly influenced the final design of our application.
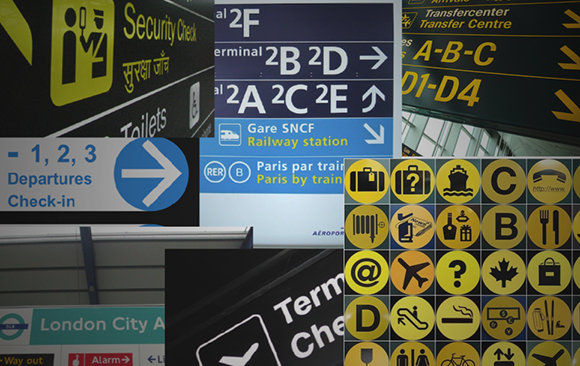
Figure 2-9: Creating a hodgepodge of imagery can help you establish an aesthetic direction before you start going down a path.
General materials: Once we established a general design direction, we began generating some visual concepts. At this point, we liked the look, but we felt that something was missing. Seeing that maps are now digital, we wanted to make ours “hyper real”; in other words, what else could we have our map do that a printed map couldn’t?
Knowing that most travelers carry a mobile phone and most airlines offer digital boarding passes, we thought it appropriate to incorporate a way for travelers to quickly flash their devices to see directions to their gate and be alerted of any delays.
In addition to device integration, we borrowed gesture paradigms from popular tablets and other small devices. We built the way finder to respond to gestures like pinch-to-zoom and inertial scrolling. This would allow users to quickly drill into particular areas of the map in a way that’s consistent with other familiar devices.
The final design: In short, I think this is a great example of how we were inspired by specific aspects of the physical environment and combined them with general insights to create a unique application. Figure 2-10 shows the final product. Even though the application is guilty of housing some ad space, I think it complemented its printed counterparts nicely.
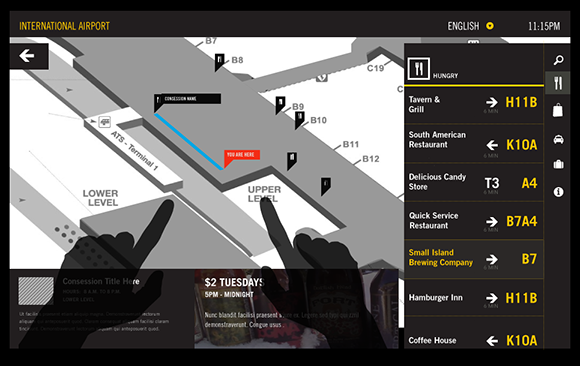
Figure 2-10: The final application design incorporating many elements of the inspirational materials.
INSPIRATION TECHNIQUE #3: MOOD BOARDS
The beginning of a new project is my favorite part—hopes are high and clients are jazzed about new ideas. But as time progresses, you realize that getting clients to articulate a clear design direction is difficult, or they don’t have much of an opinion about it. Or, even better, they have the “just make it look like an iPhone” syndrome.
With your designer hat on and hoping the client will be pleased, you head down the path of creating a design, only to have it rejected. After a bit of back-and-forth comes (you guessed it) the dreaded response that leads to thinner timelines and dented budgets: “Keep trying. I’ll know it when I see it.”
Design discussions continue on with requests like “make it pop,” “make it user friendly,” and “it should look clean” plaguing the conversation. Now, you’re thinking, if only I had a way to have a meaningful conversation that produced clear, actionable items. You’re in luck; there is a design tactic aimed at facilitating that exact situation—the mood board.
What are mood boards good for?
Mood boards are particularly helpful in jump-starting a design discussion internally or with a client early in a project. It’s a relatively quick and low-cost way to generate some strong aesthetic directions that clients can give feedback on even if they don’t have a design background. Getting a hot or cold reading from your client up front will help them anticipate what’s coming rather than leaving it up to chance.
How do I make a mood board?
Creating mood boards is easy. In fact, you may already be familiar with the mood board’s kid brother—the collage. Mood boards are really no more than a compilation of inspirational elements strategically chosen to evoke a specific feeling or tone. And because you’ve created an inspiration blog, you already have a bunch of potential resources to pull from. What a coincidence.
Construction is pretty much the same as making a collage: clip, snip, and piece elements together on a piece of cardboard (just like you did in third grade). Or you can do it digitally with any tool that lets you paste images and move them around freely. Some tools that work well are
• Adobe Illustrator & Photoshop
• Microsoft OneNote
Some things that are typically found in mood boards are
• Colors
• Patterns
• Graphic elements (illustrations, buttons, menus, icons)
• Imagery
• Textures
• Layouts
I intentionally like leaving mood boards disheveled so that time isn’t wasted on getting hung up on specific things like colors and fonts. The whole point of a mood board is to evoke an emotional response from the viewer. If the board produces the appropriate knee-jerk reaction, you can use the materials to create specific design elements. An example is shown in Figure 2-11.
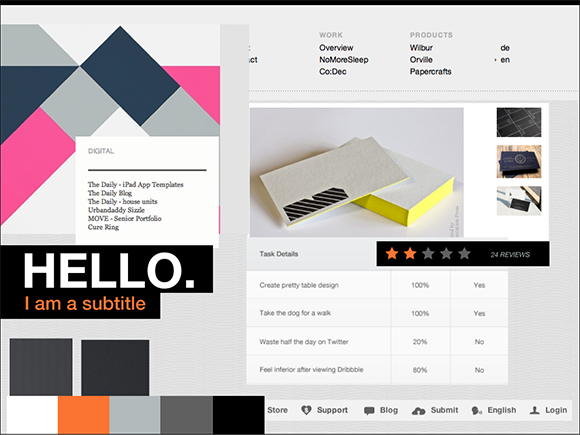
Figure 2-11: Messy but effective, mood boards help set aesthetic direction early in the design process.
How long does it take to create a mood board?
On average, it should take you about 30 minutes to one hour to create a mood board. Maybe a little longer if you’re a first-timer. I typically like to present clients with two or three different mood boards so they feel confident when agreeing on a single direction.
Do’s & don’ts
Mood boards provide a rapid way of experimenting with different styles and can be a good first approach for designers and non-designers alike. Mood boards can also help you facilitate a lively design discussion with a client, and avoid the usual make it pop and it’s got to be intuitive conversations. That said, here are some basic guidelines to keep in mind as you create your own mood board:
• Do explore unlikely elements from non-digital sources.
• Do create two to three unique styles.
• Don’t just copy and paste things from all your favorite websites.
• Don’t use mood boards to describe motion or transitions. When presenting mood boards to clients, explain your findings and try to get them to articulate why their product or brand will or will not work with a particular style. I promise, spending a brief time up front to define the design direction will save you hours of frustration later.
INSPIRATION TECHNIQUE #4: HEURISTIC IDEATION
Now for something a little different. The previous three techniques focused on generating specific stylistic elements for a project. In this section, I want to take a step back and focus on a couple of broader forms of inspiration.
Imagine that you’re asked to come up with the next “billion-dollar-app” idea. Too dramatic? Okay, maybe you’re asked to come up with a new feature for some existing software. And you’re now sitting at the whiteboard thinking, “I just don’t know where to start.” No problem, Heuristic Ideation is a great way to get over that initial creative hump.
Heuristic Ideation is a technique that combines unrelated ideas and concepts to stimulate new, creative thinking. I first learned about this technique in a book entitled Gamestorming: A Playbook for Innovators, Rulebreakers, and Changemakers, which gives the original credit to Edward Tauber dating all the way back to 1972. Gamestorming contains hundreds of techniques for creative problem solving and is an awesome read for discovering more applied creative techniques.
How does it work?
The technique operates under three rules of thumb:
• A new idea can be generated by remixing the attributes of an existing idea.
• A new idea is best explained by describing its two essential attributes.
• The more different or surprising the combination of the two attributes, the more compelling the idea.
To start, choose two categories or items of interest. Then make a list of attributes for each item and use it to define a matrix. For example, a company might use its product line (dishwashers, microwaves, and ovens) in combination with how the products are used (in the home, outdoors, professionally). Using the matrix, fill in the grid with potential idea combinations. Figure 2-12 shows a sample that was created when we were trying to explore interesting food and technology combinations.

Figure 2-12: The sample output for a heuristic ideation session. This technique comes in handy for overcoming creative block.
As you explore this technique, many strange combinations of ideas will likely pop up. That is the beauty of it! You never know when you might stumble upon a ridiculously clever idea.
If All Else Fails . . .
If you’ve tried all the techniques discussed in this chapter and none of them are working for you, don’t worry; there are a few last resorts out there to get you fired up. I say last resorts because although these sources of inspiration can be great for browsing a variety of designs, they often lead to cherry picking and combing disparate design elements, which can make it hard to achieve a single coherent design.
The techniques mentioned earlier in this chapter are intended to help you come up with unique ideas that will be appropriate for your client and project. That said, looking through the following websites, you can find a variety of artwork to help you keep up on the latest trends or even to find talent for a particular project.
• Dribbble.com: This is a “show and tell for designers” and a great place to get bit-sized inspiration on anything design-related, such as posters, typography, user-interface kits, and websites (see Figure 2-13).
• Designspiration.net: This is a means of sharing high-quality imagery for inspiration (see Figure 2-14). Designspiration does a great job of letting you search for artwork in many different ways, including color, medium, and trending topics.
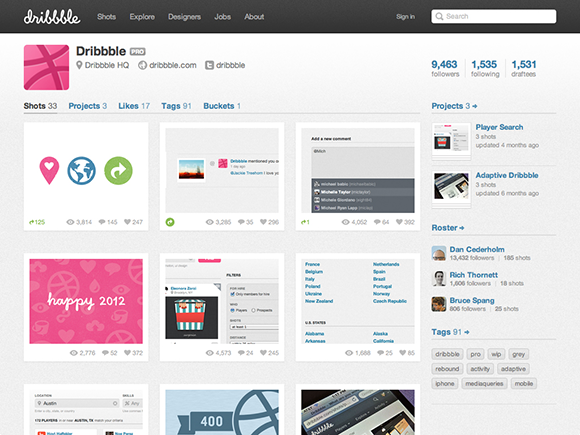
Figure 2-13: Dribbble showcases many types of artwork for inspiration and is also great for getting feedback on artwork you’re creating, too.
(Copyright Dribble LLC)
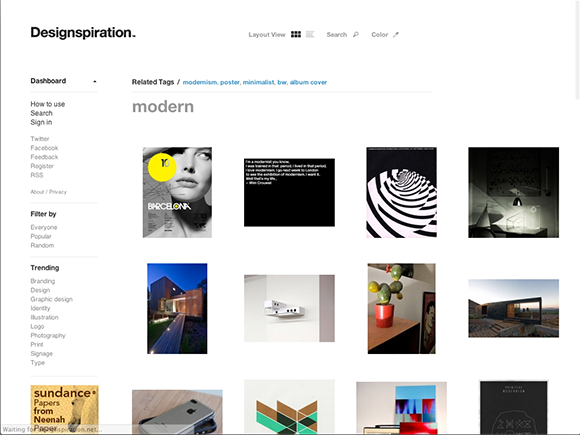
Figure 2-14: Designspiration is a minimal site focused on helping you find high quality inspiration in a variety of mediums.
(Copyright Designspiration.net)
• Behance.net: This is a network of professional designers. Behance is the mecca for everything design-related (see Figure 2-15). If you look deep enough, you can even find freebie typefaces and user-interface kits.

Figure 2-15: Behance is one of the most robust sites for finding talent and inspiration in almost over discipline of design.
(Copyright Behance.net)
Summary
Well, there you have it. One of the first steps to creating well-designed software is finding inspiration. This chapter was a crash course on how to creatively approach your next project. The techniques in this chapter will help you develop these five basic skills:
• Make clever connections among unlikely elements.
• Find inspirational design materials.
• Establish an initial design direction.
• Facilitate useful design discussions with stakeholders.
• Develop a repeatable process for producing ideas.
At this point, you’re well on your way to becoming a software-design superstar. However, the planning portion of the creative process is only the beginning. In the next part of the book, you explore the “meat and potatoes” of the creative process and examine what it really takes to create a good design.