The aim of the section is to demonstrate how to build a simple Lightning Component via the Salesforce Developer Console. We will also explore how to create a simple application to test our component.
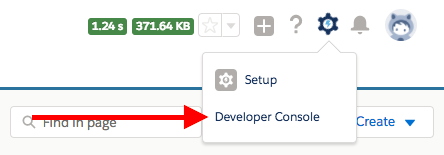
The simplest way to create a Lightning Component is to use the Salesforce Developer Console. In later chapters, we will get familiar with source-driven development and the use of an Integrated Development Editor (IDE). For now, let's use the Salesforce Developer Console:
- Open the Salesforce Developer Console:
- Use the File menu to create a new Lightning Component:
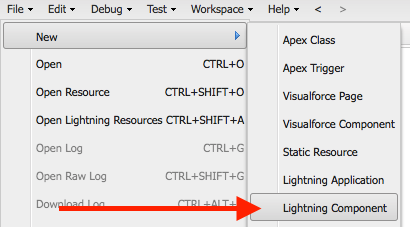
- Name the component. Let's name it HelloWorld for now.
- Enter the following code in the component markup and save it (command + S):
<aura:component >
    HelloWorld
</aura:component>
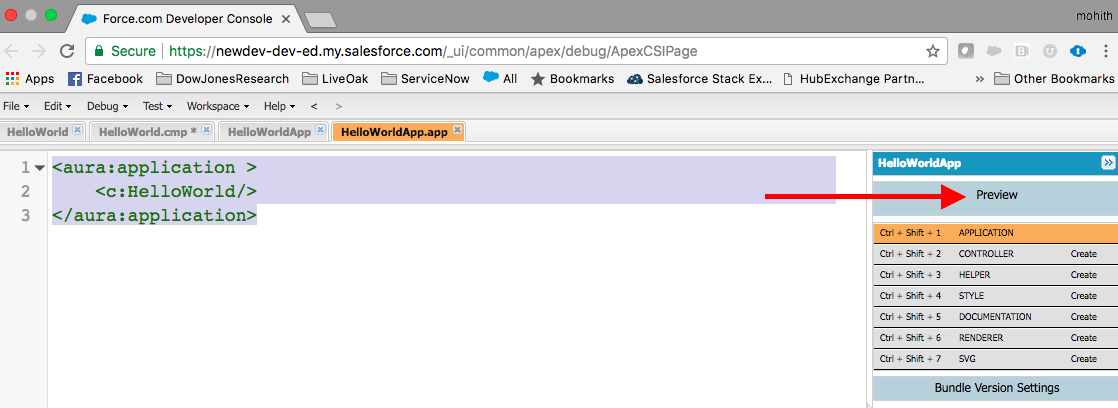
- Let's test this on the browser. To test this, we will need to create a Lightning Application. Go to the File menu, as we did in step 2, to create a Lightning Application. Let's name the application HelloWorldApp, enter the following code, and save it (command + S). Notice we have used the HelloWorld component in the aura:application tag to reference the component.
<aura:application >
    <c:HelloWorld/>
</aura:application>
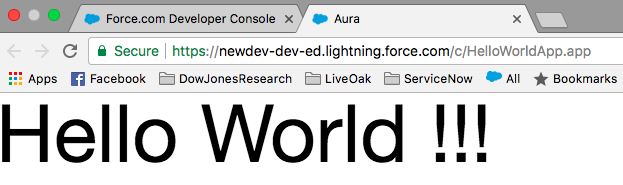
- Click on Preview in the application and make sure the browser renders HelloWorld. The following screenshot shows the preview and the application:
- You will see that there was a unique URL generated as Salesforce_domain/c/HelloWorldApp.app. Notice that c is the default namespace. For a managed package application, your organization may have a namespace and then the namespace is used in the URL generated instead of c. Also, note that Salesforce_domain is the domain name of your Salesforce instance. The following screenshot shows how the component markup is rendered on the browser: