 Improving Site Conditions
In a perfect world, your lawn would sit atop a deep layer of loam and bask in a wealth of sunshine and ideal temperatures. The lawn would slope gently, almost imperceptibly, creating efficient, non-eroding drainage for whatever excess water the lawn received. In the real world, there are very few perfect places for lawns.
The fact is, if your yard is fairly large—and even if it isn’t—chances are that the lawn will have one or more trouble spots or challenging areas where it’s hard to keep the grass healthy. Some site-related problems are easily fixed, while others call for more creative solutions.
One of the most common inhibitors to thick, lush turf is shade. Shade is a reality for many mature landscapes where shrubs have grown tall and the canopies of long-established trees arch over whole areas of the lawn. The trick is in opening up those screens as much as possible, and in ensuring watering and mowing practices don’t make the situation worse.
Drainage is another key issue for any lawn. The soil composition will control drainage to a certain degree, but the topography of your lawn will also influence how quickly water makes its way through the lawn and where, why, and how it collects. Ensuring proper drainage can involve solutions from the simple, such as slowly improving the soil by top-dressing, to the complex, such as installing a French drain. The solution that you choose will be guided by how serious and extensive your drainage issues are.
Drainage can involve grading the soil and landscape, but grading may also be required for different features in the lawn. For instance, if you are adding a child’s play structure or putting green, you may need to grade that particular area differently then the rest of the lawn.
Lastly, your site location and particular features may lead you to make aesthetic improvements. For instance, installing edging between the lawn border and the line of a flower or shrub bed will provide a crisp look to the lawn, but it also may be necessary to prevent aggressive species such as ivies or other ground covers from invading your lawn.
The point is, by proactively responding to the challenges posed by your site, you can head off a lot of problems before they begin. It’s one more way to ensure a healthy, trouble-free lawn.
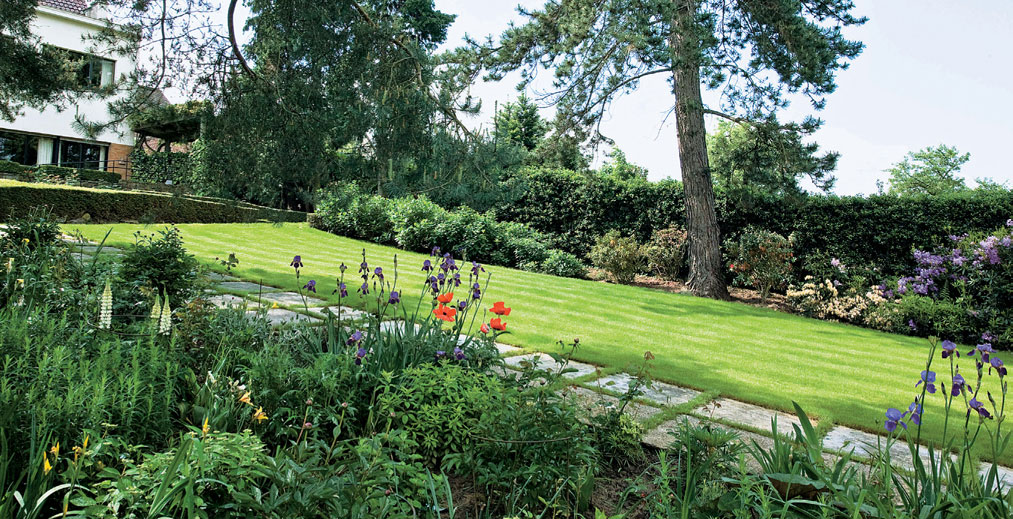
A severe slope can be an unusable and hard-to-maintain area of a lawn. A few simple terraces create an attractive, low-maintenance yard feature instead.
Deep shade such as this can lead to a host of lawn problems, from poor grass growth to a proliferation of lawn diseases. The solution is to prune trees judiciously, to thin out sun-blocking canopies.
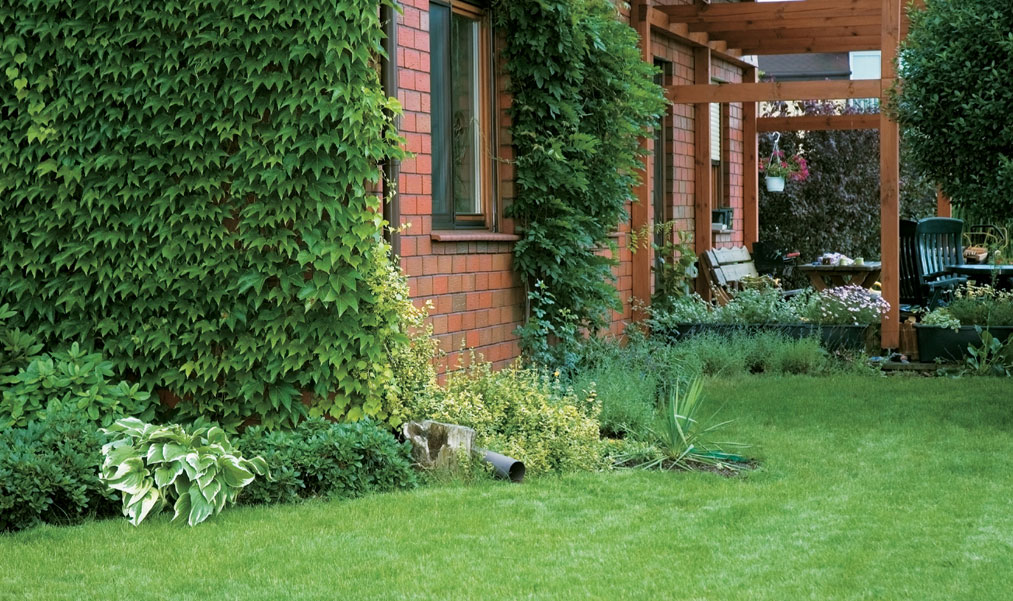
Certain types of gardens, such as native perennial beds, contain fairly aggressive plants that will covet your turf space and eventually make a play for it. You can keep most of them at bay with simple lawn edging.
Shade is a hard thing to plan for. Trees that were relatively young when your lawn was planted often grow to become incredible sun blockers. Or you may have made your lawn-care plan in the winter, when the trees surrounding your yard were bare of leaves, not realizing that in season they were going to create dense dark areas inhospitable to grass growth.
Areas of deep or persistent shade call for a change in lawn-care tactics. The challenge is changing the way you care for one small area of lawn, while maintaining the proper maintenance for the rest of the yard. That can be a bit of bother, but if you’re going to keep shaded grass healthy, you need to make adjustments.
The first is in how you feed shaded parts of the lawn. You may want to skip any mid-season feedings in the shady areas, because those feedings will divert resources of already challenged grass from roots to top growth. Shaded top growth is already full of moisture, so adding denser leaves means attracting insects and disease that prefer moist environments. It’s best for shaded areas of grass to be fertilized in spring and fall when deciduous trees are leafless. When winterizing a shady area, use a potassium-heavy fertilizer to fortify the grass against the stress of its location.
Watering is also important. Shaded areas need less water than other areas of the lawn, and allowing consistently moist conditions in a shady part of the lawn is simply asking for insect and disease problems. Check that shaded portions are regularly drying out before watering.
Overseed the problem area with shade-tolerant species and varieties. This is a simple way to introduce a more appropriate strain of grass over time.
You can also approach the problem from the other side of the equation, by increasing the sunlight in the area. This usually entails pruning back shrubs and trees that are keeping the lawn in shadow. In some cases, where a significant portion of the lawn has suffered under the shade of a large tree, you may want remove the tree if your goal is to have a healthy and vibrant lawn. You’ll find instructions for doing just that in the pages that follow.
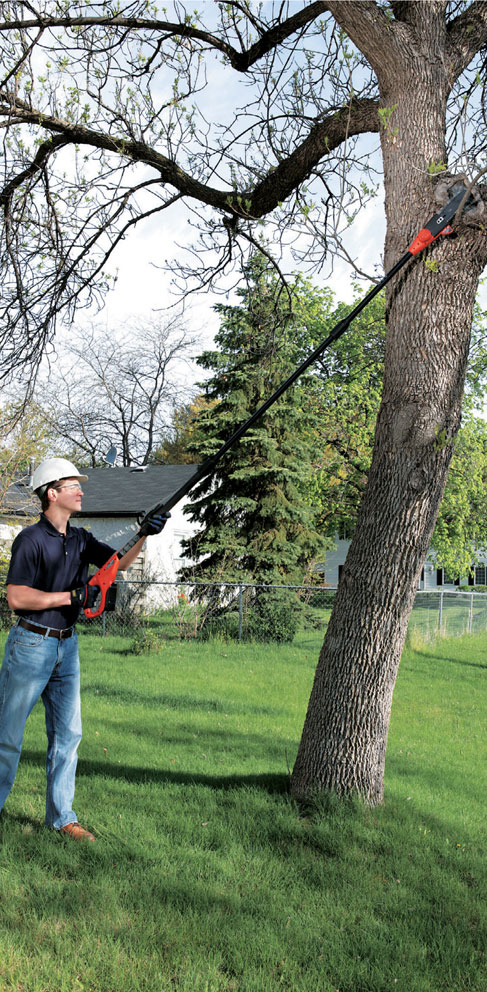
A pole chainsaw, like the one shown here, is ideal for pruning back smaller tree branches that clutter the canopy and create denser shade.
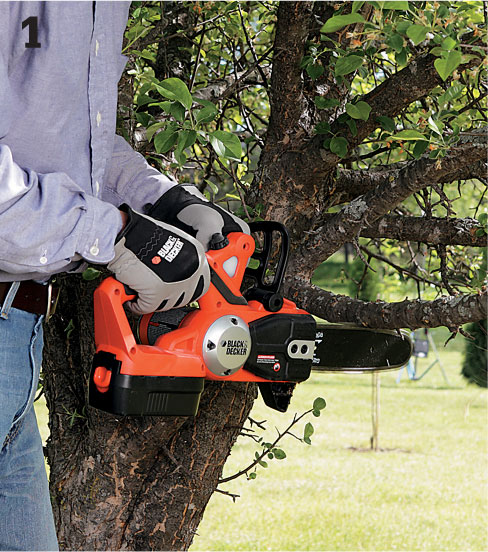
Start by undercutting from beneath the limb with your bow saw or chain saw.
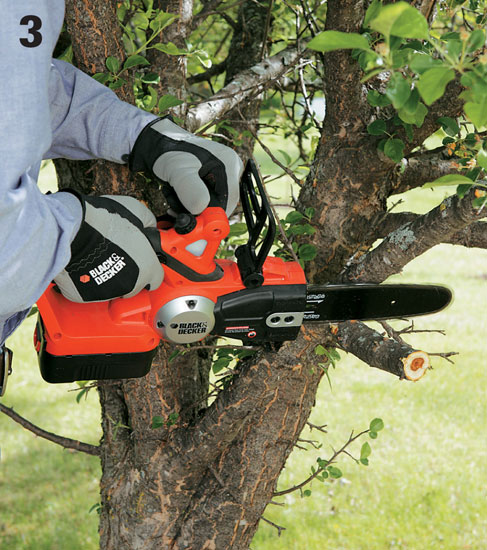
Finish the cut from above. This keeps the bark from tearing when the limb breaks loose.
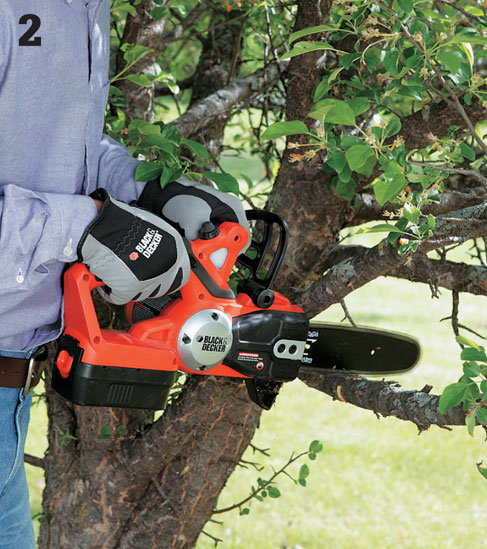
Trim the stub from the limb so it’s flush with the branch collar, but do not cut the collar, which is responsible for healing the wound.
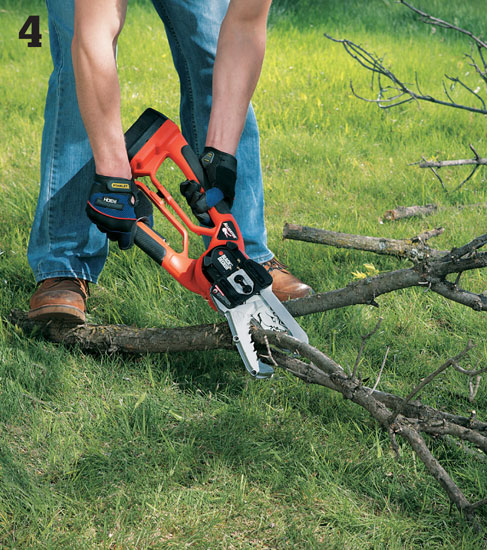
An electric alligator lopper makes quick work of fallen tree branches. Remove branches quickly; if they’re allowed to sit on the lawn too long they can kill the grass underneath and spread diseases.
Sometimes, for the health of the lawn, you may choose to remove a tree that has simply grown too large and blocks too much light. But take your time and follow all safety precautions; felling a tree is not a small job. If you don’t feel sure of your abilities, hire a professional arborist or tree trimming company to remove the tree. You should definitely seek the help of a professional if the tree is close to the house, or is diseased.
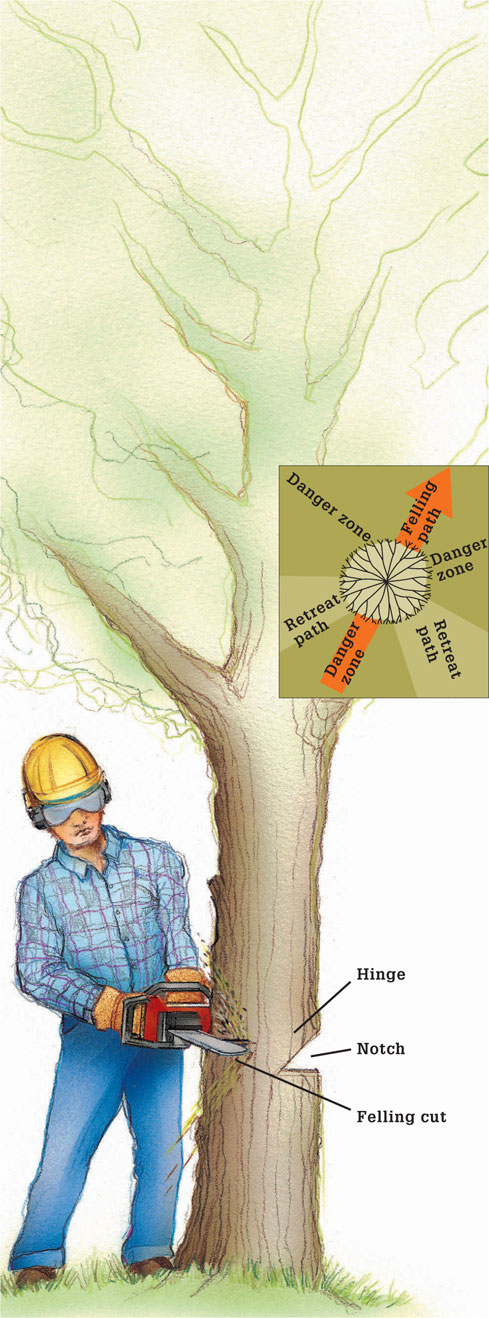
The first step in removing a shade tree is determining where you want it to fall. For safety’s sake, you’ll also want to decide on two “retreat” paths that will let you avoid the tree if it falls in the wrong direction.
Ensure that tree falls where you want it to by making a series of cuts in the trunk. The first is called a “notch” and is made by cutting out a triangle-shaped section on the side of the tree facing the path you want it to fall along. A felling cut is then made on the opposite side, forming a wide hinge that guides the tree’s fall.
Always follow the manufacturer’s safety instructions when operating a chain saw. These are extremely dangerous pieces of power equipment and every year, thousands of people are injured using chainsaws. The most common injury is caused by kickback, a sudden movement in which the saw unexpectedly jumps up and back. Kickback is caused by the nose of the guide bar making contact with the tree. Prevent it by avoiding contact with the nose of the guide bar, and using both hands on the handles while making a cut.
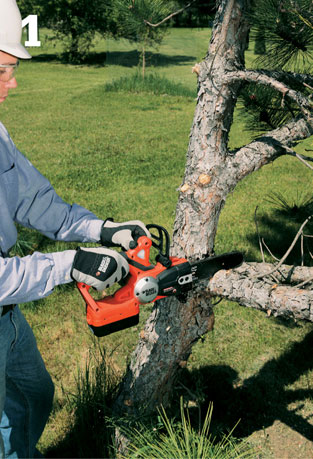
Remove limbs below head level. Start at the bottom of the branch, making a shallow up-cut. Then cut down from the top until the branch falls. Note: Hire a tree service to cut down and remove trees with a trunk diameter of more than 6".
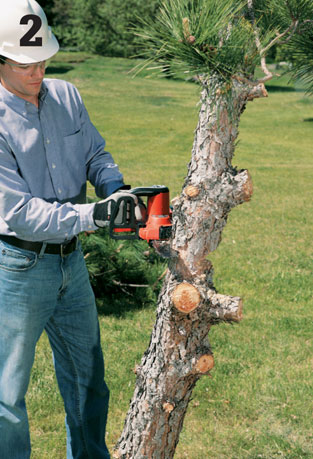
Use a chain saw to make a notch cut one-third of the way through the tree, approximately at waist level. Do not cut to the center of the trunk. Make a straight felling cut about 2" above the base of the notch cut, on the opposite side of the trunk. Leave a 3"-thick “hinge” at the center.
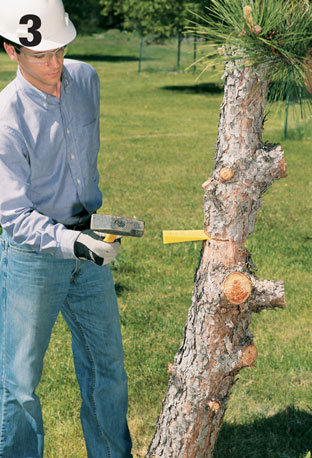
Drive a wedge into the felling cut. Push the tree toward the felling path to start its fall, and move into a retreat path to avoid possible injury.
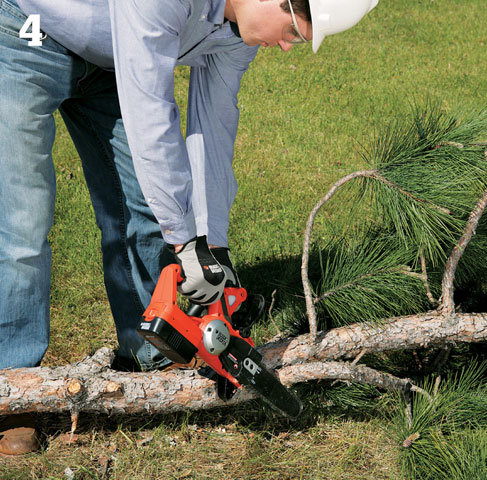
Standing on the opposite side of the trunk from the branch, remove each branch by cutting from the top of the saw, until the branch separates from the tree. Adopt a balanced stance, grasp the handles firmly with both hands, and be cautious with the saw.
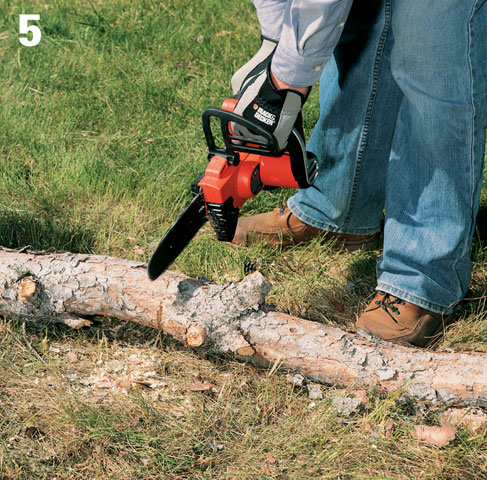
To cut the trunk into sections, cut down two-thirds of the way and roll the trunk over. Finish the cut from the top, cutting down until the section breaks away. Do not cut on compressed side of trunk or limb.
 Correcting Lawn Drainage Problems
As crucial as water is to the life of a lawn, too much of it can be as bad as too little. A properly draining lawn moves water off the surface rapidly, but slowly enough for grass roots to absorb it. Drainage problems are easy to detect in the form of pooling water, or soil that is moist hours after a rain or watering (or, on the flip side, soil that is bone-dry no matter what you do).
Excess moisture sets the stage for many different diseases and moisture-loving insects, and it stresses the grass. If you see standing pools of water or notice a section of lawn that is squishy underfoot long after you’ve watered, it’s time to pinpoint the cause, which will dictate the solution.
Poor drainage is often a result of soil compaction, in which case regular aeration is the answer. Overwatering by automatic sprinklers can also be a source of excess moisture. That’s why the “set-it-and-forget-it” philosophy of automatic sprinkler systems doesn’t lend itself to sound lawn-care practice. It pays to regularly check how much water your automatic system is actually spreading on the lawn, using a rain gauge or cans.
The rain gutters and downspouts on your house can also be adding to moisture problems in the lawn. Improperly directed downspouts can create soil erosion that sets up a situation of standing water, or saturation in a given area of the lawn.
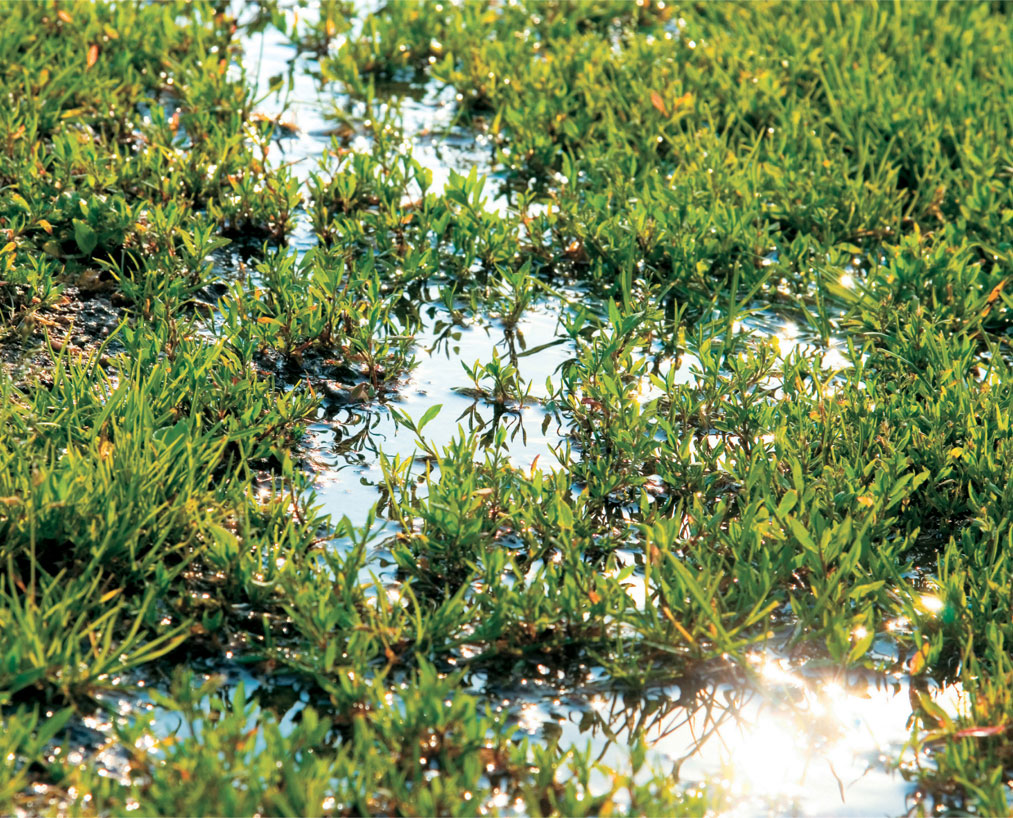
Standing water in your lawn is an open invitation to problems from nuisance insects such as mosquitoes, to a full range of damaging lawn diseases.
In other cases, the problem may be more endemic; the lawn itself may not be situated for efficient drainage. Properly grading the yard is the first step in ensuring water moves as it should through the lawn. This is best done before you create your new lawn. But even if improper grading is causing drainage problems in an existing lawn, you can use localized solutions such as a French drain, dry bed, or a lawn swale to improve the drainage.
Each of these follows the same basic principle of creating a drainage “field” in the area where moisture is accumulating, to carry away excess water even during heavy rainfall. These solutions can be used regardless of the underlying cause, whether it be a poorly graded yard or clay soil. Drainage can be routed to another area of the garden or yard, off the property into a culvert or gutter, or into a dry well—a simple underground structure that can be highly efficient at draining away excess water.
Whatever the solution, take action as soon as you notice a moisture problem. Excess water in the lawn is one of the more debilitating conditions that can quickly lead to a host of serious problems.