 Artificial Lawns
Certain areas of your yard might never have been meant to be covered in lush grass. Perhaps there is a great umbrella of shade over a corner of your lawn, cast by old growth oak trees that you wouldn’t consider cutting down. Or maybe you’ve cultivated a stately stand of beautiful, flowering, acid-loving shrubs that require soil conditions that are much too acidic for turfgrass. In some cases, the soil may simply be too barren of vital nutrients, or too rocky, or too sandy to sustain grass plants. And lastly (and perhaps most commonly), local watering restrictions in arid climates may make it impossible to cultivate a living lawn. These are just a few of the landscaping dilemmas to which an artificial lawn may be the answer.
Artificial turf has come a long way since it first came into use in sports stadiums and athletic fields. Although it will never become a completely believable replication of actual grass, today’s equivalents to Astroturf are much more realistic than early types. The use of rubberized infill is a particularly good advance that softens the surface underfoot and makes spending time on artificial turf a much more pleasant experience. The introduction of variations in the color and height of individual blades also helps fake turf look much less like the famous backyard of that popular ‘60s sitcom. Plus, newer products breathe and drain much better, making them more practical for dog owners (they don’t discolor or trap odors like outdoor carpet does).
Installing artificial turf is not much more difficult than laying carpet. In fact, in some ways it’s easier—it doesn’t normally require stretching. An installation about the size of the one shown in the following pages (200 square feet) should take no more than a weekend to do. Turf comes in wide rolls—the EasyTurf product seen here (See Resources, page 218) is sold in 20-ft.-wide rolls—so smaller yard areas can be installed without any seaming. The key is to build a firm, level base for the turf, which will create a natural but stable feel underfoot and will ensure proper drainage. Professionally laid turf bases do this one of two ways—a thick layer of gravel with a sand bed on top; or, a thick layer of sand-and-aggregate mix. Follow the recommendations of your turf’s manufacturer or supplier.
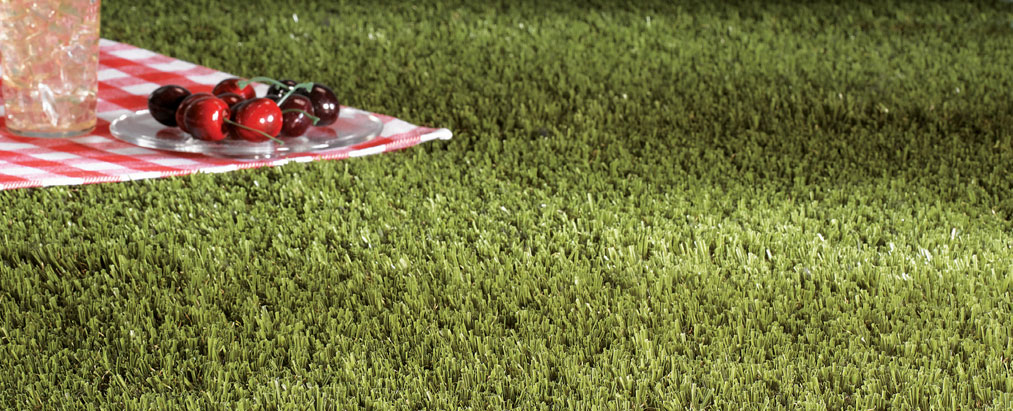
Synthetic turf has become a much more convincing imitation of natural turf in recent years, making it a viable option for yards (or parts of yards) that are unfriendly to turf grass and in areas where watering restrictions discourage the growing of real grass.
Tiny shady backyards are perfect candidates for artificial turf. Especially for homeowners looking for a good-looking, maintenance-free lawn alternative.
 How to Install an Artificial Lawn
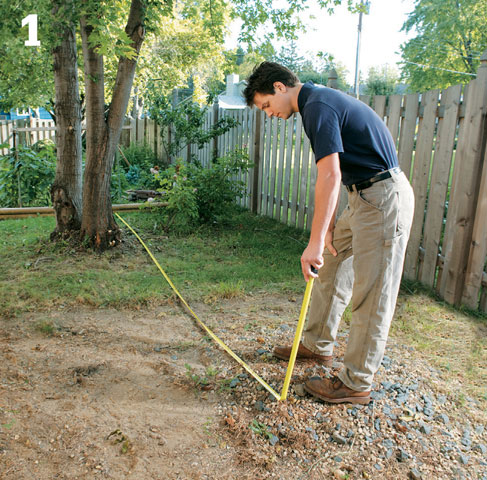
Measure the affected area you’d like to cover with artificial turf. Try to find logical starting and stopping points, such as fences and sidewalks. Butting artificial turf up to natural grass seldom gives satisfying results. If it is necessary, however, create a transition feature like a walkway or even landscape edging. Relay the desired dimensions for your artificial lawn to the sales associate at the turf supplier and they’ll help you calculate how much material you’ll need to order.
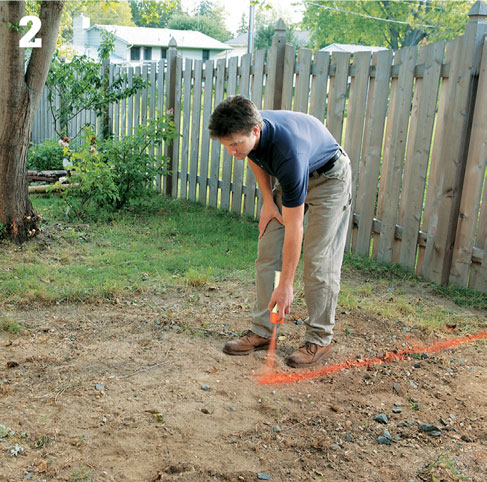
Mark off the borders of the area to be covered with landscape spray paint if they do not fall at physical structures. Tip: If you have a large, flat area outside the project area, roll out the artificial turf so it can lay flat for a few hours prior to installation.
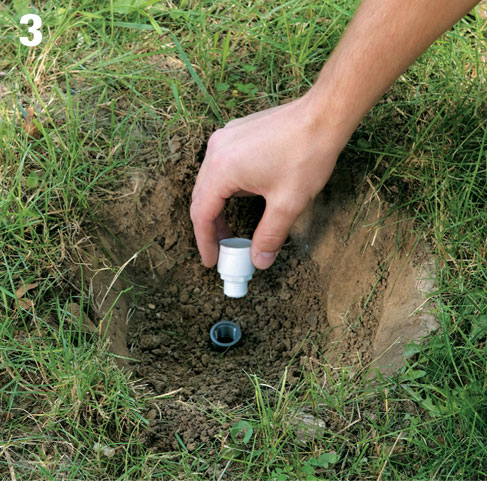
If your yard has an in-ground sprinkler system, be sure to deactivate and cap off any sprinkler heads in the installation area. Or better yet, disconnect the supply pipes servicing those heads at the manifold.
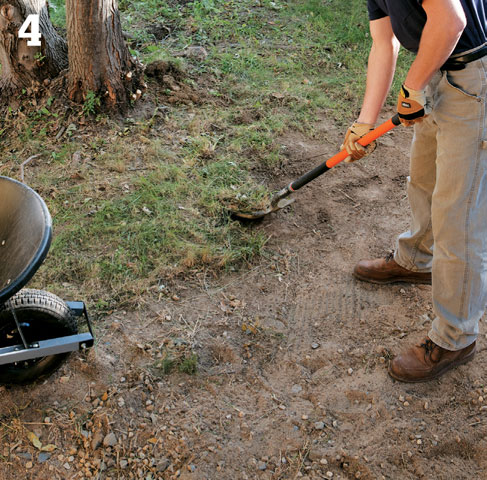
Excavate to remove existing grass, weeds, and soil to a depth of 3" to 4" (or deeper if your turf manufacturer specifies it).
Level off the soil, using a grading rake. The soil surface should be flat, but if the ground has a natural slope your new turf will normally look best if you allow it to follow the original slope line. Option: Treat the ground with a liquid herbicide or cover it with landscaping fabric to prevent weed growth.
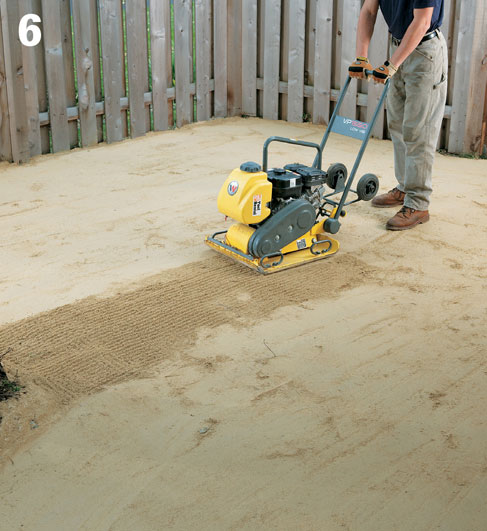
Use a plate compactor to tamp the soil base and all other subbase layers after each is laid. Spread the sub-base aggregate across the installation area. Smooth it out with a landscaping rake until it is level, spray with water, and then compact the surface with the compactor, leaving enough room at the top for the thickness of the turf.
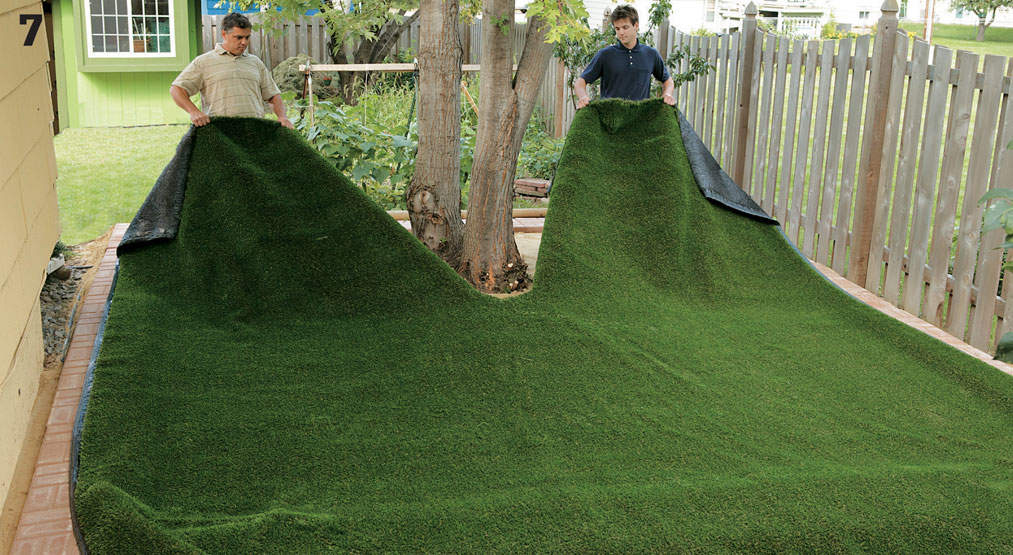
Roll out the turf in the installation area. If you need to cut around an obstacle, such as the tree above, roll the turf up to the obstacle, making sure it is in the proper starting position. Then, cut a slit from the opposite edge of the turf so it aligns with the obstacle. Continue rolling. If your plan is for multiple pieces of turf, roll them all out before you do any seaming.
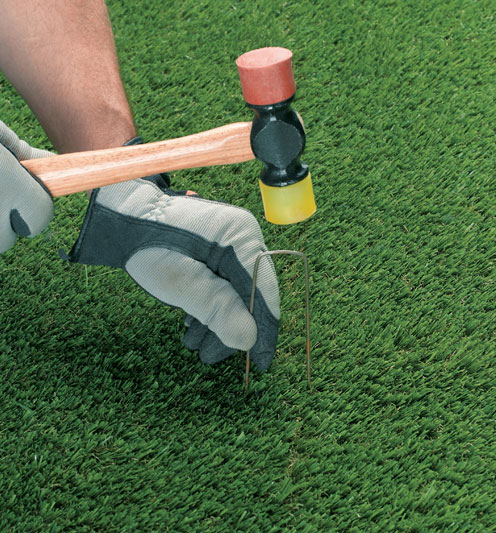
option: Seam the pieces of turf where they meet if you are doing a multi-piece installation or if you had to slice the turf to get around an obstacle. Professional installers typically use special products for seaming artificial turf, but you can do it yourself with supplies available at any building center. First, make sure the pieces of turf are oriented so the naps are facing the same direction and the tuft patterns are aligned. Fold back the turf on both sides of the seam. Cut a strip of building wrap that’s about 12" wide and slip it underneath the seam so each half overlays it about 6". Apply a bed of exterior-rated construction adhesive to the building wrap on one half and then set one piece of turf into the adhesive. Move to the other side, apply adhesive, and fold the second half of the turf down into the adhesive (left photo). Press along both sides of the seam to set the parts. For added strength, drive U-shaped landscape fabric staples every 12" along the seam (right photo).
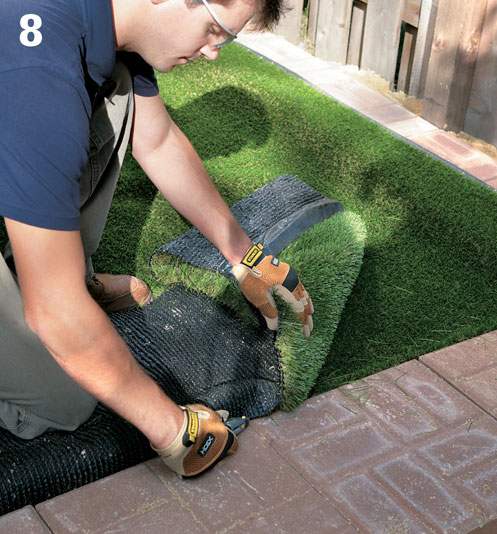

After all seams are complete and you have verified that all turf pieces are exactly where you want them, trim around the borders as necessary. Cut the turf using a utility knife with a new blade or sharp scissors. Here, a concrete paver border has been installed at the edges of the artificial lawn area. Cut the turf just long enough so that the edge can tuck under slightly.
Spread the turf infill recommended by the manufacturer, if any. Sand, small particles of rubber, or a mix of the two are the most common infill materials (also called ballast). For large installations, use a drop spreader to cast the infill.
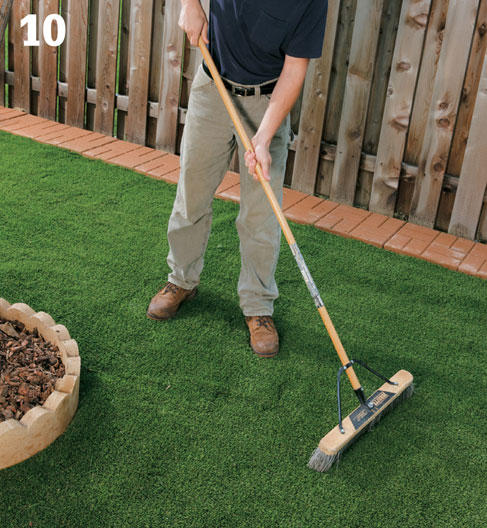
Use a stiff push broom to spread the infill and help work it into the “root” area of the artificial grass. Monitor the infill as you use your lawn. It occasionally becomes necessary to replenish the material.