Chapter 2
Gathering Must-Have Equipment
In This Chapter
![]() Choosing your weapon: Smokers and grills
Choosing your weapon: Smokers and grills
![]() Getting the lowdown on charcoal
Getting the lowdown on charcoal
![]() Barking up the right tree: Wood for smoking
Barking up the right tree: Wood for smoking
![]() Having on hand the right tools for each stage of the game
Having on hand the right tools for each stage of the game
U nless you’re strictly a microwave “cook,” you probably already have much of the equipment you need to get started with the recipes in this book. Barbecue isn’t so esoteric that you have to run out and buy a bunch of special tools to give it a go.
If you end up taking to barbecue (and be warned, it becomes an obsession or even a lifestyle for a pretty high percentage of harmless dabblers), you have no end of options for upgrading and expanding your tool kit, and more show up on the market almost daily.
In the meantime, start small. This chapter gives you what you need to know about the tools that are essential for barbecue cooking, and it fills you in on some of the options for the bigger, better, badder equipment that you may want to check into down the line.

Settling on a Smoker
Back in ye olden days, people dug a pit to smoke meats, so don’t think you have to drop a heap of dollars on your equipment. Using less-expensive options may mean that you have to work a little harder and be a little more watchful to keep the temperature steady. What it doesn’t mean is that you can’t cook great barbecue, so don’t be a sissy. As I show you, even a charcoal grill can serve as a smoker.
The following sections give you some ideas about what you can do with the various kinds of equipment available and what makes them desirable or not.
Rigging a charcoal grill
Using a charcoal grill as a smoker is a good way to test the barbecue waters. If you find you enjoy smoking, you’re likely to want to upgrade, but a large kettle grill with a lid is a reasonable starting point.
The main difference between grilling and barbecue is that when you grill, you cook directly over the heat source. Barbecue cooking uses indirect heat. To make that happen in a grill, do the following:
1. Prepare your heat source.
Use a chimney starter (see “Using a chimney starter,” later in this chapter) to light your charcoal.
2. Place the charcoal.
When it’s ready, heap the hot charcoal onto only one side of the kettle’s bottom grate, leaving the other side free for the meat.
3. Add wood.
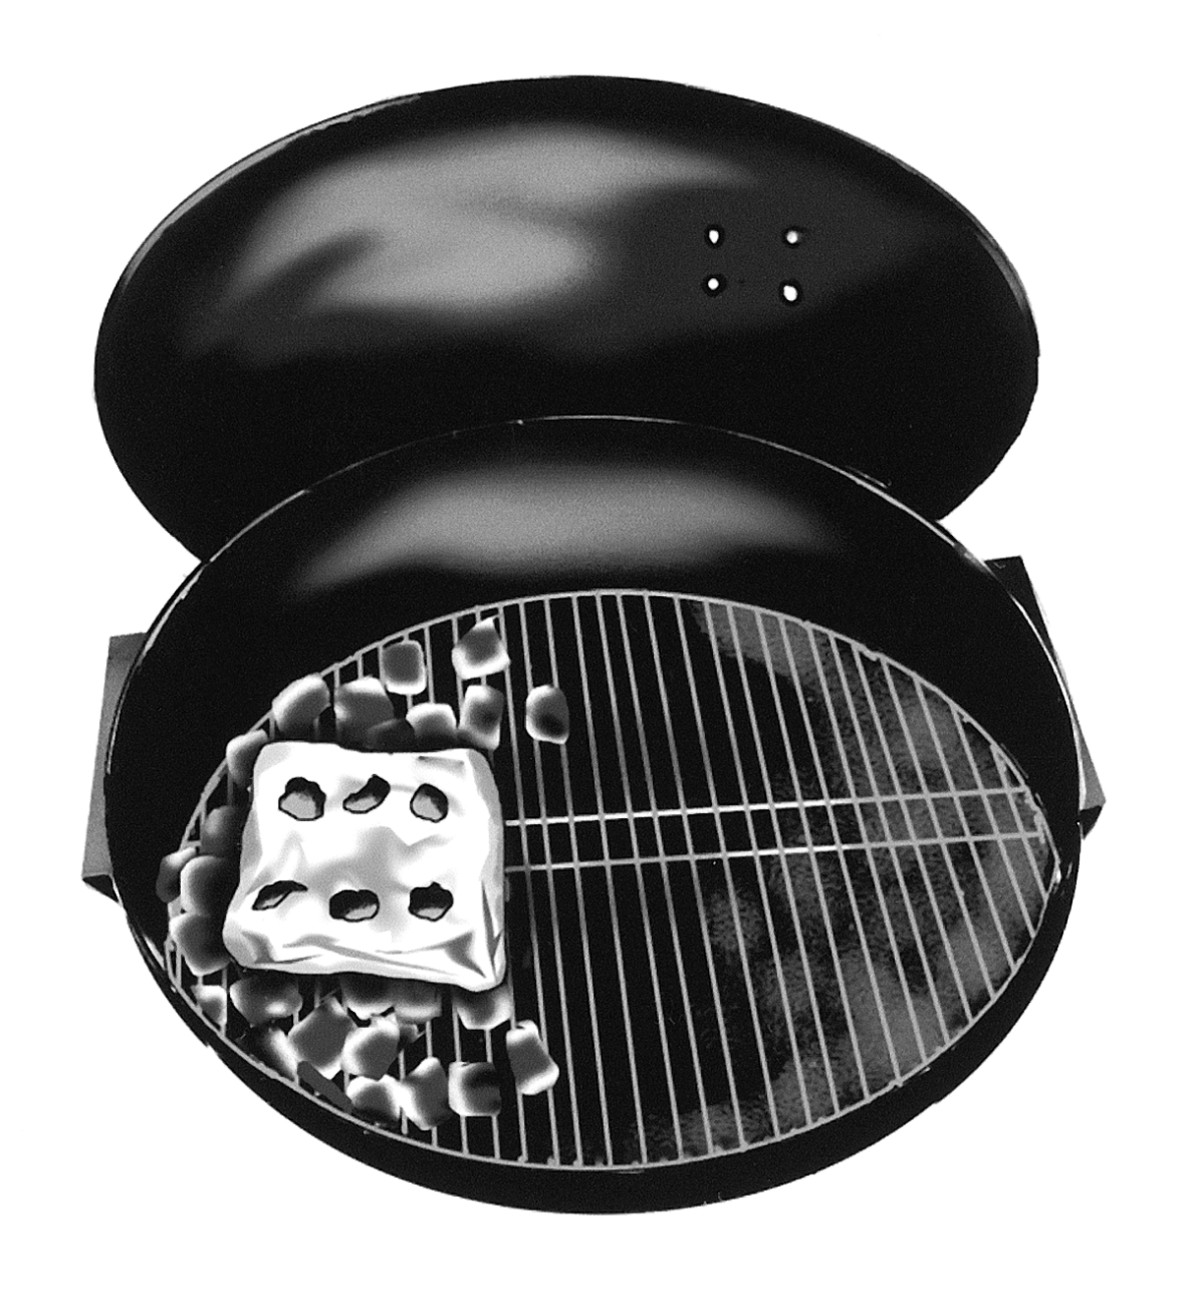
Put soaked wood chunks or an aluminum-foil packet of wood chips directly onto the coals, as Figure 2-1 shows you. (Check out “Using wood to add flavor,” later in this chapter, for more details)
4. Get ready to cook.
Place the top grate onto the kettle and give it a few minutes to heat up.
|
Figure 2-1: A kettle grill set up for smoking. Note that the charcoal is piled onto one side instead of across the bottom grate, as it would be for grilling. |
|
5. Throw your meat on the grate, carefully.
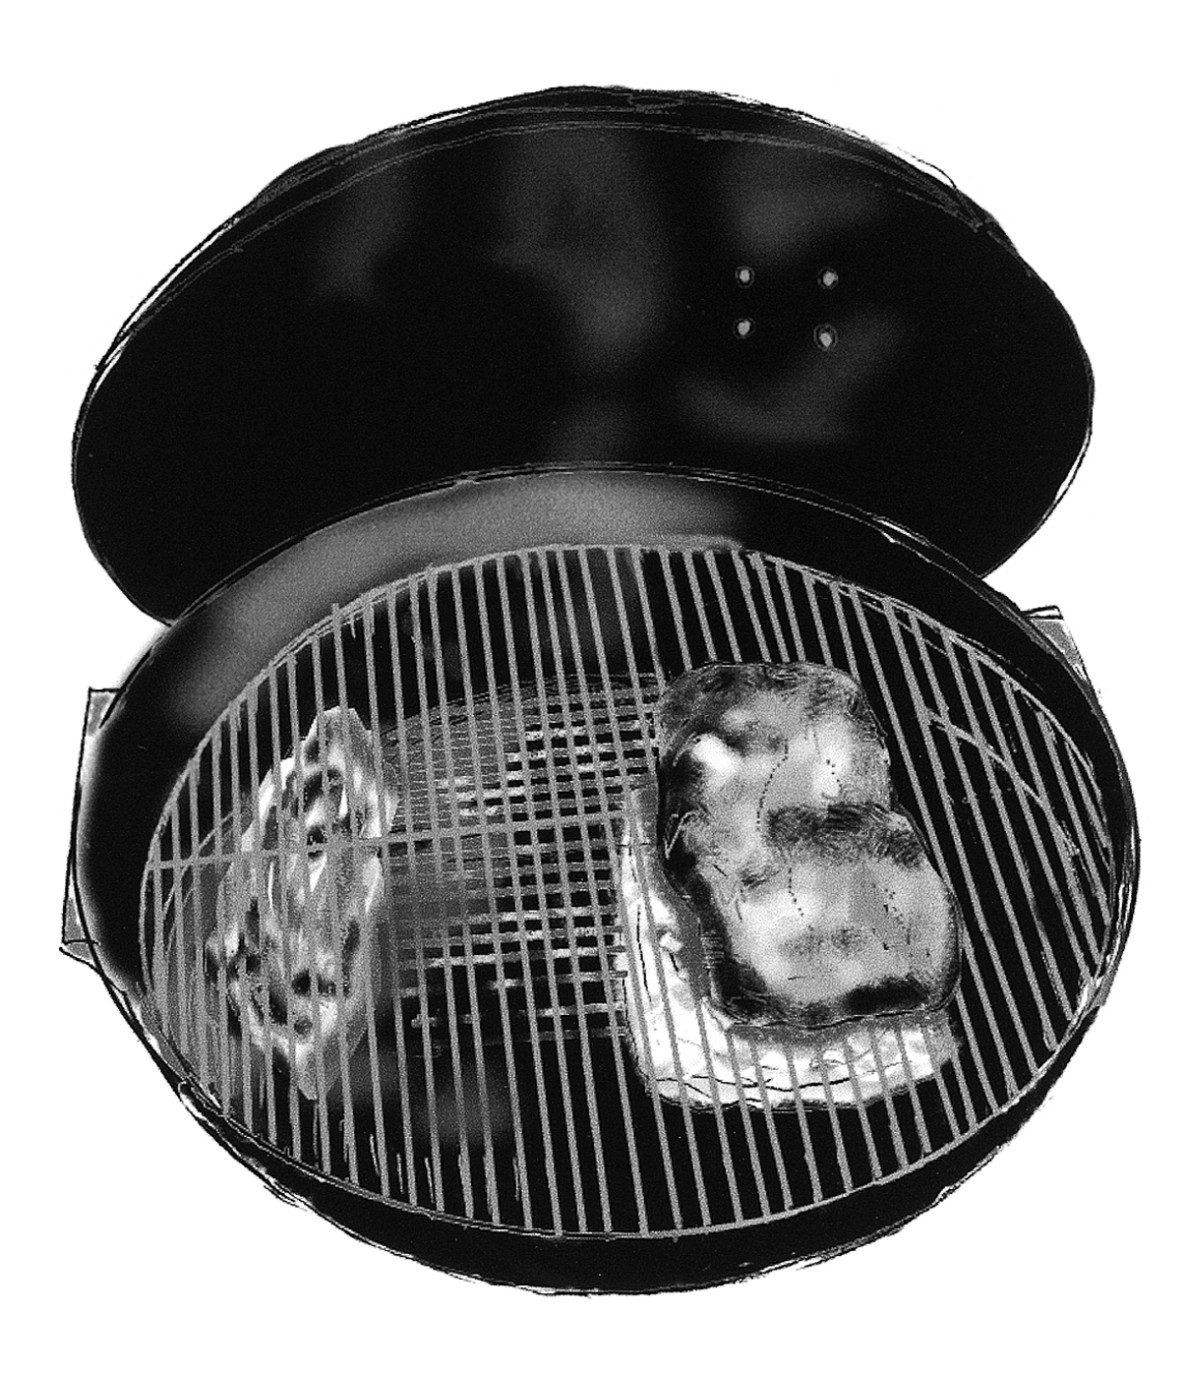
Place your meat on the side of the grill opposite the charcoal. Figure 2-2 shows you how your setup should look.
6. Close the lid to smoke the meat.
Leave the vents or intake partially open to keep oxygen moving over the charcoal and to encourage good circulation of the heat throughout the grill. Adjust the upper vent or exhaust above the meat and opposite the fire to draw heat and smoke toward the meat.
|
Figure 2-2: Keep your meat out of the direct line of the heat source when you use your charcoal grill as a smoker. |
|
Check the temperature intermittently by inserting a candy thermometer into the vent on the grill’s lid. (Make sure the vent is positioned over the food that you’re cooking so you know you’re reading the temperature where you’re most concerned about it.) Open the vents farther to increase heat, and narrow them to decrease it. Add more charcoal if you need to increase the heat by several degrees.

Buying a charcoal smoker
You most often run into two varieties of charcoal smokers for home cooks on the commercial market:
 Vertical smoker: A vertical smoker (sometimes called a bullet smoker because of its shape; see Figure 2-3) is one of the all-time most popular smokers and not terribly hefty in size or cost. You use it by cooking a significant distance over the heat and with a water pan in between the heat source and the cooking grate to keep the meat moist.
Offset horizontal smoker: An offset horizontal smoker (see Figure 2-3) keeps the fire in a compartment separate from the meat. You have a large cooking surface and vents to control the heat and keep it moving through the cooking chamber.
|
Figure 2-3: On a vertical smoker (left), the meat cooks far above the heat. An offset horizontal smoker separates the fire and the cooking surface. |

|
Building a barrel smoker
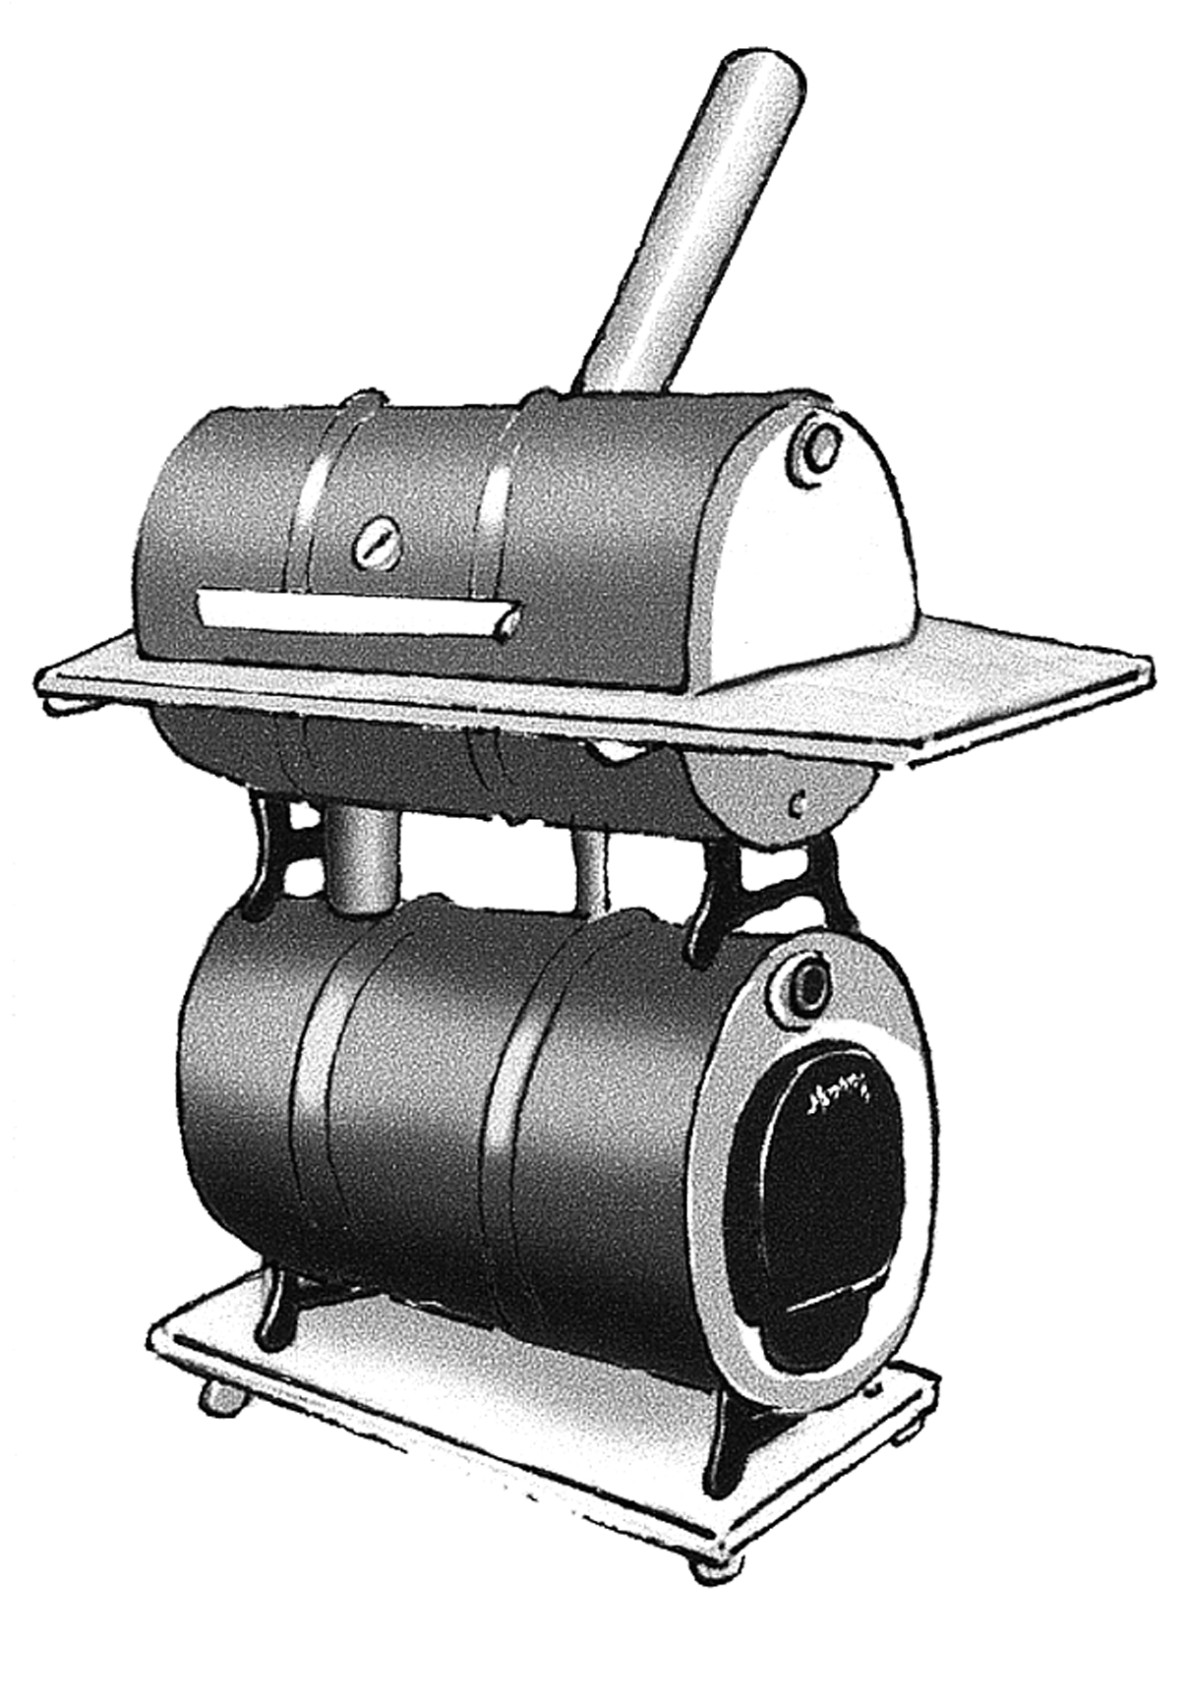
A do-it-yourself option if you’re industrious, a barrel smoker makes use of a 55-gallon drum turned on its side and split down the middle (see Figure 2-4). This type of smoker is the definition of inexpensive, but it’s fickle to use and doesn’t last terribly long. It does have a heckuva cowboy quality, if that’s what you’re into. A number of Web resources are available to show you how to turn a barrel into a smoker; you can find a particularly thorough version for building a double-barrel smoker at www.mikesell.net/smoker.
|
Figure 2-4: A barrel smoker is the rustic version of commercial horizontal smokers. |
|
Using an electric or gas smoker
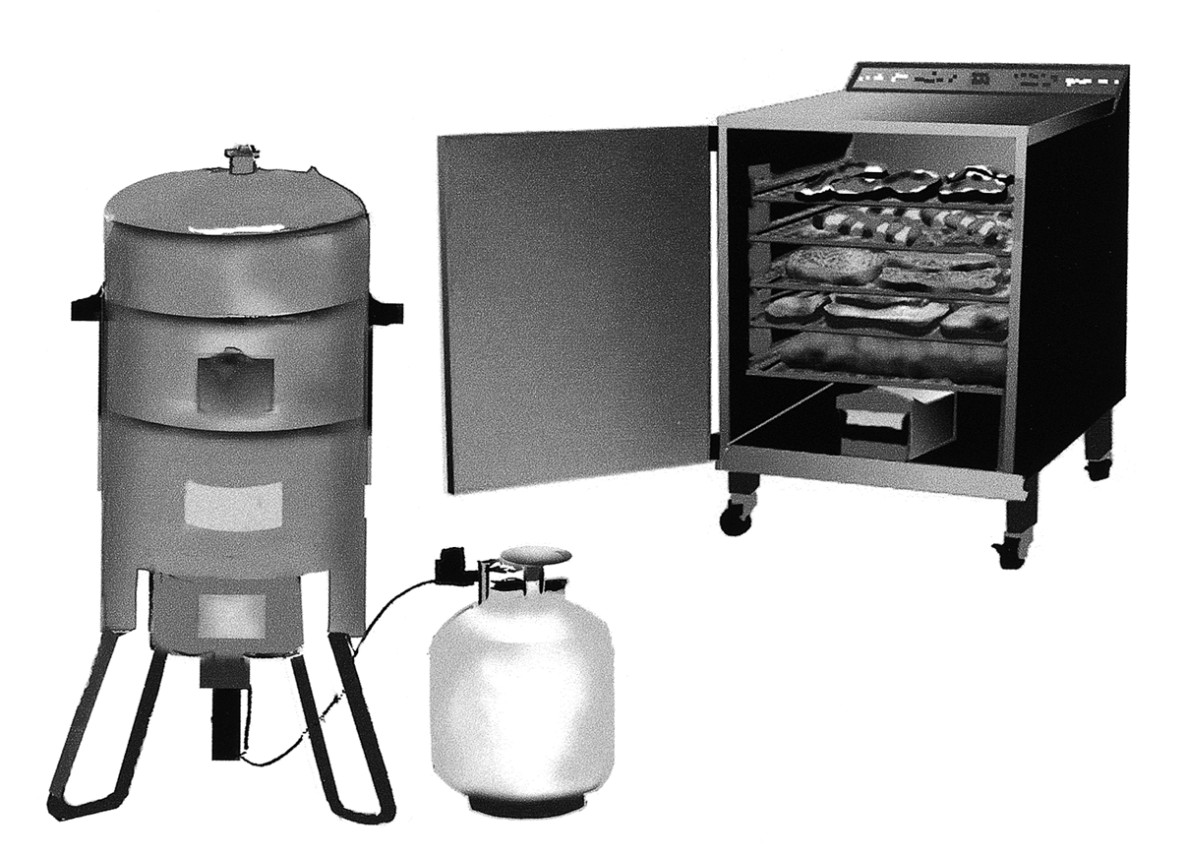
Take charcoal out of the equation, and you lose a lot of the great smoke flavor that makes barbecue an obsession for eaters and cooks. You can use wood with an electric or gas smoker (see Figure 2-5), but the effect is just not the same. (Although some barbecue cooks argue this point, as they do nearly every other point, most prefer to cook with charcoal to enhance the flavor of the smoke.)
|
Figure 2-5: You find gas and electric smokers in a range of styles. |
|
What you gain from electric or gas smokers is easier-to-control heat. Instead of messing with adding charcoal, you just adjust a dial. Shazam!
Fire, Starters: Managing Heat
In most cases, you use charcoal as your heat source, and you use wood to add smoke and flavor. Why not use wood as heat and smoke, you ask? Because oversmoking is a common mistake when you try to kill two birds with one pile of wood — you have better luck and better smoke and heat control if you use charcoal. Use too much smoke, and you’re likely to end up with a very unwelcome bitterness in your meat.
Eyeing charcoal types
You can buy charcoal in two varieties, both of which have their enthusiasts:
Charcoal briquettes: Made from charred hardwood and coal, charcoal briquettes are the most commonly used medium for backyard grilling. Briquettes are in many cases eschewed by serious barbecue cooks because of the additives that are compressed into them to keep the briquettes burning and hold them together.
Lump charcoal: Made from charred hardwood and nothing else, lump charcoal doesn’t have the additives you find in charcoal briquettes (nor does it have the smooth shape — hence, the name). Lump charcoal burns hotter and faster than briquettes. You pay more for it, but depending on the sensitivity of the meat you’re cooking, lump charcoal may be worth the expense for the lack of chemical additives that may flavor the meat.
.jpg)
Using a chimney starter
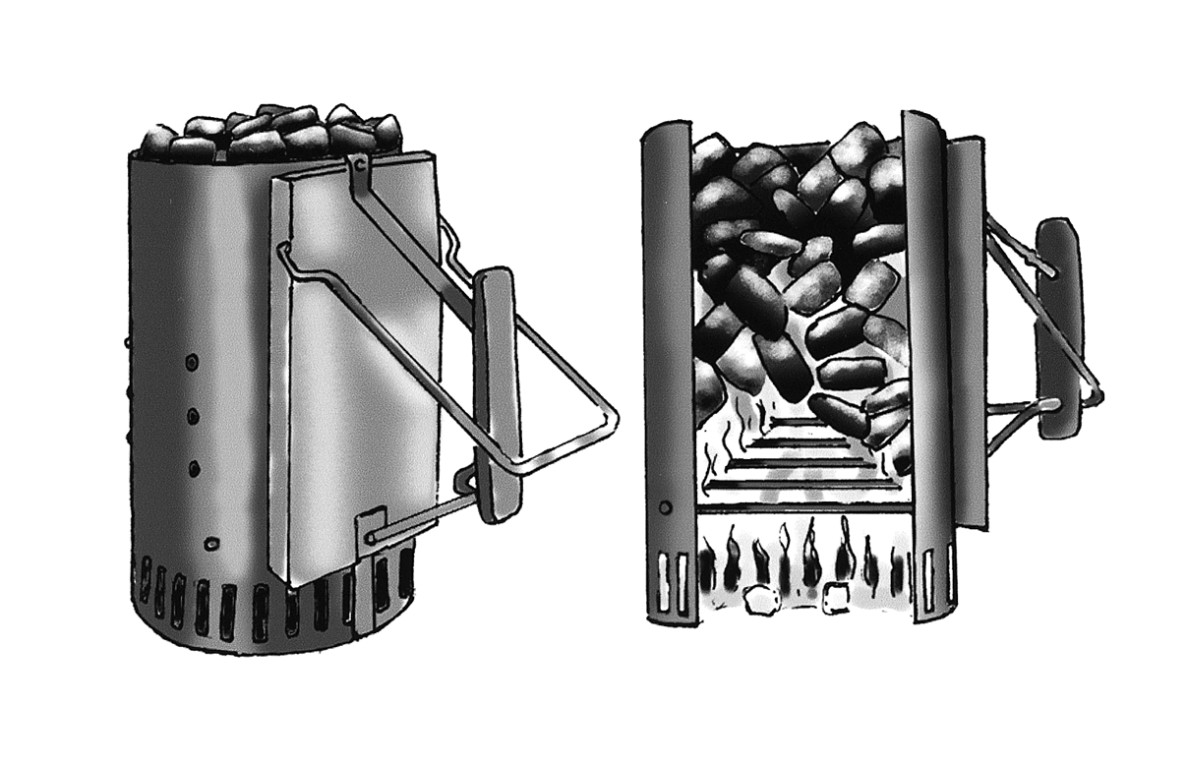
Through the magic of a chimney starter, you can light charcoal easily and quickly without pouring on the lousy-tasting chemicals you find in lighter fluid. You can buy a chimney starter (see Figure 2-6) at most hardware or home-supply stores.
You use it by stuffing newspaper into the bottom section and filling the top section with charcoal. Set it in a safe place and light the newspaper. In 15 to 20 minutes, your coals are ready to go. Just dump them into the smoker.
|
Figure 2-6: A chimney starter gets your coals ready for cooking without adding chemicals. |
|
Determining how much charcoal you need
The amount of charcoal that you use varies according to whether you go for the lump or briquette variety and what and how much you’re cooking. That’s a lot of variables, and finding just the right amount of charcoal for reaching your target temperature takes some practice.
Wood: To Hickory or Not to Hickory
The meat of the matter, when it comes to barbecue, actually is the wood. Smoke gives barbecue its unique flavor, and you get the smoke from putting hardwood between your charcoal and your meat so that the slow-burning wood sends its heavenly smoke up into whatever you’re cooking.
Charcoal quantity: What’s right for a butt may be wrong for a chop
The amount of charcoal you use depends on the density and weight of the meat you’re cooking, and the efficiency of the smoker you use. As an example, in Tom’s Weber Smokey Mountain Cooker, a metal ring at the base of the smoker sits on a rack. He typically smokes two to three pork butts at a time, each with an average weight of 6 pounds, so that’s 12 to 18 pounds of pork. For that amount of meat, he fills the ring to the top, fills a chimney starter (check out the section “A Mop, Some Tongs, and So On,” later in this chapter), lights that charcoal, and when it’s hot, dumps it on top of the ring of briquettes.
“All said. I use about 65 percent of an 18-pound bag of briquettes,” Tom explains. “It gets me about 12 hours of smoking, holding the temp to about 95 percent of the original set-point temperature. The smokers I use are extremely efficient with a fuel source. In fact I can put five butts (30 pounds) on that smoker with the same amount of coals.”
Things change considerably if the smoker isn’t as efficient. Tom remembers smoking about 70 pounds of meat on a custom rig: “It took me three bags — 54 pounds — of coals to smoke that for 12 hours,” he said. “Very inefficient. If I smoked 70 pounds of meat across two units like mine, I could do it with about 30 total pounds of coals. My competition units ($225 apiece) are much more efficient than the custom, and larger capacity rig, I used ($6,000!).”
Meat density is another variable to consider. A pork butt is the size of a football and very dense. Say it weighs about 6 pounds, meaning you need about 12 hours to smoke it. Three slabs of ribs with bones weigh 6 pounds, too, but they need only 4 to 6 hours to smoke. Cook 18 1/3-pound pork chops, and that particular 6 pounds’ worth of meat needs only 3 to 4 hours on the smoker.
The single butt takes 8 pounds of briquettes; the pork chops and ribs need only about 3 to 4 pounds of briquettes. Tom’s rough rule of thumb: About a dozen briquettes for a pound of meat minus the bone weight to slow-cook meat.
Using wood to add flavor
You can add wood to your grill or smoker in a couple different forms:
Chips are small pieces along the lines of mulch. Wrap them in heavy-duty aluminum foil and tear several holes in the foil to give the smoke a route out of the packet and onto your meat. A word of warning: Fish easily picks up a metallic flavor from the foil, so if you’re planning to smoke fish, you may want to use wood chunks instead.
Chunks are good-sized pieces of wood that are 3 or 4 inches across. Before you use them, soak them in cold water for half an hour to an hour. Drain off the excess water and then place the chunks right on top of your charcoal.
Describing characteristics of woods
You carefully choose your marinade, your meat, your rub — and the decisions don’t stop there. The type of wood you use to smoke meat affects the way it tastes.
Here’s a rundown of the characteristics you find in different types of wood:
Almond or pecan wood imparts a mild, nutty (surprise!) taste.
Apple and cherry woods do what their fruits would: They give a sweet, fruity flavor.
Hickory provides an intense flavor; be careful not to use too much.
Maple is mild and versatile, and its smoke is a little sweet.
Oak is a finicky option because it has a distinct flavor that can easily come across too strong.
Walnut comes off as bitter if you use too much of it. Better to use it restrainedly and with a milder choice, like one of the fruit woods.
A Mop, Some Tongs, and So On
Ours is an age of excess. Along with completely unnecessary tools for golfers, wine drinkers, and virtually every other hobbyist from hunters to knitters, barbecue cooks have a steady stream of new and “life-altering” gadgets to choose from. Some of these options may tempt you mightily, but very few of them do you actually need.
In this section, I run down the equipment you’ll use over and over in your barbecue cooking.
Smoker or grill: You get a rundown of your smoker options in the “Settling on a Smoker” section, earlier in this chapter. There, I also tell you how to use your grill to approximate the effect of a smoker so you can try it out before committing to the cost of buying your own.
Fire: You need matches or a long butane lighter to get your charcoal going.
Charcoal: I tell you everything you need to know about your heat source in the “Fire, Starters: Managing Heat” section, earlier in this chapter.
Chimney starter: A chimney starter is the best way to get your charcoal going. (Check out the “Using a chimney starter” section, earlier in this chapter, to get the details on chimney starters.”)
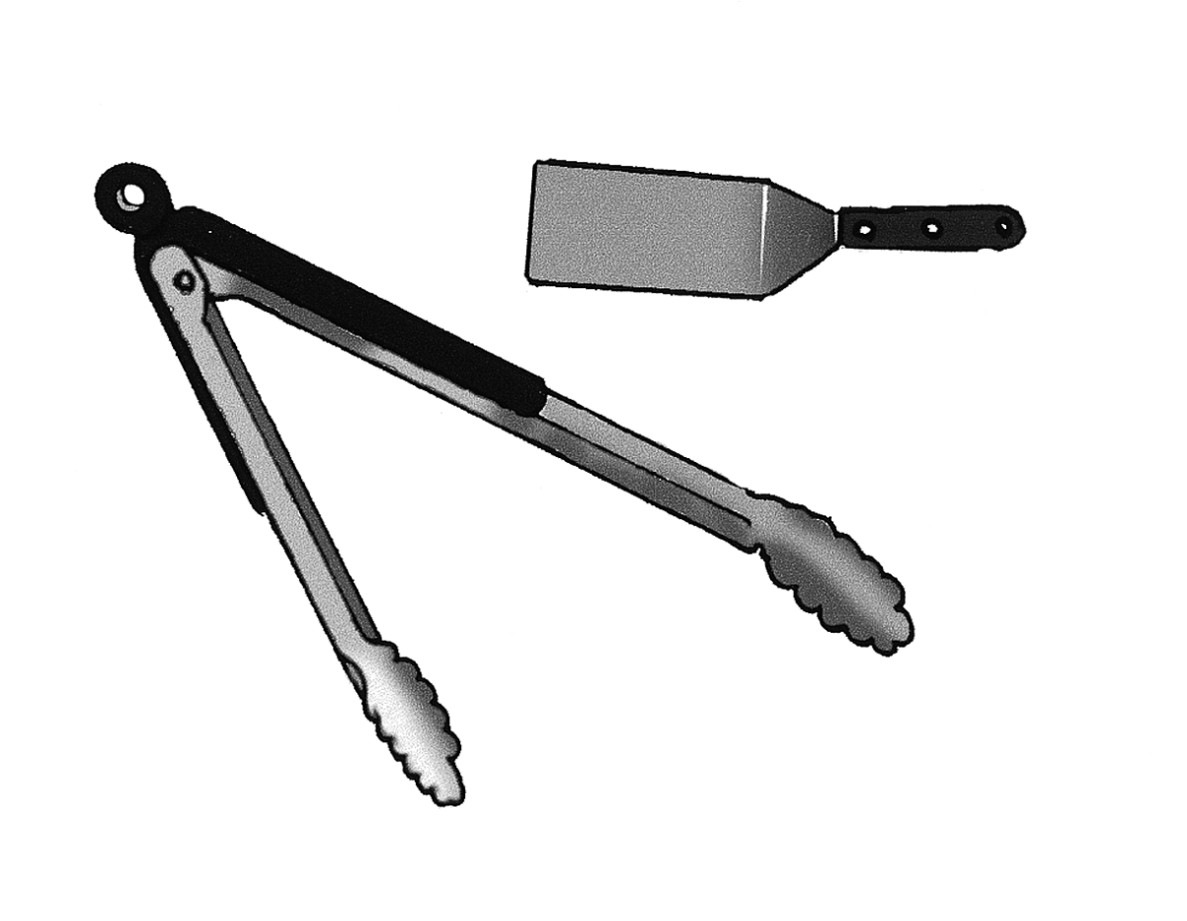
Tongs and a long-handled metal spatula: Only suckers turn meat with a fork. You don’t want to pierce it and let the juices run out. Tongs or spatulas (see Figure 2-7) let you move meat without damaging it.
|
Figure 2-7: Tongs or spatulas enable you to turn meat without poking holes in it. |
|
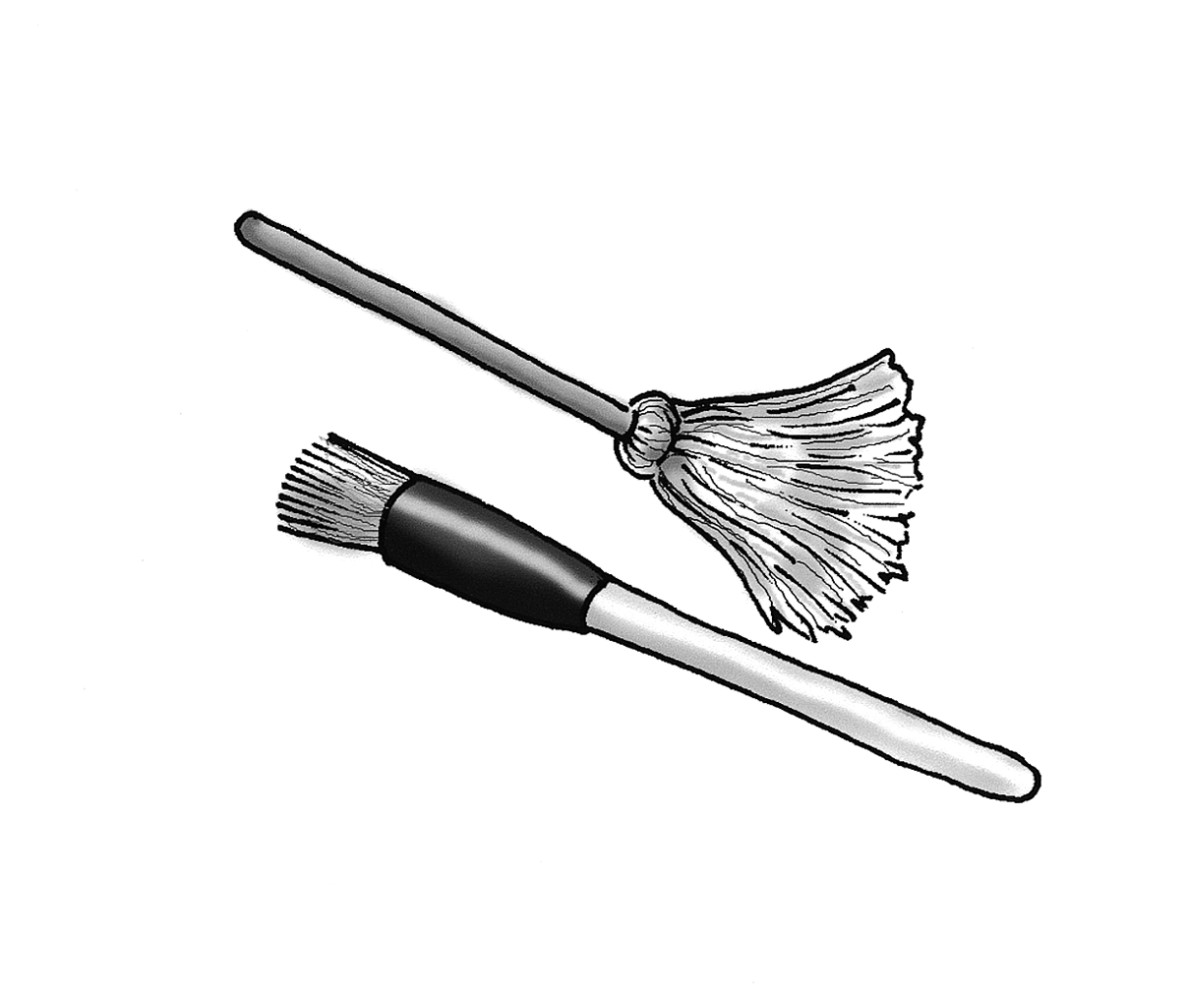
Basting brush or mop: Choose a sturdy brush or buy a cotton basting mop (see Figure 2-8), which gives you great coverage quickly — a plus considering you’re working hard to maintain a steady temperature.
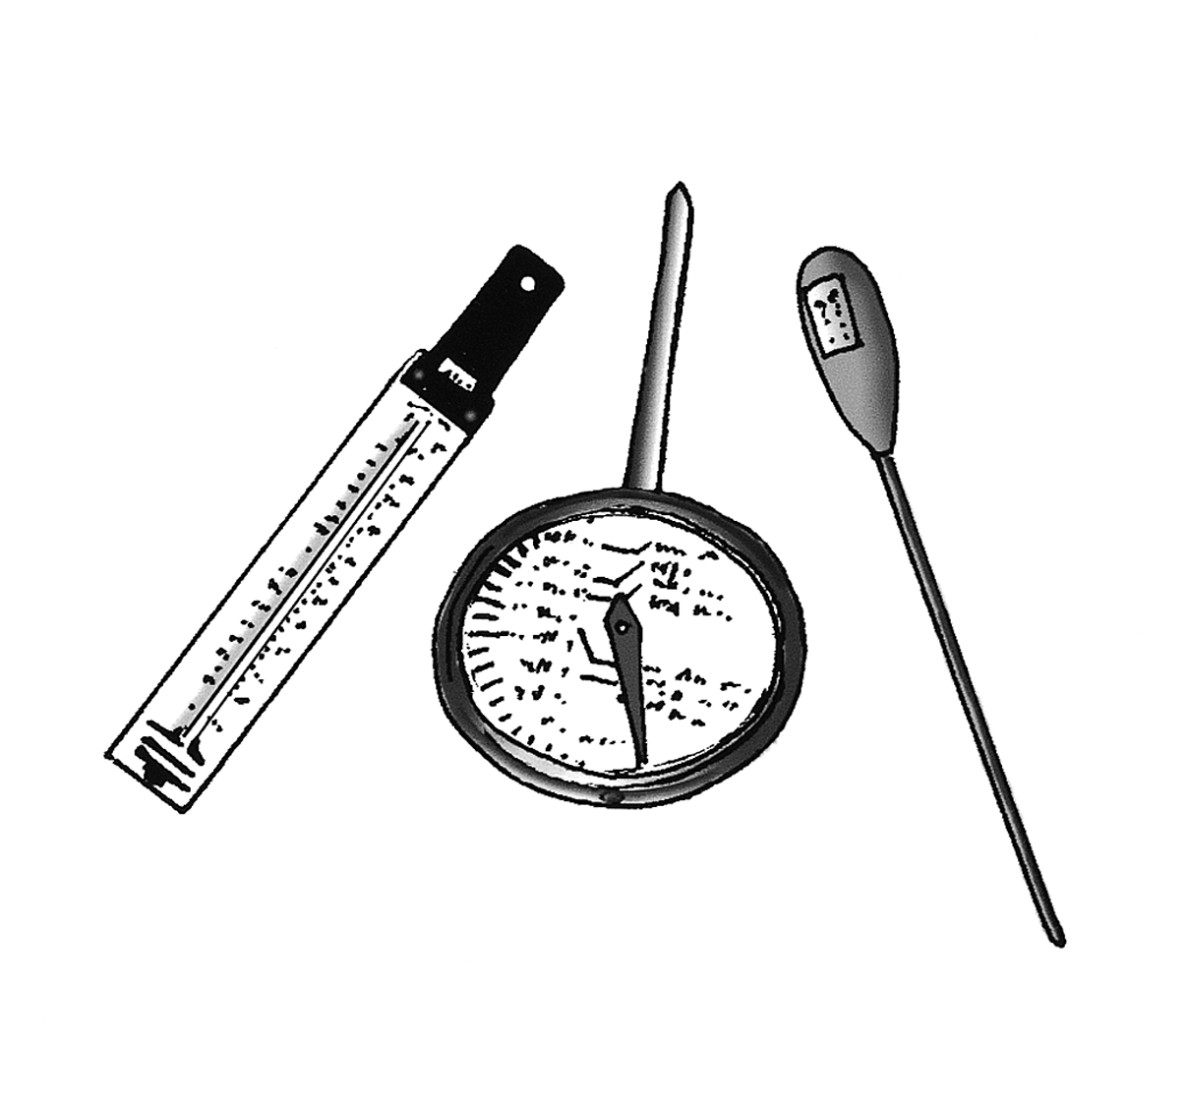
Thermometer: If your smoker doesn’t have a built-in thermometer, stick a candy thermometer into a vent. You find digital, dial, and notched versions (see Figure 2-9). Take your pick; they all suit your purposes just fine.
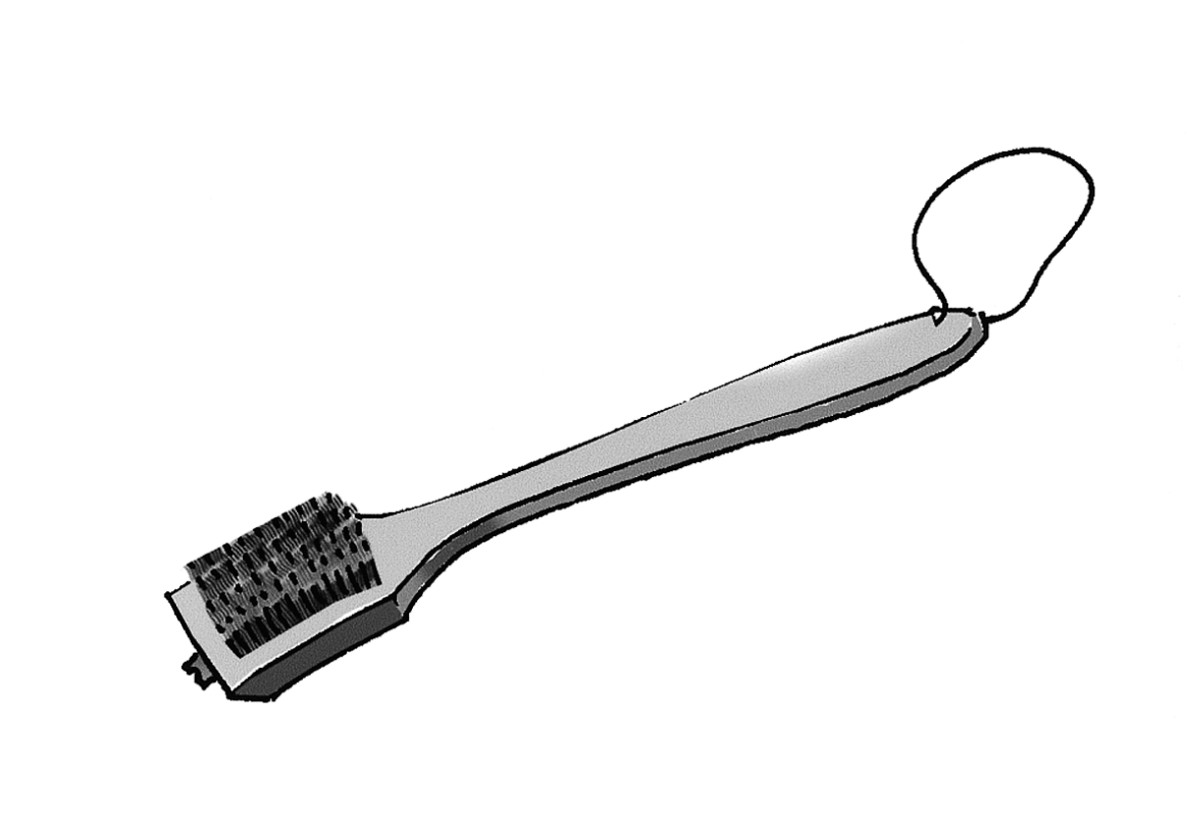
Grill brush: No matter how spectacular your last batch of ribs was, it’s not going to taste good on today’s chicken. A gunked-up grate makes meat stick and causes you extra headache because you have to keep the lid open longer and lose valuable heat while you wrestle the meat as you move it during cooking. A thorough scrape with a grill brush (see Figure 2-10) goes a long way toward maintaining the flavor of your food and keeping it from sticking.
|
Figure 2-8: A well-made brush or basting mop allows you to quickly sauce whatever you’re cooking. |
|
|
Figure 2-9: Thermometers come in three flavors: digital, dial, and notched. |
|
|
Figure 2-10: Get rid of residue with a grill brush. |
|
Drip pan: Dripping fat and charcoal are not a good combination. Keep the two separate by using a drip pan. A pie tin or cake pan or a pan you fashion from heavy-duty aluminum foil works great.
Spray bottle: Use a spray bottle to discourage flames that may lick up from your grill or to add moisture to meat as you smoke it.
Apron: In addition to making you look sexy, aprons give you a place to stash your tongs and a way to save your clothes from all manner of stains.
Heat-resistant gloves: Big cuts of meat need hands-on attention, which means you need heat-resistant gloves so you can move them.
Heavy-duty aluminum foil: You use foil to wrap meat before you cook it and to keep the meat hot for residual cooking after it’s out of the smoker or off the grill.
Plastic wrap: You need it to cover marinating meat or for storing cooked food.
Glass bowls: When you marinate meat, do it in a glass container. Stainless steel works, too, but steer clear of aluminum or cast iron, which react with the marinade and knock it out of whack.
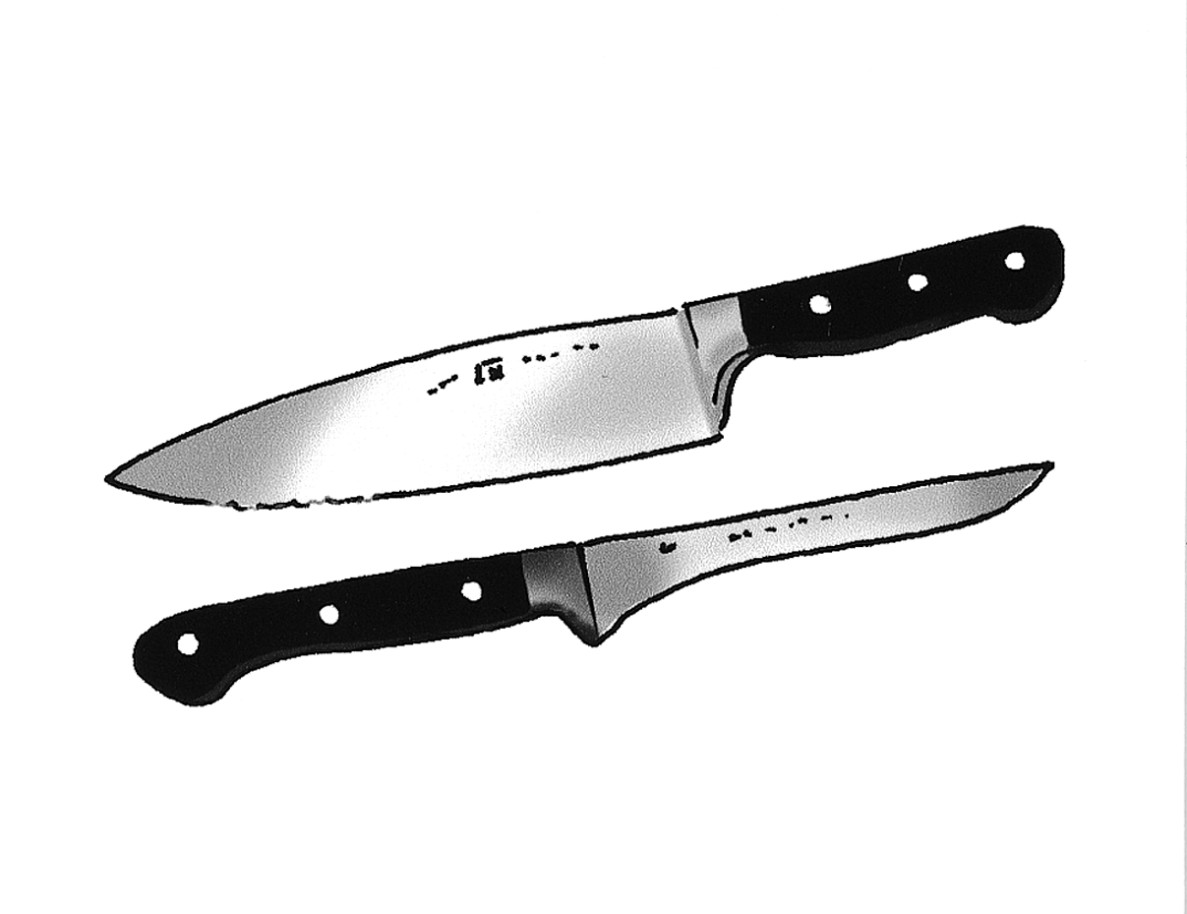
Sharp knives: You’re going to need to trim your meat with some precision and in some cases around tricky terrain. A boning knife gets into hard-to-navigate spots, and an 8-inch chef’s knife works well for outside trimming (see Figure 2-11).
You can use whatever knives you feel comfortable with — just make sure they’re sharp. Dull knives not only make trimming a challenge, they also put you in danger of gouging yourself as you fight through the meat.
|
Figure 2-11: A chef’s knife and a flexible boning knife are good choices for trimming fat from meat. |
|
Estimating temperature in a pinch
If ever you find yourself without a thermometer but otherwise ready to cook, no need to run out for a replacement — use the “hands-on” method to estimate the temperature of your heat source. Hold your hand approximately 5 to 6 inches above the coals; the amount of time you can stand to keep it there tells you your temperature range. If you can hold your hand above the coals for
1 to 2 seconds, the coals are hotter than 500 degrees
3 to 4 seconds, you’re working with medium grill heat at about 350 to 400 degrees
6 seconds or so, and you’ve got smoking heat — 250 degrees or less