Chapter 4
Barbecue Methods, Art, and Science
In This Chapter
![]() C’mon, baby, light my fire pit
C’mon, baby, light my fire pit
![]() Readying meat for its moment
Readying meat for its moment
![]() Making the right temperature last
Making the right temperature last
![]() Finishing strong when the smoking’s done
Finishing strong when the smoking’s done
B efore you can offer your friends brisket so savory that they call upon the powers of interpretive dance to describe it, you have to gear up (see Chapter 2) and plan several steps ahead.
In this chapter, I give you guidelines for figuring out how to get where you want to go, from preparing the meat to taking that first taste. I also show you how to baby your barbecue while it cooks and how to finish it flavorfully without losing moisture.
Beginning with an End in Mind
If you’re more inclined to jump in the car and start driving instead of planning a vacation, the type who might head down to the Little White Wedding Chapel with the person you just locked eyes with from across the paddy wagon, then barbecue may not be for you.
Barbecue requires forethought and patience — good barbecue, that is. You can make all the bad barbecue you want without planning and while in a hurry. You can also cook a turkey in the microwave, but no one’s going to want to eat it.
When you get the hang of cooking barbecue, much of what you find in this section will be second nature. Your own adventures in trial and error will pay off and yield the secrets that make your cooking unique. Until you cook with confidence, though, take advantage of the hard work others have done.

Planning hours (and hours) ahead
Despite the tales that need telling and the smack that needs talking, the real reason competitors show up for competitions a day before the cooking begins is that they need hours and hours to trim, marinate, smoke, and finish the meats they’re sending to the judges.
The following sections give you some notion of how much time you need to set aside.
Seasoning with dry rubs
More time means more flavor, but some meats soak in rubs much more quickly than others and can become dry from the salt. To get the most out of your dry rubs without going overboard, stay within the following parameters:
 Allow about an hour and no more than an hour and a half for chicken breasts.
Dark-meat chicken, such as legs and thighs, have muscle tissue that’s less dense than that of the white meat, so they pick up flavors more easily. Forty-five minutes to an hour ought to do the trick.
If you’re cooking a whole chicken, 4 hours is a good start, and you can let the meat sit in its rub for as many as 12 hours.
Pork chops or steaks need an hour and can handle as much as three hours.
A rack of ribs does best with 12 hours.
Briskets and pork shoulders require 12 hours and can handle a full day of soaking in a rub.
.jpg)
Using marinades
You find a wide range of possibilities with marinades, depending on the type and size of meat you’re preparing and the ingredients in your marinade. Use a marinade with hot chilies and the meat needs to stay in contact with the marinade for a shorter time than it would if the strongest flavor in your marinade is oregano.
Another important factor is the size of the meat you’re marinating:
Small pieces of meat, like shrimp or boneless chicken breasts, grab flavors in about an hour.
Give steaks and chops at least three hours and as many as six hours.
Veggies do well with a couple hours’ marinating time.
Whole chickens, pork loins, rack of lamb, or other big pieces of meat need at least 5 hours and as many as 14 hours in the marinade.
If you’re marinating something as big as a pork shoulder or brisket, allow about a day.

Selecting style and substance
The ’80s proved that too much sometimes is more than enough, thank you. You’re likely to dig up that same nugget of wisdom if you throw rub, marinade, and finishing sauce on a poor, defenseless chicken breast.
How you choose to season your meats is one more in a long line of personal preference points that you encounter in the world of barbecue. You may well cook a rack of ribs that you marinate and rub and baste and then serve with a healthy mop of sauce. Then again, you may prefer your ribs to be simply rubbed and smoked.
Here’s what you can expect from the various flavor-enhancing methods:
Dry rubs provide dashes of flavor when you simply sprinkle them on and get cooking; they change the texture and character of meat when you use them as marinades. Dry rubs ensure that you get a nice crust on your smoked meats.
Marinades tenderize meats because they have acids, like lemon juice or vinegar. Lean meats do especially well in marinades, which break down the muscle fibers and then keep the meat moist.
Finishing sauces contain sugar, which means if you apply them before your meats are just about cooked, you get a burnt crust. Save finishing sauces for the final step, when they help keep meat moist. (I tell you more about finishing sauces in the “Using final-stage sauces” section, later in this chapter.)
Trimming and Prepping Meat without, Er, Butchering It
Striking the balance between juicy flavor and tender chewing starts with how you trim the meat you cook. The following sections give you guidelines for getting the most popular cuts ready for your rub or marinade — or grill or smoker.
Priming pork butt
Pork butt actually comes from the shoulder of the animal and so contains a number of muscles that meet up in the cut (see Figure 4-1). It’s a pretty solid hunk of meat, but one with a lot of fat veins that require a careful prep.
|
Figure 4-1: A pork butt comes with a thick fat cap and a lot of internal fat, as well. |
|
When prepping a pork butt, take the following steps:
1. Trim the fat cap.
Start at one side and, with a large, sharp knife, begin trimming the fat cap as evenly as possible about 1/8 inch all the way across the top.
2. Cut off remaining pockets of fat.
You can make yourself crazy trying to scalpel through to get off all the fat you see on a pork butt, and there’s just no good reason to do so. Slice off the substantial portions you find, and leave it at that.
3. Cut out any large veins or blood clots you run into.
Cleaning ribs
You don’t have to work too hard to prep ribs, and you can use the process I outline here for beef or pork ribs.
Whatever style ribs you’re making, you find a membrane along the bone side of the rack. Use a table knife (some people find a screwdriver works better) to puncture the membrane along one end of the rack, and then use a paper towel to grip the thing and pull it from the ribs (see Figure 4-2). Finally, if you see excess fat on the ribs, trim it off.
Preparing beef brisket
Brisket is cut from the sternum area of the cow, and it includes the following parts (see Figure 4-3):
Flat: The lean meat that you slice and eat after you cook it
Point or deck: A fattier section that overlays the majority of the flat
Fat cap: The thick section of fat that separates the flat and the point
|
Figure 4-2: Pull the membrane from the bone side of the ribs before you season and cook them. |

|
|
Figure 4-3: Parts of a brisket. |

|
Most brisket starts out with a fairly thick layer of fat. Start whittling that down by cutting off excess around the point. Then trim down the fat along the flat by running a large, sharp knife along the fat, leaving only about a quarter-inch layer. Rub your hand over the flat so you get a feel for any deep pockets of fat, and then shave those down.
Grooming poultry
A whole bird doesn’t require much in the way of preparation. Just pull out the neck and giblets from the chicken’s or turkey’s cavity and then slice off whatever fat surrounds the opening. You don’t need to tie up the legs as you would if you cooked it in the oven.
After you prepare a chicken, you may want to butterfly it to cook it more quickly and evenly. Here’s how to do it:
1. Set the chicken on the table so its back is facing up and its neck points away from you.
2. Use kitchen shears to cut alongside the backbone from end to end.
You cut through the ribs rather than the spine itself (see Figure 4-4).
|
Figure 4-4: Cut alongside a chicken’s spine to split and flatten it for quicker cooking. |

|
3. Repeat Step 2, cutting along the opposite side of the spine to remove it completely.
4. Press down on the breastbone to flatten the chicken.
Getting Time and Temperature Right
Some people tell you the secret to great barbecue is in the sauce. Great sauce helps, sure, but barbecue doesn’t fly unless you cook it slowly, over low, indirect heat fueled by natural sources such as hardwood and charcoal.
Keeping a careful watch on the temperature in your smoker is critical for pulling tender, evenly cooked meat out of it. When you do the pulling is the difference between becoming Kansas City’s pride and being told, “Next year, just bring the beer to the barbecue.”
Determining cook time
Intuition and experience are enough for barbecue cooks with serious pit time under their belts, but target internal temperatures are the best guides for making your early barbecue efforts successful. Table 4-1 shows you the numbers you’re shooting for.
| Meat | Target Internal Temperature |
|---|---|
| Beef brisket | 185 to 195 degrees |
| Beef tenderloin | 130 degrees for rare, 140 degrees for medium rare, |
| 150 degrees for medium, 160 degrees for well | |
| Boston butt | 165 to 180 degrees if you’re slicing it, 185 to 195 degrees |
| for pulling | |
| Pork shoulder | 165 to 180 degrees if you’re slicing it, 185 to 195 degrees |
| for pulling | |
| Whole chicken | 170 degrees in the thigh |
| Whole hog | 185 to 195 degrees in the shoulder |
| Whole turkey | 170 degrees in the thigh |
Managing the smoker
The urge to peek into or otherwise mess with your smoker is a strong one, but it’s an impulse that’s best beaten back. Use the Force, distract yourself with an unsolvable conundrum like whether free will exists if thought is dependent upon physical processes — whatever works — but for the love of Christmas, don’t mess with the smoker any more than you have to.
Keeping an even temperature is your prime directive when it comes to slow smoking. Maintaining your target cooking temperature with as little volatility as possible is the most important thing you can do to end up with superstar-quality meat.
Remember the following tips about holding a temperature in your smoker:
Your target temperature for most meats is 225 degrees, and you have only about 25 degrees’ leeway in either direction to stay in the comfort zone.
If your smoker doesn’t have a built-in thermometer, stick a candy thermometer through the vent to keep tabs on the inside temperature.
Charcoal dies out after about 45 minutes, and you need a half-hour to get another batch ready. (You don’t want to use charcoal that hasn’t started to ash over.)
To keep a steady supply of ready charcoal, light another batch in a charcoal chimney (see Chapter 2) shortly after you move a new batch into the smoker.
Close down the upper dampers when you need to reduce the heat, and open them a bit when you want to raise the temperature.
Seriously: Don’t open the lid unless you absolutely have to. Otherwise, you’re making your temperature (and, therefore, your meat) go wonky.
Free ribs, and no charge for the lies
Come summer, any old barbecue fan can take advantage of the free-for-all that arises at barbecue competitions. Because the competitors don’t get vending licenses for the events, they can’t sell their extra ribs, and they usually have quite a pile of them: Smoking a half-dozen racks is common, even though the judges evaluate only six ribs at most sanctioned events. Competitors want to improve their chances for getting that perfect pair of ribs.
In the moment of relief after their entries are turned in, many competitors hand out samples to passersby. Take advantage of the pulled pork or chicken, but take anything you hear from the source with a grain of salt.
Part of the fun of competing is blowing smoke and, even though you aren’t a competitor at the moment, who’s to say you won’t be later? Tom Schneider, a contributor to this book and an accomplished pit master in the Indianapolis area warns first-timers not to be fooled by the friendly faces:
Barbecuers are some of the nicest, friendliest people around. They’ll help you if you run out of ice or out of salt, but if you ever ask someone to give a piece of advice on barbecuing, you usually get a smile and not much more than that. If you do get more, chances are, that person is intentionally leading you down the path of screwing up your food.
The Big Finish
Given the extensive amount of time you put into your barbecue, you wouldn’t be the first person to melt into a puddle of glum if your food doesn’t come out like you envisioned. Avoid that outcome by playing the barbecue endgame with good sense and patience.
You don’t sprint to the barbecue finish. You keep on babying your meats until they’re safely on your grateful guests’ plates.
Using final-stage sauces
The sauce you coat your pulled pork in or slather on your ribs usually is not the sauce you use before or during cooking, and here’s why: Any sauce that contains sugar or tomatoes is going to burn at a very low temperature, adding an unpleasant flavor and imparting a less-than-toothsome texture to your meats.
So what’s the story with those sweet, tomato-based sauces that, for many people, are the essence of barbecue? Those are all well and good, provided that you wait until the cooking is almost done to use them.
Keeping basting brushes clean
A challenge on par with creating the perfect sauce is cleaning the basting brush you use to apply it.
Oil clings to the bristles and doesn’t rinse out no matter how determinedly you may attack the brush-cleaning process. Bristles stay sticky and may even stink up your utensil drawer.
Try putting your washed brushes in a glass, bristle-side-down, and pouring coarse salt in around them until salt covers the bristles. Just as it does with meat, salt pulls out moisture from the brushes so they’re dry and ready to go when next you need them. Just shake off the salt.
Resting the meat
Just because you’ve pulled it from the smoker doesn’t mean your meat is ready to go. Whatever you’re cooking needs a moment to ease away from its cooking temperature and absorb the juices that otherwise would end up all over a plate instead of in the meat, where you want them. Resting your cooked meat — letting it sit away from the heat for a while — keeps it from drying out.

You invest way too much time in barbecue to let last-minute impatience ruin your work. Give your meats a good rest after cooking, and your efforts are better showcased. Count on about two minutes for each pound of meat that you cooked.
Some people tell you to tent your meat with aluminum foil while it rests. Others say that’s just playing with it. The idea is that the foil keeps the heat in and keeps the meat from cooling off too fast. Maybe so, but the difference isn’t striking. Foil or don’t — this decision isn’t going to make or break your results. But, of course, there’s an exception. . . .
Pulling, slicing, presenting
After your meat is rested (I beg you: Check out the “Resting the meat” section if you don’t know what I mean), you may well be finished. You can simply toss ribs or chicken pieces on a plate. Other cuts require a smidge more work.
For pulled meats or brisket, find your knives or rubber gloves and take the following steps for getting your meat ready to serve:
When pork shoulder for pulled pork is cool enough you can touch it, remove any fat still on the meat, and then dig in with your hands, removing bones and shredding the meat into thin strips. If hands-on preparation isn’t your thing, use a knife and chop the meat into fine bits.
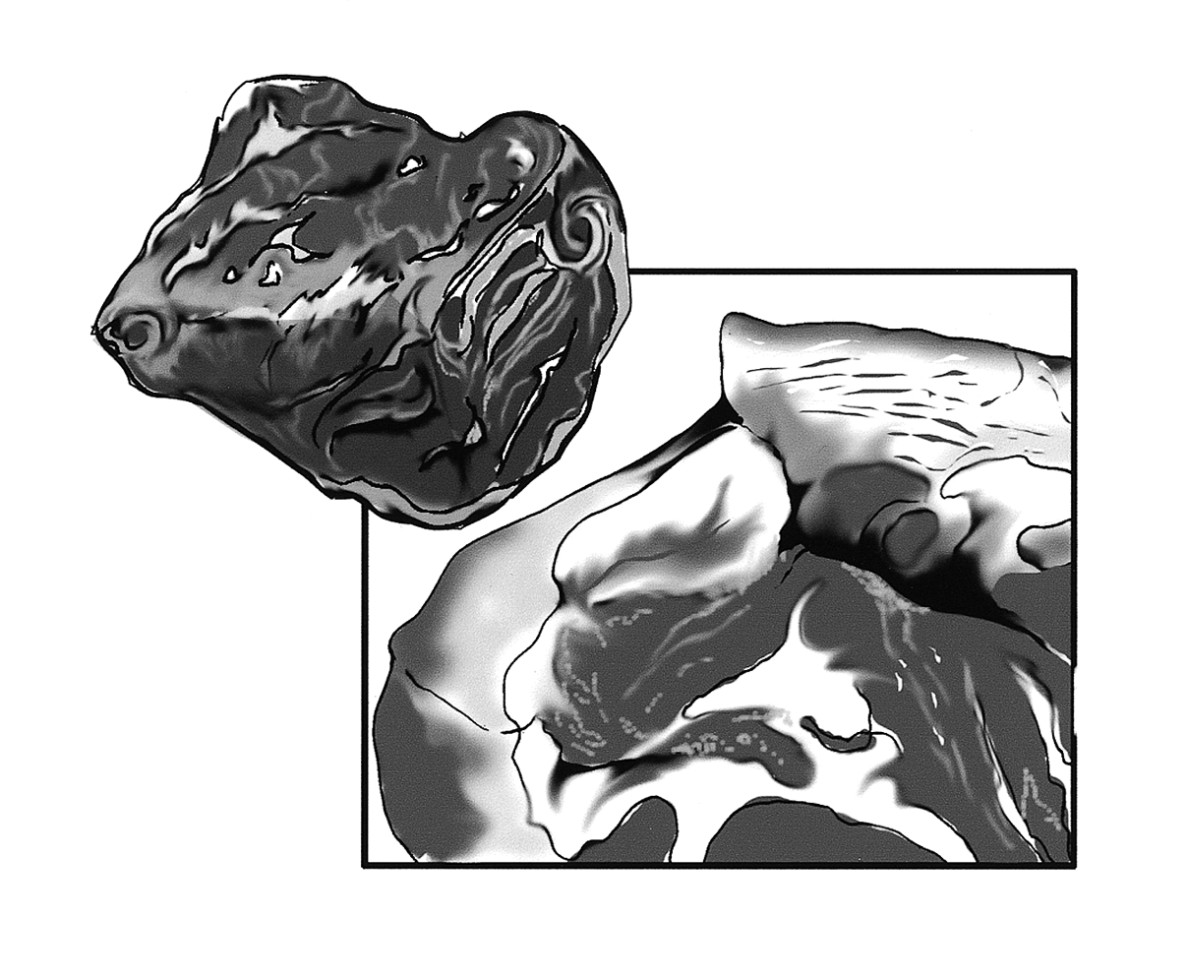
The grain on beef brisket runs in two directions, so separate the cuts before you slice the meat. Carve on the bias across the grain into thin slices no thicker than a pencil. Figure 4-5 shows you how to slice brisket — an extra-critical point given the texture of brisket.
For pulled chicken, dig into the cooled bird with hands or forks, tearing the meat from the bones. Of course, you can also serve the whole pieces.
|
Figure 4-5: Cutting across brisket’s grain is important for getting the most appealing texture. |

|