Let's add images into our project by performing the following:
- Select the Assets.xcassets folder in the NAVIGATOR PANEL:

- Hit the Delete or Backspace button, and you will get the following message:

- Select Move to Trash.
- Open the project's assets folder that you downloaded from Packt's website or GitHub. Open Chapter_07. Drag the Assets.xcassets folder into your project in the Navigator Panel:

- When you drop the folder, you will get the following message:

- Make sure that both Copy items if needed and Create groups are selected. Then, hit Finish.
If you open the Assets.xcassets folder, you will now see all the assets for your entire project:

When you explore the assets, you will notice that we will be using both PNGs and PDFs.
Using PDFs allows us to support multiple device resolutions with only one image. Therefore, Xcode can handle supplying assets for all resolutions.
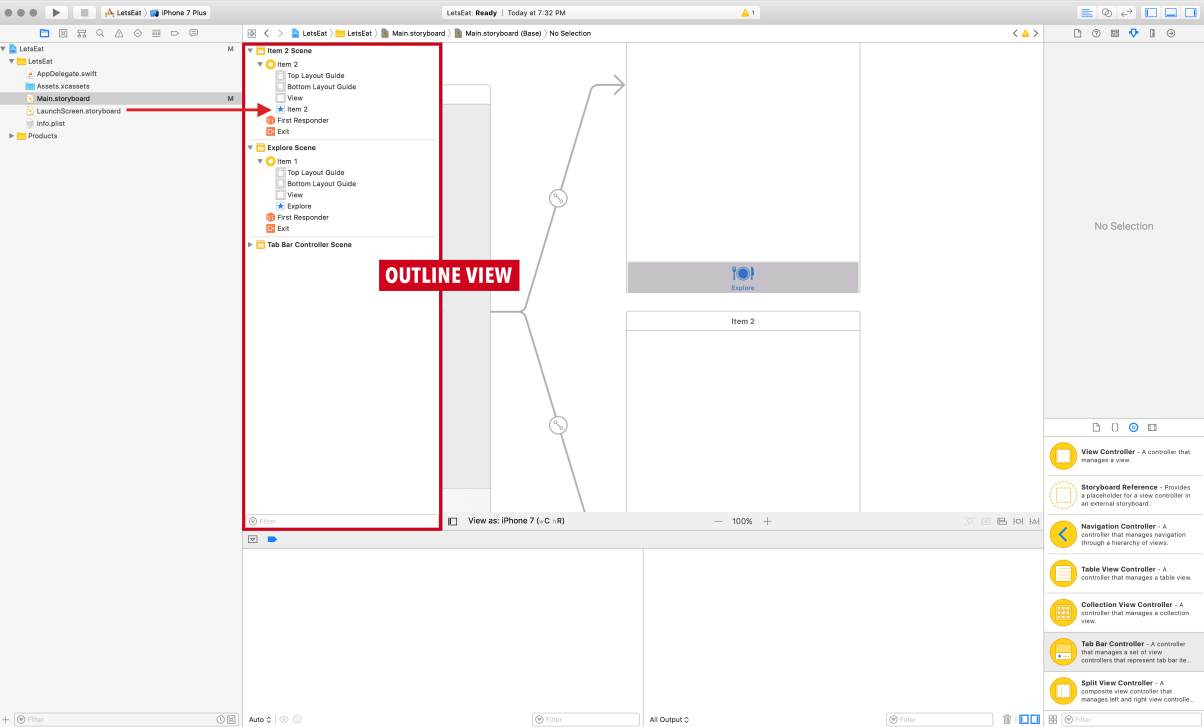
- Select Main.storyboard again, and, in the Outline view, select both disclosure arrows for Item 1 Scene and Item 2 Scene, to have them face downwards:

- Select both disclosure arrows for Item 1 under Item 1 Scene and Item 2 under Item 2 Scene. Both should be downward-facing:

- Select Item 1 with the blue star to the left of it, and then select the Attributes inspector in the UTILITIES PANEL:

- In the panel, use the following values to update your first tab icons:
-
- In the Tab Bar Item, enter the following details:
- Badge: Leave this field blank
- System Item: Select Custom from the drop-down list
- Selected Image: icon-explore-on
- Title Position: Select Default Position from the drop-down list
- In the Tab Bar Item, enter the following details:
-
- In the Bar Item, enter the following details:
- Title: Type Explore in this field
- Image: icon-explore-off
- Tag: Enter 0 in this field
- Enabled: This checkbox should be checked
- In the Bar Item, enter the following details:
- Select Item 2 with the blue star to the left of it in the OUTLINE VIEW, and the Attributes inspector should already be open:
- Add the following to the panel:
-
- In the Tab Bar Item, enter the following details:
- Badge: Leave this field blank
- System Item: Select Custom from the drop-down list
- Selected Image: icon-map-on
- Title Position: Select Default Position from the drop-down list
- In the Bar Item, enter the following details:
- Title: Type Map in this field
- Image: icon-map-off
- Tag: Enter 0 in this field
- Enabled: This checkbox should be checked
- In the Tab Bar Item, enter the following details:
- Run the project by hitting the play button (or use command + R) to see where we are:
As you may have noticed, this screen does not look like an app. Since we are building a Tab Bar Controller from scratch, we need to add an entry point. So, close the simulator, and continue with the steps.
- Select Main.storyboard again in the OUTLINE VIEW, and make sure that the disclosure arrow is down for Tab Bar Controller Scene:

- Select Tab Bar Controller under Tab Bar Controller Scene, and, in the UTILITIES PANEL, make sure that the Attributes inspector is selected:

- Under the View Controller section, you will need to check the box for Is Initial View Controller:

- Once you set the initial View Controller, there will be an arrow pointing to the Tab Bar Controller. This arrow signifies the entry point of our app:

- Let's rerun the project by hitting the play button (or use command + R):

Perfect! Now, with our basic structure established, we can start adding more specific elements to our views.