To add custom UI to our notifications, we need to add an extension. Let's get started by doing the following:
- In the Navigator panel, select the Project navigator and then your project.
- At the bottom of the TARGETS area, click the + button.
- Select Notification Content Extension under Application Extension and then click Next:

- In the options screen that appears, set Product Name to LetsEatNotificationExtension and click Finish.
Now that our extension has been created, we need to be able to use it:
- Open the info.plist file in the LetsEatNotificationExtension folder.
- Tap the NSExtension disclosure arrow to open up that key.
- Tap the disclosure arrow to open NSExtensionAttributes, under which you can see UNNotificationExtensionCategory:

This category is the category of the notification we set previously.
- Update myNotificationCategory to reservationCategory.
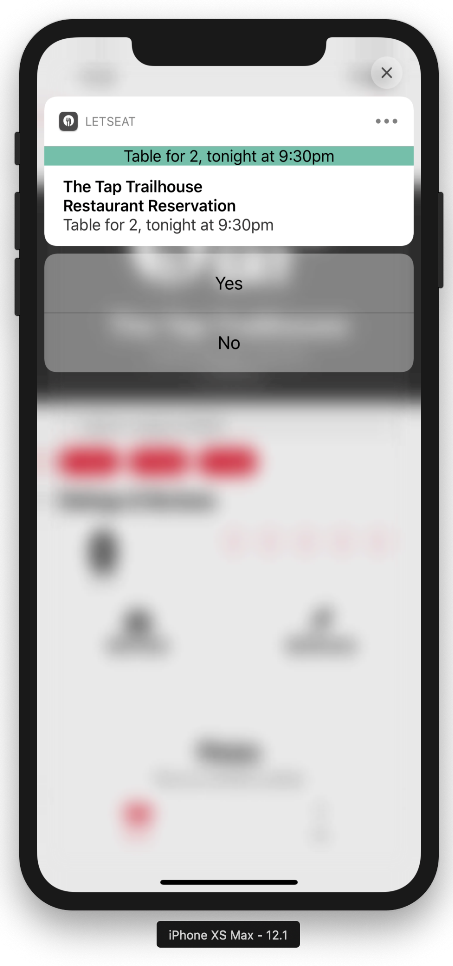
Save the file and switch your target back to the Let's Eat app. Build and run the project by hitting the Play button (or using command + R). This time, instead of seeing our custom image, we now have the following:
You might have noticed something slightly off when you pulled down on the notification. The notification starts out large and then shrinks down. Inside of your Info.plist file, there is a property, UNNotificationExtensionInitialContentSizeRatio, that is currently set to 1. Changing it to 0.25 makes this less noticeable.
Currently, this custom notification is showing us the custom and default content together. We can fix this by returning to our Info.plist inside of LetsEatContentExtension.
Inside of NSExtensionAttributes, add a new item, called UNNotificationExtensionDefaultContentHidden, and set the type as Boolean and the value to YES:

Save the file and build and run the project by hitting the Play button (or using command + R). Once you pull down on the notification, you will see that the default content is hidden:

You can now update MainInterface.storyboard inside of your LetsEatContentExtension folder. In iOS 12, you can now add custom buttons into your storyboard for users to interact with. This is outside the scope of this book, but we have covered a lot of what you need already.