The data model is where you create your app's model objects and their properties. For our project, we only need to create one model object, called Review. Let's create a managed object model now:
- In the Navigator panel, right-click on the Misc folder and create a new group, called Core Data.
- Next, right-click this new Core Data folder and click New File.
- Inside the Choose a template for your new file screen, select iOS at the top and then scroll down to the Core Data section. From there, select Data Model. Then, hit Next:

- Name the file LetsEatModel and click Create.
- Click Add Entity in the screen that appears:

Then, in the bottom-right corner of the new screen, change the Editor Style to Graph Style:

In the Graph Style, double-click on Entity in the box in the middle of the graph to change your entity's name:

- Update the text to say Review and then hit Enter.
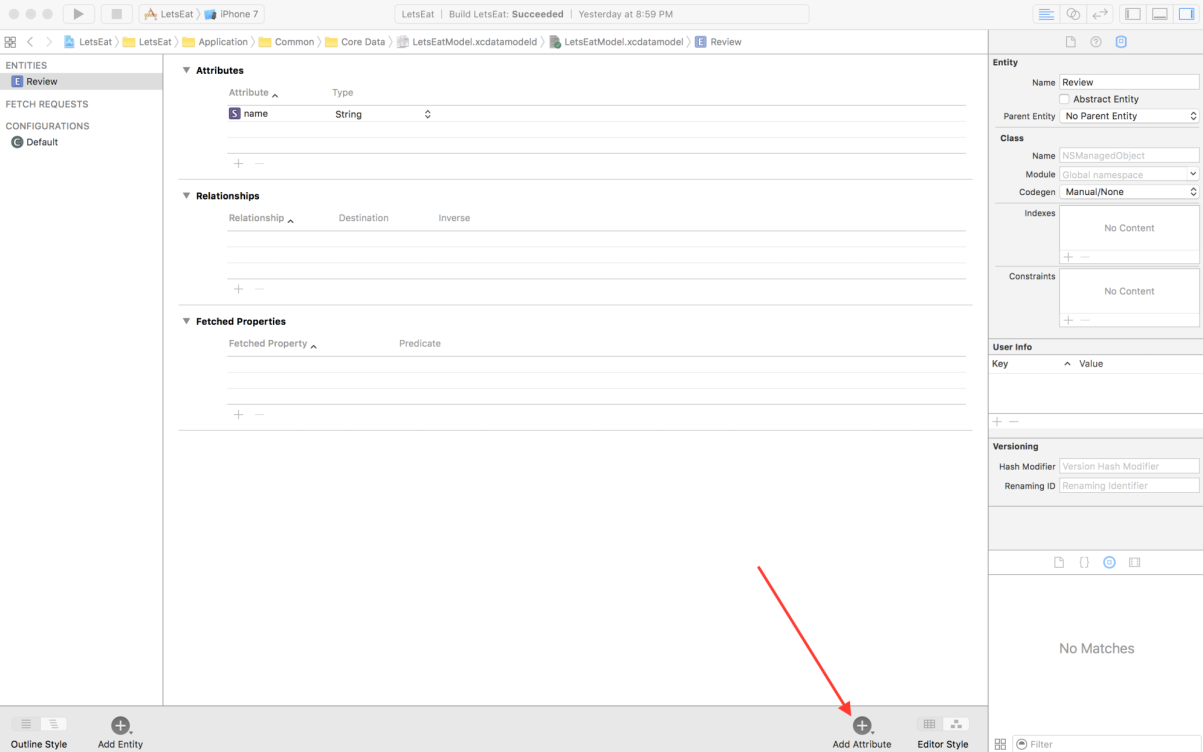
- Now that we have our first entity created, let's add our first attribute. Select Review Entity and click Add Attribute in the bottom-right corner of the screen. The word attribute appears under Attributes in the box in the middle of the screen:

- You will see that Xcode shows an error. The reason for this error is that we created an attribute without giving it a type. Let's do that now.
- Select the word attribute and open your Utilities panel. You will only see three icons: the File inspector, the Quick Help inspector, and the Data Model inspector.
- Select the last icon, the Data Model inspector and, under Attribute, click on the dropdown for Attribute Type and change it from Undefined to String. The error should now disappear.
- Next, under Attribute in the Data Model inspector, change the Name from attribute to name and hit Enter.
Your first attribute should now look as follows:

We have created our first attribute in the Graph Style and now need to set up the rest of our attributes, which we will do in the Table Style:
- Switch the Editor Style toTable Style and then click Add Attribute.
- Update the attribute to date and set its data type to Date. You do not have to do anything in the Data Model inspector for this attribute.
- Next, select the + button in the Attributes section of the Table Style screen under the two attributes we just added.
- Update this third attribute to customerReview and set its data type to String.
- Next, add a fourth attribute, named rating, with a data type of Float.
- Now, add a fifth attribute, named restaurantID, with a data type of Integer 32. When we save reviews, we save them with their restaurantID. Whenever we go to a restaurant detail page, we get all of the reviews just for that specific restaurant and then display them. If we do not have any reviews, then we display a default message.
- Now, add a sixth attribute, named title, with a data type of String.
- Lastly, add a seventh attribute, named uuid, with a data type of String and, under Attribute in the Data Model inspector, uncheck the Optional checkbox. This attribute is our unique ID for each review.
Your Attributes table should now look like the following:
Now that we have our attributes set, we need to do a few more things before we start working on some code.