Chapter 2
Caring for Your eReader
In This Chapter
![]() Powering up
Powering up
![]() Operating the system
Operating the system
![]() Pushing buttons, tapping keys
Pushing buttons, tapping keys
An old-fashioned printed book is ready right off the shelf. Open it up, take a whiff of that smell, and turn on your eyes. That’s all there is to do. Okay, maybe you need to turn on a light if it’s after 8:00, but you get the point: An old-style book is good to go immediately.
Not so an electronic reader. An eReader needs four things to change from being a paperweight to a highly usable device:
 Electrical power (aka a battery)
A means of communication
Memory or storage
An operating system
If you’re reading this on your eReader, you’ve got these things — but you can finesse some of them a bit. Read on.
Batterying Down the Hatches
All current eReaders and tablets come with rechargeable batteries. Depending on the design of your particular model and how you use it, the battery may provide several hours to several days of use before you need to connect it to a wall outlet.
 Your battery has needs too, you know:
Plan to recharge for typically six to eight hours.
Respect the battery’s learning curve. Read the instructions that came with your eReader for how to get the most from your batteries. Some batteries have a “learning curve” that involves fully discharging the battery a few times before recharging, while others are meant to be plugged into the wall anytime it’s convenient.
 Don’t replace the battery yourself. Many current eReaders and tablets don’t let you replace the internal battery; the devices are so tightly packed with tiny electronic parts that it requires the special tools and training of a technician. The good news is that the supplied batteries should be good for a year or two (or more) of regular use, which may be about as long as you will want to use your reading device before upgrading to the next great thing.
Saving it up
 To save power, follow these tips:
Dial down the screen. Adjust the brightness on an LCD screen. Having it at the highest setting uses the most power. (Some advanced models can gauge the brightness of the room, and turn down the lamp.)
Put the tablet into a sleep mode. Again, make a choice that works best for you. When a tablet “goes to sleep,” it makes a copy of whatever was on the screen and can quickly come back to wakefulness with the touch of a button or the swipe of a finger.
Go wireless-less. Turn off the wireless connection (WiFi, Bluetooth, or cellular link) anytime you don’t need it. These radios can consume a large amount of power. You can manually disable wireless or choose the airplane mode if one is available.
Making like a bull and charging it
You’ve got a couple ways to recharge your battery. Well, not your battery — your eReader’s battery. Recharge your own battery any way you like. An AC adapter or a USB cable goes a long way toward getting you going an even longer way — away from the house.
AC adapter
An AC adapter (see Figure 2-1) is the fastest way to recharge an eReader’s battery. Keep these things in mind:
Use the adapter that’s provided by the maker of your device. Or use another company’s equivalent certified to match exactly the needs of your electronic unit. Sending the wrong voltage or insufficient or excessive amperage may damage the battery or the eReader or tablet itself.
You can play, but you will pay. In general, while recharging you can also read, buy books, go to the web, or play games. However, doing so slows down the recharge process a bit.
You can’t get too much juice. You can leave it attached to a power source overnight or even longer.
Turn it on. Or maybe leave it off. Read the specific instructions for your device to understand whether it needs to be turned on during the recharging process or whether it can (or must) be turned off.
Figure 2-1: This AC adapter has nothing to do with your air conditioning.

USB cable
USB (an acronym for Universal Serial Port) is a highly flexible means of communication that has all but taken over most wired connections between computers and computer-like devices. USB allows you to quickly transfer data between devices (phone to eReader, eReader to computer, and so on) and can also charge a device.
Using the USB cable instead of an AC adapter may be more convenient in some situations, but generally takes longer to fill up the battery. Also, if you’re drawing power from a laptop to recharge your eReader or tablet, you’ll have to recharge the laptop or run it from an AC power source.
All USB cables are the same electrically, but come in a variety of possible connectors. On most cables, this is the way things shake out:
The end that attaches to a computer or certain other devices: A large, rectangular connector (about half an inch in width with a noticeable white positioning tab) is called a USB Standard Type A plug.
The end that attaches to the eReader or tablet: This plug is usually smaller and has a sort of trapezoid shape (a long top, a shorter bottom, and two angled sides with a few extra positioning bumps here and there). The most common form of small-end USB connector is a Micro USB B, although some devices use a slightly larger Mini USB B. See Figure 2-2.
Figure 2-2: A USB cord: Standard A to Mini B.

Take your time and carefully insert the plug at each end; if it doesn’t attach easily it may be upside-down or the wrong size. Forcing a plug into the wrong port can damage your computer or eReader.
When you get a new device and a new cable, take about two inches of sticky tape and fold it over the cable somewhere near one of the connectors; this creates a label. Use a pen and mark the label so you know with which device it goes: NOOK to PC, or PlayBook to Mac, or whatever makes sense to you. Trust me, this will save you much time and perhaps a bit of aggravation someday.
Reading the battery indicators
By no means are they the most interesting reading, but the battery indicators do offer important information, and you should consult them regularly. Since where they appear depends on your eReader model, check your instruction manual.
In general, most eReaders have some sort of status bar that has an icon that shows the amount of remaining power. One commonly used pictogram is a battery-like icon.
Some readers or tablets may use a lightning bolt or even the word “Battery.” Some — many, in fact — use the icons shown in Table 2-1.
Table 2-1 Battery Indicators
|
What You See |
Means the eReader Is |
|
|
Fully charged. |
|
|
Has half its power. |
|
|
Plug it in, plug it! Your reading time is very short. |


When you select that icon using directional keys or by tapping that icon, you may see the battery level indicated as a percentage: 100 means fully full, which is a state that doesn’t last very long because the device will begin using power as soon as you turn it on, 50 means half full, and very small numbers mean time is short. (You’ll probably never see a 0 because that means the battery is fully discharged and when that happens it doesn’t even have the strength to tell you it’s empty.)
You can look two places to confirm that your eReader or tablet is being recharged:
The status bar or menu. You should see something like a lightning bolt, a + sign, or a pulsing indicator that tells you power is flowing in. Some devices also give a number, showing the battery level on a scale from 0 to 100. See Figure 2-3.
An indicator light. It glows or flashes to tell you when the battery is being recharged. Depending on the design, the light either turns off or changes from red or yellow to green (or some other color scheme) to indicate charging progress.
Figure 2-3: Not a 67% chance of rain. You’re almost done recharging.

Battery’s Connected to the Power Mode
As noted, one or another eReader or tablet may differ slightly in the details. In general terms, your device is going to be in one of four power states:
Off
On
Airplane mode
Sleep mode
Off
The reading screen and the touchscreen (if there is one) aren’t available and won’t respond to any touches or pushes, no matter how you hold your tongue. However, even when an eReader or tablet is off, the books you’ve bought (or obtained from libraries or personal sources) are on the virtual shelf for you.
 Be sure to read the instructions that come with your device to learn any particular details about how to turn it on or off. In general, you need to press and hold down a power button for a few seconds.
Read the instruction manual to find out if your device needs to be turned on in order to be recharged; some makers require this somewhat counter-intuitive scheme in order to make use of a high-tech battery management system.
On
The reading screen is ready to display a book or other content and the touchscreen (if included) is yearning for your touch. On an LCD tablet, the backlight for the screen is usually illuminated when the device is first turned on, but will go dark (to save battery power) if the system does not detect your touch to the page controls or menus from time to time; you should be able to adjust the screen backlight timeout from the menu of the device.
When a device is turned on, you will be able to use WiFi or Bluetooth wireless communication, a cellular radio, or direct cable connection to a computer; you may need to turn a particular feature on.
Airplane
 When you’re in Airplane mode, you can perform most functions (including read a book) except connect by WiFi, Bluetooth, or cellular radio. (I explain the purpose and use of these forms of connection later in this chapter.) When you aren’t connected, you can’t do the following:
Download content from your account.
Buy new books or periodicals.
Go online.
 The purpose of Airplane mode is to make airlines happy. There’s a very slight, tiny, almost imperceptible threat to the operations of a modern airliner posed by devices that transmit their own radio waves. These devices include cell phones, walkie-talkies, eReaders, tablets, and remote-control cars (for racing in the aisles). Therefore, many eReaders have an Airplane mode, which turns off all radio communication but leaves other functions active. If your device lacks this particular detail, you can manually turn off WiFi, Bluetooth, or cellular communication.
Read the instructions provided by the maker of your eReader to find out how to turn on Airplane mode. On some units, the modes are changed from the onscreen menu; others may have switches or special menus that appear when you press a particular button.
Sleep
When you’ve ignored your eReader for a certain amount of time, it will “go to sleep,” so to speak. To save power, the reading screen, the touchscreen, and the wireless radio system are turned off. The reading screen may show a screensaver or go completely blank.
Depending on your model (consult your manual), you have to do one of the following to wake your device:
Press one of its page-turn buttons.
Swipe across the touchscreen.
Press the power button briefly and release it.
Whatever the particular method, when it wakes, the eReader usually returns to the book you were reading when it (or you) went to sleep.
In general, letting it sleep (instead of turning it off) has several advantages:
The eReader becomes useful almost immediately, rather than taking 15 seconds to reload.
If you’re set up to automatically download publications (or you placed a pre-release order for a new book), your eReader will wake up by itself at an appropriate time to download new content and present it to you at breakfast. (Some advanced systems may check for updates anytime your device is connected to the Internet. Others may require you to visit a particular website and look for updates. An in-between method involves registering your device with the manufacturer and giving an email address. That way the developer can send you email to notify you about updates.)
Pushing Its Buttons and Keys
It’s easy enough to forget that beneath the slim covers of your eReader or tablet is a pretty capable little computer. In fact, even the most basic reading device has more processing power than the computer that guided astronauts to the moon and is considerably more capable than a fully equipped personal computer of a decade ago and is sold at a fraction of the price.
Because a computer lives inside, you get to adjust the way your eReader reacts to your button presses (or, on a touchscreen model, the way it responds to swipes, pinches, flicks, and other gestures). On most devices (and in eBook files), you can also change the type style and size. You may also be able to adjust the background color (on an LCD tablet). Try doing that with a paper-and-ink book. Go ahead; I’ll wait. Perhaps best of all, after an eReader leaves the factory, the maker can fix any bugs in its operating system or add features in an upgrade. This can be done wirelessly through an Internet or WiFi or cellular connection.
Read the instruction manual for your particular device to see how fixes or updates are supplied and installed. And then check for updates regularly.
Some people can remember the first computers — or at least how they were depicted in science fiction movies. Leaving aside the fact that these devices were the size of a truck and as speedy as a turtle, they came with all sorts of impressive controls: flashing lights, rows of dials, dozens of switches, tens of buttons, and huge clacking keyboards. A modern computer (that includes eReaders) belies its internal complexity and wide range of features within a case that typically has only one light and perhaps four tiny buttons. Most eReaders don’t even offer a physical keyboard, but a virtual, onscreen version.
eReader buttons
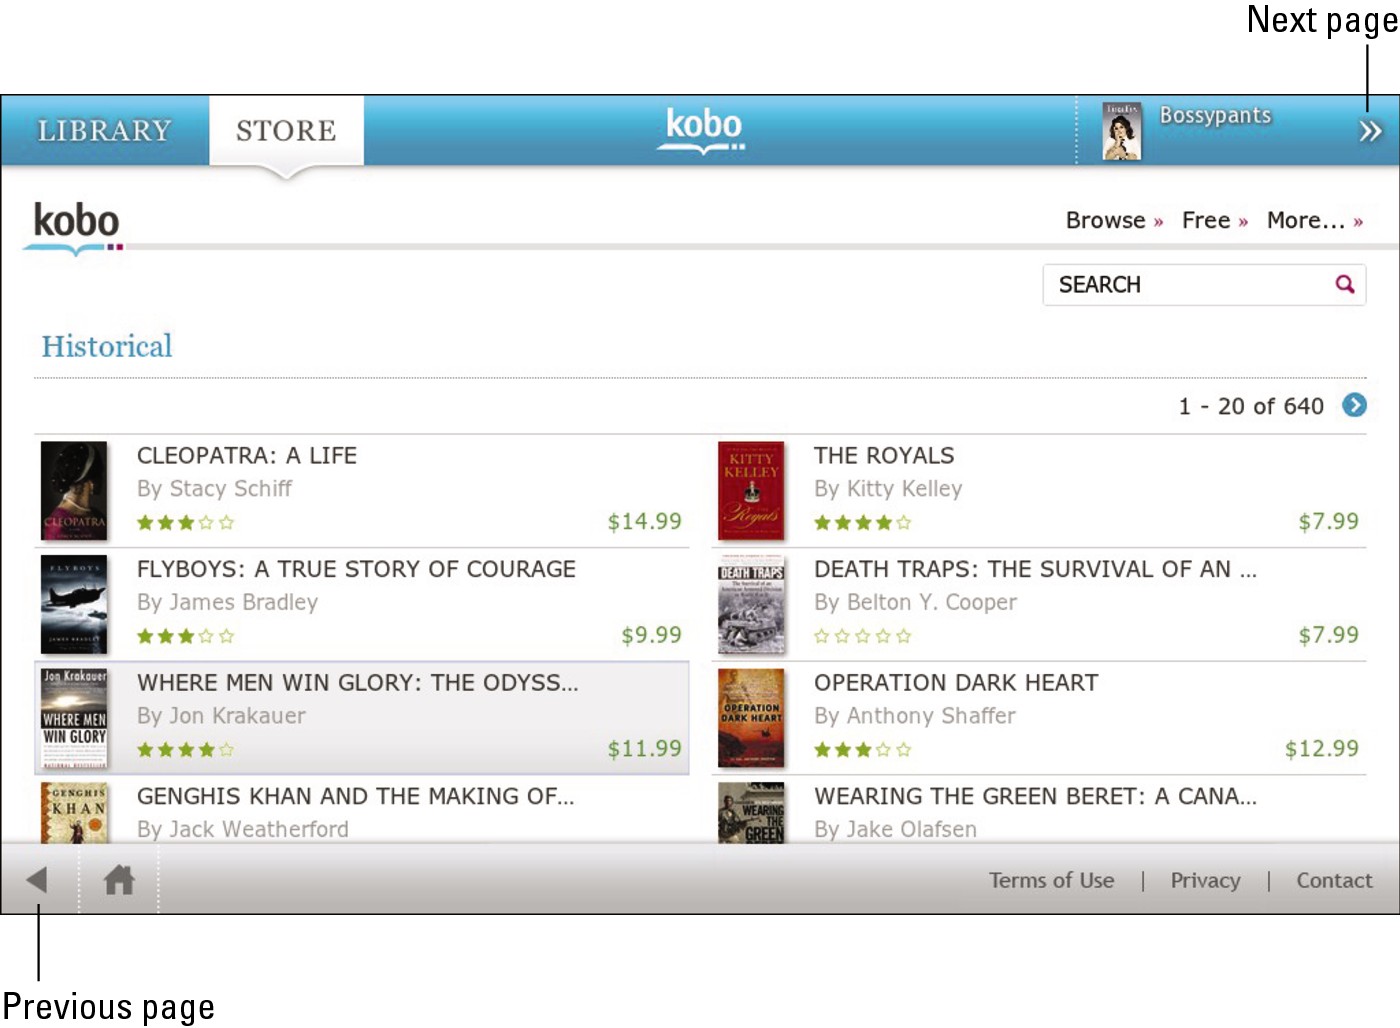
Most single-purpose eReaders (not tablets) have a simple set of buttons. When you want to get something done with a button, make sure you press and hold it for a second or two. Many eReaders also have what are called soft buttons, which are onscreen menu choices. In the bottom-left corner of Figure 2-4 is a button for previous page. Screens and buttons vary from device to device and on applications, but they’re usually in a logical place. On devices with touchscreens, touch or tap the virtual button to get things done.
A virtual button exists onscreen; it isn’t a physical button. A soft button is a virtual button that can change its label or purpose as needed. All soft buttons are virtual, but only certain virtual buttons are soft.
Figure 2-4: Soft buttons appear on a touchscreen. This Kobo has page forward and page backward buttons.
Power button
This button is usually tucked away on the top or sides of the device. Push the power button to
Turn the reader on when it is off.
Restore it from Sleep mode.
Return it to Sleep mode.
Turn off the device completely.
Reset the device (but don’t erase memory).
You can put many a device to sleep, restore it from sleep, and even reset by making choices from the built-in menu screens.
Page forward and page backward
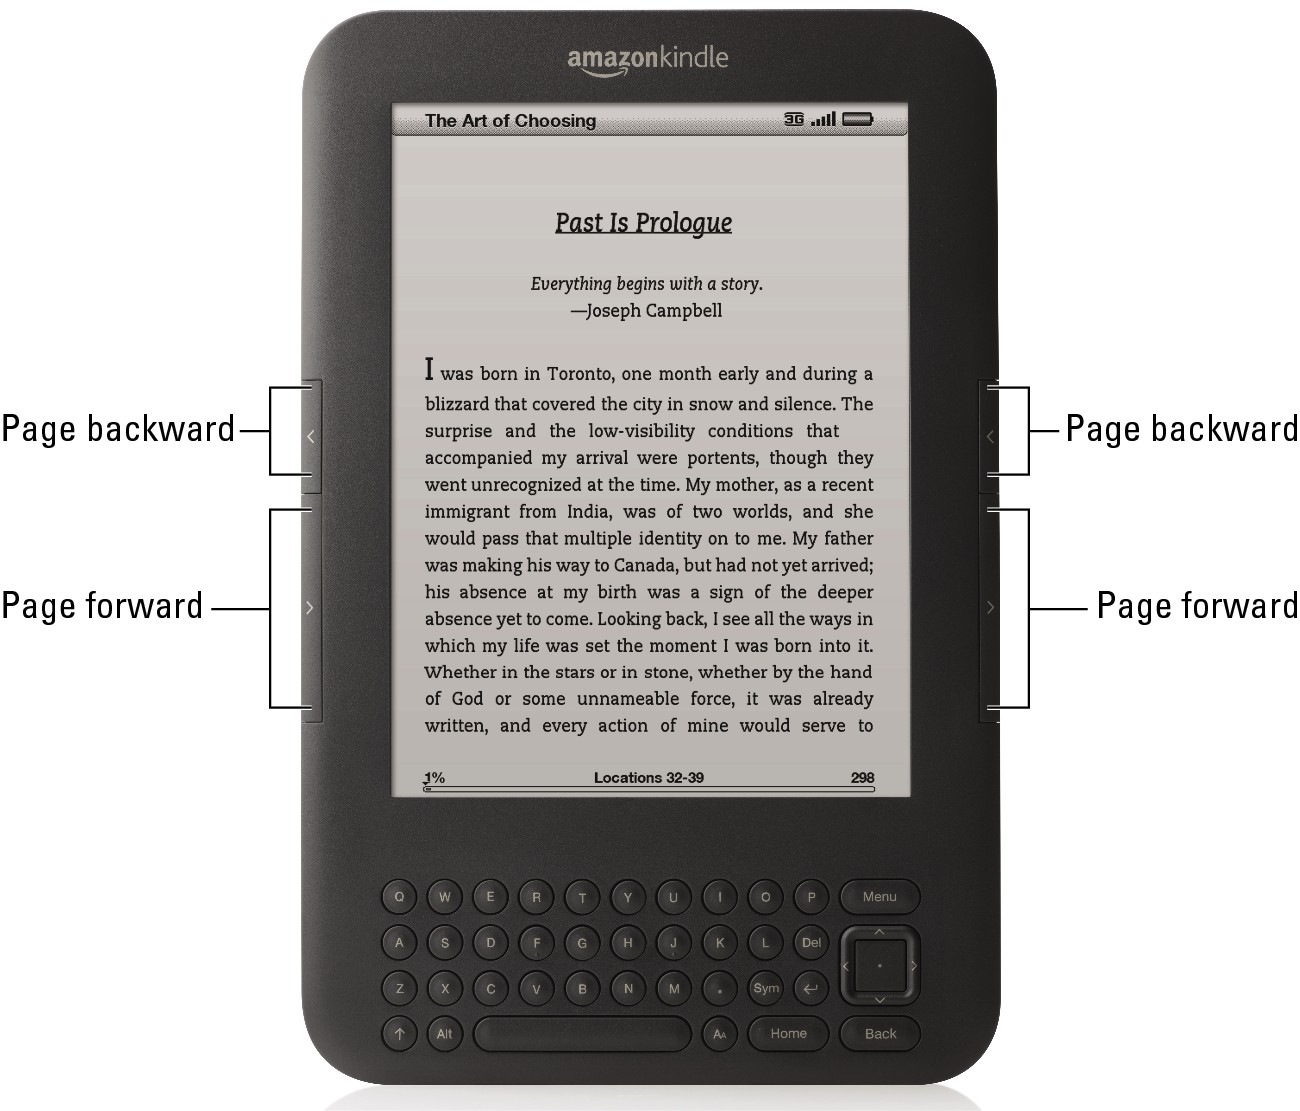
You’ve probably already used these buttons to get where you are today. (Would you like to thank them and all the little people as well?) These buttons, on the front of the device (alongside the reading screen) do exactly what their names suggest. They send you forward or backward in books (and in certain library and shopping screens that extend across more than one page). In most designs, you press the right button to go to the next page; you press the left button to go back a page. The Kindle is shown in Figure 2-5. It has both buttons on both sides, because Lefties are people, too.
Menu button
Most eReaders have a button that takes you to a central control panel where you can select from submenus. From the main menu you can adjust the words’ size and style; you also can adjust some documents so the words are justified (with test spread evenly across each line).
The Menu button is, on some eReaders, called a Shop button. The button connects you by WiFi or cellular radio link to the bookstore that’s associated with your device.
Home button
On some eReaders, and on most tablets, a home button takes you away from the book page or website you’re reading to the main control page for the device. Think of home as a way to quickly get out of where you were last. Depending on the device, the home button lets you quickly open a new book, adjust the screen, or start a new task.
Figure 2-5: The Kindle’s page forward and page backward buttons are pointed out here.
Directional pad
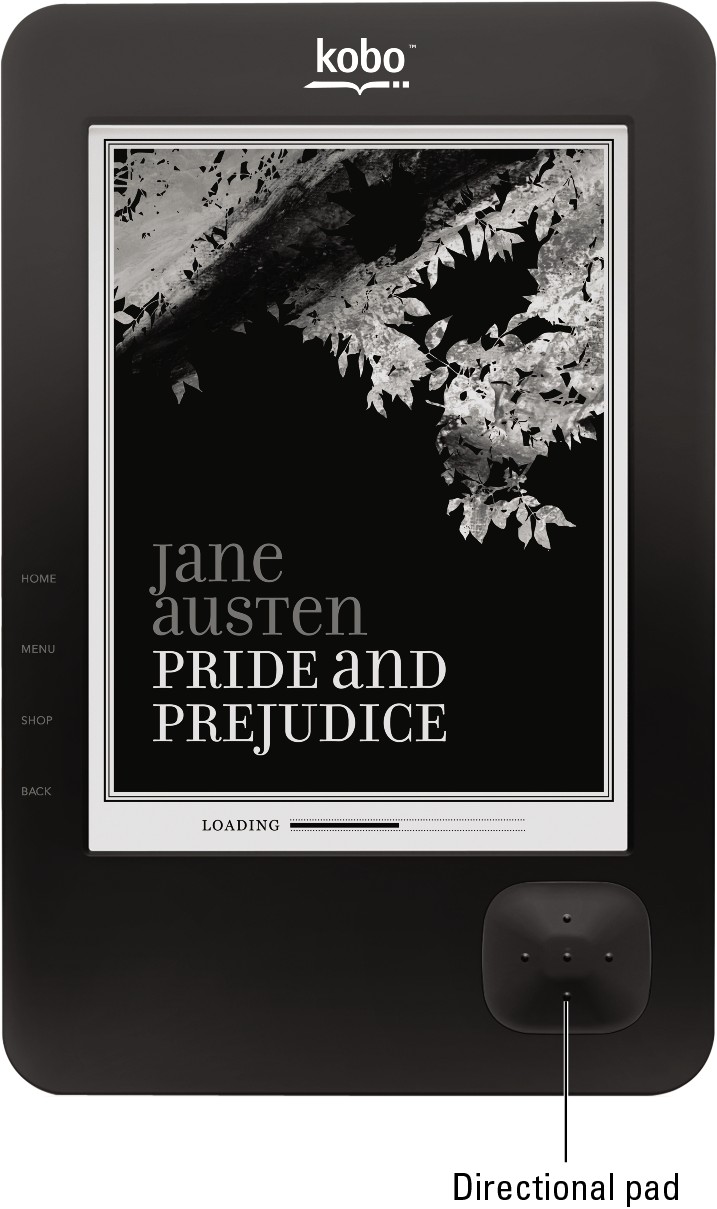
Some eReaders let you move through various menus by pressing one or another part of the directional pad (d-pad). The pad responds by moving an onscreen cursor up when you press the portion at the top and down when you press the bottom. (And I bet you’ve figured out that depressing the pad leftward moves the cursor in that direction and rightward the other way.) See Figure 2-6 for a look at the Kobo’s directional pad.
Figure 2-6: Your eReader’s directional pad may resemble this one.
Touchscreen and tablet buttons
Some eReaders (like the NOOK Simple Touch) and nearly all tablet computers have a touchscreen, which lets you touch, tap, or move things onscreen with one or more of your fingers. Touchscreen eReaders don’t need as many buttons. For example, the BlackBerry PlayBook has actual power switch, volume, and play/pause buttons. Everything else is handled with virtual (soft) buttons that appear on the screen when you need them. You can swipe on a touchscreen to turn the page, pull down a menu from the top, and or go to the store to buy stuff. No need for a directional pad, because the touchscreen itself can read the motion of your fingers.
On a menu-based system in basic eReader devices, some options may be grayed out (shown in gray instead of a dark black). That means you can’t choose the option. This might be because it isn’t available in the particular document (for example, changing the font in a PDF file). It might be unavailable because an operation is in progress. In that case, the option will change from gray to black when it’s available. More advanced tablets may reduce the chances of confusion by simply displaying only those options currently available.
Keyboards, real and virtual
One way or another, you need to communicate characters and numbers to your eReaders: to type a book title you want to search for, to supply your name and credit card number to buy something, or to perform some of the more advanced email or messaging features available on certain devices. Here you run into a basic conflict with the laws of physical dimensions. The keyboard on a laptop computer — already a bit squeezed for many users — is roughly twice the size of an eReader’s keyboard.
It won’t be long before nearly all tablets and eReaders include voice recognition software; it’s already offered for certain functions on some tablets, like the Samsung Galaxy Tab. Also in the offing: tablets that project a holographic image of a keyboard, allowing you to hunt and peck words and names on keys made up only of light beams.
The Amazon Kindle has a tiny keyboard below the reading screen with teensy little keys you can tap to spell a word or a name. That works well for some people, with the exception of those of us with large hands. But the most common solution for newer eReaders and tablets is to display an onscreen virtual keyboard. At the right moment — when you go to a screen that requires typing — the keyboard appears.
If your eReader has a d-pad, move the cursor and then select a letter by pressing in the middle of the pad.
If your eReader has a touchscreen, type on the virtual keyboard as you would a real, live, crumb-ridden one.
The basic keyboard for most eReaders or tablets is a recognizable version of the familiar QWERTY device that most people have learned to master to some degree or another. The keyboard from an advanced BlackBerry PlayBook tablet is shown in Figure 2-7.
Figure 2-7: This virtual onscreen keyboard is shown on the screen of a BlackBerry PlayBook.
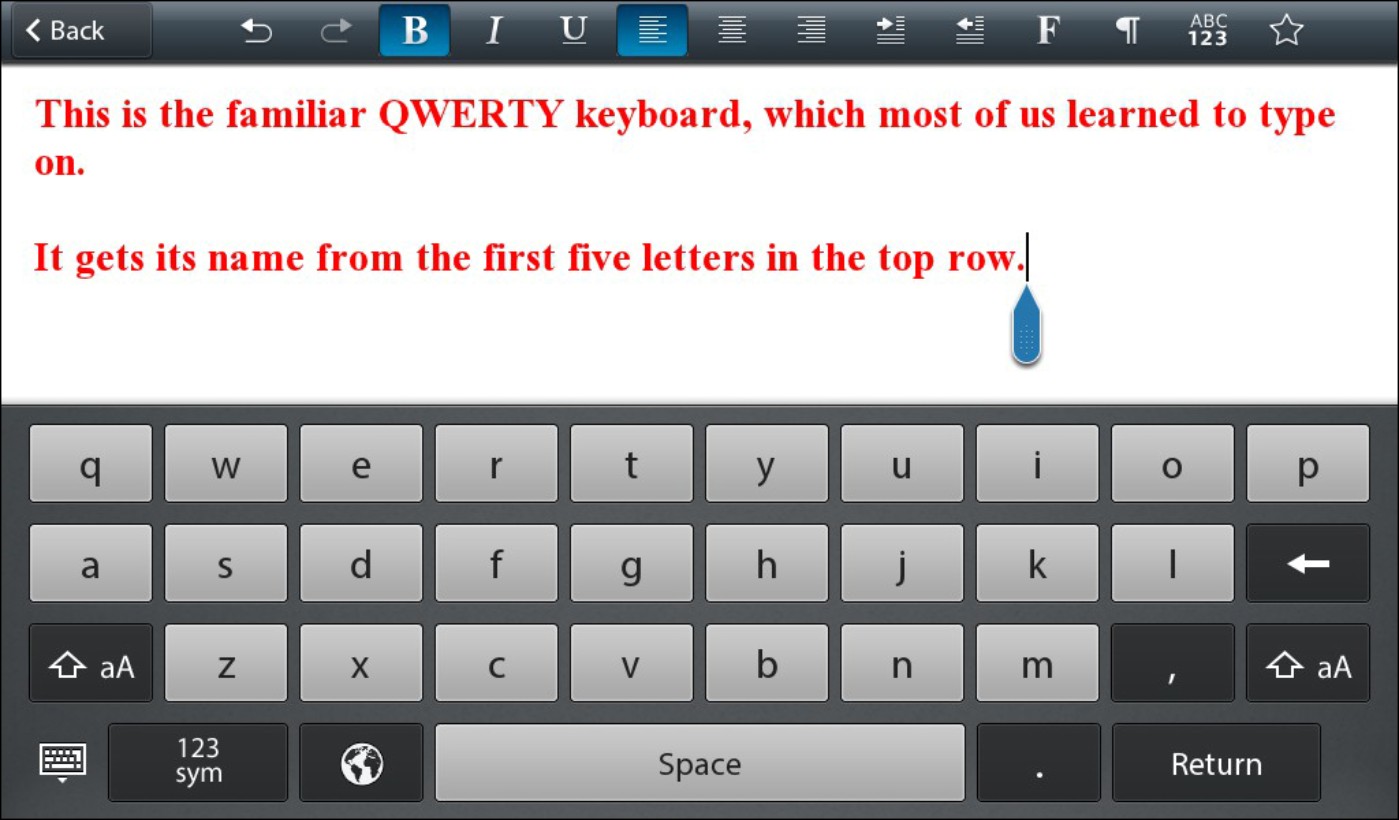
I am using the BlackBerry PlayBook tablet as an example of the sort of virtual onscreen keyboards you will find on many advanced tablets. The particular set of special symbols and foreign character sets may differ slightly on devices like the Apple iPad or the Samsung Galaxy Tab.
Use the following as a guideline if you don’t have the PlayBook:
To capitalize a letter: Tap the aA button.
To insert a number or a common symbol: Tap the 123SYM button.
Making Some Smooth Moves
If your eReader has a touchscreen, you can accomplish just about anything using one or (sometimes) two fingers. They’re called gestures. This section introduces the basic gestures. Consult your device’s instruction manual for any unusual commands. I’m not aware of any rude gestures. . .
Swipe
Touch the screen and keep touching it as you slide your finger up or down, left or right. This swipe can do things such as
Scroll through a list on the screen.
Move a web page one direction or another within the browser.
Spin through a stack of applications or icons.
Pinch
Pinch the screen with the pointing finger and thumb of one hand and pinch together or apart. (No rule says you must use your pointing finger and thumb, or that they have to be from the same hand. If you can do this sort of digital gymnastics with other fingers, or perhaps your toes, more power to you.) You can do the following with this gesture:
Zoom in or out of a web page.
Enlarge or reduce the size of a picture of other content.
Here’s a pinch in:

And here’s a pinch out:

Drag
To move an item from one place to another, touch it and keep your finger on the item; then slide your finger to where you want the item to be. You can drag diagonally, up, down, left, or right. When the item is where you want it to be, simply lift your finger from the screen.