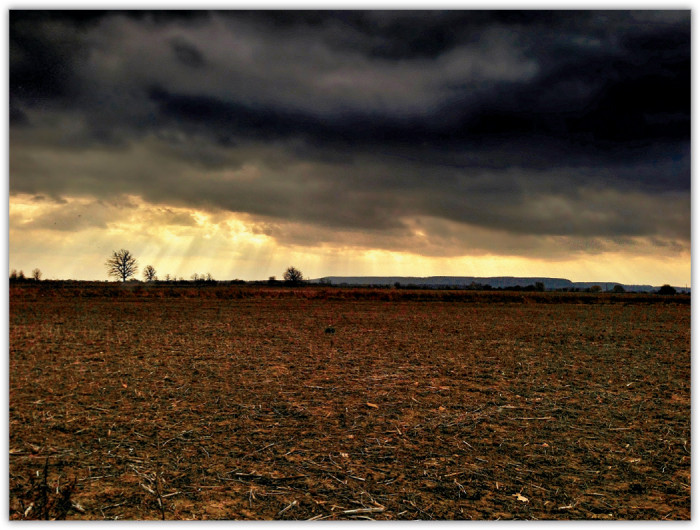

I Offered Up My Innocence and Got Repaid with Corn
The goal in this tutorial is to create an image with increased dynamic range without losing detail. You’ll learn how to selectively sharpen an image, heighten saturation and contrast, darken a sky without sacrificing image quality, and utilize multiple exposures to selectively achieve effects in isolated portions of an image.
 Snapseed
 Filterstorm
 LensLight
 Camera+
Several years ago I moved from the city in which I had spent the first 37 years of my life. My wife and I wanted to raise our boys away from the concrete jungle and instill in them an appreciation of nature on a daily basis. We also wished for the serenity of small-town life. So we moved to a little town nestled against the Niagara Escarpment about 45 minutes west of the city. As a landscape photographer, it was a dream come true. My daily routine now involves driving by cornfields and horse farms and through the hills and valleys of rural Ontario. This image was shot about an hour before sunset just as a storm front was colliding with what had been a lovely, sunny afternoon. The juxtaposition between the impending rainstorm and the last of the golden sun caught my eye, and I pulled the car over and walked to the edge of a harvested cornfield to take some photos.
 Step 1: Increasing Dynamic Range and Saturation, and Adjusting White Balance
To increase the detail of the harvested cornfield and brighten the area where the clouds break and the trees stand, I brought the image into Snapseed and used the Ambiance adjustment located under the Tune Image menu. I increased the ambience to +55 |1|. It’s important not to go too far or the colors begin to take on unrealistic hues. I also increased the White Balance under the same menu, just slightly, to give the image a warmer cast and bring out the detail in the red scale part of the image.
|1|
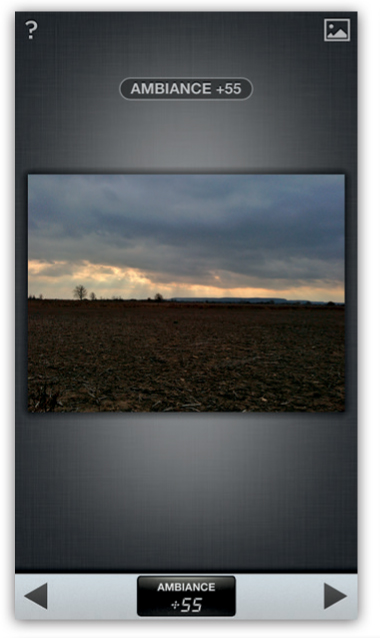
I then used the Drama feature to increase the dynamic range even further. Again, I was careful not to go too far or there would have been very little contrast in the shadows. The idea here is to raise the brightness of the cornfield and the trees without sacrificing image quality.
 Step 2: Selectively Darkening Part of an Image
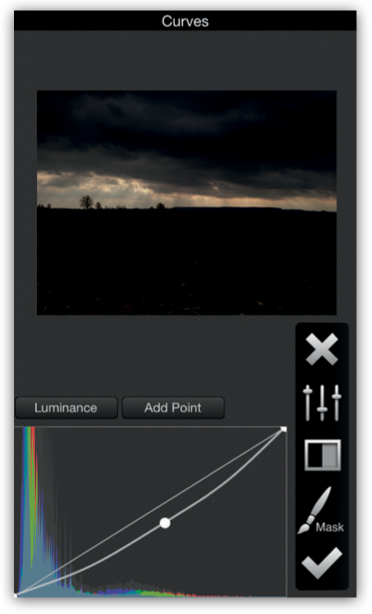
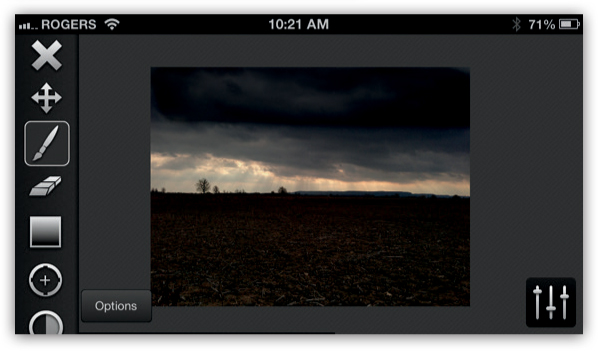
Using Filterstorm, I brought the image into the Curves adjustment area and lowered the overall brightness by adding a curve point to provide more drama to the sky |2|. With the Paintbrush/Mask feature, I selectively applied this adjustment to the part of the image I wanted to enhance. I began to darken the sky by smoothing my finger directly over the area where I wanted to apply the curves adjustment |3|. The rest of the image remained untouched. With the sky taking on a more ominous look, I created a more radical juxtaposition of the compositional elements and heightened the drama of the oncoming storm. I then made another minor curve adjustment to decrease the dynamic range of the ground and to bring the contrast of the elements into closer visual alignment.
|2|
|3|
 Step 3: Selectively Blurring for Noise Reduction and Softness in the Clouds
I have learned that when I increase dynamic range or darken elements of an image with a curves adjustment, it often introduces undesired noise into the image. The noise or graininess in the clouds is visible in figure 4.
|4|
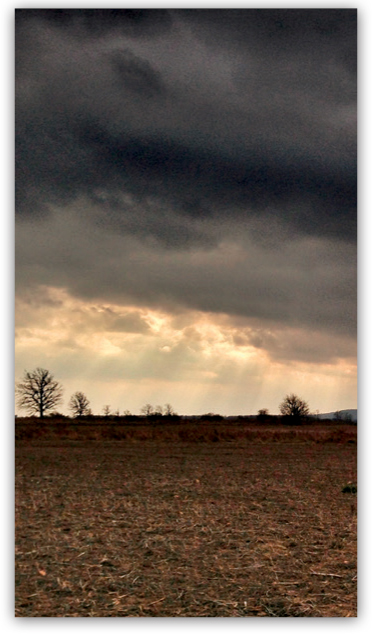
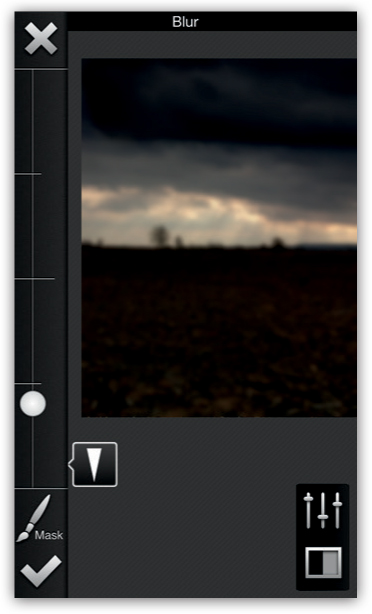
The trick I developed to overcome this with landscape photos is to apply a selective blur to the sky. Again, I used Filterstorm to achieve this with masking. I went back into the Filters panel and chose the Blur function, and I blurred only part of the image. I used the slider on the left and adjusted it until the blur level was at a point that I felt best suited the image |5|. I didn’t try to create a noticeable blur effect, but rather attempted to hide the noise introduced from the curves adjustments and the increased dynamic range in the sky. After I selected the desired blur level, I applied the blur to the parts of the image where the noise was a little too heavy. I did this in the same manner with the Paintbrush that I had used to apply the curves in step 2. The resulting image detail may be seen in figure 6.
|5|
|6|
 Step 4: Bringing Back Part of the Higher Dynamic Range
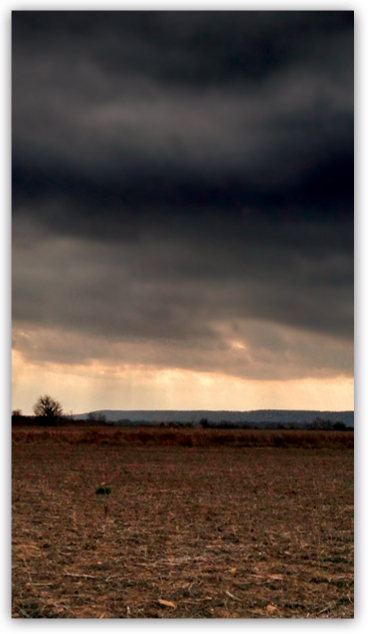
Now that I had some fluffy, ominous clouds, I wanted to bring back some of the dynamic range I had previously introduced into the lower part of the image. I did this by selectively compositing part of one image onto another. Still in Filterstorm, I selected the Filters drop-down menu and chose Add Exposure |7|.
|7|
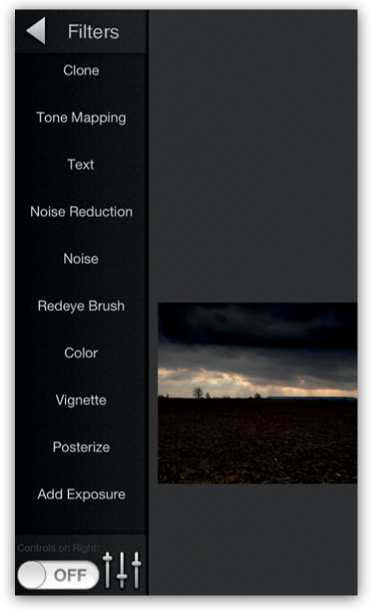
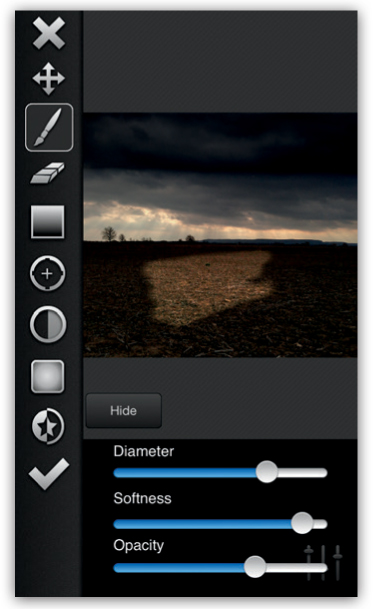
I chose a second image of the scene from the camera roll and then selected the Paintbrush/Masking feature |8|. When this option was open, the newly added image sat underneath the current picture, and I could selectively paint in the new image directly with my fingers. I used the Diameter, Softness, and Opacity panel to adjust the impact of the paintbrush. This helped me achieve the exact contrast I wanted between the two images and allowed me to precisely blend the two photos to achieve a more balanced final image. The example shows how the new image appeared as I swiped my fingers across the parts of the picture I wanted to replace.
|8|
 Step 5: Selectively Sharpening the Image
Still in Filterstorm, I again selected the Filters drop-down menu, chose Sharpening, clicked the Paintbrush feature, and sharpened just the horizon line of trees and the rock escarpment that runs along the horizon line.
 Step 6: Adding More Rays of Light
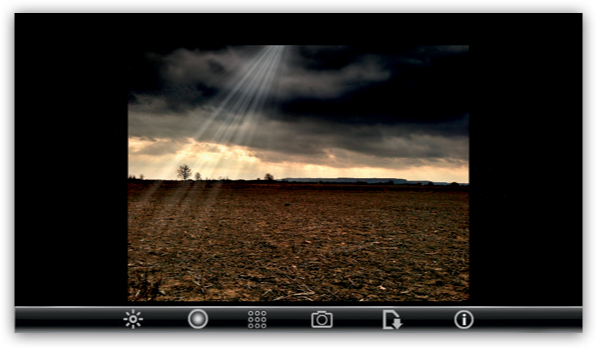
I opened the image in LensLight to add a set of light rays. The original image had light rays beaming down from the clouds, but since I didn’t feel as though I had quite captured their beauty, I decided to add some more myself |9|. After adding some light rays and adjusting them to taste, I took the image back into Filterstorm. I used the Add Exposure feature again to paint over the rays so it looks like they are coming out of the clouds at the horizon line.
|9|
 Step 7: Making Final Contrast Adjustments
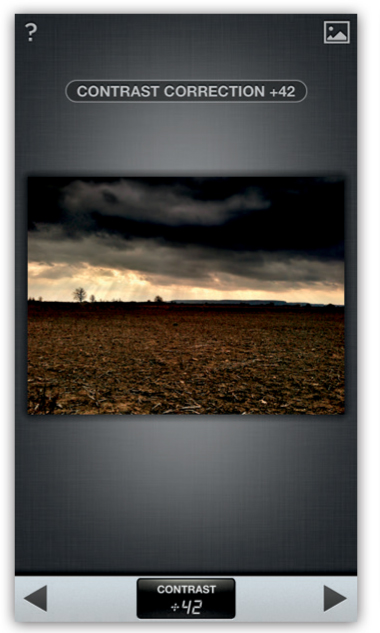
I brought the image back into Snapseed and adjusted the contrast using the Auto feature |10|. I find that this feature usually overdoes the contrast, so I swiped down to bring up the menu and then swiped left to bring the contrast down to where it looked right to me.
|10|
 Step 8: The Last Step
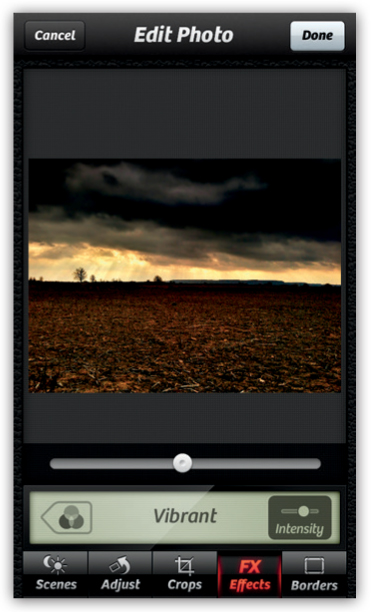
I made the final adjustment for vibrance in Camera+. I can achieve the same result in a number of different ways, but I like the effect of the Vibrant filter in Camera+ because it has a slider to allow adjustment. With the slider I chose the amount of the effect I wanted to apply. I set it to about the midpoint and saved the final image to my camera roll |11|.
|11|
Filterstorm is one of the most powerful apps available for photo editing on the iOS platform. With an array of tools familiar to anyone who has used Adobe Photoshop, Filterstorm provides unprecedented control for precision photo processing. There is a learning curve for anyone who is more comfortable with simply adding a premade filter or two to their images, but after that curve has been mastered, the power of Filterstorm’s manual controls is liberating. From curves, levels, and cloning to masking, layers, and tone mapping, Filterstorm provides iPhone photographers a set of fine, granular controls unlike just about any other image-processing app.
The following is a description of some of the manual adjustments available in Filterstorm. The filter menu is shown in figure 12.
|12|
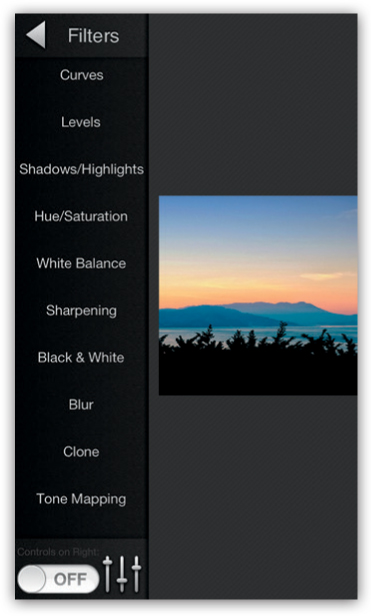
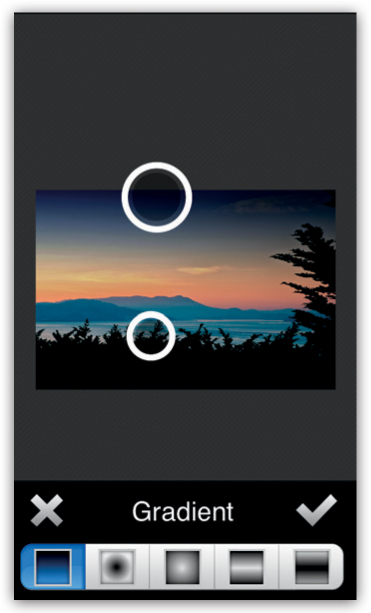
Each effect can be selectively applied with the masking tool or to the whole picture at once. One of the more effective options for precision editing is the gradient feature. You can choose your overall look with any adjustment and then use the masking feature to apply a gradient version of the effect by rotating two circular controls to apply the gradient on any part of the image, as shown in figure 13.
|13|
Filterstorm can handle extremely large files. The resolution is preserved and will be output at the highest possible level, as shown in the output dialogue depicted in figure 14.
|14|

The developer of Filterstorm provides some excellent video tutorials that I highly recommend watching. What might seem daunting at first becomes clear when you see real-time examples of the app in action. If you want to challenge yourself and take your iOS photo processing to the next level, give Filter-storm a whirl. It’s a great way to move beyond the simplicity of adding a retro filter or two to your image.
To achieve my goal of treating the three areas of the composition—the ground, the trees and sun, and the oncoming storm—with different effects, I used Snapseed (for contrast, dynamic range adjustments, and saturation); Filter-storm (for curves adjustments, selective sharpening, and selective blurring to decrease noise); LensLight (to increase the drama of the sun’s rays); and, finally, Camera+ (to add contrast and vibrance).
Daniel Berman (Reservoir_Dan)
Daniel is a fine art photographer, filmmaker, and digital artist. He is the founder of the Mobile Photo Awards, the world’s largest competition and open gallery call for mobile photography and art. With his background of running a successful television production company specializing in music and nature programs, Daniel brings a lifelong passion for the rhythm and imagery of the natural world to his photographic art. www.mobilephotoawards.com