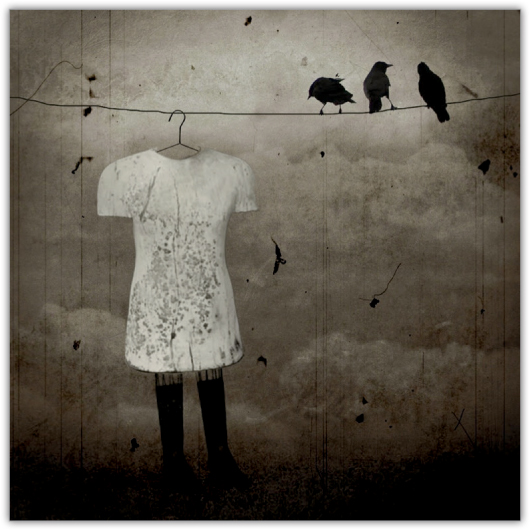

Hung Out to Dry
In this tutorial you will learn how to create a surreal image without a preconceived idea. You will be working with masking techniques and different filter options. By following your instincts with unconnected elements, you will learn several masking and blending techniques with different filters using apps like Superimpose and ScratchCam FX.
 6x6
6x6
 Superimpose
 PhotoCopier
 ScratchCam FX
 ArtStudio
I generally start working without a preconceived idea of a final image. The work evolves from each preceding step until I reach a point where all the elements come together to portray an interesting and well-composed image. The final edit tends to incorporate a surreal relationship or narrative. I tend to derive inspiration from combining unrelated elements to tell a story or convey an idea. For instance, I might combine an inanimate object with an animate object to create an interesting image. I am always looking for new ways to interpret the world around me.
In this image there are relatively few steps that involved a limited number of apps, but this isn’t always the case. There can be a lot of shuffling around from one app to another with a lot of steps within each app, but this image is fairly straightforward.
 Step 1: Capturing the Background Image
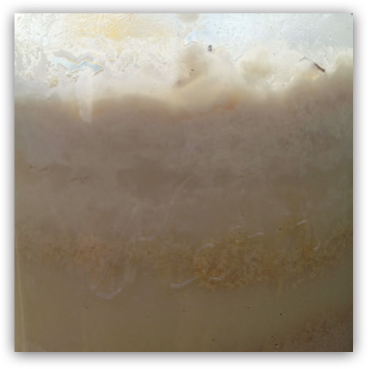
The initial picture is a closeup of a candle that I shot with the app 6x6 |1|. I use this app to create square format images. At this point in my process, I look for interesting objects or textures to build upon.
|1|
 Step 2: Adding a Foreground Element
I decided to add some clouds to the foreground. For this step I used Superimpose with the Multiply filter |2|.
|2|

 Step 3: Filtering the Image with PhotoCopier
I brought the image into PhotoCopier. I often import an image into this app to explore different color or process options. There are four main categories: Movie, Painting, Process, and Photo. There are additional adjustments under each category, such as texture, vignette, and color settings. For this image I used the Atget selection in the Photo category |3|. There are no steadfast rules as to when you should add a particular filter or effect to your image. Sometimes adding a filter earlier in the process is desirable if you do not want elements you introduce later to be processed with the same effect.
|3|

 Step 4: Adding a Texture
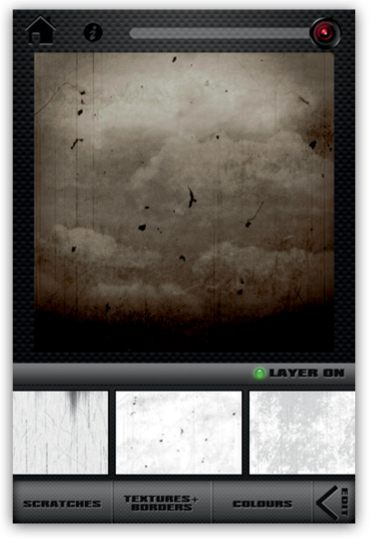
I considered adding a texture effect to the image in ScratchCam FX. I don’t always use this app, but it doesn’t hurt to explore the various effects it can add to a particular image. After I looked at some different options, I decided on the effect shown here in the Textures+Borders section |4|. It gave the image an old, worn film or photo effect that I like.
|4|
 Step 5: Adding a Foreground Motif
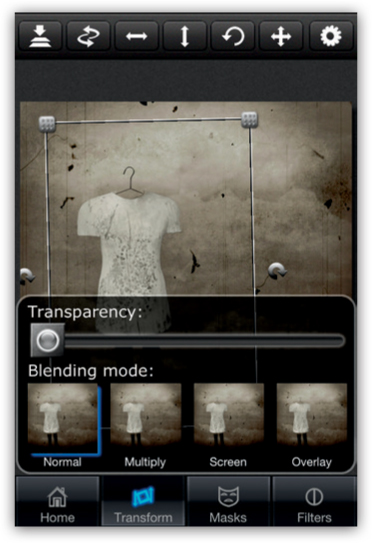
Next I added a motif to the image by using Superimpose to create a new layer. I masked and superimposed an image of an old mannequin bust with a coat hanger onto the image with the Normal setting |5|. Remember to edit objects beforehand that you plan to introduce separately. This can be useful if you want different elements within your image to contain different textures or color schemes than the base image.
|5|
 Step 6: Refining the Foreground
At this point I was not sure what elements I would add next. I had committed to building a narrative around the mannequin and had to brainstorm about to how to proceed. After some deliberation, I decided to add a clothesline. I opened the image in ArtStudio. You can do many things with this app, but I used it to simply add a black line to act as a clothesline that the mannequin would be hanging from. I used the Pencil tool at a small size and full opacity |6|.
|6|
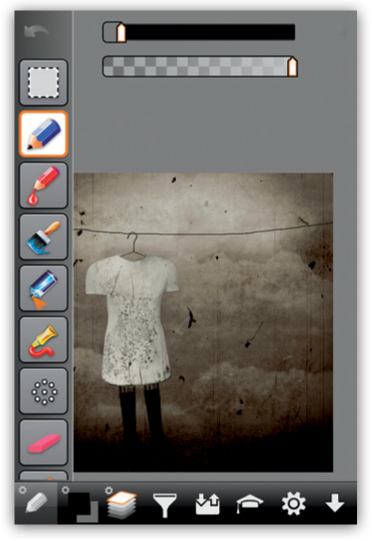
 Step 7: Completing the Story with Additional Foreground Elements
Last, I added the silhouettes of the birds to the image using Superimpose |7|. I thought these last elements balanced out the image and contributed to the overall theme.
|7|

The most important app I used to construct this image was Superimpose. It is a great app for adding or removing elements, and it also provides additional editing options. There are 15 filter options and 10 masking tools to achieve nearly any desired effect. To add or remove elements within an image, there should be a fair amount of contrast between the elements to be selected or masked. This makes some of the masking tools, such as the Magic Wand, more effective. If the tints and tones or colors are too closely related, this tool will tend to mask the wrong areas of an object. In this situation the best approach is to either adjust the strength of the masking tool or manually mask the area using the Brush or Marquee tools. If there is a good amount of contrast or separation between the elements, this will be less of an issue.
There are a few other really useful features within this app. The transparency bar lets you adjust the transparency of the active layer, which makes it easy to adjust the placement of foreground objects. Within the Transform section you can merge the two current layers to create another layer. (Unlike some apps—such as Filterstorm for the iPhone, and Adobe Photoshop Touch and Laminar for the iPad—Superimpose allows only one active layer at a time.)
Superimpose saves images at a high resolution and does not reduce the resolution of full-size images of up to 4,000 pixels on the longest side. This is convenient if you plan to manipulate the image in other apps or print it. There are several new options in Superimpose that were not available in the older version, including the Flip tool, which flips the top layer vertically or horizontally, and the Swap tool, which allows the base layer and the active layer to be interchanged.
My goal was to produce a surreal image and work intuitively as each step suggested a new way forward. I blended the background from separate elements in Superimpose, added interest to the image by applying textures in PhotoCopier and ScratchCam FX, and finished the image by layering previously prepared images in Superimpose. To add greater detail and interest, I drew some final linear elements in ArtStudio.
Dax Curnew (Timezone0)

Dax studied drawing and painting at the Ontario College of Fine Arts and Design in Canada. His influences originate from many different styles and movements in art. Surrealism had the greatest influence on his work. After a long period of creative inactivity, Dax discovered the medium of the iPhone. He has created paintings for Envers Chapin fine art print gallery, various fine art events, and private galleries. Six of his pieces were exhibited at the 2012 LA Mobile Arts Festival.