

The Red Pencil Portrait
My goal was to create a beautiful portrait with an artistic, painterly feel. In this tutorial you will learn the basics of capturing a good base photo to work with (and avoid the distorted look that is characteristic of the iPhone lens), making it cartoon-like in preparation for painting, applying paint on different layers with a variety of brushes, and adding the finishing touches with textures and fine pencil work.
 ToonPAINT
 Pic Grunger
 SketchBook Mobile (iPhone) or SketchBook Pro (iPad)
Long ago, I thought I would never be able to make a good portrait on my iPhone. But I became interested in making a collection of photographs that I edited and painted in ToonPAINT. The final images look like drawings. When SketchBook came along, I painted over one of my ToonPAINT images and discovered a way to make beautiful pictures that look like real paintings. Adding thin pencil messages or decorative drawings over the painting came naturally to me.
 Step 1: Knowing the Model
To capture a good portrait, the photographer must know the model. You need to gain the model’s trust to achieve intimacy and beauty. The iPhone camera is prone to distorting images because the lens is very small; therefore it’s important to carefully consider the shooting angle so the model’s face doesn’t get distorted like an egg. I don’t worry too much about the composition—that can always be changed later. The next most important consideration is lighting. Nicely defined shadows are ideal, but too much contrast or hard light is not. A beautiful female face is always helpful, but remember that it’s the artist’s job to render the beauty.
 Step 2: Making the Image Cartoonlike
ToonPAINT is a great app that will turn a photograph into a black-and-white, high-contrast image like a cartoon. From there, it’s a matter of tweaking it.
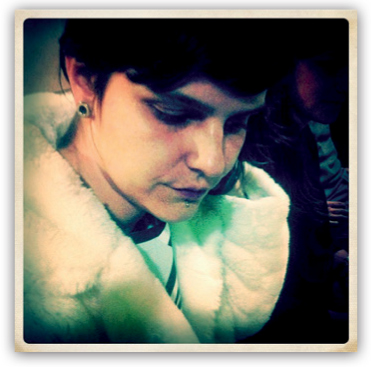
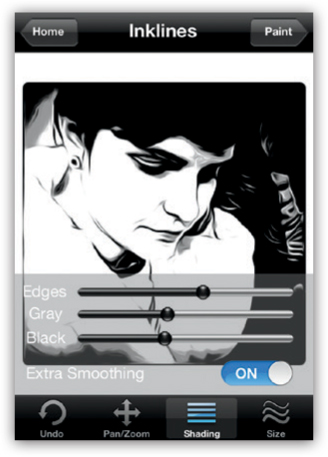
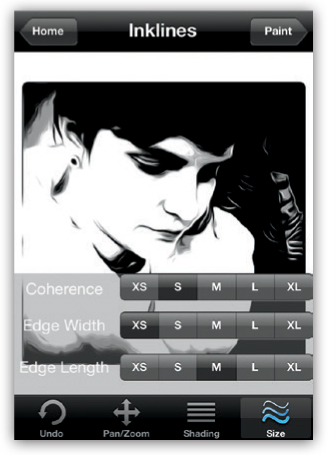
First I imported the original photo from my photo library |1|. I adjusted the edges and the gray and black levels to my liking. I like to keep Extra Smoothing set to ON because it gives a much softer line with smooth blending between the middle and dark tones |2|. I wanted to keep the lines elegant, so I used the configuration shown in figure 3. I saved the ToonPAINT drawing to my Photo Gallery (by clicking on Paint) with High-res output set to ON (the setting is located under Preferences) |4|.
|1|
|2|
|3|
|4|

 Step 3: Adding Grunge Effects
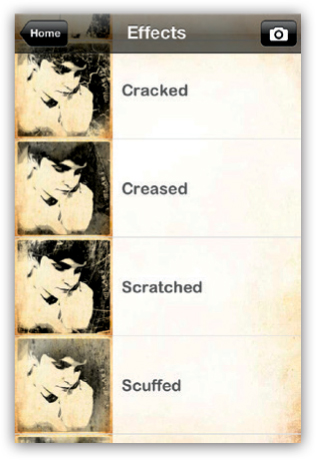
I opened Pic Grunger, selected resolution, and set High Resolution to ON. Then I closed the resolution screen and pressed start, which gave me the option to import my ToonPAINT image from my camera roll. When my image was loaded into Pic Grunger, I chose Scratched from the various grunge options |5|. On the bottom menu I set the Style to Gig and kept the other options at the default settings. I pressed the top right button to save my image.
|5|
 Step 4: Using SketchBook and Becoming an Artist
This is where I became an artist. I opened SketchBook, pressed the + button, and began a new project. On the white canvas, I pressed the small circle at the bottom. This opened the menu, and I selected the Layers icon. From the Layers menu, I chose the Import command from the Library icon and loaded the image from the photo library. After the image appeared on the canvas, I adjusted the size and position of the layer by using the Free Transform button |6|.
|6|
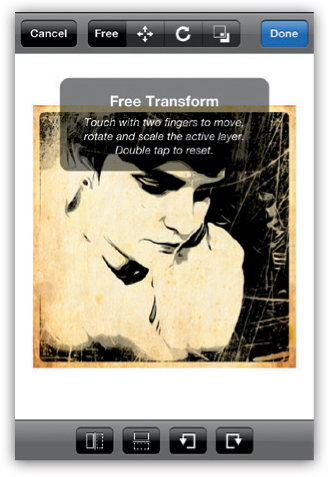
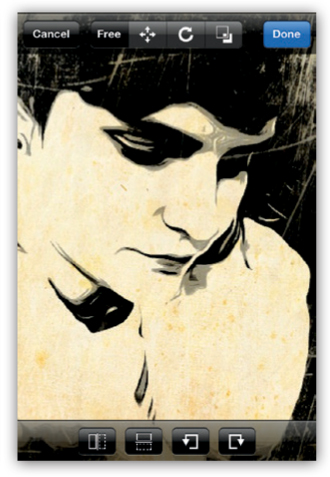
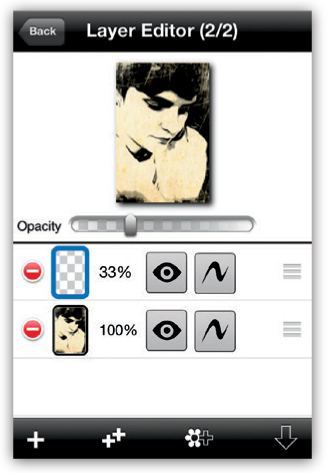
I positioned the image on the canvas so it felt balanced |7|. Then I added a new blank layer on top of the image by pressing the + button. I set the Opacity to 33 % and pressed the Back button to start painting on the top layer |8|.
|7|
|8|
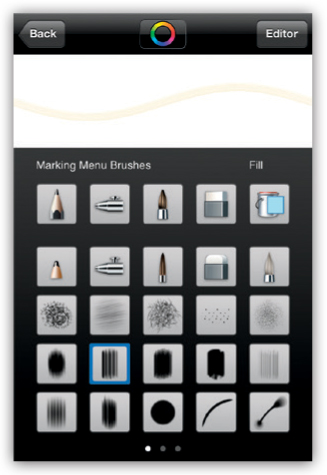
It is important to select the right brush and colors to paint with |9 and 10|.
|9|
|10|
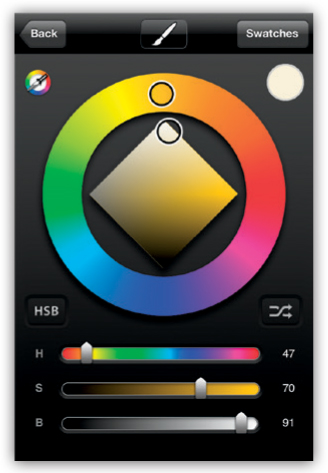
After I made my selections, I started to add paint and layers. I generally use transparent layers of a warm white paint on the face and darker colors on the background and the clothes. I use lighter tones on the top layers. It is important to let the brush strokes stay visible and create a painterly crosshatch pattern.
It is also important to make sure the colors blend nicely. I used blue tones on the face and added white underneath the layers to give it a cooler look. I added some contrast by adding warmer tones to the clothes and very dark tones to the background. It’s not necessary to be exact. I simply followed the shapes and lines on the photograph and applied loose strokes. SketchBook makes this painting process very smooth.
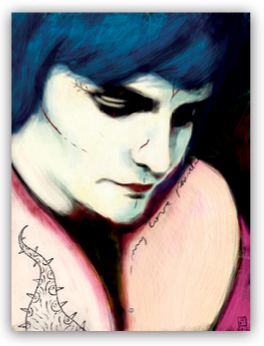
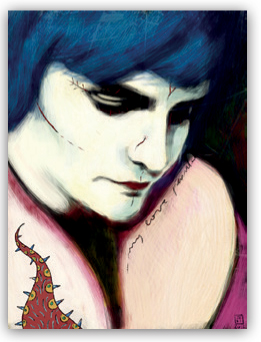
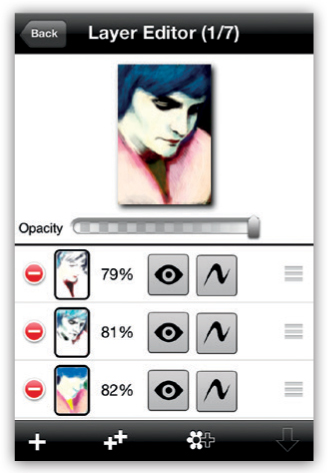
On an additional top layer, I added a drawing with a pencil to give the image a more artistic look. Figures 11 through 15 show the evolution of the image as I applied various colors and details. Figure 16 shows the build up of layers in SketchBook.
|11|
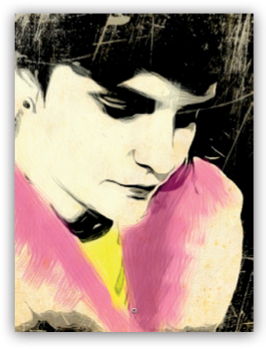
|12|
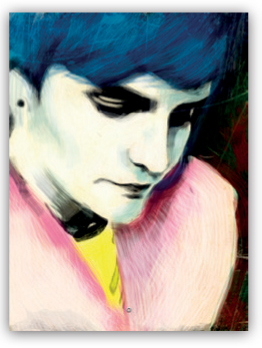
|13|
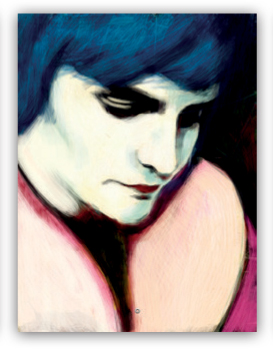
|14|
|15|
|16|
 Step 5: Adding the Final Effects
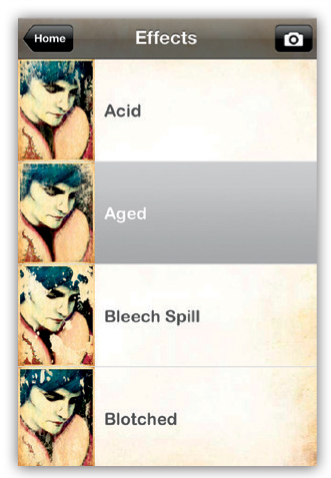
I imported the image into Pic Grunger and selected the Aged effect |17|. I adjusted the strength to one-third and set the Border to ON |18 and 19|.
|17|
|18|
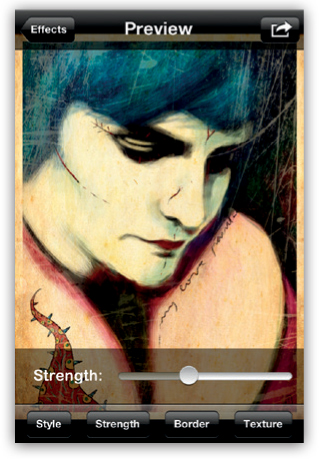
|19|

Finally my image was finished, and I saved it.
SketchBook Mobile is one of the best drawing tools for the iPhone. It is simple and intuitive, it has a great full-screen canvas feature, and it easy to access the tools I need. It has more than 40 customizable brushes, and you can switch between them by tapping a button.
Layers is a powerful feature of the app. It is easy to work with a photograph taken with the iPhone and add layers that may be reordered as needed. The color palette is comprehensive and features an amazing range of hues and tones. The brush workflow is wonderful. You can save SketchBook images to iCloud to effortlessly continue your work on an iPad. The app will also export a PSD (Photoshop) file to Dropbox so you can continue your work on a laptop or desktop computer. The SketchBook family of apps includes both iPad and desktop versions.
You learned to consider the shooting angle when you capture the image and how to use ToonPAINT to create a base black-and-white image to use in SketchBook. You also saw how to add pencil details and grunge textures in Pic Grunger. You are now ready to create an image in ToonPAINT and practice your technique to paint over a picture in SketchBook, and you can try some of the amazing filters in Pic Grunger. In SketchBook you can try the various brushes and add as many layers as you want. Explore the possibilities and give yourself a chance to make a stunning portrait.
José António Fundo (Jafundo)
José graduated from the University of Porto School of Fine Arts with a degree in painting in 1995. He is now a vice principal at Soares dos Reis Artistic high school where he teaches media studies and cinema and photography history. In 2009 he began experimenting with mobile art on an iPhone 3G and it soon became José’s major form of artistic expression. In 2011 his works were part of Autodesk’s The Digital Canvas exhibition at One Market in San Francisco and the Autodesk University Creative Studio exhibit in Las Vegas and Beijing. In 2012 his work was also shown at the LA Mobile Arts Festival. www.flickr.com/jafundo