
This chapter focuses on using stores to share data between components, regardless of their relationship in the component hierarchy. Stores provide an alternative to using props or context. They hold application state outside any component. Each store holds a single JavaScript value, but the value can be an array or an object, which of course can hold many values.
Svelte supports several kinds of stores.
Readable stores do not allow components to change their data because the store itself can change its own data.
Custom stores can do any of these things and often provide a custom API for controlling their use.
Every store has a subscribe method that returns a function you can call to unsubscribe.
The built-in support for stores is so useful that there is really no need for state management libraries. Such libraries are commonly used with other frameworks. For example, Angular has @ngrx/store, React has Redux, and Vue has Vuex.
To create a writable store, call the writable function, which is defined in the svelte/store package. Pass an initial value and optionally a function that initializes the store. The use of such a function is described later.
In addition to the subscribe method, writable stores have the following methods:
This updates the store value based on its current value. fn is a function that is passed the current value and returns the new value. For example, the following would double the value of a store that holds a number:
myStore.update(n => n * 2);
Here is an example of defining a writable store using just an initial value. Its purpose is to hold a collection of objects that describe dogs.
Listing 6.1 Writable store with an initial value
import {writable} from 'svelte/store';

export const dogStore = writable([]);      ❶
❶ The initial value is an empty array.
Recall that declaring a variable that holds a reference to an object as const does not prevent modifying the object properties. The same is true for stores. Declaring a variable that holds a reference to a store does not prevent the store value from being modified.
We can also pass a function to the writable function that determines the initial value. This function is passed a set function that it calls to set the store value. For example, the function can call an API service and pass the value returned to the set function.
This way of initializing a store is lazy in that the function is not called until the first component subscribes to the store. It is called every time the subscriber count goes from 0 to 1, which can occur more than once.
The function passed to the writable function must return a “stop” function. This is called every time the subscriber count goes from 1 to 0. Any necessary cleanup can be performed here. Typically this is not needed, and the function does nothing.
The following example calls an API service to obtain an array of objects describing dogs. This becomes the value of the store.
Listing 6.2 Writable store that sets its value asynchronously
import {writable} from 'svelte/store';

export const dogStore = writable([], async set => {     ❶
  const res = await fetch('/dogs');                     ❷
  const dogs = await res.json();
  set(dogs);
  return () => {};                                      ❸
});
❶ The initial value is an empty array.
❷ This uses the Fetch API, which is built into modern browsers.
❸ This is the “stop” function.
Using a $ prefix on a store name utilizes “auto-subscription,” which is explained in section 6.4.
The bind directive can be used to bind the value of a form element to a writable store. In the following example, someStore holds a string value that is used as the value of the input and is updated when the user changes the value of the input.
<input bind:value={$someStore}>
Components that use a writable store can call the set and update methods on the store to modify it.
To create a readable store, call the readable function, which is defined in the svelte/store package. As with writable stores, readable is passed an initial value and optionally a function that takes a set function.
Here is the example shown in listing 6.2, but this time it creates a readable store instead of a writable one.
Listing 6.3 Readable store example
import {readable} from 'svelte/store';

export const dogStore = readable([], set => {
  const res = await fetch('/dogs');
  const dogs = await res.json();
  set(dogs);
  return () => {};
});
The set function can use setInterval to continuously change the value of the store. For example, the readable store in the following listing provides numbers starting from 0 in increments of 10. The value changes every second.
Listing 6.4 Readable store that updates its value periodically
import {readable} from 'svelte/store';

let value = 0;
export const tensStore = readable(
  value,                            ❶
  set => {
    const token = setInterval(() => {
      value += 10;
      set(value);
    }, 1000);
    return () => clearInterval(token);
  }
);
Components that use a readable store cannot set or update it. This does not mean that readable stores are immutable, just that only they can change their own value.
For stores that should be available to any component, you should define and export them in a file like src/stores.js and import the stores from that file wherever they’re needed.
For stores that should only be available to descendants of a given component, define them in that component and pass them to descendants using props or context.
To begin using a store, you can gain access to it in one of these ways:
There are two ways to get the value from a store:
Call the subscribe method of the store (this is somewhat verbose).
Use the auto-subscription shorthand (this is usually preferred).
Listing 6.5 shows an example of using the subscribe method to access the value of dogStore. The function passed to the subscribe method of the store is called initially and again every time the value changes. Here we just assign the value to the component variable dogs so it can be used in the HTML.
Listing 6.5 Store subscription example
<script>
  import {onDestroy} from 'svelte';
  import {dogStore} from './stores';
  let dogs;
  const unsubscribe = dogStore.subscribe(value => (dogs = value));
  onDestroy(unsubscribe);
</script>
Now we can use dogs in the HTML section.
We can simplify this code by using auto-subscription. All variables whose names begin with $ must be stores. Components automatically subscribe to stores when they’re first used, and they automatically unsubscribe when the component is destroyed. When using auto-subscription, you only need to import the store as follows. It is not necessary to subscribe to or unsubscribe from the store.
<script>
  import {dogStore} from './stores';
</script>
Now we can use $dogStore in the HTML section. Clearly, less code is required when using auto-subscription.
The svelte/store package also exports a get function that takes a store and returns its current value. This can be used in both .svelte and .js files. For example, to get the current value of the store in the variable myStore, call get(myStore).
Note The get function is somewhat inefficient. Behind the scenes it subscribes to the store, gets its value, unsubscribes from the store, and returns the value. Avoid calling this function frequently.
There are three ways to change the value of a writable store from inside a .svelte file. You have already seen the set and update methods. The value can also be directly assigned using a $ prefix on the store name:
$dogStore = [{breed: 'Whippet', name: 'Dasher'}];
Only .svelte files can use auto-subscription. Files with a .js extension must use the set or update method to change the value of a writable store.
Listing 6.6 uses the tensStore readable store (defined in listing 6.4) with auto-subscription. This component is automatically updated every time a new value is provided by the store. Each second a new value is displayed: 0, 10, 20, and so on.
Listing 6.6 App that uses tensStore
<script>
  import {tensStore} from './stores';
</script>

<div>{$tensStore}</div>
Let’s create an app that manages a collection of dogs. For now the app will just hold objects representing dogs in memory. Later we will modify it to persist the dogs so they are not lost if the browser is refreshed.
We’ll begin by defining a writable store to store objects that describe dogs. It will hold an object where the keys are dog IDs and the values are dog objects. Dog objects have id, name, breed, and size properties.
Listing 6.7 Creation of the dogStore in src/stores.js
import {writable} from 'svelte/store';

export const dogStore = writable({});
We want the ability to view, add, modify, and delete dogs. All components that subscribe to the store will see the changes.
Now we’ll define the topmost component, App. It uses the DogList and DogForm components, which are defined in listings 6.9 and 6.10. The App component decides which one to render based on the value of mode, which can be list, create, or update. When mode is list, it displays the DogList component. Otherwise it displays the DogForm component.
The App component listens for two custom events. The mode event signals that the value of mode should be changed. The select event signals that a dog has been selected in the DogList component. The selected dog can then be edited.
Listing 6.8 App that uses the DogForm and DogList components
<script>
  import DogForm from './DogForm.svelte';
  import DogList from './DogList.svelte';

  let dog = {};
  let mode = 'list';               ❶

  function changeMode(event) {
    mode = event.detail;
    if (mode === 'create') dog = {};
  }

  const selectDog = event => (dog = event.detail);
</script>

<h1>Dogs</h1>
{#if mode === 'list'}
  <DogList on:mode={changeMode} on:select={selectDog} />
{:else}
  <DogForm {dog} {mode} on:mode={changeMode} />
{/if}
❶ Other modes are “create” and “update”.
The DogList component displays the list of dogs, sorted on their names. It also provides buttons that can be clicked to act on the list (see figure 6.1). To add a dog, click the “+” button. To edit a dog, select one in the list and click the pencil button. To delete dogs, select them in the list and click the trash can button.
Listing 6.9 DogList component in src/DogList.svelte
<script>
import {createEventDispatcher} from 'svelte';
import {dogStore} from './stores';
import {sortOnName} from './util';
const dispatch = createEventDispatcher();
$: dogs = sortOnName(Object.values($dogStore));
let selectedDogs = [];
function deleteSelected() {
const ids = selectedDogs.map(dog => dog.id);
dogStore.update(dogMap => {
for (const id of ids) {
delete dogMap[id];
}
return dogMap;
});
selectedDogs = [];
}
const dogToString = dog => dog.name + ' is a ' + dog.size + ' ' + dog.breed;
function onSelect(event) {
const {selectedOptions} = event.target;
selectedDogs = Array.from(selectedOptions).map(
option => $dogStore[option.value] ❶
);
dispatch('select', selectedDogs[0]); ❷
}
</script>
{#if dogs.length}
<select multiple on:change={onSelect}>
{#each dogs as dog (dog.id)}
<option value={dog.id}>{dogToString(dog)}</option>
{/each}
</select>
{:else}
<h3>No dogs have been added yet.</h3>
{/if}
<div class="buttons">
<button on:click={() => dispatch('mode', 'create')}>
<span aria-label="plus" role="img">➕</span>
</button>
<button
disabled={selectedDogs.length === 0} ❸
on:click={() => dispatch('mode', 'update')}>
<span aria-label="pencil" role="img">✎</span>
</button>
<button disabled={selectedDogs.length === 0} on:click={deleteSelected}> ❹
<span aria-label="trash can" role="img">🗑</span>
</button>
</div>
<style>
button {
background-color: transparent;
border: none;
font-size: 24px;
}
option {
font-size: 18px;
}
select {
padding: 10px;
}
</style>
❶ The value of each option is a dog id.
❷ Remember the first of the selected dogs. This is the one that can be edited.
❸ Clicking the edit (pencil) button is disabled if no dog is selected.
❹ Clicking the delete (trash can) button is disabled if no dog is selected.
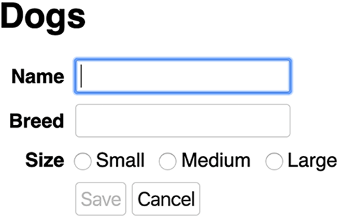
The DogForm component displays a form that is used to enter data for a new dog or modify an existing dog (see figure 6.2).
Listing 6.10 DogForm component in src/DogForm.svelte
<script>
  import {createEventDispatcher} from 'svelte';
  import {dogStore} from './stores';
  import {getGuid} from './util';

  const dispatch = createEventDispatcher();
  export let dog;
  export let mode;

  let {name, breed, size} = dog;
  $: canSave = name && breed && size;

  function save() {
    const id = dog.id || getGuid();
    dogStore.update(dogMap => {
      dogMap[id] = {id, name, breed, size};
      return dogMap;
    });
    dispatch('mode', 'list');        ❶
  }
</script>

<form on:submit|preventDefault={save}>
  <div>
    <label for="name">Name</label>
    <input autofocus id="name" bind:value={name}>
  </div>
  <div>
    <label for="breed">Breed</label>
    <input id="breed" bind:value={breed}>
  </div>
  <div>
    <label>Size</label>
    <span class="radios">
      <label>
        <input type="radio" value="small" bind:group={size}>
        Small
      </label>
      <label>
        <input type="radio" value="medium" bind:group={size}>
        Medium
      </label>
      <label>
        <input type="radio" value="large" bind:group={size}>
        Large
      </label>
    </span>
  </div>
  <div>
    <label />
    <button disabled={!canSave}>{mode === 'create' ? 'Save' : 'Update'}</button>
    <button type="button" on:click={() => dispatch('mode', 'list')}>
      Cancel
    </button>
  </div>
</form>

<style>
  div {
    display: flex;
    align-items: center;
    margin-bottom: 10px;
  }

  input {
    border: solid lightgray 1px;
    border-radius: 4px;
    font-size: 18px;
    margin: 0;
    padding: 4px;
  }

  input[type='radio'] {
    height: 16px;
  }

  label {
    display: inline-block;
    font-size: 18px;
    font-weight: bold;
    margin-right: 10px;
    text-align: right;
    width: 60px;
  }

  .radios > label {
    font-weight: normal;
    width: auto;
  }
</style>
❶ After saving, display the list.
The util.js file in listing 6.11 defines a couple of utility functions. The first generates a unique ID that is used as the ID of a dog. It uses the npm package “uuid,” which must be installed by entering npm install uuid. The second function sorts an array of objects on their name properties.
Listing 6.11 Utility functions in src/util.js
import {v4 as uuidv4} from 'uuid';

export const getGuid = () => uuidv4();

export function sortOnName(array) {
  array.sort((el1, el2) =>
    el1.name.toLowerCase().localeCompare(el2.name.toLowerCase())
  );
  return array;
}
The following global.css file in the public directory defines CSS rules that can affect any component. We want all buttons in the app to have common default styling.
Listing 6.12 Global CSS rules in public/global.css
body {
  font-family: sans-serif;
}

button {
  border: solid lightgray 1px;
  border-radius: 4px;
  font-size: 18px;
  margin-right: 5px;
  padding: 4px;
}
That’s it. We now have a working Svelte app that performs the common CRUD operations on a collection of dogs.
Derived stores derive their value from one or more other stores. To define one, import the derived function from the svelte/store package and call it.
The derived function takes two arguments. The first is the source stores. It can be a single store or an array of them. The second is a function that is passed that single store or array of stores. This function is called again each time the value of any of the source stores changes. It returns the new value of the derived store.
For example, we can create a derived store that holds only the large dogs in dogStore. The value of this store is an array of dog objects.
Listing 6.13 Derived store defined in src/stores.js
import {derived} from 'svelte/store';

export const bigDogsStore = derived(dogStore, store =>
  Object.values(store).filter(dog => dog.size === 'large')
);
The preceding derived store is based on only one other store. The next example uses two stores named itemsStore and taxStore. itemsStore holds an array of objects that have name and cost properties. taxStore holds a number that is the sales tax percentage. We can create a derived store that uses these stores to hold an array of objects similar to those in itemsStore, but that adds a total property. The total of each item is computed by multiplying its cost by one plus the tax percentage.
Here is the definition of these three stores.
Listing 6.14 Stores defined in src/stores.js
import {derived, writable} from 'svelte/store';

const items = [
  {name: 'pencil', cost: 0.5},
  {name: 'backpack', cost: 40}
];
export const itemsStore = writable(items);

export const taxStore = writable(0.08);

export const itemsWithTaxStore = derived(
  [itemsStore, taxStore],
  ([$itemsStore, $taxStore]) => {
    const tax = 1 + $taxStore;
    return $itemsStore.map(item => ({...item, total: item.cost * tax}));
  }
);
Listing 6.15 shows a component that allows the value of taxStore to be modified. It displays the name, cost, and total for each item in itemsStore (see figure 6.3). The itemsWithTaxStore is updated any time the value of itemsStore or taxStore changes. Note that we haven’t provided a way to change itemStore here.

Figure 6.3 Derived store example
Listing 6.15 App that uses stores in src/App.svelte
<script>
  import {itemsWithTaxStore, taxStore} from './stores';
</script>

<label>
  Tax
  <input type="number" bind:value={$taxStore}>
</label>

{#each $itemsWithTaxStore as item}
  <div>
    {item.name} - cost ${item.cost.toFixed(2)} - total ${item.total.toFixed(2)}
  </div>
{/each}
We can also create custom stores. These can control the ways in which the code that uses them can modify the store. This is in contrast to a writable store, where the value can be changed to anything by using the set and update methods.
One use of a custom store is to provide methods that are more restrictive than set and update. These can allow only specific values or specific kinds of changes. The following count store example does this.
Another use of a custom store is to encapsulate access to API services that create, retrieve, update, and delete objects held by the store. It can expose methods that make the API calls and validate the data used to create and update the store.
The only requirement on a custom store is that it be an object with a properly implemented subscribe method. This means that the subscribe method accepts a function as its argument and returns another function that unsubscribes from the store. The subscribe method must call the function passed to it immediately and every time the store value changes, passing the function the current value of the store.
As an alternative, subscribe methods can return an object that has an unsubscribe method instead of an unsubscribe function.
Typically custom stores are created from a writable store that already has a proper subscribe method.
In the following example, count is a custom store. Unlike writable stores, it does not expose set and update methods. Instead it exposes increment, decrement, and reset methods. Users of this store can only update its value by calling those methods.
Listing 6.16 count store defined in count-store.js
import {writable} from 'svelte/store';

const {subscribe, set, update} = writable(0);

export const count = {
  subscribe,
  increment: () => update(n => n + 1),
  decrement: () => update(n => n - 1),
  reset: () => set(0)
};
The following listing shows an example of using this custom store (see figure 6.4).

Figure 6.4 App using the count store
Listing 6.17 App using the count store in src/App.svelte
<script>
  import {count} from './count-store';
</script>

<div>count = {$count}</div>
<button on:click={() => count.increment()}>+</button>
<button on:click={() => count.decrement()}>-</button>
<button on:click={() => count.reset()}>Reset</button>
Stores can hold instances of custom JavaScript classes. If those classes define methods that modify the properties of an instance, calling them will not notify the store that a change has been made, and subscribers to the store will not be notified.
This is no different than storing any object in a store. The only ways to trigger an update to all the subscribers are to call the set and update methods on the store or directly set the store value using the $ prefix syntax.
Fixing this is easy. In the following two listings we have the classes Point and Line. A point is defined by x and y coordinates. A line is defined by start and end Point objects. Both points and lines can be translated by given delta x (dx) and delta y (dy) values.
Listing 6.18 Point class defined in src/point.js
export default class Point {
  constructor(x, y) {
    this.x = x;
    this.y = y;
  }

  toString() {
    return `(${this.x}, ${this.y})`;
  }

  translate(dx, dy) {
    this.x += dx;
    this.y += dy;
  }
}
Listing 6.19 Line class defined in src/line.js
import Point from './point';

export default class Line {
  constructor(start, end) {
    this.start = start;
    this.end = end;
  }

  toString() {
    return `line from ${this.start.toString()} to ${this.end.toString()}`;
  }

  translate(dx, dy) {
    this.start.translate(dx, dy);
    this.end.translate(dx, dy);
  }
}
To demonstrate holding instances of custom classes in stores, we can define stores in stores.js. Any component that needs these stores can import them.
Listing 6.20 Stores defined in src/stores.js
import {writable} from 'svelte/store';
import Line from './line';
import Point from './point';

export const pointStore = writable(new Point(0, 0));

export const lineStore =
  writable(new Line(new Point(0, 0), new Point(0, 0)));
The following listing shows a Svelte component that uses these stores.
Listing 6.21 App using the Point class and stores in src/App.svelte
<script>
  import Point from './point';
  import {lineStore, pointStore} from './stores';

  let point = new Point(1, 2);                    ❶

  function translate() {                         ❷
    const dx = 2;
    const dy = 3;

    point.translate(dx, dy);
    point = point;                               ❸

    pointStore.update(point => {
      point.translate(dx, dy);
      return point;
    });

    lineStore.update(line => {
      line.translate(dx, dy);
      return line;
    });
  }
</script>

<h1>local point = ({point.x}, {point.y})</h1>
<h1>point store = {$pointStore.toString()}</h1>
<h1>line store = {$lineStore.toString()}</h1>

<button on:click={translate}>Translate</button>
❶ This point is local to this component and is not in a store.
❷ This translates the local Point, the Point in pointStore, and the Line in lineStore each by the same amount.
❸ This assignment is necessary to let Svelte know there has been a change.
The main takeaway is that instance methods can be used to update objects in stores, but the updates must be performed inside the function passed to the store’s update method. In addition, those functions must return the updated object.
The calls to update can be simplified as follows if the translate methods in the Point and Line classes are modified to return this.
pointStore.update(point => point.translate(3, 4));

lineStore.update(line => line.translate(dx, dy));
Another approach is to use custom stores instead of classes to represent points and lines. This moves all the logic into these stores and out of the code that uses them. For example, we can define the following custom stores for points and lines.
Listing 6.22 Stores defined in src/stores.js
import {get, writable} from 'svelte/store';

export function pointStore(x, y) {
  const store = writable({x, y});
  const {subscribe, update} = store;
  let cache = {x, y};
  return {
    subscribe,
    toString() {
      return `(${cache.x}, ${cache.y})`;
    },
    translate(dx, dy) {
      update(({x, y}) => {
        cache = {x: x + dx, y: y + dy};
        return cache;
      });
    }
  };
}

export function lineStore(start, end) {
  const store = writable({start, end});
  const {subscribe, update} = store;
  return {
    subscribe,
    translate(dx, dy) {
      update(({start, end}) => {
        start.translate(dx, dy);
        end.translate(dx, dy);
        return {start, end};
      });
    }
  };
}
These stores can be used as in the following listing.
Listing 6.23 App using stores in src/App.svelte
<script>
  import Point from './point';
  import {lineStore, pointStore} from './stores';
  let point = pointStore(1, 2);
  let line = lineStore(new Point(0, 0), new Point(2, 3));

  function translate() {
    const dx = 2;
    const dy = 3;

    point.translate(dx, dy);
    line.translate(dx, dy);
  }
</script>

<h1>point = ({$point.x}, {$point.y})</h1>
<h1>line = {$line.start.toString()}, {$line.end.toString()}</h1>

<button on:click={translate}>Translate</button>
It may seem that we could use the toString method in the object returned by the pointStore function to render its value. However, Svelte will not detect that there has been a change simply from the following:
<h1>point = {$point.toString()}</h1>
We can fix this by adding the following lines inside the script element,
let pointString = '';
point.subscribe(() => pointString = point.toString());
and rendering it with the following:
<h1>point = {pointString}</h1>
A similar approach can be used to add a toString method to lineStore and use it to render the current value of the store.
If a user refreshes the browser, the code that creates stores is run again. This causes them to revert to their initial values.
It is possible to implement custom stores that persist any changes to sessionStorage and restore their values from sessionStorage on refresh.
Note The REPL is sandboxed and cannot use localStorage or sessionStorage.
The following example of a generic writable store does this. Using it is nearly the same as using the provided writable function. The only difference is that it needs a sessionStorage key string.
Listing 6.24 Creating writable, persistent stores in src/store-util.js
import {writable} from 'svelte/store';

function persist(key, value) {
  sessionStorage.setItem(key, JSON.stringify(value));
}

export function writableSession(key, initialValue) {
  const sessionValue = JSON.parse(sessionStorage.getItem(key));
  if (!sessionValue) persist(key, initialValue);                ❶

  const store = writable(sessionValue || initialValue);         ❷
  store.subscribe(value => persist(key, value));                ❸
  return store;
}
❶ Only save initialValue in sessionStorage if it does not already contain a value.
❷ Create a writable store using either the value in sessionStorage or the provided initial value.
❸ This persists any changes to the store to sessionStorage.
The following listing creates an instance of this kind of store.
Listing 6.25 Writable, persistent store of numbers in src/stores.js
import {writableSession} from './store-util';

export const numbers = writableSession('numbers', [1, 2, 3]);
Any number of components can import the numbers store and call its set and update methods to change the value. All changes are saved in sessionStorage and restored from there if a user refreshes the browser.
The Travel Packing app doesn’t need stores because there is no data that needs to be shared between multiple components. In chapter 17 on Sapper server routes, you will see how to call API services to persist the data in a database.
In the next chapter you will learn several ways to interact with the DOM, in addition to the DOM manipulation performed by Svelte.
Svelte stores provide an easy way to share data between components regardless of their relationship in the component hierarchy.
Custom stores can do any of these things and often provide a custom API for controlling their use.
Stores can persist their data in a number of ways. For example, sessionStorage can be used so data is not lost if the user refreshes the browser.