This chapter covers
- Reasons to use Sapper
- Creating a new Sapper app
- Redeveloping the shopping application with Sapper
In this chapter we will review the benefits of using Sapper and walk through developing a Sapper app.
As you learned in chapter 1, Sapper (https://sapper.svelte.dev/) is a framework built on top of Svelte. It is used to create more advanced web applications that take advantage of one or more of the features summarized below.
-
Sapper provides page routing, which associates URLs with the “pages” in an app and defines how navigation between pages is described in markup. Having a unique URL for each page allows those pages to be bookmarked so users can begin subsequent sessions on different pages.
-
Sapper supports page layouts, which define a common layout for sets of pages within an app. This can include common areas of a page such as headers, footers, and navigation.
-
Sapper provides server-side rendering (SSR), which allows the generation of HTML for pages to occur on the server instead of in the browser. This can provide a better user experience for rendering the initial page, because it is typically faster to generate this HTML on the server than to download the JavaScript required to render it in the browser and then do so. JavaScript for rendering subsequent pages can then be downloaded in the background before the user navigates away from the initial page.
-
Sapper supports server routes, which provide an easy way to implement Node-based API services in the same project as the frontend web application. This allows API services to be implemented in the same programming language that is used to implement the user interface, avoiding a mental switch between languages. Having frontend and backend code in the same project naturally leads toward storing it in the same source repository, which is convenient for developers who maintain both kinds of code.
-
Sapper supports code splitting, which allows the JavaScript required for each page of the application to be downloaded only when a page is visited for the first time. This reduces the initial load time because it is no longer necessary to download all the code for the app at startup. It also avoids downloading code for pages that are never visited.
-
Sapper supports prefetching, which provides faster page loads by anticipating the next page a user will visit based on mouse hovers. Page links can be configured so if a user hovers over it, Sapper will begin downloading the code needed to render the page before the user clicks the link. This provides a better user experience because it decreases the time required to render the next page.
-
Sapper supports static site generation by crawling a Svelte web app at build time and generating the HTML that each page renders. This produces a site where all the pages a user might visit have already been rendered to HTML files. It provides a better user experience because when users visit each page, no server-side or client-side HTML generation is required. Static sites can include JavaScript code that provides dynamic behavior.
-
Sapper supports offline usage by using a service worker in order for some portions of an application to remain usable when network connectivity is lost. This includes issues with internet providers and cell phone connectivity.
-
Sapper supports end-to-end testing using Cypress. This enables you to write comprehensive tests that exercise an application in ways that a user would. It can simulate user actions such as typing text into input fields, selecting items from drop-downs, and clicking buttons. Everything needed to implement and run Cypress tests is preconfigured in Sapper projects created using a template described in the next section.
In this chapter we will recreate the shopping application from chapter 9 using Sapper. It will use page routing, page layouts, server-side rendering, and code splitting. This will serve to demonstrate how easy it is to take advantage of some of the features of Sapper.
15.1 Creating a new Sapper app
Let’s walk through the steps to create and run a Sapper application. It will have Home, About, and Blog pages, along with a way to navigate between them. The Sapper home page recommends that you start any Sapper application from this beginning point and then customize the pages and their navigation to suit the app you would like to create.
-
If you haven’t already, install Node.js from https://nodejs.org.
-
Create the starting directory structure and files for a new application. Choose between using the Rollup or Webpack module bundler. To use Rollup, enter npx degit sveltejs/sapper-template#rollup app-name. To use Webpack, enter npx degit sveltejs/sapper-template#webpack app-name.
-
Enter cd app-name.
-
Enter npm install.
-
Enter npm run dev. This starts a local HTTP server and provides live reload, unlike npm start, which omits live reload. Then browse to localhost:3000.
The default Sapper app contains three “pages” or “routes” with navigation links at the top. The routes are Home, About, and Blog. Links on the Blog page open sub-pages that render specific blog content. These pages are shown in figures 15.1, 15.2, and 15.3.
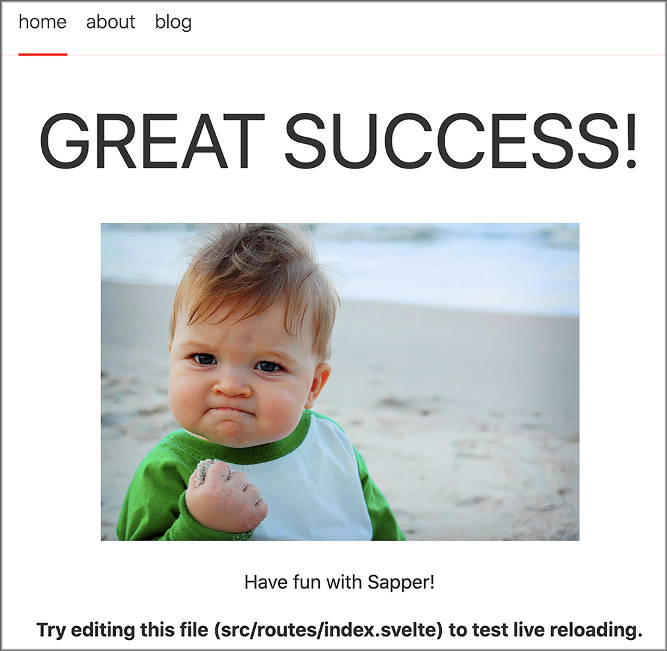
Figure 15.1 Home page

Figure 15.2 About page

Figure 15.3 Blog page
The page in figure 15.4 is rendered when the first link on the Blog page is clicked.

Figure 15.4 Blog page for “What is Sapper?”
Now we can begin modifying the app.
15.2 Recreating the shopping app with Sapper
Let’s recreate the shopping application from chapter 9 using Sapper. The code for this app can be found at http://mng.bz/NKG1.
This is a simpler app to start with than the Travel Packing app. We will tackle creating a Sapper version of that in chapter 16.
Change the links at the top of the pages to be “Shop”, “Cart”, and “Ship”. To do this, modify Nav.svelte and change the li elements to match the following.
Nav component in src/components/Nav.svelte
<li>
  <a aria-current={segment === undefined ? 'page' : undefined}
    href=".">Shop</a>
</li>
<li>
  <a aria-current={segment === "cart" ? 'page' : undefined}
    href="cart">Cart</a>
</li>
<li>
  <a aria-current={segment === "ship"? 'page' : undefined}
    href="ship">Ship</a>
</li>
Note For details on the aria-current attribute, see the W3C documentation (www.w3.org/TR/wai-aria-1.1/#aria-current), which says “Indicates the element that represents the current item within a container or set of related elements.”
Note Perhaps you don’t want the page links to be at the top of the page, or you want to style them differently. You’ll see how to change them in section 16.2.
Files in the src/routes directory represent the pages in the app. These define Svelte components, but the filenames are all lowercase. This is because these names become part of the URLs for visiting the pages, and it is common for URLs to be lowercase.
Make the following changes to files in the src/routes directory:
-
Rename about.svelte to cart.svelte.
-
Modify cart.svelte to match the following:
<svelte:head>
  <title>Cart</title>
</svelte:head>

<h1>Cart</h1>

<p>This is the 'cart' page.</p>
-
Copy cart.svelte to ship.svelte.
-
Modify ship.svelte to match the following:
<svelte:head>
  <title>Ship</title>
</svelte:head>

<h1>Ship</h1>

<p>This is the 'ship' page.</p>+
-
Delete the blog directory in src/routes.
-
Modify the bottom of index.svelte, which represents the Home page of the app, to match the following:
<svelte:head>
  <title>Shop</title>
</svelte:head>

<h1>Shop</h1>
-
Delete the following line in src/routes/_layout.svelte:
max-width: 56em;
Removing this left-justifies the content of each page. Page layouts will be discussed in the next chapter.
We now have the three pages we need for the shopping app. Assuming the app is still running, click the links at the top to verify that navigating between the pages still works.
Another way to navigate to a page is to manually change the URL in the browser’s address bar. Change it to end with /cart or /ship to switch to those pages. Remove the path at the end to switch to the Shop page, since it is the Home page.
Now let’s copy code from chapter 9 to finish implementing the three pages:
-
Copy public/global.css from the chapter 9 version of the shopping application to the static directory, replacing the existing file. This includes styling for tables.
-
Copy src/items.js from chapter 9 to the src directory. This defines the items available for sale.
-
Copy src/stores.js from chapter 9 to the src directory. This defines a writable store that holds items in the cart.
-
Copy the code in src/Shop.svelte from chapter 9 into the existing src/routes/ index.svelte file. The only code currently in index.svelte that should be retained is the <svelte:head> element, which should be the first element after the script element. Change the path for the imports at the top of the script element to begin with .. since those files are in the parent directory of the routes directory.
-
Repeat what was done with src/Shop.svelte to copy code in src/Cart.svelte from chapter 9 into src/routes/cart.svelte and to copy code in src/Ship .svelte from chapter 9 into src/routes/ship.svelte.
The app should now be operational. Figures 15.5, 15.6, and 15.7 show screenshots of the three pages with some data entered.
What did we gain by using Sapper instead of straight Svelte? We now have simple page routing, server-side rendering, and code splitting.
To see server-side rendering in action, open the DevTools in the browser window where the app is running, click the Network tab, and refresh the browser. There will be a GET request to http://localhost:3000/ that returns HTML for the first page, which is the Shop page. The remaining pages are created in the browser by downloaded JavaScript code.
To see code splitting in action within the DevTools Network tab, click the Cart or Ship link at the top of the page. The first time each page is rendered, new files are downloaded with names like cart.hash.js, ship.hash.js, and ship.hash.css. The Cart page does not contain a style element, so no cart.hash.css is downloaded.

Figure 15.5 Shop page

Figure 15.6 Cart page

Figure 15.7 Ship page
In the next chapter we will dive deeper into Sapper projects and learn about their directory structure, more on routes, page layouts, preloading, prefetching, code splitting, and more.
Summary
-
Sapper builds on Svelte to add many features.
-
Creating a new Sapper app is as easy as running npm degit.
-
Pages in a Sapper app are defined by files in the src/routes directory.
-
Navigation to pages is implemented with HTML anchor elements (<a>).
-
Sapper automatically provides many benefits.