Chapter 6 – Step 2: Stretching
“Body is not stiff, mind is stiff.”
-K. Pattabhi Jois
Jessica came to me with some pretty bad low back pain that she said would radiate down into her leg from time to time. When asked about her history, she told me about a horrific car accident she was in 6 years prior. Broken jaw, herniated disks, and contusions – not fun stuff by any means. Refusing to let pain dictate her life, she was still very active. She ran, did yoga, and loved heavy weightlifting. Upon inspection, I noticed right off the bat that her left glute was extremely tight which made a lot of sense because she was hit on her right side. Her left glute was overcompensating during everything she was doing from an activity standpoint and in doing so created a nasty lower crossed syndrome where her left glute tightened up along with her right hip flexor. The left glute muscle was so tight that it was actually creating an impingement in her hip. She was instructed to roll out her left gluteus musculature, as well as her right hip flexor muscle first, and then follow that up with some specific stretches. During her last session she said that her left hip felt like it needed to pop. I told her that it probably did in order to release the muscle fully, open up the hip, and ultimately get rid of the impingement for good. As she
inched forward ever so slowly you could see the concern as the pressure built and then a loud pop was heard as her glute finally succumbed to the pressure. She felt a warm sensation flood down her left leg and as she returned to a standing position could not believe the relief she felt in her back. This was only our third session together!
Although she still had some treatment to follow our time together did not last very long after that. Correcting the residual tightness in the hip flexor was now an easy task and the body soon returned to its normal tensegrity. The fact remained that I was treating another crooked set of hips that was creating an ailing lower back. I find this much too often when someone injures a limb on one side of their body, rehabilitates that limb, only to ignore the non-injured limb completely. This is not their fault, but the fault of the rehabilitation specialist. The maxim becomes not only what we do to one side of the body we also do to the other, but instead should be dictated, “What we do to one area of the body can be felt throughout the entire body.”
The length of this book whether 200 pages or 2,000 will never be enough for me to reiterate how interconnected our body truly is. Jean-Claude Guimberteau says in his book, The Architecture of Human Living Fascia,
that our body is a “system of systems.” To me, our body is a walking juxtaposition. One strategically placed bullet and we are done for. Yet another person survived from 37 poorly placed stab wounds. Our body can be very fragile at times, yet very resilient at others. When working with our tissue we need to keep this at the
forefront of our mind at all times. Jessica didn’t force herself into that position to haphazardly explode that muscle, as you will learn in this chapter, stretching is about patiently allowing your body to adjust itself. It’s about breathing, repetition, and consistency (Are you willing to stretch those glutes before bed? Or are you too tired and just going to wait till tomorrow?). By now, I think I have sparked your interest enough and it’s time to reveal magic step number 2 in my healing process – stretching!
Why We Have to Do It
Stretching always gets the benefit of the doubt, whether it deserves it or not. It is one of the most commonly prescribed things for a tight muscle. The use of foam rollers, lacrosse balls, and softballs for healing the tissue is still under a little bit of an attack though. There are some therapists that criticize self applied massage tools such as foam rollers or lacrosse balls as not being “true” myofascial release and I tend to agree with them. What they are trying to depict is the truest definition of the word “release.” They want to claim only a manual therapist can truly “release” a muscle but this is far from true. I along with several other mobility experts have got nothing but amazing results teaching people to be their own best therapist. In my opinion there are 3 major steps to releasing a muscle. Step one was rolling our tissue. If you remember, incorrect muscle firing patterns create tense, fibrotic, and knotted up tissue called trigger points. The pressure provided by our own bodyweight up against the rigidness of the ball or roller will help break up the tissue to decrease the pain response, but it still needs to
be unglued and lengthened. This is where stretching comes in. Stretching will help pull apart the glued fascia and help return its ability to glide once again, restoring its original length and allowing the joint it controls to operate in a full range of motion once again.
This is where the incomplete release bit comes from. If you just foam roll, the release is incomplete, but you think you are done because there is no more pain being referred. The tissue may stay glued together and when we return to sport or our regular daily activities the brain still has a hardwire to the damaged area, tightening it right back up, leaving us scratching our head and having to starting back at square one again. Note to self: just because the pain went away does not mean we are out of the woods yet!
Even though the elimination of the pain is our goal, returning our body to its normal structure and function is always our mission
. Failing to stretch a muscle after we apply pressure is like winning one battle, and not caring to win the war.
Stretching Rules and Plasticity vs. Elasticity
Stretching is one of those things that everyone knows how to do, right? I mean there’s really nothing to it. You’re tight, you bend over, the muscles stretch and then you stand back up. I’m sure you know where I’m going with this…. Stretching in this manner is not bad, but it doesn’t do very much good for the body either. We are interested in making a permanent change to the tissue, as well as optimizing
our time while stretching. Stretching haphazardly with no instruction will not lengthen your muscle tissue. This is because muscle is elastic
, but the
fascia that covers the muscle is plastic
. Let’s not forget that the fascia penetrates our muscle tissue all the way down to the bone as well. The bottom line is to make an actual change to what we are stretching; we need to realize we are stretching more than just a muscle.
To get a picture of what I’m talking about, think about a rubber band that is wrapped in a thin coating of plastic. You know the rubber band can expand and contract very quickly and with minimal effort, but what about the plastic? Have you ever tried to break a plastic tag off of a new shirt? Take notice next time how slowly the plastic stretches, and then if it does not break let the tag go and watch how slowly the plastic contracts to regain its original shape and length. This is truly what your muscle tissues do. As a result, my first of several rules to stretching a muscle is always slow going into the stretch and even slower coming out of the stretch. We are stretching the muscle, but if we fail to adhere to the rules of the fascia, we will be stretching for nothing.
There has been a lot of new information on stretching coming out over the last few years. It used to be the only way to warm up until studies found that rigorous stretching actually increased the incidence of injury in sport. This is because when we stretch our muscles and create a change in length, we are disrupting the balance the sensors in our muscles have created. These two sensors are called Golgi tendon organs, and muscle spindle fibers. Golgi tendon organs measure the amount of force (tension) that is being applied to the muscle, and muscle spindle fibers measure the length of the muscle and report this information back to the brain
in real time. When we change the length of our muscles through stretching, our brain needs to calibrate the new length-tension agreement before we can do explosive exercise like sprinting, or squatting. Light stretching required a downtime of 15 minutes, and extensive stretching required a downtime of nearly 2.5 hours!
Hopefully you are already getting the idea that stretching is way more than it seems. We have barely scratched the surface though, but for now let’s recap on rule #1:
Slow going in, slower coming out.
My second rule to stretching is to breathe correctly. Wow, here we go with the breathing thing again! Have you ever had a friend help you with a stretch and accidently push you too far? Did you ever take note of what happened? I’m betting your ability to breathe got cut off. This is because we have a negative feedback loop in our body that relates our ability to stretch with our ability to breathe. Think about it, if you are stretching a muscle to far too fast where you can potentially injure yourself, what would be a quick response your body could produce to stop you from doing that? Breathing, that’s what! Our yogi friends have it right when they are promoting the breath while stretching and this is where many people fail when trying to make a change in flexibility.
To stretch properly, our breath must be under a constant state of control. We inhale before the stretch and then exhale through the stretch. This turns off that
negative feedback loop in the brain and allows us to take control of what limits stretching the muscle, rather than the mind controlling the limits of the stretch. Never hold your breath or suffocate yourself during stretching. Controlling the normalcy of your breath will keep the nerves calm and allow you to achieve a deeper, more permanent stretch.
Rule #2:
Inhale before the stretch, exhale during the stretch.
Rule number three is already systematically built into the program, but is worth noting and explaining into greater detail and that is always roll before you stretch! I have said it before; putting pressure on your muscles sends a message back to the brain for that area to relax. If we are lucky enough to get that area of tissue to actually release, then the stretch will help open it to a much greater extent. I actually found this out the hard way when I was training for a marathon in Honolulu one year. With all of the running and weightlifting I was doing, my hamstrings started to tighten up on me considerably, producing discomfort in both my lower back and calf muscles. A friend of mine was a bikram yoga instructor and told me a class or two would clear me right up. She invited me to partake and I wasted no time in trying to open these suckers up. While the stretching was intense and my flexibility did improve, the pain actually got worse in my calf muscles. I found out later this was due to the tightening of the trigger points in my hamstrings. In Clair Davies' wonderful book The Trigger Point Therapy Workbook
, he cautions against stretching before applying
pressure due to the tightening effect it can have on active trigger points. Unfortunately, I didn’t have this information available to me at the time, but you certainly do! So rule #3 is:
Always apply pressure before stretching!
Rule #4 is an interesting one, and that’s to stretch actively, and not passively. My definition for this is to always be moving, especially for some of our deep hip stretches. To do this, we can provide a little bounce, a wave motion, or a circular motion. The key is to do this very gently. There’s a huge difference between stretching a muscle and stretching a joint capsule, especially one like the hip. Pinning yourself down in a hamstring stretch and creating a lot of pain is never a good idea. Remember, movement heals, isolation and immobilization prolong healing. While some of our stretches may seems like we are isolating a muscle, really each stretch is designed to open up the hip capsule by also stretching some of the surrounding musculature at the same time.
Rule #4:
Stretch actively, not passively.
The first time I heard about this way of stretching was in 2006 through a book called Stretch to Wi
n
written by Chris and Ann Frederick. They had a simple concept they were trying to introduce – stretch the fascia and win! As soon as I started to institute this concept with my athletes and myself we were achieving new ranges of motion almost instantly
.
Two Tests
I love learning about anything related to the human body, especially when it comes to movement or pain free movement. I research new ways of improving mobility constantly, and always ask my clients some of the good things they have taken from people or procedures that have not worked for them in the past. If I find a technique I have never heard of before or one I feel needs further explanation of how to do it, I will visit the practitioner and pay for a treatment. I’ve been poked, prodded, hooked up to machines, and assessed for up to 30 minutes before any type of treatment was done.
Sometimes the therapist/practitioner comes to a correct conclusion, and other times they are way off the mark. In my opinion, the eye should be the first assessment. I can sometimes tell a client what their problem is before they even open their mouth. Other times I will have them perform one of two tests, which take literally 15 seconds from beginning to end. The first is the hip impingement test, which is where I experienced my first pop in my tissue just like Jessica. Chris and Ann Frederick (
Stretch to Wi
n
) had a simple test for hip impingement, which is where the muscles surrounding a nerve get so tight that they actually get suffocated, creating pain and numbness in the area. I did the test for my right leg and had no problem. When performing the test on my left leg I found I had a real big problem. The test was simple. Lay on your back with one leg straight. Pull the other knee into your chest as much as possible and see if there is a pinching sensation that originates in your hip.

As I applied the principles I learned in the book about active stretching, and stretching fascia not muscles, I was sitting in front of the TV one day stretching my left glute and heard a loud pop in my hip feeling a warm rush of blood down my leg shortly after. It took some time for me to achieve this, as I’m sure it will take you, but like everything else we talk about in this book we must apply the Kaizen principle to stretching as well. With some stretches you may see an instant increase in mobility and flexibility. In other instances, it may take a few months in order to get where you want. Avoid our human tendency to think more is more. Don’t force yourself into positions your body is not ready for, snapping out of them like a wound up rubber band. Approach every day as if it’s your first day, be gentle, be consistent, and the results will come—trust me!
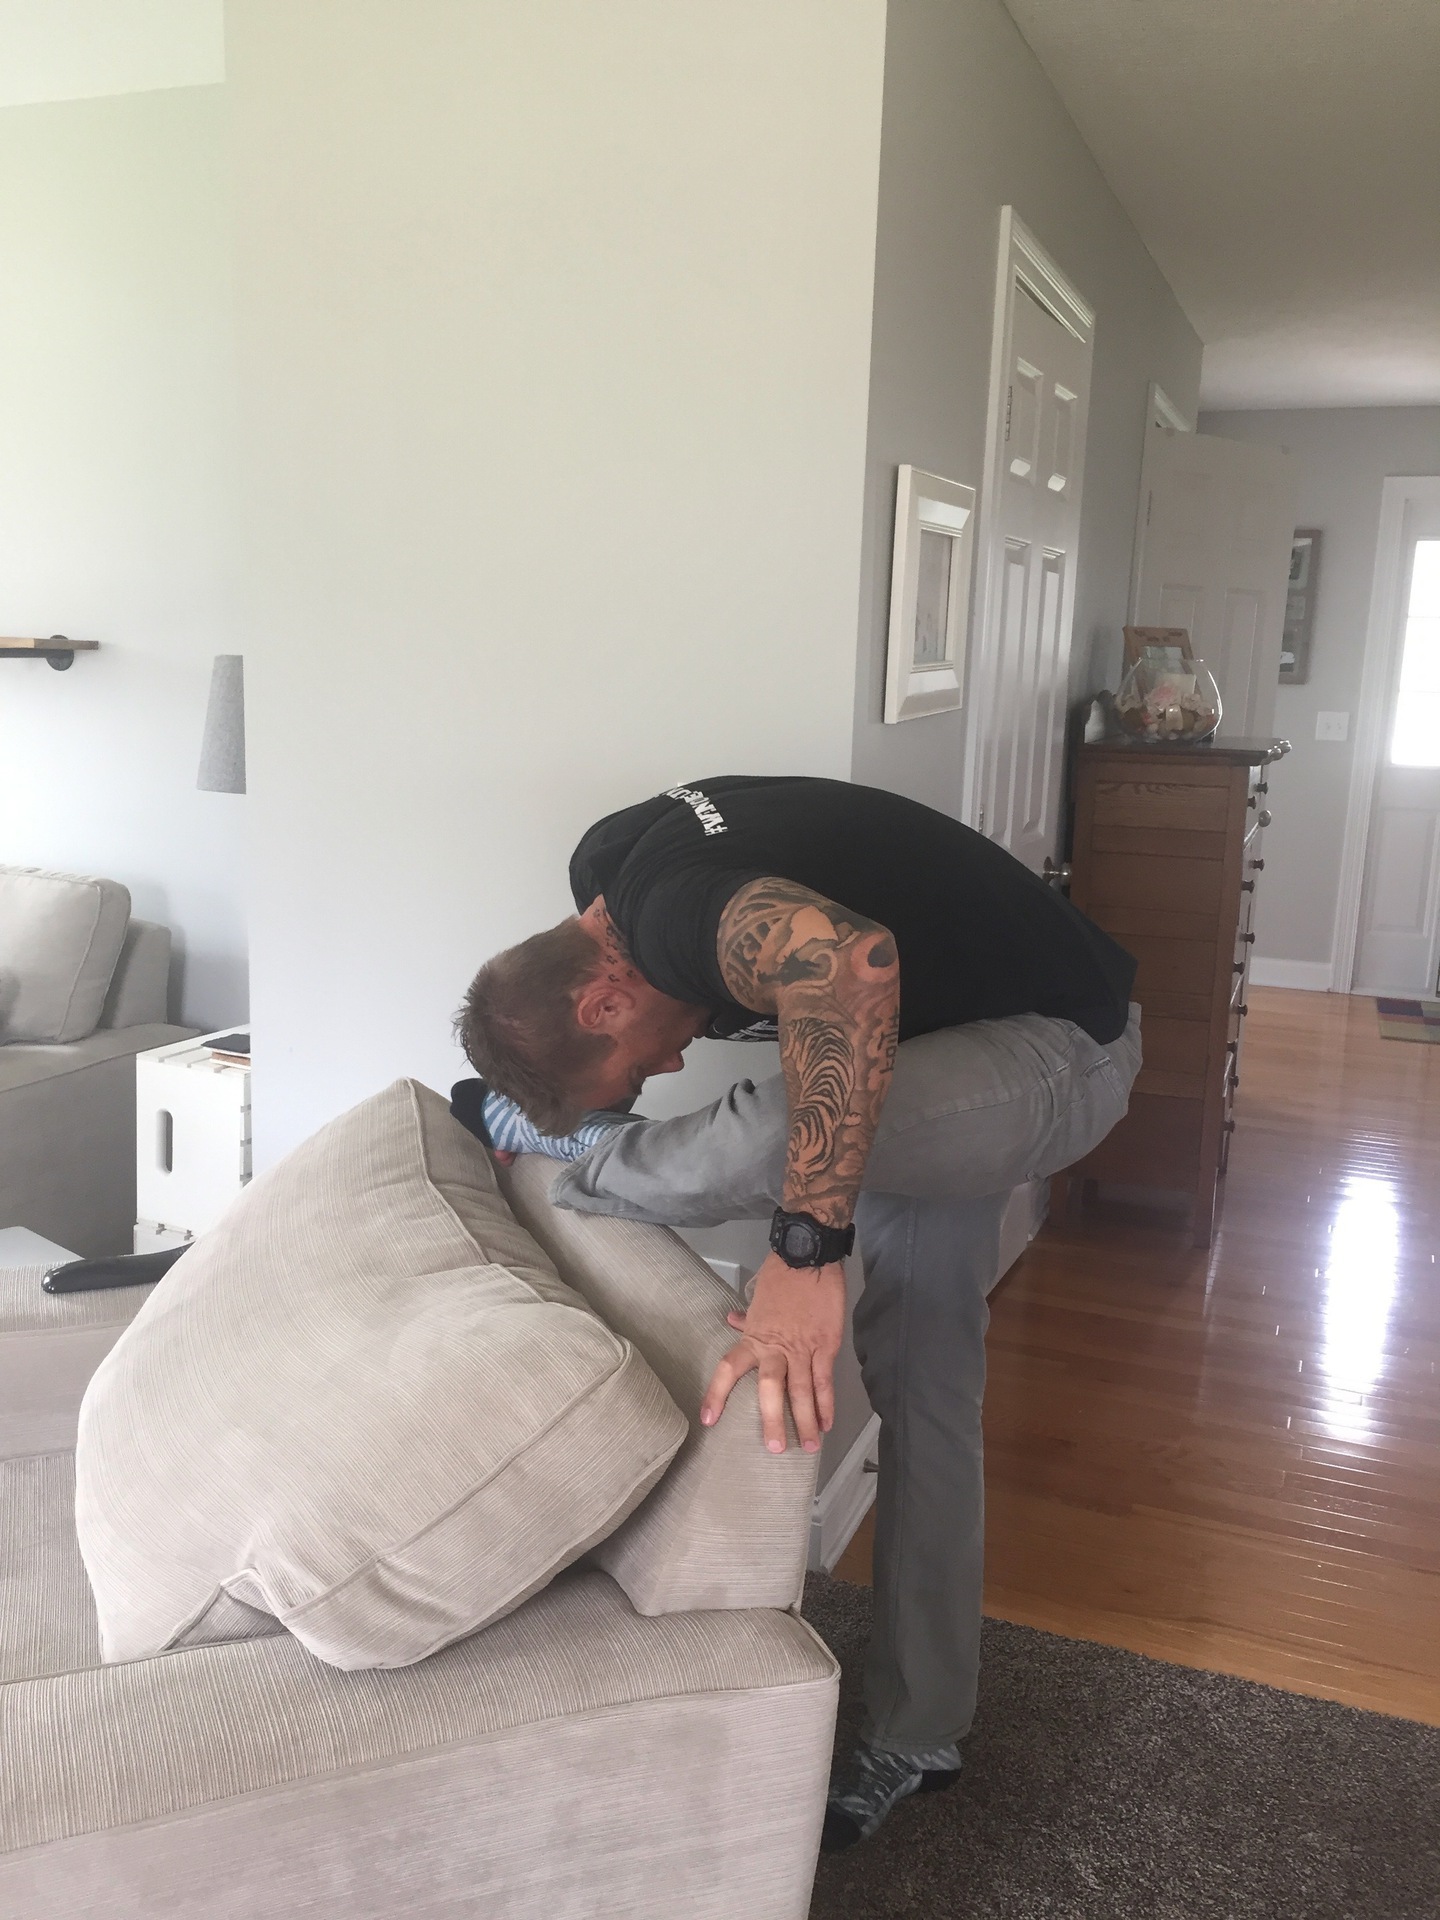
My second test is the glute stretch test. This test is simple as well and we are trying to find any type of unilateral tightness that has developed through our many years of movement on this Earth. The first thing you want to do is to find something you can put your foot on that is
knee height. Place one foot on the object, then whichever foot is on the floor, take a little bit of a step back to put your glute/hamstring complex on a little bit of a pre-stretch. Next we ideally would like to bend forward at the hip only keeping the back neutral. I find however that it makes no difference if you round your back or keep it straight, if you have one glute tighter than the other, you will definitely be able to tell either way. Do this stretch on both sides and see which side allows you to bend lower – this is the loose side.

Have a friend, family member, or roommate take a picture of you so you can get a clear idea of how tight you actually are and the urgency needed in the matter.
Pictures work wonders for some clients who have a decreased sense of body awareness. I have shown some clients their unilateral differences much to their disbelief. Their pain and discomfort then makes that much more sense to them! Even though we have so much more to learn, I really truly hope you are not feeling overwhelmed yet and are starting to realize how easy all of this is. I hope my words are providing a sense of calm for you and there is a picture starting to develop in your head of exactly what is wrong, and every page is another brick in the road of where you have to go. Having said that, I can already read your mind – bring on the stretches!
The Modified Lunge
This stretch is a compliment to the glute test I just spoke about. If you are very tight, this is a great way to get started; hence, that is why this is our first stretch in the series. For this stretch we start in a finished lunge position. The forward foot is on the floor, with the opposite knee on the floor, foot pointing behind you.
From here, bend forward at the hips allowing for a slight (let me reiterate slight) bend in the lower back. Wrap your hand down on the outside of your foot, and if you can, place your palm firmly on the ground.
If you cannot put your palm on the ground, place a thick book next to your foot and try to get your palm flat on the book.
Our goal here is to eventually reach our forehead to the ground as I show below.
We can perform this stretch with a slight back and forth rocking motion, making sure to exhale every time we stretch if you are really tight. For those who have a little bit more flexibility we want to wave stretch, which means taking a nice deep breath at the top and then
exhaling as we descend into the stretch. When we can go no further into the stretch we return to the starting position, inhaling as we come back up, then returning back down into the stretch as we exhale, trying to get down a little further.
Set a timer and perform this stretch for 2 minutes continuously starting with your tighter side. My rule for stretching is 2 to 1 tight side to loose. If your right glute is tighter, stretch the right first, then the left side, then go back and stretch the right side one more time. In the case of a severe one-sided tightness I will have my clients only stretch the tight side, after rolling their tissue of course!
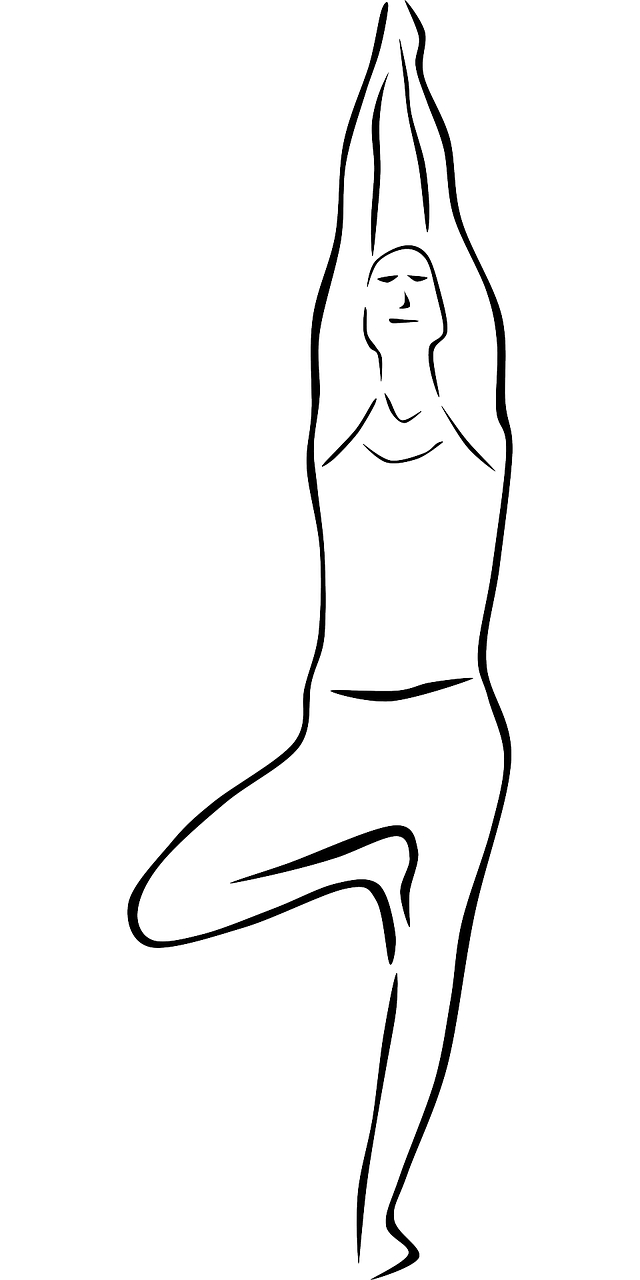
The Couch Pose Stretch
I adopted this stretch from the first yoga class I ever went to – it is originally called a tree pose. The tree pose is supposed to help improve focus, and calm your mind. If you can do a fully knee bent tree pose, chances are you are not reading this book. If you are reading this book then we are going to start off with the couch pose, and hopefully one day achieve just a standing tree pose.
This stretch is one of my favorite ways to target and stretch the glute medius. The higher the back of your couch, the more challenging this stretch will be, but the more you will feel it in your gluteus medius. As always, start off slowly, let gravity help you rest into the stretch and avoid the temptation to grab the couch to wrench yourself into a deeper position.
Start off behind the couch like so, pulling the couch away from the wall if need be.
Place your leg up on the back of the couch, ideally with the entire side of your leg resting on the couch. If you can’t do this, don’t worry; your knee can be up a bit and you can still do the stretch properly. From there we take a deep breath in and exhale as we bend forward at the hip. Same rules apply, you can have a slight bend forward of the back, just make sure you are not bending so much that you are going into C-spine.
This is an ideal position:
We can start off trying to get our head down to our shin at first, and when our flexibility improves we can switch gears and start to make the destination our foot.
Because of the advanced nature of this stretch it is best to take it slow once again. If you can not even get your foot up on the back of your couch, then I would suggest staying with the modified lunge until you can achieve a forehead to ground position first. Performing the couch pose after will be a nice compliment to continue opening up your gluteus medius. Perform this stretch in a wave pattern, taking a nice deep breath inhalation at the top and then exhaling as you descend down to your shin/foot. Set the time for 2 minutes and relax into the stretch, utilizing our 2 to 1 ratio stretching the tight side to the loose side.
The 75 – 90 – 120 Stretch
This stretch has three parts to it and really packs a wallop towards the end. This is a great example of how we stretch a joint rather than just a muscle. To start, we want to sit on the floor with one leg behind us at the 90-degree position, and the other leg in front of us in the 75-degree position.
From here we want to take a nice deep breath in and exhale as we bend forward at the hip bringing our head towards, and as close to our foot as possible. Work the tissue in a wave pattern for two minutes allowing gravity to help you relax into the stretch.
Our next position is to kick our front foot out so we have both legs at 90 degrees. This one is going to be a little harder now.
Repeat the same wave pattern trying to get your forehead down to your foot. Set your timer for 2 minutes again and exhale every time you relax down into that stretch.
Our last stretch is the kicker and some of you may be so tight that you cannot even achieve a stretch in this position. If this is the case, only perform the first two stretches at 75 and 90 degrees until you gain flexibility and are able to get this one right. To perform this stretch, move your foot out even further so it is at 120 degrees.
Take a nice deep breath in and exhale as you slowly descend down as low as possible.
Set your clock for two minutes and develop a nice slow rhythm as you work at unlocking the tissue surrounding your hip joint. For those of your who are looking to accelerate your progress we can add a side-to-side movement I call the pendulum. This pendulum movement will really break up the surrounding fascia and help open up the joint even more.


When you complete all three positions for 2 minutes each, we then want to switch legs starting the process all over again with the 75-degree leg position. I realize this is a long one, but it is also a very effective one so the same rules still apply. Stretch the tight side first for 6 minutes, then the loose side for 6 minutes, then back to the tight side for a final 6 minutes. To some, this may seem excessive, but a paltry 18 minutes of stretching pales in comparison to the destruction your normal, every-day movement, posture, and positions have created. The pain you are experiencing at this point is a process of priorities, or a lack of them per se. Has health really been a priority to you? If not, it is time you start to make it a priority. This book, the mobility exercises in the previous chapter and these stretches are a great start. Like we said earlier, awareness is the first key. Being aware of every movement, no matter how big or small, is our first key to feeling better.
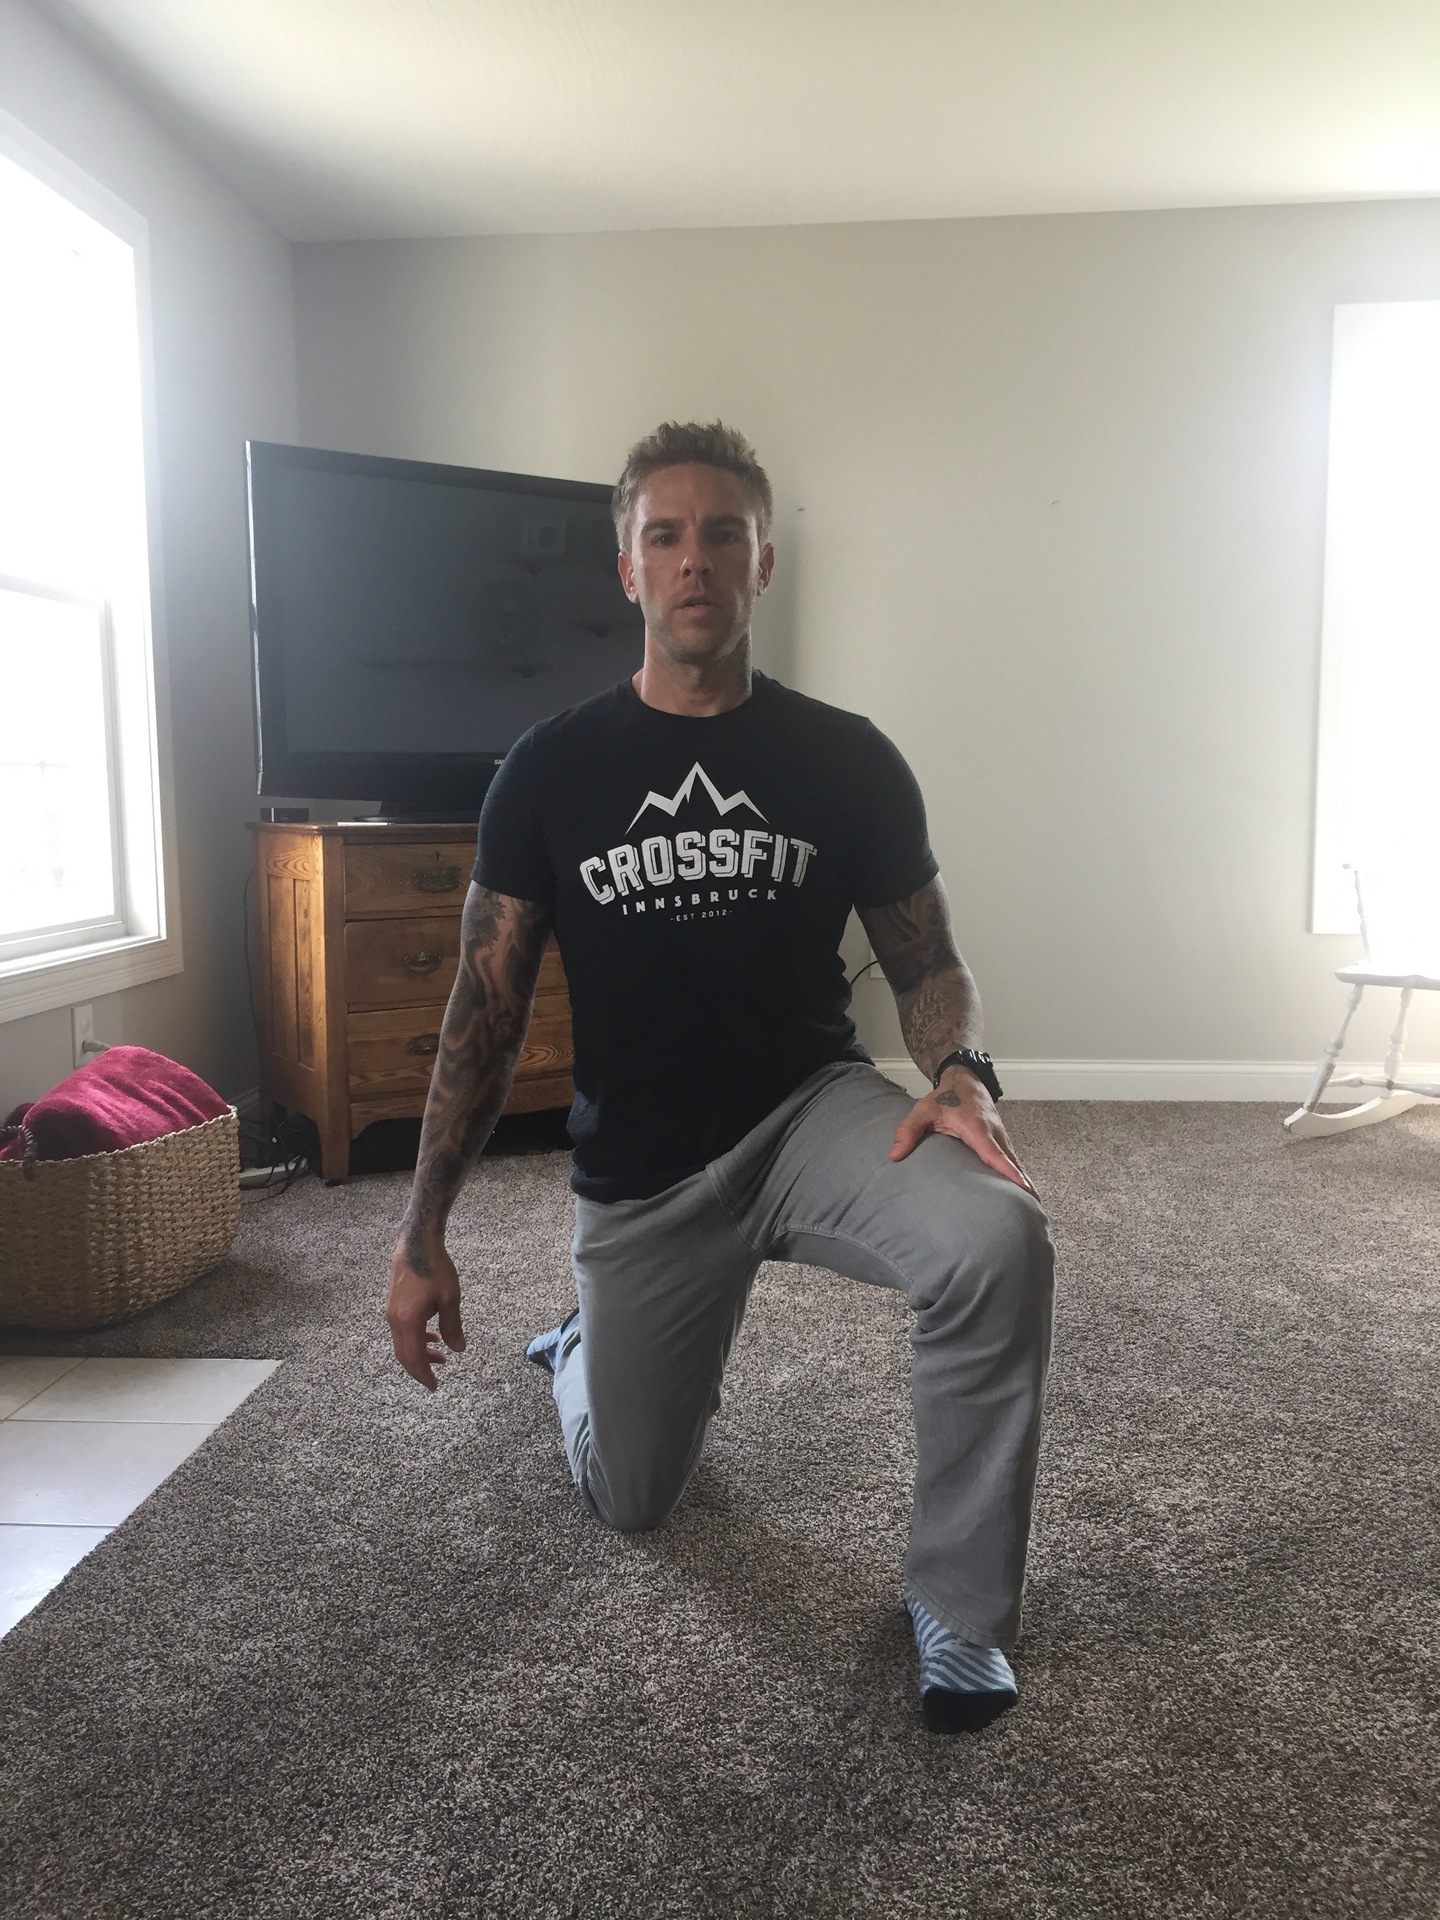
The Hip Flexor Stretch with Rotation
If you thought our last 75-90-120 stretch was starting to get complicated, welcome to the hip flexor stretch with rotation. When executed correctly, there is no better stretch to open your hips up and make you feel like a spring chicken again. For those of you who run, or love fire breathing through CrossFit, Tough Mudders, or Spartan races you will notice that after doing this stretch your breathing will become less laborious and it may even feel like you have an extra lung. This is because the fascia of your hip flexors is connected to the fascia of your diaphragm, and the fascia of your diaphragm is connected to the fascia of your heart. Funny how the body does that
huh? The prime muscle used in forward movement is connected to what helps us breathe and circulate blood. You can do this stretch in one of two ways either on the floor or on a couch – it just depends which one you are more comfortable on. To understand completely what this stretch offers we must get a little bit into what the hip flexors actually do, because to stretch them we are going to undo what it does. Yes, that’s how funky your hip flexors are!
The first action your hip flexors perform that we are going to talk about is lateral flexion meaning your right hip flexor helps you bend to the right. So if we are stretching the right hip flexor, how do we undo what it does? We tilt our upper body to the left!
The second motion your hip flexors contribute to is rotation to the opposite side of your body. So staying with the right hip flexor, this means it will also rotate your upper body to the left, which means during this stretch, we will be rotating to face right.
The third job your hip flexors have is to extend your lumbar vertebrae which makes you look like you have a belly out position. To undo this action, we tuck our tail and posteriorly rotate our pelvis by pulling up on our lower abdominals (please don’t fall asleep yet, this is just getting good!).
Fourth, the hip flexors flex the hip! So to undo this we are going to extend the hip.
Fifth, the hip flexors externally rotate the thigh bone, so part of this stretch is going to include us internally
rotating the thigh bone which will rotate our foot out away from us.
All too often I see people getting into a tremendously grotesque position to chase a hip flexor stretch. Their back has a huge arch, their head is extended backwards and it looks like they are trying to bend in half backwards at the hip. This will all too often reinforce its tightness. To stretch the intricacies of this muscle we need to develop a very robust position while trying not to yield to its uncomfortable nature. The following guide is the best and most stable way I have found to get into the stretch and don’t worry, getting out of it is much, much easier.
First we are going to start in the modified lunge position again.
From here keeping our spine neutral, we are going to internally rotate our femur, which will externally rotate our foot moving it further away from the midline of our body.
Next, we want to bring the opposite leg close to our knee making it look like we are trying to kneel on a tight rope.
Fourth, we want to tuck our tail by pulling up on our lower abdominal muscles, not by just squeezing our gluteal muscles. This takes some getting used to, be
patient and get it right as the pay off is a big one. This gets the hip flexor out of its lumbar flexion component and usually when you get it right will produce an instant stretch in the front of your hip.
Tail Not Tucked
Tail Tucked (Notice the flatness of my lower back)
Now that I have you all off balance and ready to tip over from a stiff breeze, we want to side bend slightly away from the side that we are stretching, which will loosen up our lateral flexion component.
Our last movement to undo what the hip flexor does in order to stretch it correctly is to rotate to the side we are trying to stretch. Also, we want to extend the arms in front, externally rotate our hands with the fingers spread wide and pull our wrists back, this is a full fascial stretch. Remember we are not in the business of isolating a single muscle!
Once we complete the final step to this stretch we want to stay in the stretch for one minute. Remember to take a deep breath in before going into the final part of the stretch and then exhale as you begin to rotate. Once you have reached the extent of your ability to rotate you can then practice normal box breathing inhaling for a four count and then exhaling for a four count.
Getting out of the stretch is simple, but remember: it must be done slowly. When your minute is up, slowly rotate back to facing forward, and then to finish off and come out of the stretch lean forward taking the pressure of the stretch off of your hip flexors. Switch legs and repeat the step-by-step process we just discussed.
Coach’s Tip! Are you having difficulty discerning which hip flexor is tight for our 2 to 1 rule? As consistent as death and taxes, the glute that is tight will naturally produce a tight opposite hip flexor. This means if your left
glute tested as the tight one, then your right hip flexor will be tight as well. Sometimes it’s too slight to feel, and other times it is blatantly obvious. Do your due diligence and give that tight one some extra love!
The Van Damme Stretch
I grew up watching Sylvester Stallone movies, Arnold Schwarzenegger movies, and especially Jean-Claude Van Damme movies. I loved Stallone for his toughness, Arnold for his physique, and Van Damme for his athleticism and martial arts. I was enamored by the positions Van Damme put his body in and wanted to achieve the splits he performed in the movies so one day I took two boxes and spread them apart, put a foot on each one and tried to “ease” into a split. I’m sure I don’t have to tell you this did not go well. Stepping back 30,000 feet and assessing the situation, I realized if I put a prop in the middle I could support myself and then put the “ease” back in easy. In doing so I proceeded to get the best adductor, hamstring, and gluteus minimus stretch I’ve ever had in my life. Cleverly, I nicknamed these “Van Dammes.”
You’ll be happy to know that in order for you to get the same benefit out of the Van Damme stretch you will not have to prop yourself up and balance like a tripod. You, sir or madam, will remain safely grounded. This doesn’t mean that I’m taking it easy on you though. To effectively do the Van Damme stretch for your hamstring/groin/glute complex, you need to start with your feet spread as wide as possible while internally rotating your feet at the hip.
From here, your next step is to bend over and put your palms flat on the floor pushing your butt back.
If this position is too easy for you, your next step is to put your elbows on the floor.
If you can put your elbows on the floor with no problem, then the last step is to get your forehead to touch the ground.

You can literally keep progressing this stretch until you obtain a split. You can keep spacing your feet apart, and keep relaxing into the stretch further and further until you get closer and closer to the floor. This stretch is going to be held for two minutes, which at first seems to be closer to 5 minutes. Remember to exhale as you descend into your initial stretch, and then as gravity does its thing, focus on your box breath of four seconds on the inhale and four seconds on the exhale. When you’re finished, slowly inch your feet back together, pausing for a few seconds after each step if you wish. We don’t want to collapse or snap out of the stretch as we’ve discussed returning our beautiful fascia to back to how it was with no change essentially wasting that two minutes we spent in what is sometimes agony. I know coming out of these stretches sometimes is difficult, but it’s not as difficult as having to do it all over again because of a sloppy exit.
Like I said earlier, stretching always gets the benefit of the doubt in any situation and is as revered as breathing. It’s commonplace to see a runner stretching on a park bench and not think anything about it. He or she is warming up as they should, but sadly they are not making the change that they think. There have been many studies published about the efficacy of static stretching and the results have been poor at best. Just look at a few of the studies conducted:
-
Konrad A, Tilp M. Increased range of motion after static stretching is not due to changes in muscle and tendon structures. Clin Biomech (Bristol, Avon)
. 2014 May 9. (Many people think stretching
increases the muscles length, clearly by the title we are finding otherwise.)
-
Shrier I. Stretching before exercise does not reduce the risk of local muscle injury: a critical review of the clinical and basic science literature. Clin J Sport Med
. 1999;9. (People think stretching before exercise reduces injury, and it clearly does not.)
-
Kay AD, Blazevich AJ. Effect of Acute Static Stretch on Maximal Muscle Performance: A Systematic Review. Med Sci Sports Exerc
. 2011 Jun 8. (Researchers looked at data from 4,500 studies on stretching and found overwhelming evidence of no significant effect for performance; hence, stretching does not make you a better athlete.)
-
Lund H. The effect of passive stretching on delayed onset muscle soreness, and other detrimental effects following eccentric exercise. Scand J Med Sci Sports
. 1998 Aug;8(4):216–21. (There was no difference seen between the control and experimental groups, so stretching does not take away soreness either.)
-
Ylinen J, Kautiainen H, Wiren K, Hakkinen A. Stretching exercises vs manual therapy in treatment of chronic neck pain: a randomized, controlled cross-over trial. J Rehabil Med
. 2007;39(2):126–132. (People think stretching reduces pain. This trial of 125 patients found pretty promising benefits to both stretching exercises and “manual therapy” for a month, and the researchers concluded that “low-cost stretching exercises can be recommended in the first instance as an appropriate therapy
intervention to relieve pain, at least in the short-term.”—Wait, what???)
There it was! I’m sure you were wondering why I was recommending stretching exercises, and then telling you stretching doesn’t do anything. Well, it turns out that stretching may really only be good for one thing – people with pain who are also combining it with manual therapy! That’s what we are doing here, ladies and gents. People with pain as we have already depicted have created an environment in their body that is producing a constant state of contraction even when you are at rest. This constant contraction draws the muscle into a shortened state making it tight, and reducing our mobility. The main reason we stretch in this program is not to increase the length of our musculature; it is to return the length to normal! Ultimately yes, we are increasing the length of the muscles, and the fascia, but we are not taking the muscle from its normal length to a longer length, we are taking the muscle from a shortened contracted length to a normal length.
Your Keys to Success
-
Always roll the fascia before you stretch.
-
Realize you are returning the fascia, and muscle to its normal resting length and no further.
-
We are increasing the range of motion of the joint as well.
-
Inhale before stretching, exhale during.
-
Slow going in, slow coming out.
Ask the Coach: Should I Go See a Massage Therapist?
The short answer here is yes, absolutely. The long answer is a bit, well, longer. There are so many different manual therapists out there, and because massage therapy isn’t cheap it’s challenging to find someone who not only understands your condition, but also can provide a solid road map for you to return to health. A general massage, or “feel good” massage as I like to call them, is not targeted enough to make a change to the state of the tissue, nor are they addressing the problem. Rather, these sessions are designed to stimulate endorphins and provide total body relaxation. I’ve had many clients tell me they were so relaxed they fell asleep during the session. Good luck doing that with me! Like I have stated before, pain is never the purpose of what we do, it is simply part of the process.
Sports massages may be a little more targeted, but still fail to correct the actual problem. The pressure may be a little bit more intense, but if your feet hurt, I find the therapist targeting the feet when there are plenty of trigger points in the calf muscle and hamstring that refer pain into the foot. Once again we are missing the mark. Shiatsu massages are much more intense, primarily using elbows and knees to stimulate blood flow and lymph drainage. They have been known to decrease pain from time to time, but still are not an optimal form of body treatment because it fails to target where the problem is specifically coming from
.
Even though there are several types of massage left (lomi-lomi, hot stone, deep tissue, Thai, reflexology) they all still fail at one main (and very important) point: they’re all treating symptoms, not the actual problem. So what to do then? Be specific and let your fingers do the walking. Call therapists up and ask them if they have heard of Erik Dalton, Paul Kelly, or if they know how to do fascial stretching. Ask them if they have ever heard of Jean-Claude Guimberteau, or Guy Voyer (Voy-ay [they’re both French]). Ask them if they are familiar with trigger points, and if they have read anything from Clair Davies. Any hesitation on their part should constitute caution on yours.
Your other option is to work with me. Yes, that’s right, I work with people all over the nation, even though my home base is in South Florida. If you’re interested in working with me shoot me an e-mail at
chris@influentialhealthsolutions.com
even if you just want to say hi and ask a quick question. I love getting to know my readers and it gives me the chance to thank you for your support in believing what I do. As a quick reminder, you can also access the video course with 10x more information and a full 3 month program for a small fee by emailing me as well.