Chapter 2: Working with Stone Tools
Companies manufacture and sell more high-tech tools to consumers who want to work with stone than ever before. Earlier stonemasons had only chisels and hammers to use when cutting and shaping stone. But, even with all the new tools available, many masons still pick up a hammer and chisel and form stone by hand, just as it was done centuries ago because it is less complicated and more economical than obtaining expensive and complicated machines. This chapter explores the basic tools needed to shape and form stone and rock, as well as how to lift and transport stone. Each step will explain how to properly divide, split, or cut raw stone for dry stone or mortar masonry and will describe power tools available to modern stonemasons.
Lifting, Loading, and Transporting
Before you can begin building with your stone, you need to move it to the project site. Depending on the sizes and weights of your stones, you may only require a pickup truck with a large piece of plywood in the bed to protect against scrapes and dents. If you are trying to transport large rocks that are too heavy or bulky for you to lift safely on your own, you will need something a bit more heavy duty, such as a heavy flatbed truck or bulldozer. It is best to leave the stones weighing a ton or several tons to the professionals who move stone with heavy construction machinery.
You will also want to take your hammer and chisel into the field with you if you are gathering your own stones. This allows you to shape rocks that are easy to cut. You can determine the nature of rock by chipping or cutting it on the site to see the interior of the stone, as well as to determine how hard or dense the stone is. For example, using a hammer and chisel to break a stone in half will allow you to see the interior of the stone where you can determine if it is sandstone, fieldstone, or granite. You can also shape the stone on site to prevent taking more weight than you need to the project site. And, of course, you can leave the small rock you chip off the larger ones when you shape your stones to naturally degrade and become part of the soil.
Lifting anything of weight or bulk is better if you have two or more people because you want to avoid back or joint injuries. If you decide you really want to take off into the woods alone to look for stone, and you find some heavier rocks you just cannot resist taking back, you will need to apply some basic safety rules and remember a very important fact: Leverage is your friend. Using leverage will greatly increase the weight you can move or lift without injuring yourself. Using the crowbar to dislodge stones, rolling the stones along a makeshift roller belt by using polyvinyl chloride (PVC) piping, and making a hoist are also ways you can move stone without too much effort.
If you need to lift a heavy stone by yourself, always implement the following steps:
1. Rest the stone against your upper thighs to prevent lifting the full weight of the stone with your arms.
2. Bend your knees, keeping your back as straight as possible.
3. Slowly stand and lean back slightly so that your legs do most of the lifting and not your back.
4. When you walk to your vehicle (or the job area) with the stone, watch your footing. If you stumble, release the stone, pushing away as you release so it does not fall on your toes.
It is always better to have another person help you lift and transport rock and stone, but if you cannot find another person to help you, you can use certain methods to help you achieve your collecting goals. Realize your own limitations, and if you find some rocks you want to collect but they are too heavy or too bulky, make a note of their location and come back when you can find someone to help. In the meantime, here are six methods that can help you lift the heavier stones and transport them.
Board and piping
Lay a large, flat board, such as a sheet of plywood, on top of several metal or PVC pipes. Set your stone on top of the makeshift sled and roll, removing and replacing the pipe from the back of the sled to the front of the sled as you go along. If you have a large stone slab to move, you can eliminate the plywood if you have large enough PVC pipe — it is best to use a pipe with a 4-inch diameter. You do not need another person to help you transport stone using this method, but it does make it easier.
A sledge is a sleigh or sled with a flat base with handles and runners on the base to help with mobility. It usually has a pull rope or chain in the front for steering. Using chain instead of rope is recommended so you can pull the heavy stones without worrying about the rope breaking.
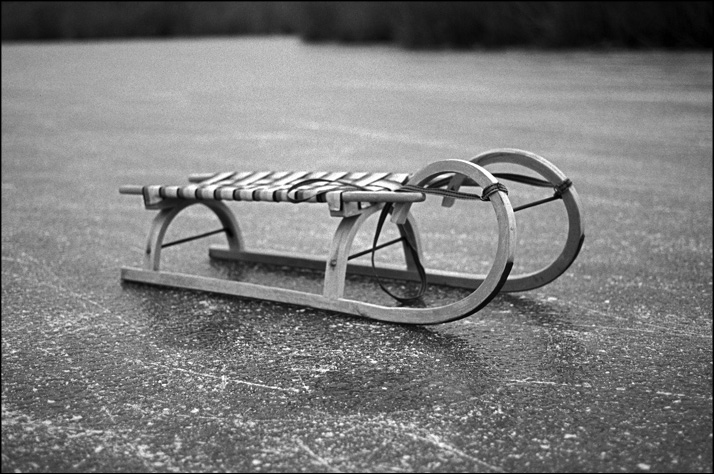
Example of a sledge.
Hand truck
A sturdy hand truck, also called a dolly, is a highly valued tool for anyone who has to move heavy objects. A dolly is made up of a small cart that has a frame with two low wheels and a ledge at the base. It has handles at the top and is often used to move crates or other heavy objects. You can position heavy stones on the hand truck by gently raising the handles up to transport the stones without having to secure them. Always put larger, flatter stones on the bottom, and if you are moving very heavy stones, then never move more than three at a time to prevent damage to the hand truck.

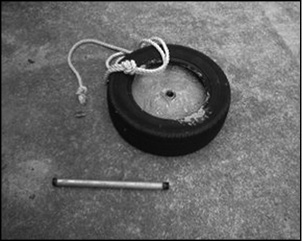
Tire sled
You can make a functional sled from an old tire and a tarp. Simply tie a chain around one end of the tire and insert the tarp into the rim hole in the tire. Place your stones into the center and drag the tire by the chain.
Use a makeshift lever
Using a heavy board, a 2-by-12-inch oak or other hardwood plank is recommended, as a lever can help you lift stones out of the ground and onto a sled or hand truck. You can also use a plank to prop against your vehicle and slide or tumble heavier stones up the plank into the bed.
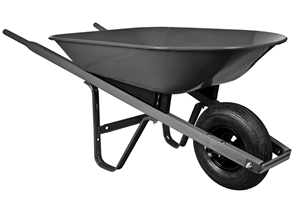
Wheelbarrow
This is another invaluable tool for transporting stone. You can lay it on its side and slide the stone inside. Turn the wheelbarrow back upright and push it to the location. Use the same methods for unloading the stone.
Trucks
In the event that you become a die-hard rock gatherer or you choose to move on from smaller stone projects to building homes or other structures from stone, you will probably want to invest in a standard size pickup truck with manual transmission — allowing you to downshift and save on fuel and brake pads — and an electric winch. This device requires a heavy-duty cable with a hook powered by the vehicle’s battery and is used to pull rock out of difficult and/or wet areas. A four-wheel drive truck will cost more in fuel, but it may allow you to navigate safely down to creek beds and through steeper, mountainous ranges. You may even look to have a hydraulic lift installed in the back of the truck, similar to a tow truck. If you progress to installing this type of heavy-duty machinery, then you will need to take special consideration of the truck itself and the loading capacity of your mounting bolts and braces, axles, and wheels. It is also important to remember that once you load your stones, you will have to unload and possibly transport or carry the rocks up a scaffold if you are building a fireplace or chimney. This is why you may want to enlist the help of others to help you lift the stones. Another stonemason’s rule applies here: It takes just as long to lay a small stone as a large one. Although it looks good to alternate large stones with small ones, small ones may be all you can handle.
The Essential Tool List
Each project outlined in this book has a specific materials and tools list. You may need certain tools for one project that you may not need for others. For example, if you are building a veneer stone wall over concrete block, you will need masonry ties, whereas if you are building a dry stone wall, you will not. Therefore, pay close attention to each project’s materials and tools list to avoid buying more than you will need for that particular project.
All stonemasons — regardless of experience level — need various tools to get the job done right. When you start to purchase chisels and hammers, you will find many different types of tools made from steel, carbide, and titanium, and it appears to be a personal choice as to which is better among stonemasons. But if you use power tool bits when working with hard rock, such as granite, carbide will outlast steel. The tools you may need are listed here, as well as a short description of their primary functions.
Gloves
A heavy-duty set of gloves, preferably leather, will save your hands from scrapes and cuts. It is best to have several sets in different sizes scattered around in case someone sees you laboring away and decides to help.
Also, when you mix mortar and cement, you will need specialized gloves because mortar and cement have caustic qualities that will burn the skin off your hands. Cement contains a chemical called hexavalent chromium, which causes allergic dermatitis. Prolonged exposure can cause severe dermatitis, which is an inflammation of the skin that causes severe itching, flaking, and burning. Gloves made from rubber are best for using when mixing cement.
Side note: If you work with Portland cement on an extended basis (including grout), you can protect yourself from caustic burns or dermatitis by following these safety tips:
1. Always wear gloves when mixing, troweling, or grouting with any cement-based product.
2. Wear long sleeves and long pants or wear rubber boots.
3. Wash your hands frequently with running water from a hose or sink and do not use abrasive cleansers containing limonene — these cleansers usually have a citrus odor and are used for removing oil and gasoline.
4. Remove your gloves from the fingertips and not from the cuff.
Safety Goggles
Protective eyewear is essential on job sites that have anything to do with flying rock, blowing sand, or cement dust. The importance of wearing goggles cannot be stressed enough. One small splinter from a chiseled rock flying into your eye can cause permanent blindness. Even if you wear glasses, slipping a pair of safety goggles over your glasses protects the lenses. Several types of safety glasses exist, as well as tinted safety glasses to help protect your eyes from the sun when working outside for an extended time.
Buckets
Buckets are useful for many reasons, but you will need them more than you ever realized as soon as you begin building with your stones. You can mix small amounts of mortar in large, empty commercial paint buckets, load smaller stones in the buckets to easily transport them, fill them with water for washing up tools, and even store hand tools in them when the day is finished. You can purchase these buckets at home hardware stores for less than $3 each.
Hoes
Hoes are long-handled tools with a flat blade attached at a right angle used for weeding, cultivating, and gardening. When building with stone, it is a perfect tool for mixing mortar, dislodging small rocks, leveling ground, and weeding if you are building an outdoor structure. There is a hoe specifically designed for mixing mortar and cement that has two large, round holes in the blade that allow mortar or cement to gush through while mixing, but it is not entirely necessary to have this specific hoe. A simple garden hoe will achieve the same results. It is important to wash the hoe off with running water after each use or the cement and mortar will set up on the blade, and you cannot use it again.
Shovels
Shovels allow you to dig footings, move earth, and add mortar mix to foundation footings. The best shovel for these applications is a heavy-duty shovel with a flat blade. Newer shovels have reinforced handles made from construction-grade plastic that will not rot or weather.
Crowbars
Crowbars are tools used for leverage and demolition, and you will be doing both when working and building with stone. A crowbar is a straight bar of iron or steel with the working end shaped like a chisel and often slightly bent and forked. Originally called crows in Colonial America because the split end resembles a crow’s foot, they come in many different sizes and weights. They are also referred to as prybars, jimmys, or jimmy bars. Using the crowbar as a leverage tool, you can pry larger stones from the earth. They can also be used to help lift and roll large stones onto a sled or wooden plank for transporting. There are lightweight crowbars made from titanium, which is a nearly indestructible metal, but the weight of the crowbar works in your favor when you are working with rock so choose one made from steel because it offers more weight than a titanium version.
Three-pound hammer (sledgehammer)
These are also referred to as 3-pound sledgehammers or mashing hammers. Seasoned masons sometimes make their own from heavy metals like truck axles and use hardwoods wedged into holes drilled through the centers of the metal. The commercial 3-pound hammers with tempered steel and fiberglass is an acceptable substitute to making your own. This tool is used for striking a chisel when splitting stone, but you can also use a steel mallet for striking chisels.
Mason’s hammer
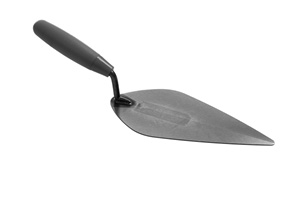
This tool has one end shaped like a common hammer and the other end fashioned with a curved chisel. The mason’s hammer is used for splitting block or brick with the chiseled end by creating light blows all the way around where you want the stone to split. You then use the hammer end to sharply tap the stone, causing the stone to split cleanly. You can clean any remaining edges or burrs using the chisel. This is one of the tools you will use the most as a stonemason.
Levels
Any project you build will need to be level, or as level and plumb as you can get it using rock. The longer the level — a carpenter’s level, which is 4 feet long, is preferable — the easier you can determine whether your project is on the right track. For example, if you are building a connecting wall, you must have a level surface on both sides in order to have the capstones level. Make sure the bubbles that indicate alignment are both vertical and horizontal.
String
If you are building a structure or wall, you will need at least 100 feet of string, or mason’s line — also called a chalk line — to determine where to place the wall and keep your lines straight. Natural string in cotton or jute keeps knots taut better than nylon, but nylon weathers better if you are working with an outdoor project that may take weeks or months to complete.
Charcoal pencil
This type of pencil is readily available in most hardware stores and art supply stores. It makes a clean black mark on rock and stone for measuring chisel lines and for drawing out areas to carve, yet washes off easily with water.
Stakes
Building walls and pathways can employ the use of small wooden stakes for marking out the areas the walls and pathways will go. Stakes help keep your pathway or walls from veering off course.
Measuring tape
You need a metal, retractable tape to measure the lengths and widths of building stones and walls and to determine the length of an area you will build upon. A measuring tape with a 24- or 30-foot expansion should suffice for the projects described in this book.
Wire brushes
Wire brushes are used to clean moss and debris off fieldstones, as well as to clean out cracks and crevices in walls. They will also help clean old mortar off brick and stone. You can also use wire brushes to texture grout to resemble original grout when doing restoration work.
Scoops for mortar and cement
You can use shovels to get dry mix out of bags of mortar and cement, but it is easier if you use a large scoop because shovels rarely fit inside the bags.
Mortar pan (mixing trough)
These are large metal or plastic bins that you mix cement in. You can also use your wheelbarrow, but if your wheelbarrow is stacked with stone, it is always nice to have a separate mixing trough.
Hand spade
A spade is a hand tool designed primarily to dig or remove soil and to break clumps of earth. It is narrow and pointed, much like an arrow, with a short handle.
Mortarboard
A mortarboard is a large piece of hand-held wood that excess mortar can be thrown on as you work, much like an artist’s oil palette. You can reuse excess mortar in your building projects as long as it has not begun to cure and dry.
Stone grinder attachment
There are hundreds of grinding bits and attachments made for use in the stone-cutting industry. The most popular bit for stonework is a diamond-gritted grinding cup, which is an attachment to a drill that you can use to core out basins and smooth rough stone edges. These grinding bits are attached to an electric or pneumatic drill like any other bit. Other popular grinding bits are:
- Grinding wheel — used to remove excess stone when polishing.
- Machine chisel with finishing blade — used for general carving and sculpting.
- Machine chisel with roughing blade — used when removing heavy stones is necessary.
- Four-point tooth chisel — used to aggressively remove excess rock.
- Splitter or cape chisel — used for fine-tuning lines in rock and stone. It is also used to remove old mortar in preparation for pointing. Pointing is the process by which old grout and mortar is removed from brick structures and replaced with new grout and mortar without tearing down the structure itself.
Stone chisels (also called blocking chisels)
Stone chisels are large metal wedges used to create splits in stone. They come in many different shapes and sizes but are all designed to split stone. It is recommended that you have one wide chisel — 8 inches wide, also called a brick chisel; a medium-sized chisel — 4 inches wide; and a small chisel — 1 inch wide — for smoothing jagged ends or to fashion tight cornerstones. Small chisels are also used for removing old grout and mortar.
Pick
The pick closely resembles a mason’s hammer but has a spaded, pyramid-shaped point on one end and a curved pointed end on the other. It is used to find rock under the soil and to dig with.
Rake
A garden rake, preferably metal, is useful for clearing excess stone debris and helping create a level surface on which to lay stone. You can also use this tool to clean around the finished structure.
Earplugs
If you will use power tools, earplugs are essential to protect your hearing.
Masonry ties
Masonry ties, also called brick ties, are small metal reinforcing clips used in building walls to help tie veneer stone to concrete walls. They are used whenever and wherever structural strength is needed on brick or veneered walls. They are normally placed into the wet mortar every second or third block.
S-hooks, anchor bolts
When building forms and other tools, such as a ratchet hoist for moving larger rocks over stream beds or installing stone bench seats, you may need large S-hooks and anchor bolts. S-hooks will hold the chains for the ratchet hoist, and anchor bolts will keep the legs of the hoist together, as well as support braces for stone pillars.
Garden hose
Water is necessary for mixing cement and mortar and for cleaning tools after you use them. Having access to a garden hose and spigot rather than carrying water in buckets is best. You will also need access to a garden hose if you plan on creating a water garden.
Trowels
Trowels are flat-bladed, pointed hand tools used for leveling, spreading, or shaping substances, such as cement or mortar. Trowels are also used to apply mixed mortar, and the two trowels you should have in your tool kit are a pointing trowel and a trowel with a blade roughly 8 to 12 inches wide. The 8- to 12-inch trowel is good for applying mortar to flat, level surfaces, and the pointing trowel is a finishing trowel good for cleaning mortar joints and to finish work on the exterior. Choose trowels with short handles because manipulating a long-handled trowel can be hard on your joints after a long time. Also, choose a trowel that has a thick metal band where the trowel blade joins the handle because most of the stress occurs here.
Sponges
When working with grout, you will need to use grouting sponges, which are large cellulose sponges used to wipe excess grout off the rock. They are 6 to 8 inches long and at least 4 inches thick, but you can cut them to whatever size you feel comfortable working with. It is important to keep sponges clean from debris while working with them and important to rinse them often to keep mortar and cement from collecting in the sponge and hardening.
Power tools
To cut harder stones, such as granite and basalt, you need tools that use an external power source in the form of an air compressor, which uses air pressure to run drills, cutters, grinders, and splitters. Many of the power tools used in commercial applications are huge and not practical for the beginning stonemason. But, companies have manufactured simple and affordable power tools for the beginning stonemason to make cutting through harder stones easier.
Air compressor
All of these power tools operate off an air compressor and a 1-inch or 3/4-inch “D” or “B” type pneumatic tool base. The “D” and “B” designation is based on size variations in drill bits. The air compressor, which is a large motor encased in metal, also has an air hose and a quick connect for various bits and chisels. You can purchase air compressors at any hardware store. The size of your air compressor should depend on how hard the rock is you will carve and shape. For instance, if you are dealing with limestone or sandstone, you will not need much power. Working with harder rock, such as granite, requires a larger air-compression unit. Also, if you intend to do quite a bit of shaping, sanding, and carving, it is best to invest in an air compressor with a higher horsepower, which will provide a better long-term investment and fewer repairs. A five-horsepower air compressor should supply enough compression for working with either type of pneumatic tool base. You can use several different interchangeable chisels for this type of work and most are finishing chisels for cleaning up rough cuts and carving. You can also use diamond blades and grinding stones for cutting edges into stone and for keeping your chisels sharp and free of metal burrs.
Type “B” pneumatic tool base
The type “B” pneumatic power tool has a shorter piston stroke, offers less vibration, and is quieter to operate than the type “D” power tool. The type “B” is better suited for light use and softer stones, such as limestone and sandstone.
Type “D” pneumatic tool base
The type “D” pneumatic power tool is specifically designed for harder rock and provides more vibration and noise than the type “B.” If you are going to be cutting primarily granite and basalt, invest in the type “D” tool base.
A note on sharpening your chisel bits when they become dull: When you sharpen chisels using a grinding stone or blade, you can cool them in a bucket of water as you go but only if you are sharpening steel. If you sharpen carbide-tipped chisels in water, the chisel head may crack because of the rapid temperature change. There are two schools of thought in choosing steel over carbide: Carbide tips are considered harder and more durable than steel and do not tend to develop the “mushrooming” effect of steel over time. For example, as you continue to hammer on a chisel, the top will slowly flatten and form a lip over the chisel top. This effect is called “mushrooming.” This can be very dangerous as the sharp edges on the mushroomed lip can break unexpectedly and fly off. It is important to keep these edges ground off with a grinding bit. A grinding bit is a drill bit made from diamond or hard silica that will grind metal. You have to let carbide tips cool down from time to time as they do get hotter with continued use, and you cannot cool them in water as you can with steel.
Bushing tools
Bushing tools are specific tool bits used to finish-carve, which is the term used to describe the final phases of carving on a stone piece and adding texture to stone, such as cross-hatching or facial details in sculpture. These tools are the four- and nine-point chisels, the carver’s drill, and the cup chisel. None of these bushing tools are used in any of the projects listed in this book and are normally used by stone sculptors in the completion of their art. It was important to mention them in the event you choose to carve lettering into stone.
Additional tools
Other tools or accessories you may find you need are:
Steel-toed boots
For safety reasons, these feet protectors are absolutely valuable to any rock gatherer and stone builder. Accidents happen; therefore, if you have a pair of steel-toed boots, you will be exceptionally thankful should a rock of any size come into contact with your foot.
Moving Straps
Moving straps are densely woven nylon or rubberized straps designed to fit under or over heavy equipment or furniture. They are useful in moving stone because they conform to any shape object and are strong.
Tile Mastic
Tile mastic, a premixed tile adhesive used in the construction industry, looks like a joint compound and sets up slowly, allowing you to reposition easily. Tile mastic is an all-purpose adhesive but is used primarily on flat surfaces.
Stud Finder
A stud finder, also called a stud detector or stud sensor, is a hand-held device used to determine the location of wood and metal framing studs used in light-frame construction after you have installed the walling surface.
Metal Lath
Metal lath is a sheet of metal that is slit and drawn out to form openings. It is used as a plaster base for walls and ceilings and used as reinforcement over other forms of plaster base.
Leather apron
A leather apron is more durable than a standard denim or cloth apron and will protect your clothing while carrying or working with stone, cement, and mortar.
Grade 1 ladders
The American National Standards Institute determines the “grades” of ladders. These grades are listed on the next page.
You will need a minimum Grade 1 ladder if you do any climbing with your stone project. You may also need scaffolding if your project requires a height of more than 6 to 8 feet.
|
|||||||||||||||||||||
Hard hat
You may find that wearing a construction hard hat when working on projects above your height level or when on ladders or scaffolding is an excellent extra safety procedure to protect your head from falling or dropping rock and stone.
Circular saw
You may need a circular saw to cut wood when making a form or brace in stonework. You can also use a hand saw or have your local hardware store cut the lumber to length as requested for a minimal charge.
Jigsaw
This hand-held power tool is primarily used for cutting patterns, usually circular, in wood because the blade moves up and down instead of across, allowing for detailed cuts.
Metal grid
Metal grid is simply a metal cooking grill, such as the one made for portable or free-standing cooking grills. If you are making a barbecue pit, you will need a manufactured metal grid, or grill, on which to place your food when you cook. You can buy these grids wherever replacement parts for portable grills are sold.
Rubber liner
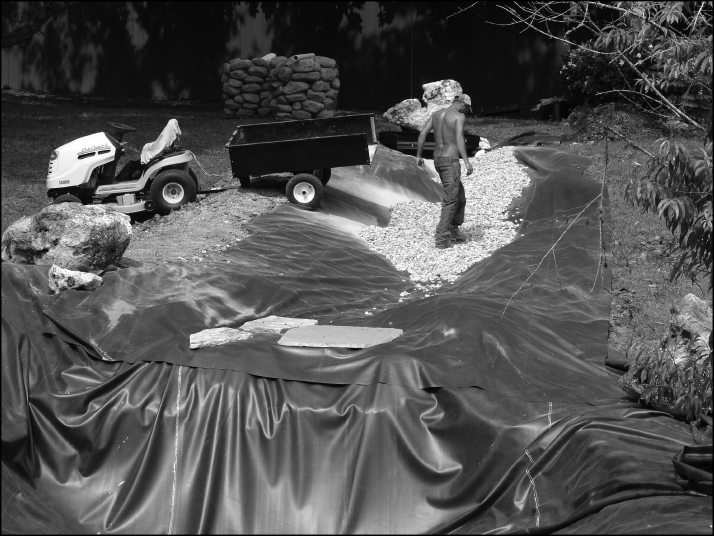
Here is an example of rubber liner being used in a backyard pond. Photo courtesy of Douglas R. Brown.
If you are building a water garden, you will need a rubber liner for the pond to hold the water if you do not use a fiberglass or plastic premolded form. You can purchase these liners in rolls to accommodate any pond size.
Pointing tool
If you are doing repair work to brick, you will need to add a pointing tool to your tools list. A pointing tool is also called a pointing trowel, which is a small, short-handled trowel used to replace mortar between brick.
Shock-absorbing gloves
Gloves are always necessary, but when using power tools for an extended time, you will need to invest in shock-absorbing gloves. Shock-absorbing gloves, also called impact-resistant gloves, usually have a mesh back for air flow and a gel-filled palm designed to reduce stress and fatigue when operating jack hammers and pneumatic drills used in shaping stone. Some gloves have additional leather padding across the palm as well. Leather gloves alone will not provide the protection needed for impact tools.
Filter fabric
If you are building water gardens, you will need to put an underlayment of filter fabric down to protect against weeds, rocks, and debris and to protect the rubber liner from tearing or abrasion. If you are building a retaining wall, it is advised to put a strip of filter fabric underneath the top capstone and along the embankment edge to help prevent debris and soil from filtering into the stones and causing a possible weakened area where the wall may crumble.
Dust masks
Dust masks are essential when using any kind of power towel for grinding, drilling, or sculpting rock or stone. Many natural stones contain trace elements of minerals not good for you to breathe into your lungs, such as lead, zinc, and calcium carbonate.
While you can purchase all or some of these tools at your local hardware store, you can also purchase them on the Internet. One source is Master Wholesale®, Inc., based in Seattle, Washington. The company’s website is www.masterwholesale.com, and the phone number to request a catalog is 1-800-938-7925. Another source is Trow & Holden, based in Vermont, and the company website is www.trowandholden.com.
Now that you have the tools you will need for stonemasonry, it is time to start learning to use them. The beginning steps to your projects usually involve learning how to cut and shape the stones you have purchased or gathered.
Cutting and Shaping Stone
The idea of cutting and shaping stones might seem like a task better suited for Paul Bunyan, but once you have read the following sections explaining the use of tools and techniques you will need to shape the stones for your project, you will be surprised at how easy it actually is. Most tools used for cutting and shaping stone use leverage and weight and require little effort on your part.
To know how you want to shape or cut your stone, you must first determine what stone you will use and how you will use it. For example, a barbecue may be square, which would require you to have square-cut cornerstones if you are using fieldstone or sandstone. If you wish to build a circular fire pit, then you do not need cornerstones or shaped edges, but you will need shims and wedges, which are small shards of rock used to fill in and help level rock structures when using unshaped rock.
In order to successfully begin and execute any endeavor, planning is a vital step. It is impossible to know how much stone you will need for your specific project, as the requirements are determined by how wide, how long, or how deep something will be. You can approximate the amount of stone you will need and the amount of mortar initially, but that may change drastically as you build. Start with the basics, and add as you go.
Using a hammer and chisel
No matter what project you begin, if it requires structure, such as a wall, bench, or barbecue, you need somewhat square or rectangular stones to work with to allow the stones to fit properly to provide stability and strength.
If you are out in the field cutting and shaping stone, follow these simple steps to cut rounded corners or jagged edges off rock:
1. Lay the rock on padding, such as old blankets or pillows, to prevent the stone from sinking into the ground. If possible, bring a sturdy wooden or metal table with you, which should be roughly the height at which your knuckles come. This will give you enough leverage when you strike the chisel to force a cut in the rock and will keep you from bending over to work at ground level. If you cannot bring a table, at least bring a wooden box or stool to sit on while breaking the rock at ground level to prevent any possible back injuries.
2. Mark the cut you want to make by making a series of light taps into the stone with a striking hammer and stone chisel. Go over the same marks twice more, only harder.
3. Turn the stone over and make the same cuts again on the reverse side, leaning the chisel slightly out into the rock as you strike.
The rock will ideally split exactly where you have made the chisel marks, but in reality, it does not normally happen this way. But, the chiseled cut will usually be enough for you to use it as a building stone. You can continue to work with it until you are happy with the shape.
As you continue to use your stone chisels, you will notice that after hundreds of strikes with the hammer, the tops will begin to mushroom out. It is best to grind these edges off with a grinding stone to prevent any injuries.
Dividing and Splitting Stone
Dividing and splitting stone is handled in much the same process as shaping it:
1. Make several small chisel marks along where you want the stone to split with a chisel tool known as a hand tracer, making sure to hold the chisel tool vertical to the stone.
2. Repeat these same chisel marks at least twice, using more force each time.
3. Turn the stone over and make the same marks on the reverse side of the stone.
4. Use your chisel and hit forcefully in the center of the marked area on the stone. It should begin to split.
Please note: This method is only for sandstone or limestone because these stones are soft and will break relatively easily. Harder stones, such as granite, require different methods, normally involving commercial power tools. Breaking granite is not recommended for beginning stonemasons.
Fieldstones are sedimentary rocks that have formed in layers, which is the reason the rock should break somewhat evenly once you have made the initial splits. Never hit the chisel hard the first time you strike it. It is important that you use the chisel to set a light indention in the stone before you strike hard to prevent breakage in the wrong places. This will also make your work more effective, as well as help prevent any damage to your hands.
Using plugs and feathers (wedges and shims)
There is a widely used technique called the “plugs and feathers” method, also called “wedges and shims,” although that term also refers to small stone used to fill and level rock structures. This method is used for splitting large stones, and stonemasons have used this practice for centuries. This involves the following steps:
1. Mark the stone with a marker where you want to split the stone.
2. Drill holes about 6 inches apart along the marked split line as deep as your wedges are long. Wedges are thin pieces of metal or wood that you will insert into the hole to cause the split. These wedges have a slightly curved top and somewhat pointed base. You can make this split either straight or curved.
3. Insert the wedges and shims. You should place shims, which are small metal bits wider at the top than the bottom, into the center and wedges with their “ears,” or top curves, pointed outward.
4. Strike the wedges with your stone hammer one by one in sequence until the stone begins to split.
Keep your stones as large as you think you can manage and relative to the size of your project. If you are building an outdoor barbecue, using a stone roughly 2 feet in diameter by 3 feet wide and 1 foot tall is not going to work; cutting a stone that large into several smaller stones would be the wisest choice. However, as a foundation rock for a springhouse or residence, it would be a perfect size.
Carving Stone
Perhaps becoming the next Gian Lorenzo Bernini, a 17th century Italian sculptor, is not on the list of things you would like to achieve in life, but any book about using stone would be remiss in not at least approaching the subject of carving stone.
You can have boulders delivered to your garden and carve them out to create a pool of water for birds and wildlife, or you can use them as an accent in your water garden. You can also carve out bench seats from whole rock, create hot tubs and sinks, and make accents in walls, such as small niches for placing a planter.
Carving stone requires using small power grinders with diamond-chip blades, which create an abundance of dust, making it imperative to always wear dust masks when carving with power tools.
You will rough-carve the stone first, which simply means carving the stone in a rough, unfinished manner. As you get your basic shape, finish-carve the remainder, which means smoothing the cut and providing more definition. Instructions for carving the projects listed in this book are included here, and all stone carving uses the same techniques, which are as follows:
1. Use a chisel and hammer to score several parallel grooves — also called kerfs — in the area you will remove.
2. Chisel out the kerfs using a hammer and large block chisel to break and remove the chunks of stone from the interior. You can use power chisels for this job or finish it by hand using a chisel and hammer.
3. Next, you will begin to finish-carve the grooves, or kerfs, with smaller, more precise chisels until it has reached the desired depth and width.
4. Smooth the surface, which you can do with a power grinder or metal sander.
CASE STUDY
Oleg Lobykin, stone carver and sculptor
Stonesculpt
538 Sacramento St.
East Palo Alto, CA 94303
(650) 575-9683
“There is beauty in a stone’s polished surface; yet, at the same time, there is beauty in the surface of a rock in its natural state. It is difficult to compete with nature’s creations.” — Oleg Lobykin
Originally from St. Petersburg, Russia, Lobykin is a stone carver and sculptor, as well as the owner of Stonesculpt, which specializes in custom stone carving and restoration. Lobykin began his career in the United States by working on the Cathedral Church of St. John the Divine in New York City, the largest cathedral in North America. Lobykin was commissioned to do mostly new stone carving but to match specific styles and time periods. He spent six years working on the cathedral with other master stone carvers before moving on to other projects.
Lobykin is also known for carving a column directly into a mountain in northern Alabama, dubbed “The Alabama Column.” He worked with the design of a co-artist and friend who was inspired by work she had seen in Egypt and recreated the same style at the face of a quarry located in Russellville, Alabama. “The quarry is all inside the mountain, and it is huge, like a cave. I carved icons that represented the local flavor of Alabama, such as the Confederate flag and red-bellied turtles,” Lobykin said.
Lobykin uses all types of natural stone for his work. “It all depends on the design and use for the work. I’ve worked in all types of marble, including Belgian black marble, granites, limestone of course, and onyx from Mexico. I like to use the onyx because I can incorporate a light source within the stone to make it glow.” Many representations of this unique work can be seen on his personal website, www.lobykin.com.
Using quarried stone
You can go to your local stone yard and choose stone already shaped into building stones, and this is perfectly acceptable. After all, it is all about the project and not about the creation of your own stone building blocks. It is more cost effective to gather your own fieldstone or reuse old brick gathered from nature.
Commercial quarries break stone using pneumatic and electric drills. Larger jobs are handled using explosives to blow apart the stone. After being transported by huge bucket loaders into trucks specifically designed to carry tons of rock, it is then stacked on pallets in the stone yards and sold per stone or by the ton. You can handpick some stone, but other stone is sold in bulk so you have to take whatever you get.
Now that you have more knowledge about the stones and tools you will need for your projects, the next chapter will talk about the difference between using stone without mortar, called dry stone, and with mortar.