I have never had so many good ideas, day
after day, as when I worked in the garden.
John Erskine

This chapter puts the “craft” back into your witchcraft. Are you ready to put a whole new spin on the arts and crafts store? I’ll warn you now, you’ll never look at a craft store the same way again after I get through with you.
We are going to explore making magickal accessories. You’ll find directions on how to sew some drawstring-style charm bags and magickal herbal-scented dream pillows, as well as recipes for magickal sachets to fill those charm bags and pillows. There are instructions for fashioning dried tussie-mussie bouquets. We’ll look at formulas for bath salts, suggestions for herbal wreaths, and thoughts on creating your own garden witch’s Book of Shadows. This chapter will finish with a small correspondence chart of backyard flowers and plants, including everyday herbs that you probably have in your cupboards and their magickal uses, as well as crystal and color correspondence tables.
Magickal accessories such as pillows are an easy, inexpensive project to start out with, even for those of us who shudder at the sight of a sewing machine. My sewing skills are basic at best, limited to pillows, craft projects, hemming the occasional pair of shorts, and, of course, the yearly Halloween costumes.
Botanical, celestial, and Halloween fabrics are fun to work with for your projects. Sometimes the celestial or astrological prints may be found in the juvenile section. In the fall, when they put out the winter holiday fabrics, you can usually find prints in deep purple and blue with metallic stars and such. Watch for sales or check the bargain tables.
I will confess that I am always on the lookout for Halloween fabric. I’ve made vests, table cloths, throw pillows, and, of course, many charm bags out of Halloween material. Halloween fabrics featuring adorable folk-art witches, full moons, stars, and cats usually start to show up in stores around July. Some fabric stores will carry it year ’round, but they will have a bigger selection in the late summer months.
I think charm bags that are sewn up from fabric that has witches and other magickal themes on them are fun and clever. They’re charm bags, after all. For those anal-retentive types who consider Halloween fabrics that sport cute little girl witches with pumpkins and cats beneath them, or harvest-theme material that feature witches on brooms and stirring cauldrons in bad taste . . . I say, oh, loosen up. You are allowed to laugh and enjoy your witchcraft, you know. Tuck that tongue firmly in your cheek and let’s have some fun, shall we?
What is charm? It is what the violet has
and the camellia has not.
Francis Marion Crawford

Charm Bags
Charm bags are a classic example of a garden witch craft. With a few simple ingredients found around the house, some fabric, a bit of ribbon, herbs from the garden, and the secret added power of the garden witch, you have the makings of a potent magickal tool.
Often the simplest and easiest magicks, such as a charm bag filled with magickally charged herbs and stones, will work the best. Small and easily portable, they make wonderful magickal talismans for all kinds of situations: for good luck on job interviews, healing after a surgery, keeping ghosts out of a home, or increasing sales at a business—just about anything you can think of.
A good illustration of the charm bag would be one that I made for a coworker who traveled all the time but was actually afraid to fly. This charm bag included a moonstone for safe travel and some homegrown lavender and a few drops of the essential oil for its calming effects. I tossed in some sea salt to banish negativity and added yarrow for courage. I passed it along with instructions to keep the bag on his person or in his carryon bag. After returning from his trip, it was reported back to me that it was the smoothest flight he had ever taken and that he was even bumped up to first class!
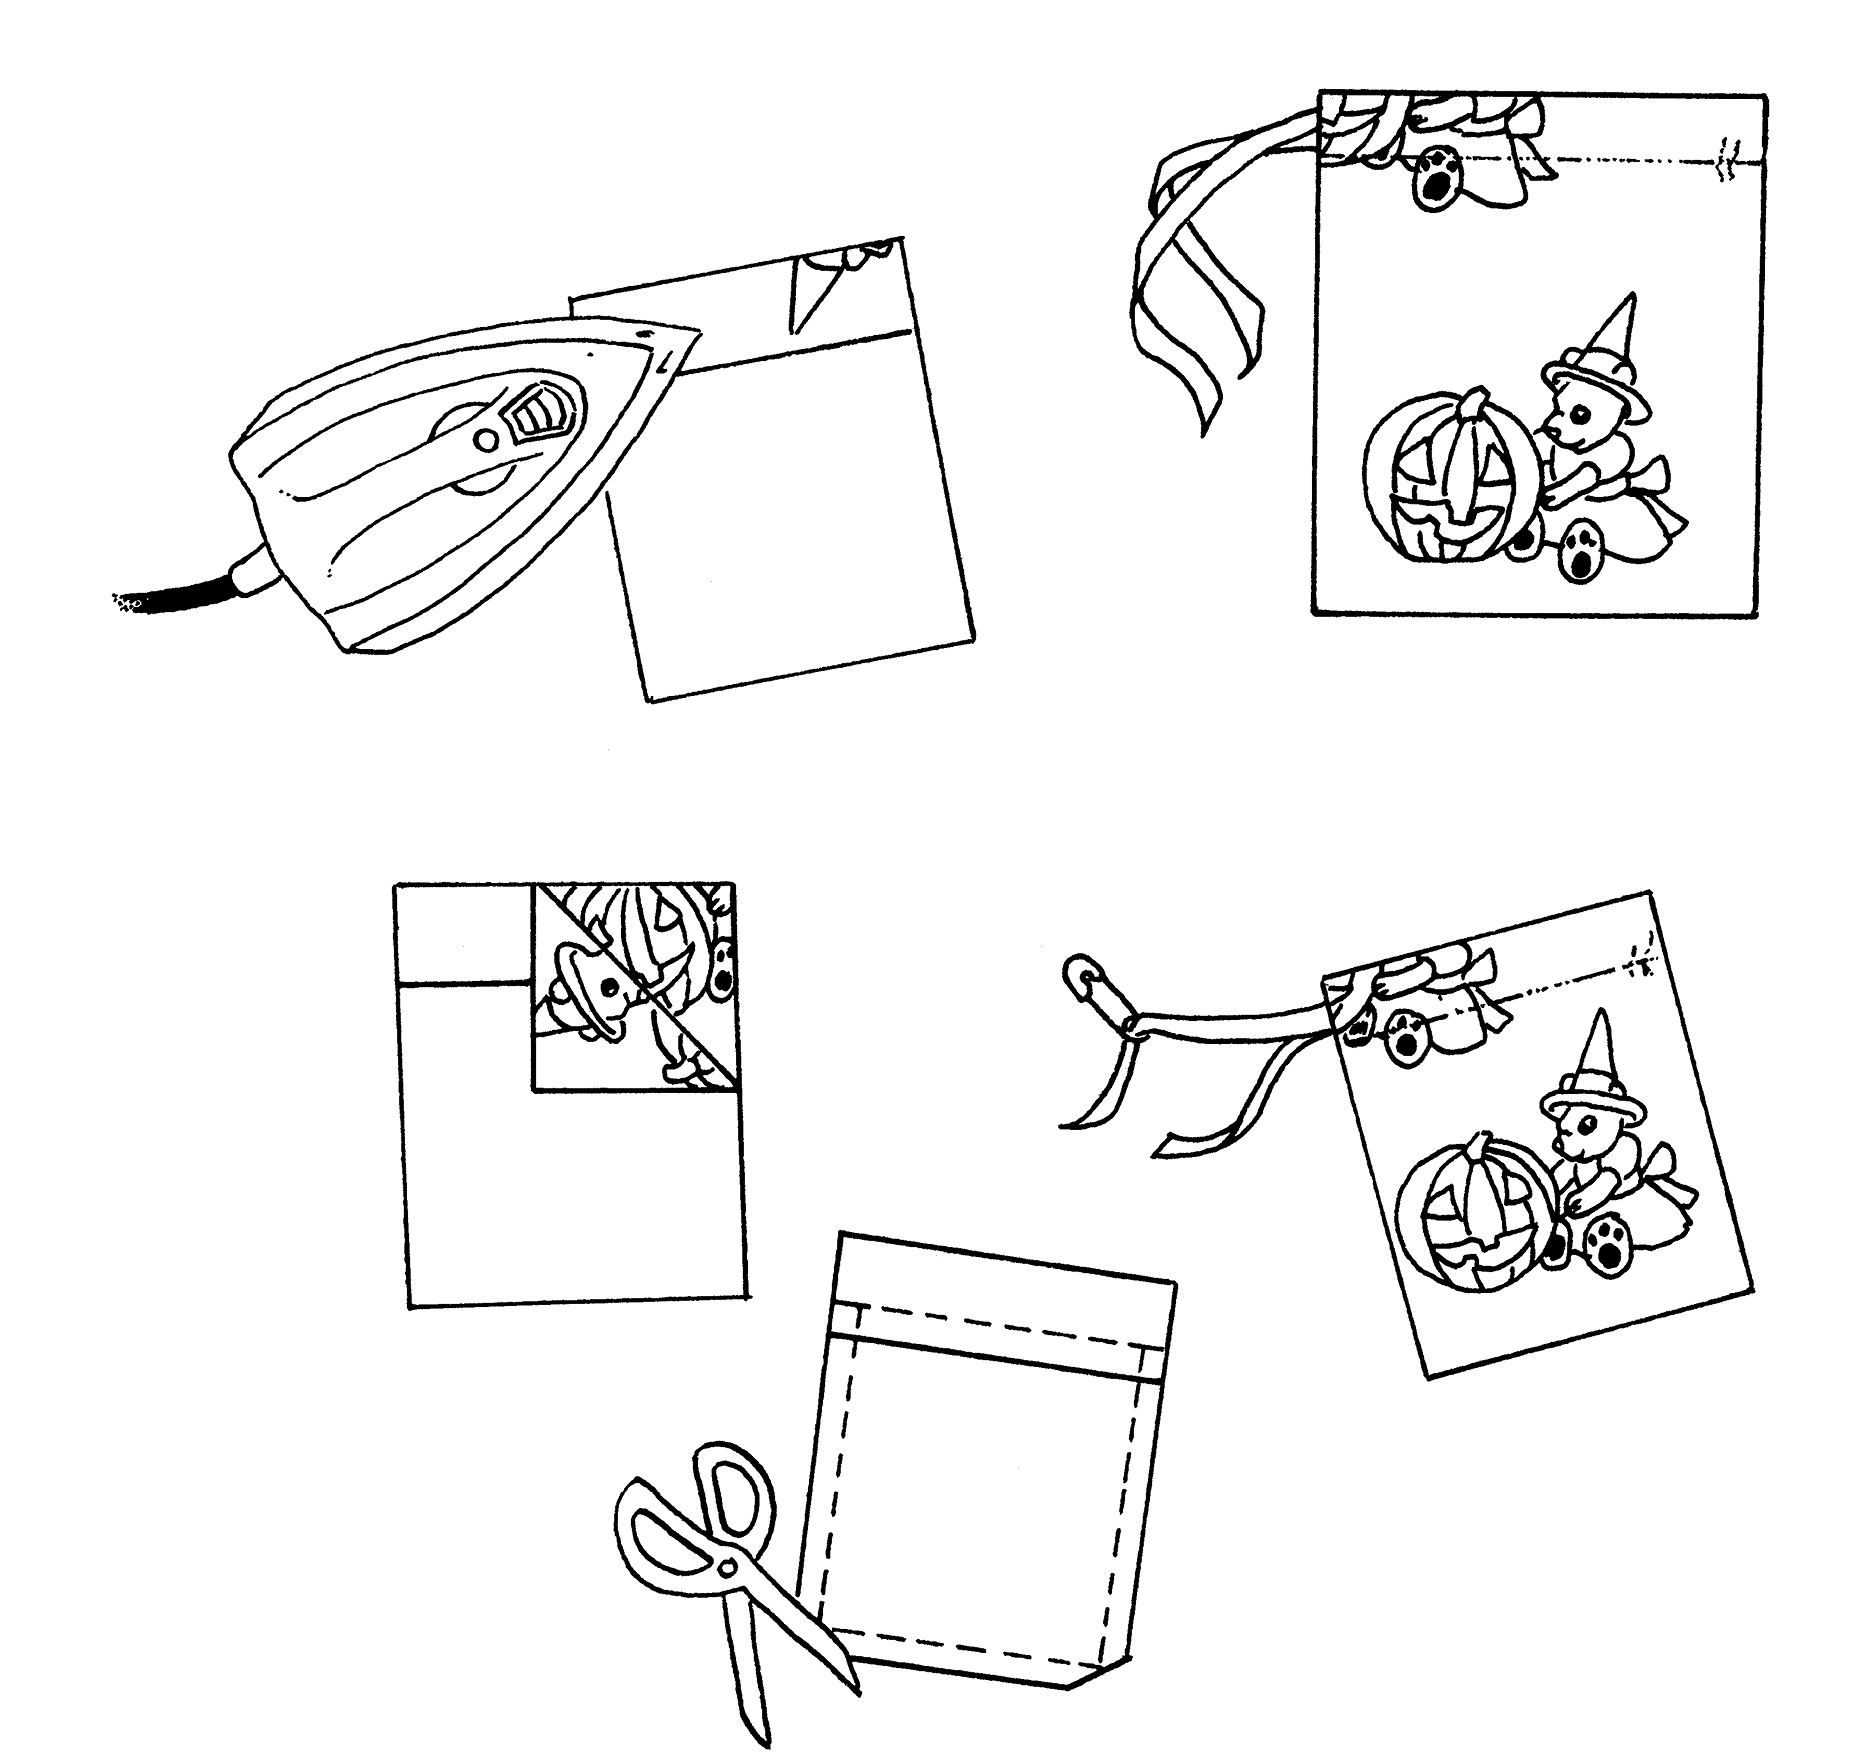
Sewing Directions for Drawstring Charm Bags
1. Cut out two fabric pieces into 4 x 6-inch sections. Press under 1⁄4 inch
across the shorter side.
2. To make the drawstring channel, fold over the fabric again 1⁄2 inch. Press.
Sew right above the folded edge. Make sure you are allowing enough room
for a ribbon to pass through. Repeat on the second section of fabric.
3. Turn both pieces so the right sides are facing each other. Pin in place.
4. Sew 4⁄8-inch seams across the bottom and the sides, stopping just before
your seam along the top folded edge. Clip corners. Turn right-side out and press.
5. Cut twelve inches of a coordinating ribbon and pull through the seam allowance,
across the top of both sides of the bag, with a safety pin. Cut the ribbons at an
angle to help avoid fraying. Pulling on both ribbons will draw the bag tightly
closed.
Charm Bag Instructions
Now, to fill those charm bags using ideas listed under Recipes for Spellbinding Sachets on page 146. The ingredients are given in the following order: charm bag color, suggested herbs, and suggested crystals. In regards to the crystals, use those small, inexpensive tumbling stones that you can pick up at any metaphysical or nature-type store.
Choose your ingredients, and place them into the charm bag. Draw the ribbon up tightly to close the bag. Empower the magickal sachet by holding it in both hands and visualizing what it is that you want it to do. Then, using an old Craft standby, tie the charm bag shut and knot the ribbon three times, saying:
By the powers of the moon (tie the first knot)
The stars (tie the second knot)
And the sun (tie the third knot)
Do as I will, an’ it harm none.
Or, if you prefer, you may try this:
By the powers of the Maiden (knot)
The Mother (knot)
And the Crone (knot)
Bless this charm bag that I have sewn.
To sleep: perchance to dream . . .
Shakespeare

Dream Pillows
Dream pillows are small, decorative pillows filled with stuffing and a small amount of dried, fragrant herbs, such as lavender or rose petals, to promote restful sleep or love. These make a fun and easy project for a beginner or for a teen. Celestial fabrics and botanical prints in particular are delightful choices for dream pillows.

Dream Pillow Direction
1. Cut your dream pillow fabric into 61⁄2-inch squares. Place the right sides of the fabric together.
2. Sew shut three of the sides of the pillow using a 4⁄8-inch seam allowance. On the final and fourth side, sew the seams in one inch on both sides, leaving the center open to receive stuffing.
3. Turn pillow right-side out, work out the corners to a point, and press.
4. Stuff the pillow with fiberfill and add a few tablespoons of dried herbs.
5. If you care to use an essential oil, use one drop in the center of the stuffing. Don’t go overboard on the oils. It will stain the pillow and, if the scent is too strong, it may make the recipient nauseous. A light scent is desirable, nothing more.
6. Sew the pillow shut by hand. Pin the raw edges together, turning them to the inside, and then whipstitch the pillow closed with matching thread.
To enchant your dream pillow, say this verse while you sew the pillow shut:
By the powers of magick and flowers grown,
Bless this dream pillow that I have sewn.
Secure your seam with three knots and snip the thread on the last verse.
Note: Please be careful and do not use any herb or oil that may be toxic, especially if you are giving this pillow to a older child or pregnant woman. If this is a gift for a child, make sure that they are old enough not to eat the contents.
Some safe herbs, fragrant flowers, and spices to use in dream pillows are lavender for peace; rose petals for love and romance; chamomile flowers to soothe and uplift; calendula blooms promote good health; mint leaves encourage prosperity and are refreshing; dried, grated orange rind and lemon rind will perk you up and boost your energy; and rose geranium leaves are for elegance and devotion.
Recipes for Spellbinding Sachets
These sachets may be inserted into either charm bags or dream pillows.
Conception: Pastel yellow for creativity (tie up the bag with blue and or pink ribbons); yarrow, rosebuds, cyclamen leaf or bloom for fertility; acorns for a boy and cinquefoil for a girl (add both if you aren’t particular); rose quartz for love; and a moonstone for the Goddess’ assistance.
Good Luck: Green and gold; a four-leaf clover, mint, cinquefoil, basil, and an oak or maple leaf for prosperity and good fortune; aventurine is the gambler’s stone.
Love: Pink and red; red rose petals, yarrow, and rosemary for love; a maple leaf to sweeten things up; rose quartz for love. Note: Don’t target anyone specifically, use this to draw love to you.
Peace: Blue or light purple; angelica, lavender flowers, and pink rose petals for peace and healing; an amethyst and moonstone for their protective and calming qualities.
Pick-me-up: Orange or yellow; bergamot, dried orange, and lemon peel, and mint to refresh you; carnation petals for energy; tiger’s-eye and carnelian for passion and courage.
Prosperity: Green or gold; cinnamon sticks, cinquefoil, mint, and pine to attract money; aventurine and malachite brings fortune and prosperity.
Protection: Black or purple; periwinkle vine, garlic, morning glory vine, and dill for protection; sea salt to banish bad vibes; a hematite stone for grounding and destressing; an obsidian for protection and courage.
Psychic Power: Purple or silver; cyclamen, violets, a rowan leaf, and lilac leaf or flower to promote psychic abilities; a black feather for mystery; a quartz crystal for power; and a moonstone to encourage empathy.
Safe Travel: Blue or white; yarrow for courage; lavender for its calming influences; sea salt to break up negativity; moonstone is a safe travel stone.
Study and Knowledge: Orange, lily of the valley, lavender, fennel, dill, and sage for wisdom; clematis for mental beauty; carnations for stamina; and quartz crystal for power.
Gently steep our spirits, carrying with them dreams of flowers.
William Wordsworth

Yarrow Love Charm
The following is an adaptation of a flower spell from the 1800s. To perform this enchantment you must gather an ounce of yarrow blossoms and sew them into a small flannel bag. I would cut the fabric no larger than a three-by-five-inch piece. Either sew it up on a sewing machine or whipstitch it together by hand. Red or pink would be the fabric color to use for this charm bag and for the ribbons to tie it closed.
The entire spell, the gathering of the herb, and the sewing of the charm bag should be worked on the night of the full moon. After tying up the bag, place it beneath your pillow. Repeat this incantation, while gazing at the full moon, before bedtime.
Thou lovely herb of Venus’ tree,
Thy true name is yarrow;
Now who will my true love be?
Pray tell thou me tomorrow.
In olden times this was said to ensure that a maiden would dream of her future husband. A creative, clever witch would take one look at this old charm and then wonder how they could further enhance it. There are all sorts of ways to spice this spell up!
How about burning a spicy-scented pink votive candle dressed with rose oil to ensure a little passion? You may try jasmine or ylang-ylang oil. Add a rose quartz stone to effect love and a carnelian to encourage desire. For information on impending romantic possibilities or even a glimpse of your future spouse, carve a question mark and a heart on the sides of the candle. Sweet dreams!
It is in society as in nature not the useful, but the ornamental, that strikes the imagination.
Sir Humphry Davy

Tussie-Mussie in a Teacup
Take an old, castoff teacup and some colorful dried flowers, and turn them into an enchanting little gift for a friend or for yourself. In chapter 4 we discussed the tussie-mussie. Now, armed with the knowledge of the language of flowers and using dried flowers, you can turn that inspiration into a fun little magickal project.
Pick out some pretty dried flowers and get started. These bouquets are meant to be diminutive, so you don’t have to go crazy and purchase tons of dried flowers. Small amounts will do very nicely. Try using different colored dried roses, fragrant lavender, and hydrangea blooms. Work with golden yarrow, poppy pods, and nigella. Brightly colored cockscomb, purple statice, and tawny-colored wheat stalks will add texture.
Supplies:
Dried flowers of your choosing
Small bag of green sheet moss
An old castoff china teacup
Floral foam cut to fit the teacup
Knife
Floral pins
Scissors
Hot glue gun and glue sticks
1. Cut the foam to fit down snugly into your teacup.
2. Use a thin sheet of the moss to completely cover up the foam. Secure with a floral pin or two. Make tiny clusters of dried blooms and then, using the scissors, trim the stems of dried materials to same length. Insert the stems of the first little bundle into the center of the foam.
3. Working out from the center of the cup, continue adding flowers in clusters, positioning shorter flowers and stems near the edges so that the arrangement rolls over the rim. Some flowers may require a bit of hot glue to help hold them into place. Keep the bunches of flowers close together. You want the flowers in this arrangement to be packed tightly together.
Note: Don’t be afraid to use an old teacup or creamer that is less than perfect. If it is chipped or cracked, so much the better. It adds character. Watch flea markets and garage sales for inexpensive old teacups, saucers, and creamers. Dried flowers are to be found at most arts and crafts stores. Try checking with an herb or potpourri shop for more exotic options. If your garden isn’t producing anything or you need more supplies, check the arts and crafts store.
I have had a good many more uplifting thoughts, creative and expansive visions
while soaking in comfortable baths,
than I ever had in any cathedrals.
Edmund Wilson

Bedazzling and Bejeweled Bath Salts
Bath salts are a pleasant project for a beginner. Some sea salt or Epsom salts, a little essential oil, some dried herbs, and violà! Place your salts into some funky glass jars that you can purchase at a home interior store, or sterilize and then use old baby food jars. Add small seashells to the salts or embellish the jars by tucking in a few tumbling stones—be as crafty as you like! A basic recipe for bath salts is as follows:
1 cup sea salt or Epsom salt
Several drops of essential oil (any kind)
A few drops of food coloring
A resealable bag
Put salt, oils, and food coloring in the resealable bag, and press air any out. Seal the bag and massage the contents until they are well blended. Place into airtight, nonporous container and store in a dark, cool place for three days. After the salts have cured, place into a glass jar. Use 2–3 tablespoons per bath. When using food coloring to tint the salts, less is more. You could turn the bathtub or your skin colors if you use too much.
Bath salts will cause your pores to open up and you may perspire. If you use too much salts in the bath, it may make you lightheaded. Be conscientious of skin allergies, and if you are pregnant or nursing you may want to avoid using bath salts altogether. Try sprinkling the water with a small amount of fresh rose petals or lavender buds instead.
Sea siren: 5 drops of jasmine oil, 1 tablespoon of powdered kelp (available at health food stores), a few drops of blue food coloring to tint the salts. Add a few tiny seashells to your jar when finished for a charming gift.
Garden Witch 2 drops of rose oil, 3 drops of lavender oil, and 1 drop of orange oil. Add 3 tablespoons of dried lavender flowers and sprinkle in some dried pink rose petals. This bath salt would be pretty tinted a soft purple or pink.
Clairvoyant Cleansing: 4 drops of lilac oil and 3 drops of lavender oil. Tuck into the jar a few amethyst tumbling stones or sprigs of dried lavender. Tint a soft purple. Good for a cleansing after a lot of psychic work, or for when you just have had one hell of a day. This will help clear the aura and clean off any negativity that you are still carrying around.
Magick Man (just for the guys): 4 drops patchouli oil and 3 drops rosemary oil; add a few drops of green food coloring. This has a resinous, pine-forest-type scent.
Wizard's Blend (for guys and gals): 3 drops of orange oil, 2 tablespoons grated, dried orange peel, and a fresh sage leaf, chopped fine. The sage is for wisdom and the orange for purification. Add a quartz crystal for power.
Passionate Practitioner: With this recipe, you should blend or adjust the amounts to your preference. Omit or add more drops of any of these oils to suit: 2 drops rose oil, 1 drop lavender oil, 1 drop ylang-ylang, and 2 drops jasmine oil. A rose quartz crystal or two would be nice. Finally, add red rose petals for romance and tint these salts pink.
Rhiannon's Refresher: 3 drops of orange oil, 3 drops of mint oil, and 1 drop of neroli oil. You may add 1 tablespoon of grated, dried orange peel to this mixture for texture and color. Add a small piece of moonstone or citrine to these salts. You can figure out what color to tint the salts.
You can’t use up creativity.
The more you use, the more you have.
Maya Angelou

Magickal Herbal Wreaths
Wreath making is an ancient practice. The ancient Romans used wreaths to celebrate Saturnalia, a winter solstice celebration, and the wreath has been employed since the Middle Ages to celebrate the changing seasons and holidays. Creating an enchanted herbal wreath is an enjoyable process. There are three basic elements to wreath making: the base, the materials used, and the method of attachment. It’s not expensive or difficult to do. Many of the necessary items you may either have on hand, could grow yourself, or can be found easily at your local arts and crafts store. Basic supplies you will need include:
A glue gun and glue sticks
Florist wire, 20 gauge
Floral picks
A base wreath (try a grapevine, straw, pine, or a moss wreath)
Dried or fresh flowers, seed pods, nuts, small twigs, and feathers
Ribbons in assorted widths and colors
First, take a walk around the yard and see how you can use the bounty that your garden has to offer. The garden has much to provide: herbs and flowers, changing autumn leaves, acorns, pine cones, twigs, and fallen feathers. Often a lazy hour spent outdoors scavenging yields more organic material than any trip to the store. Please recall those gathering guidelines from chapter 2, and get permission if you are harvesting natural materials on someone else’s property. Be a courteous gatherer.
When you begin to assemble the components for your own wreaths, you may want to refer to the correspondence chart listed at the end of the chapter. Don’t forget your intuition, though. Let your instincts guide you.
Lay the wreath out first. Take your time and arrange things to your liking. Have fun, relax, and enjoy yourself. Remember that it’s much easier to shift pieces around before you glue them on than it is to pry them off afterward. If you are incorporating twigs or viny things like bittersweet into the wreath, try to work them into the grapevine for a more natural look.
You may use different colors of ribbon to decorate the wreath or to weave a pentagram inside of the circle. Experiment with coordinating colors for certain needs and to align with the elements.
Ready to get started? Before I turn you loose, here are several seasonal projects for you to try and to get the creative juices flowing. These projects are meant to be a starting point for you. Change them around and add to them according to your tastes.
Spring Wreath: A moss wreath would be an interesting choice for the base, or a grapevine. Add silk lilacs and dried rosebuds. If the wreath is going to be for Ostara, try tulips and daffodils, and use dried baby’s breath and yarrow for fillers. Tuck a tiny faery in your wreath so she’s peeking out from the flowers. A decorative bluebird with a tiny nest would be very spring oriented. You could add some mini garden tools or tie on a tiny watering can.
Lamas Wreath: I like a straw wreath for the base, it seems more summer oriented. Decorate this wreath with sunflowers, either dried or silk. Add stems of wheat, black feathers, or a small decorative silk blackbird. Use dried yellow yarrow from the garden, marigolds, and purple statice, which looks great with these colors as a filler.
Harvest or Samhain Wreath: Begin with a large grapevine wreath. Add dried golden yarrow, red cockscomb, and miniature ornamental corn. See if you can work in a few miniature pumpkins or gourds. (Use floral picks for the heavier items and glue them in securely.) Weave in bittersweet or rose hips and dyed oak leaves. Embellish with a few gilded acorns. For Samhain, weave an orange or black pentagram into the center of the wreath.
Yule Wreath: A live or artificial pine wreath as the base is traditional. Pine cones add texture and are easy to find. Add sprigs of holly, dried rose hips, seed pods, nuts, and acorns. Small twigs spray painted white and then sprinkled with iridescent glitter are a sparkling addition. Add a silk red bird (cardinal) to your wreath. How about a partridge and a few small artificial pears? Lastly, tie on some bundles of cinnamon sticks for a prosperous new year.
It doesn’t matter whether you grew the herbs and flowers in your own garden and dried them yourself, found them while scavenging, or bought them in the craft store. There are many resources for materials. Searching is half the fun. Enjoy creating your magickal wreaths and keep your eyes open for those little treasures of nature. The Goddess is eternally bountiful. Walk gently, open your heart, and see what you find. Happy wreath making!
A Garden Witch’s Book of Shadows
Now that you have all these wonderful creative ideas and spells swirling around in your brain, where are you going to put them? I hope you have been writing your own charms and recipes. I bet you went out and made a faery garden, didn’t you? How did it go? Did you notice any changes in the yard? In your magick? Are we keeping track?
Remember that spiral notebook that you started taking your first garden witch notes in? Let’s jazz it up a little and make it into a garden witch’s Book of Shadows. A Book of Shadows is simply a witch’s recipe book—a listing of notes, correspondences, and tried-and-true favorites.
Every BOS is unique, as is each witch or natural magician. The difference here will be that we are going to be adding plant information and our gardening notes. Sounds like another excuse to be magickally creative, doesn’t it ?
Either use a binder or locate a blank book or journal. This is your magickal journal, so make it however you want it. Try writing out your spells and recipes with different colored pens and decorating the pages with rubber stamp art. Magickal themes such as faeries, witches, and wizards are classic. Keep your eyes open for Halloween rubber stamps and stickers too.
If you go the three-ring binder route, check out the scrapbook sections at the craft store and look for interesting computer paper to print your spells out on. Take a look at celestial, floral, and garden motif stickers for embellishing the pages.
Add photos from your own gardens, pictures of your spouse, children, or pets, and anything that is special to you. Clip out flower photos, gardening quotes, and magazine articles on gardening and plant folklore that appeal to you and glue them in (I recommend using a glue stick for this).
I don’t advise placing dried, pressed flowers in the journal, unless you put clear contact paper over them. I tried to glue dried, pressed pansies in my BOS once.They looked great until I closed the book and the flowers crumbled apart. It made a hell of a mess altogether.
Your garden witch BOS may be used to record gardening trials and triumphs: what plants grew well, which plants sulked, varieties that you’d like to try next year, and so on.
Basically, your garden witch BOS should reflect you. Take your time and build your BOS up slowly over the years. If you want it to be more gothic and witchy, try your hand at calligraphy and go for it! If you enjoy a botanical theme, or happen to have a thing for flower stickers (which I am guilty of), indulge yourself.
All of the projects in this chapter are designed for you to have a little fun experimenting with the crafty side of witchcraft. Go ahead, try your hand at being artistic. No one is going to grade you. Do you think all of my craft projects, magickal or otherwise, turned out splendidly over the years? Wait a minute, I have to glare at my husband for laughing at me.
Anyway, be daring! Live, laugh, and learn. Most of all, just enjoy the creative process!
Laugh, and the world laughs with you.
Sing . . . and the hills will answer.
Ella Wheeler

At-a-Glance Plant Correspondences
Prosperity
Color: Green. Element: Earth. Plants: Acorns, bayberry, bergamot, cinnamon, cinquefoil, heliotrope, honeysuckle, mint, nuts, oak leaves, pine, poppy, tulip, wheat
Love
Color: Red. Element: Fire. Plants: Catnip, clove, dill, geranium, lady’s mantle, meadowsweet, orange rind, pansy, rosemary, rose, rose hips, tiger lily, violet, yarrow
Healing
Color: Blue. Element: Water. Plants: Angelica, bittersweet, carnation, geranium, juniper, lavender, meadowsweet, mullein, oak, rosemary, rue, St. John’s wort, tansy, thyme
Creativity
Color: Yellow. Element:Air. Plants: Aspen, grapevine, horehound, iris, lavender, lily of the valley, nutmeg, periwinkle, rosemary, rue, sage, spearmint, sunflower, wisteria
Protection
Color: Black. Element: All. Plants: Betony, cloves, cypress, dill, foxglove, garlic, hydrangea, rose geranium, rowan twigs, rue, snapdragons, yarrow, sweet woodruff, violet
At-a-Glance List for Crystal and Stone Magick
Amethyst: Peace and psychic power—a good stone to keep with your Tarot cards
Aventurine: The gambler’s stone, prosperity, and good luck
Bloodstone: Health, good luck, and healing
Carnelian: Love, lust, and health
Citrine: Psychic abilities
Hematite: Grounding and healing
Lapis Lazuli: Healing, love, psychism, bravery; this stone is sacred to the Goddess Isis
Lepidolite: Peace, protection, and brings good luck in new ventures
Moonstone: The Goddess, moon magick, safe travel, self-analysis
Malachite: Cash, business success, healing, and protection
Obsidian: Grounding, deflects negativity, and protection
Quartz Crystal: Power, this will magnify any other crystal or stone added to the charm bag
Rose Quartz: Love, self-confidence, friendships, and warm fuzzies
Tiger's Eye: Protection and success
Turquise: Protection and healing, friendship and good luck
I thought this index might come in handy for all of your garden witch craft projects. As you choose fabric for your charm bags or decorate your wreaths with assorted colored ribbons, you may care to refer to this magickal color list. Note: This is also a handy reference guide for candle magick.
Red: Passion, love and healing, the element of fire, and the Mother Goddess
Orange: Energy, action, communication, and intensity
Yellow: Creativity, conception, studying, spring, and the element of air
Green: Prosperity, healing, gardening, herbalism, faery magick, and the element of earth
Blue: Peace, hope, healing, and the element of water
Purple: Psychic powers, to increase personal power, and magick
Brown: Grounding, happy homes, pets, and garden magick
Black: Breaking hexes, banishing illness or negativity, and the Crone
White: All-purpose, the Maiden Goddess, peace, calm, and hope
Grey: Bindings, banishing, invisibility spells, and glamouries
Silver: The Goddess, women’s mysteries, the moon, and intuition
Gold: The God, riches, wealth, and fame
Pink: Love, warm fuzzies, friendship, and children
Baby Blue: Comfort, children, and harmony
Lime Green: Warding off jealousy, seed blessing, and springtime magick
Lilac: Clairvoyance, Tarot work, and faery magick