
The angles of the head and body display the perspective of this figure, especially evident with the placement of the feet. By observing the shadow, you can determine that the light source is directly coming from the upper left. Though only the hilt of the sword is visible, it is easily recognized because of the sword’s shadow.
Paper: 12" × 9" (30cm × 23cm) medium-texture drawing paper
Pencils: 2B graphite, 6B graphite
Other Supplies: 12" × 9" (30cm × 23cm) medium-texture sketch paper, lightbox or transfer paper, kneaded eraser
With a 2B pencil sketch a vertical line, which will be the line of balance going from the pit of the neck to the space between the feet. Sketch short horizontal lines for the placement of the top of the head, forward toes, chin, distant toes and center of the figure.

Sketch the form of the head between the top two horizontal lines with attention to its placement in relation to the balance line. Add two vertical lines to indicate the fullest width of the body.
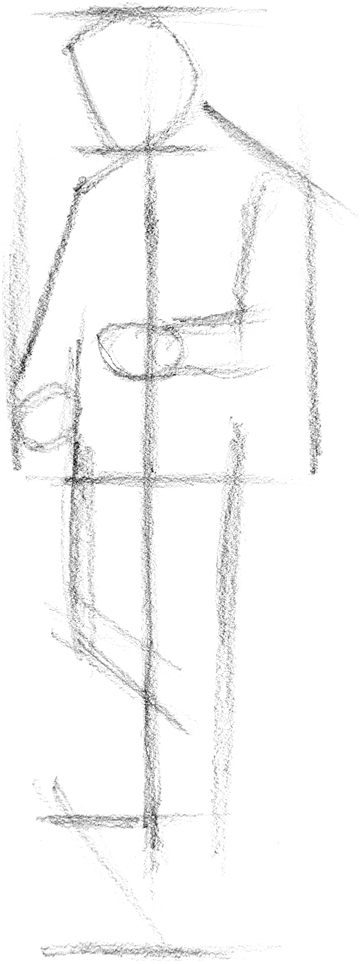
Continuing with a 2B pencil, sketch in ovals for the shapes of the hands, lines for the arms and the slope of the shoulders. Add angled lines for lining up the toes, knees and boot tops in perspective. Note that the forward foot looks larger because it is closer to the viewer than the distant foot.

Start to develop the arms and sleeve, legs, feet and circles for the knees. Sketch a line for the lower edge of the vest just above the centerline.

Continue to develop the vest, distant boot and pants at the knees. Sketch lines for the placement of the facial features.

Refine the form throughout and start adding details including the mug, sword hilt, rose, hair and facial features. Add the shadow on the pavement to the right of the figure.
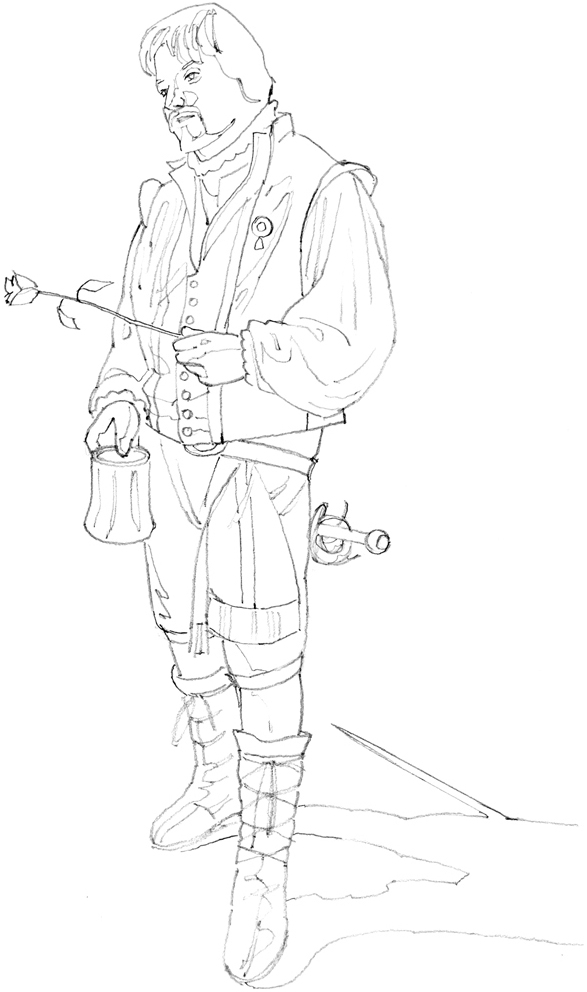
With a 2B pencil, continue to add details to the face, hands and clothing. Erase unwanted lines if working directly on the drawing paper. If you used sketch paper for your structural sketch, trace or transfer the image onto drawing paper, omitting unwanted lines.

With a 2B pencil, add values to the lighter regions of the face and the clothes. At this stage, avoid going dark with the pencil lines because you don’t want to lose the structural lines you have previously sketched.

Gradually darken the features and add the middle values with a 2B pencil.

With a 6B pencil, add the darks that are noticeable to the face, hair and clothes.

Don Juan
Graphite pencil on drawing paper
12" × 9" (30cm × 23cm)
With 2B and 6B pencils, darken areas such as the shadowed regions and add the details. Make adjustments using a kneaded eraser to lighten areas if needed. Sign the front and write the date on the back of the drawing.