
Makes one swiss roll
Prep 25 minutes plus cooling | Bake 15 minutes
oven 160°c (fan)/180°c/350°F/Gas Mark 4
I don’t think you can beat the taste of a freshly made Swiss Roll. Believe me, they are a cinch to make and nothing to be afraid of. There’s no fat added in the form of butter, so if kept a Swiss Roll will stale quickly – not much chance of that in my house! Don’t let the lack of a Swiss Roll tin put you off – baking or roasting trays are often just the right size.
• 4 eggs, large
• 100g (31⁄2oz) caster (superfine) sugar
• 100g (31⁄2oz) plain (all-purpose) flour
• A little caster (superfine) sugar for rolling
• 175g (6oz) raspberry jam (about half an average-sized jar)
• Electric handmixer
• Swiss Roll tin (pan) or shallow-sided roasting tray approx. 33 × 23cm (13 × 9in)
• Spreader
Greasing the tin before lining with paper will help stick and mould the paper to the tin – otherwise it’ll keep jumping out at you!

1 Preheat the oven to 160°C (fan)/180°C/350°F/Gas Mark 4. Grease the tin and cut a piece of baking paper about 3cm (11/4in) larger than the tin all the way around. Push the paper into the tin, smoothing out at the corners.

2 Place the eggs and the caster sugar in a large bowl. Air is the only raising agent in a Swiss Roll so get whisking! Don’t let the eggs and sugar sit in the bowl together for too long or else the sugar will draw moisture from the eggs and it will take much longer to whisk them up until thick and volumised.

3 The eggs and sugar will start to go pale and thicken, but keep going: it can take up to 10 minutes to whisk in enough air. When the mixture is ready lift out the whisk, the mixture should trail away in a ribbon and stay visible on the top of the mixture. If it sinks straight back in and disappears it still needs more whisking.
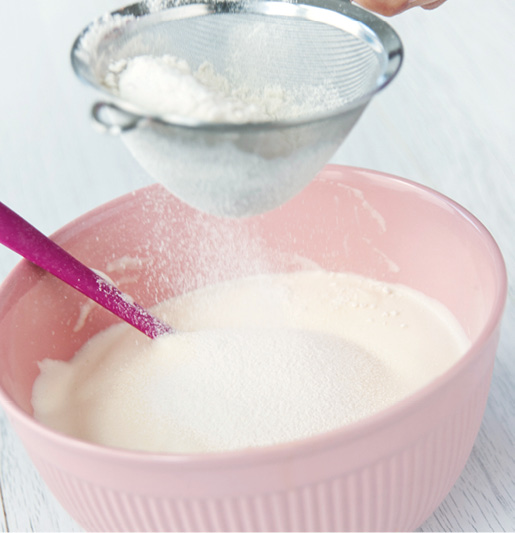
4 When the egg and sugar mixture is thick and aerated enough gently sift over the flour.

5 Fold the flour into the mixture using a spatula or metal spoon. Cut through the mixture and turn, lifting the mixture from the bottom of the bowl. Cut through any pockets of flour as you find them. Gently is the way to do it to keep as much air in the mixture as possible.
If the flour is just tipped in the weight of it will make it sink straight to the bottom in a clump and will be difficult to fold in.

6 Once it’s fully combined gently transfer the mixture into the prepared tin. Ease the mixture into the corners of the tin by tilting gently, trying to avoid popping any of the bubbles.

7 Bake the cake for 15 minutes. It should be a light golden brown on the top and you should still hear a little ‘pfft’ when you touch it lightly with a fingertip. We need this moisture for flexibility and rolling. Dry it out completely and it would have to be folded not rolled!
8 The cake should still be warm and it’s time to get ready for rolling: take a piece of baking paper slightly larger than the size of the cake and set it on the work surface. Scatter it liberally with caster sugar – this will stop the cake from sticking to the paper.

9 Remove the cake from the tray, still in its baking paper. Gently ease the lining paper away from each edge of the cake, then flip it over so that the top of the cake sits on top of the caster sugar covered sheet. Carefully peel away the paper from the base of the cake. It will still be warm so do be careful.

10 Spread the cake with a good layer of jam. Using a sharp knife, cut a line going halfway through the depth of the cake about 2cm (3⁄4in) from the short end of the cake, all the way along. Fold this small section directly over onto the jam.
Rolling a Swiss Roll whilst warm is the best way to avoid it cracking excessively but that means you can’t fill it with cream as it would melt – see my Chocolate, Cream and Strawberry Roll version for tips on rolling a cold Swiss Roll.

11 Take a firm hold of the baking paper along the short side and begin to roll up the cake. Use your free hand to encourage it to roll. Once it starts simply continue lifting the paper and the cake will roll itself up.

12 Once you reach the end turn the cake so that the seam sits underneath, transfer to a serving plate and try to fend off the hungry masses or you’ll just be left with a plate of crumbs!
Because Swiss Rolls are so aerated they should be cut with a sharp serrated knife in a gentle sawing motion to avoid compressing the cake as it is cut.