Designed by Richard L. Alexander
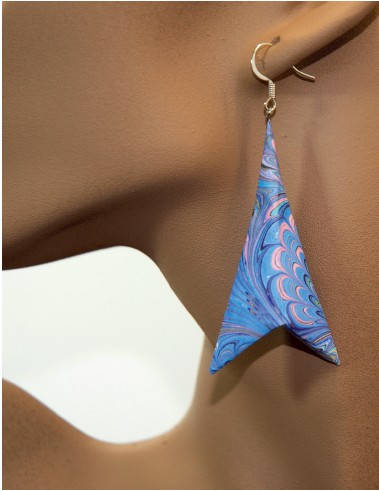
This unusual design is a modern echo of our earliest of jewelry—a keepsake tooth or claw of the beast, vanquished after ravaging the village or camp ... the hunting souvenir ceremonially presented to the brave victor who wore it with pride. It is simple, abstract, and bold, transforming even the most humble patterned paper into a conversation piece! The finishing steps take the model from flat to fat in a most satisfying way. The structure is designed to be reinforced not only by the pleasing, final shape, but by the internal pleats and angles. As a singular pendant, or as a group of graduated sizes arranged in starbursts, these lightweight components can be folded in any size you desire. Larger models from bold prints work well as hair clasp decorations, or on chopsticks or hatpins worn as a fashion statement. Since the finished model is hollow, be sure to use stiff, well-sized and back-coated papers.
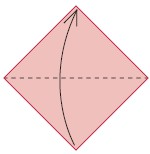
1. Begin display side up. Valley-fold in half, bottom corner to top.
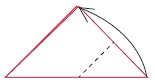
2. Valley-fold the bottom right corner to the top corner, forming a triangular flap.
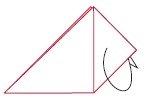
3. Reverse the triangular flap to the back.
4. Valley-fold the top flap down, as far as it will go, flat.
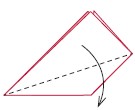
5. Turn over, left to right.
6. Unfold the triangular flap on the left.
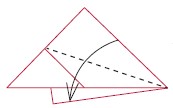
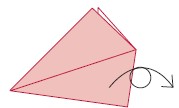
7. Valley-fold the top flap down to match the position of the flap at the back.
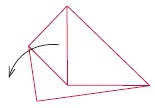
8. Valley-fold the indicated double edge to align with the short edge of the top layer triangle flap.
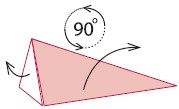
9. Unfold completely and rotate 90 degrees counter clockwise.
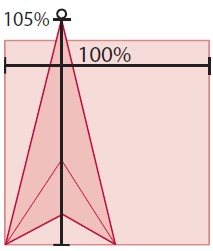
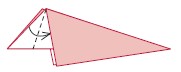
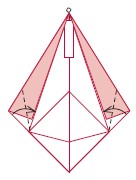
10. Check the crease pattern, your paper should look like this. This is the best time to add mounting hardware, such as an eye pin. Apply paste to a narrow strip of paper and paste it over the pin. Valley-fold the two top edges, each to the nearest crease. Allow the paste to dry.
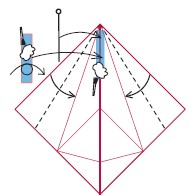
11. Valley-fold the indicated edges to the target creases in the previous step.
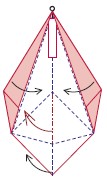
12. Inside View: Use the existing creases to close the bead.
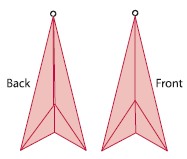
13. The completed Wolverine Claw, front and back.
