CHAPTER SEVEN
LOCOMOTIVES
Of all the vast variety of aspects that go to make up the enthralling hobby of railway modelling, none, in my view, holds so much attention as locomotives. The number that one owns is almost like a status symbol. It’s the ‘locos’ that certainly interest me the most in this hobby and those steam locomotives, which operated over the ex-LNER main lines of the Eastern Region, North Eastern Region and Scottish Region of BR, are particularly fascinating.
I could write whole books describing how I make/modify my locomotives (I’ve already written two), but for the purposes of this chapter I’ve confined myself initially to a small selection of what’s currently suitable in OO gauge RTR and how to improve them. These are followed by three ‘case-studies’ where I build three locos from kits: a London Road Model D2, a PDK B17 and a Graeme King/Comet V2. All the constructional techniques employed are applicable to all scales and gauges.
With regard to ready-to-run locos today, particularly in OO, it can honestly be said ‘we’ve never had it so good’. The models produced by the likes of Bachmann, Hornby, Heljan, Oxford Rail, Kernow and others represent a standard that, just a few years ago, could only be achieved by the very best loco-builders and painters. It has made the hobby so much more egalitarian, particularly at the prices asked. Regarding prices, even though these (inevitably) are going up, a fully finished RTR loco will still cost less than a kitequivalent – much less – and the latter still has to be made. That said it’s still the making of things that is central to this hobby.
I love making my own locos – they are ‘mine’ in a unique way. Though open to all, RTR locos, if nothing has been altered on them, are just possessions – very nice possessions, it has to be said. Anyway, though more and more loco ‘gaps’ are filled by the out-ofthe-box manufacturers, there will still be the oddities that will have to be built. And, do you want your locos to be just the same as those of everyone else?
My apologies for not including 2mm or 7mm scales – I can only comment personally in the scale/gauge I principally work in, though I have dabbled in the other two. My apologies also for only briefly mentioning any painting/weathering techniques – they could fill a complete book in their own right.

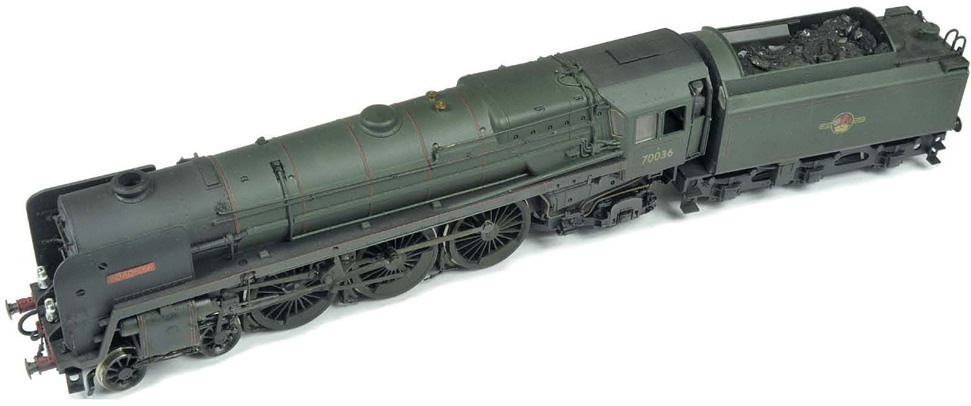
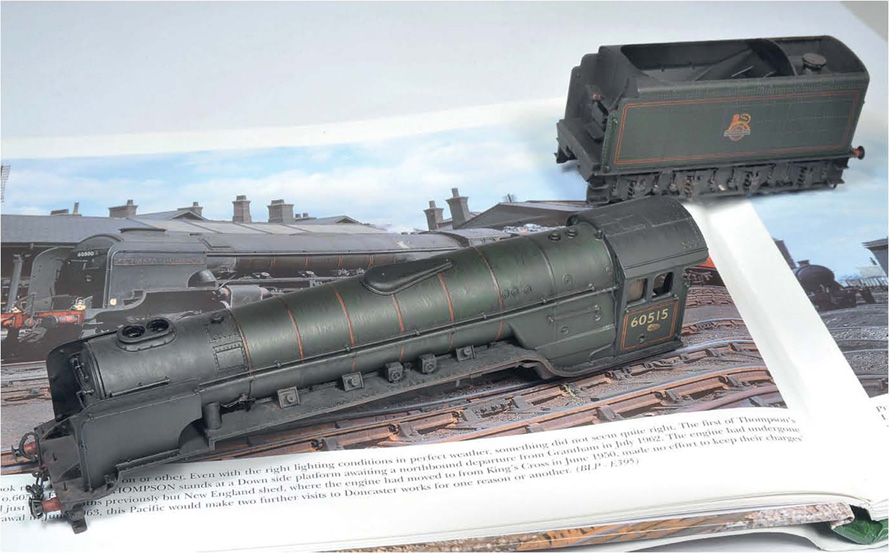
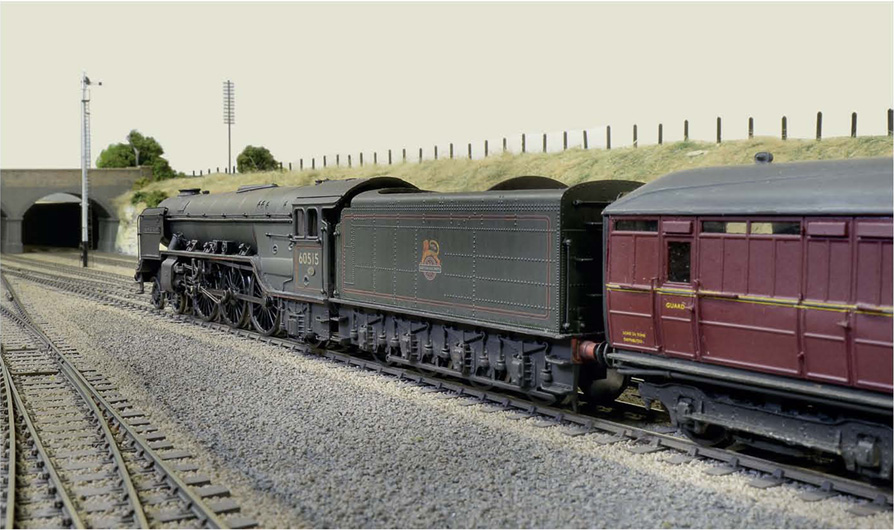
Current state-of-the-art offerings for the ECML from Bachmann are represented by this A1, presented in earlier BR condition, still with a stovepipe chimney, front number at the top of the smokebox door and first emblem on the tender. It’s good – very good, though some features let it down.
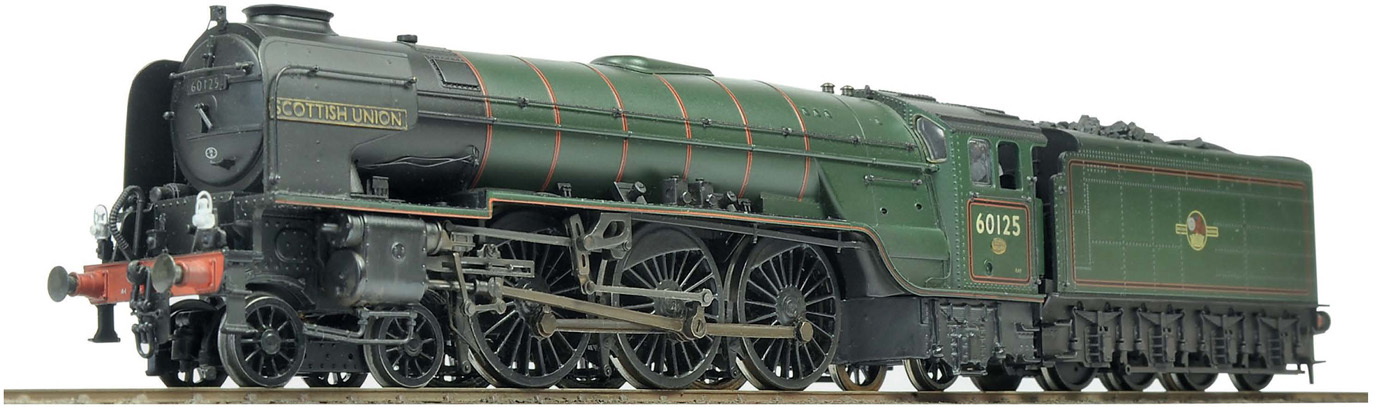
With a little work, the Bachmann A1 model can be improved. On this one the horrid bogie wheels have been replaced, its identity has been changed (and etched nameplates fitted) and the back end of the loco has been raised up slightly to bring the footplate more in line with the soleplate on the tender. It’s also been weathered. Though improved, my preference would still be for a kit-built A1.
This Hornby K1 is an example of a current state-of-the-art loco from this most famous of firms. The finish is outstanding and it captures the look of these last-of-the-line LNER locos perfectly.
However, if just left as it is, it’ll be little more than a possession. I altered the identity of this loco by removing the cabside numbers with a scalpel, renumbering it using the HMRS Pressfix Sheet 14 and Ian Wilson’s ‘Pacific’ range of plates for the front number, then weathered it using the dry-brush technique to produce a much more natural, in-service loco.
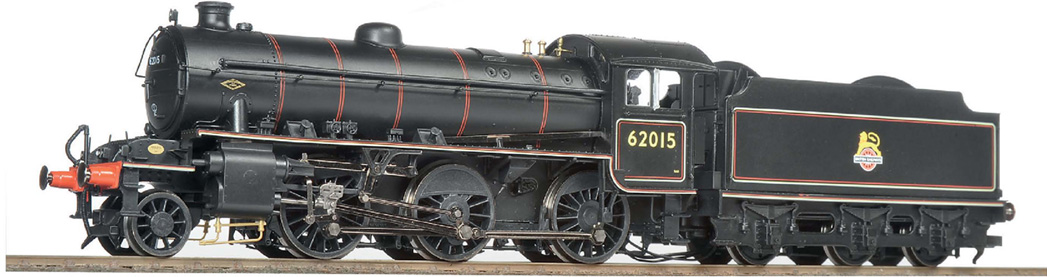
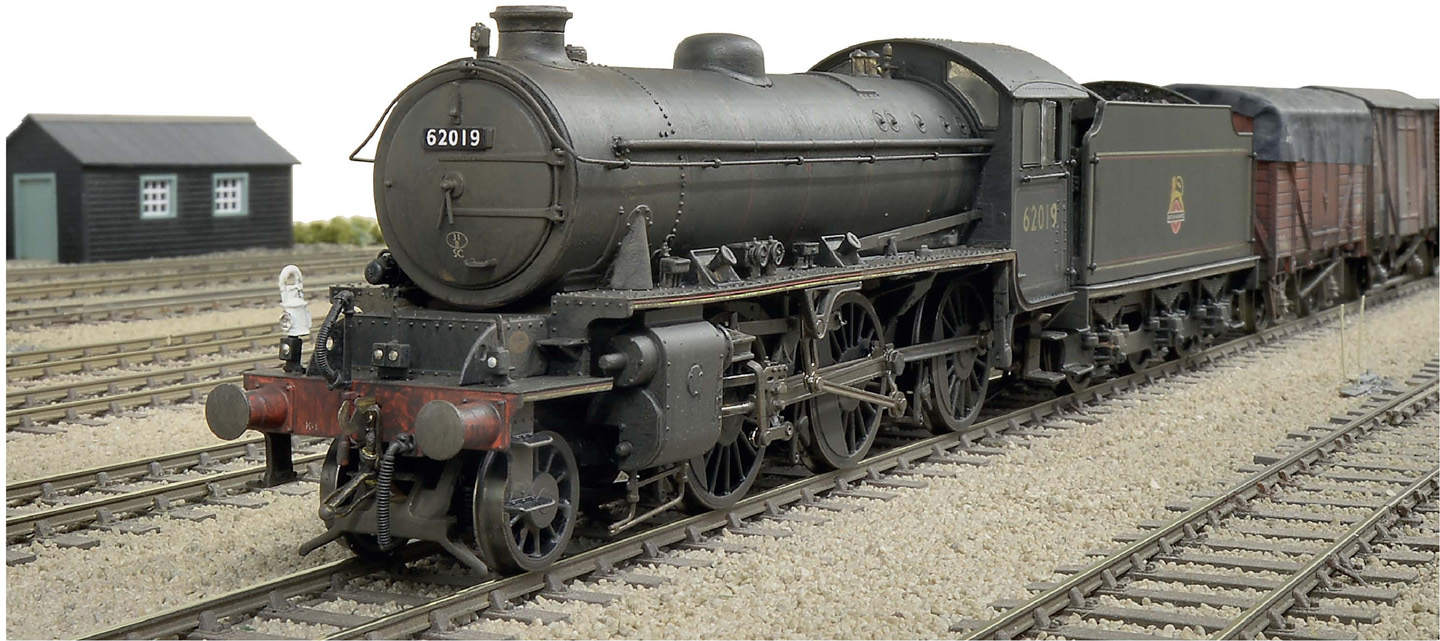
Heljan’s first venture into making an ECML loco was in the form of this O2/3. Geoff Haynes weathered this one using powders and an airbrush, after I renumbered it.

I have to admit, though I’ve made dozens of them from kits, I’ve never produced a better B1 than this. It started off as a standard Hornby B1, which I renumbered and changed the equally horrid bogie wheels; these are Markits’ LNER 3ft 2in (965mm) examples. Tom Foster then weathered it to perfection using Klear, powders and an airbrush. As with all my locos, I also added a crew and lamps.
Hornby’s current ‘Britannia’ is also a good-looking loco. I did all the usual refinements on this, including closercoupling the loco to the tender, and Tom Wright (my elder son) weathered it using an airbrush. Another ‘detail’ I always add, is to put real coal in the tender.
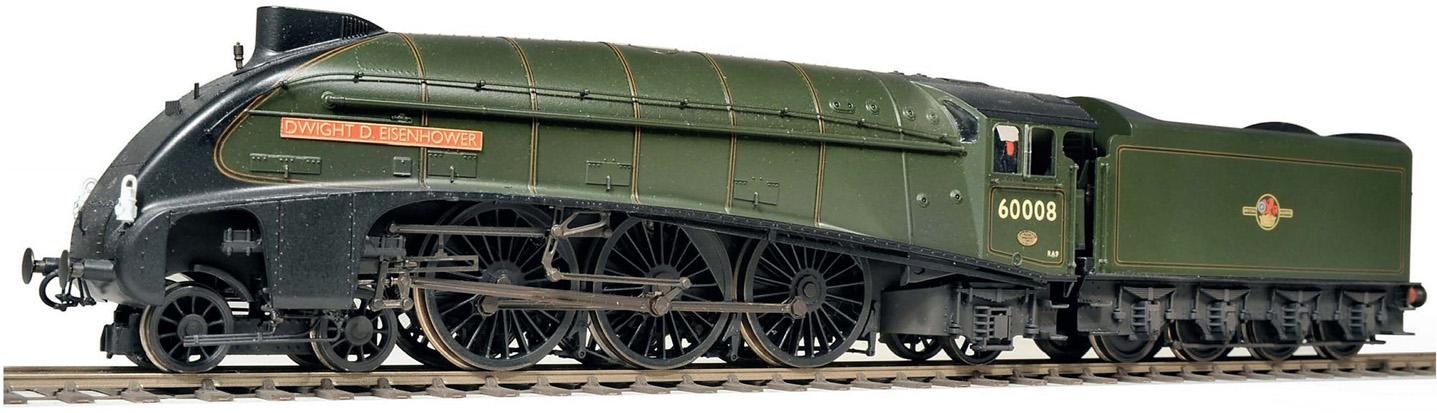
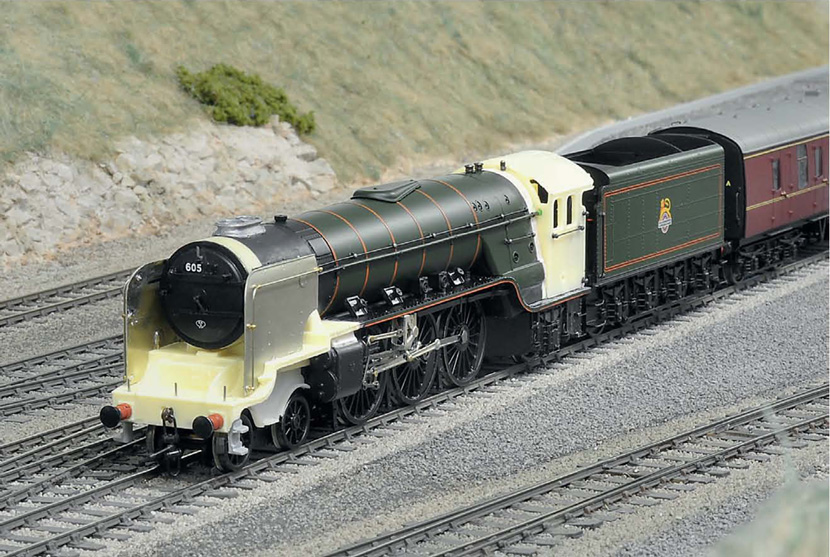
If one wants to lift an RTR loco to the highest levels, then get a top painter to produce a result like this. This is a Hornby A4 painted by Ian Rathbone. Changing the bogie wheels and close-coupling the loco to the tender just finished off the job.
This Bachmann A2 started out as 60533 Happy Knight. I merely changed the last digit on its cabsides to make it into Velocity (plates, as yet to be fitted). The addition of those wiggly pipes (various sizes of fusewire) makes a big difference. I also chucked away the horrid bogie wheels and fitted Gibson substitutes.
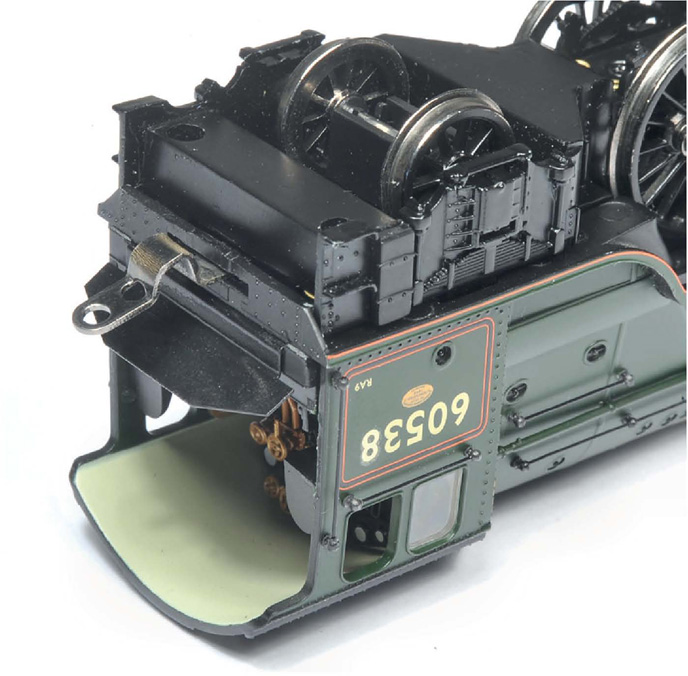
Shortening the loco-to-tender gap is most easily done by cranking the drawbar, as shown here.
After part re-painting and the fitting of 247 Developments’ plates, Tom Foster weathered it to perfection; Tyneside-based locos had a reputation for being dirty!
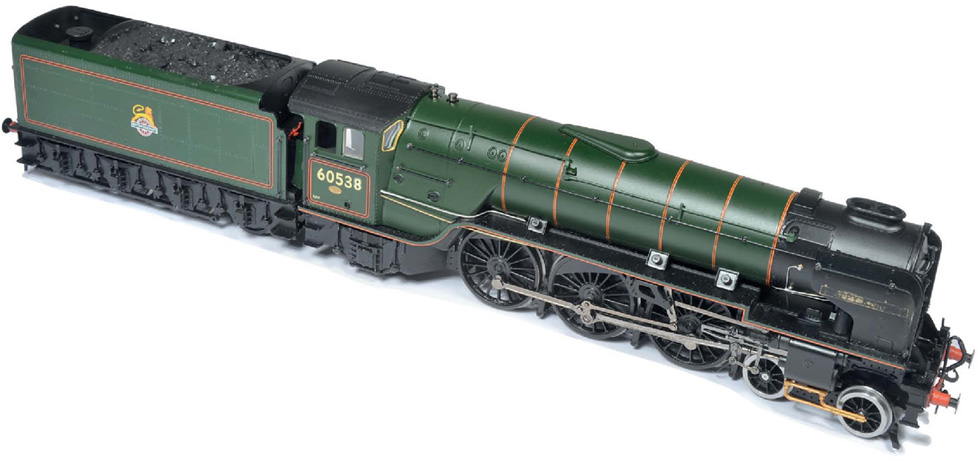
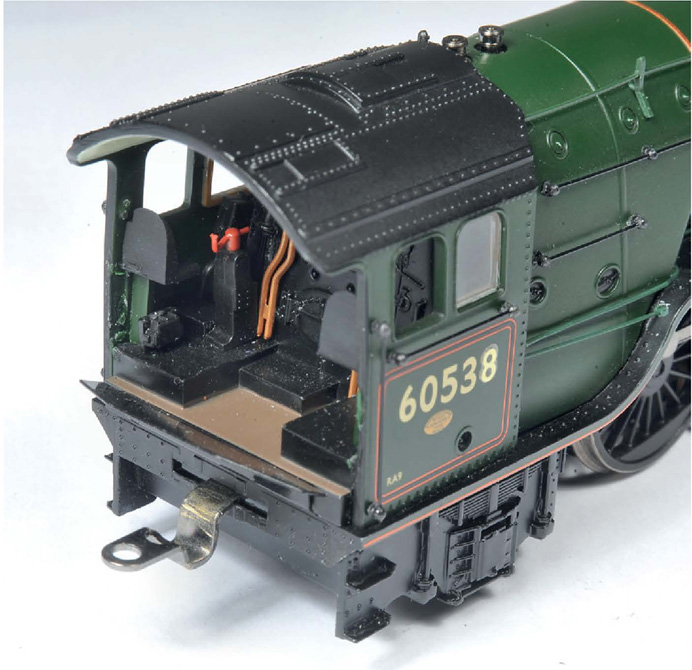
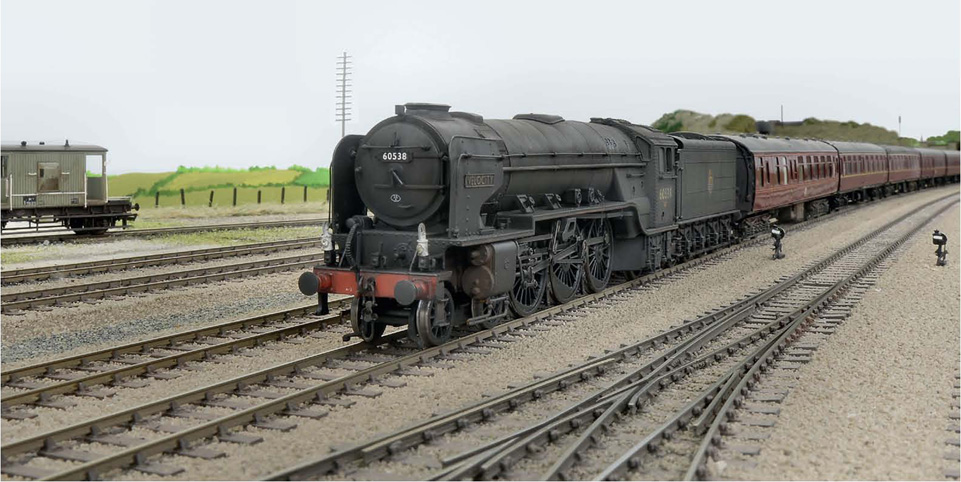
A more drastic modification to a Bachmann A2 can be achieved by converting one into an A2/3 by using Graeme King’s resin and etched parts.
Graeme did the conversion and I patch-painted it using Humbrol enamels and a sable brush. The cab at this stage had only two coats of green on it. The changes to the chassis are apparent.
I lined the cab using Modelmasters’ BR orange-black-orange lining sheet and used HMRS numbers. Weathering was then applied using the dry-brush technique. As yet the nameplates (247 Developments) have yet to be fitted.
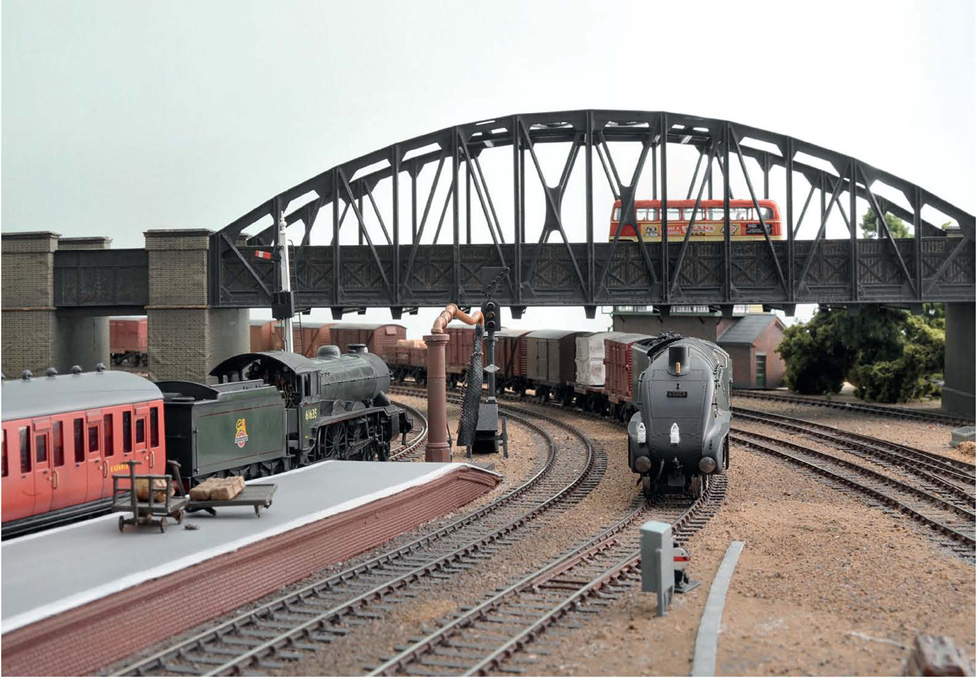
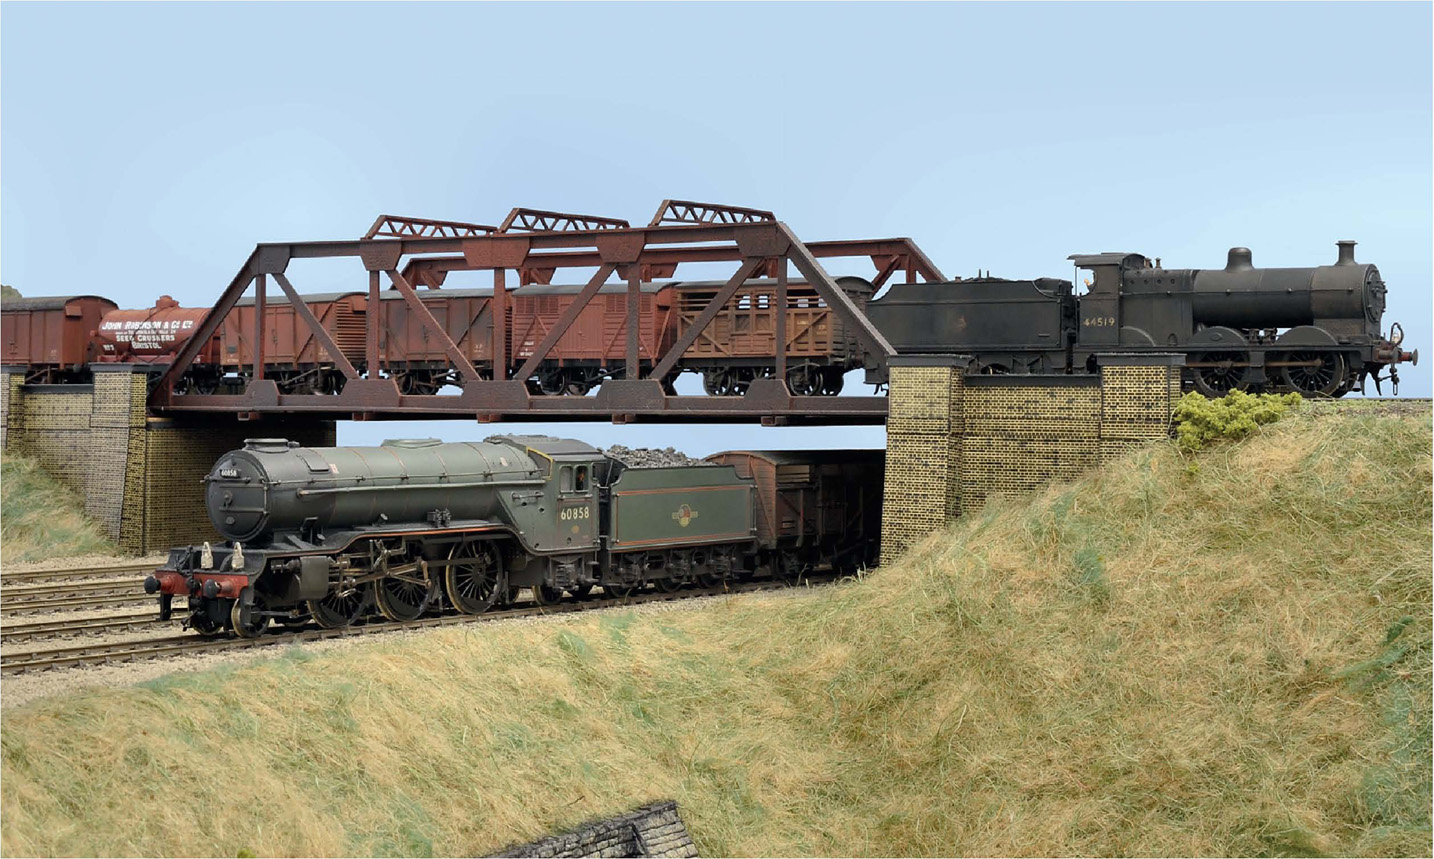
Plates now on and Sun Stream heads south on an express towards Marsh Bridge on ‘Little Bytham’.
Is such a conversion as good as a kit-built equivalent, especially one painted by Ian Rathbone? I made Hycilla from a DJH kit.
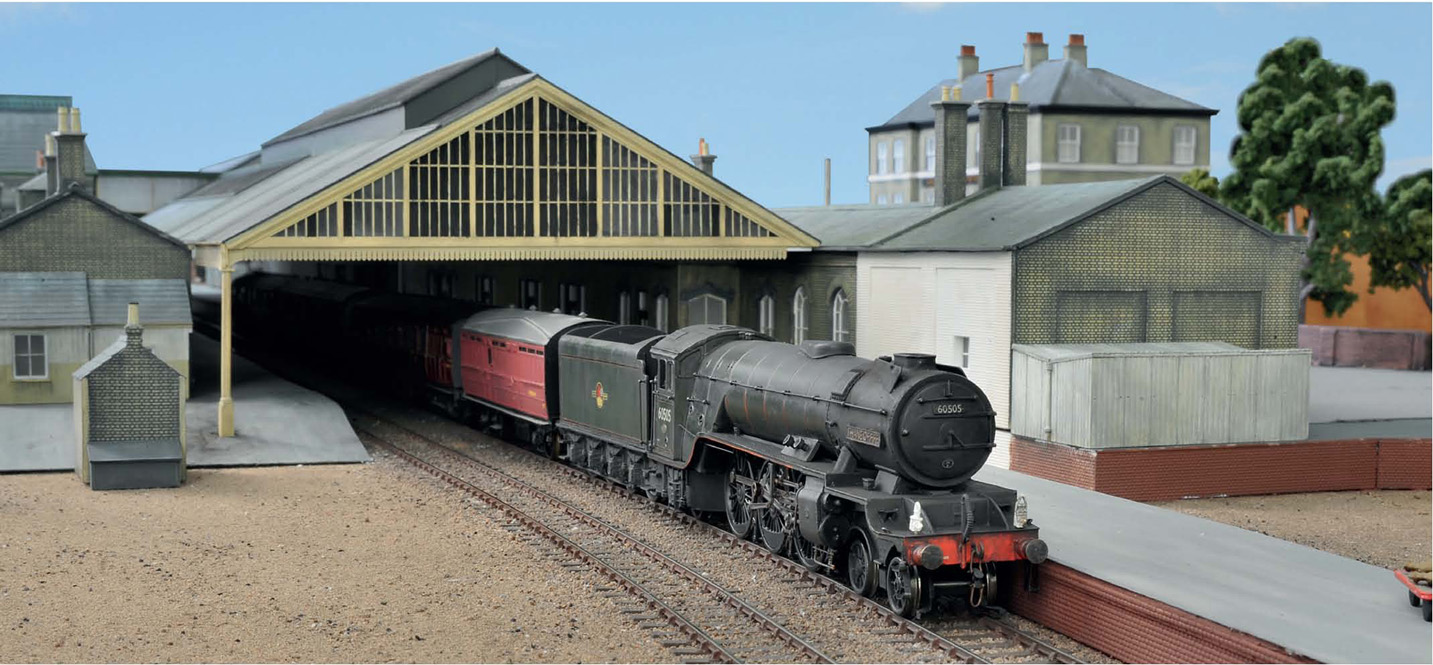
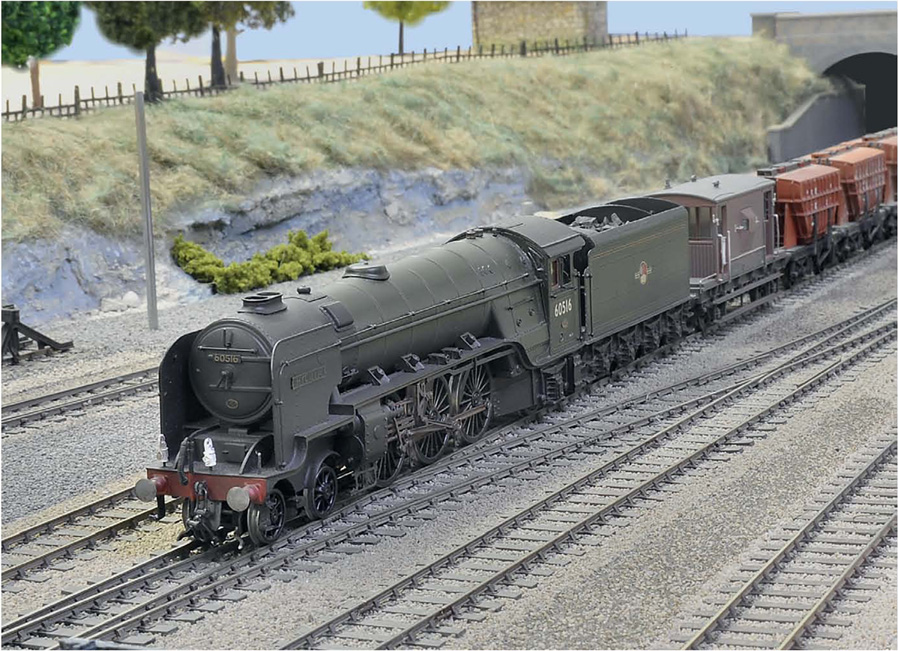
Graeme King also does a conversion kit to change a Bachmann A2 into an A2/2. This splendid rendition by Tim Easter of 60505 Thane of Fife was just such a conversion for Gilbert Barnatt, running on his ‘Peterborough North’.
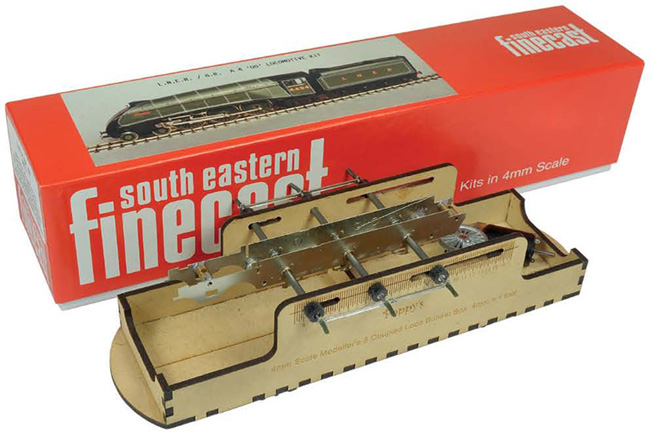
You’ll note in the case studies how I used my old Jamieson jig to erect the chassis for the D2 and the V2. I now use this new jig exclusively. It’s made by Poppy’s Wood and is simplicity itself for getting an absolutely dead-square, and thus good-running, chassis. I’m using it here to erect the frames of a SE Finecast A4.
Whenever I think I’m getting anywhere with my locomotive building, I have the opportunity to take a picture of something really special indeed. This is an O gauge kit-built 9F, the work of Tony Geary. Though initially allocated to the WR, many of these double-chimney ones eventually ended up at York, so it could qualify as an ECML loco. Anyway, on to the case studies.
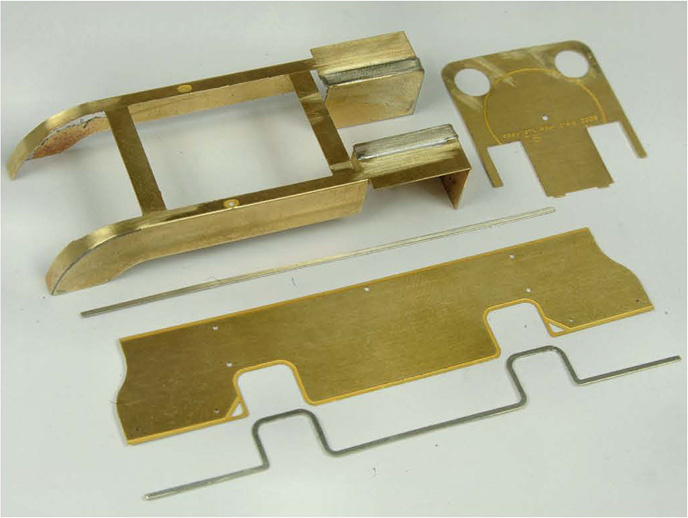
LRM D2 BUILD
Right at the start of the BR period in 1948, these superannuated Ivatt 4-4-0s were coming to the end of their lives. I thought it would be a good idea to thus begin by building a ‘signature’ ECML loco from an earlier time, and following it up by building a pair of much more powerful ‘signature locos’ in the form of a B17 and a V2. Though the last of the D2s were allocated BR numbers in the 621XX series, only one actually received its BR identification (62172). However, it was two years into BR before the last one was withdrawn, so they fit into the start of the period of this book. At the other end of the spectrum, the V2s lasted until the end of ECML steam power. The D2 is a much simpler option for kit-building, especially for those just getting into the delights of ‘metal-bashing’.
The prototype D2s were built by the GNR between 1898 and 1909, eventually totalling seventy in number. Two more were added to the class by the rebuilding post-Grouping of a pair of D1s. They were never more than secondary engines on the main line, though they did take their share of express duties in earlier times. By the period depicted by the model (the end of its life), they could still be seen at ECML locations, such as Grantham, but on very slow trains. I chose to model one of the superheated D2s – this must be stipulated when ordering the kit, for LRM does both saturated and superheated versions.
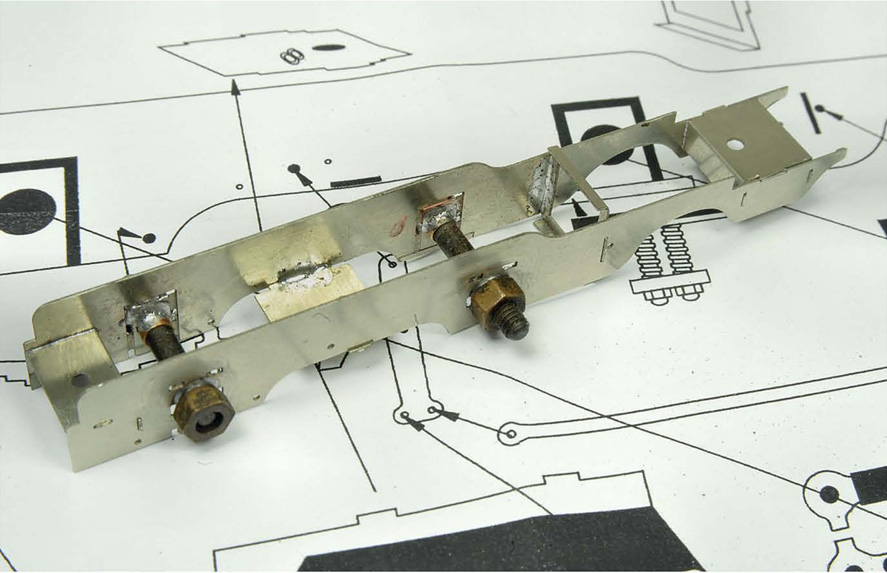
The usual procedure of using my ancient Jamieson jig was employed to erect the frames. I set up the arrangement as rigid (again, my usual practice), but the chassis can be made compensated if required. For chassis construction I now use the Poppy’s Wood jig.

Also as usual, I arranged the chassis to be live to one side, gluing a piece of PCB board to the central spacer to act as the pick-up pad. Part of the spring detail was removed from the insulated side to clear the pick-up wipers.
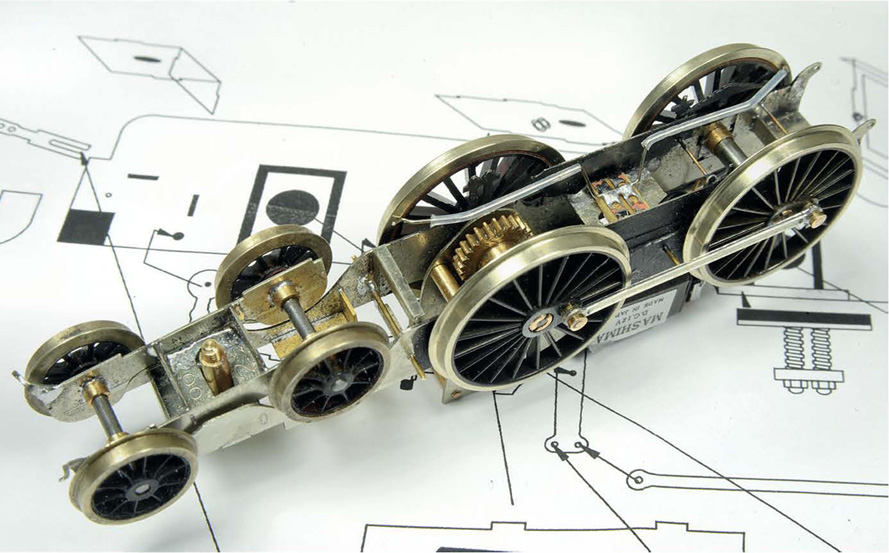
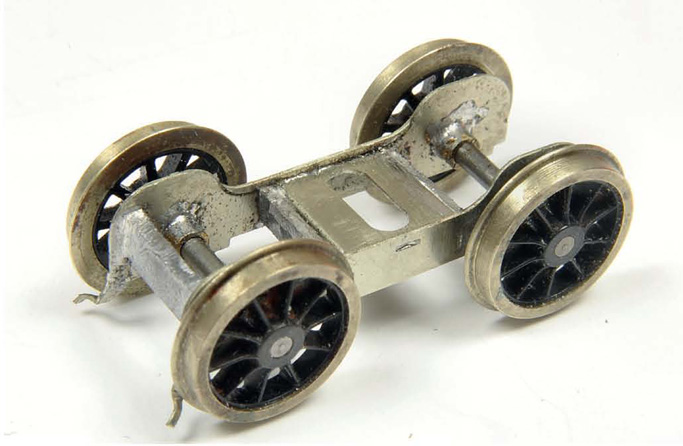
Pick-ups installed, a DJH motor/gearbox installed, rods on and the bogie installed. Markits’ drivers were employed – perfect quartering every time, and concentricity. The bogie wheels came from Alan Gibson.
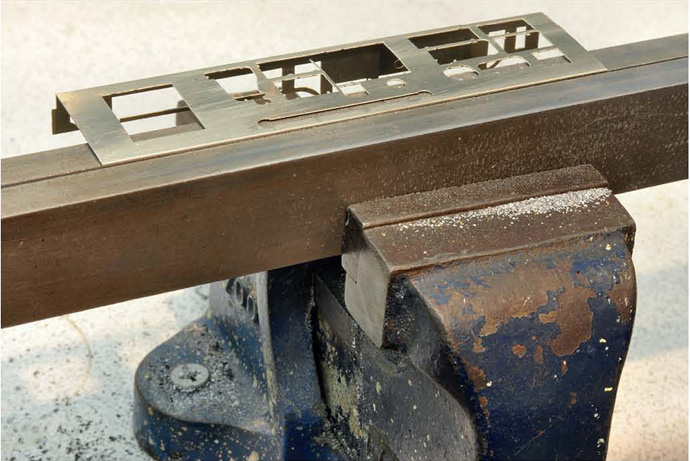
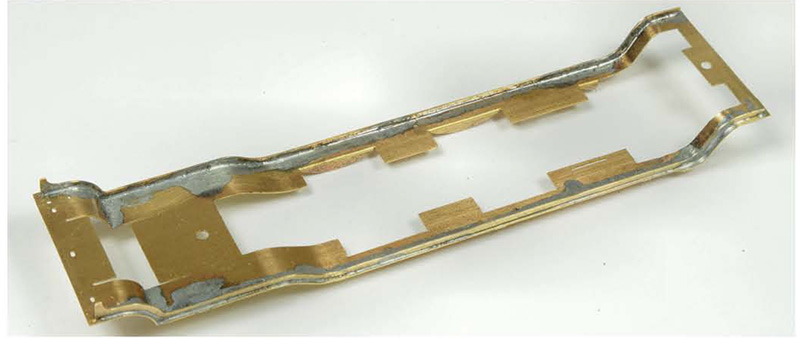
The body is designed to be erected on a fold-up jig. It’s a very good idea but it needs bending bars to ensure that it can be folded-up square.
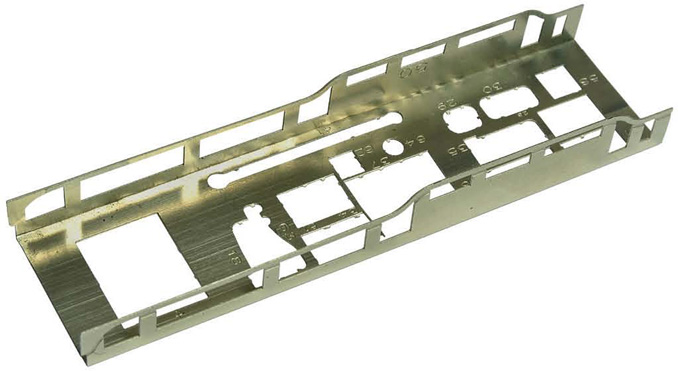
The nickel-silver jig folded-up and ready for use. It was important to remove any small etchings contained in the spaces in the jig before it was folded-up. The valances are attached to the top of the jig.
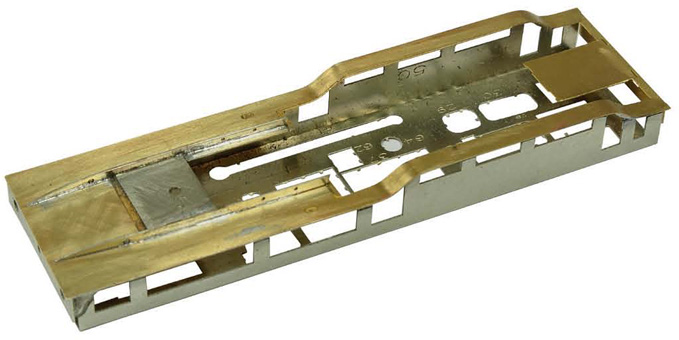
The jig in use, with the brass footplate shaped and soldered in place. This had to be done with great care; especially, because of the box shape of the jig, soldering had to be done from the outside.
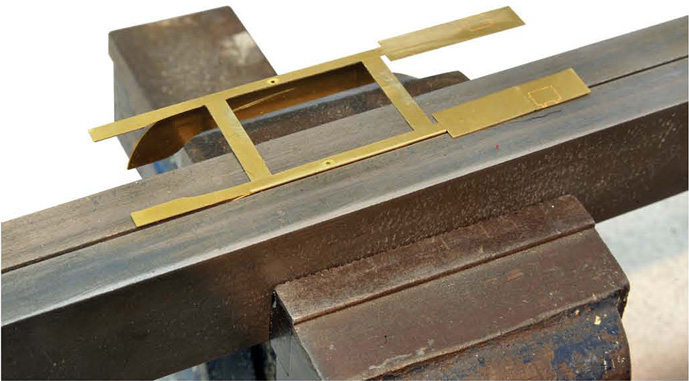
The bending bars were employed to correctly shape the right-angle bends in the tops of the splashers.
Splashers made up and soldered together. The cross-pieces will be removed later. The cab beading was soldered on before the cab itself was erected. Shaping of the cab was achieved by using rolling bars.
The splashers were soldered to the footplate and the made-up cab made ready to be fixed on. Correct forming of all the parts was essential because incorrect bending would result in poor fitting. The maxim was to do a bit, check it, bend a bit more, check again and so on.
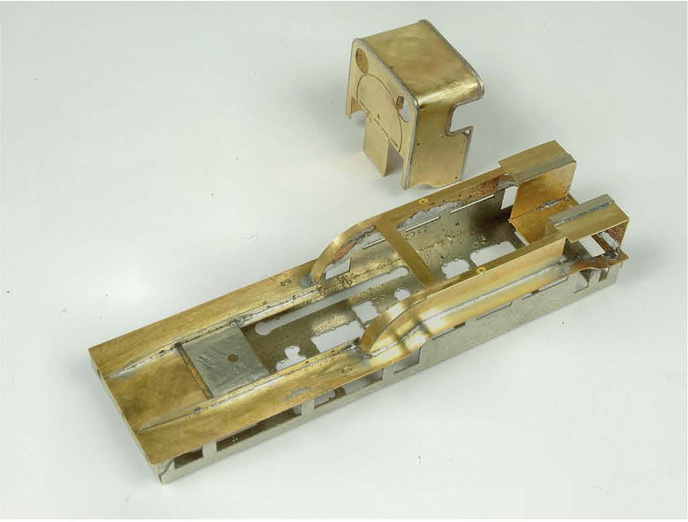
Though the instructions suggested leaving the jig in place until after the boiler was fixed on, I took it off at this stage. I just nibbled away at it with tinsnips, taking it off in bits. Why divert from the prescribed path? Because external soldering of the boiler was not an option.

The boiler was pre-rolled but the smokebox wrappers were not. Rolling bars were employed to produce the correct curve and cocktail sticks employed to line up the components for soldering.
The reason for removing the jig at an earlier stage than prescribed is evident in this shot. Soldering the rear end of the firebox to the cab front, and the splashers to the firebox sides, was much easier to achieve neatly from the inside.

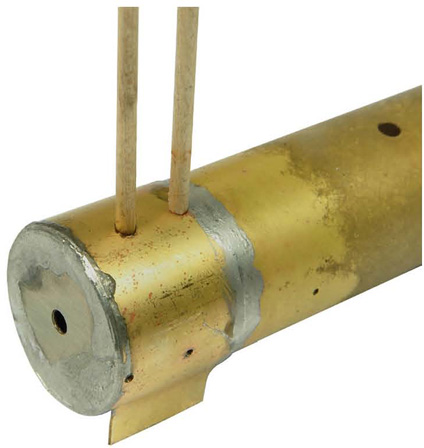
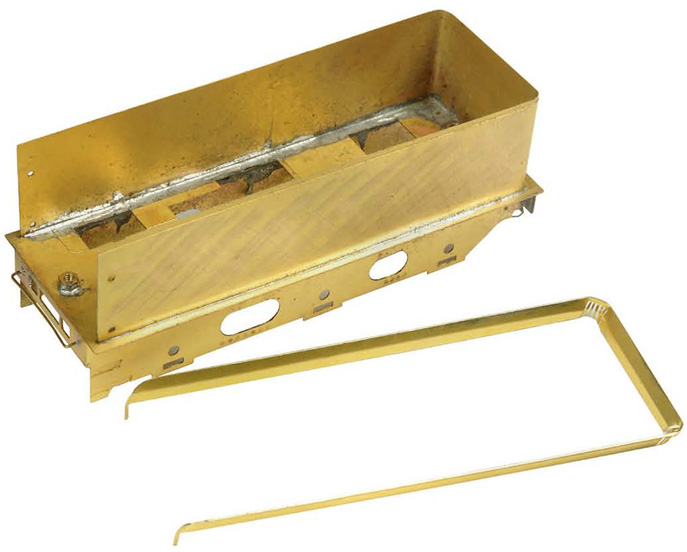
As with all my tender loco constructions, the tender was made at the same time as the loco. Using an old beech mitre block, the tender sub-frame was erected straight and true.
4-4-0s are notorious for stalling on less-than-perfect track, so the opportunity was taken to install a tender pick-up. The insulated side went to the pick-up pad and the live side direct to the frames.
Apart from the boiler being formed, everything else was in the flat, including the tender sides and rear. Great care was taken to ensure any bends were in exactly the right place. A groove in the tender’s soleplate aided this.
The reason for my making loco and tender simultaneously is evident here. Any adjustments/alterations in the relative ride-heights can be made easily before all final detail is attached.
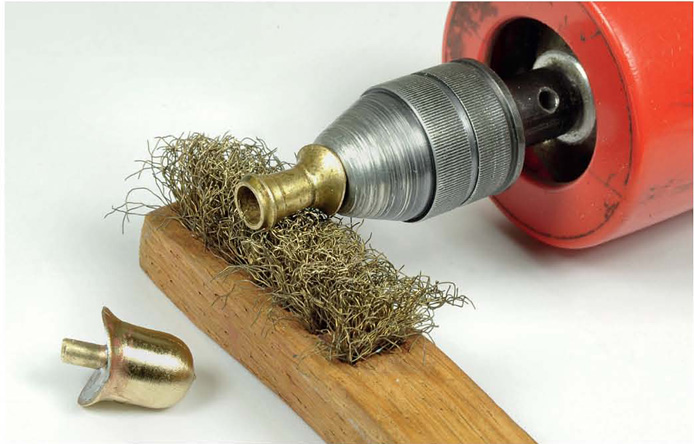
Though the cast-brass boiler details were generally well-formed, some flash and mould lines were still evident. The easiest way of removing this was to fix the castings’ spigots into a mini-drill and whirl them away against a suede brush.
Where brass-to-brass is concerned, fixing with solder is always my preferred method. I tinned the components with 145-degree solder, finally fixing them on with low-melt.
The smokebox door made up and ready for fixing in place. This was secured with Araldite after any internal soldering (handrail pillars, etc.) had taken place.

Splasher beading was very fine and had to be cut from the parent fret with the greatest care to prevent distortion. Solder was used in very small amounts to fix it in place.
Because 4-4-0s are very difficult to balance, I arranged the front of the tender to rest on to the draw-hook of the loco, thus transferring weight.
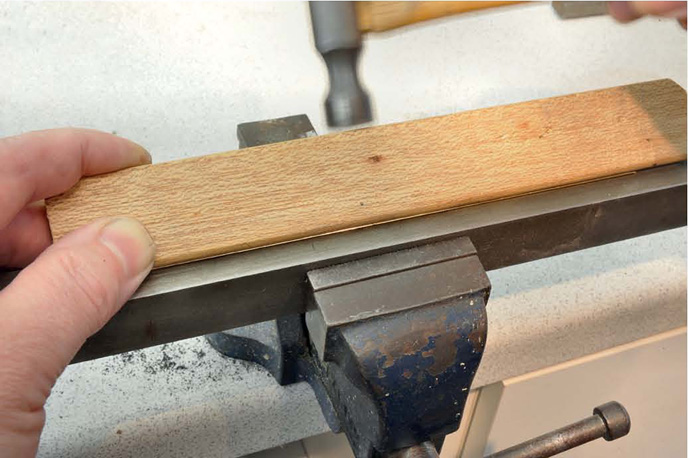
Shaping the flare to the tender top had to be done with great care, in this case clamping the lower half of the piece in the bending bars and tapping it into shape using a toffee hammer and some hardwood strip.
The flare correctly shaped and bent to match the tender top.
And carefully soldered in place.
The coal rails were extremely flimsy and prone to careless damage. After I’d formed them to shape, they were left to the very last before being soldered in place.
The holes in the frames to take the axleboxes were way too small and had to be broached so that the ’boxes fitted.
The ’boxes were soldered in place with low-melt, after pre-tinning the frames with 145-degree solder.
The bogie was very lightweight, so, to ensure good road-holding, a lead slug was soldered into its front framing.
The arrangement of tender pick-up in place. Current-carrying wires represent the feed hoses between loco and tender.
As mentioned, I chose to make a model of a D2 with superheated boiler. It also had the vacuum ejector pipe fitted outside the boiler cladding.

Ready to be painted in its final BR condition (though still branded ‘LNER’). Several locos, particularly older ones, soldiered on into the 1950s, still carrying their old owners’ brandings.
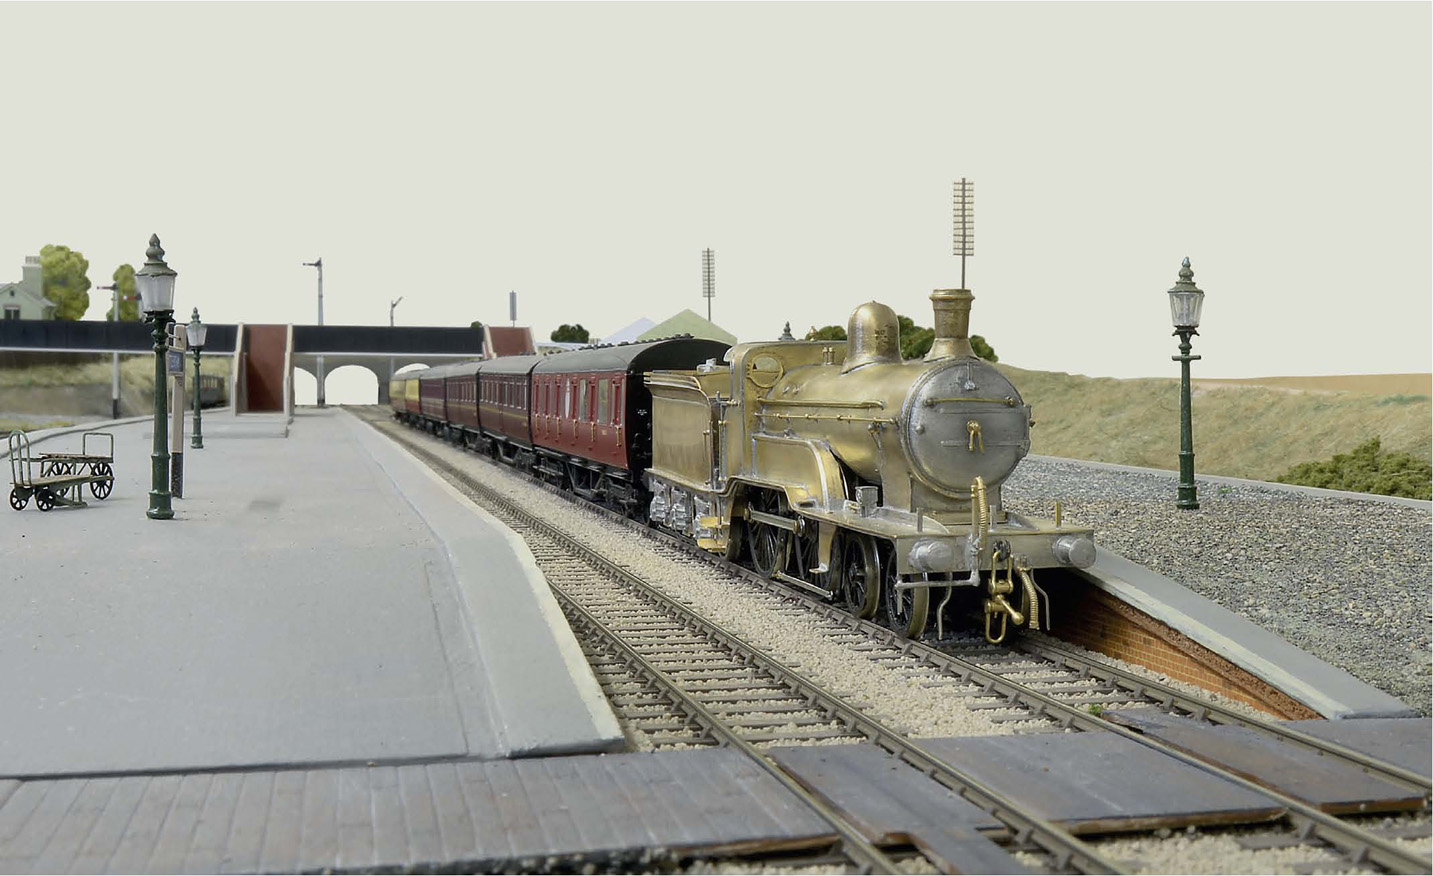
Just the sort of job these old veterans would have finished their lives on (though the stock is in later-painted guise) – a humble Peterborough–Grantham all-stations slow, as she runs-in at Little Bytham.
PDK B17 BUILD
Fitting in between the pre-Grouping D2 and the last-of-the-line V2s come the elegant B17 4-6-0s. Unlike the other members of the Big Four at some time, the LNER never used 4-6-0s as its principal express motive power, preferring to use ‘Pacifics’, ‘Mikados’ or ‘Prairies’. In fact, it wasn’t until BR days that Doncaster ever built a 4-6-0, in the form of a BR Standard Five. In the case of the subject here described, the prototype class was built from 1928 originally for service on the ex-GER lines, where, because of the lines’ extreme weight and length restrictions, anything bigger, heavier and more powerful would have been excluded. So little experience did Gresley’s team have of designing or building 4-6-0s, that the final design and construction was sub-contracted out to the North British Loco Co. in Glasgow.
The locos were not an unqualified success, though later examples were built with bigger tenders to operate over the ex-GCR main lines, where there were no length or weight restrictions. Most were named after country houses and estates and the GCR ones after Association Football clubs. A couple were named after cities and military themes. By BR days almost all were on the ex-GER lines, larger turntables having been eventually provided. They finished their days by the turn of the 1960s, usually on secondary duties, which hardly taxed them, though one final job was the North Country Continental boat train, from Harwich to Liverpool, which members of the class from the depot in March took as far as Sheffield. It was on this duty that I saw them. Latterly, some were fitted with B1 boilers, which gave them greater power, and ten were rebuilt from three cylinders into two-cylinder B2s. None has been preserved, though there is a group set up to make one.
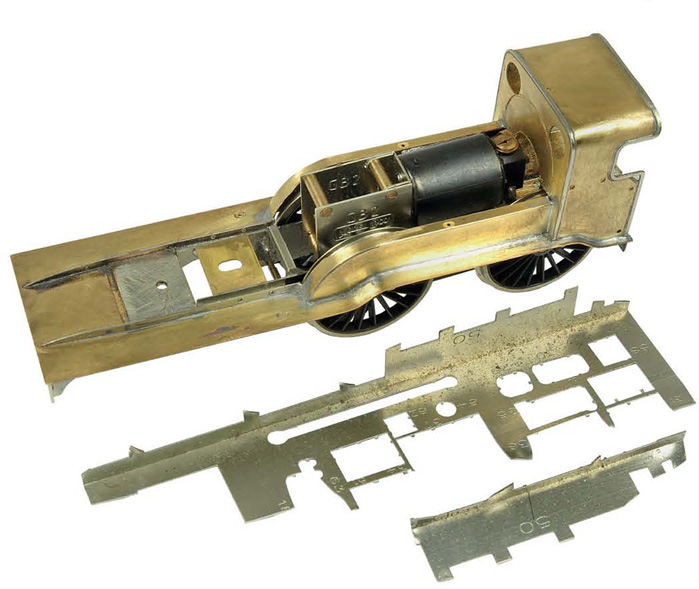
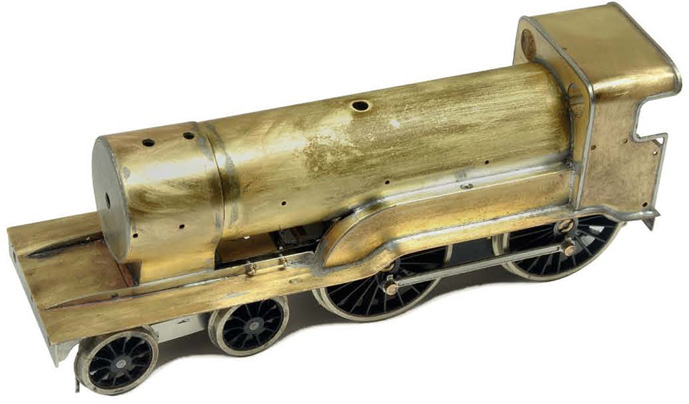
What one gets from PDK is a complete etchedbrass kit, though without wheels and motor.
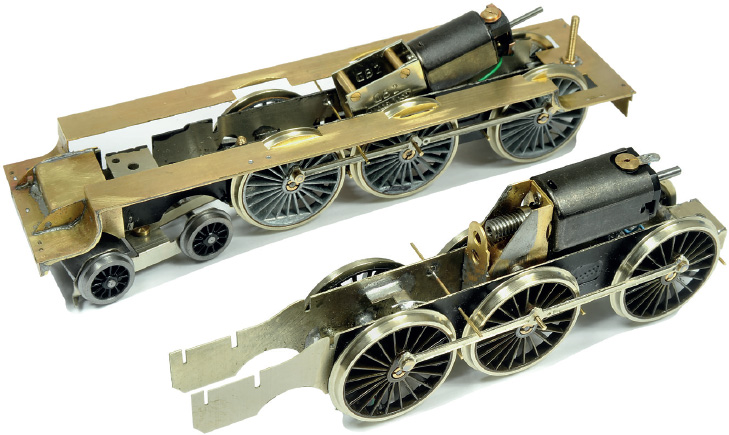
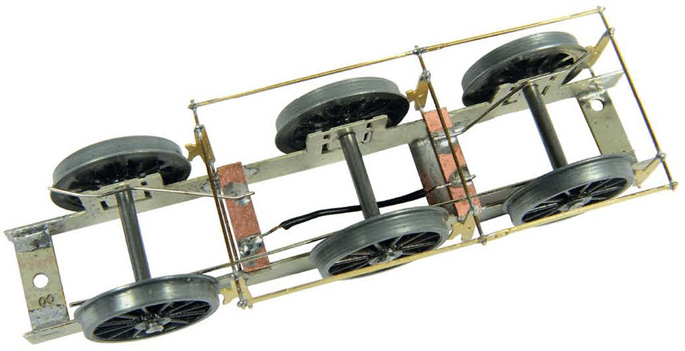
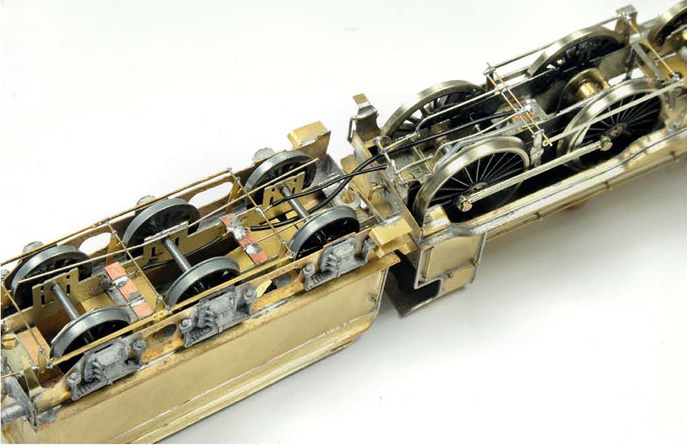
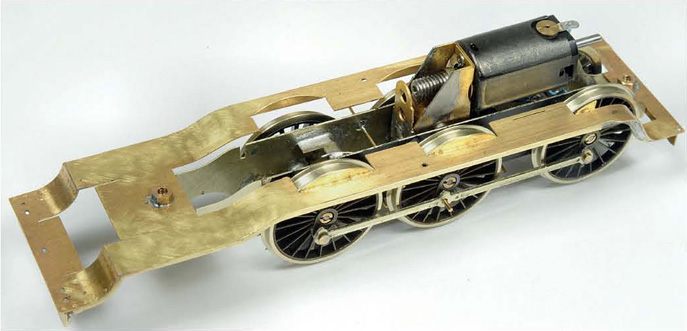
The chassis was accurately etched in nickel silver. I used a Comet gearbox, Mashima motor and Markits’ wheels. At the same time as my building of this model, I helped a friend in the building of a DMR B2, progress on which is seen behind.
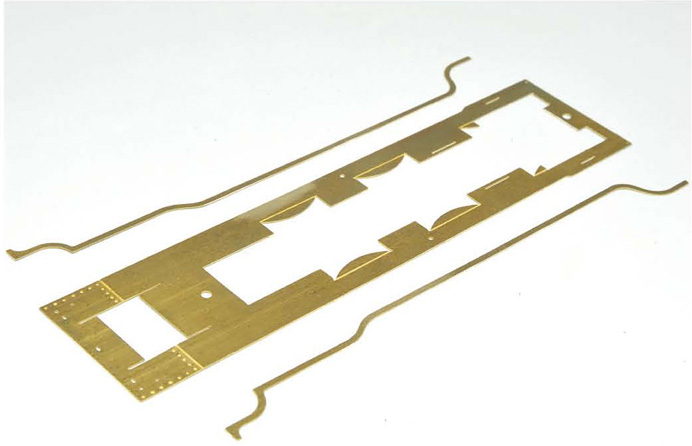
The footplate came as a flat etch, with serpentine valances.
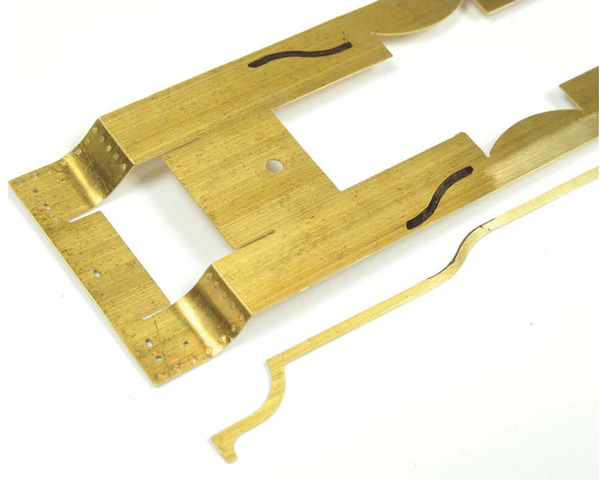
Great care was taken in getting the curves uniform and without creases. I used a felt-tip marker to indicate where the bends had to be.
With the footplate shaped exactly the same both sides, the valances were then soldered on.
At every stage it was important to check that the chassis and the footplate matched exactly.
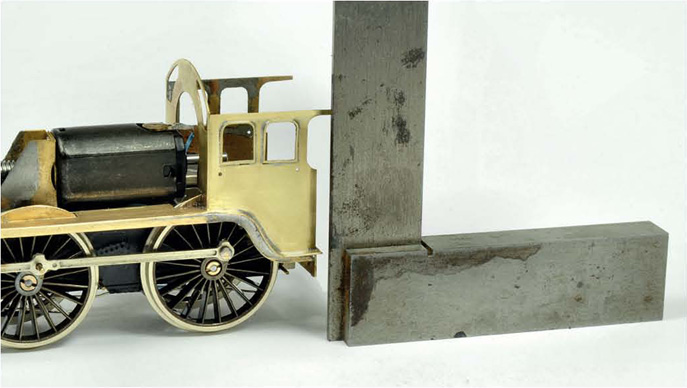
Though a good eye is essential for getting things perpendicular, it was still necessary to check all was true using an engineer’s small square.
With the cab properly in place, how much of the motor armature might eventually have to be cut off (with a cutting disc in a mini-drill) could be established.
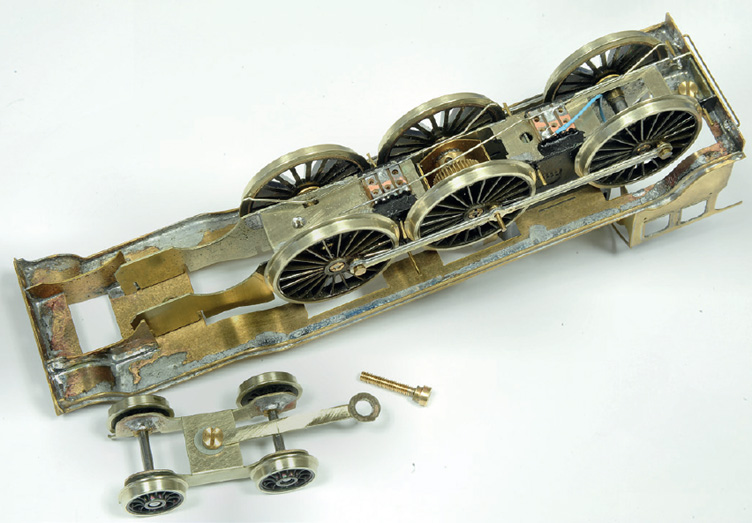
The bogie was made up and tested for no shorting or interference at this stage. Markits makes the exact 12-spoke bogie wheel. I made a shouldered screw to hold it in place.
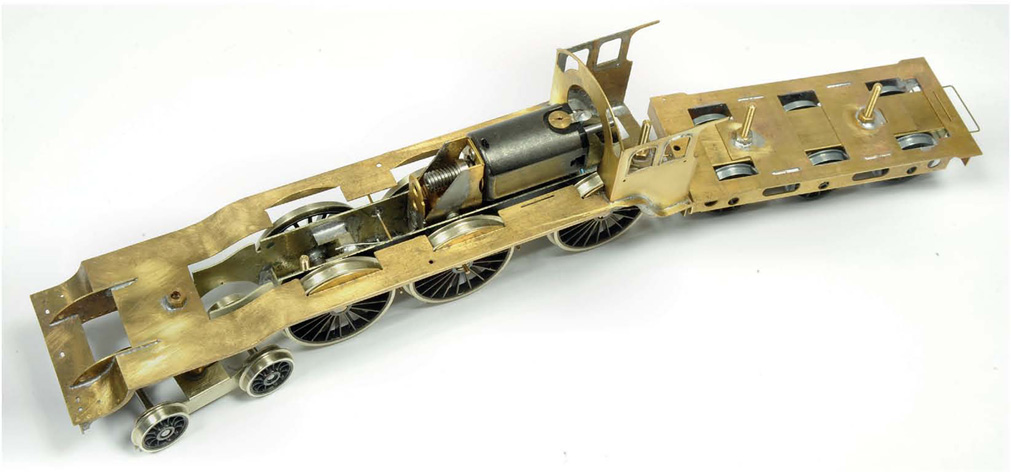
As with every loco I build, construction of the tender began at the same time.
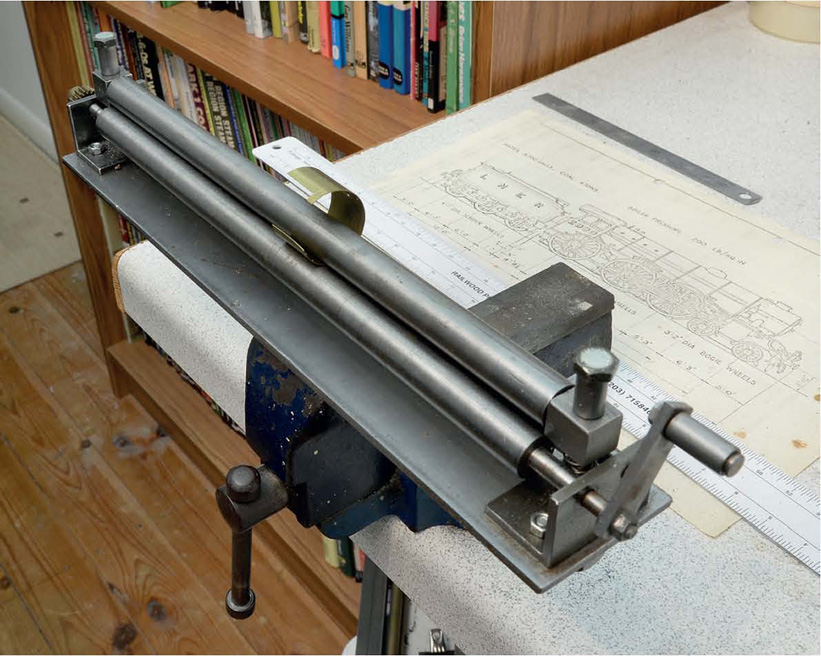
Though the boiler was supplied pre-rolled, the smokebox wrapper was not. Without rolling bars this procedure would have been very tricky.
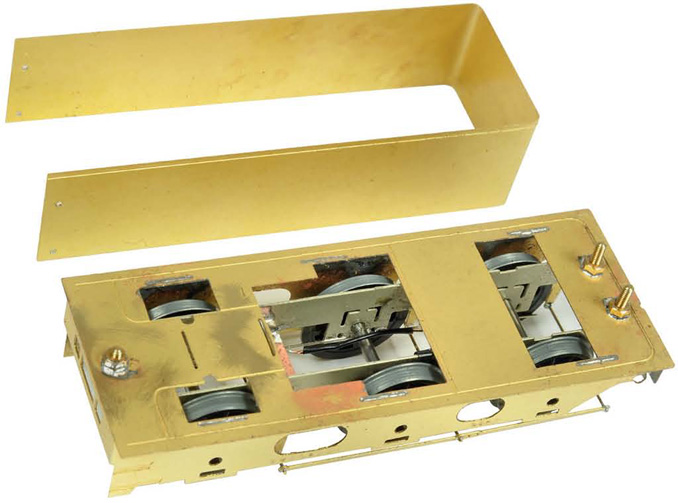
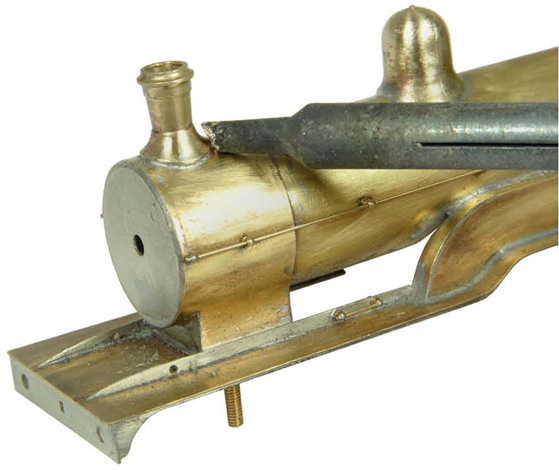
With the whole boiler in place, the splasher tops fitted and most of the tender completed, the loco began to look much more like a B17.
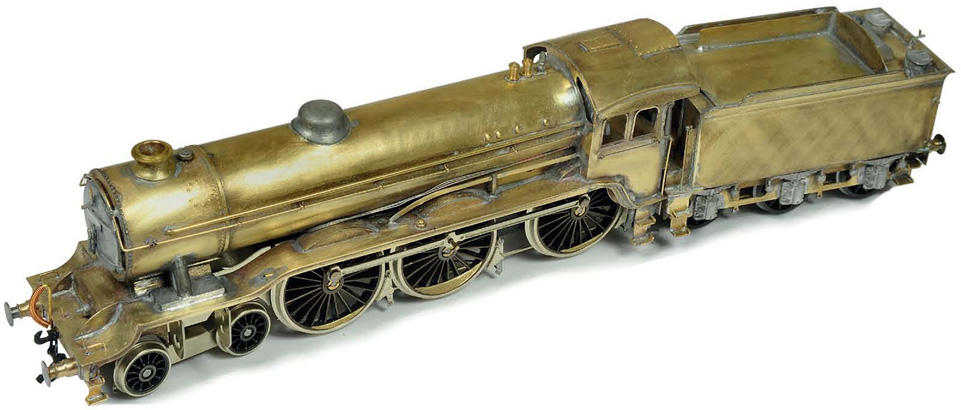
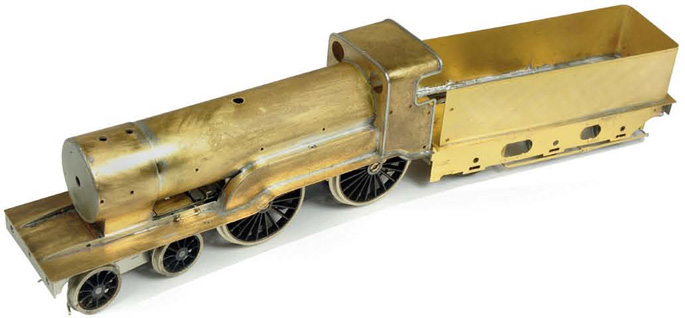
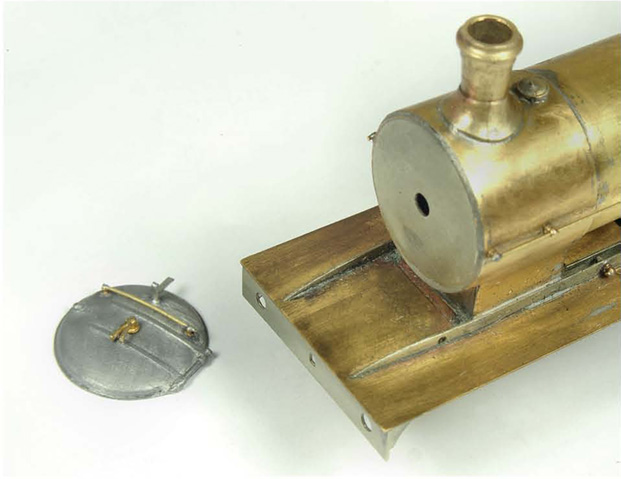
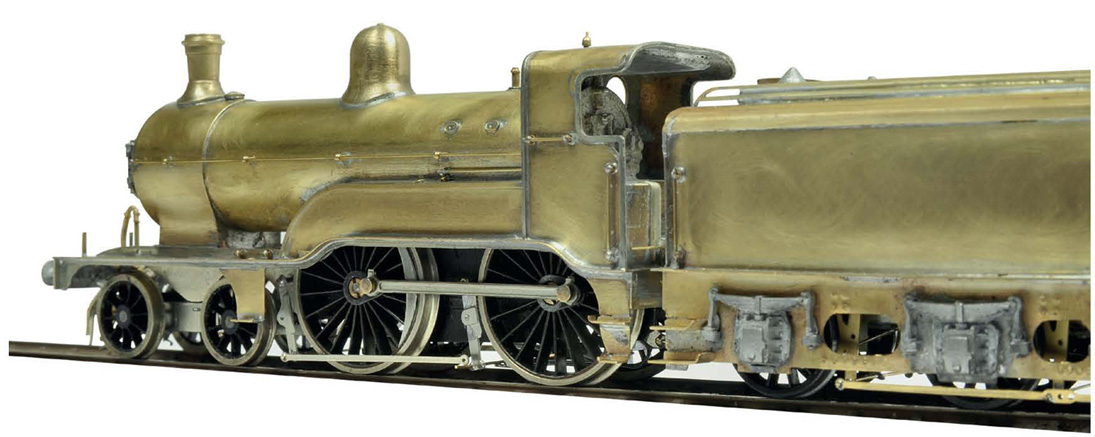
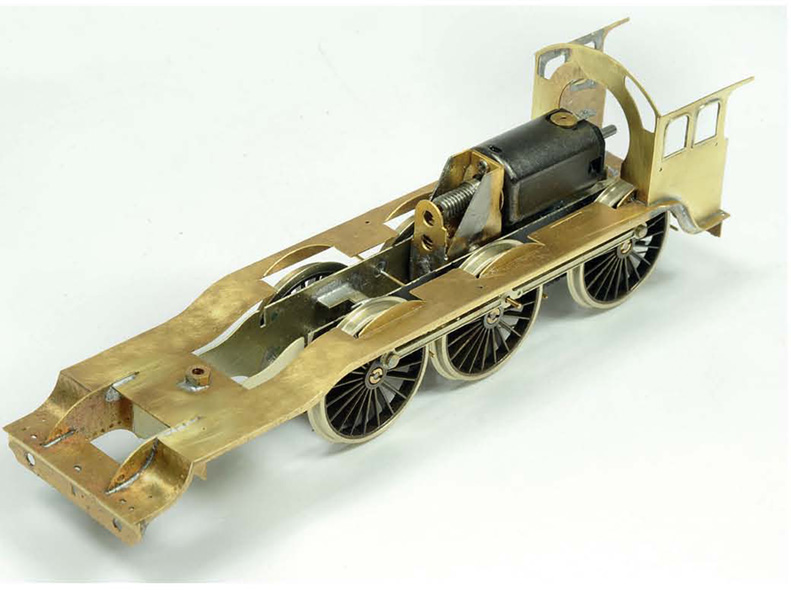
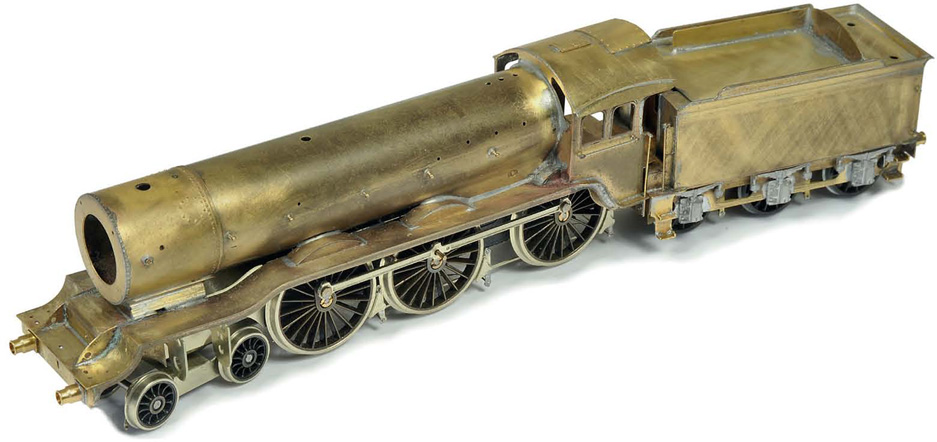
The whole bodywork is complete in this shot. Boiler fittings were soldered in place.
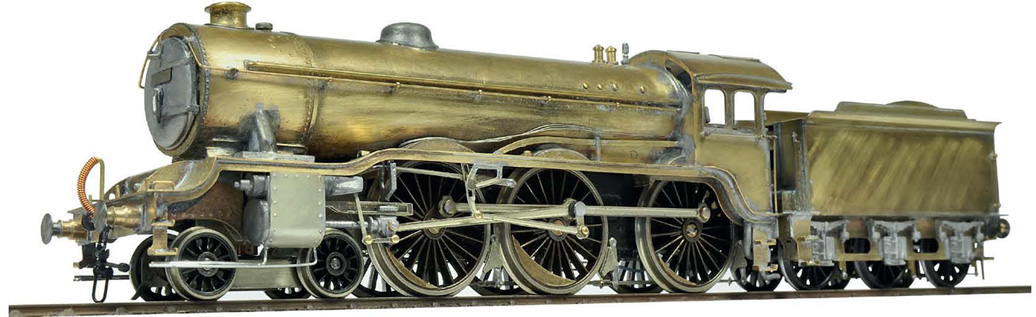
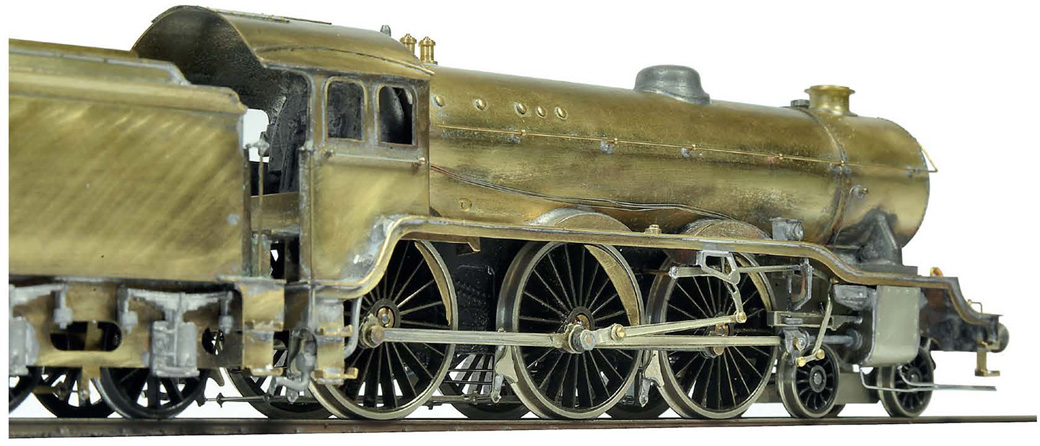
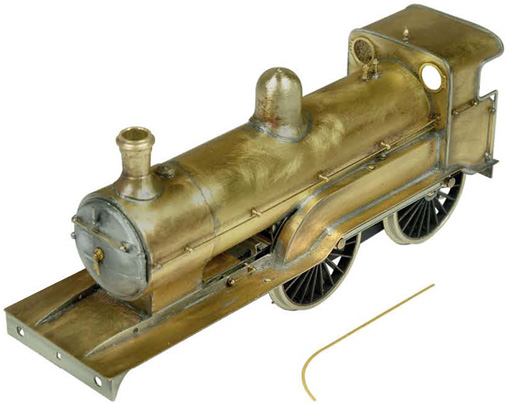
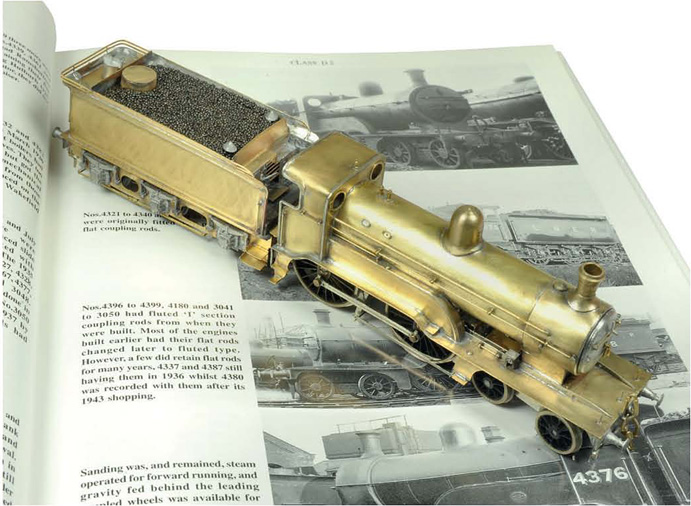
Complete and ready for the paint shop.
I’d already built a few B17s before, in the case of this one for Gilbert Barnatt from a Crownline kit. Ian Rathbone painted it perfectly.
Recently, when demonstrating loco-building at shows, I took my kit-built B17, only to be informed by some that ‘Hornby makes one of those’. And so the firm does, and it’s very nice as this image shows. However, despite it’s being very good it’s only a possession in my opinion. Mine is mine in a much more personal way.
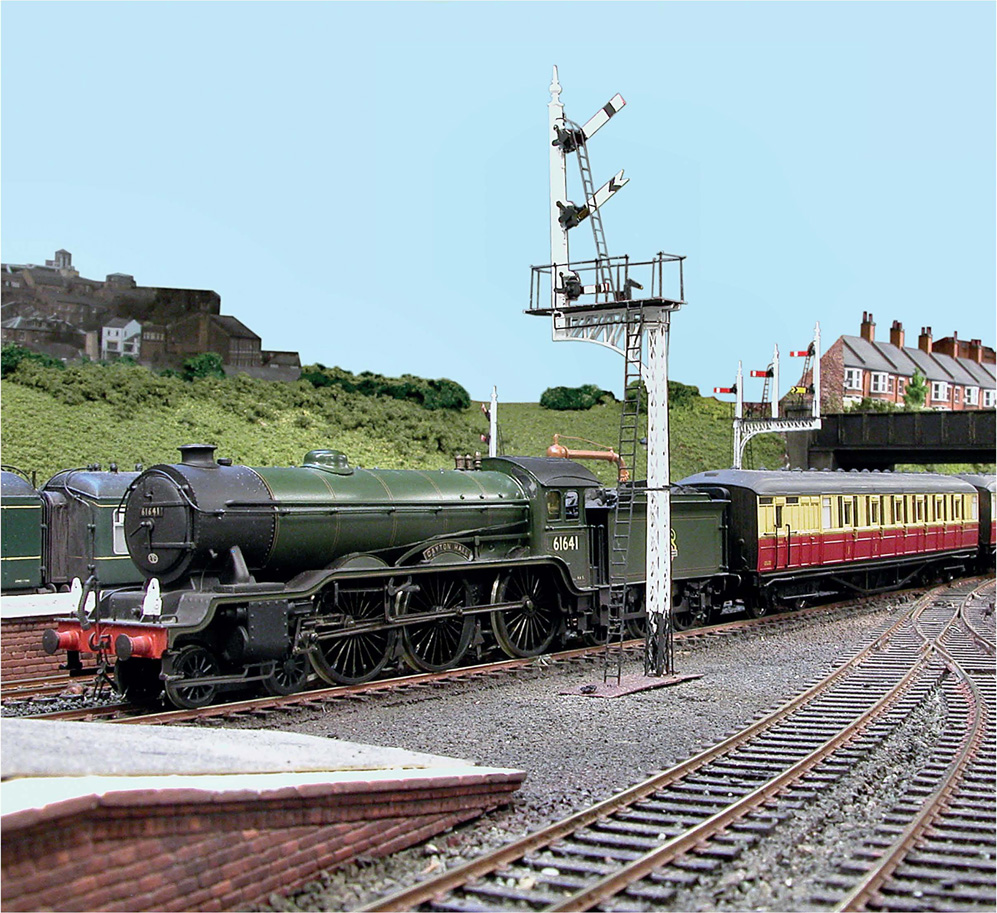
The Hornby B17 is so good that with a little detailing and weathering, an exceptional model can be the result. Tim Easter made this one into something special for Gilbert Barnatt’s ‘Peterborough North’. He also improved the A4 coming under Crescent Bridge.
V2 BUILD
The elegant, Gresley-designed, big mixed-traffic 2-6-2 has always been popular with railway enthusiasts: those who merely observed them and studied their performances, and those who’ve made models of them. ‘The engines that won the war’, I think is one epithet given to them. Certainly, during the hostilities, when most of them were brand new, they hauled prodigious loads on the ECML. With 184 of them, later in BR days, they could be seen over the whole range of the ex-LNER system on those routes that were RA9, ranging from the whole of the main line between King’s Cross and Aberdeen, through to Glasgow and Central Scotland, over the Waverley route to Carlisle, along the ex-GCR main line as far as Manchester (prior to the Woodhead electrification from Sheffield), along the GER/GNR joint through March and Lincoln and beyond, and along the GWR joint line through the Chilterns. Because of their weight, they were barred from the ex-GER system in the main – a pity, because they would have been an ideal loco for the Liverpool Street–Norwich services otherwise.
In LNER green they looked beautiful and even in wartime black their classic GNR serpentine lines still were evident. In lined BR black they looked good but eventually these thoroughbreds were given BR green, which suited them well. They were good steamers, though when just a few were given Kylchap double pots towards the end of their lives they were the equal of many ‘Pacifics’. A few were honoured with names – the first after the LNER’s fast freight service, the rest after the military or schools. In Green Arrow we have one preserved.
Apart from the few with double chimneys (the outward appearance of the BR-type and the Kylchap were identical), and the unique stovepipe and deflector fitted to 60813, the only major differences in the locos’ appearances was the outside steam-pipes fitted to those latterly equipped with separate cylinders, and the different types of Group Standard tenders; they could have high or low frontplates, high or low rear coal division plates or flared or flush sides. Before embarking on the making of any models, it is best to sort out exactly which manifestations you wish to represent. I thus consulted the RCTS green series, Yeadon, Irwell and as many pictorial volumes as I could find that had V2 pictures. I also used the appropriate Isinglass drawing.
As a popular prototype, there have been several models produced of V2s down the years, particularly in 4mm. Though it was mooted, Hornby–Dublo never actually made one, and I think Lima considered a V2 at one time, but nought came of that. Bachmann made the first RTR V2 in OO gauge, but its poor chassis design let it down. Now, with a decent, DCC-compatible chassis, it’s a vast improvement, but issues with the body-shape in general and in detail rather compromises it. In 4mm kits we’ve had Jamieson, Bristol Models, Nu-Cast, Pro-Scale, Crownline/PDK and Martin Finney (are there any others?).
Because any steam-powered ECML depiction requires umpteen V2s, I’ve built loads, for myself or on commission. I never tackled the rather lumpen Bristol Models’ offering, but those from Jamieson, Nu-Cast and Crownline have proved successful builds; I’d best draw a line under the Pro-Scale one! I’ve also fitted a decent chassis to a Bachmann V2, and also changed the dome.
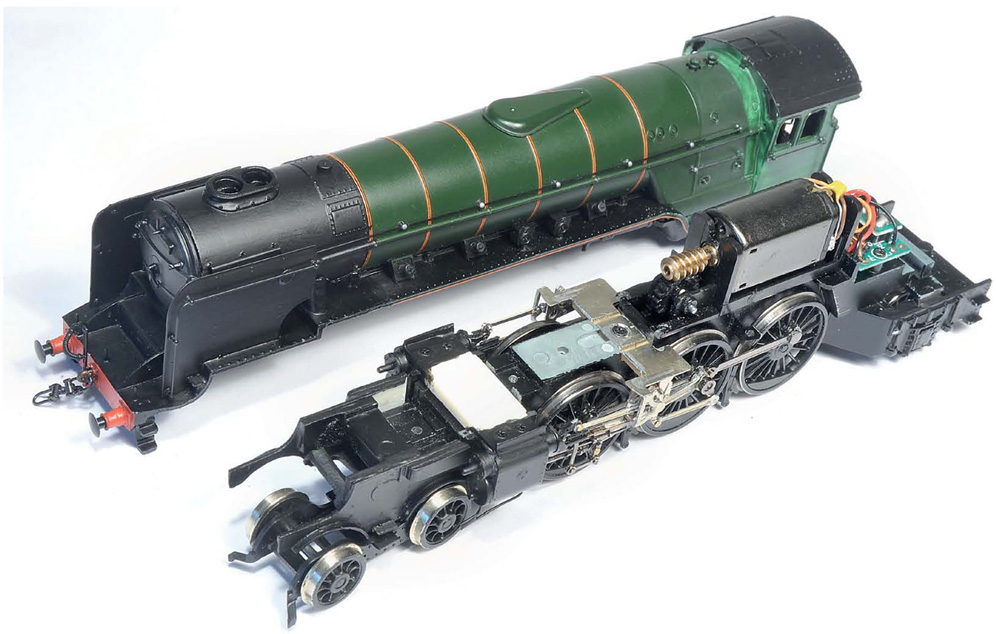
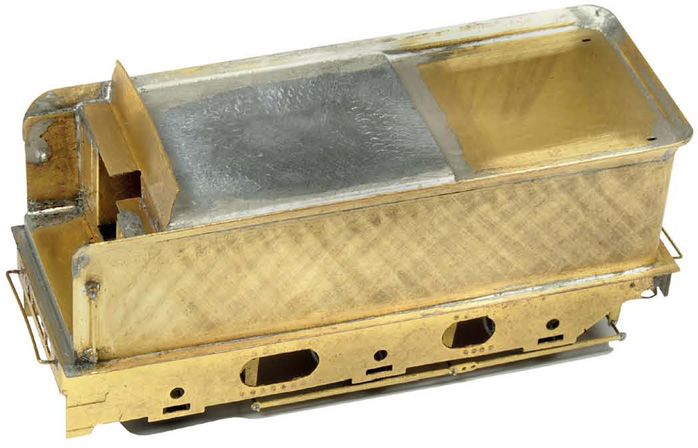
The latest V2 manifestation has been ‘cottage industry’-produced by Graeme King, and consists of a complete resin body for the loco, designed to fit on a Bachmann or Comet chassis. Graeme gave me one of these to try, and the construction of this is described in the following step-by-step pictures.
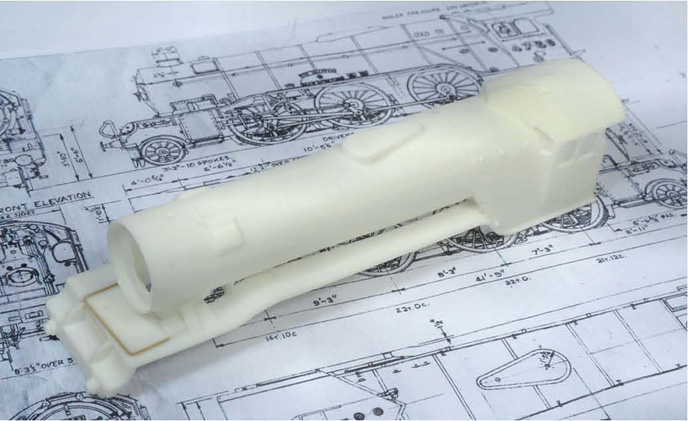
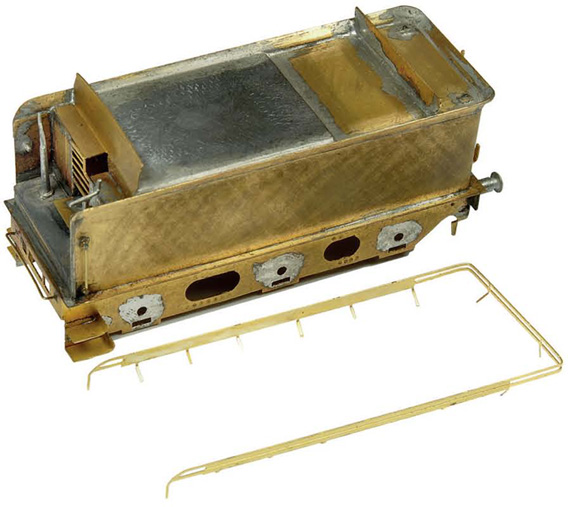
This is what one gets from Graeme, in the form of this Milky Bar resin body. Because of previous ‘sagging’ issues with the cured resin, Graeme has fitted brass inserts to prevent this happening. Basic cleaning up was necessary at this stage, there being some little flash.
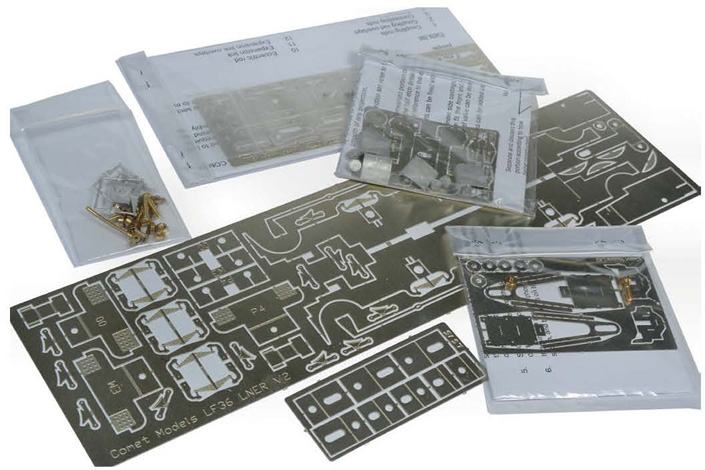
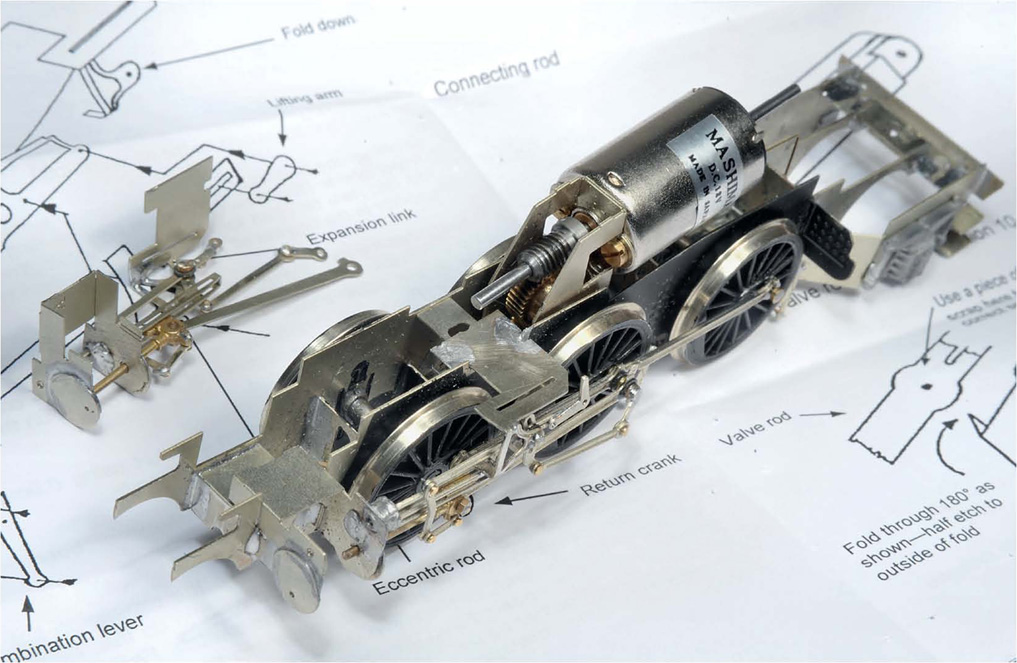
Though a current Bachmann chassis can be fitted, I went for the Comet option, ordering everything required to make a complete chassis. These are splendid kits for loco frames and how many I’ve built, I’ve lost count.
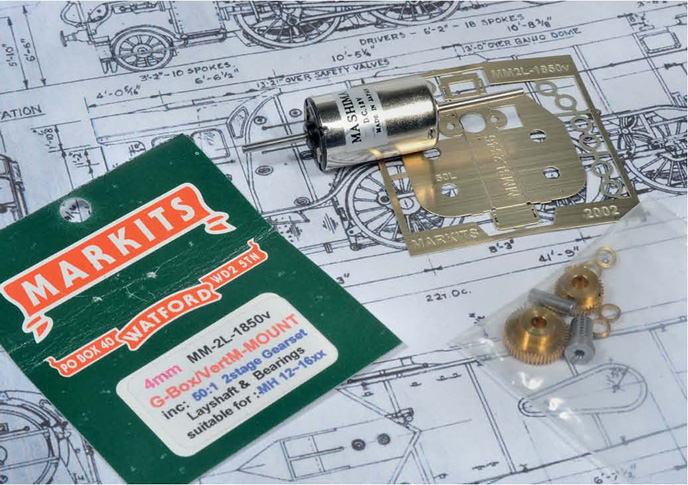
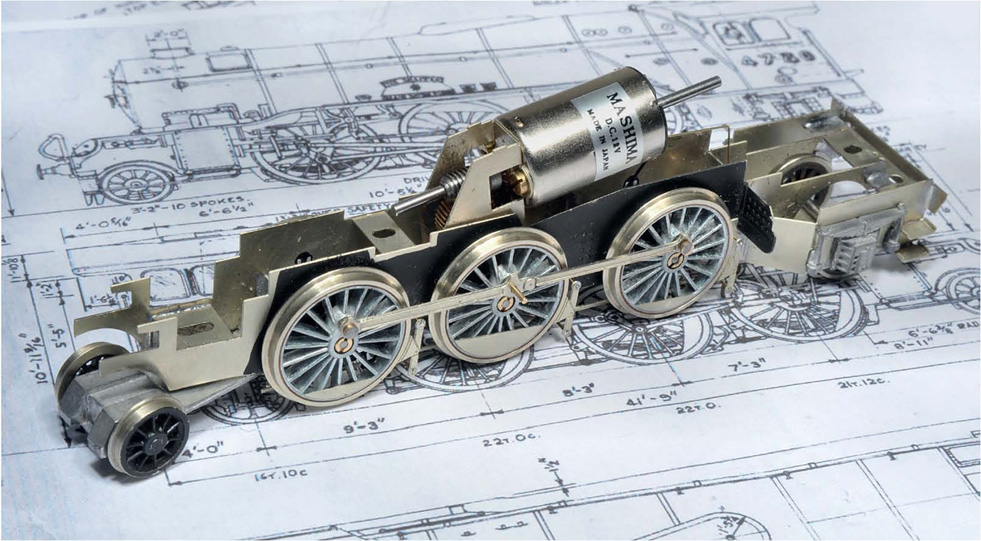
I chose a Markits gearbox and Mashima can motor to drive this one. These gearboxes are very accurate and can be made up into very sweet-running units, but (like all drive constructions) care must be taken during their assembly.
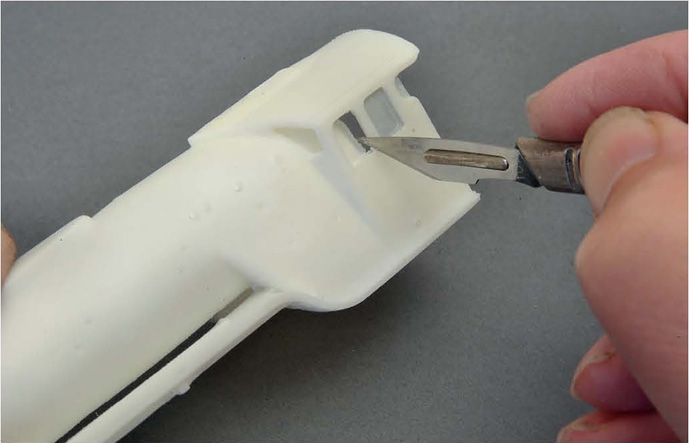
Great care must also be taken removing the flash from the window apertures in the cab. I pared it away with a sharp scalpel then cleaned it up with files and a fibreglass pencil. The resin is quite resistant, but too much pressure will mark it.
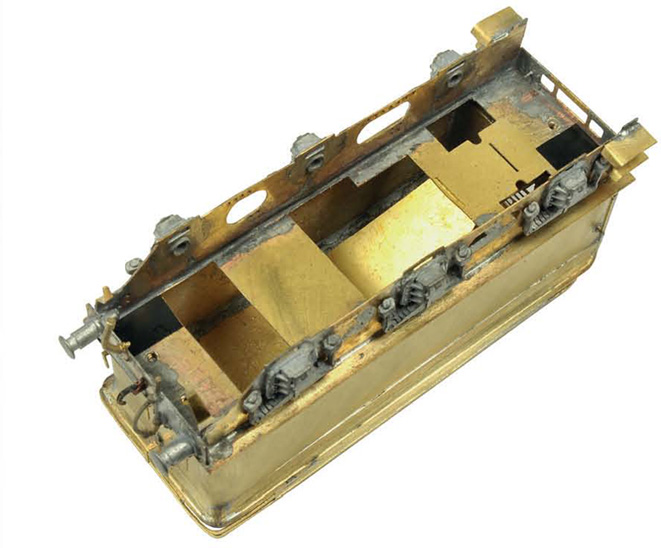
I also used the axles of my Jamieson jig to erect the Comet frames. As can be seen, the side that accommodates the pickups has had part of the spring detail removed. This is invisible once the wheels are on.
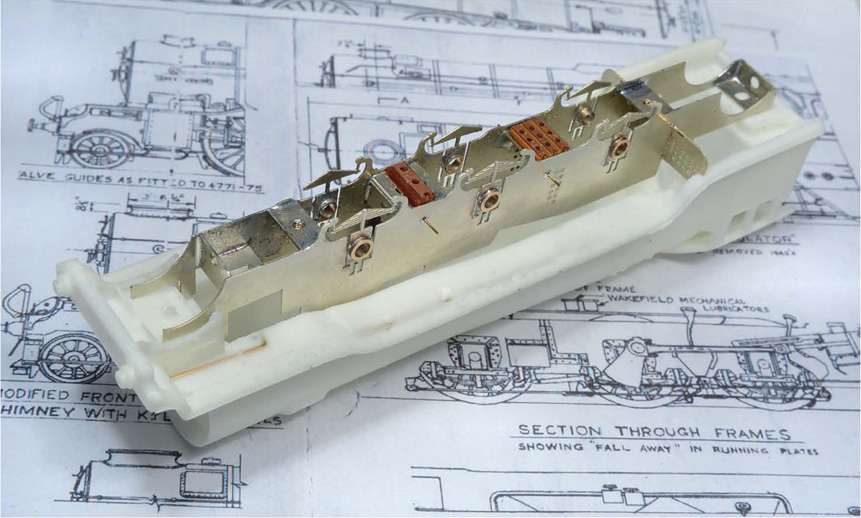
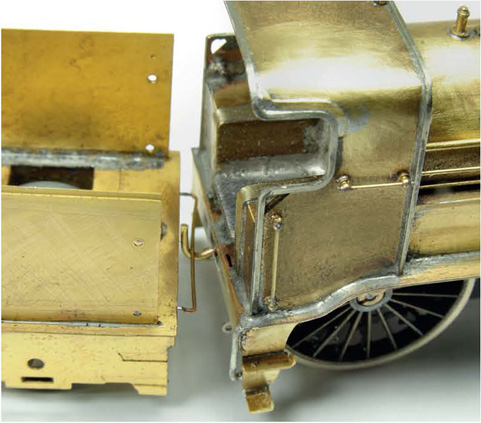
The Comet frames fitted like a glove. This is no surprise because these were designed as Bachmann substitutes and the Graeme King body is designed around a Bachmann chassis. The rear firebox and footplate support is a nice touch.
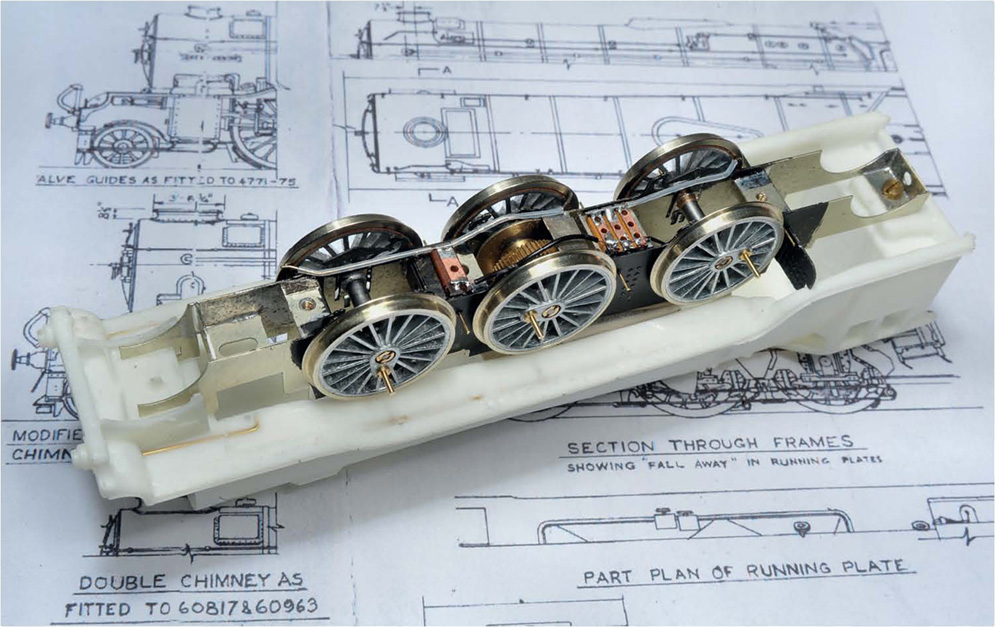
Wheels and pick-ups in place. Once more I turned to my store of older 24mm Romford drivers (I have dozens) for this loco. They’re obviously not to RP25 profile but they’re true-round, robust and easy to quarter.
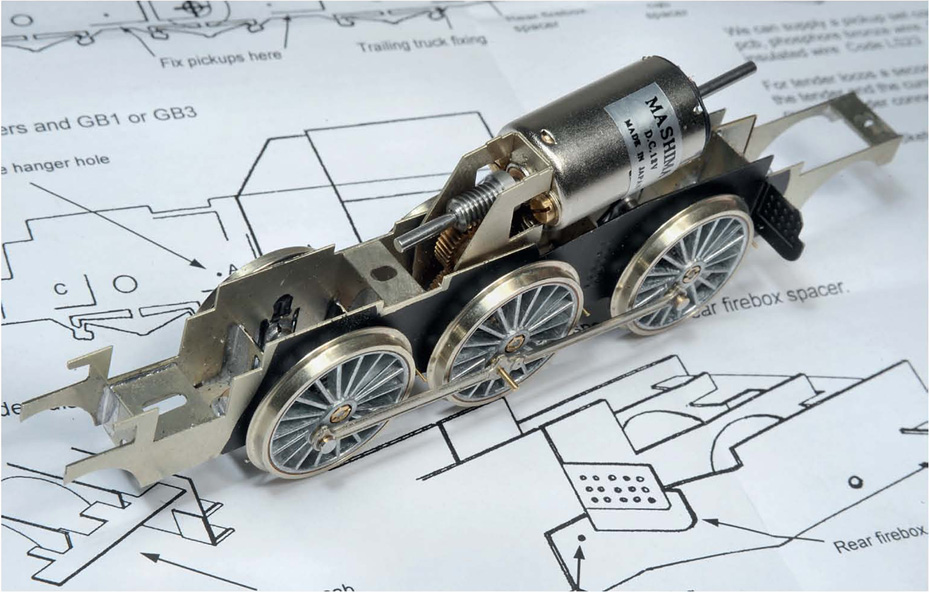
Because the Markits’ gearbox was dead sweet in both directions, I drove off the centre axle with this one. This is mechanically more advantageous than driving off an outer axle and there’s plenty of space inside to accommodate the big motor.
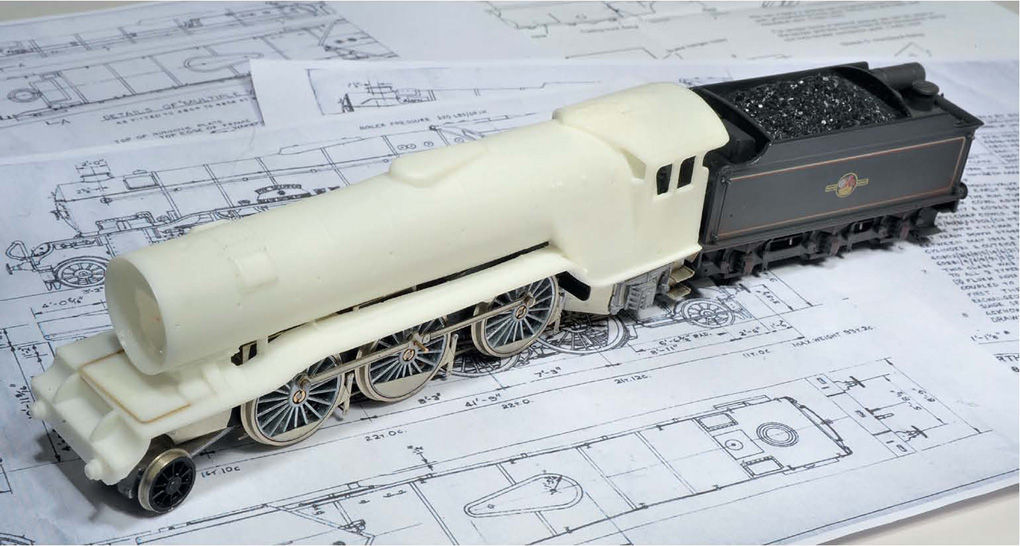
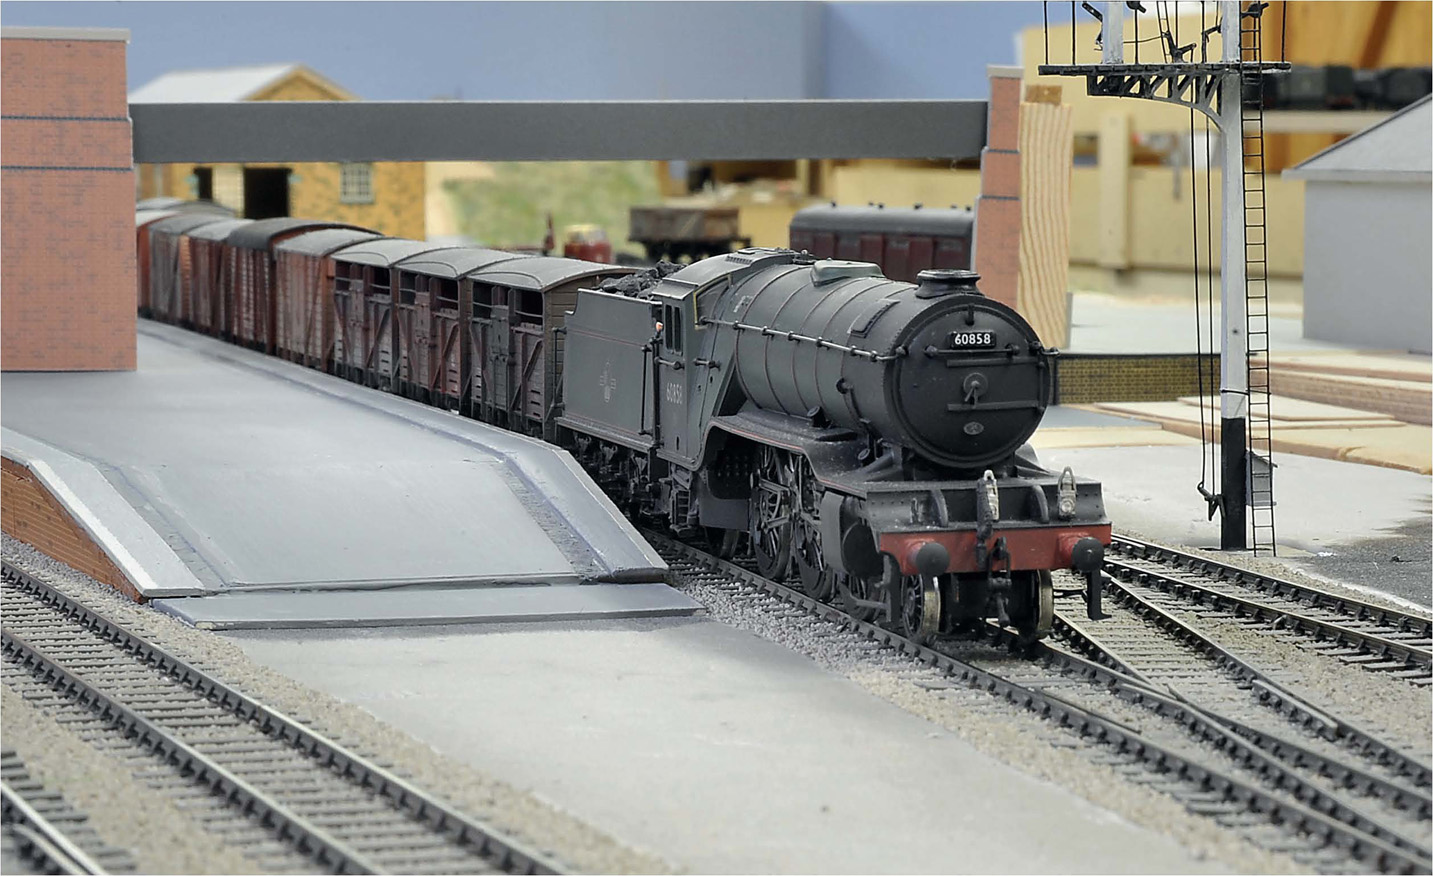
A Bachmann tender is recommended, and I had a spare one from the K3 conversion published in BRM in 2015. It’s flared, so restricts the options for a V2 but, as will be seen, it suited the one I’d chosen to model.
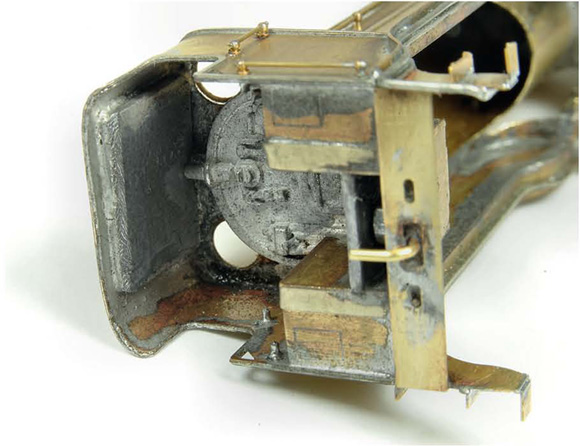
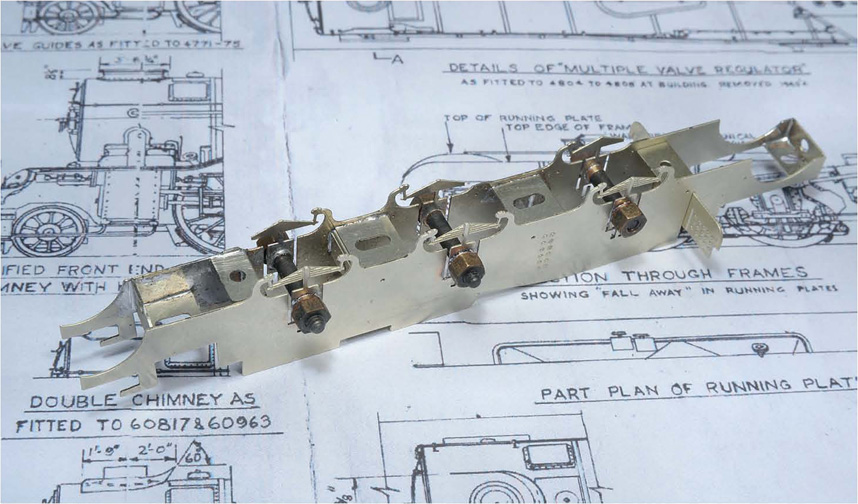
The basic chassis with rear frames, Cartazzi axleboxes, brake rigging and ponies installed. This was thoroughly tested at this stage to ensure no tight spots or interference. The Isinglass drawing was a constant aid for ensuring accuracy.
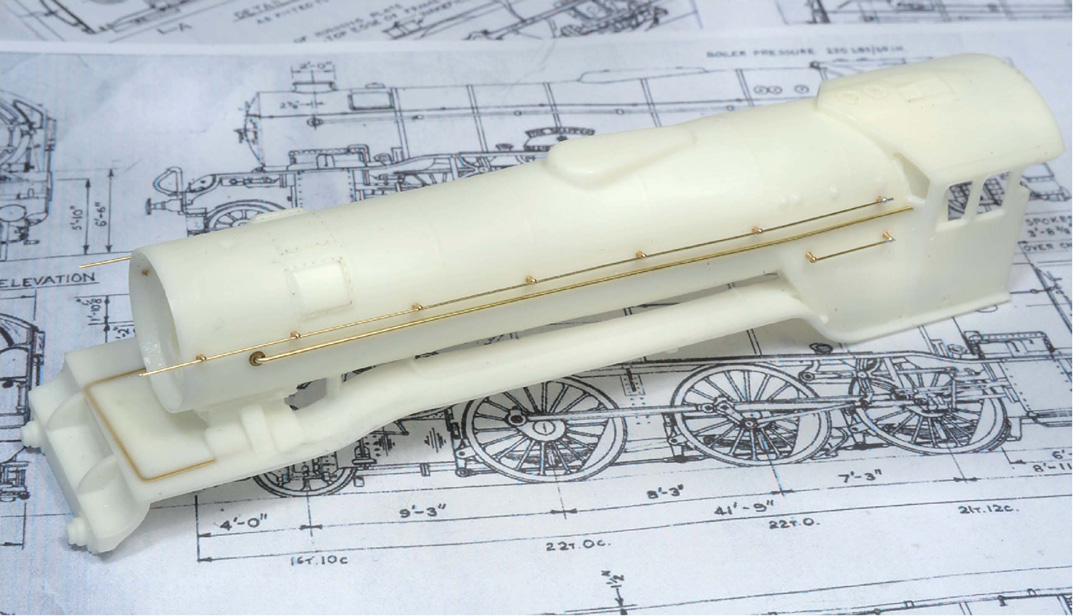
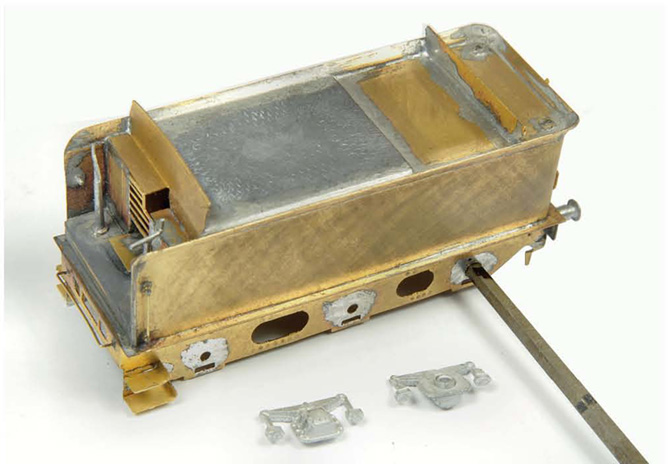
Dimples/witness marks were provided on the resin body, so there was no need to mark the positions for handrails, etc. I just drilled through with a pin chuck and small bit. The dome and superheater header covers are cast with the body, as are the buffer shanks.
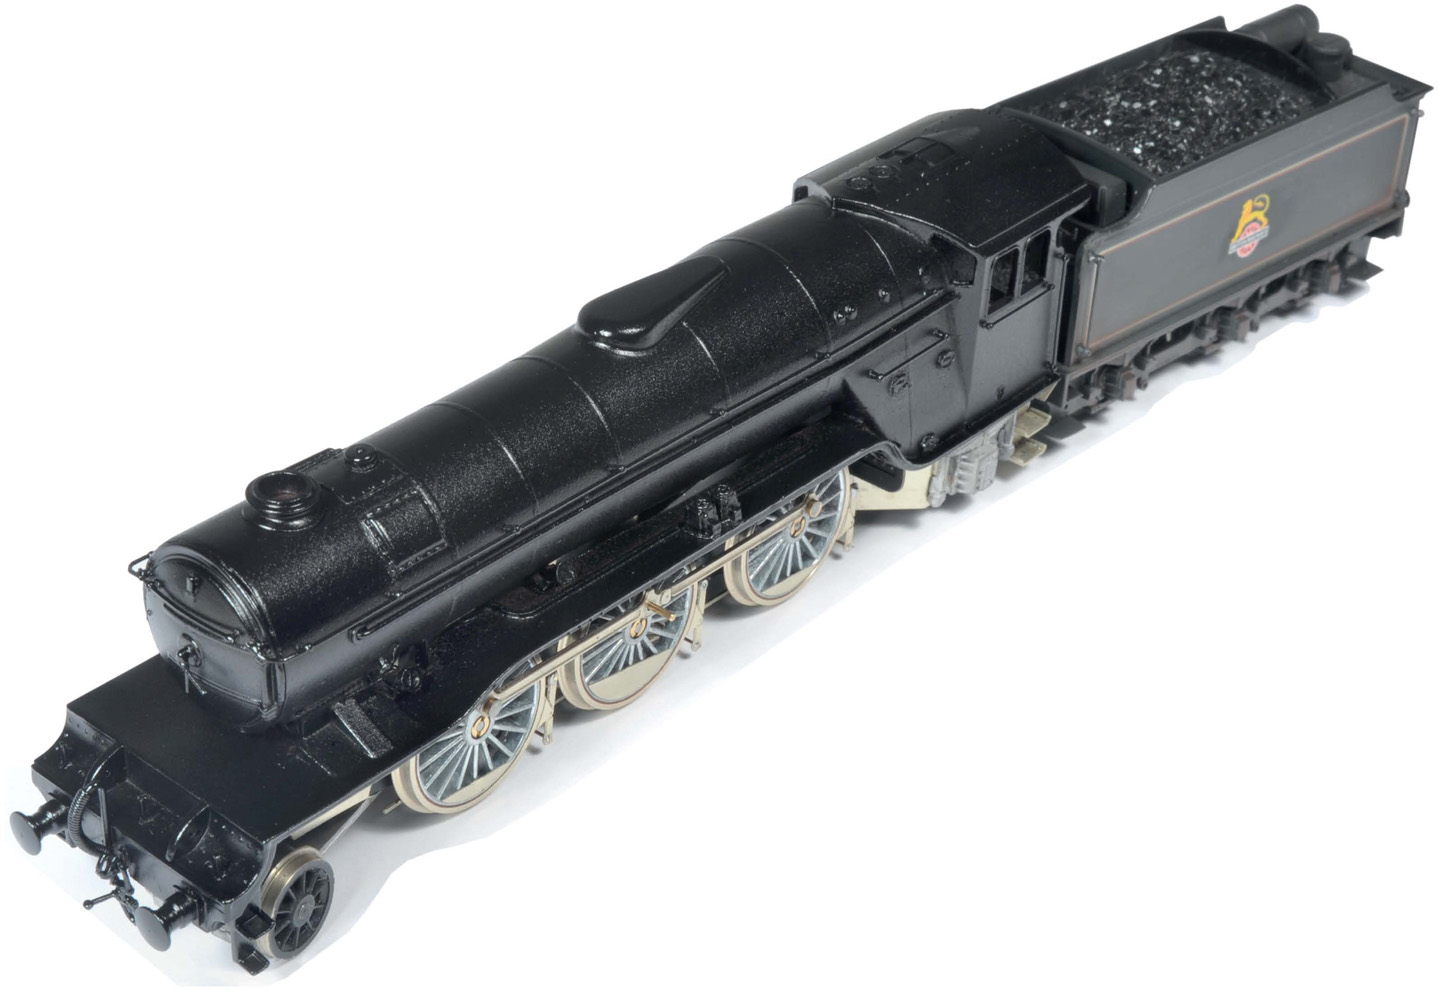
I fitted the resin smokebox door, making up a dart in the process. I also substituted all-brass buffers and a Markits’ brass chimney to replace the resin one supplied. Sandbox fillers were from my spares. I then dusted-over a coat of car acrylic red primer, followed by two coats of satin black. The tender was a spare Bachmann one I had, though kits exist for an LNER Group Standard 4,200 gallon type.
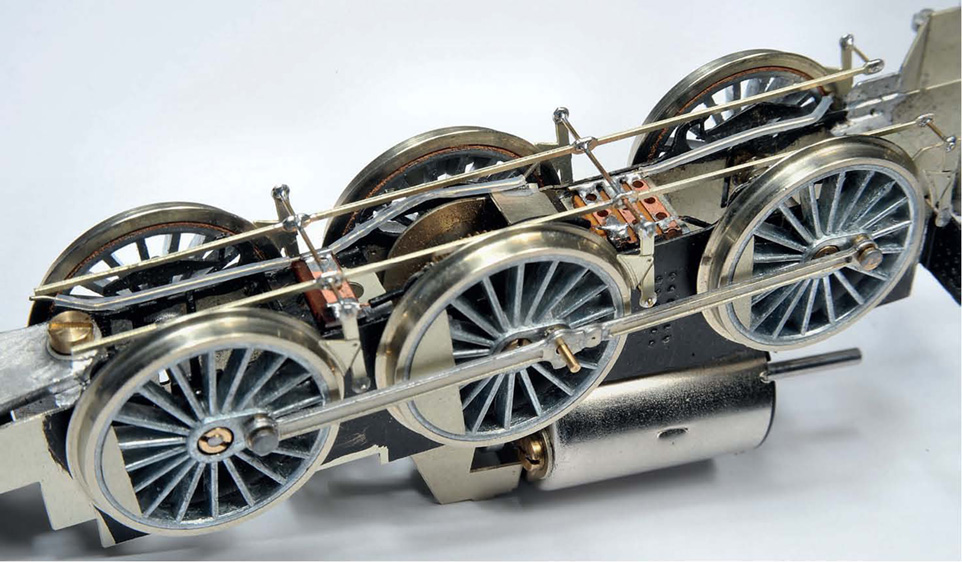
Like most of my chassis, this one is live to one side and care had to be taken to ensure the pick-ups didn’t foul the brake rigging or touch the frames. Thin-bore PVC tubing was used to prevent any short circuits.
I always erect any cylinders/valve gear assemblies in two separate halves, splitting the cylinder stretcher and motion support bracket. That way, both sides can be checked independently for tight spots and it’s easier to remove should it be subsequently necessary.
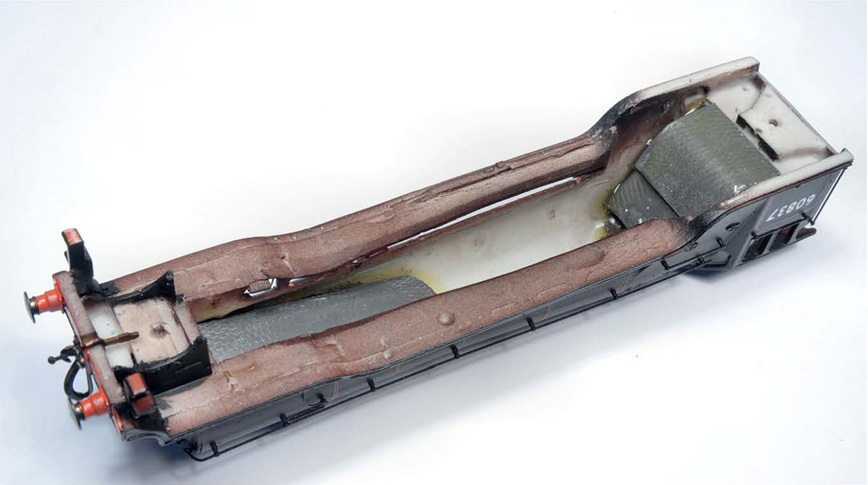
Because the resin body is lighter than even the nickel silver one, every available space was packed with lead (or its modern equivalent).
All but complete. I lined the loco with Modelmaster BR lining and used HMRS transfers for the numerals. Ian Wilson’s ‘Pacific’ numberplates were used for the smokebox plate and the cab was glazed with thin Plastiglaze and Kristal Klear. Final painting and weathering await.
Thorough running-in trials were conducted before the final livery applications were applied, and this resin-bodied V2 did all that was asked of her. A light duty was initially given, but she’ll haul fifteen bogies with ease.
Fortunately, the future of Comet is now in the good hands of Andrew Hartshorne who has added it to his Wizard/MSE range. With every new RTR loco release, the imperative to kit-build/modify becomes less and less, to the extent that the hobby might well lose its traditional kit-building base. My advice, for what it’s worth, is to buy up anything you might need for future use while you still can. As new technologies become more prevalent – laser-cutting, 3D printing and so on – then the future for kit-building in the traditional sense looks bleak. For those of us who prefer the traditional soldering iron to modern adhesives, then make sure you stock up well with metal kits; or dive into your dust-gathering stocks.
My Bachmann V2 with Comet chassis is illustrated here as a comparison. The too-fat boiler and lack of rearward slope to the top of the firebox are apparent, as are also the too-inboard position of the bufferbeam outer lamp brackets.
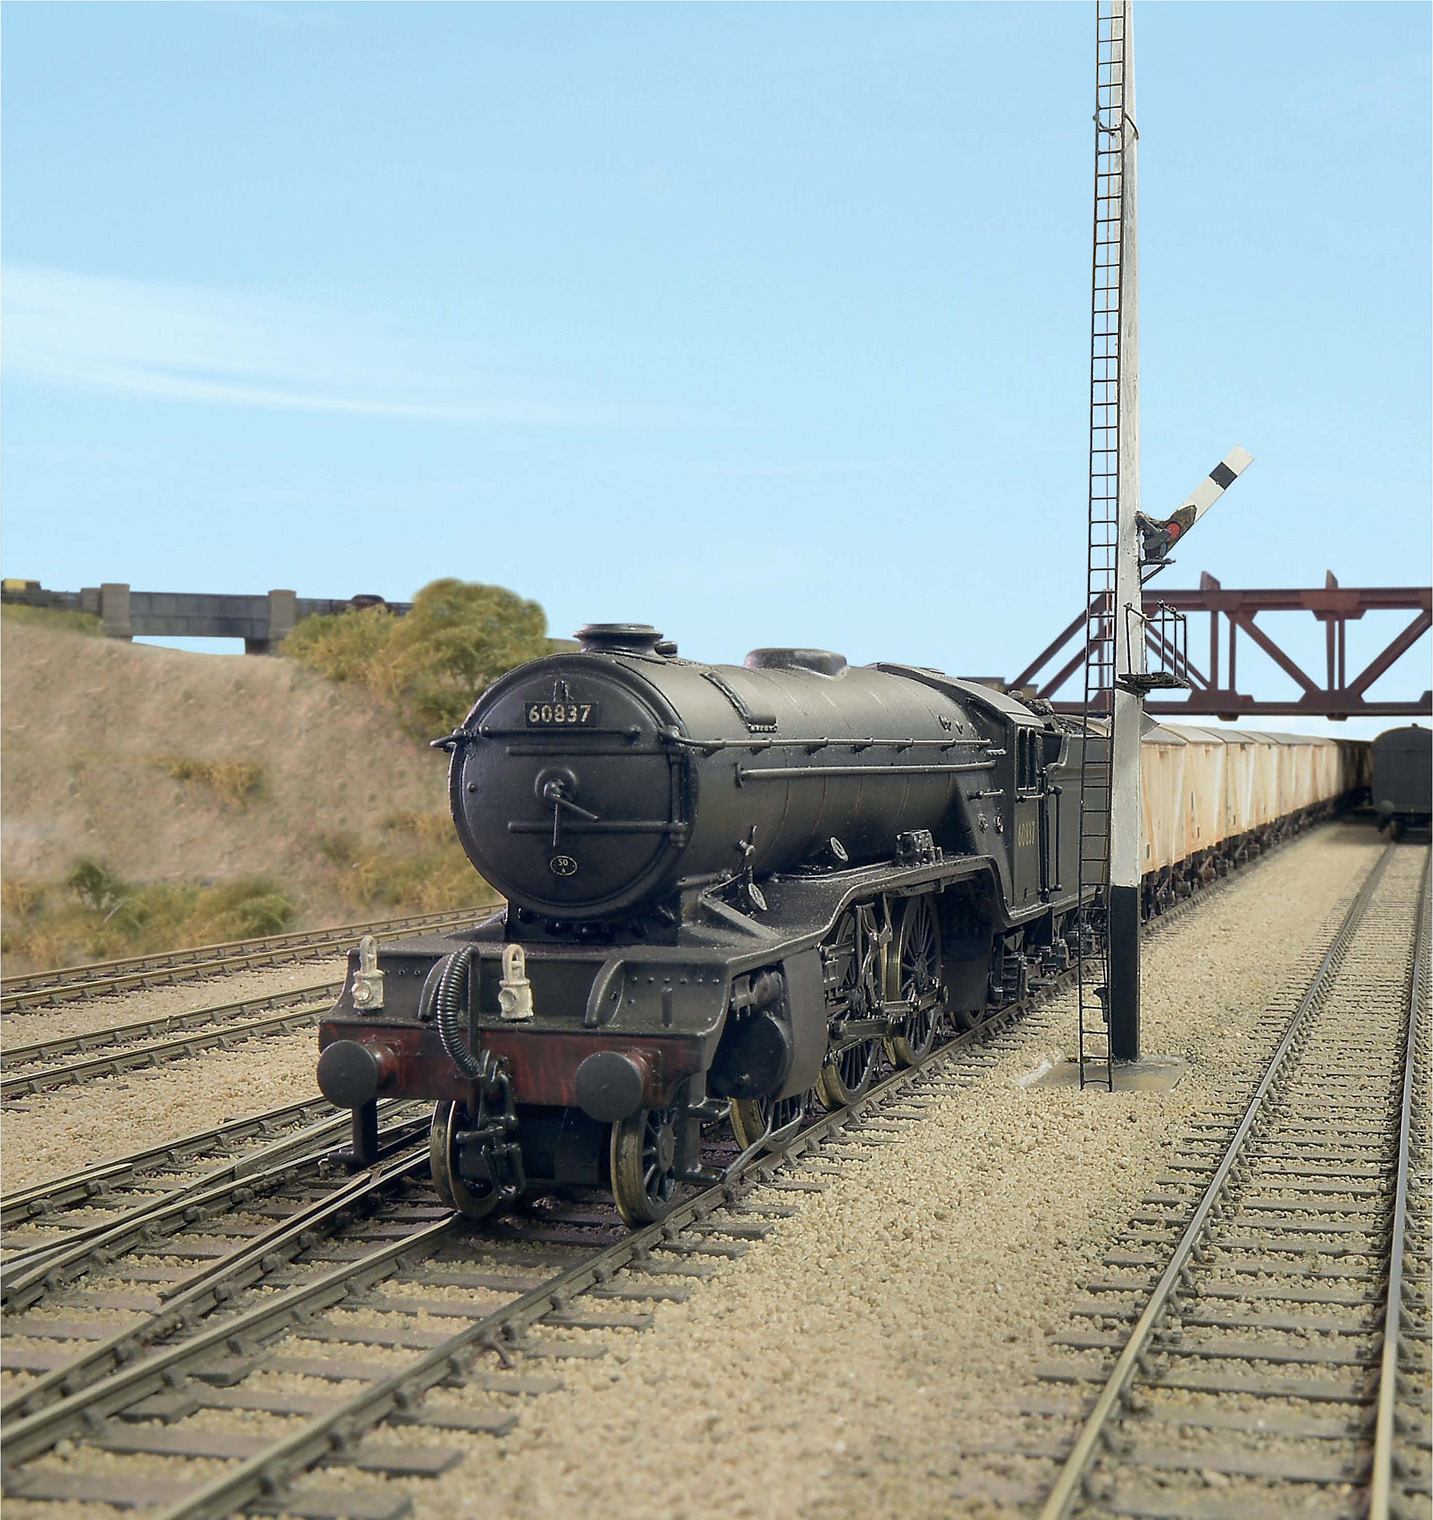
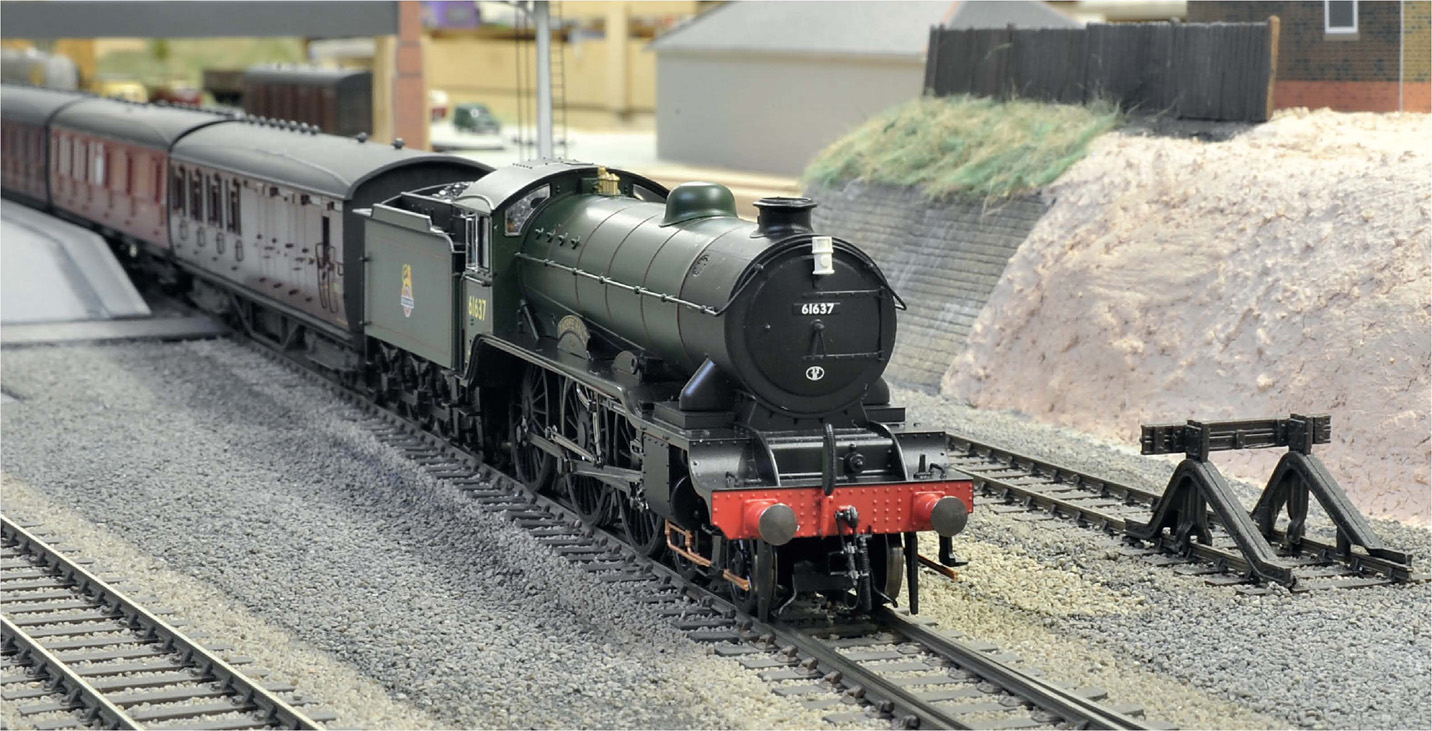
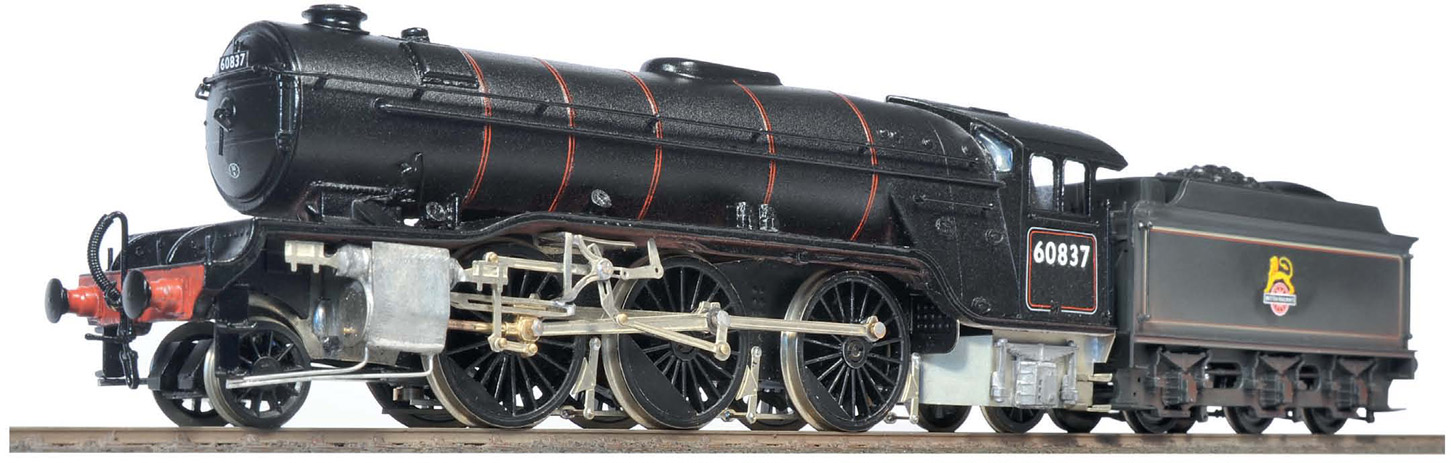
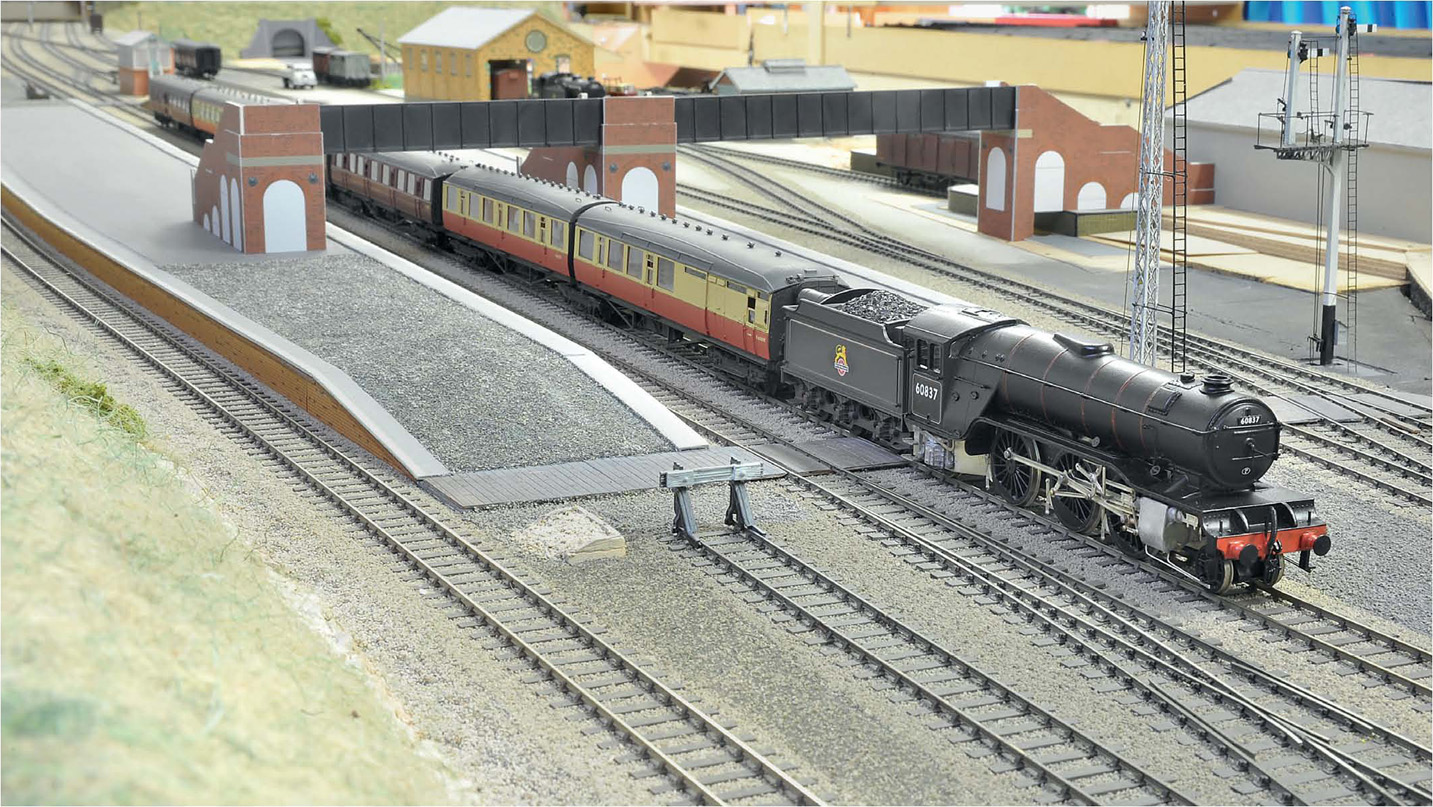
I completed the loco to be York-allocated 60837, and here she’s seen on typical V2 duties on Little Bytham. The Bachmann tender was in black and weathered, so I just matched the loco accordingly. A few V2s remained in black until the late 1950s, so I hope mine is correct for that. Though initially I approached this project with some ambivalence, mainly because I’m not a fan of resin in loco construction, I have to say I’m delighted with the end result. As a ‘layout’ loco, it fits perfectly into my scheme of things and its non-solder construction origins are very well hidden. I’m pleased as well that the painting and finishing is all mine. It’s all too easy to farm out the more difficult jobs to professionals. Railway modelling, to me, is all about having a go yourself and this Graeme King-originated project is ideal for the ‘novice’ builder, especially if a new Bachmann chassis is employed. It’s needed because the basic Bachmann V2 body is poor, and it’s an excellent substitute in my opinion. I thoroughly recommend it, though what will happen when Bachmann revisits its V2 body?