Sweets and Desserts
- Yogurt and Olive Oil Cake
- Apple–Olive Oil Pound Cake
- Quince and Ginger Olive Oil Cake
- Olive Oil Cake with Roasted Pears
- Sweet Cheese Ravioli with Bitter Honey
- Olive Oil Brownies
- Mousse au Chocolat with Olive Oil
- Mrs. Fancelli’s Olive Oil Cookies
- Olive Oil Gelato with Vanilla or Rose Water
- Griddle-Baked Semolina Pancakes with Sweet Date-Orange Filling
Switching from vegetable oil to olive oil in most cooking applications is easy—if a recipe calls for ¼ cup vegetable oil, you simply substitute ¼ cup olive oil. Switching from butter to olive oil, in most of the recipes in this book, is an equally easy one-to-one proposition. But when it comes to baking, especially cakes and cookies, things get a little trickier. That’s because butter is much denser, with less liquid, than olive oil. Even though all butter contains some liquid, it’s much less than fluid olive oil. That extra liquid must be accounted for in any baking recipe because it changes the way other ingredients will react. As a general rule, olive oil should be substituted at three-quarters the amount of butter called for. For example, if the recipe calls for 1 teaspoon butter, use ¾ teaspoon olive oil; similarly for 1 cup butter, use ¾ cup olive oil, and for 1 stick butter (8 tablespoons), use 6 tablespoons olive oil.
However, as that wonderfully helpful website www.oliveoilsource.com points out, it isn’t always a good idea to use liquid fat, that is, olive oil, instead of solid fat, that is, butter, margarine, or lard. For instance, the good people at that site remind us, “since cake frosting must stay solid at room temperature, butter and powdered sugar work nicely, but olive oil and powdered sugar don’t.”
Similarly, even though I’m a dedicated olive oil baker, I use butter for the cake pan or cookie sheet when it’s called for. It sticks to the sides of the pan, for one thing, and is much easier to manipulate over a tricky surface, such as a Bundt pan.
One thing I’ve noticed over the years, but which I’ve been playing around with: Most cake and cookie recipes conventionally call for creaming butter and sugar together right at the start. That doesn’t work so well with olive oil, as the mixture never reaches the fluffy stage the recipes call for. I often change a recipe like that to begin by creaming together eggs and sugar, then adding the olive oil later, along with any other liquid ingredients (milk, cream, wine, water, whatever).
If you’re interested in developing your repertoire of baked goods with olive oil, I suggest you try out these recipes to get a sense of what is involved, then go on to experiment with your own favorites.
Yogurt and Olive Oil Cake
This is a lovely plain tea cake, the kind Europeans might serve on a breakfast buffet. It’s not overly sweet so it can be gussied up, if you wish, with a dollop of homemade jam or whipped cream or even a little ice cream. Arbequina, either from Spain or from a New World grower, is a good choice for this cake, especially if you can find a fresh oil from a recent harvest. But any lightly fragrant oil will do.
Makes 8 dessert servings or 16 smaller servings
- Unsalted butter, for greasing the pan
- ½ cup plain whole-milk yogurt
- ⅔ cup granulated sugar
- 3 large eggs
- 1½ cups unbleached all-purpose flour
- 2 teaspoons baking powder
- Pinch of sea salt
- 1 tablespoon grated lemon zest
- ½ cup lightly fragrant olive oil
- ¼ cup powdered sugar (optional)
Preheat the oven to 350°F.
Use a scant tablespoon of butter to grease the bottom and sides of a 9-inch round cake pan, preferably a springform pan. Line the bottom with parchment paper and grease the paper.
In a large bowl, beat together the yogurt, granulated sugar, and eggs. Sift together the flour, baking powder, and salt, and fold into the yogurt mixture. Stir in the lemon zest, then add the oil and fold in until well blended. Pour the batter into the prepared cake pan.
Bake for 25 to 35 minutes, until a toothpick inserted in the middle comes out clean and the cake pulls away from the sides of the pan.
Cool on a wire rack for 15 minutes. Loosen the edges from the pan with a knife and then release the cake from the pan.
Serve the cake as is, or sift the powdered sugar over the top.
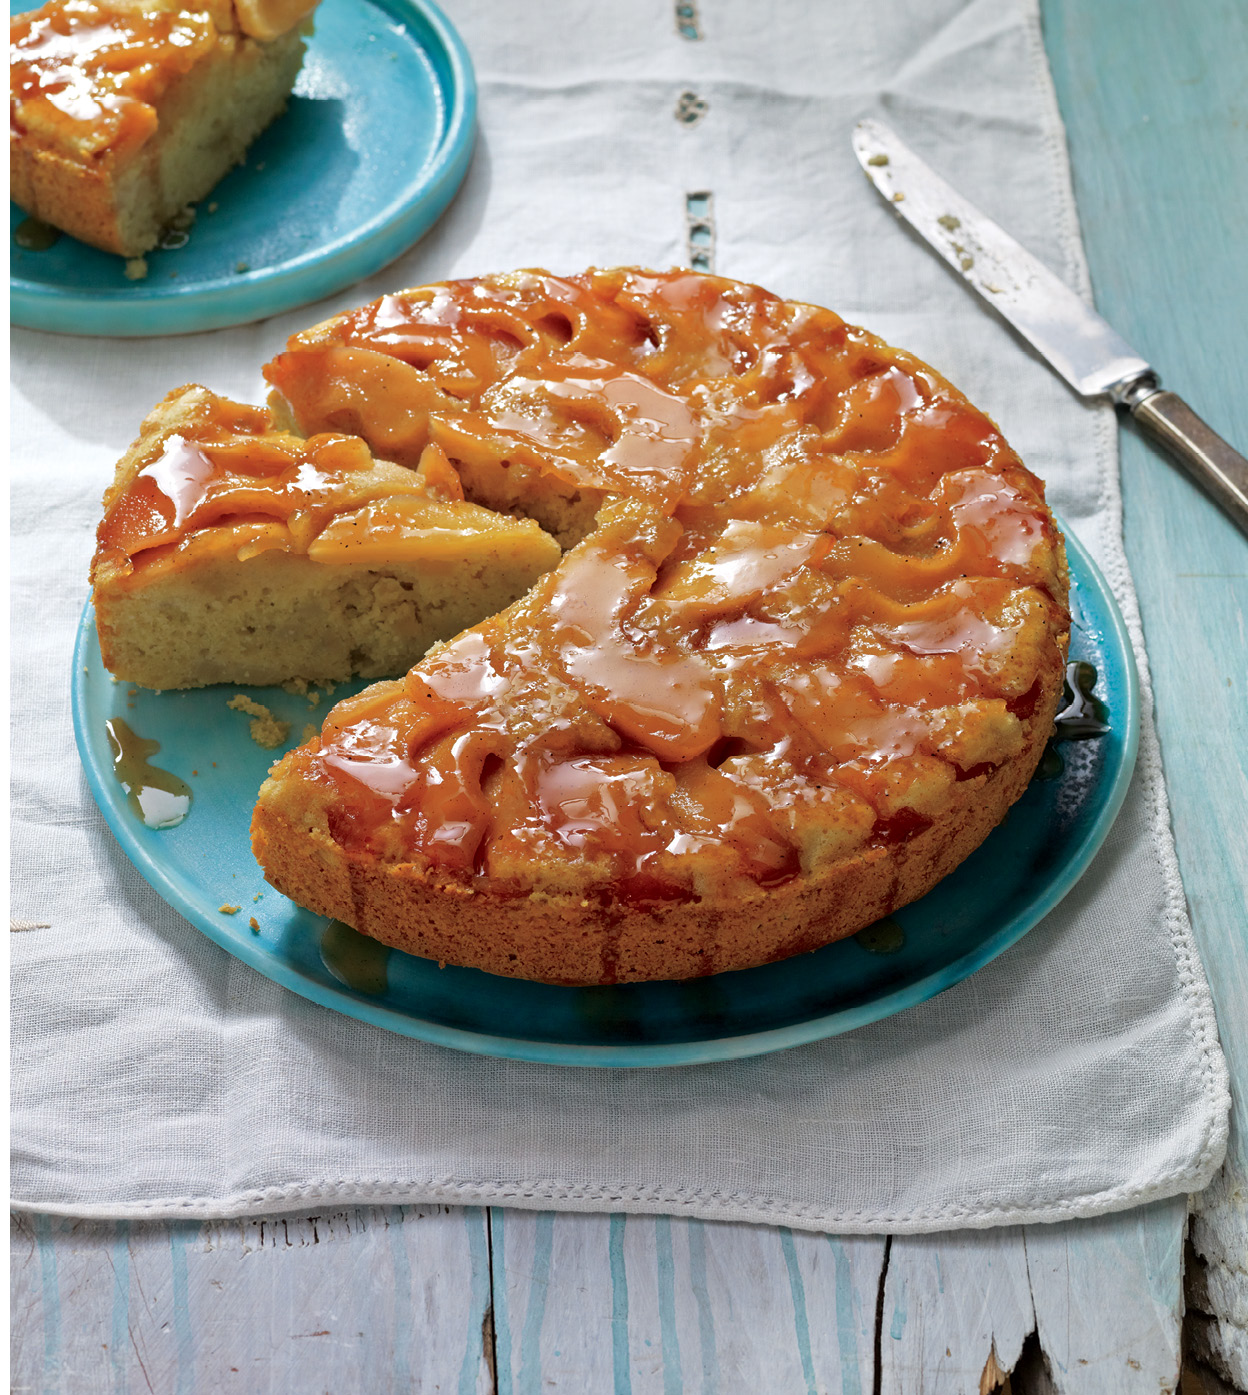
Apple–Olive Oil Pound Cake
This variation on an old-fashioned pound cake, so called because the ingredient quantities are determined by relative weight, uses olive oil instead of butter for a light, fresh flavor. The weight of the eggs should be matched by the weight of each remaining ingredient. Originally, everything was supposed to weigh a pound, but that makes a huge amount of cake, so I’ve cut it back. Three eggs should weigh about 6 ounces; for any variation in weight, adjust the quantities of sugar, flour, and olive oil accordingly. If you are using a kitchen scale, simply weigh the ingredients as described in the recipe. But for those who lack a kitchen scale (a terrific addition to any kitchen, by the way), I’ve included volume measurements in the list below.
Use a mild, sweetly fruity oil here—an Arbequina, or a Taggiasca from Liguria would be just fine, as would any of the lightly flavored California oils.
Makes 8 dessert servings or 16 smaller servings
- A little unsalted butter, for greasing the pan
- About 1¼ cups unbleached all-purpose flour, plus more for dusting the pan
- 3 large eggs (about 6 ounces)
- ¾ cup plus 2 tablespoons sugar
- About ¾ cup olive oil
- 1 teaspoon vanilla extract
- Sea salt
- 2 to 3 cups peeled and chopped apples
Preheat the oven to 350°F. Grease and flour a 9-inch round cake pan, preferably a springform pan. Line the bottom of the pan with parchment paper.
First, weigh your eggs in their shells. This is your baseline and allows you to expand or reduce the recipe as much as you wish. The eggs should weigh around 2 ounces each, 6 ounces in all. Once weighed, separate the whites from the yolks and set the whites aside. Weigh an amount of sugar equal to the weight of the eggs (6 ounces). Take out a couple of tablespoons and set aside to add to the whites when you beat them. Set the remaining sugar in a large bowl. Measure out the same amount, again 6 ounces by weight, of flour and set aside. Finally, measure the oil, again by weight, and set aside. (If you are not weighing your ingredients, use the measurements given in the ingredients list.)
Add the egg yolks to the sugar in the bowl and, using an electric mixer, beat together until the mixture is very thick and light-colored. Beat in the olive oil, a few ounces at a time, until all the oil has been absorbed into a thick emulsion. Add the vanilla and beat on high speed for a couple of minutes, then remove the beater and add the flour. Using a rubber spatula, fold the flour into the batter.
Now clean the beaters scrupulously (the least trace of fat will stop the egg whites from mounting). Add a pinch of salt to the egg whites and beat to soft peaks. Sprinkle the reserved sugar over the whites and continue beating to very stiff peaks. Using a spatula, gently fold the egg whites into the batter until thoroughly combined.
Turn half of the batter into the prepared cake pan. Distribute about three-quarters of the chopped fruit over the batter in the pan, then top with the remaining batter. Finally, distribute the remaining fruit over the top and transfer to the preheated oven. Bake for about 45 minutes, or until the top of the cake is golden brown, the sides pull away from the pan, and a slender toothpick inserted in the middle comes out clean. Transfer to a cake rack and let cool before removing from the pan.
Quince and Ginger Olive Oil Cake
This recipe was inspired by one developed by my friend Patricia Shea, an artist and passionate baker who lives in Belfast, Maine. Quinces give an astonishingly lush pink color to the glaze. The quinces should be prepared first and can be done several days in advance.
Makes 8 to 10 servings
- For the quinces:
- 1 lemon
- 1 pound quinces (about 3 medium quinces)
- ½ cup sugar
- ½ cup honey
- 1 (1- to 2-inch) piece fresh ginger, peeled and very thinly sliced
- 1 teaspoon ground cardamom, preferably freshly ground
- For the cake:
- Unsalted butter, for greasing the pan
- 2 cups cake flour, unbleached if available
- 2 teaspoons ground ginger
- 1 teaspoon ground cardamom
- 1 teaspoon baking powder
- Pinch of salt
- 3 large eggs plus 1 egg yolk
- ¾ cup sugar
- ½ cup olive oil
- 1 teaspoon vanilla extract
- ½ cup Greek-style yogurt
To make the quinces: Grate the zest of the lemon and set aside. Cut the lemon in half and add the juice of half the lemon to a bowl of cool water to make acidulated water for the quinces—it will keep them from turning brown.
Peel and core the quinces and slice all but one of them into wedges. As you finish, add the quince wedges to the acidulated water. Chop the final quince into small pieces and add to the acidulated water. This will be mixed into the cake batter.
Once all the quinces are sliced or chopped, combine the sugar, honey, ginger, and cardamom in a saucepan with the lemon zest and the juice of the second lemon half. Add 2½ cups water, bring to a simmer, and add all the quince, both sliced and chopped. Cover and simmer the quince for about 20 minutes, or until they are tender all the way through. Remove the quince from the syrup and set aside, separating the chopped pieces from the slices. Boil down the syrup until it is thick and syrupy. This can be done well ahead of time. Refrigerate both the quince and the syrup if you’re going to keep them longer than a couple of hours.
To make the cake: Preheat the oven to 325°F.
Butter the bottom and sides of a 9-inch springform pan. Line the bottom with parchment paper and butter the paper. Arrange the slices of quince in a pattern over the bottom of the cake pan.
Sift together in a bowl the flour, ginger, cardamom, baking powder, and salt.
Beat the eggs and egg yolk briefly in another bowl. Beat in the sugar, a little at a time, until the mixture is fluffy, then beat in the oil and vanilla. Using a spatula, fold in a few tablespoons of the flour mixture and the yogurt. Then fold in the chopped quince and the rest of the flour mixture.
Spoon the cake mixture over the quince slices, transfer the cake pan to the oven, and bake for 40 to 50 minutes, until the cake is golden on top and pulling away from the sides of the pan.
Remove the cake from the oven and set on a wire rack to cool slightly, then invert it onto a serving platter. Remove the paper from the bottom (now the top), leaving the quince slices in place. If the reserved quince syrup has gelled, set it over very low heat until it loosens, then spoon it over the top of the cake, letting it dribble down the sides, to make a glaze.
Olive Oil Cake with Roasted Pears
Firm-textured Bosc pears, with lovely russeted skin, are what you need for this cake. Green cardamom is available in many gourmet stores, or online from www.worldspice.com. Open the cardamom pods and crush the dark seeds in a mortar. Use any late-harvest wine, or a Moscato or Moscatel; fruit wines may also be used, as long as they are sweet. And if you don’t want to use anything alcoholic, substitute a sweet apple cider.
Makes one 9-inch round cake (8 to 10 servings)
- For the roasted pears:
- 4 very firm pears, peeled, quartered lengthwise, and cored
- ⅓ cup sweet dessert wine
- 2 tablespoons olive oil
- 2 tablespoons sugar
- For the cake:
- Small amount of unsalted butter, for greasing the pan
- 1 cup unbleached all-purpose flour
- ½ cup semolina
- 2½ teaspoons baking powder
- Pinch of sea salt
- ⅔ cup sugar
- 2 large eggs
- 1 cup olive oil
- ½ cup sweet dessert wine
- ⅓ cup whole milk
- Finely grated zest of 2 lemons
- 1 tablespoon crushed green cardamom seeds
To make the roasted pears: Preheat the oven to 350°F. Set the pear quarters in a roasting dish and sprinkle with the wine, oil, and sugar. Roast for 45 minutes, turning occasionally, until the pears are tender and starting to caramelize. Set aside to cool to room temperature.
To make the cake: Lightly butter a 9-inch round cake pan, preferably a springform pan. Line the bottom with parchment paper. Sift together both flours, the baking powder, and salt. Arrange the cooled pears in a circle on the bottom of the cake pan. Scrape all the remaining syrup in the roasting dish into a small saucepan and set aside.
Beat the sugar and eggs together in a large bowl until pale and creamy.
Beat in the oil, then the wine, then the milk with the lemon zest and cardamom, thoroughly beating in each ingredient before adding the next. Using a rubber spatula, fold in the flour mixture until just combined. Turn the batter into the prepared pan, covering the pears completely, and transfer to the oven.
Bake the cake for 40 minutes, or until a toothpick inserted into the middle comes out clean and the cake pulls away from the sides of the pan. Remove the cake from the oven and set on a wire rack to cool slightly, then invert the cake and release it from the pan.
Reheat the reserved syrup in the small saucepan and dribble it over the cake. Serve immediately.
This cake keeps well for a day or two, but it will get a little soggy if you try to keep it longer than that.

Sweet Cheese Ravioli with Bitter Honey
These lightly sweetened cheese tarts are made on the island of Sardinia, where they’re called sebadas (say-BAH-dahs) or seadas. They are always served with the island’s famous miele amaro, bitter honey. If you can’t find miele amaro, use a richly flavored honey—chestnut honey, for instance, is excellent. (Adding a bit of orange juice and rosemary perks it up for this recipe.)
Fresh sheep’s milk ricotta cheese with a pleasantly acid tang is not easy to find except in the finest cheese shops. Be careful that you are actually buying ricotta and not just curdled milk. Ricotta is made from the whey left after cheese making; it is not made by adding lemon juice or vinegar to whole milk. The folks at Old Chatham Sheepherding Company in New York’s Hudson Valley (www.blacksheepcheese.com) will happily ship their ricotta for overnight or second-day delivery. If you can’t find it, you could substitute a creamy fresh goat’s milk chèvre instead.
Makes 16 to 20 sebadas (5 or 6 servings)
- For the dough:
- 1½ cups semolina
- ½ cup unbleached all-purpose flour
- 1 large egg
- 3½ tablespoons olive oil
- Big pinch of salt dissolved in ½ cup very warm water
- For the filling:
- 2 abundant cups fresh sheep’s milk ricotta cheese
- ½ cup hot water
- 2 to 3 tablespoons semolina
- 1 teaspoon sugar, or more or less to taste
- Grated zest of 1 medium lemon, preferably organic
- Grated zest of 1 small orange, preferably organic
- 2 cups olive oil
- ¾ cup Sardinian bitter honey (miele amaro) or chestnut honey
- Up to ¼ cup freshly squeezed orange juice
- Leaves from 1 sprig fresh rosemary, coarsely chopped
To make the dough: Toss the two flours together in a bowl and make a well in the middle. Add the egg and oil to the center and mix with your hands, rubbing the oil into the flour until the dough is quite sandy in texture and the oil is evenly distributed throughout. Then start adding the salty water by the tablespoon—5 to 6 tablespoons should be the right amount, but you may need more or less depending on relative humidity. The dough should be quite soft and malleable but not sticky. Knead the dough a few strokes on a very lightly floured board, just to incorporate everything very well. Shape it into a ball, cover with a damp towel or a piece of plastic wrap, and set aside to rest while you make the filling.
To make the filling: In a small saucepan over medium-low heat, combine the cheese with the hot water. As soon as the mixture starts to bubble around the edges, stir in 2 tablespoons of the semolina and continue to cook very gently, stirring with a wooden spoon, until the cheese thickens. Add all or part of the remaining semolina if needed. The cheese mixture should be thick but not solid—about the consistency of commercial sour cream. Remove from the heat and stir in the sugar and citrus zests. Taste and add a little more sugar if the cheese is still very acidic, but keep in mind that the cheese should not be noticeably sweet.
Divide the pasta dough into quarters. Roll one portion out on the very lightly floured board until it is very thin—less than 1/16 of an inch. (Italian cooks say you should be able to read a newspaper through the pasta—but whatever you do, do not roll the pasta out on a newspaper, as it will pick up a nasty taste and possibly other nasty things as well from the newsprint.)
Use a circular biscuit cutter 3¼ to 3½ inches in diameter to cut circles from the pasta dough. Drop about 1 teaspoon of the filling into the center of half the circles. Dip your finger in warm water and run it around the edge of the circle, then cover with the remaining circles and press the two together with the tines of a fork. Set the completed sebadas on a rack while you continue with the remaining pasta dough and filling.
When all the sebadas have been shaped, heat the oil in a heavy pot until a thermometer reads 350° to 360°F. Have ready a wire rack with paper towels underneath to drain the fried sebadas. Drop 3 or 4 sebadas into the hot oil and let them fry, turning them once after they have risen to the surface of the oil. They should be lightly golden rather than brown in color. As soon as they are ready, remove with a slotted spoon and set on the draining rack. Then continue with the remaining sebadas.
Meanwhile, warm the honey in a small saucepan, adding the orange juice and the chopped rosemary, until it is liquid and quite warm. Serve the sebadas, 2 or 3 to a serving, with the liquid bitter honey drizzled over the top.
Olive Oil Brownies
Well, why not? Brownies are never going to be considered health food, but we can make them minimally better for us by using olive oil. And don’t forget the walnuts, which add a powerful quotient of omega-3 fatty acids. Truly, though, forget about health food for the moment and just enjoy these luscious treats for what they are, made even more delectable with olive oil.
Makes 16 brownies
- Unsalted butter, for greasing the pan
- 4 ounces dark chocolate (at least 70% cacao)
- ⅓ cup fruity olive oil
- 2 large eggs
- ¾ cup sugar
- ½ cup unbleached all-purpose flour
- 2 teaspoons vanilla extract
- 1 cup chopped walnuts
Preheat the oven to 350°F. Butter an 8-inch square baking pan.
Break up the chocolate in small pieces into an ovenproof bowl or pan and set it in the oven to melt thoroughly. When it is completely soft, combine it with the olive oil, beating with a fork to mix thoroughly. Let cool.
Beat the eggs until they are thick and foamy, then beat in the sugar, about ¼ cup at a time. When the sugar is thoroughly incorporated and the chocolate mixture has cooled down, combine the two, stirring them together with a spatula or wooden spoon (do not beat).
Using a rubber spatula, stir in the flour, vanilla, and walnuts. Spread the mixture in the prepared brownie pan and transfer to the preheated oven. Bake for about 25 minutes, or until the edges start to pull away from the pan. Remove from the oven and set on a wire rack to cool completely before cutting into squares.
Mousse au Chocolat with Olive Oil
An amazingly easy but very elegant dessert, this has been a favorite of mine for years. It is a perfect ending for any sort of festive meal.
Makes 6 to 8 servings
- 6 ounces high-quality bittersweet chocolate
- 2 tablespoons Armagnac or cognac
- 2 tablespoons very strong brewed coffee
- 4 large eggs
- ½ cup olive oil
- 1 tablespoon finely grated orange zest (optional)
- Pinch of sea salt
- 2 tablespoons sugar
Chop or grate the chocolate to make it easier to melt and combine it in the top of a double boiler with the Armagnac and coffee. Set it over simmering, but not rapidly boiling, water and let melt thoroughly, stirring occasionally. Once all the chocolate has melted, remove from the heat and let cool slightly.
Separate the eggs, setting the whites aside. Using a handheld mixer, beat the chocolate while adding the egg yolks, one after the other, beating continuously. Still beating, pour in the oil. When all of this is fully amalgamated into a dark, shiny, unctuous mass, beat in the orange zest, if using.
Clean and dry the beaters thoroughly, then beat the egg whites, first adding the salt and later, as the whites mount and firm up, the sugar. Beat until the eggs are very stiff.
Fold about one-quarter of the beaten whites into the chocolate mixture and then, once it is thoroughly incorporated, continue with the rest of the egg whites, about one-quarter at a time, until all the whites have been folded in and no trace of white can be seen.
Spoon the mousse into a serving bowl or into 6 to 8 individual ramekins and set in the refrigerator for a couple of hours to become totally firm.
The mousse may be kept in the fridge for several days, but it should be thoroughly wrapped in plastic wrap to prevent it from picking up other refrigerator odors.
Mrs. Fancelli’s Olive Oil Cookies
Feliciano Fancelli runs the oil mill, or frantoio, that has been in his family for umpteen generations. An old-fashioned crush-and-press operation, it is one of the last still functioning in the hills near Assisi, in Umbria. This simple cookie recipe, typical of Italian country sweets, comes from Mrs. Fancelli, who has been making them, she says, for years. For sweet wine, she uses a local Sagrantino passito from nearby Montefalco, but a sweet Moscato will do very well instead.
Toast the nuts in a 350°F oven until they are golden; when they are cool enough to handle, chop or process briefly in the food processor to make a coarse mix, not at all pasty.
Makes 34 to 40 cookies
- 2¼ cups unbleached all-purpose flour
- 1 cup sugar
- 1½ teaspoons baking powder
- Pinch of sea salt
- 1½ cups chopped toasted almonds or hazelnuts, or a mixture
- 1½ cups raisins, chopped
- 2 large eggs
- ⅔ cup olive oil
- ⅔ cup sweet wine
Preheat the oven to 350°F. Spread sheets of parchment paper on two or three cookie sheets.
Toss together in a bowl the flour, sugar, baking powder, and salt, then stir in the nuts and raisins.
In another bowl, whisk together the eggs and combine, whisking, with the oil and wine. Pour over the flour mixture. Stir and knead slightly with your hands to mix the liquids thoroughly into the flour.
Drop the cookie mixture by tablespoons onto the prepared cookie sheets and transfer to the preheated oven.
Bake for about 20 minutes, or until the cookies are lightly golden. Remove and transfer the cookies immediately to a wire rack to cool.
Variations: Use dried cranberries in place of the raisins. Make olive oil Toll House cookies by substituting walnuts and chocolate chips for the almonds and raisins and adding ½ teaspoon vanilla extract. Or make lemon drops by omitting the almonds and raisins entirely and adding ¼ teaspoon vanilla extract, the grated zest of 1 lemon (organic, preferably), and 2 tablespoons freshly squeezed lemon juice, then top each cookie before baking with 4 or 5 pine nuts.
Olive Oil Gelato with Vanilla or Rose Water
This is adapted from a remarkable recipe for ice cream that America’s premiere gelataia, Jeni Britton Bauer, developed for the website Food52. After trying innumerable eggy ice cream recipes, I came across this. It makes an astonishingly smooth, creamy ice cream that really has the texture of frozen cream and not, like so many others, frozen custard. It is, in my not inconsiderable experience, much more akin to Italian gelato than it is to American ice cream.
Try the recipe at different times with a variety of different oils to see which you prefer. I like to make it with a sturdy Tuscan-style oil with its assertive flavors, but you might prefer a subtler Catalan Arbequina or a softer oil from California or Chile. Rose water is a lovely flavor to add, but vanilla is almost as good, and almond extract brings out the almond flavors in that Catalan oil.
If you use a modern canister-style ice cream maker, such as the Cuisinart ICE-21 that I prefer, be sure to set the canister in the coldest part of your freezer for a full 24 hours before using it, and do not remove it from the freezer until you’re ready to add the chilled cream to it.
Read through the recipe and you will see that this is not something you can do in a couple of hours. Best to start preparations at least a day before you intend to serve the gelato—and even better to start two days ahead. But, believe me, it is worth the wait.
Makes 2 pints
- 2 cups whole milk
- 4 teaspoons cornstarch
- 1½ ounces cream cheese, at room temperature
- ⅛ teaspoon fine sea salt
- ¾ cup heavy cream
- ½ cup olive oil
- 1 teaspoon rose water or vanilla extract, or other flavoring
- ⅔ cup sugar
- 2 tablespoons light corn syrup
Note that the gelato mixture must be thoroughly chilled before it’s added to the equally thoroughly chilled canister of the ice cream maker. You may simply put the gelato mixture in the refrigerator, well covered so it doesn’t pick up off-odors, overnight; or you can prepare an ice bath, using a large bowl into which the bowl of gelato mixture will fit, and filling the larger bowl with ice and a little water. If you decide to do this, have the bowl of ice ready before you start to make the gelato.
Add 2 tablespoons of the milk to a small bowl and stir in the cornstarch to make a smooth, lump-free slurry.
In a medium bowl, combine the cream cheese and the salt, mixing with a fork to get rid of any lumps.
Combine the cream, olive oil, rose water, sugar, and corn syrup with the remaining milk in a 4-quart saucepan. Bring the cream mixture to a rolling boil over medium heat and set a timer. The mixture should boil for precisely 4 minutes. Remove from the heat and use a wire whisk to stir in the cornstarch mixture. Return to the stovetop over medium heat and continue cooking until the mixture thickens slightly, about 1 minute. Remove from the heat.
Gradually add the hot milk mixture to the cream cheese in the medium bowl, whisking steadily until it is smooth. Do this a little at a time to avoid lumps. Now, either set the bowl into the ice water bath, stirring it occasionally and adding more ice, until it is very cold, or set the bowl in the refrigerator overnight. After about 20 minutes, when the mixture has lost most of its heat, cover the bowl with plastic wrap to avoid picking up refrigerator odors. (If you cover it before it is chilled, you risk creating condensation, which will drip back into the gelato mixture.)
Once the gelato mixture is as cold as you can get it without freezing it, add it to the frozen canister of the ice cream maker and proceed according to the manufacturer’s directions. Once the machine has stopped freezing (with the Cuisinart I mentioned above, that takes 25 to 30 minutes) and the mixture is pulling away from the sides, indicating that it’s well on its way to becoming gelato, transfer it to a container with an airtight lid and set in the freezer for at least 4 hours before serving.
Griddle-Baked Semolina Pancakes with Sweet Date-Orange Filling
This griddle cake, which comes from Tunisia, derives its sweetness solely from the dates in the filling. It is delicious with afternoon tea or midmorning coffee, but it could also be a special treat for Sunday breakfast. If you don’t have a griddle, you can use a heavy cast-iron frying pan, preheated until it’s very hot.
Makes 10 to 12 servings
- ¾ pound dates, pitted
- 1¼ cups olive oil
- 2 tablespoons freshly grated orange zest
- 1 tablespoon crumbled dried orange peel
- 4¼ cups semolina
- Sea salt
Process the dates in the bowl of a food processor until they are quite smooth, then, with the motor running, slowly pour in ¼ cup of the oil. Add the fresh and dried orange and continue processing until you have a smooth paste. Set aside.
Place 4 cups of the semolina in a large bowl. Add the remaining 1 cup olive oil, working the semolina until the oil is absorbed. Dissolve about 1 teaspoon salt in ¾ cup warm water and slowly add that to the semolina dough, working the dough in the bowl until you have a kneadable consistency. Knead in the bowl briefly, then transfer to a board and knead until the dough is quite smooth. Use the remaining ¼ cup semolina if necessary to keep the dough from sticking to the board.
When the dough is well kneaded, it should feel soft but not at all sticky. Set aside, covered with plastic wrap or a kitchen towel, to rest for about 30 minutes.
When ready to proceed, start to heat a stovetop griddle or cast-iron skillet over medium heat. (You should not need additional fat on the pan.) Divide the semolina dough into quarters. Shape a quarter into a ball, then pat it out into a circle on the board. Use a rolling pin to roll an even circle 8 to 9 inches in diameter and ⅛ to ¼ inch thick. Spread half the date mixture over the circle, then top with another circle made from a similarly shaped quarter of the dough. Use the remaining dough and date mixture to make a second cake—or, if you wish, make long skinny rectangles. The cakes may be cooked as they are, or they may be cut into smaller lozenges, squares, rectangles, or other shapes.
As soon as the cakes are made, transfer them to the very hot surface of the griddle and cook for about 4 minutes per side, or until the surfaces are brown and crisp and the inside is cooked through. Adjust the heat as necessary so the cakes don’t burn. If you need to cook in batches, keep the cooked cake or smaller pieces warm until ready to serve.
Serve immediately, although they are also very good set aside and served later at room temperature.