Once you have installed FileZilla, the control panel will most likely open by itself.
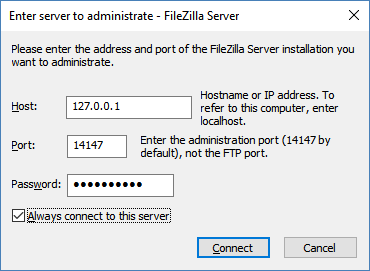
- Since this is the first time you have launched FileZilla, it will ask you to set up the server. Keep the server IP address as 127.0.0.1 (which means localhost) and the admin port to 14147.
- Key in your desired password for administrating the server and check on the Always connect to this server option. Press Connect and the FTP server will now start up! This is shown in the following screenshot:
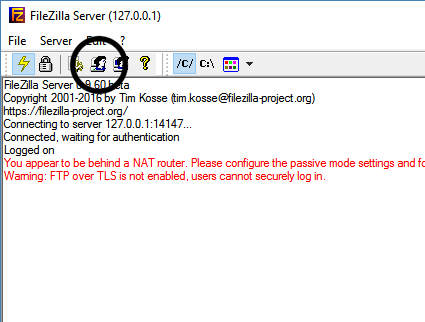
- After the FTP server has started running, we need to create a user account. Click on the fourth icon from the left to open up the Users dialog:
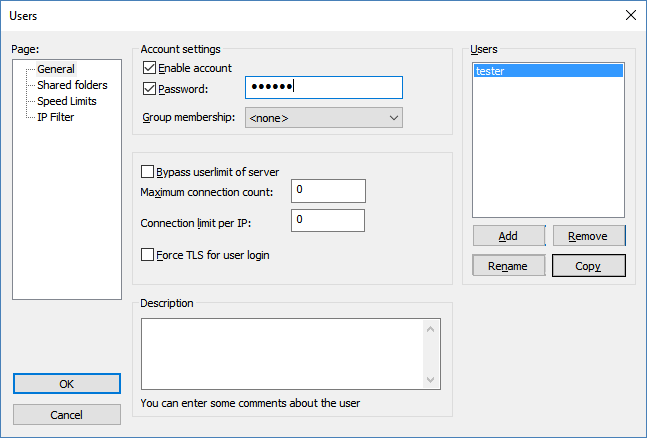
- Then, under the General page, click on the Add button located at the right side of the window. Create an account by setting a username and press OK.
- We don't have to set the user to any group for now, as user groups are only useful when you have many users that have the same privilege settings since it is easier to change all users settings at once or move users to different groups. Once you have created the user, check on the Password option and key in your desired password. It is always a good practice to put the password on your FTP account:
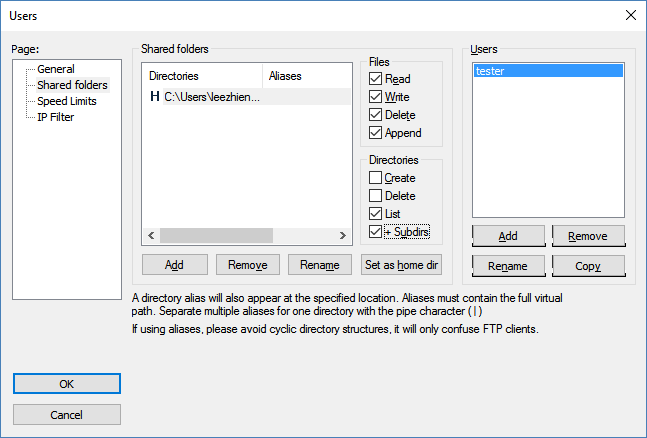
- After that, we will proceed to the Shared folders page and add a shared directory for our newly created user.
- Make sure the Delete and Append options are checked so that files that have the same name can be replaced. We will be using that for updating our file list in a moment:
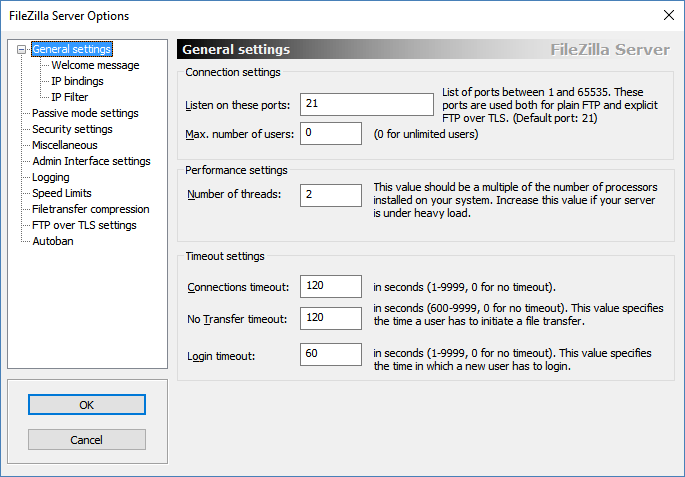
- If you click on the third icon from the left, the FileZilla Server options dialog will appear. You can basically configure everything here to suit your needs. For instance, if you don't want to use the default port number 21, you can simply change it on the options window, under the General settings page:
- You can also set the speed limit for all users or a specific user under the Speed Limits page. This can prevent your server from becoming low performance when many users are downloading huge files at the same time:

Next, let's proceed to create our Qt project!