If I tell you my favorite restaurant is located at (40.7802655, -74.108644), you won't be able to make sense of it. However, if those coordinates are being displayed on the map view in the form of a location marker, instantly, you will have an idea of where it is. Let's see how we can add position markers to our map view!
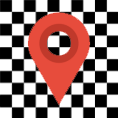
First of all, we need a marker image that should look something like this, or even better, design your own marker:
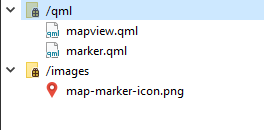
After that, we need to register this image to our project's resource file. Open up resource.qrc with Qt Creator and create a new prefix called images. Then, add the marker image to the newly created prefix. Do make sure that the image has a transparent background to look good on the map:

Next, open up mapview.qml and replace the code with the following:
Item
{
    id: window

    Plugin
    {
        id: mapPlugin
        name: "osm"
    }

    Image
    {
        id: icon
        source: "qrc:///images/map-marker-icon.png"
        sourceSize.width: 50
        sourceSize.height: 50
    }

    MapQuickItem
    {
        id: marker
        anchorPoint.x: marker.width / 4
        anchorPoint.y: marker.height
        coordinate: QtPositioning.coordinate(40.7274175,-73.99835)

        sourceItem: icon
    }

    Map
    {
        id: map
        anchors.fill: parent
        plugin: mapPlugin
        center: QtPositioning.coordinate(40.7264175,-73.99735)
        zoomLevel: 14

        Component.onCompleted:
        {
            map.addMapItem(marker)
        }
    }
}
In the preceding code, we first added an image object that will be used as the marker's image. Since the original image is really huge, we have to resize it by setting the sourceSize property to 50x50. We must also set the anchor point of the marker image to the center-bottom of the image because that is where the tip of the marker is located.
After that, we create a MapQuickItem object that will be served as the marker itself. Set the marker image as the sourceItem of the MapQuickItem object, then add the marker to the map by calling map.addMapItem(). This function must be called after the map has been created and is ready to be displayed, which means we can only call it after the Component.onCompleted event has been triggered.
Now that we're done with the code, let's compile and look at the result:
Even though it's now looking all good, we don't want to hardcode the marker in QML. Imagine adding hundreds of markers to the map, it's simply impossible to manually add each marker using a distinct set of code.
In order to create a function that allows us to dynamically create position markers, we need to first separate the marker QML code from mapview.qml to a new QML file. Let's create a new QML file called marker.qml and add it to the resource file:
Next, remove both the MapQuickItem and Image objects from mapview.qml and move it to marker.qml:
import QtQuick 2.0
import QtLocation 5.3

MapQuickItem
{
    id: marker
    anchorPoint.x: marker.width / 4
    anchorPoint.y: marker.height
    sourceItem: Image
    {
        id: icon
        source: "qrc:///images/map-marker-icon.png"
        sourceSize.width: 50
        sourceSize.height: 50
    }
}
As you can see from the preceding code, I have merged the Image object with the MapQuickItem object. The coordinate property has also been removed as we will only set it when putting the marker on the map.
Now, open up mapview.qml again, and add this function to the Item object:
Item
{
    id: window

    Plugin
    {
        id: mapPlugin
        name: "osm"
    }

    function addMarker(latitude, longitude)
    {
        var component = Qt.createComponent("qrc:///qml/marker.qml")
        var item = component.createObject(window, { coordinate:
        QtPositioning.coordinate(latitude, longitude) })
        map.addMapItem(item)
    }
From the preceding code, we first created a component by loading the marker.qml file. Then, we created an object/item from the component by calling createObject(). In the createObject() function, we made the window object as its parent and set its position to the coordinate supplied by the addMarker() function. Finally, we added the item to the map for it to be rendered.
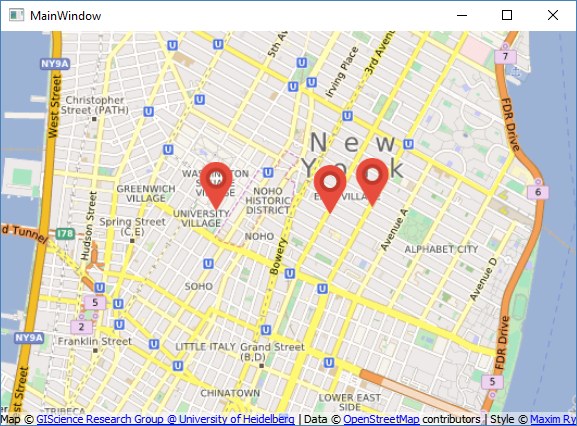
Whenever we want to create a new position marker, we'll just have to call this addMarker() function. To demonstrate this, let's create three different markers by calling addMarker() three times:
Map
{
    id: map
    anchors.fill: parent
    plugin: mapPlugin
    center: QtPositioning.coordinate(40.7264175,-73.99735)
    zoomLevel: 14

    Component.onCompleted:
    {
        addMarker(40.7274175,-73.99835)
        addMarker(40.7276432,-73.98602)
        addMarker(40.7272175,-73.98935)
    }
}
Build and run the project again, and you should be able to see something like this:
We can go even further by adding a text label to each of the markers. To do that, first open up marker.qml, then add another module called QtQuick.Controls:
import QtQuick 2.0
import QtQuick.Controls 2.0
import QtLocation 5.3
After that, add a custom property to the MapQuickItem object called labelText:
MapQuickItem
{
    id: marker
    anchorPoint.x: marker.width / 4
    anchorPoint.y: marker.height
    property string labelText
Once you're done, change its sourceItem property into this:
sourceItem: Item
{
        Image
        {
            id: icon
            source: "qrc:///images/map-marker-icon.png"
            sourceSize.width: 50
            sourceSize.height: 50
        }

        Rectangle
        {
            id: tag
            anchors.centerIn: label
            width: label.width + 4
            height: label.height + 2
            color: "black"
        }

        Label
        {
            id: label
            anchors.centerIn: parent
            anchors.horizontalCenterOffset: 20
            anchors.verticalCenterOffset: -12
            font.pixelSize: 16
            text: labelText
            color: "white"
        }
}
From the preceding code, we created an Item object to group multiple objects together. Then, we created a Rectangle object to serve as the label background and a Label object for the text. The text property of the Label object will get linked to the labelText property of the MapQuickItem object. We can add another input to the addMarker() function for setting the labelText property, like so:
function addMarker(name, latitude, longitude)
{
        var component = Qt.createComponent("qrc:///qml/marker.qml")
        var item = component.createObject(window, { coordinate: QtPositioning.coordinate(latitude, longitude), labelText: name })
        map.addMapItem(item)
}
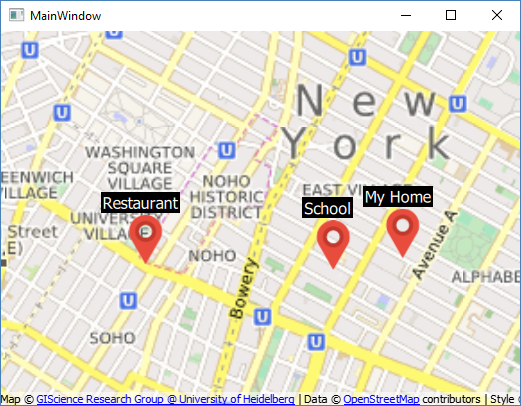
Therefore, when we create the markers, we can call the addMarker() function like this:
Component.onCompleted:
{
   addMarker("Restaurant", 40.7274175,-73.99835)
   addMarker("My Home", 40.7276432,-73.98602)
   addMarker("School", 40.7272175,-73.98935)
}
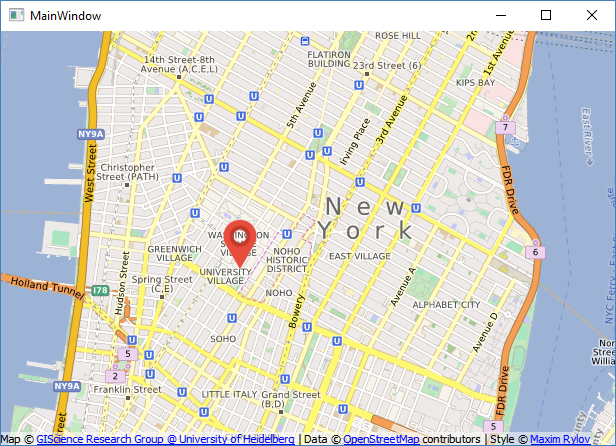
Build and run the project again and you should see this:
Pretty awesome isn't it? However, we're not done yet. Since we're most likely using C++ to obtain data from the database through Qt's SQL module, we need to find a way to call the QML function from C++.
To achieve that, let's comment out the three addMarker() functions in mapview.qml and open up mainwindow.h and the following headers:
#include <QQuickItem>
#include <QQuickView>
After that, open up mainwindow.cpp and call the QMetaObject::invokeMethod() function, like this:
MainWindow::MainWindow(QWidget *parent) :
QMainWindow(parent),
ui(new Ui::MainWindow)
{
ui->setupUi(this);
QObject* target = qobject_cast<QObject*>(ui->quickWidget->rootObject());
QString functionName = "addMarker";
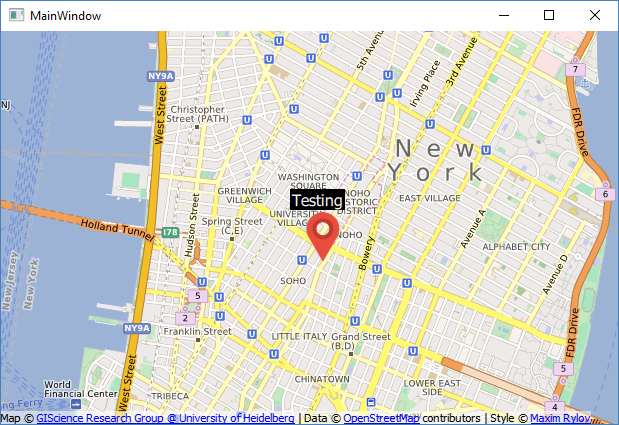
QMetaObject::invokeMethod(target, functionName, Qt::AutoConnection, Q_ARG(QVariant, "Testing"), Q_ARG(QVariant, 40.7274175), Q_ARG(QVariant, -73.99835));
}
The preceding code might seem complex, but it's actually really simple if we dissect it and analyze each of its arguments. The first argument of the preceding function is the object that we want to call the function from, and in this case, it is the root object (the Item object in mapview.qml) of the map view widget. Next, we want to tell which function name we want to call, and it is the addMarker() function. After that, the third argument is the connection type used by the signal and slot system to invoke this method. For this, we'll just let it be the default setting, which is Qt::AutoConnection. The rest are the arguments that are needed by the addMarker() function. We used the Q_ARG macro for indicating the type and value of the data.
Finally, build and run the application again. You will see a marker with the label has been added to the map, but this time, it's called from our C++ code instead of QML: