Despite today’s supersized food portions, sometimes all you want is “just a bite” instead of a multi-course meal. Maybe it’s an appetizer for guests or a light meal that can be eaten quickly, or perhaps you just want to graze. Whatever the reason or occasion, the simple, small dishes in this chapter are sure to satisfy with their vibrant flavors.
Many of the recipes have a “bread” aspect to them, since bread is what we miss most on a gluten-free diet. So, several recipes are made with some version of bread (sandwich bread or French bread), flour tortillas, breadsticks, or polenta—all lending a “bread-like” substance to these small but mighty plates. Of course, soups, salads, and vegetables make excellent small meals, so check out the Soups & Salads chapter for additional recipes that can easily be made in smaller portions.
Q
Quick
V
Vegetarian
Q, V
Makes 8 servings (about ¼ cup each)
Preparation time: 20 minutes
This is one of the easiest recipes you’ll ever make. I prefer to use pitted olives so my guests don’t have to dispose of olive pits, but use whatever you have on hand. You can also vary the herbs. This is equally good with fresh rosemary or fresh dill.
1 Place a rack in the middle of the oven. Preheat the oven to 350°F.
2 Combine all of the ingredients on a sheet of heavy-duty aluminum foil (or use a doubled sheet of regular foil). Fold up the edges of the foil to create a pocket and place on a small baking sheet.
3 Warm the olives in the oven until they become fragrant, 15 to 20 minutes. Remove from the oven and serve warm in a bowl.
Per serving: 70 calories; 1g protein; 7g total fat; 1g fiber; 2g carbohydrates; 0mg cholesterol; 295mg sodium
Q
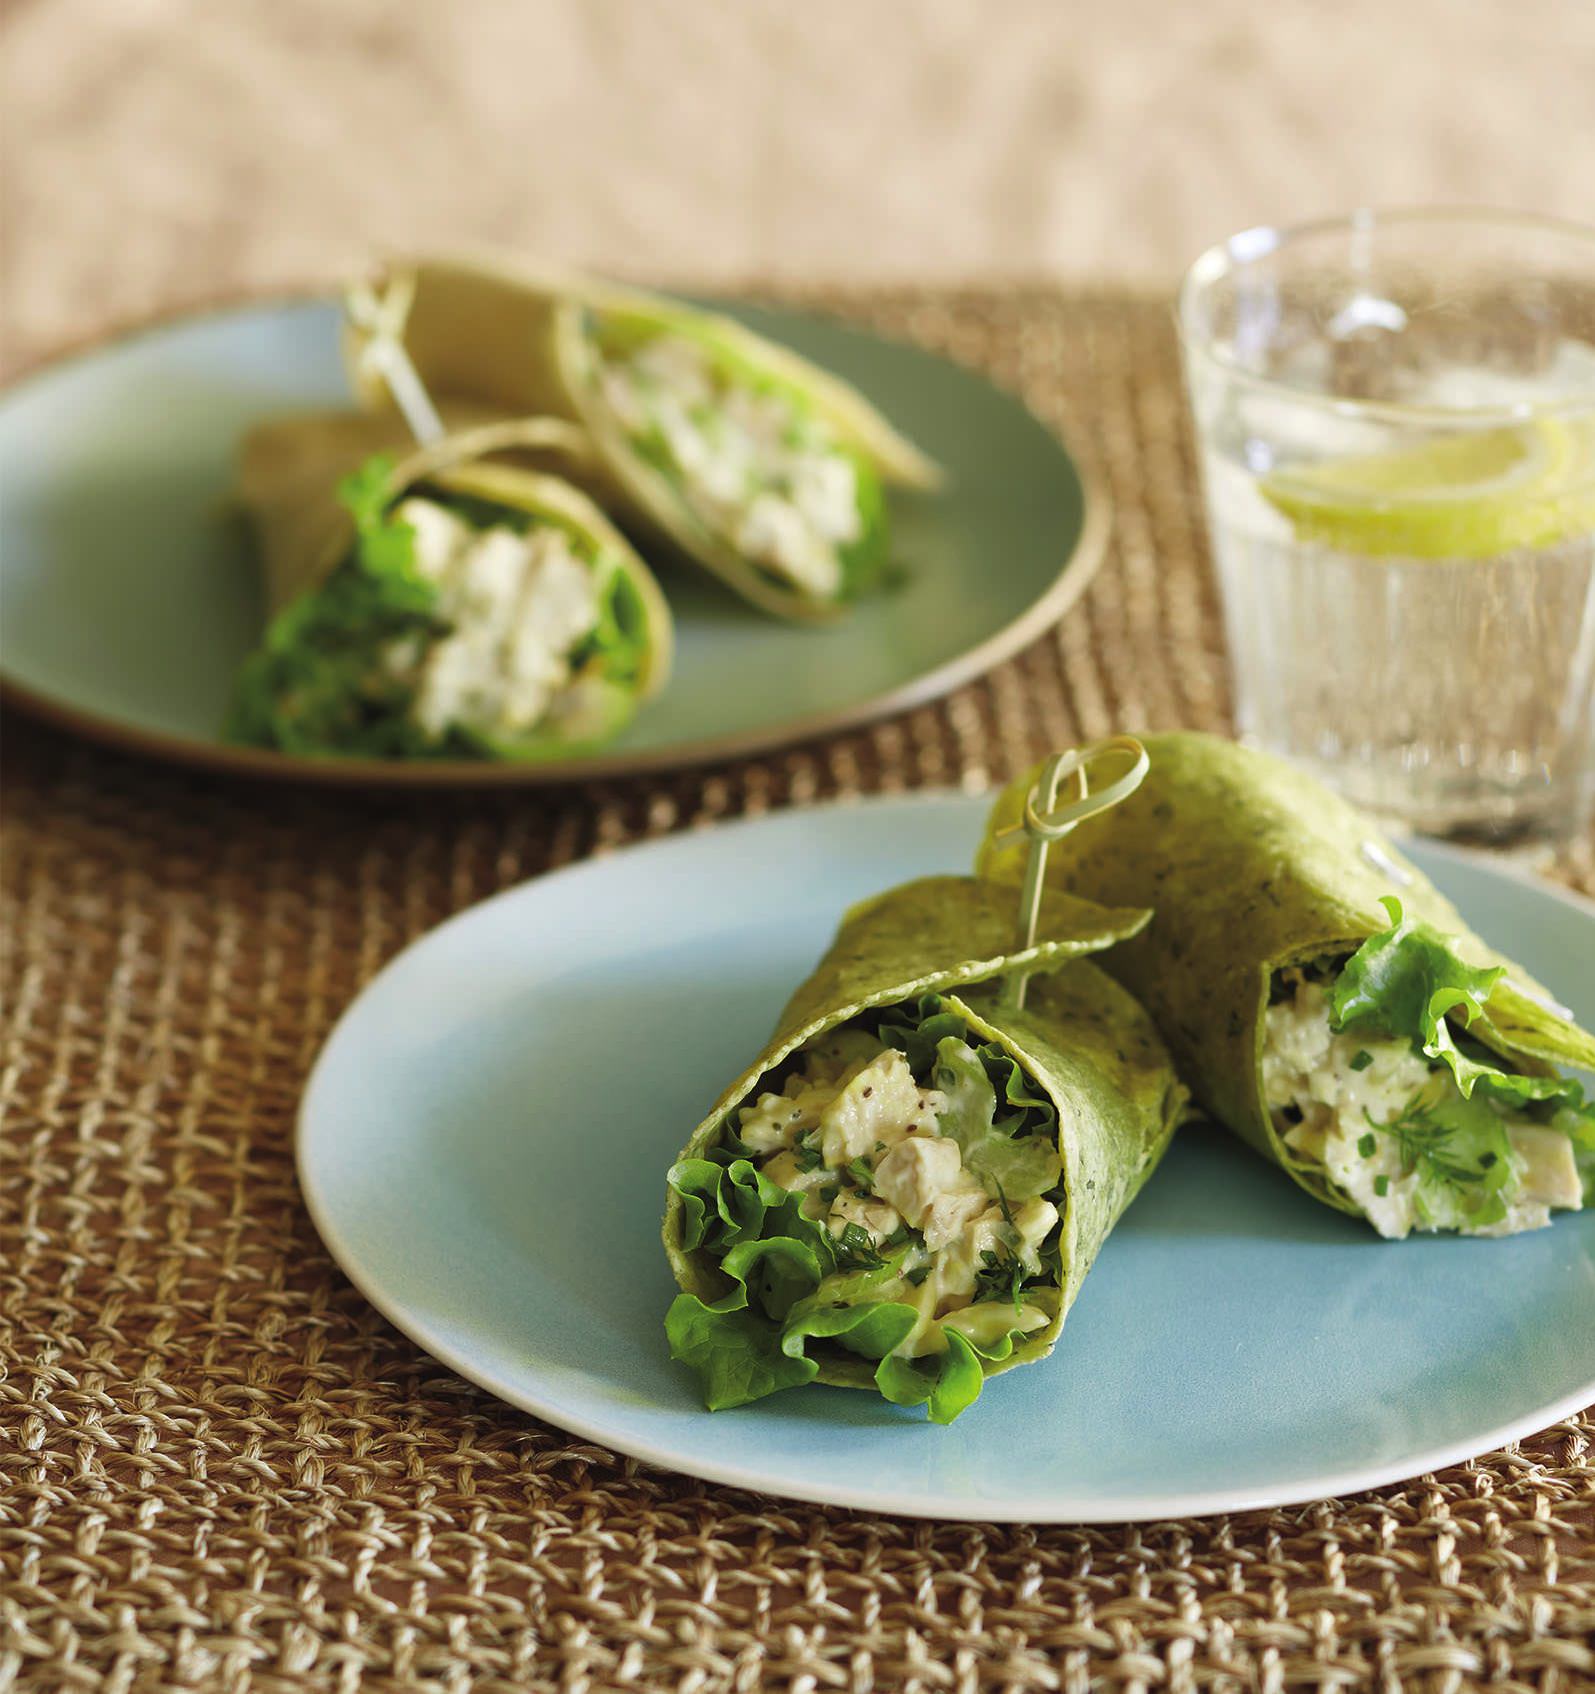
Makes 4 wraps
Preparation time: 15 minutes
Chicken salad sandwiches are delicious, but they are more contemporary when made with flour tortillas to create homemade wraps. There are several brands of gluten-free flour tortillas on the market, but my favorite is Rudi’s (available in plain, spinach, and fiesta flavors); they are quite pliable and make terrific wraps.
1 In a medium bowl, stir together the chicken, mayonnaise, celery, onion, pickle relish, herbs, celery salt, and almonds until blended. Or whirl the ingredients in a food processor until well blended for a more shredded consistency. Taste and add salt and pepper, if desired.
2 Soften the tortillas (see How to Soften Gluten-Free Flour Tortillas below). For each wrap, spread one-quarter of the chicken salad (about ½ cup) down the middle of the tortilla. Top with a lettuce leaf. Gently roll one side of the tortilla toward the center and finish rolling into a loose roll to create a wrap. Place seam side down on a serving plate, using a toothpick to keep the wrap rolled, if necessary. Repeat with the remaining tortillas, and serve immediately.
Per wrap: 580 calories; 24g protein; 31g total fat; 4g fiber; 52g carbohydrates; 74mg cholesterol; 796mg sodium
Store-bought gluten-free flour tortillas might not be pliable enough to roll into a wrap without breaking, especially when refrigerated, frozen, or slightly stale. However, they can be made pliable if you steam each tortilla on a splatter guard (a flat, handled screen that keeps bacon from splattering while frying) set over a skillet of simmering water for 5 to 10 seconds. They will soften very quickly, so watch carefully and remove from the heat before they get soggy. If you are steaming several tortillas at a time, place the steamed tortillas between sheets of parchment paper so they stay warm and soft while steaming the remaining tortillas. They are best when served immediately after steaming.
Q
Makes 12 wraps (6 appetizer servings or 3 entrée servings)
Preparation time: 15 minutes
Lettuce wraps are very popular in Asian restaurants but are also super easy to make at home. They are most often served as appetizers, but they are hearty enough to be a meal if you increase the servings to 4 wraps per person and serve other side dishes such as steamed rice or vegetables. Using store-bought slaw shaves considerable time from this recipe.
1 In a large heavy skillet, heat the peanut oil and cook the pork over medium heat until deeply browned and cooked through, 5 to 7 minutes. Transfer the pork to a paper towel–lined plate to drain.
2 In the same skillet, add the bell pepper, slaw, 6 tablespoons of the cilantro, the green onions, garlic, soy sauce, hoisin sauce, sweet red chili sauce, ginger, vinegar, fish sauce, sesame oil, and sugar. Cook over medium heat, stirring constantly, until the cabbage begins to wilt, 3 to 5 minutes. Add the cucumbers and browned pork and heat to serving temperature. Transfer the mixture to a serving plate and garnish with the remaining 2 tablespoons cilantro.
3 Arrange the lettuce leaves on a serving platter. Spoon the pork mixture into the hollow of each lettuce leaf, roll up the lettuce, and serve.
Per wrap: 60 calories; 5g protein; 3g total fat; 2g fiber; 3g carbohydrates; 12mg cholesterol; 231mg sodium
Q, V
Makes about 3 cups (4 servings as a side dish)
Makes 12 polenta rounds (4 servings as an appetizer)
Preparation time: 2 minutes
Cooking time: 20 minutes
Most polentas require standing over the stovetop while stirring the polenta (also known as corn grits) and trying to control the inevitable splatters. My easy version eliminates the mess by cooking the polenta in a very large bowl in the microwave oven. Plus, this technique frees you to do other things while the polenta cooks, so it is also a real time-saver. This is the way I always make my polenta, and it is virtually fail-proof and mess-free. I prefer to use broth because it heightens the flavor; if you use water, you may need a little more salt to compensate for the salt in broth.
1 Combine all of the ingredients in a large microwave-safe bowl. (I use an 8-cup glass Pyrex measuring cup, which is large enough to avoid boilovers.) Lay a sheet of waxed paper over the bowl and cook in the microwave on High in 10-minute increments, whisking between each increment, to reach the desired consistency. Cooking times may vary depending on your microwave; mine takes two 10-minute periods, for a total of 20 minutes. Serve immediately for hot, soft polenta. To make polenta rounds for Polenta-Parmesan Appetizers, proceed to Step 2.
2 To cool the polenta before making appetizers: Line a 7x11-inch rimmed baking pan with plastic wrap. Pour in all of the hot polenta, smooth the top evenly, cover, and refrigerate until firm and cold, 3 to 4 hours.
3 Place a large cutting board on top of the baking pan and, firmly holding opposite ends of the baking pan, flip the pan onto the cutting board. Remove the plastic wrap and cut the chilled polenta into 12 rounds with a 2-inch biscuit cutter. Or, for triangles, cut the slab of polenta in half lengthwise, then crosswise into 6 squares. Lift each square out with a spatula, place it on a cutting board, and cut diagonally into 2 triangles.
Per serving: 74 calories; 3g protein; 2g total fat; 2g fiber; 11g carbohydrates; 4mg cholesterol; 343 mg sodium
Q, V
Makes 12 rounds
Preparation time: 10 to 15 minutes
Baking time: 7 to 10 minutes
Starting with a tube of store-bought polenta means you can make these crispy appetizers very quickly. But you can also make your own polenta, using the simple recipe for Basic Polenta in the Microwave. This recipe starts with a simple topping of Parmesan cheese and fresh herbs, but you can use anything you like, such as sliced olives, diced fresh tomatoes or sun-dried tomatoes, chopped fresh herbs, pâté, hummus, or tiny bits of prosciutto.
1 Place a rack in the middle of the oven. Preheat the oven to 300°F. Line a 9x13-inch baking sheet with aluminum foil or parchment paper.
2 Place the polenta on a large cutting board. With a sharp knife, cut the polenta into twelve ¼-inch-thick rounds and lay the rounds flat on the cutting board.
3 Lightly dust both sides of the rounds with cornstarch. In a heavy nonstick skillet (gray, not black), heat the oil over medium heat. Fry a few polenta rounds at a time, turning occasionally, until browned and crispy, 2 to 3 minutes per side. Transfer the rounds to the baking sheet. Repeat with the remaining polenta, adding more oil to the skillet as needed. Sprinkle each round with salt, pepper, and a tablespoon of Parmesan.
4 Bake in the oven until the Parmesan begins to melt, 7 to 10 minutes. Remove from the oven and immediately add any additional toppings, if desired (see headnote). Serve hot, garnished with the parsley.
Per round: 190 calories; 5g protein; 4g total fat; 4g fiber; 33g carbohydrates; 4mg cholesterol; 86mg sodium
Q
Makes 4 servings
Preparation time: 10 minutes
The beauty of this plate is that it can be assembled in seconds on a pretty tray and served to your guests. In fact, it will take you longer to go to the store and buy these items than it will take you to arrange them on the tray. I rely on my local natural foods stores for these items, after reading labels to make sure that each is gluten-free. If cheese is off-limits, replace it with stuffed grape leaves or vegetables (pickled or fresh) such as baby carrots, celery sticks, or broccoli florets.
Assemble the items decoratively on a large tray, preferably one with indentations to collect any stray juices. Or, place each item in its own little bowl on a larger tray, surrounded by the crackers.
Nutrient value will vary based on items selected.
Q
Makes 4 sandwiches
Preparation time: 5 minutes
Grilling time: about 8 minutes per sandwich
Panini are toasted, pressed sandwiches, usually made in a panini press or toasted-sandwich maker (available at kitchen stores)—or in a heavy skillet, much like making a grilled cheese sandwich but using another heavy skillet to press down on top. This ham-and-cheese sandwich is just one of many possible flavor combinations, so feel free to experiment with your own favorites.
1 Lay the bread slices on a flat surface, such as a large cutting board. In a small bowl, whisk together the mustard, mayonnaise, and pickle relish until well blended, and then spread a scant tablespoon of the mixture on each slice of bread. Layer four of the bread slices with a slice of ham, a slice of cheese, and another slice of ham. Top with the remaining slice of bread, spread side down.
2 Preheat a panini press on medium-high heat and cook the sandwiches according to the manufacturer’s directions. Or place the sandwich on a heated grill pan or heavy skillet, place a heavy skillet on top, and press down while cooking until browned on the bottom, about 3 minutes. With a metal spatula, flip the sandwich, press down with the skillet, and cook until browned on the bottom, about 3 minutes more. With a sharp knife, halve the sandwiches diagonally, and serve immediately.
Per sandwich: 355 calories; 22g protein; 16g total fat; 2g fiber; 30g carbohydrates; 55mg cholesterol; 1294mg sodium
Pressed sandwiches are perfect for our somewhat delicate gluten-free bread because the process of toasting and pressing strengthens the bread, making a sandwich that holds together and is less likely to crumble. It is also a perfect way to use up stale bread. If your bread is hard or frozen, gently warm it on very Low power in the microwave oven before assembling the sandwich so it won’t break apart when pressed in the sandwich maker.
Q, V
Makes 24 crostini
Preparation time: 5 minutes
Baking time: 7 to 8 minutes
Crostini are small, thinly sliced little pieces of toasted bread. They can be topped with many different things, such as chopped tomatoes, pureed beans, diced vegetables, cream cheese, smoked salmon with dill, liver pâté, and so on. You could also simply use Parmesan cheese. If you don’t want to make your own French baguette (see recipe), use halved slices of store-bought, gluten-free sandwich bread.
1 Place a rack in the middle of the oven. Preheat the oven to 350°F. Line a 9x13-inch baking sheet with parchment paper or aluminum foil.
2 With a serrated knife or electric knife, cut the baguette on the diagonal into thin slices, about ⅓ inch thick (use discarded loaf ends to make bread crumbs; see Gluten-Free Bread Crumbs). With a pastry brush, brush both sides of the bread slices lightly with the oil and rub with the cut garlic. Arrange the bread slices on the baking sheet.
3 Bake until lightly crisped around the edges, 5 to 6 minutes. Depending on the bread’s ingredients and moisture content, it may lightly brown as well. Flip the slices and bake for another 2 minutes. Cool the toasts on the pan on a wire rack until they are cool enough to handle.
4 Spread each toast with 1½ teaspoons of cream cheese, a few diced tomatoes, and a sprinkle of basil. Season generously with salt and pepper, and serve immediately.
Per crostini: 75 calories; 2g protein; 2g total fat; 1g fiber; 11g carbohydrates; 4mg cholesterol; 166mg sodium
Crostini are the perfect solution for leftover gluten-free bread, and they are delicious whether lightly toasted or deeply browned. Ingredients in the bread (such as cow’s milk) can increase browning. Use any topping you like, but for best results use a cream or paste as the first layer (such as cream cheese, hummus, or pâté) to anchor the other toppings so they are less likely to fall off when you take a bite. Try to blend complementary flavors, such as the basil with tomato in this recipe, or smoked salmon with dill. Or try sweet ingredients, such as chutney or hot pepper jelly on cream cheese, or a sprinkle of raisins, currants, or dried cranberries for a pleasing counterbalance to savory toppings.
Q
Makes 12 breadsticks
Preparation time: 5 minutes
I have certainly eaten my share of prosciutto-wrapped melon, especially when traveling in Italy. But why not shake up this tradition and wrap the prosciutto around the gluten-free Italian breadsticks known as grissini? Found in natural foods stores, grissini are a satisfyingly crisp contrast to the salty prosciutto.
Divide each prosciutto slice lengthwise into 1-inch-wide strips. Wrap each strip around a breadstick at an angle, slightly overlapping the prosciutto to make it fit tightly. Leave one end of the breadstick unwrapped so it can be used as a handle. To serve, stand the breadsticks, wrapped end up, in a large glass or vase, or lay decoratively on a serving platter.
Per breadstick: 125 calories; 16g protein; 5g total fat; 1g fiber; 2g carbohydrates; 40mg cholesterol; 1567mg sodium
V
Makes 1 cup batter (4 servings)
This batter makes a nice, crispy coating on fried foods. Peanut oil is the best option because it is least likely to burn; however, canola or vegetable oil works well, too. The granular nature of cornmeal and white rice flour lend a pleasing crunchiness. This batter works equally well with chicken, fish, or vegetables. The carbonization from the sparkling water adds lightness.
In a bowl, whisk the flour blend, cornmeal, sugar, baking powder, salt, pepper, and sparkling water together until well blended and about the consistency of heavy cream. Chill for 1 hour, and then use as directed. Discard unused batter.
Per serving: 35 calories; 0g protein; 0g total fat; 1g fiber; 9g carbohydrates; 2mg cholesterol; 195mg sodium
V
Makes 4 servings
Preparation time: 10 minutes
Frying time: variable
French-fried onions are hardly a meal and perhaps not really an appetizer, but most gluten-free people crave them. And it’s something we can’t order in a restaurant because, like French fries, they are contaminated with gluten from the non-dedicated fryer. So, why not make them at home as an appetizer? Imagine your guests gathered around your stovetop, drinking gluten-free beer, and absolutely delighted when you serve these morsels piping hot and crisp from the fryer. Plus, you can use them on top of the traditional green bean casserole at holiday time or to adorn a grilled steak. Any way you use them, you will love this recipe and use the versatile breading batter often.
1 Place the onions on a cutting board or large plate. In a small bowl, whisk the salt and garlic powder into the Basic Breading Batter. Dip the sliced onions into the mixture, coating them thoroughly.
2 Heat 2 inches of oil to 375ºF in a narrow heavy saucepan. Or, following the manufacturer’s directions, add the recommended amount of oil to a temperature-controlled deep fryer. Add a small portion of the onions to the hot oil (be careful not to crowd the pieces) and fry until golden brown on both sides, turning once. (Frying time will vary with the size of the onions, the temperature of the batter, and whether you use a temperature-controlled deep fryer or a saucepan on the stovetop.) Drain the onions on paper towels. Fry the remaining onions in the same manner, adding more oil, if necessary, to keep the onions completely immersed. Serve immediately.
Per serving: 115 calories; 4g protein; 15g total fat; 2g fiber; 25g carbohydrates; 2mg cholesterol; 360mg sodium

